Prefilling fields in webforms
Fields in a Podio webform are empty by default when the page is visited. In this article, you’ll learn how you can pre-fill fields in your webform by adapting the URL of your webform.
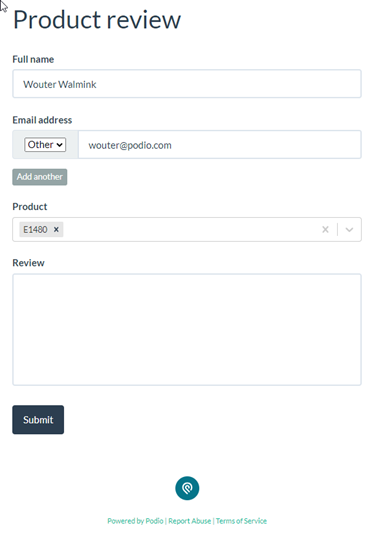
At the end of this tutorial, you’ll be able to create a prefilled form like this:
Note:
Prefilling webforms only works if you link directly to the webform page, not when you embed the webform into your own webpage.
-
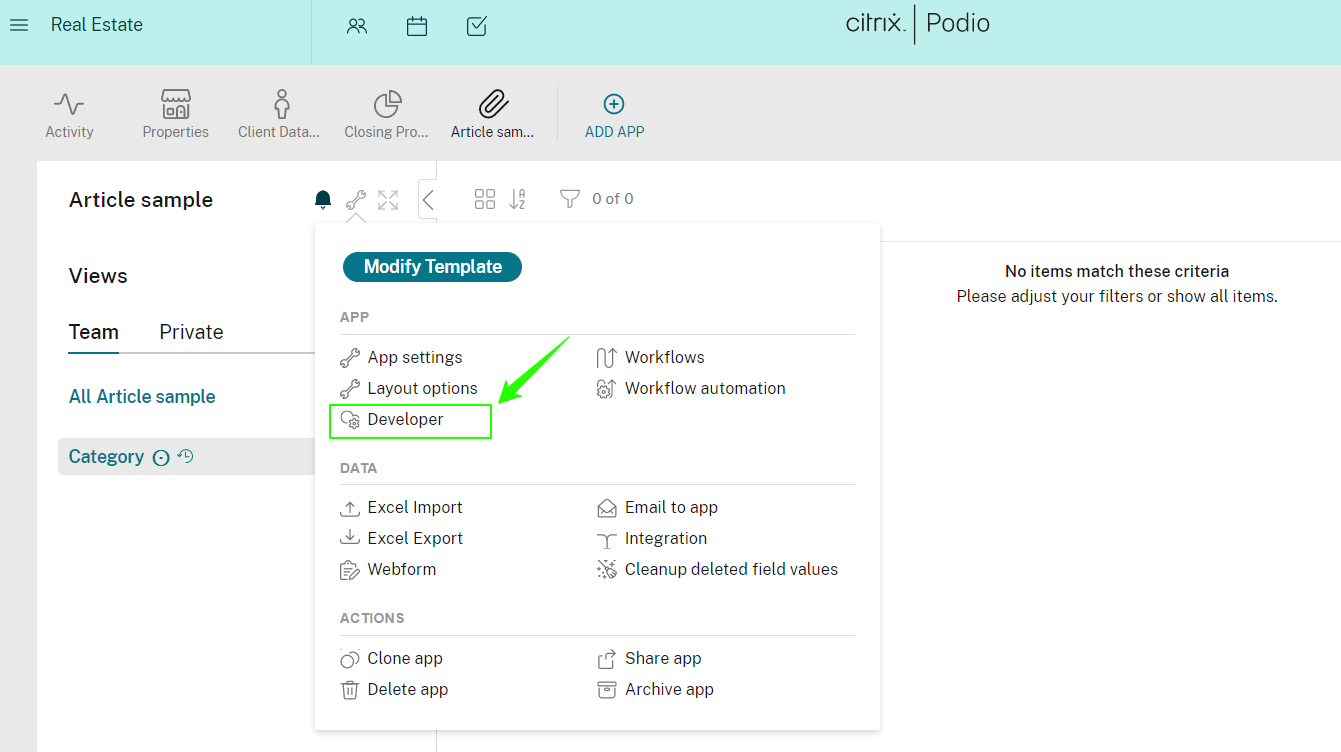
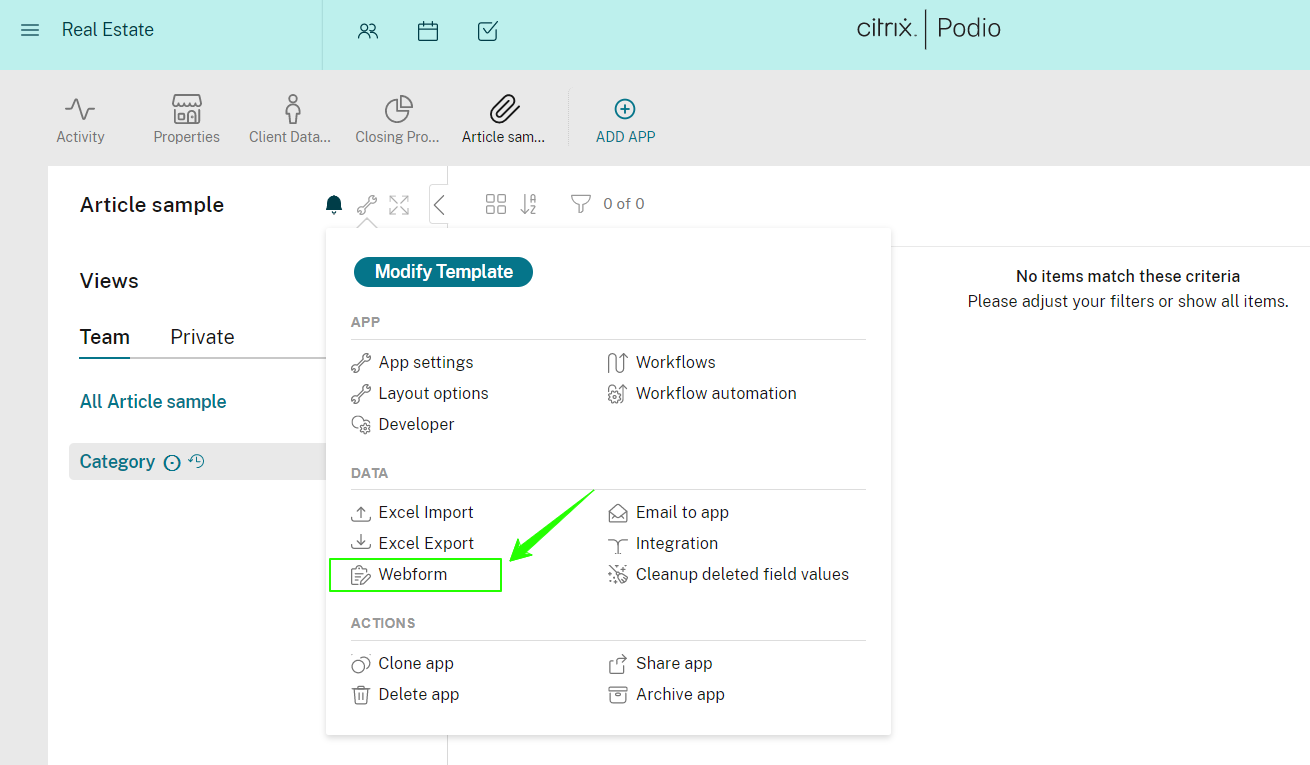
Go to the developer page of the app.
Go to the app which webform you’d like to prefill. Open the app menu and select the option “Developer” (at the end of the options list).
-
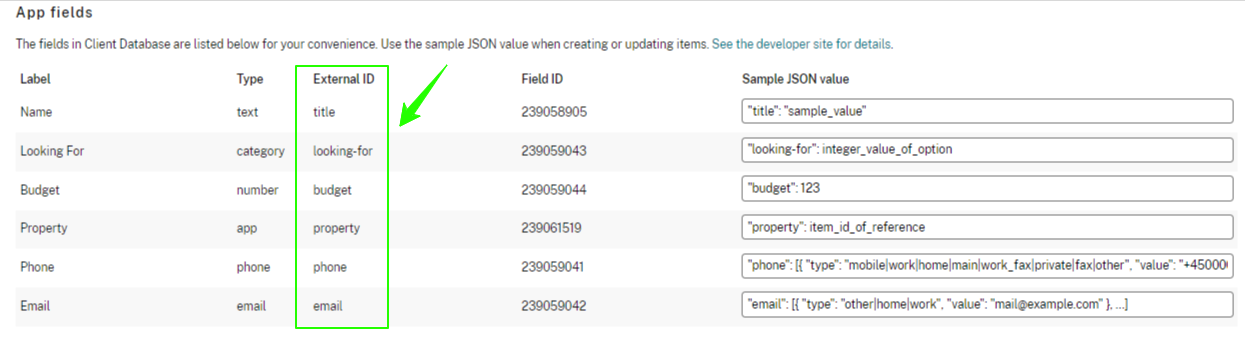
Find the external ID’s of the fields you want to prefill
On the developer page, you will see a list of all fields in the app. For any field you want to prefill, note its corresponding value in the “External ID” column.
-
Get the URL of your webform.
-
Go to the app which webform you’d like to prefill. Open the app menu and select the option “Webform”.
-
In the webform editor, copy the link under “Shareable link”.

-
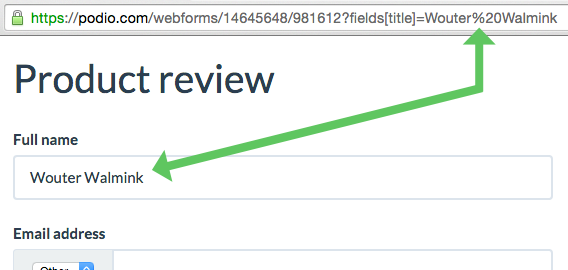
Creating a URL that prefills a text field.
To make the prefilling work, we follow a standard way of adding parameters to a URL. The format looks like this:
-
Format:
webform url ? fields[field external ID] = value -
Example:
https://podio.com/webforms/14645648/981612?fields[title]=Wouter%20Walmink [(see live)](https://podio.com/webforms/14645648/981612?fields%5Btitle%5D=Wouter%20Walmink)
As you can see in this simple example, we’ve added a question mark after the standard URL, followed by the word “fields”, the external ID of the field in between square brackets, an equal sign and then the actual value.
Any such URLs that you build yourself are not stored anywhere by Podio. They do also not affect the original URL as it appears in the webform editor, which will always be an empty form. The parameters that you add to the URL will simply be used to prefill the webform when it’s loaded. You can create as many of these URLs as you want and share them to provide webforms prefilled in different ways for different people or purposes.
Note:
There are a lot of characters that are not accepted in URLs, like spaces and commas. If the value for your field contains anything more than letters or numbers, it’s probably best to use this simple URL encoding tool. Type or copy the text you want to use, click “encode” and it will convert the text to a string that you can safely use in your URL. For example, it will replace any space with “%20”.
-
-
Creating a URL for prefilling multiple text fields
To prefill more than one field, you can add additional parameters by separating the field and value pairs with an ampersand (&), like this:
Format:
webform url ? fields[field external ID] = value & fields[field external ID] = valueExample:
https://podio.com/webforms/14645648/981612?fields[title]=Wouter%20Walmink&fields[review]=I%20think%20this%20product%20is%E2%80%A6 [(see live)](https://podio.com/webforms/14645648/981612?fields%5Btitle%5D=Wouter%20Walmink&fields%5Breview%5D=I%20think%20this%20product%20is%E2%80%A6) -
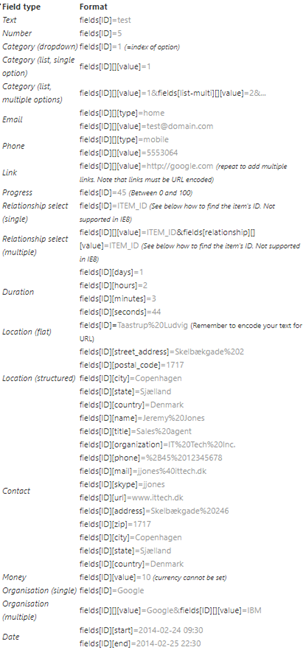
Handling other types of fields
Podio has a many different types of fields. The text field we’ve used so far is simple as it’s a single value, but other fields like the email or date field are more complex. To complete this tutorial, here is a complete overview of the supported field types and what format you need to use to prefill them.
Note:
There are three fields that are not supported for prefilling: image upload, file upload and the relationship field when set to “create new item”.
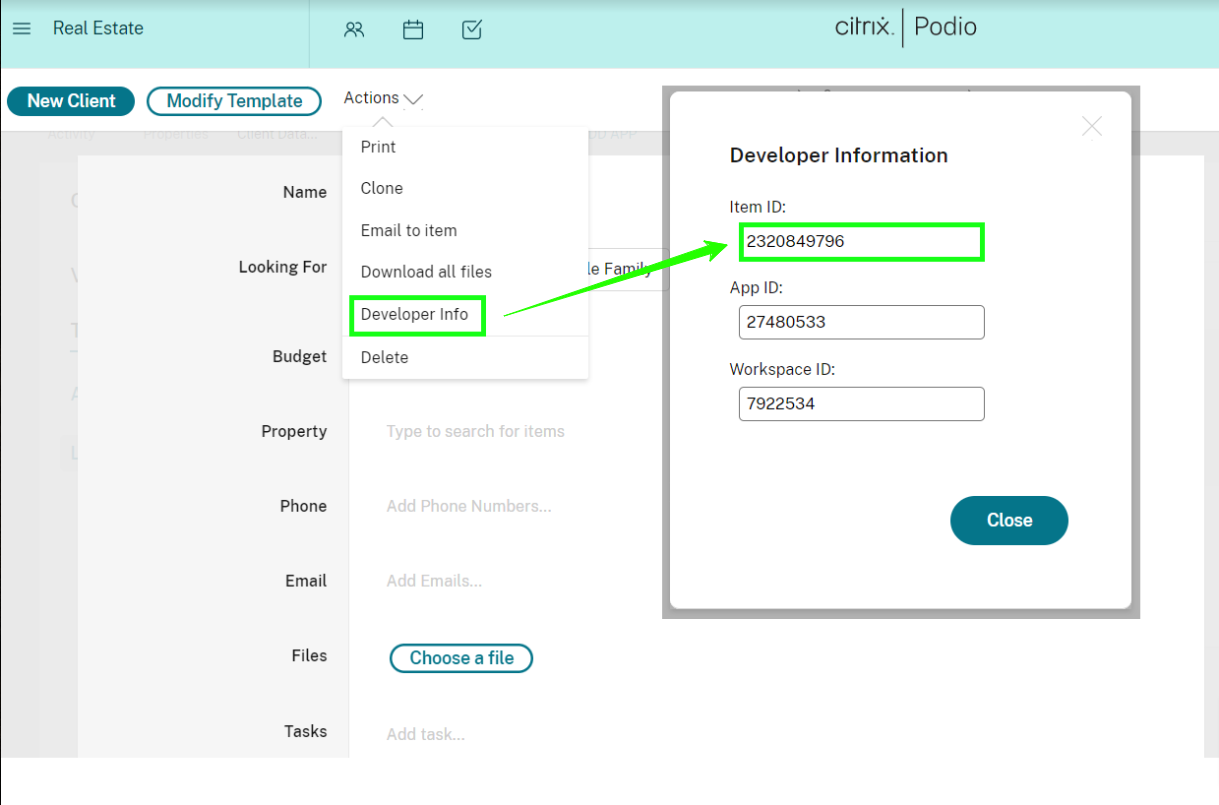
Finding an item’s ID (for prefilling the relationship field)
If you want to prefill a relationship field, you need the unique item ID of the relevant item(s). You can find this ID by going to the item in Podio, click the “Actions” button, and choose “Developer”. In this modal, you will find the item ID.