Workflow Automation: Using RightSignature Text Tags
RightSignature can search documents for certain blocks of text and replace them with fields. This may useful for users that want to automate sending a one-off document with fields without needing to build a template first.
These texts are drawn over opening and closing square brackets “[ ]” with the following format:
Combination of possible values in tag. [ {d,c,t,i}:{a-z}:{r,o} ]
EXAMPLE: [ t:a:r ]
Keep in mind that RightSignature will draw the field over the brackets as they appear in your editor. Making the brackets larger by increasing the font size or adding spaces will make the resulting field larger.
First Argument
The first letter in a text tag describes the type of field RightSignature should create there:
c : This field should be a Checkbox field d : This field should be a Date field i : This field should be an Initials field t : This field should be a Text field s : This field should be a Signature field
Second Argument
The second letter describes whoshould be prompted to fill in this field, in ABC order. The first recipient will be Signer A, the second will be Signer B, the third will be Signer C, etc.
a : This field is for the 1st Signer of the Document
b : This field is for the 2nd Signer of the Document
c : This field is for the 3rd Signer of the Document etc.
If signer sequencing is enabled, Signers will be asked to sign in the order they’re listed. For example, the document will only be sent to Signer B once Signer A finishes signing it.
Third Argument
The third letter specifies whether this field is Optional or Required. Signers will be able to leave any Optional fields blank.
o : This field is Optional
r : This field is Required
With all that in mind, the example we saw above - [ t:a:r ] - would create a Required Text field for Signer A.
For example, let’s send a document to three people. Each person will be asked to sign the same types of field, formatted like so:
Date: [ d:a:r ] Text: [ t:a:o ] Checkbox: [ c:a:o ] Initials: [ i:a:r ] Signature: [ s:a:r ]
We’ll start by adding a Create a PDF action. Here’s how it’ll look in our workflow:
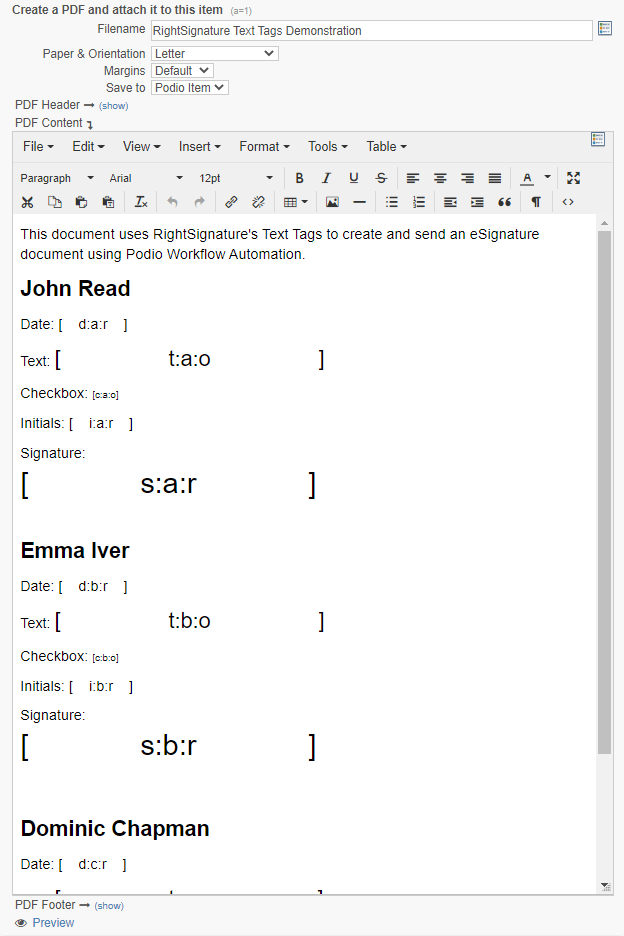
Notice how each of the text tags is a different size? We want to give our signers plenty of room to work, so we’ve made each field a different size by adding spaces and changing the font size.
Next, we’ll add a Send Item File via RightSignature action. We’re sending this document to three people, so we’ll list them in order according to which Signer we want them to be.
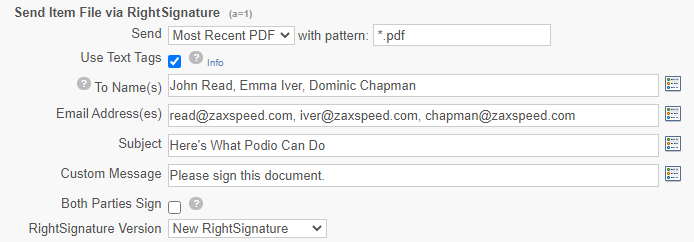
In this case, John Read will be Signer A, Emma Iver will be Signer B, and Dominic Chapman will be Signer C.
Pay special attention to the “Use Text Tags” checkbox - that’s what tells RightSignature it needs to check for Text Tags when it receives the document. If “Use Text Tags” isn’t checked, Text Tags will be ignored.
That’s all this takes! Once the workflow runs, each Signer should receive an email prompting them to sign their portion of the document. In the example above, here’s what Emma Iver would see:
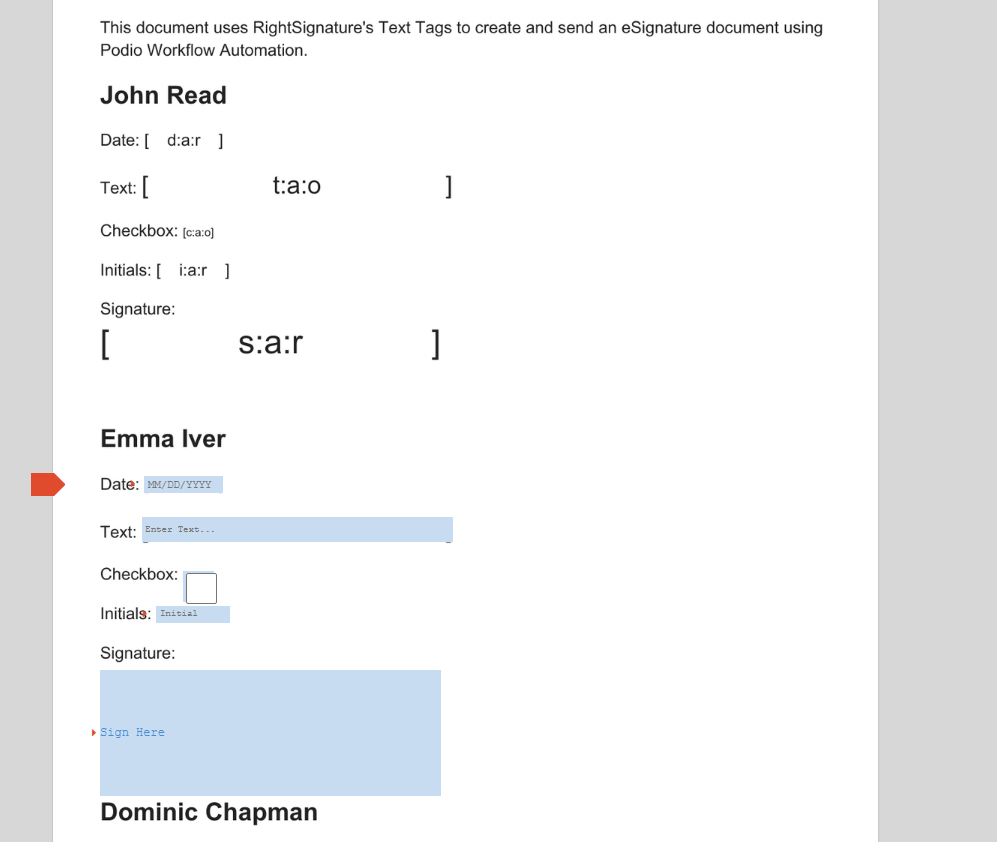
Each Signer will only be able to sign the boxes assigned to them - all other boxes will appear as plain Text Tags, which they won’t be able to interact with. Once all Signers have signed the document, the final version will include all the completed fields.