Reference: Storage zones controller configuration files
This reference provides an overview to the storage zones controller configuration files:
- Configure storage zone controller with ShareFile data on Microsoft Azure
- AppSettingsRelease.config
- FileDeleteService.exe.config
- SFAntiVirus.exe.config
- Web.config
The storage zones controller installer creates those files. Changes you make in the storage zones controller console are saved to the files.
To use or configure certain features, you must manually add or update some settings in the configuration files. This reference lists those settings and provides links to related information.
ShareFile Data on Microsoft Azure Storage
Customer-managed storage zones supports hosting ShareFile data natively within your Microsoft Azure account. Using compatible third-party storage helps IT build a cost-effective and customized solution for their organization. This solution integrates ShareFile with Microsoft Azure’s Binary Large Object (Blob) storage. This storage is a cloud service for storing large amounts of unstructured data that can be accessed from anywhere using HTTP or HTTPS.
Configure storage zone controller with ShareFile data on Microsoft Azure
Before creating a storage zone with ShareFile Data on Microsoft Azure, please review System Requirements and installation steps:
-
Create a network share for storage cache. For more information, see Create a network share for private data storage.
-
Install necessary SSL certificates. For more information, see Install an SSL certificate.
-
Prepare server for storage zone installation. For more information, see Prepare your server for ShareFile data.
Once the storage zones controller software is installed go to ShareFile Storage Zones Controller and select Configuration Page.
-
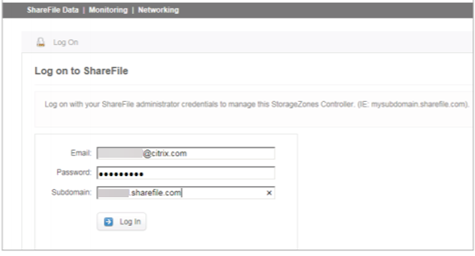
Log on to ShareFile using your assigned administrator account.
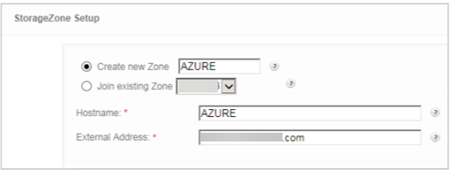
- Select the option to Create New Zone and enter a unique name for the new zone.
- Enter the Hostname, typically the computer name of the server will be used.
-
Enter the External Address for this zone. This is the publicly resolvable FQDN address to this server or load balancer.
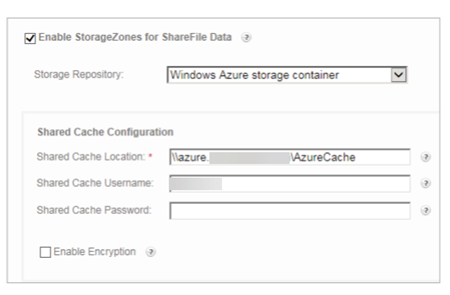
- Check the Enable StorageZones for ShareFile Data box.
- Select Windows Azure storage container from the Storage Repository drop-down menu.
-
Enter the Shared Cache Location created during the pre-requisites installation, see Create a network share for private data storage. Enter a username and password with access to the Shared Cache folder.
-
Enter Storage Account Name and Access Key. This information comes from your Microsoft Azure account.
-
Select Validate.
-
Once validated you are presented with the containers you have available to you from Azure. Select the appropriate container from the Container Name drop down menu.

-
At the bottom of the page, enter a Passphrase and re-enter it for verification.
-
Select Register.
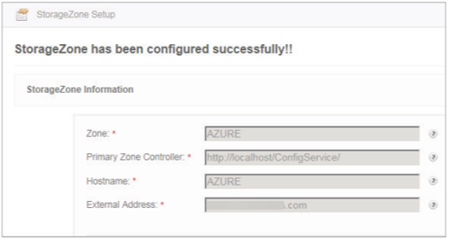
Once complete the following message displays: StorageZone has been configured successfully!!
-
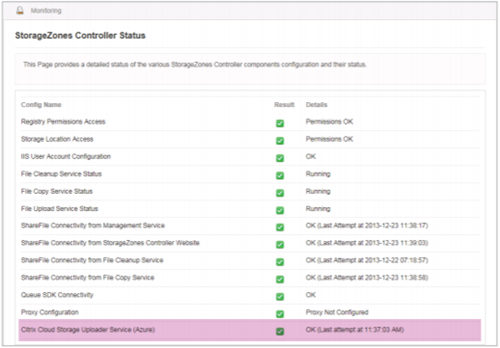
Select the Monitoring tab and verify the StorageZones Controller Status. The Citrix Cloud Storage Uploader Service (Azure) monitors the background uploader service for Azure.
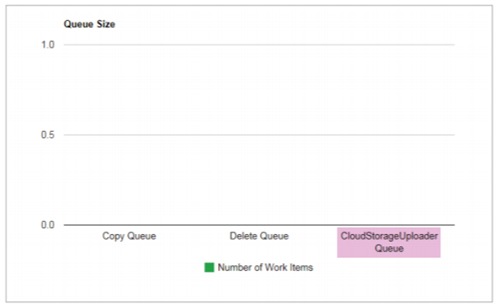
The CloudStorageUploader Queue monitors the Azure upload queue folder.
AppSettingsRelease.config
AppSettingsRelease.config files are contained in the following folders in the storage zones controller installation path (C:\inetpub\wwwroot\Citrix\):
-
StorageCenter
Defines global settings for storage zones controller.
-
StorageCenter\cifs
Defines settings for storage zones connectors for Network File Shares.
-
StorageCenter\sp
Defines settings for storage zones connectors for SharePoint.
Before editing an AppSettingsRelease.config file, verify that you are working in the correct location.
FileDeleteService.exe.config
FileDeleteService.exe.config provides controls used by storage zones controller to manage the persistent storage cache. This configuration file is located in: C:\inetpub\wwwroot\Citrix\StorageCenter\SCFileCleanSvc
For more information, see Customize storage cache operations.
SFAntiVirus.exe.config
SFAntiVirus.exe.config provides the scanner software with information about your storage zones controller configuration, the location of the scanner software, and various command options. This configuration file is located in: C:\inetpub\wwwroot\Citrix\StorageCenter\Tools\SFAntiVirus
For more information, see Configure antivirus scans of uploaded files.
Web.config
In general, C:\inetpub\wwwroot\Citrix\StorageCenter\ConfigService\Web.config contains controls that typically should not be changed. You will, however, need to update it if you are using older storage zones controllers with a proxy server.
For StorageZones Controller 2.2 through 2.2.2 only: If a zone has multiple storage zones controllers and all HTTP traffic uses a proxy server, you must add a bypass list to Web.config for each secondary server.
Note: As of release 2.2.3, the bypass setting is included in the Network page of the storage zones controllers console.
-
Open the file in a text editor and locate the
<system.net>section. Here is a sample of that section after a proxy server is configured:<system.net> <defaultProxy enabled="true"> <proxy proxyaddress="http://192.0.2.0:3128" /> </defaultProxy> </system.net> </configuration> <!--NeedCopy--> -
Add a bypass list to that section, as shown:
<system.net>
    <defaultProxy enabled="true">
      <proxy proxyaddress="http://192.0.2.0:3128" />
      <bypasslist>
        <add address="primaryServer" />
      </bypasslist>
    </defaultProxy>
  </system.net>
</configuration>
<!--NeedCopy-->
The primaryServer is either an IP address or host name (servername.subdomain.com).
If you later change the primary storage zones controller IP address or host name, you must update that information in ConfigService\Web.config for each secondary server.
-
Restart the IIS server of all zone members.