Prepare your server for ShareFile data
The Web Server (IIS) role and ASP.NET setup described in this section is required for storage zones for ShareFile data and for storage zone connectors. These instructions are based on Windows Server 2012 but are valid for later versions as well.
Update Microsoft .NET Version
Before proceeding with storage zones controller installation, ensure that you are using the appropriate version of Microsoft .NET Framework.
- Storage zones controller 5.x requires .NET 4.8 or later. Click here to download .NET 4.8
ShareFile recommends utilizing the latest version of Microsoft .NET when using ShareFile applications.
To enable the Web Server (IIS) role and the ASP.NET role service
-
On the server where you install the storage zones controller, log on with an account that has local administrator privileges.
-
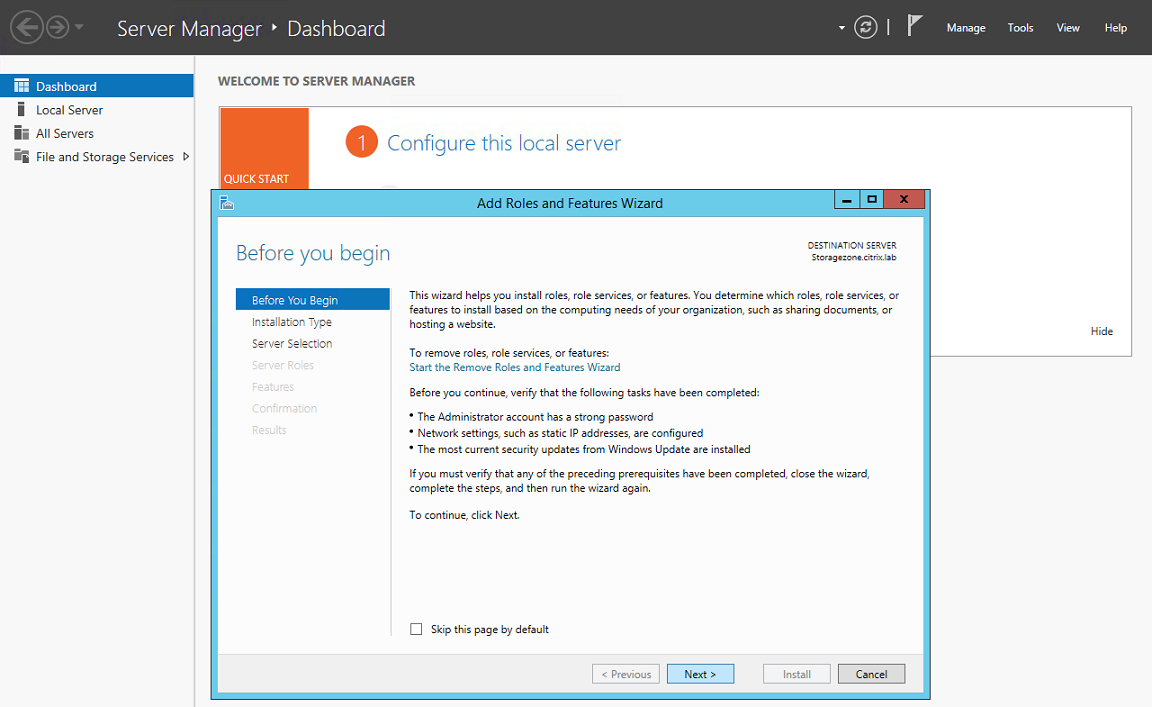
Open the Server Manager console Dashboard and then click Manage > Add Roles and Features to open the Add Roles and Features Wizard.
-
In the Add Roles and Features Wizard, click Next.
-
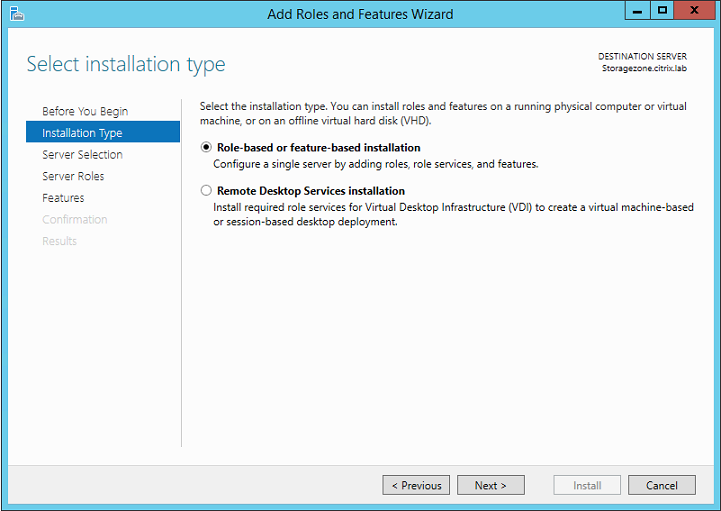
On the Select installation type page, click Role-based or feature-based installation and then click Next.
-
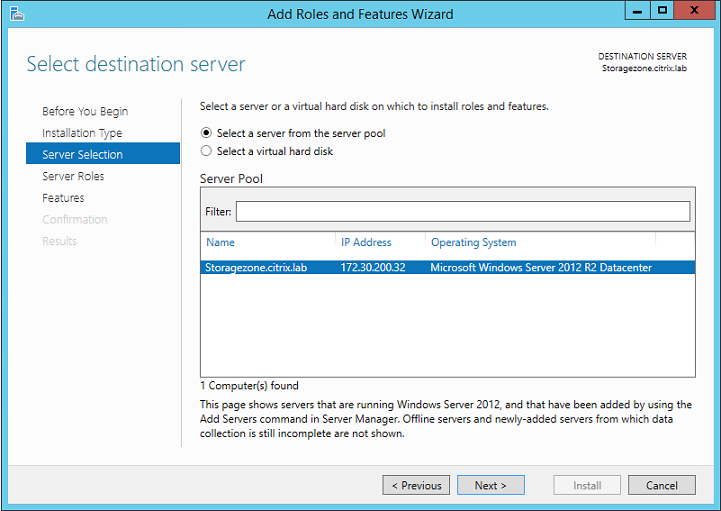
On the Select destination server page, choose your server from the server pool and then click Next.
-
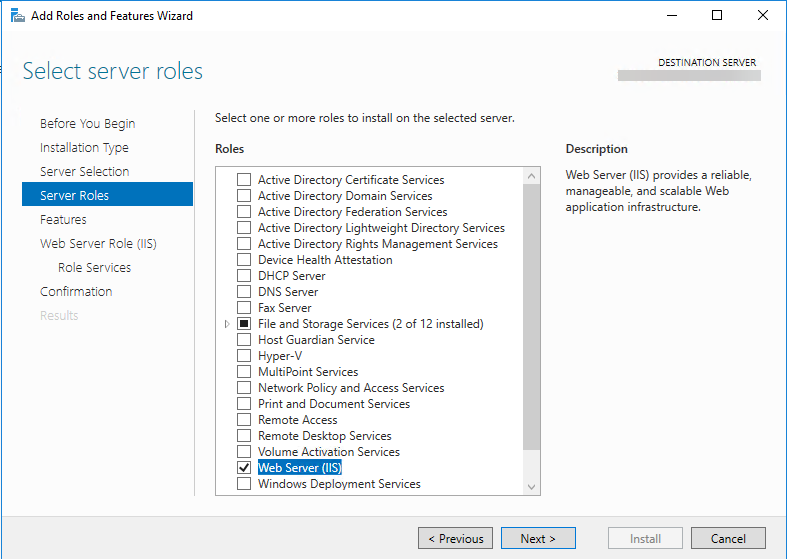
On the Select server roles page, select the Web Server (IIS) check box then click Next.
-
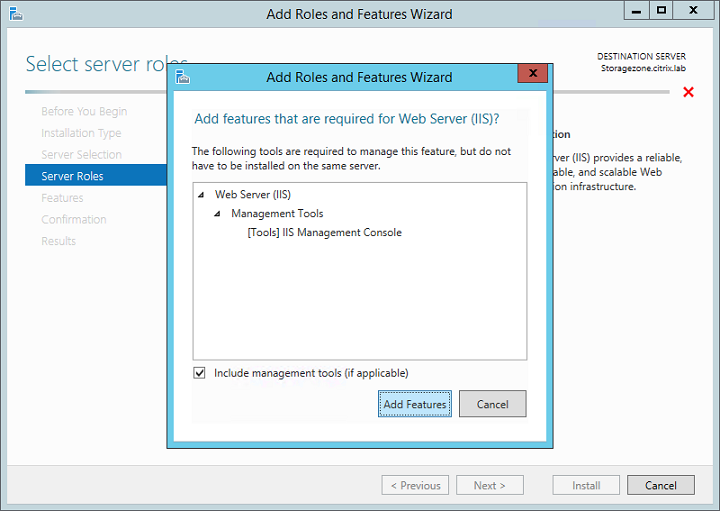
Click Add Features to add the features required for IIS.
-
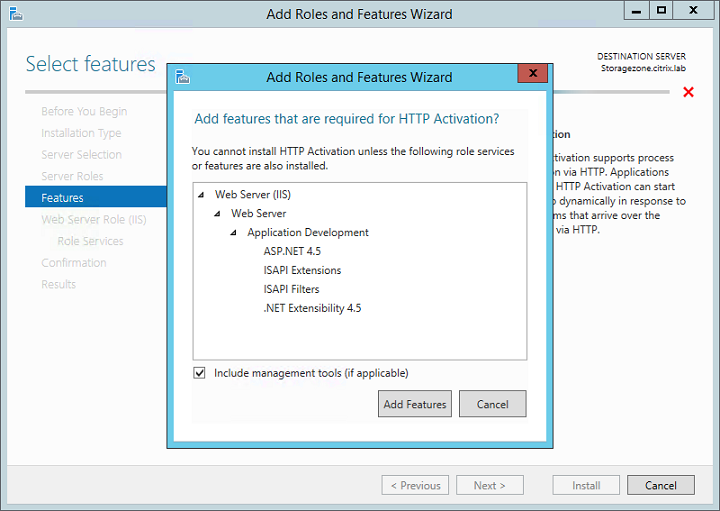
Click Add Features. The Select features page appears.
-
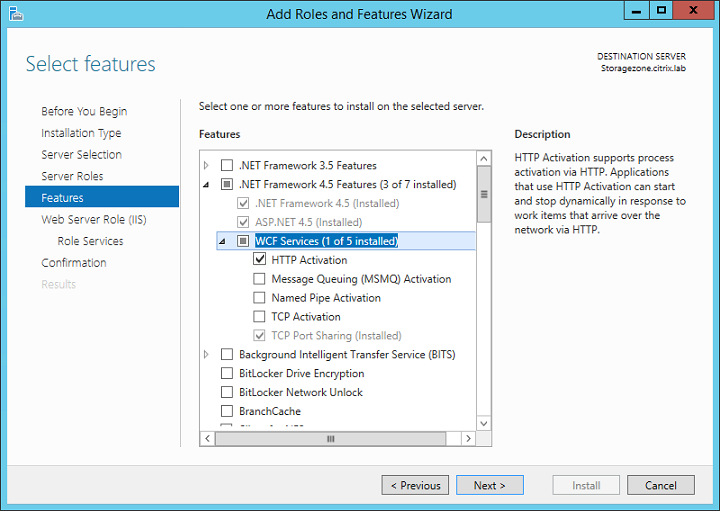
Select the required settings shown in the following screen, and then click Next.
-
On the Web Server Role (IIS) page, click Next.
-
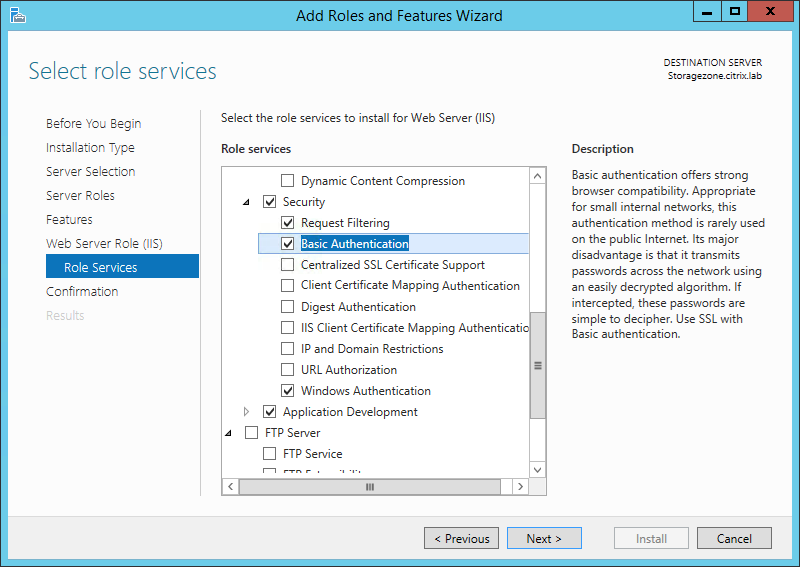
On the Select role services page, select the Basic Authentication and Windows Authentication check boxes, and then click Next.
-
On the Confirm installation selections page, click Install.
-
When the installation completes, click Close and then restart the server.
To configure IIS
After you enable the Web Server (IIS) role and the ASP.NET role service, configure IIS.
-
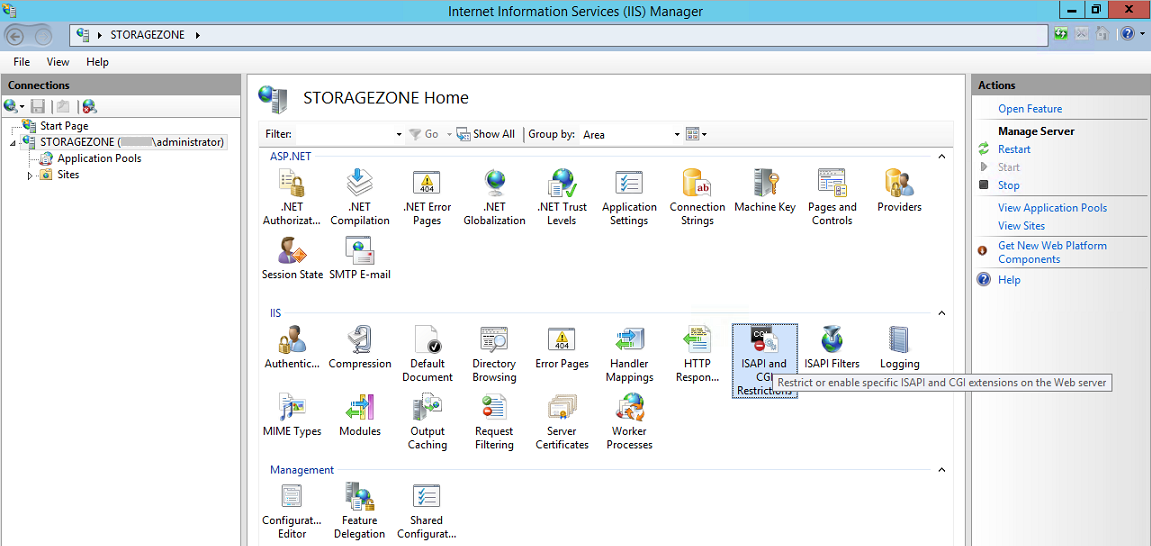
Open the IIS Manager console, click the storage zone controller server node, and then double-click ISAPI and CGI Restrictions.
-
Set each ASP.NET entry to Allowed.

-
Verify that a domain server or public certificate is installed on the server: In the IIS Manager console, click the storage zone controller server node, and then double-click Server Certificates.
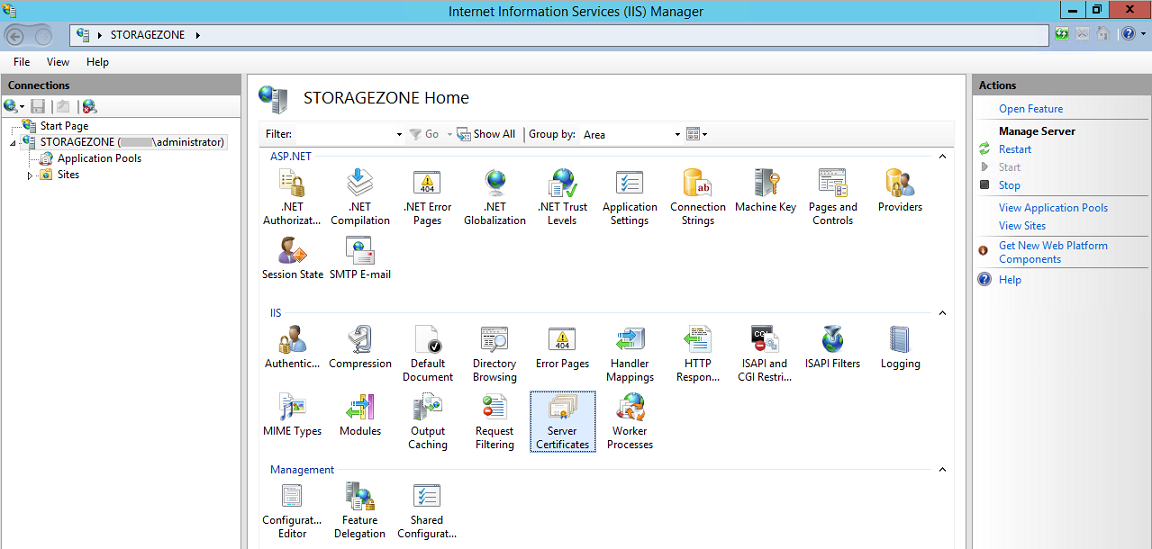
If there is no certificate associated with a public Certificate Authority, install a certificate on the server before proceeding. For more information, see Install an SSL certificate.
Note:
If you are using a Citrix Gateway or similar appliance with storage zones controller, you can use a domain server certificate. All internet traffic for standard zones must be handled using a public certificate.
-
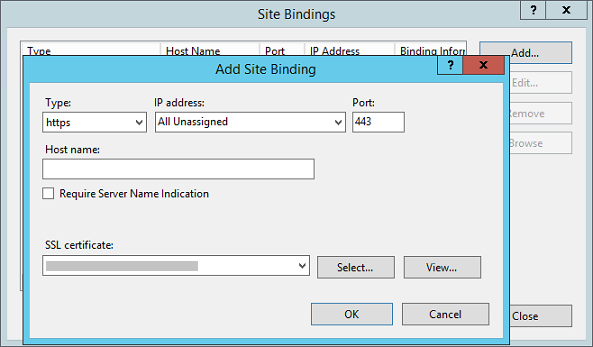
In the IIS Manager console, click Default Web Site and then click Bindings.

-
Click Add and configure the site binding as follows:
- Type is https.
- IP address is All Unassigned.
- Port is 443.
- SSL certificate is your installed certificate.
-
To test the web server connection, navigate to
http://localhost/and tohttps://localhost/. If the connection is successful, the IIS logo appears.HTTPS displays a message about the certificate not matching the localhost name in the URL header. This is expected and you can safely continue to the website.
-
If you are installing storage zones controller on a VM, take a snapshot of the VM.
NOTE:
Storage zones controller uses CORS and requires OPTIONS http verb to be enabled. Please check IIS Request Filtering feature to make sure OPTIONS verb is not disabled.
Below MS document to allow Options HTTP Verb: