Citrix Content Collaboration single sign-on configuration guide for ADFS 4
Prerequisites
- Domain joined Windows Server 2016 host
- Publicly accessible FQDN associated with public IP (Example:
<adfs>.yourdomain.com) - Valid SSL certificate associated with site FQDN (Wildcards are supported)
- Port 443 open inbound and outbound on public IP associated with AD FS FQDN
Note:
Account URL is your ShareFile account URL in the form of
https://mysubdomain.sharefile.comor, in Europe,https://mysubdomain.sharefile.eu.
Add ADFS Role
- Launch Server Manager.
- Click Manage at the top right.
- Click Add Roles and Features.
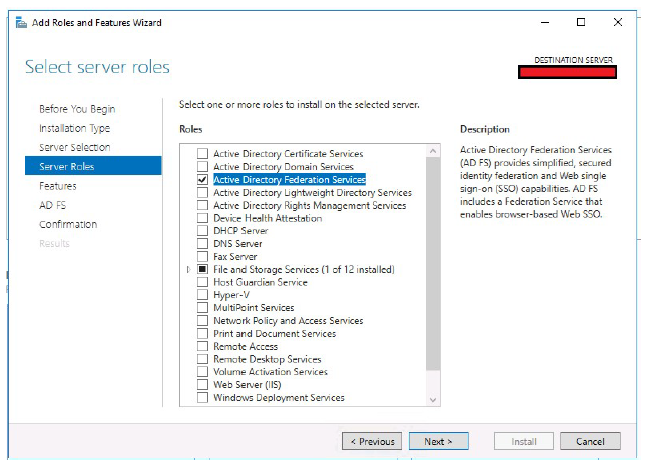
- Select Active Directory Federation Services.
- Click Next.
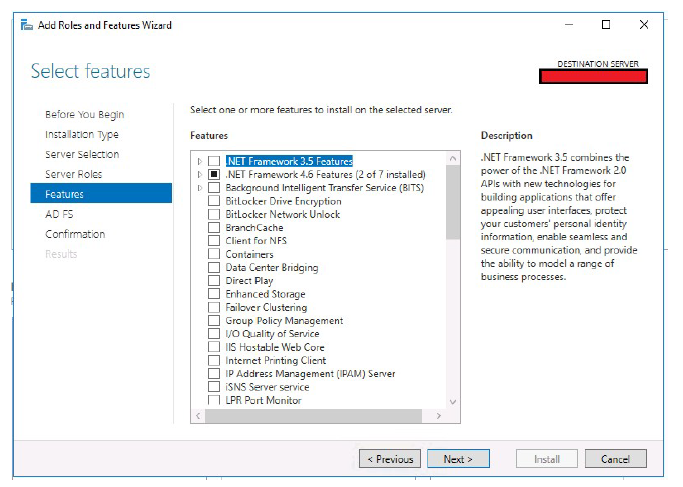
- Click Next.
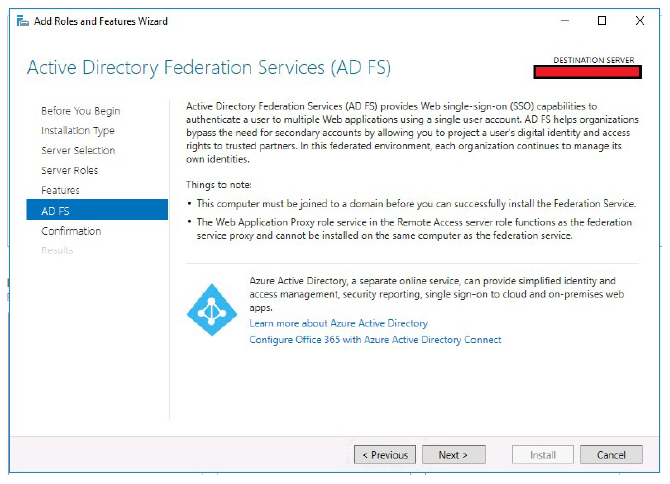
- Click Next.
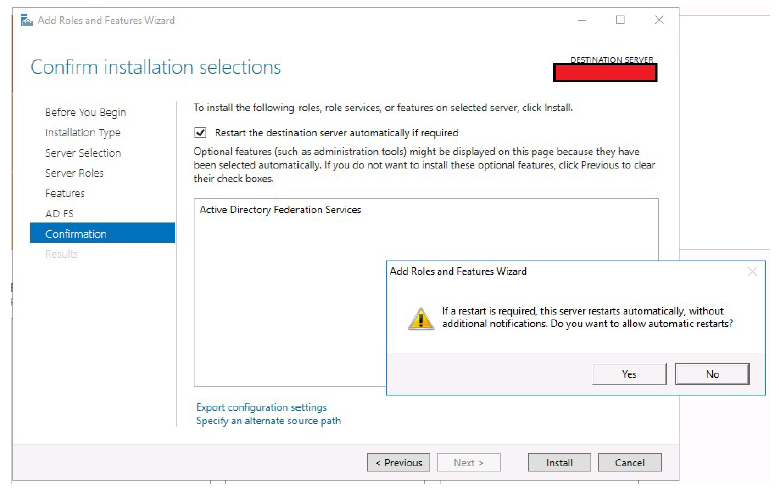
- Select Restart the destination server automatically if required.
- Click Install, respond Yes to the restart prompt.
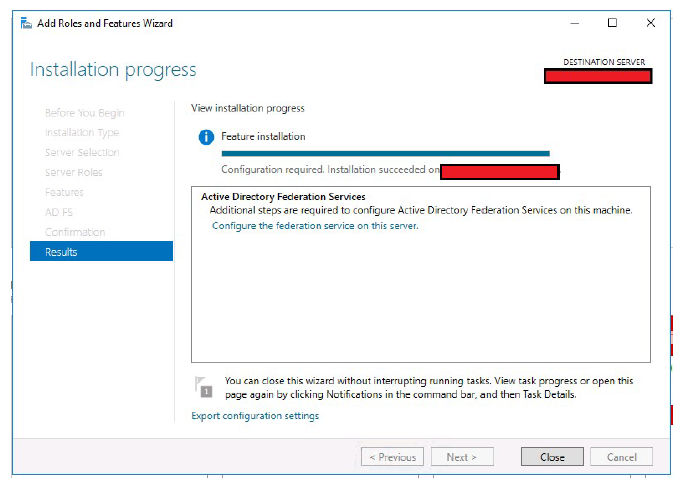
- You now see this screen upon successful install of the role. Click Close.
Configure ADFS
- Open Server Manager.
- Click the flag icon with the yellow caution symbol.
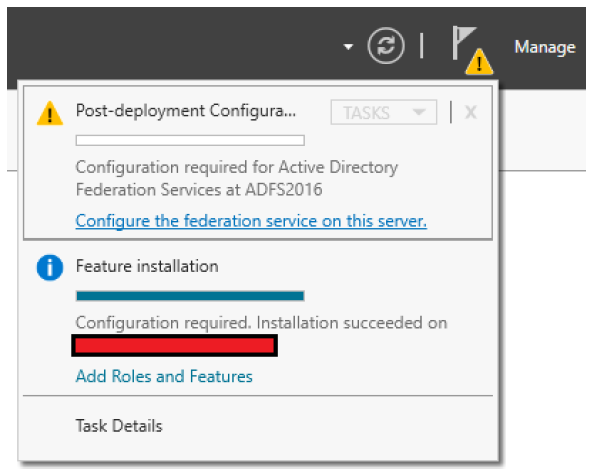
- Click Configure the federation service on this server.
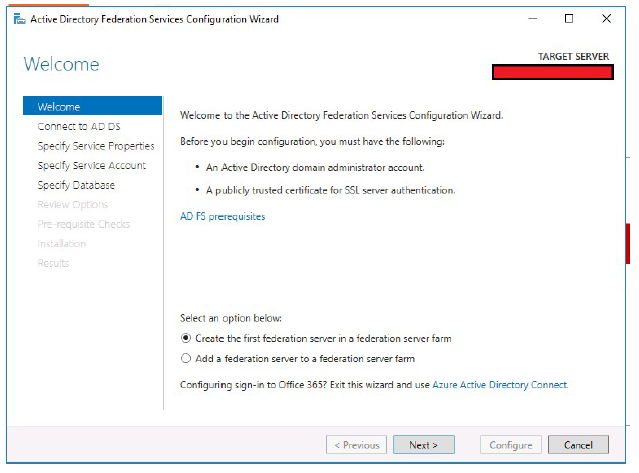
- Select the Create the first federation server in a federation server farm radio button.
- Click Next.
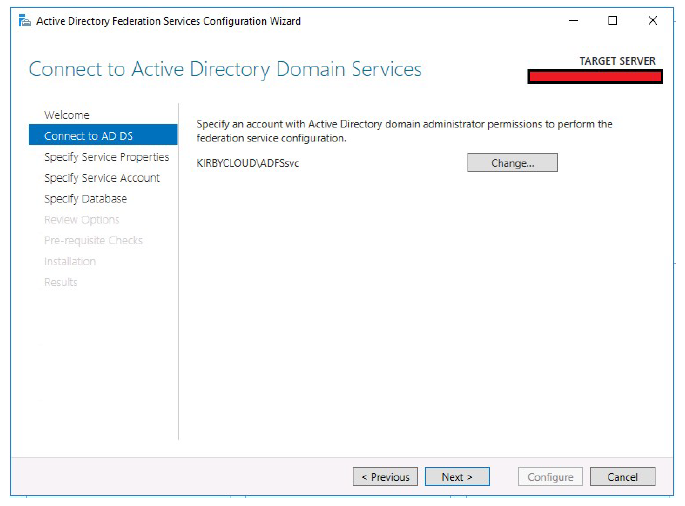
- Define a domain admin account to configure ADFS.
- Click Next.
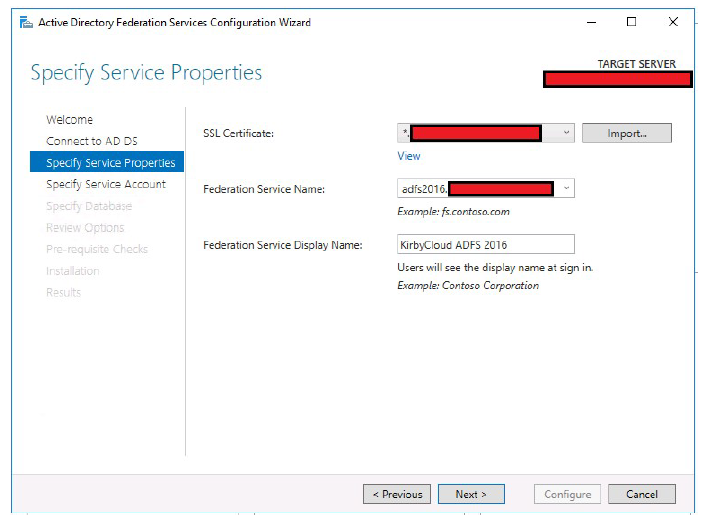
- Select the public SSL certificate. This certificate must be imported on the host before ADFS configuration.
- Type in a Federation Service Name. This name must match the FQDN you created for ADFS.
Example:
adfs2016.yourdomain.com - Type in a Service Display Name. This name is the text that shows on a forms based login page.
- Click Next.
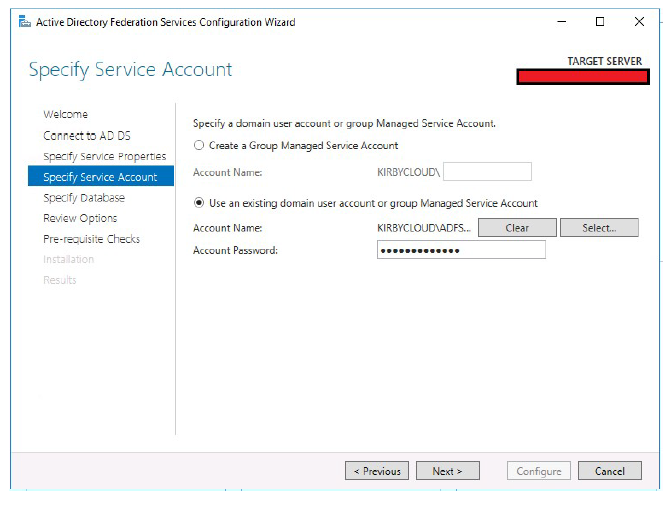
- Specify the service account ADFS uses.
- Click Next.
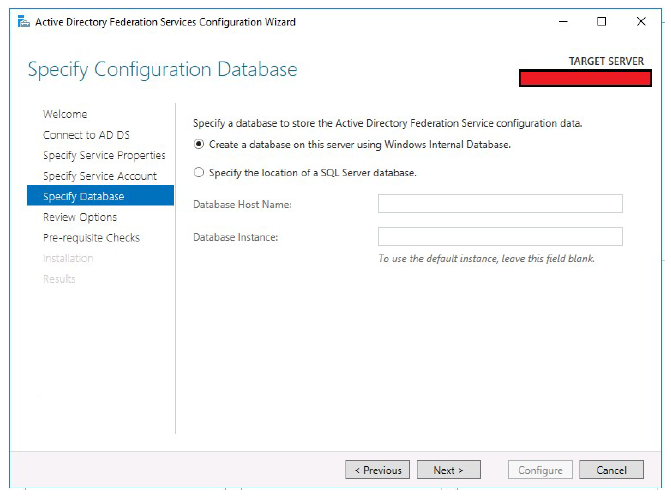
- Select the database type.
- Click Next.
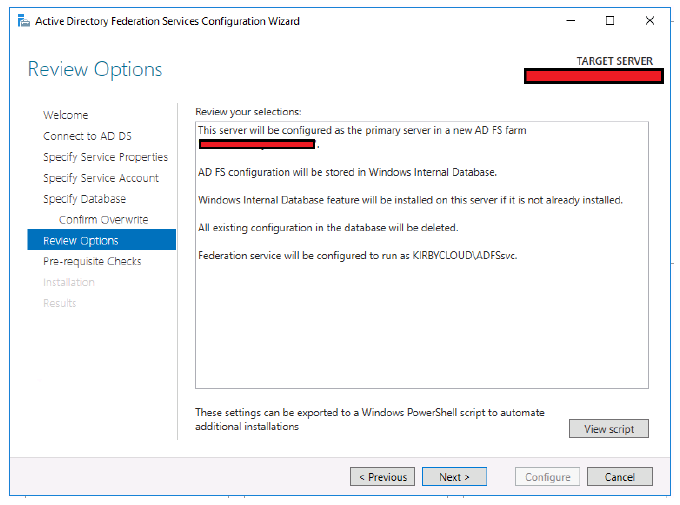
- Review the changes before they are made.
- Click Next.
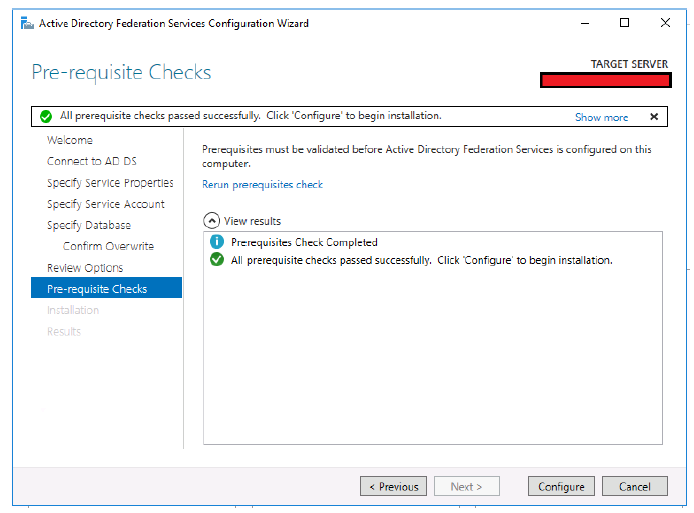
- Click Configure if all prerequisite checks completed successfully.
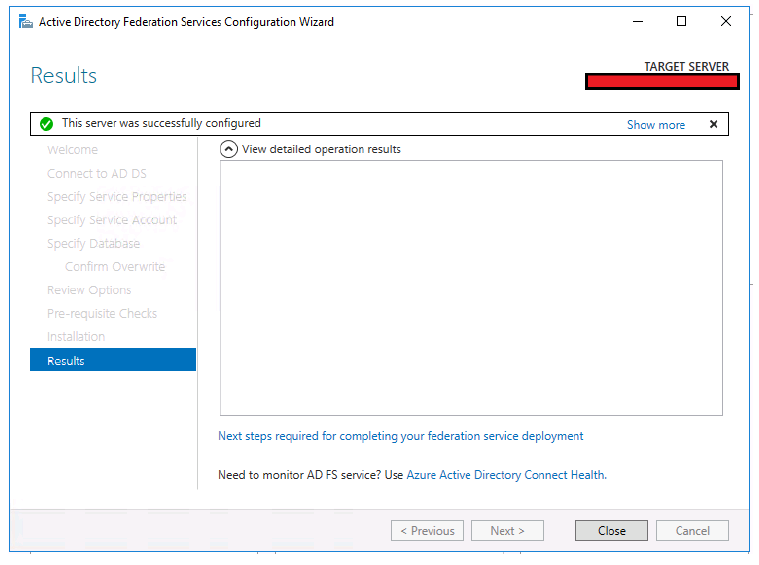
- Upon successful configuration of ADFS, you now see this screen.
- Click Close.
Enable IdP-initiated sign-in
The IdP-initiated sign-in page confirms that ADFS accepts your domain credentials before establishing service provider trusts. By default, this page is disabled on Windows Server 2016 environments. Use PowerShell to enable IdP-initiated sign-in.
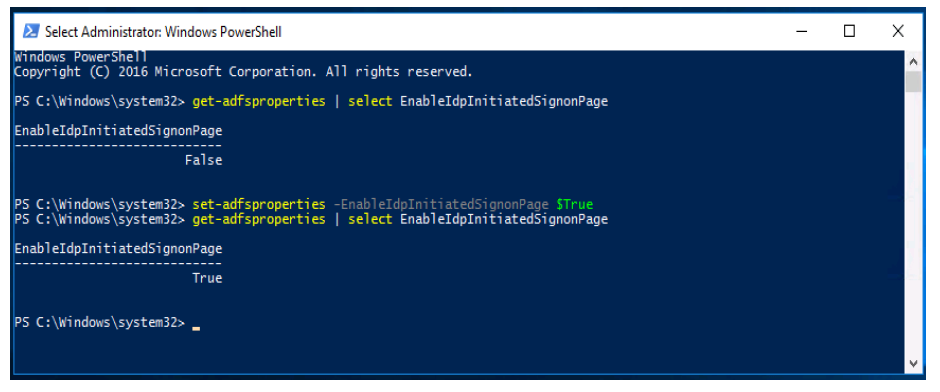
- Launch PowerShell as administrator.
- Run the command
set-adfsproperties –EnableIDPInitiatedSignonPage $True. - You can now browse to
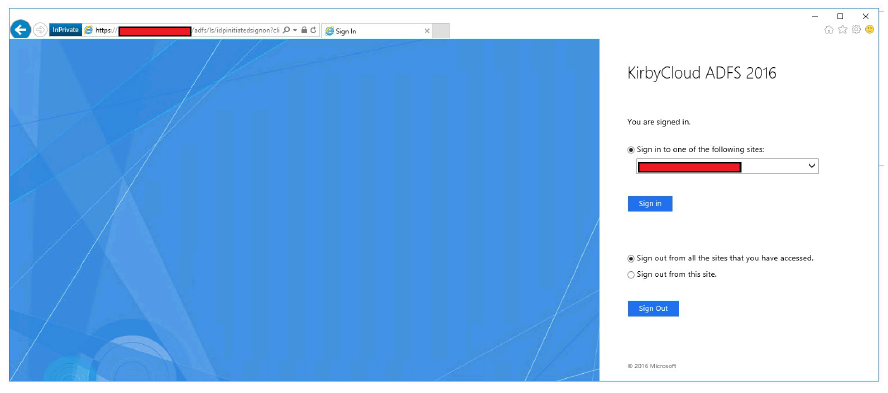
https://<adfs.domain.com>/adfs/ls/idpinitiatedsignon.aspxand sign in.
Export token-signing certificate
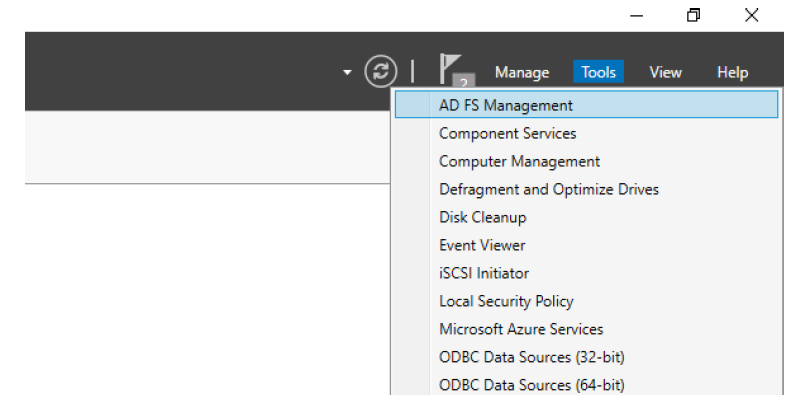
- Launch the ADFS management console from Server Manager.
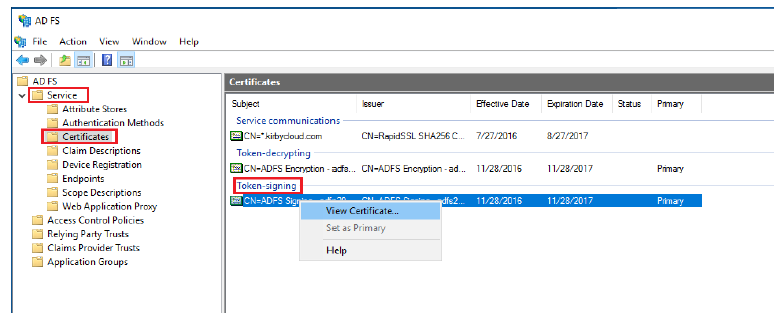
- Expand Service.
- Select Certificates.
- Right-click the Primary token-signing certificate. Select View Certificate…
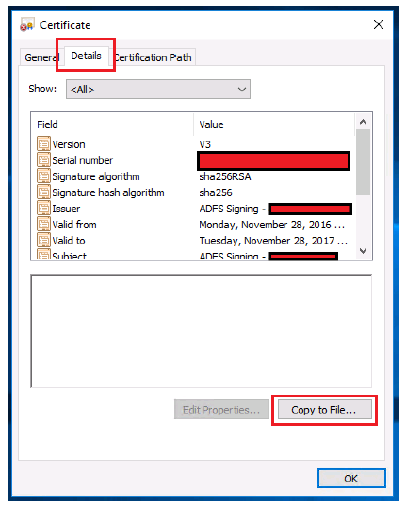
- Select the Details tab.
- Click Copy to File….
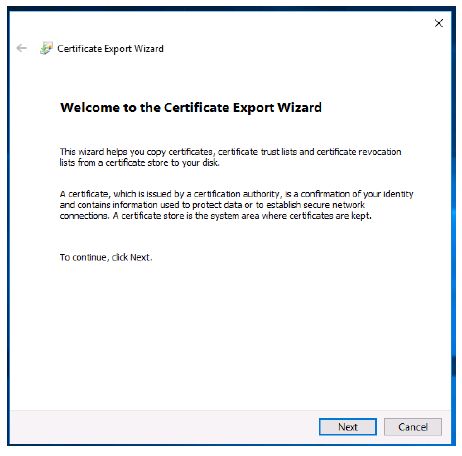
- Click Next.
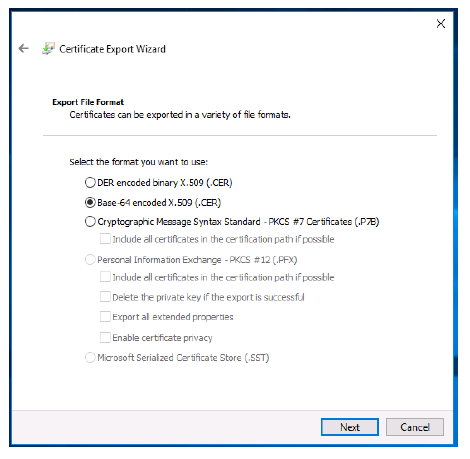
- Select the Base-64 encoded X.509 (.CER) radio button.
- Click Next.
- Click Browse.
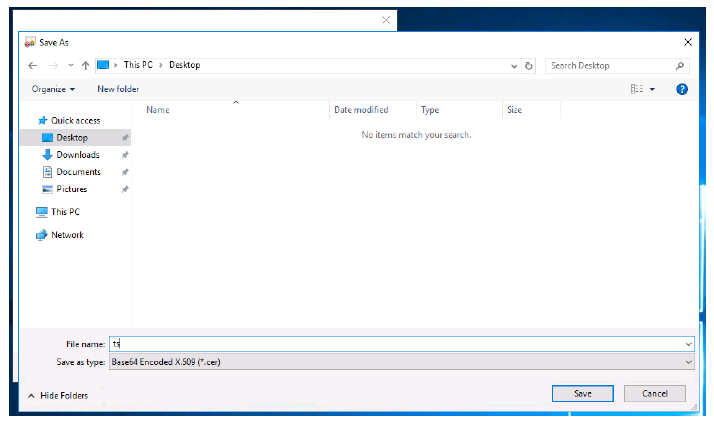
- Choose a location to export your token-signing certificate.
- Name your token-signing certificate.
- Click Save.
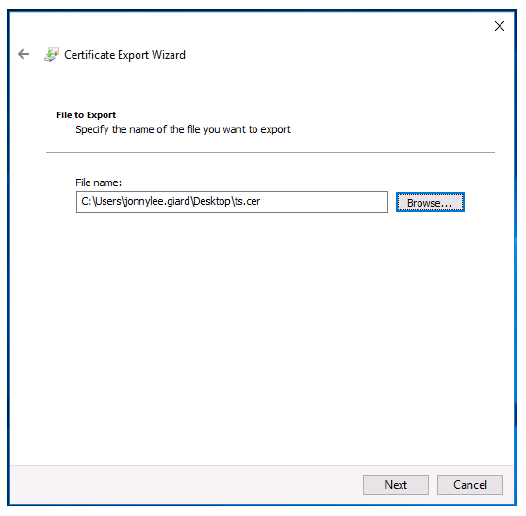
- Click Next.
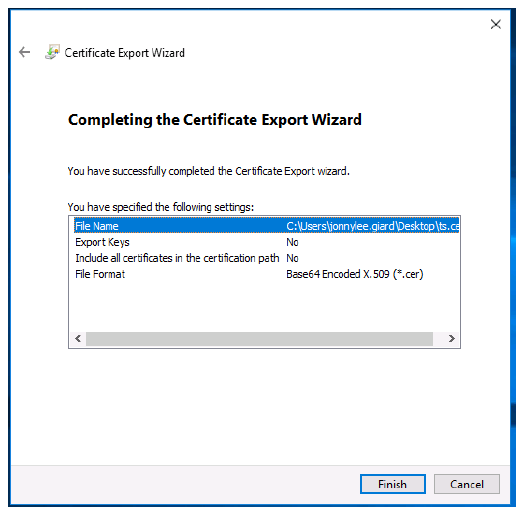
- Click Finish.
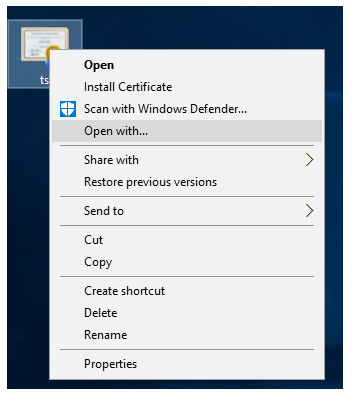
- Right-click on the exported token-signing certificate.
- Click Open with….
- Choose Notepad.
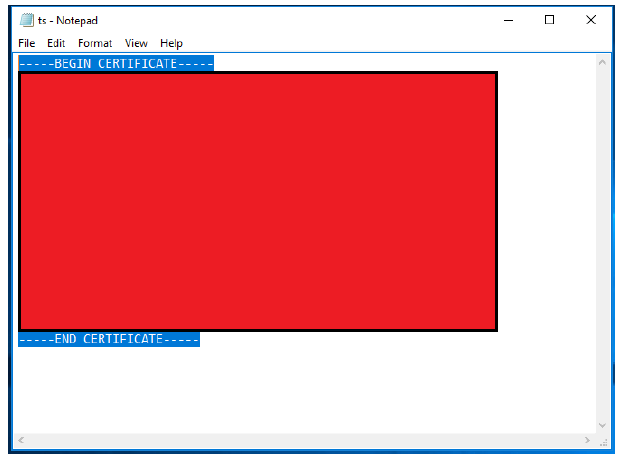
- Copy the contents of your token-signing certificate
Configure Citrix Content Collaboration account
- Sign in to your Citrix Content Collaboration account using your web browser.
- Click Settings on the left side panel.
- Click Admin Settings.
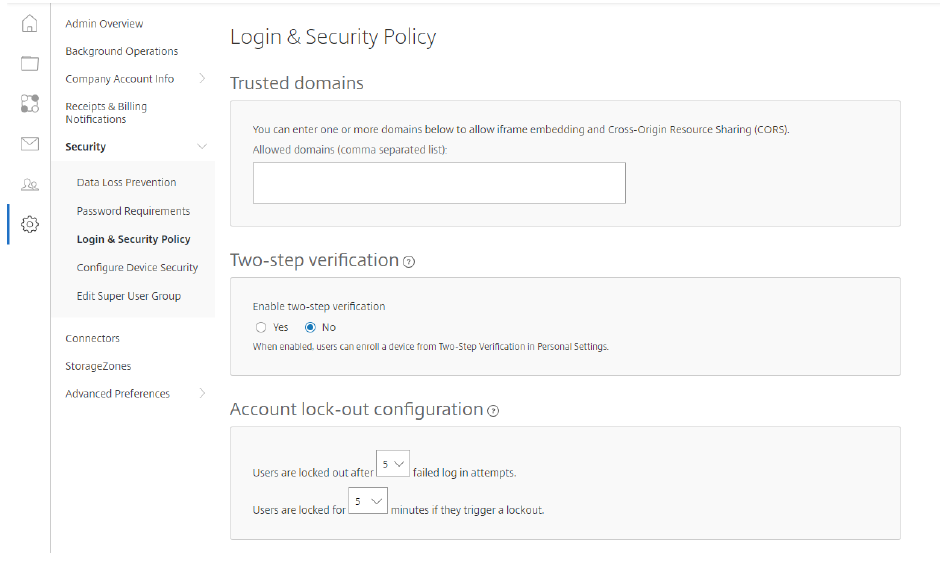
- Expand Security.
- Click Login & Security Policy. Scroll to the bottom of page.
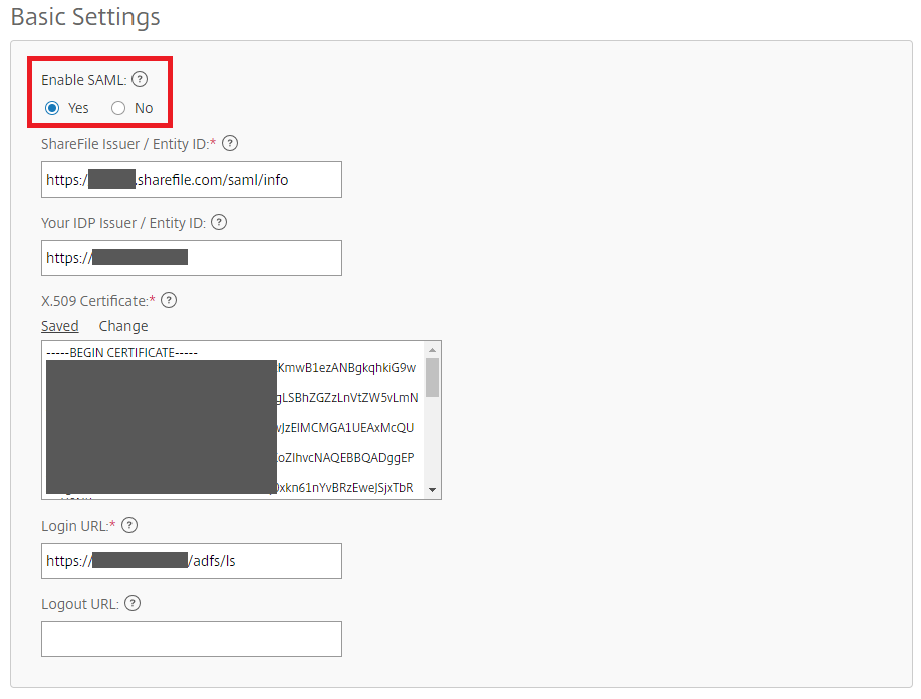
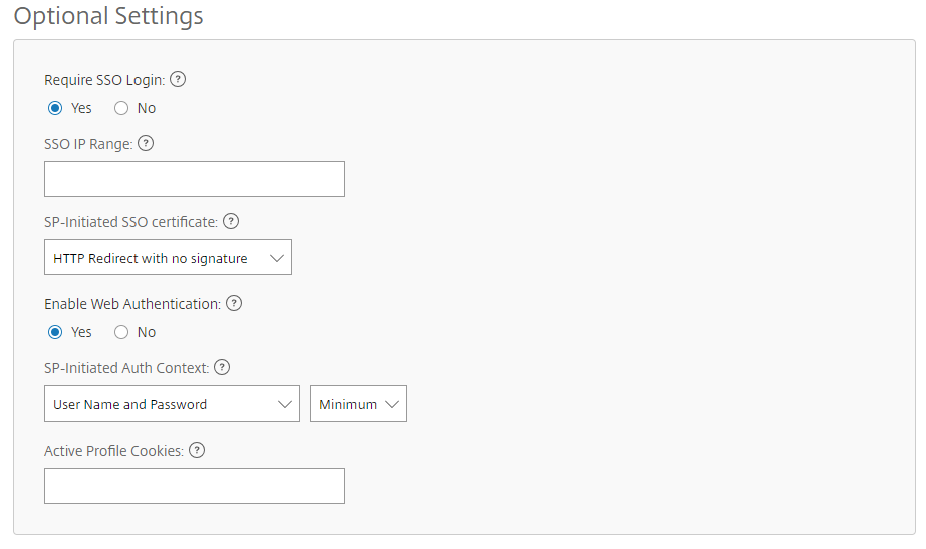
- ShareFile Issuer / Entity ID:
https://<subdomain>.sharefile.com/saml/info - Your IdP Issuer / Entity ID:
https://<adfs>.yourdomain.com - X.509 Certificate: Paste contents of exported certificate from previous section
- Login URL:
https://<adfs>.yourdomain.com/adfs/ls - Enable Web Authentication: Yes (Check marked)
- SP-Initiated Auth Context: User Name and Password – Minimum
- Save your changes.
Build service provider trust
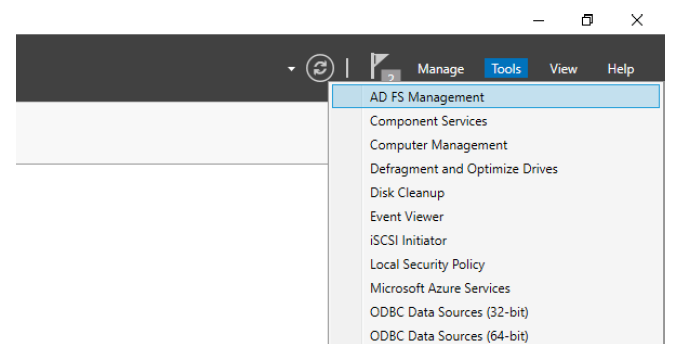
- Launch ADFS Management from Server Manager.
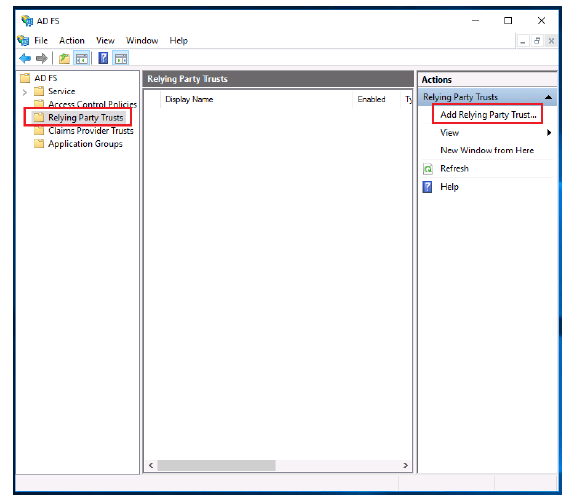
- Select Relying Party Trusts.
- Click Add Relying Party Trust.
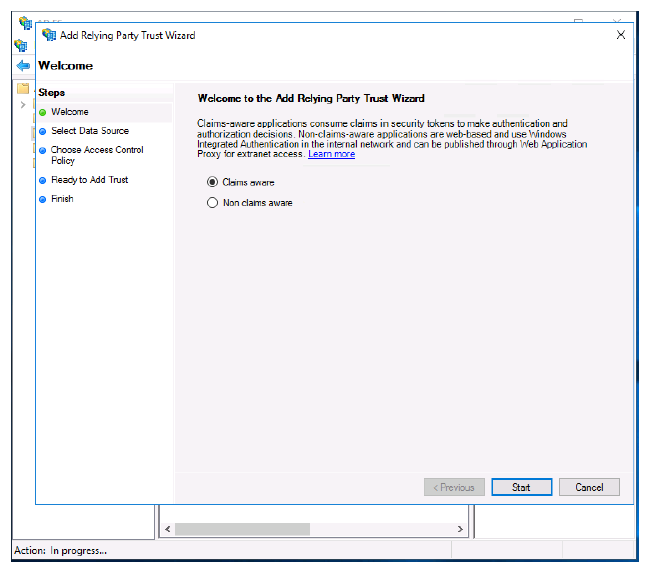
- Select the Claims aware radio button.
- Click Start.
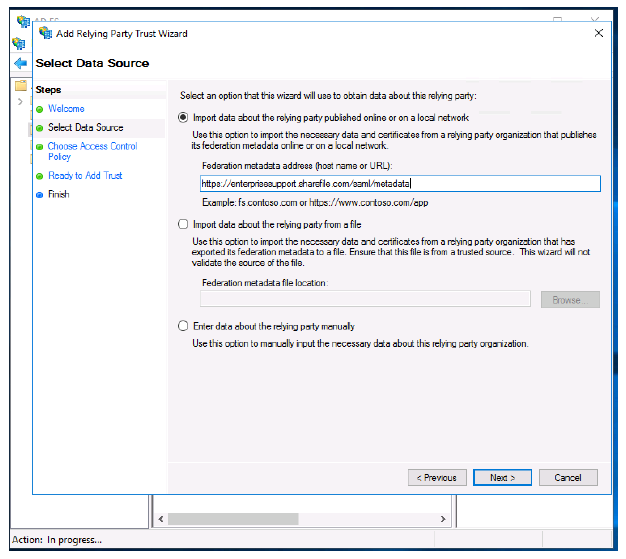
- Type in your Citrix Content Collaboration account’s metadata URL. Example:
https://<subdomain>.sharefile.com/saml/metadata - You can also browse to this URL, copy the contents, and save as an .xml file if you would rather import the SAML metadata using a file. Also, you can type in this information manually by selecting the third radio button.
- Click Next.
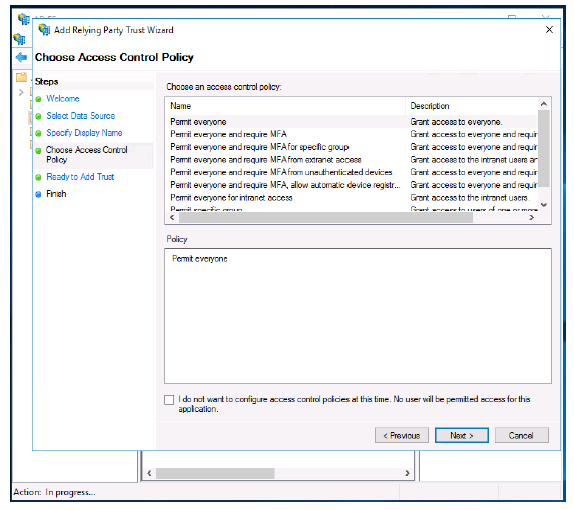
- Click Next.
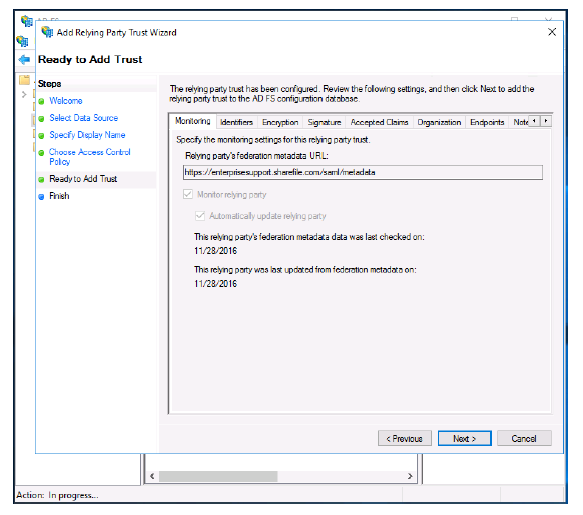
- Click Next.
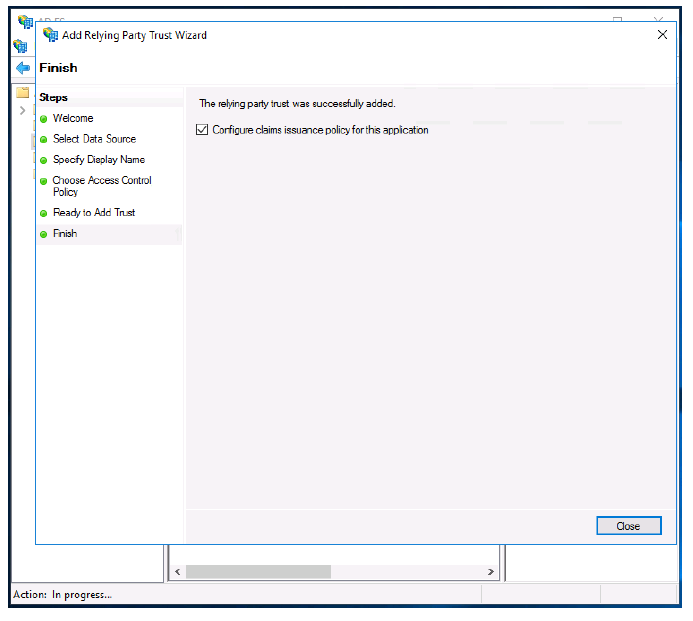
- Click Close.
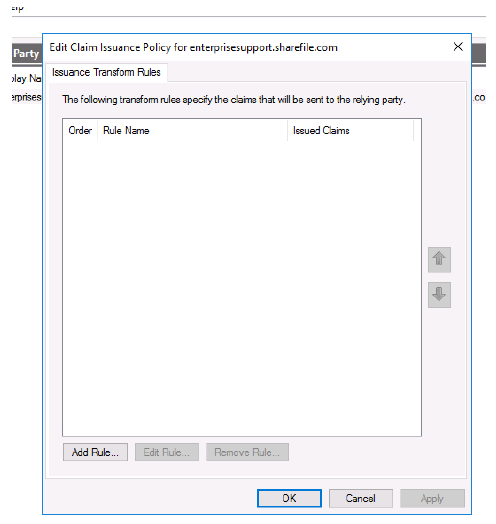
- Click Add Rule….
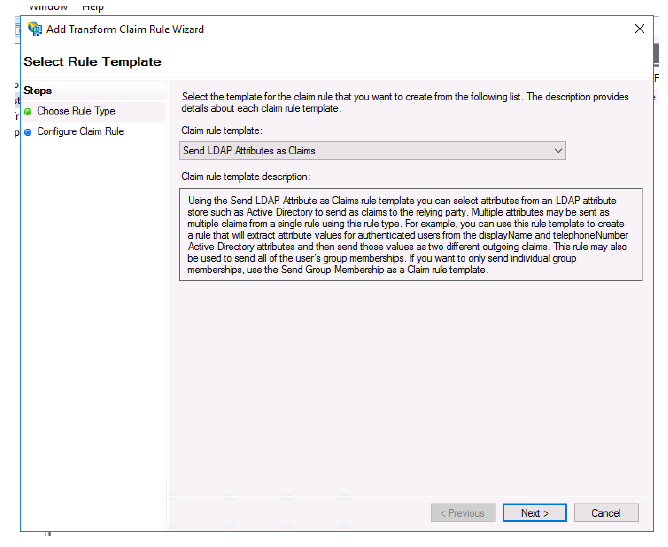
- Select Send LDAP Attributes as Claims from the menu.
- Click Next.
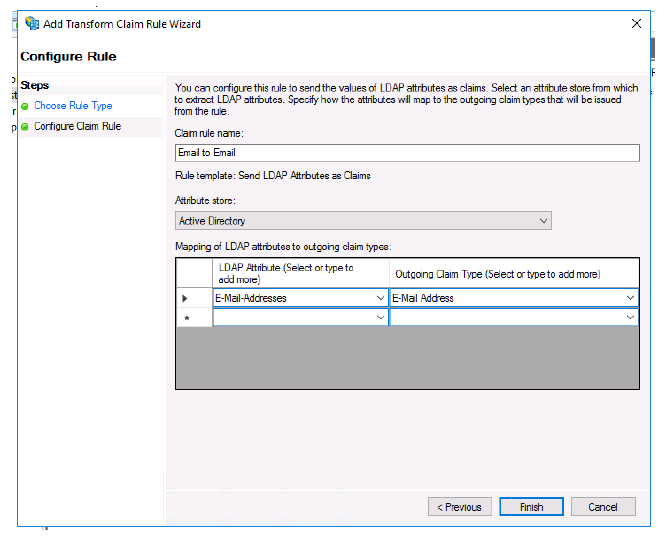
- Name your rule.
- Select Active Directory from the Attribute store menu.
- Select E-Mail Addresses under the first LDAP Attribute menu.
- Select E-Mail Address from the first Outgoing Claim Type menu.
- Click Finish.
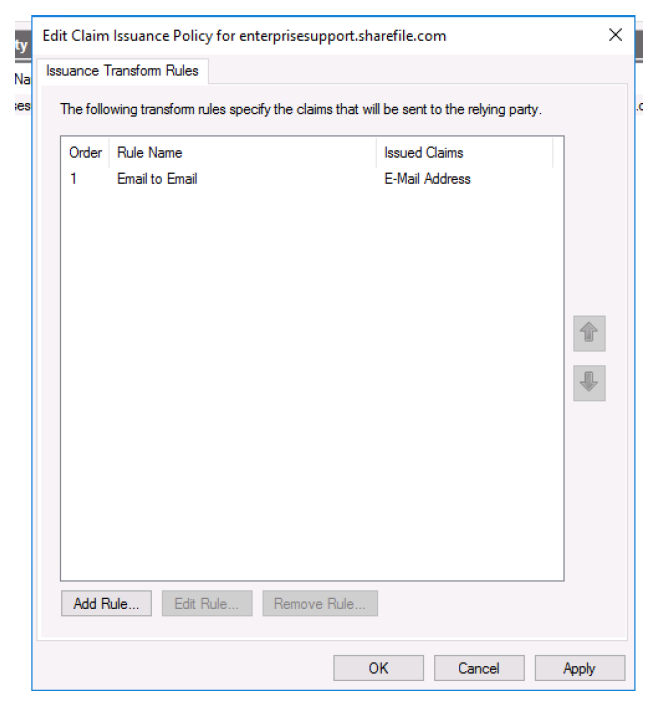
- Click Add Rule….
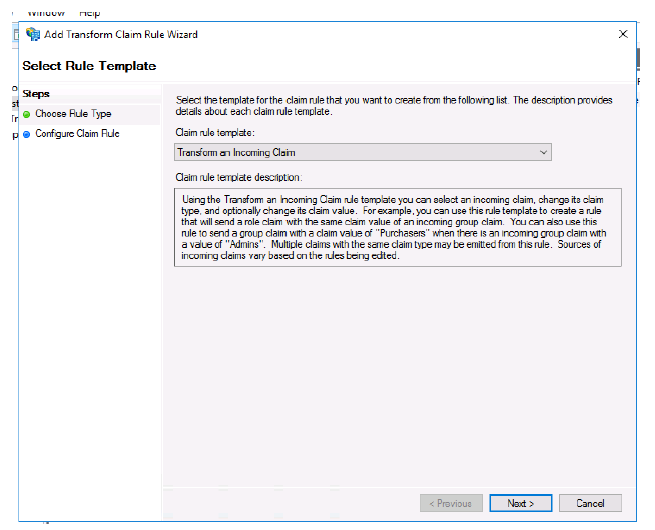
- Select Transform an Incoming Claim.
- Click Next.
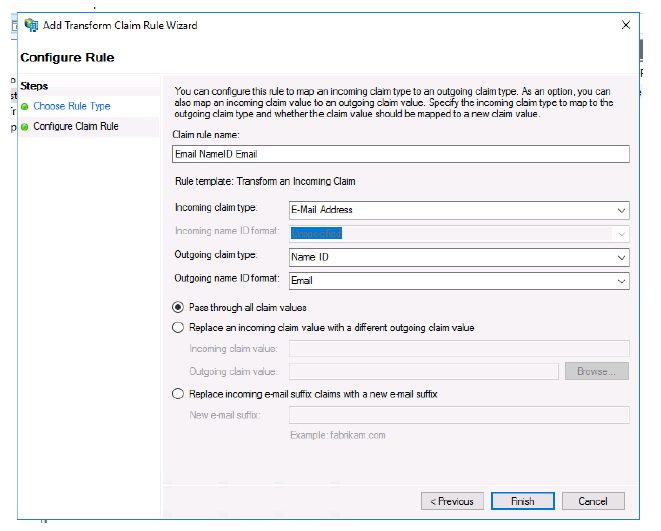
- Name your rule.
- Select E-Mail Address for Incoming claim type:.
- Select Name ID for Outgoing claim type:.
- Select Email for Outgoing name ID format:.
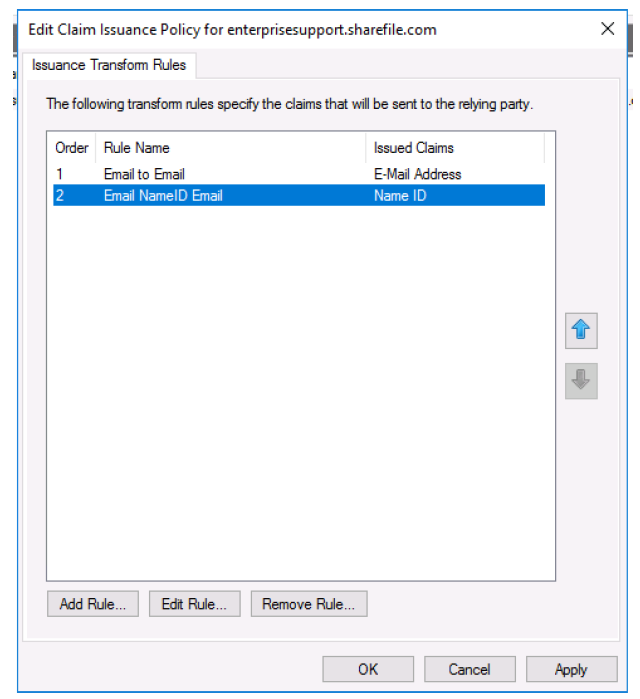
- Click Apply.
- Click OK.
Test your configuration
Browse to your Citrix Content Collaboration account’s SAML login URL. You are now redirected to your ADFS host and asked for credentials. Sign in using credentials associated with the domain your ADFS host is providing federation services for. The email address of your AD user must match the email address of a user in Citrix Content Collaboration. If the credentials are correct and your email address matches a Citrix Content Collaboration user, you are signed into the Citrix Content Collaboration account associated with your email.