Configure social sign-in
Administrators can enable a social sign-in provider on the account that client contacts can use.
By using social sign in functionality, clients can use their supported social accounts to authenticate into a ShareFile account, eliminating the need to create and remember yet another set of login credentials.
For more information on client end-user configuration, see Set up social sign-in as a client.
NOTES:
- Be aware that existing users on the account who are leveraging a disabled social sign-in option might need to go through a reactivation process to set up an available authentication method if they don’t already have an alternative authentication method configured.
- Upon the user’s next log-in, the user is sent a reactivation email for their account to set up an authentication that is enabled for them.
- The ShareFile integration for Microsoft social sign-in only supports personal use of Microsoft accounts and not work or school accounts.
Enable social sign in
You must have the Admin SSO permission to configure social sign in.
To enable social sign in:
- From the ShareFile dashboard, navigate to Account settings.
- Select Security.
- Under Sign in policy, go to Social sign in.
- Click Edit. The Social sign in drawer opens.
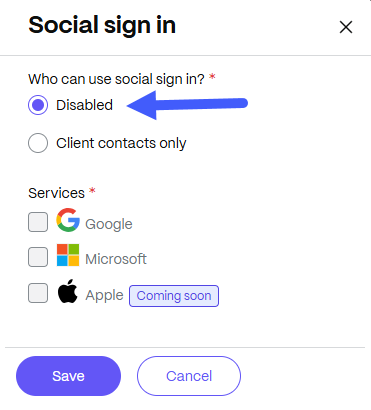
- From the Social sign in drawer, select Client contacts only to enable social sign in.
- Check the box next to the service you want to enable. Choose from Google or Microsoft.
- Click Save to apply the changes.
Once enabled, this allows client users to start configuring the social sign-in options marked with a check mark.
Disable social sign in
To disable social sign in:
-
From the ShareFile dashboard, navigate to Settings > Account Settings > Security > Sign in policy > Social sign in.
-
Click Edit.
-
Click Edit.
-
Select Disabled under the "Who can use social sign in" option.
-
Click Save.