Migrate data to ShareFile
To move data without preserving source permissions, create a Data Only transfer.
-
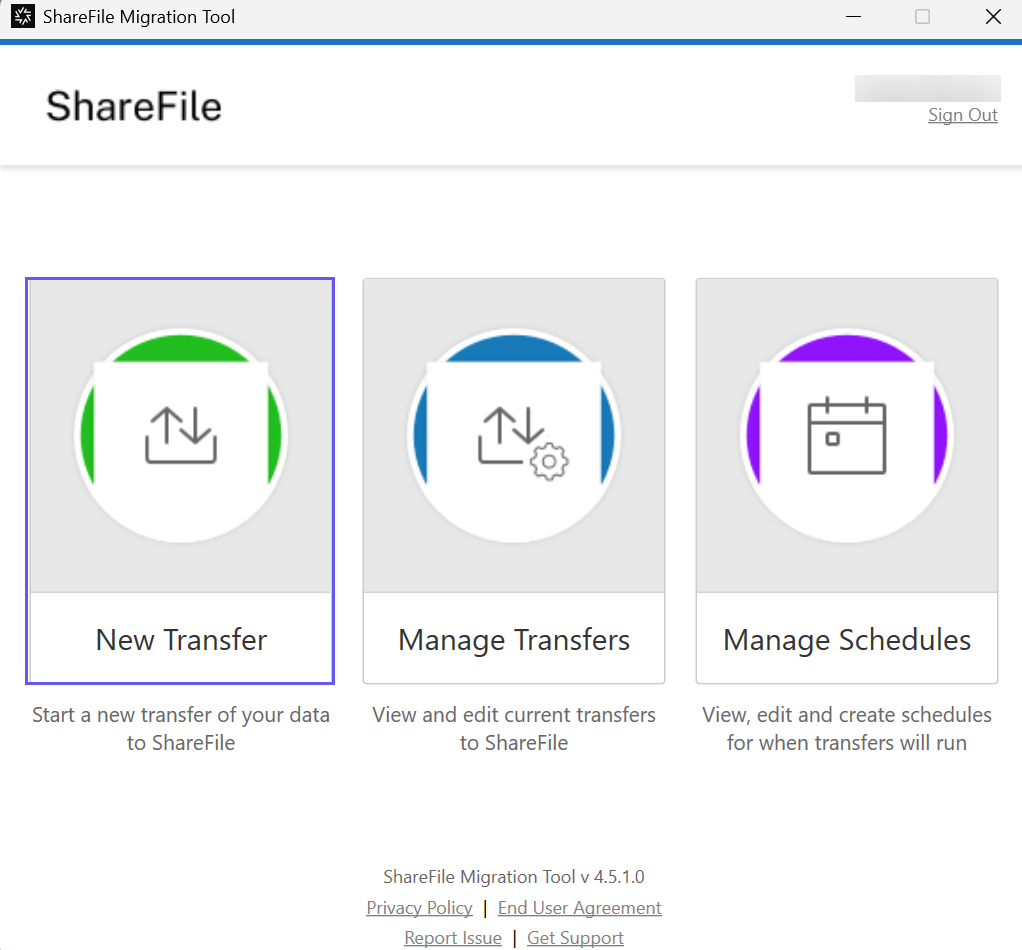
On the home page, select New Transfer.
-
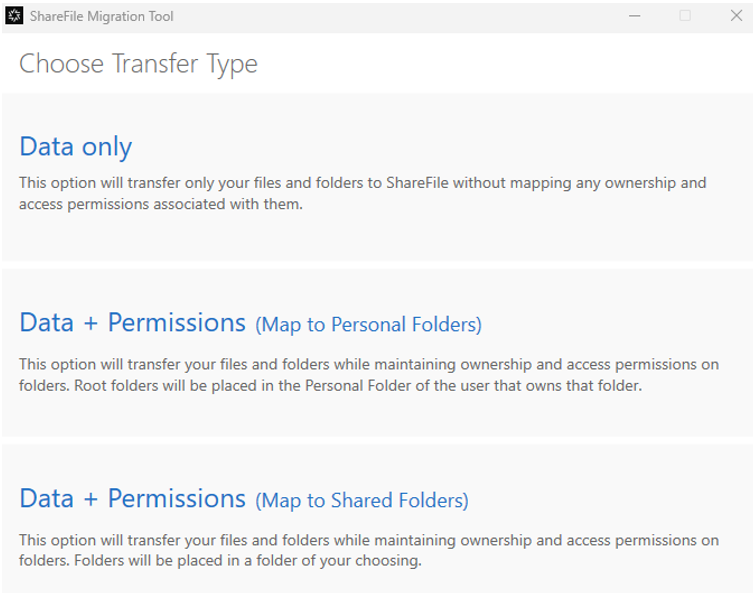
Select Data Only.
-
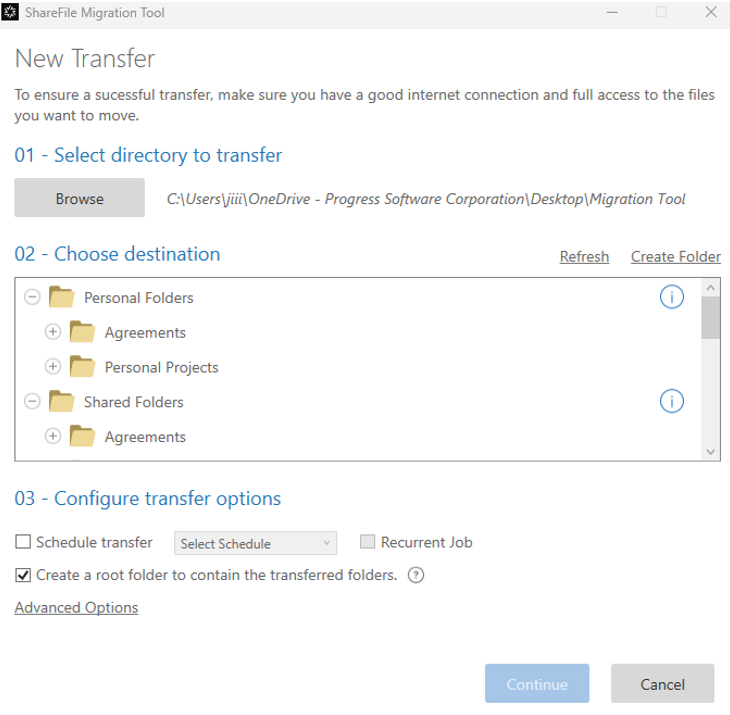
Select Browse and choose the local folder to migrate.
-
Choose a destination in Personal Folder or Shared Folders.
-
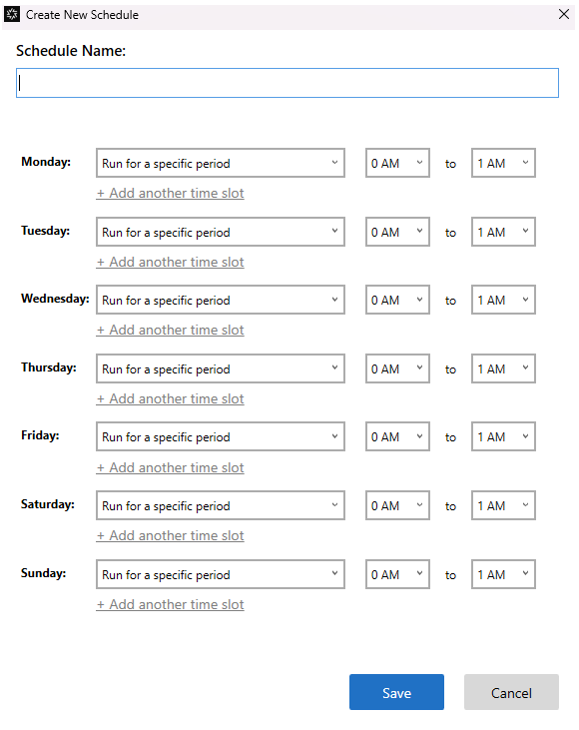
Set a schedule if you want to run the transfer outside business hours or repeat it to capture newly added files. To create a schedule, select Create New Schedule from the schedule menu.
-
Optional: select Create a root Folder to contain the transferred folders to place migrated data in a new top-level folder.
-
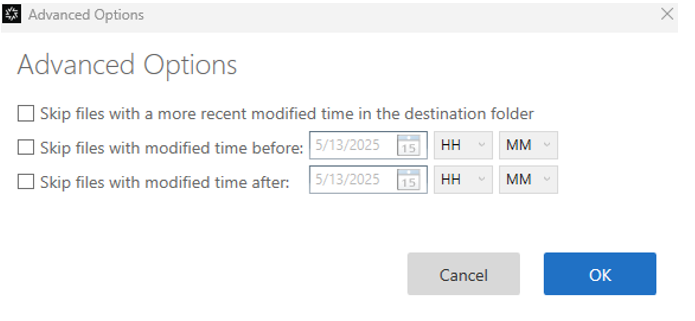
Optional: use Advanced option to skip files based on their modified date.
-
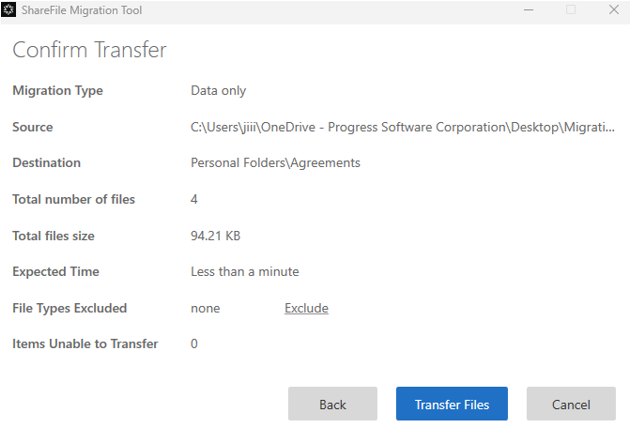
Select Continue. Review the migration statistics and, if needed, select Exclude to exclude file types.
-
Select Transfer Files to start the migration.
The transfer view shows progress. You can leave the tool open or review a transfer later from Manage Transfers on the home page.