Copy Attachments on Closing a Request List
Overview
ShareFile now enables all project users to copy files from a Request List (RL) directly to a project or folder when the request list is closed. This eliminates the need to manually download files and upload them to another storage location. Instead, ShareFile automatically copies the files attached to your RL to your selected destination when the request list is closed. You can copy all files when closing an RL only if:
- The Request List is in the Open state. The feature is not available for request lists in Draft or Closed status.
- You have permission to access the destination project or folder.
- If you are copying files from a project, the project must be active. Archived or frozen projects cannot be selected as destinations.
Copy Files on Closing a Request List
You can copy files while closing an RL in two ways:
- While closing the RL
- When all items are approved in a RL
You can copy attachments in both cases, as described in the following sections.
How to copy files while closing a Request List
To copy the files from an RL upon closing, follow the steps given below:
-
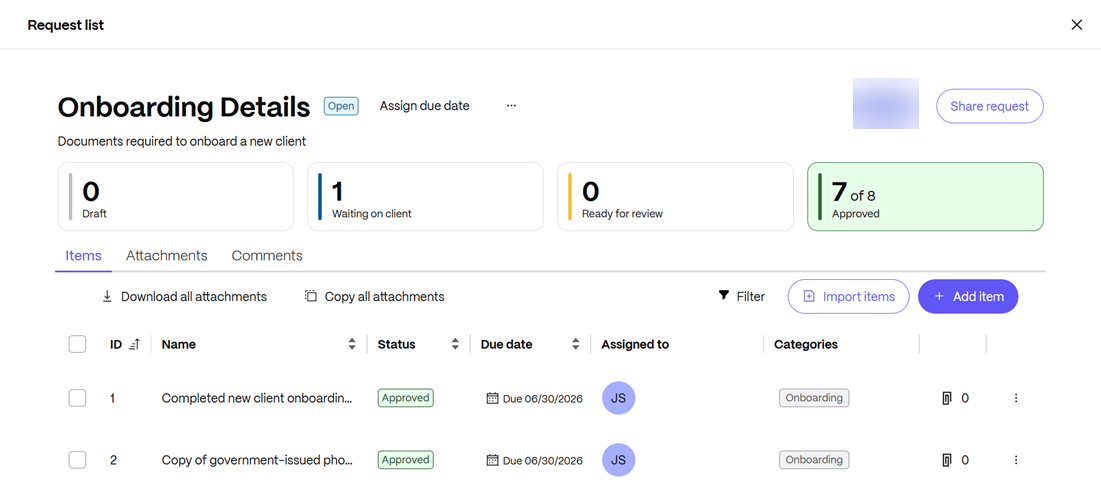
Sign in to your ShareFile account and from the dashboard, open the desired project and access the RL you want to close.
-
On the top of the screen, select the More actions menu (⋯) next to the RL and click on Close Request.
-
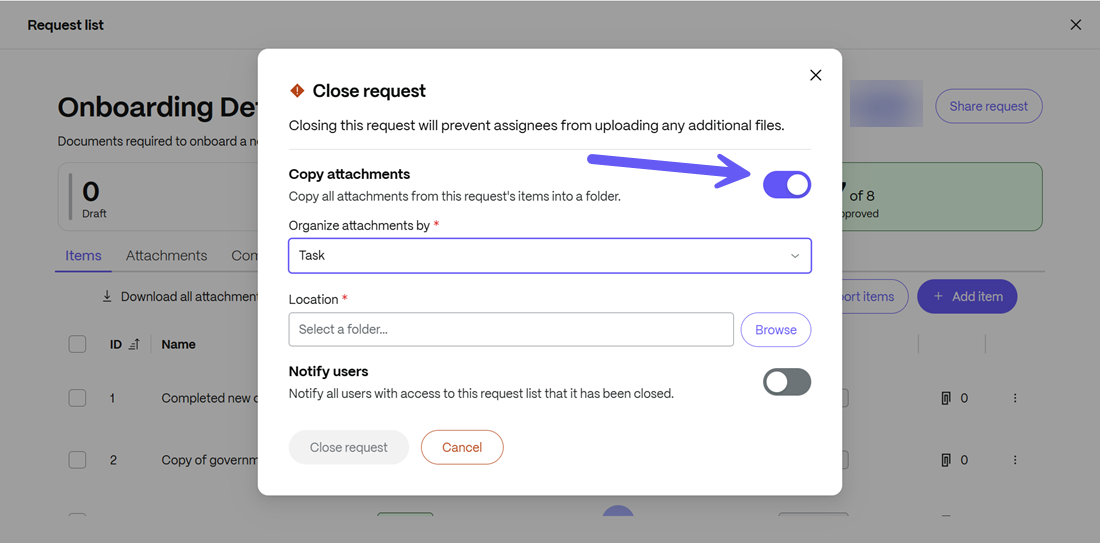
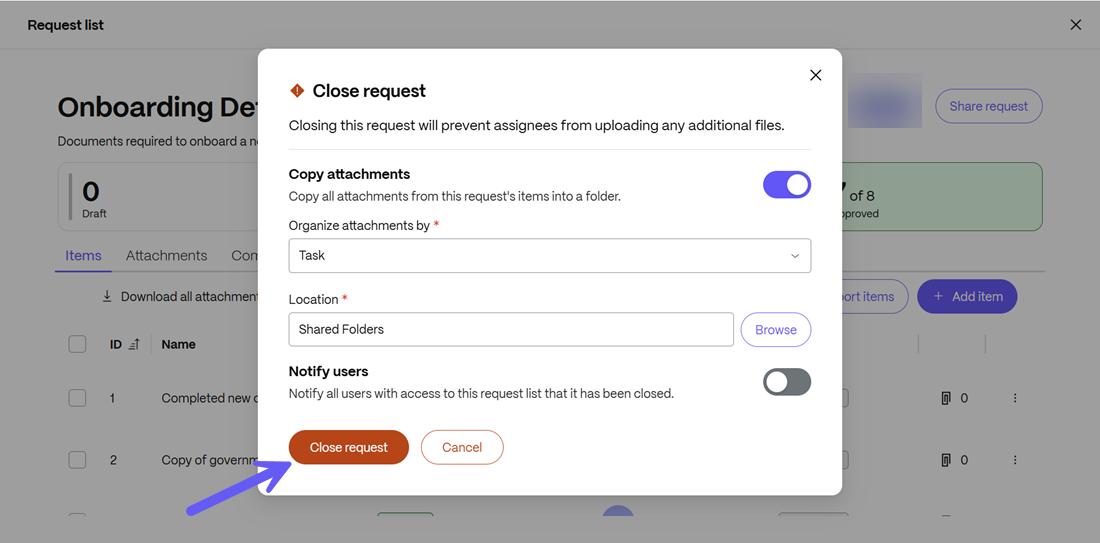
The Close Request dialog appears. Previously, this dialog only contained notification options. Now you can toggle the Copy attachments option while closing the RL to save the project files.
-
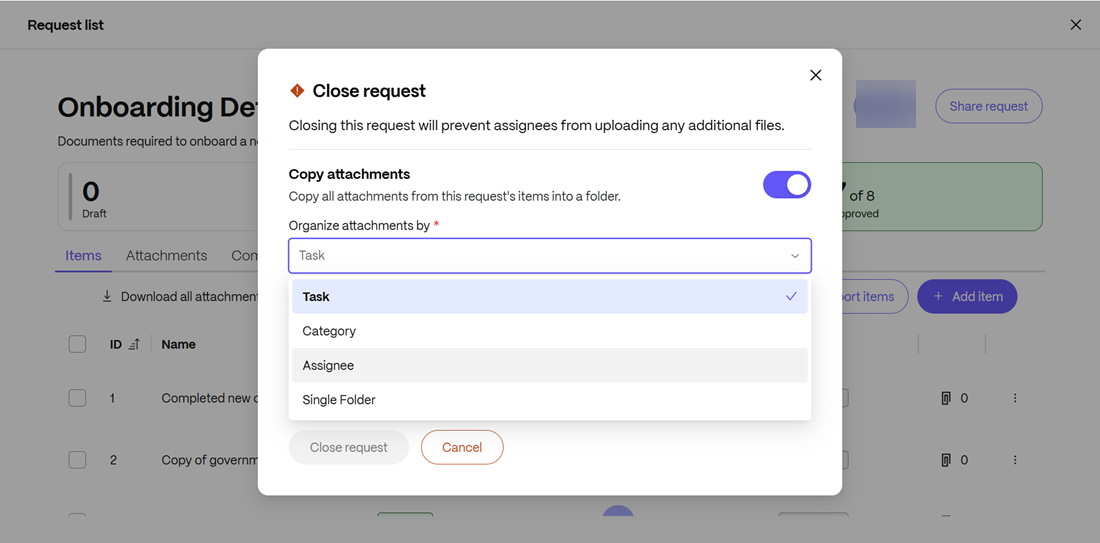
You can choose how ShareFile should organize the copied files in the destination location from the “Organize attachments by” dropdown list. The following options are available:
- Organize files by task: Creates a folder for each request item (task) in the request list and places that task's files into its corresponding folder.
- Organize files by category: Creates folders based on request categories and stores files within their associated category folders. When a file is associated with multiple categories, that file is duplicated for each category.
- Organize files by assignee: Creates folders based on the assignee and places each person's submitted files into their respective folder.
- Organize files by single folder: Copies all files into a single destination folder without creating additional subfolders.
-
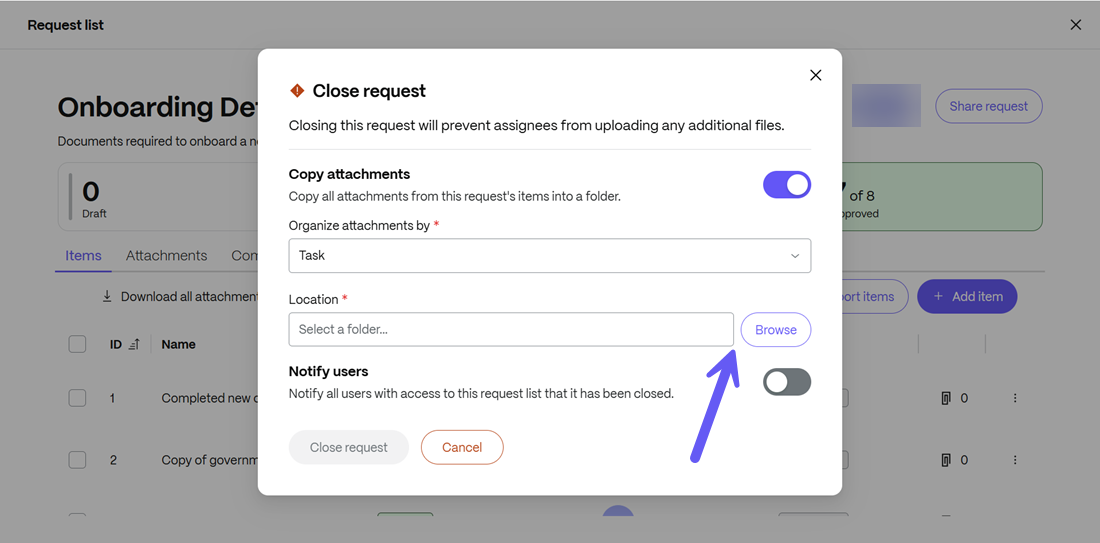
Next you must choose the destination location where the files will be stored after the RL is closed. From the Location section, click on Browse.
-
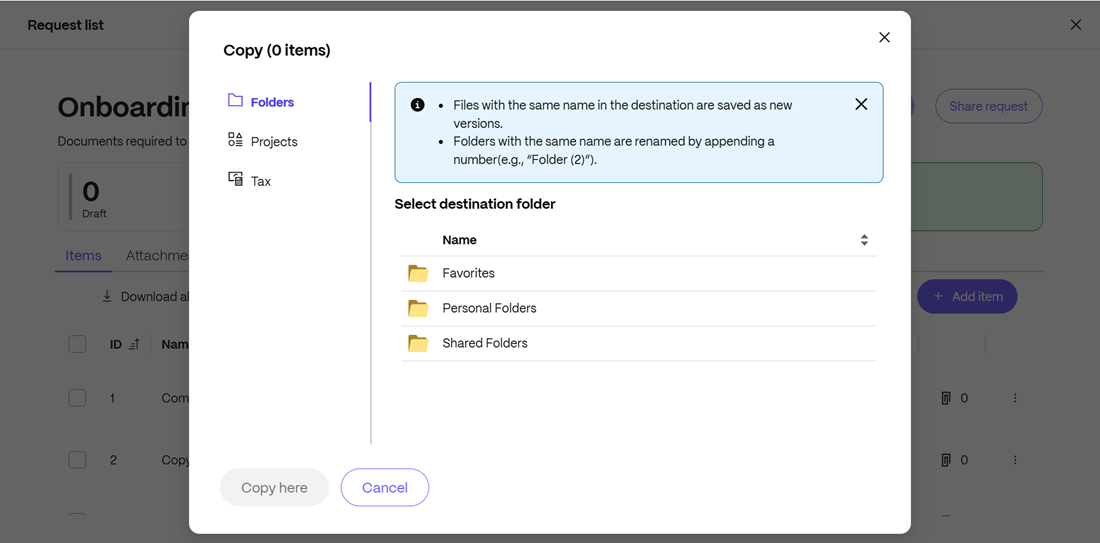
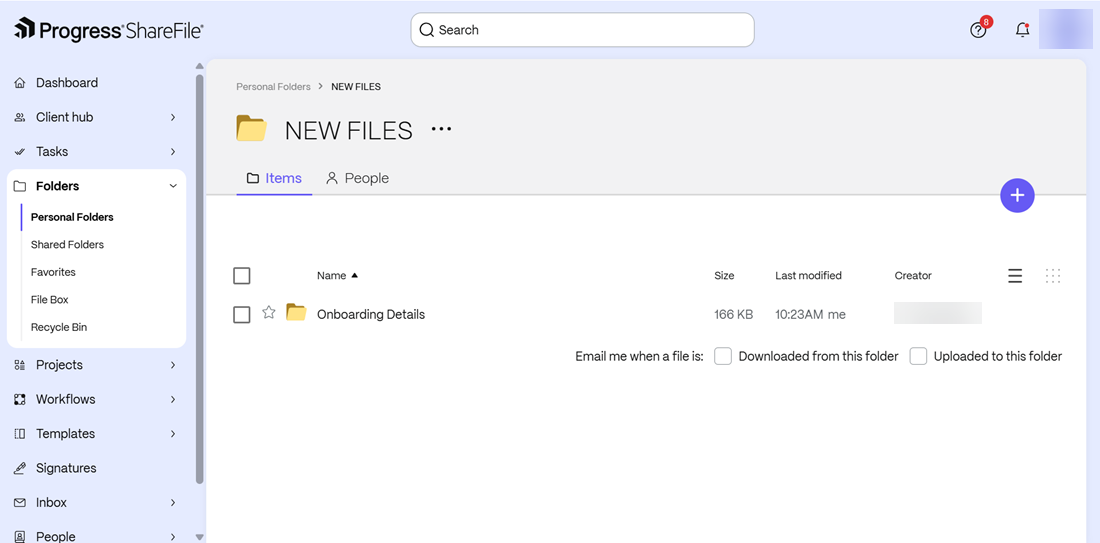
The location selection window opens and displays locations that you have permission to access. You can select a folder in your ShareFile account, or you can also choose to move the files to another existing project.
Note:
The location field is read-only. You cannot manually type a path. You must browse and select a destination from the options which are accessible by you.
-
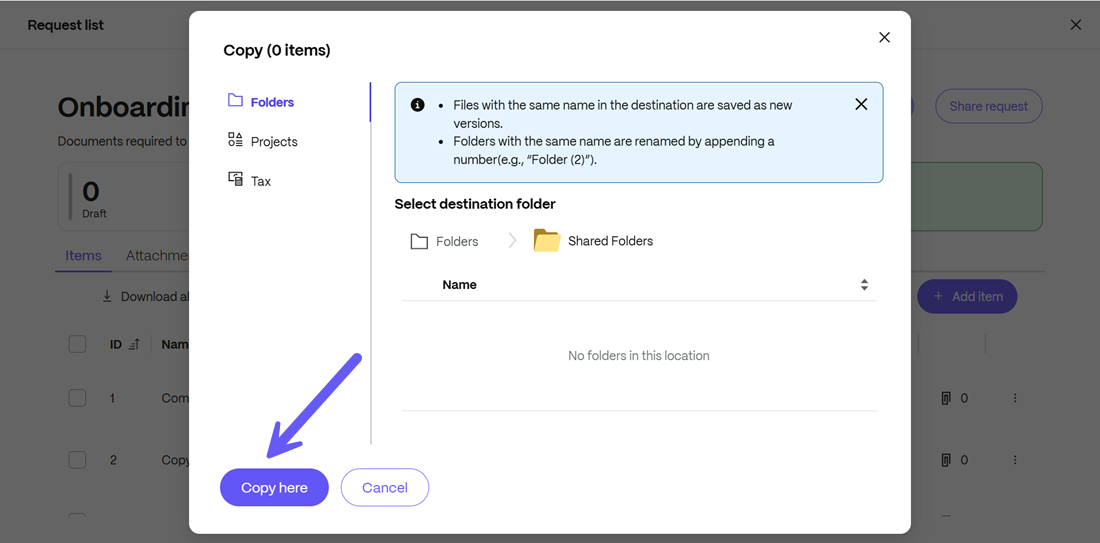
Browse to the location where you want the files to be copied. After selecting the destination, select Copy Here. The selected location is displayed in the Close Request dialog.
-
Once the destination has been finalized, click on the Close request option as shown below:
-
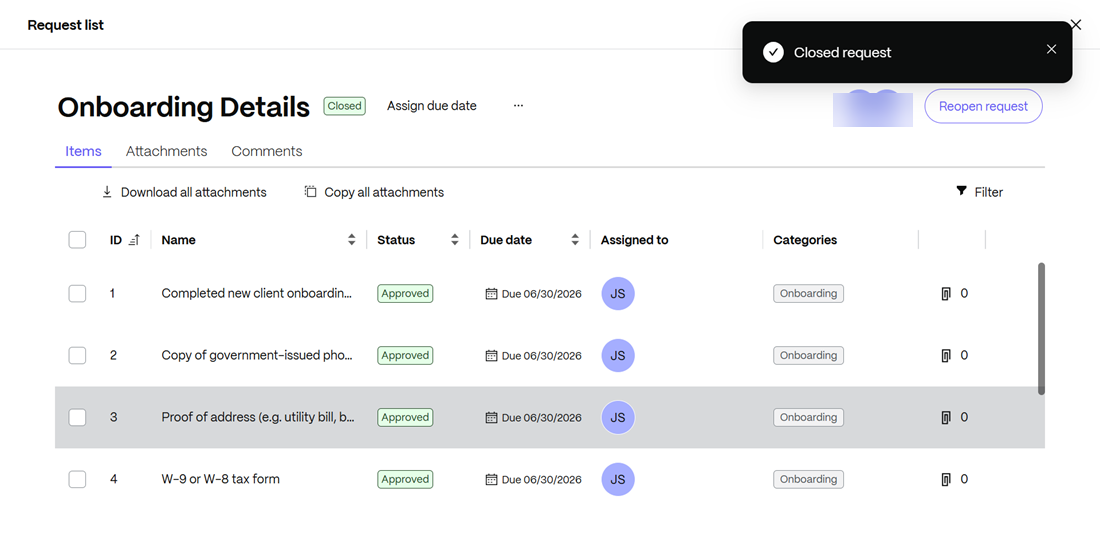
When the request list is closed, a success message is displayed, and the files are stored as per your preferences as saved above and the files are stored in your preferred location.
Copy files after approving all request items
You can also access the Copy attachments feature after all request items have been approved in a request list. To do so:
-
Go to the desired request list and approve every item in the Request List.
-
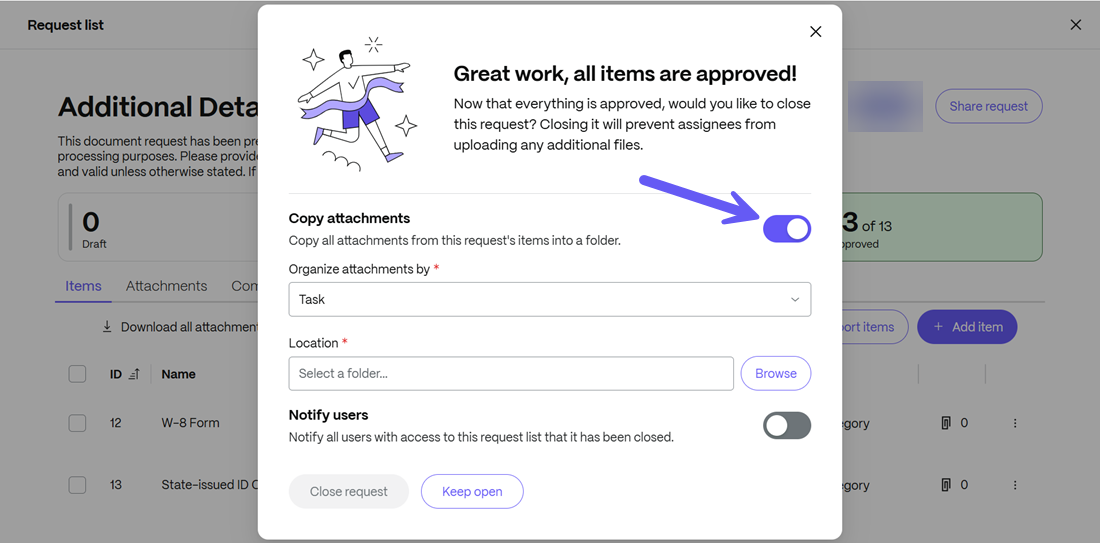
When all items are approved, ShareFile displays a completion message indicating that the review process is finished. The Copy attachments feature will be displayed as shown below:
-
From the completion dialog, enable the Copy attachments toggle as shown above.
-
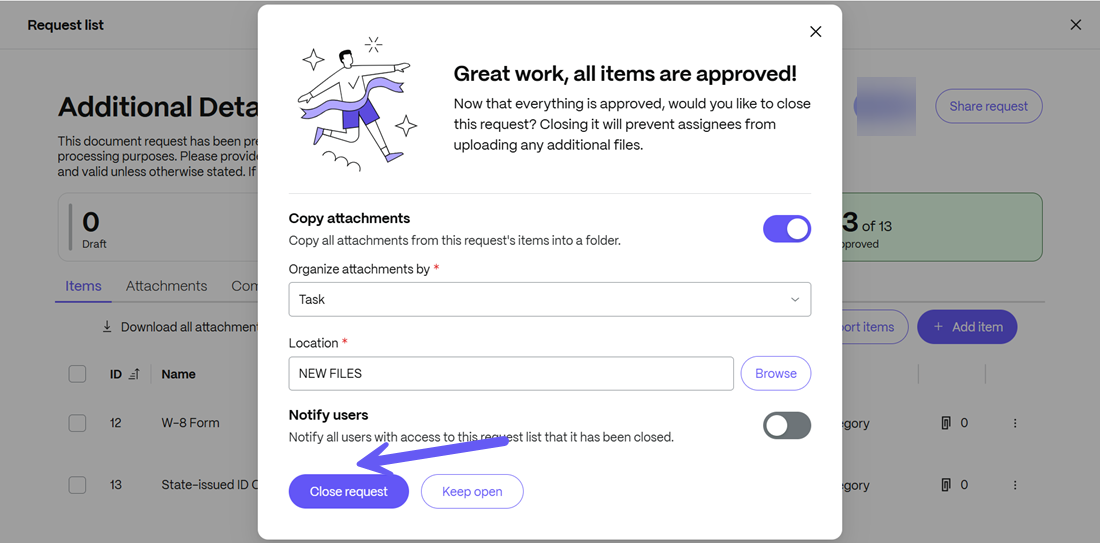
Select the Organize attachments by option and enter the destination where the files will be saved. This is similar to steps 4-7 as mentioned in the previous section.
-
Once done, click on Close request.
-
ShareFile closes the request list from this screen and copies the files to the selected destination using your chosen folder structure. The folder structure is automatically created during the close process, and the original files remain available in the request list. The files are copied—not moved—to the selected destination.
Note:
Copying attachments during the close process is optional. You can close any RL without selecting this option similar to the Notify users toggle.