Set up Microsoft Entra ID provisioning with SCIM
Use SCIM to automatically provision users and groups from Microsoft Entra ID into ShareFile.
Before you begin
To use ShareFile SCIM provisioning with Microsoft Entra ID, you need:
- A ShareFile Enterprise account
- A ShareFile account admin
- A Microsoft Entra ID admin
- SCIM enabled in ShareFile (see User Provisioning (SCIM))
IMPORTANT: ShareFile SCIM uses your ShareFile account as the tenant context. The SCIM URL you copy from ShareFile is the value you use in Entra as the Tenant URL.
Step 1: Enable SCIM in ShareFile and copy the connection details
-
Log in to your ShareFile account.
-
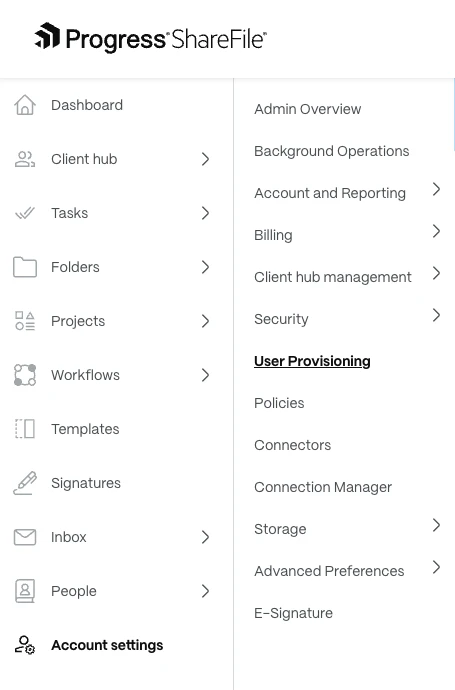
At the bottom of the left navigation, select Account Settings.
-
Open User Provisioning.
-
Ensure SCIM is enabled.
-
Copy the following values:
- URL — you will enter this as the Tenant URL in Entra ID
- API Key — you will enter this as the Secret Token in Entra ID
Step 2: Create or open your Microsoft Entra enterprise application
If you already have a ShareFile enterprise application in Entra ID, open it and skip to Step 3.
To create a new non-gallery enterprise application:
-
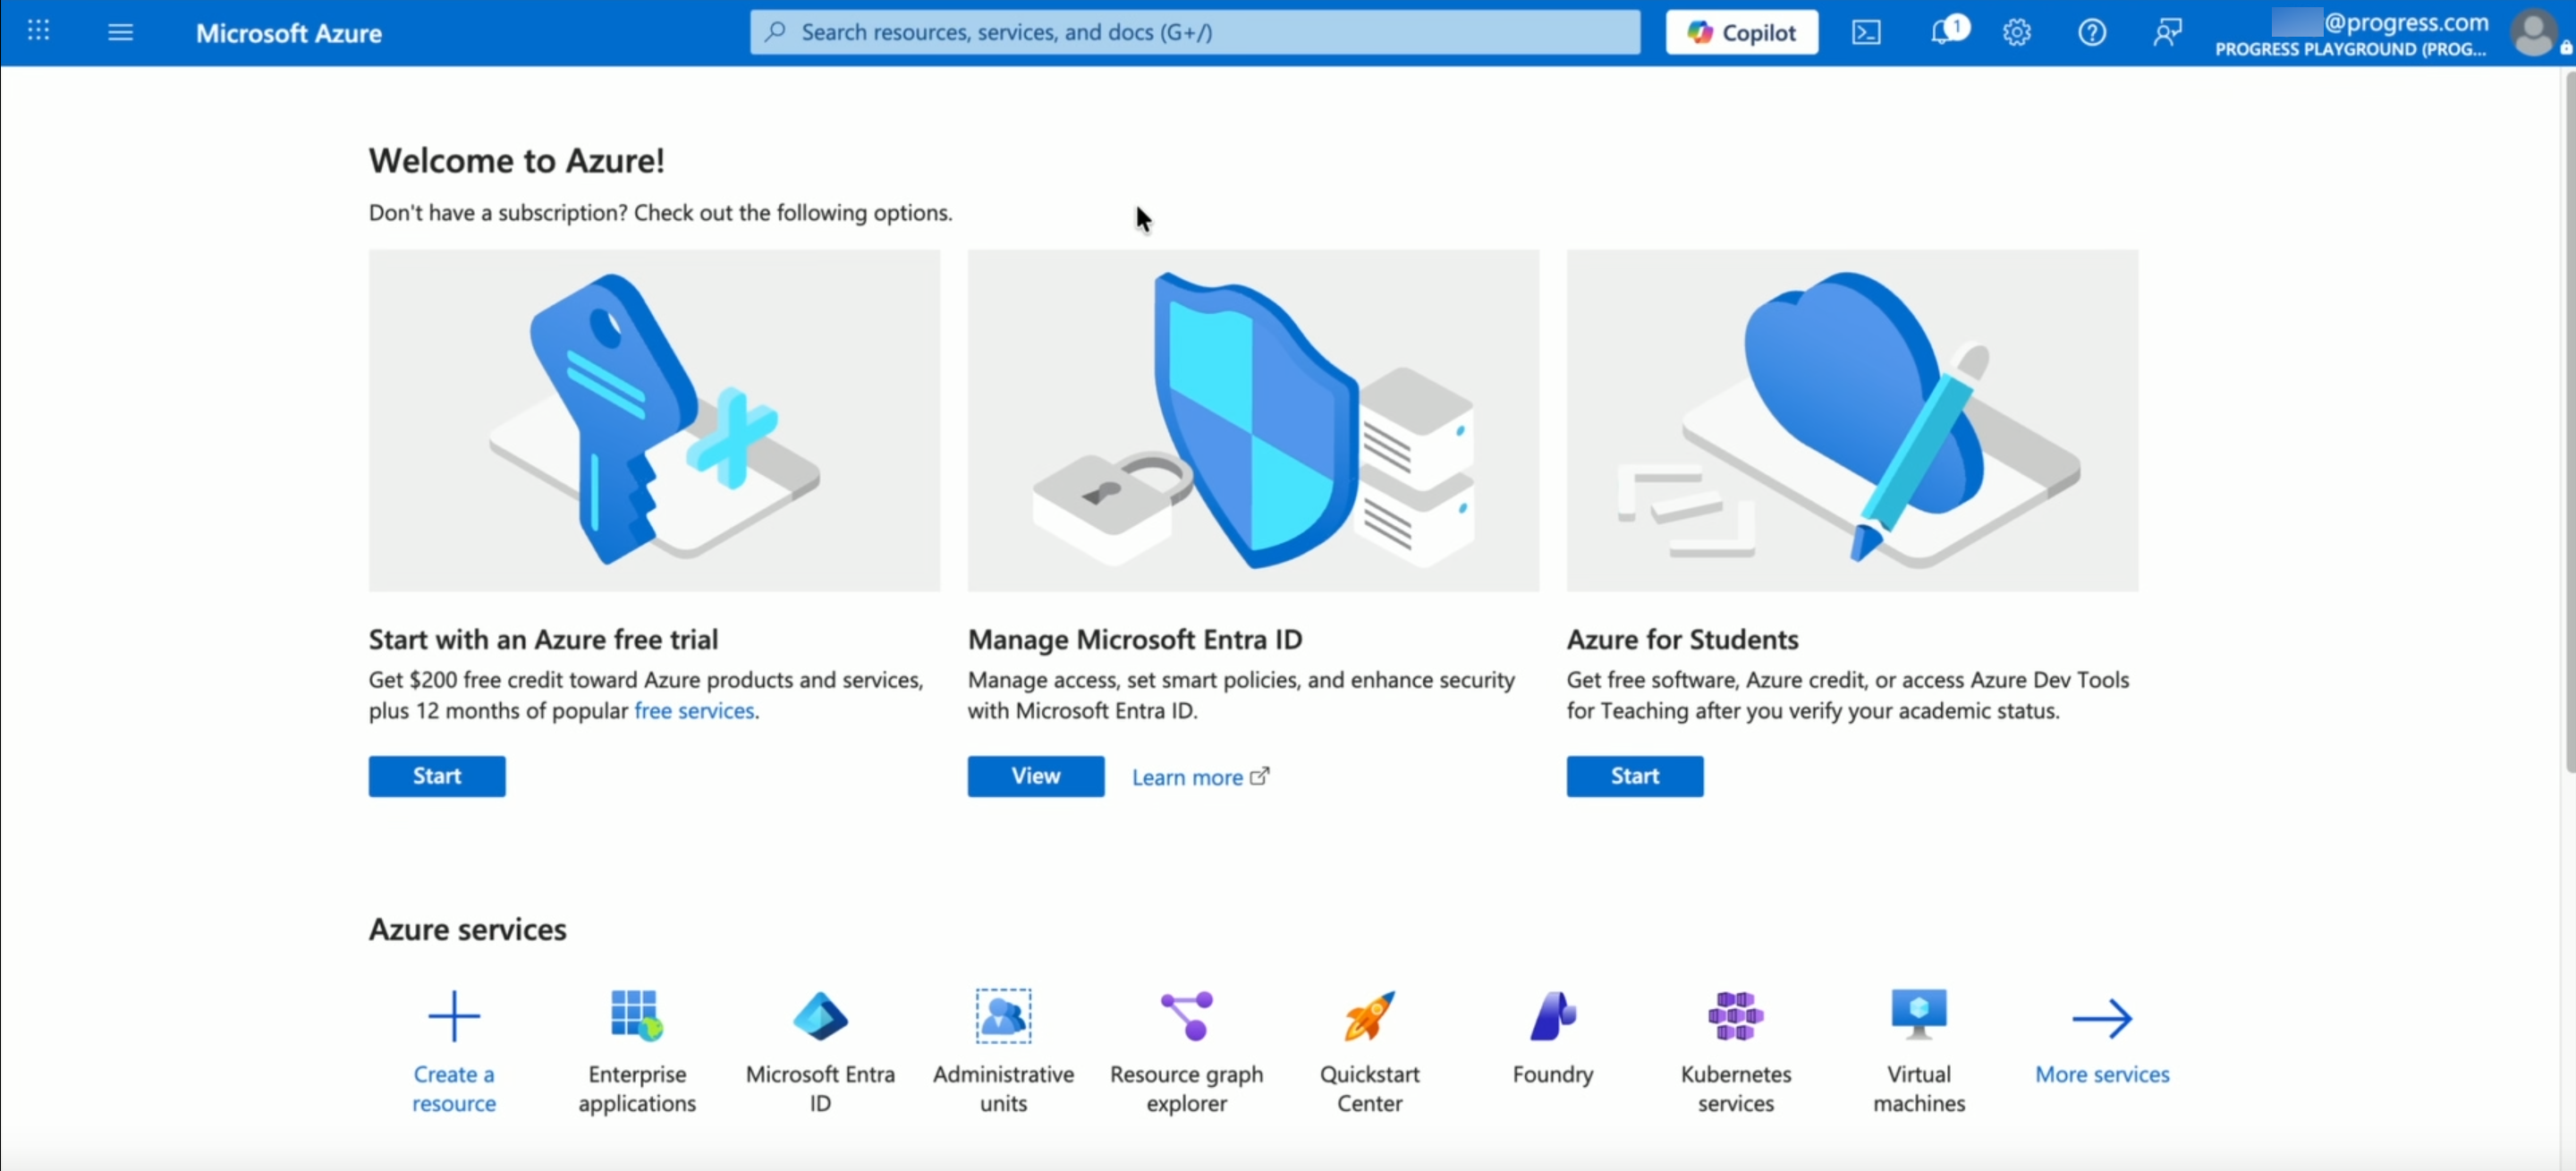
Go to the Azure portal.
-
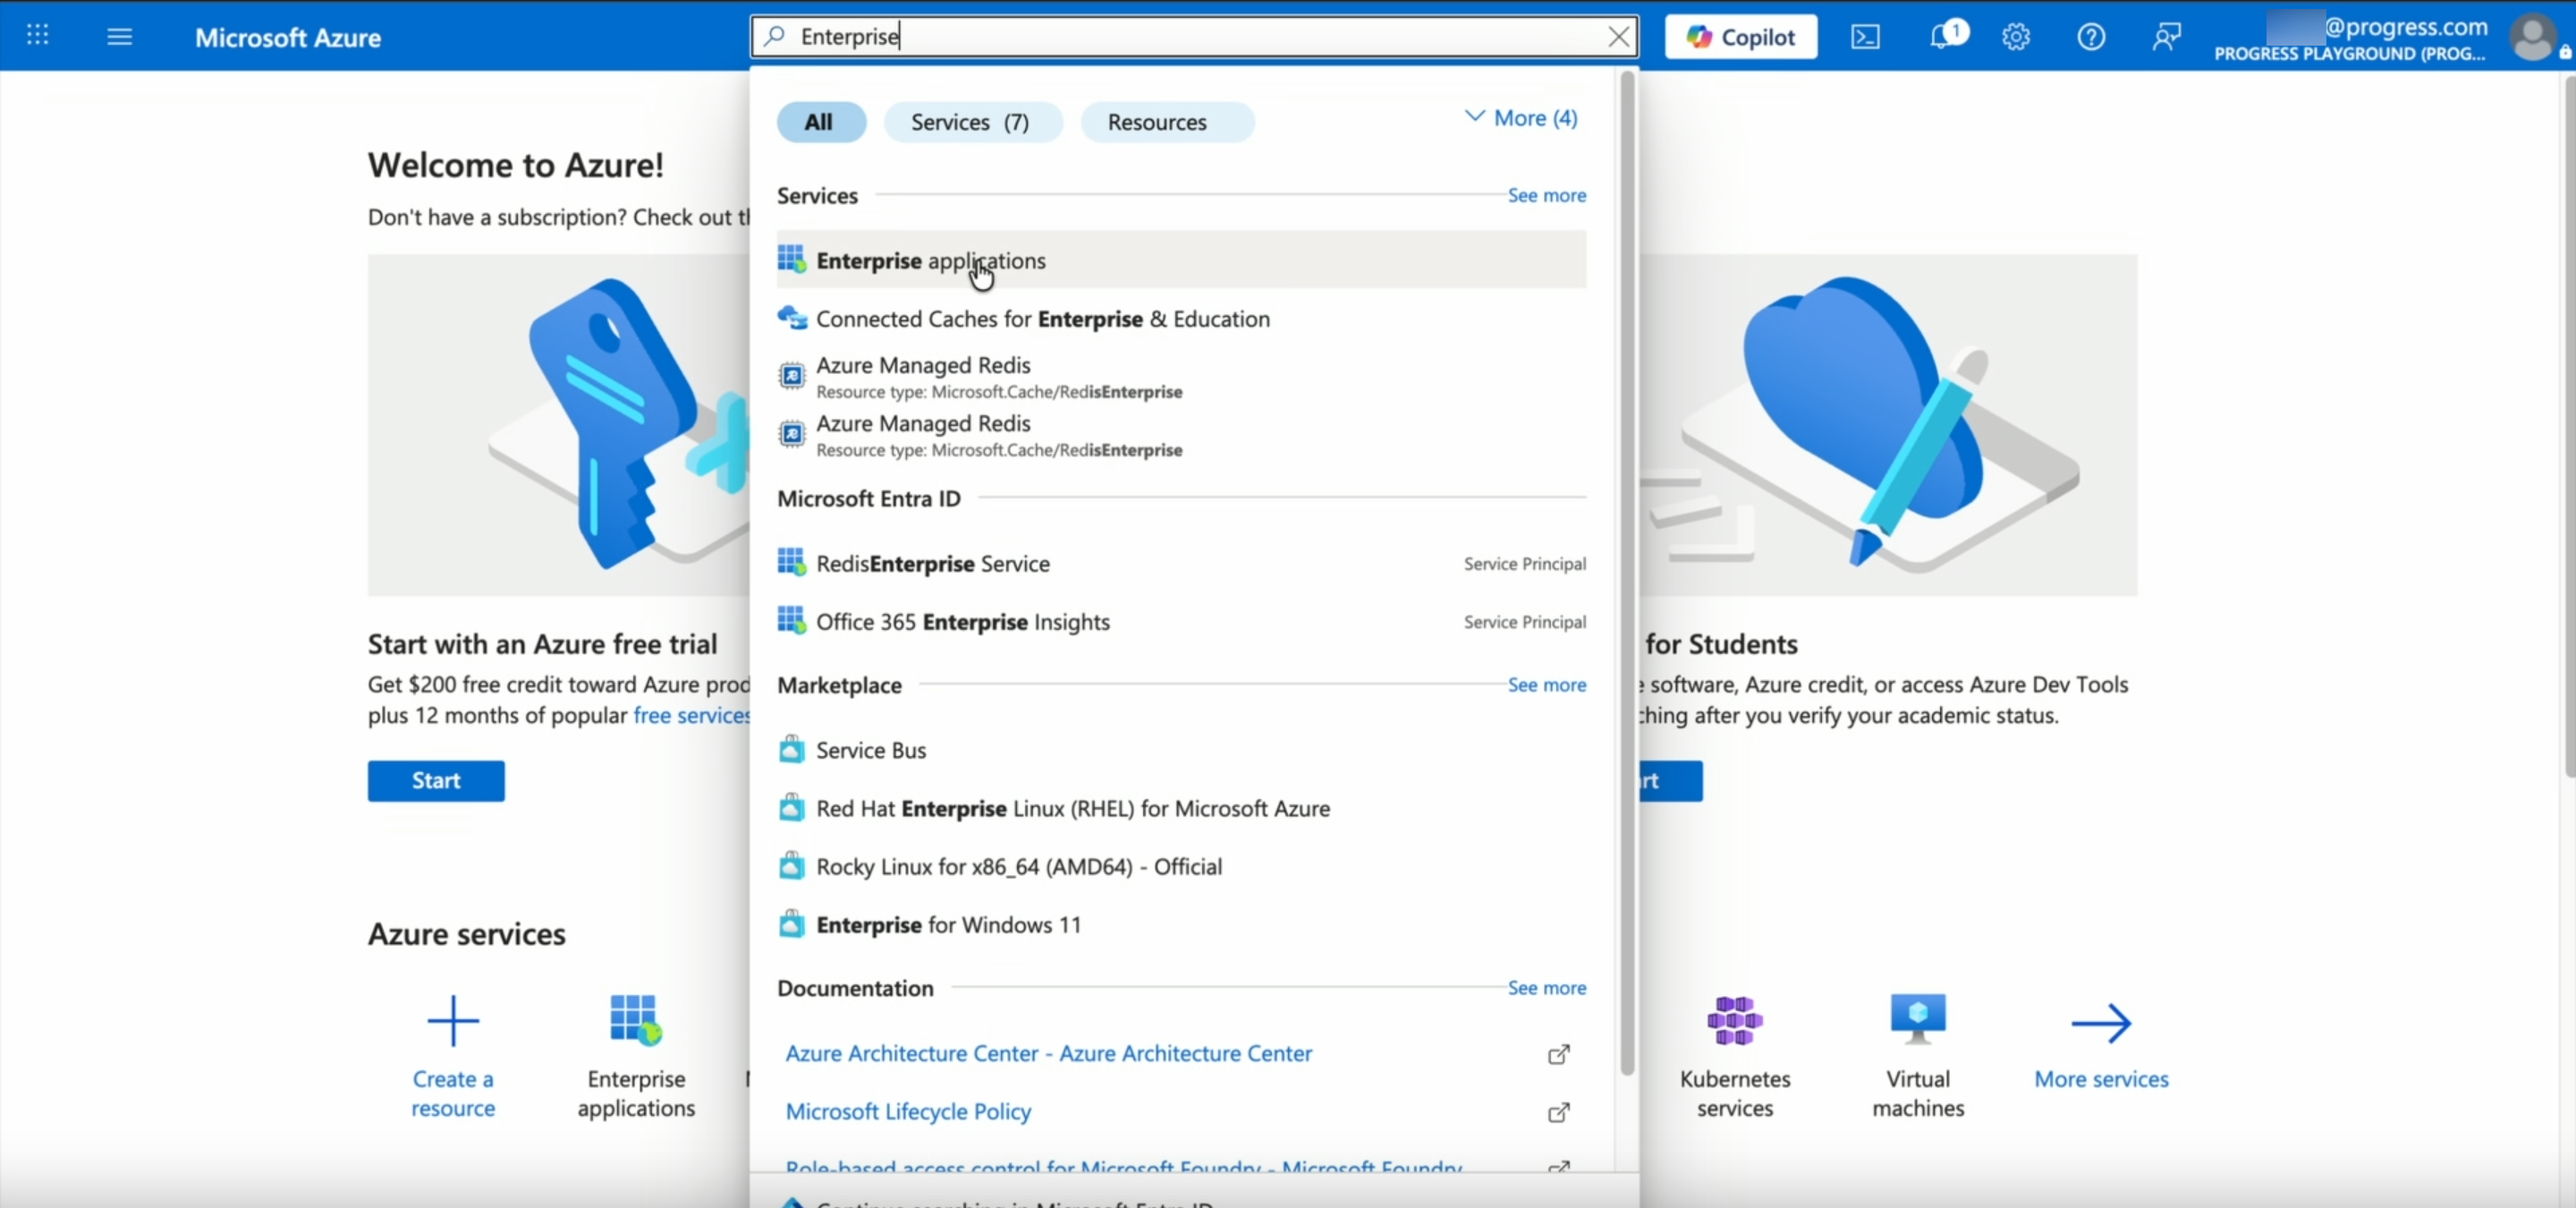
In the global search bar, search for Enterprise applications and select it.
-
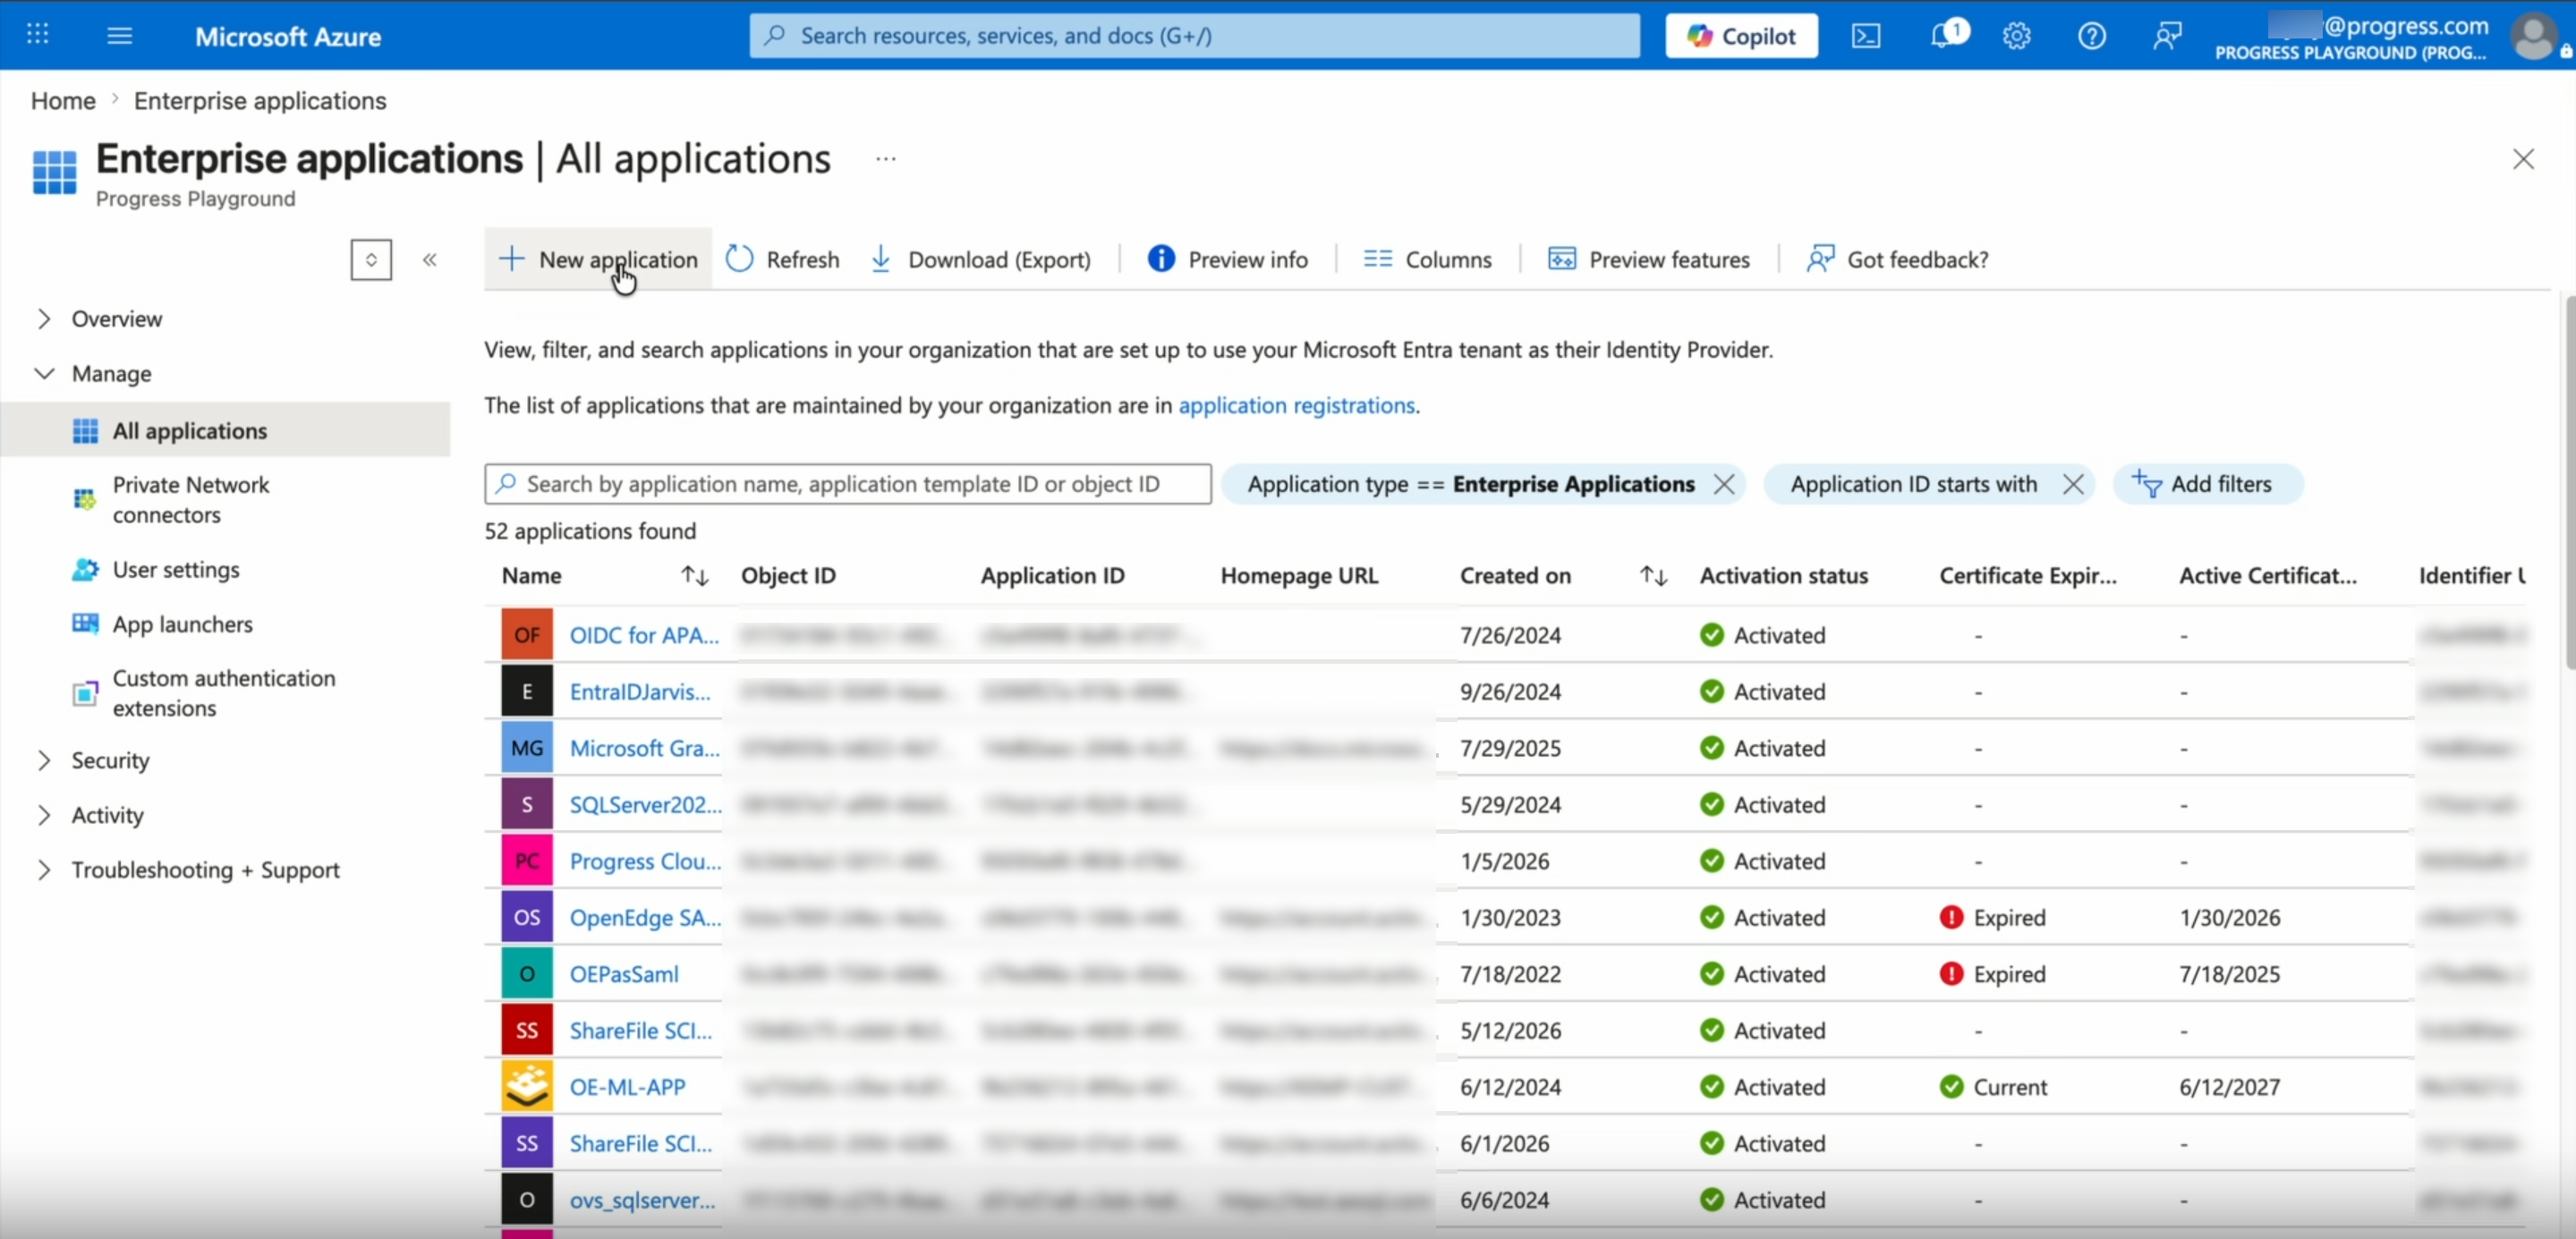
Select + New application.
-
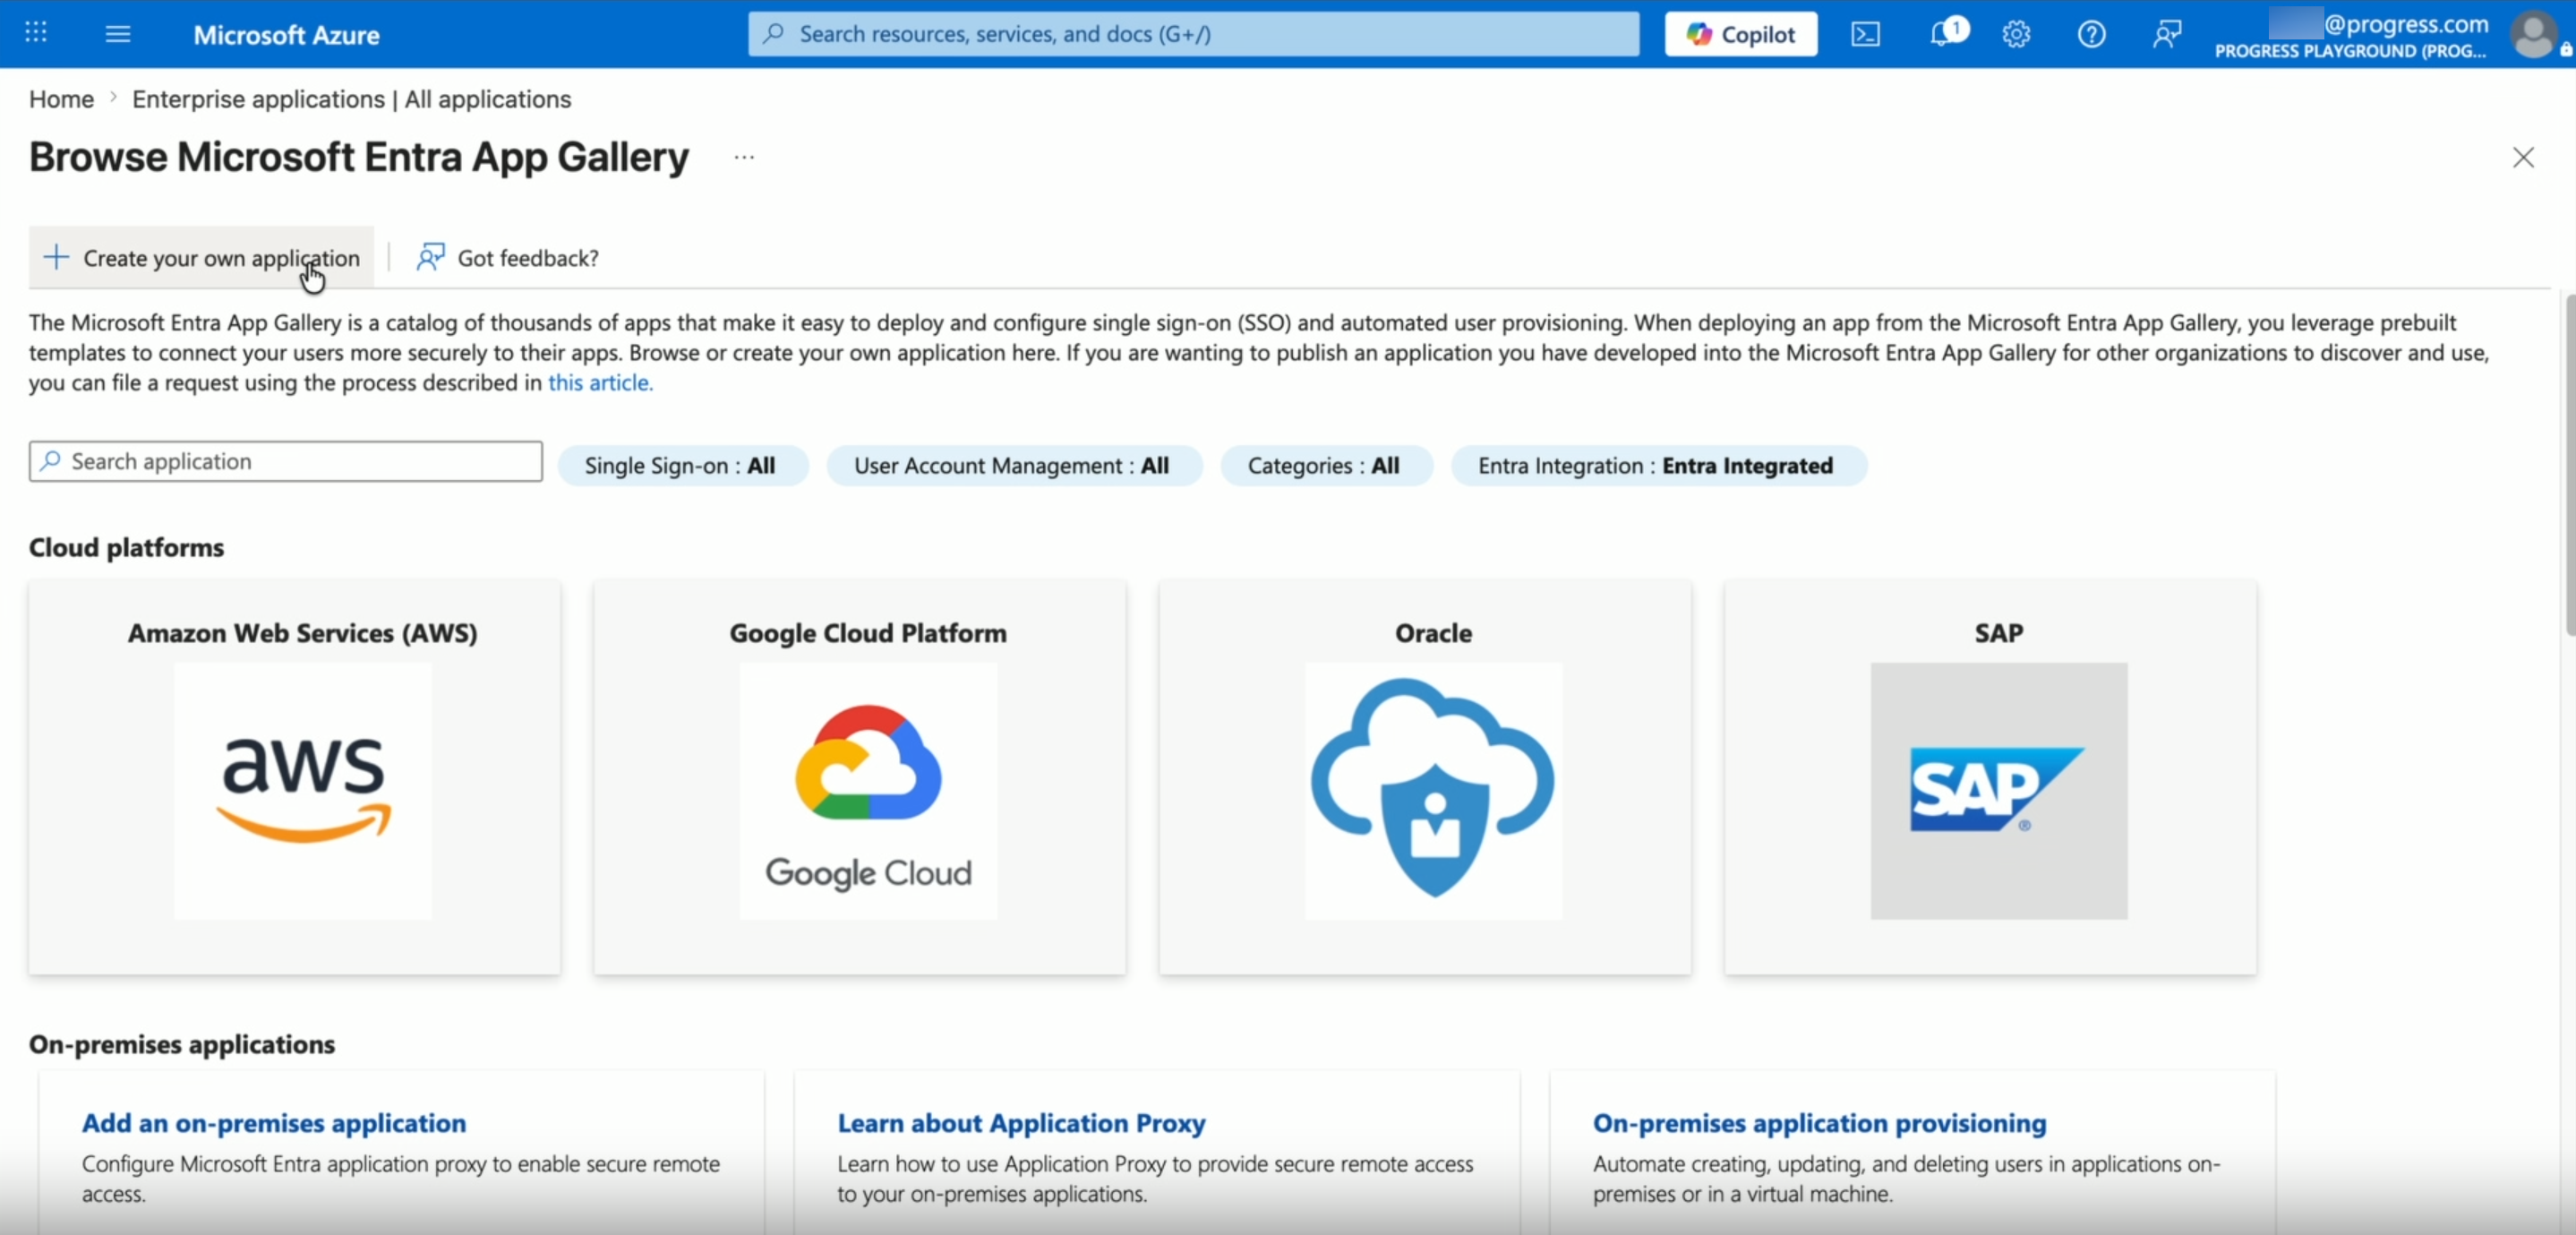
In the Microsoft Entra App Gallery, select + Create your own application.
-
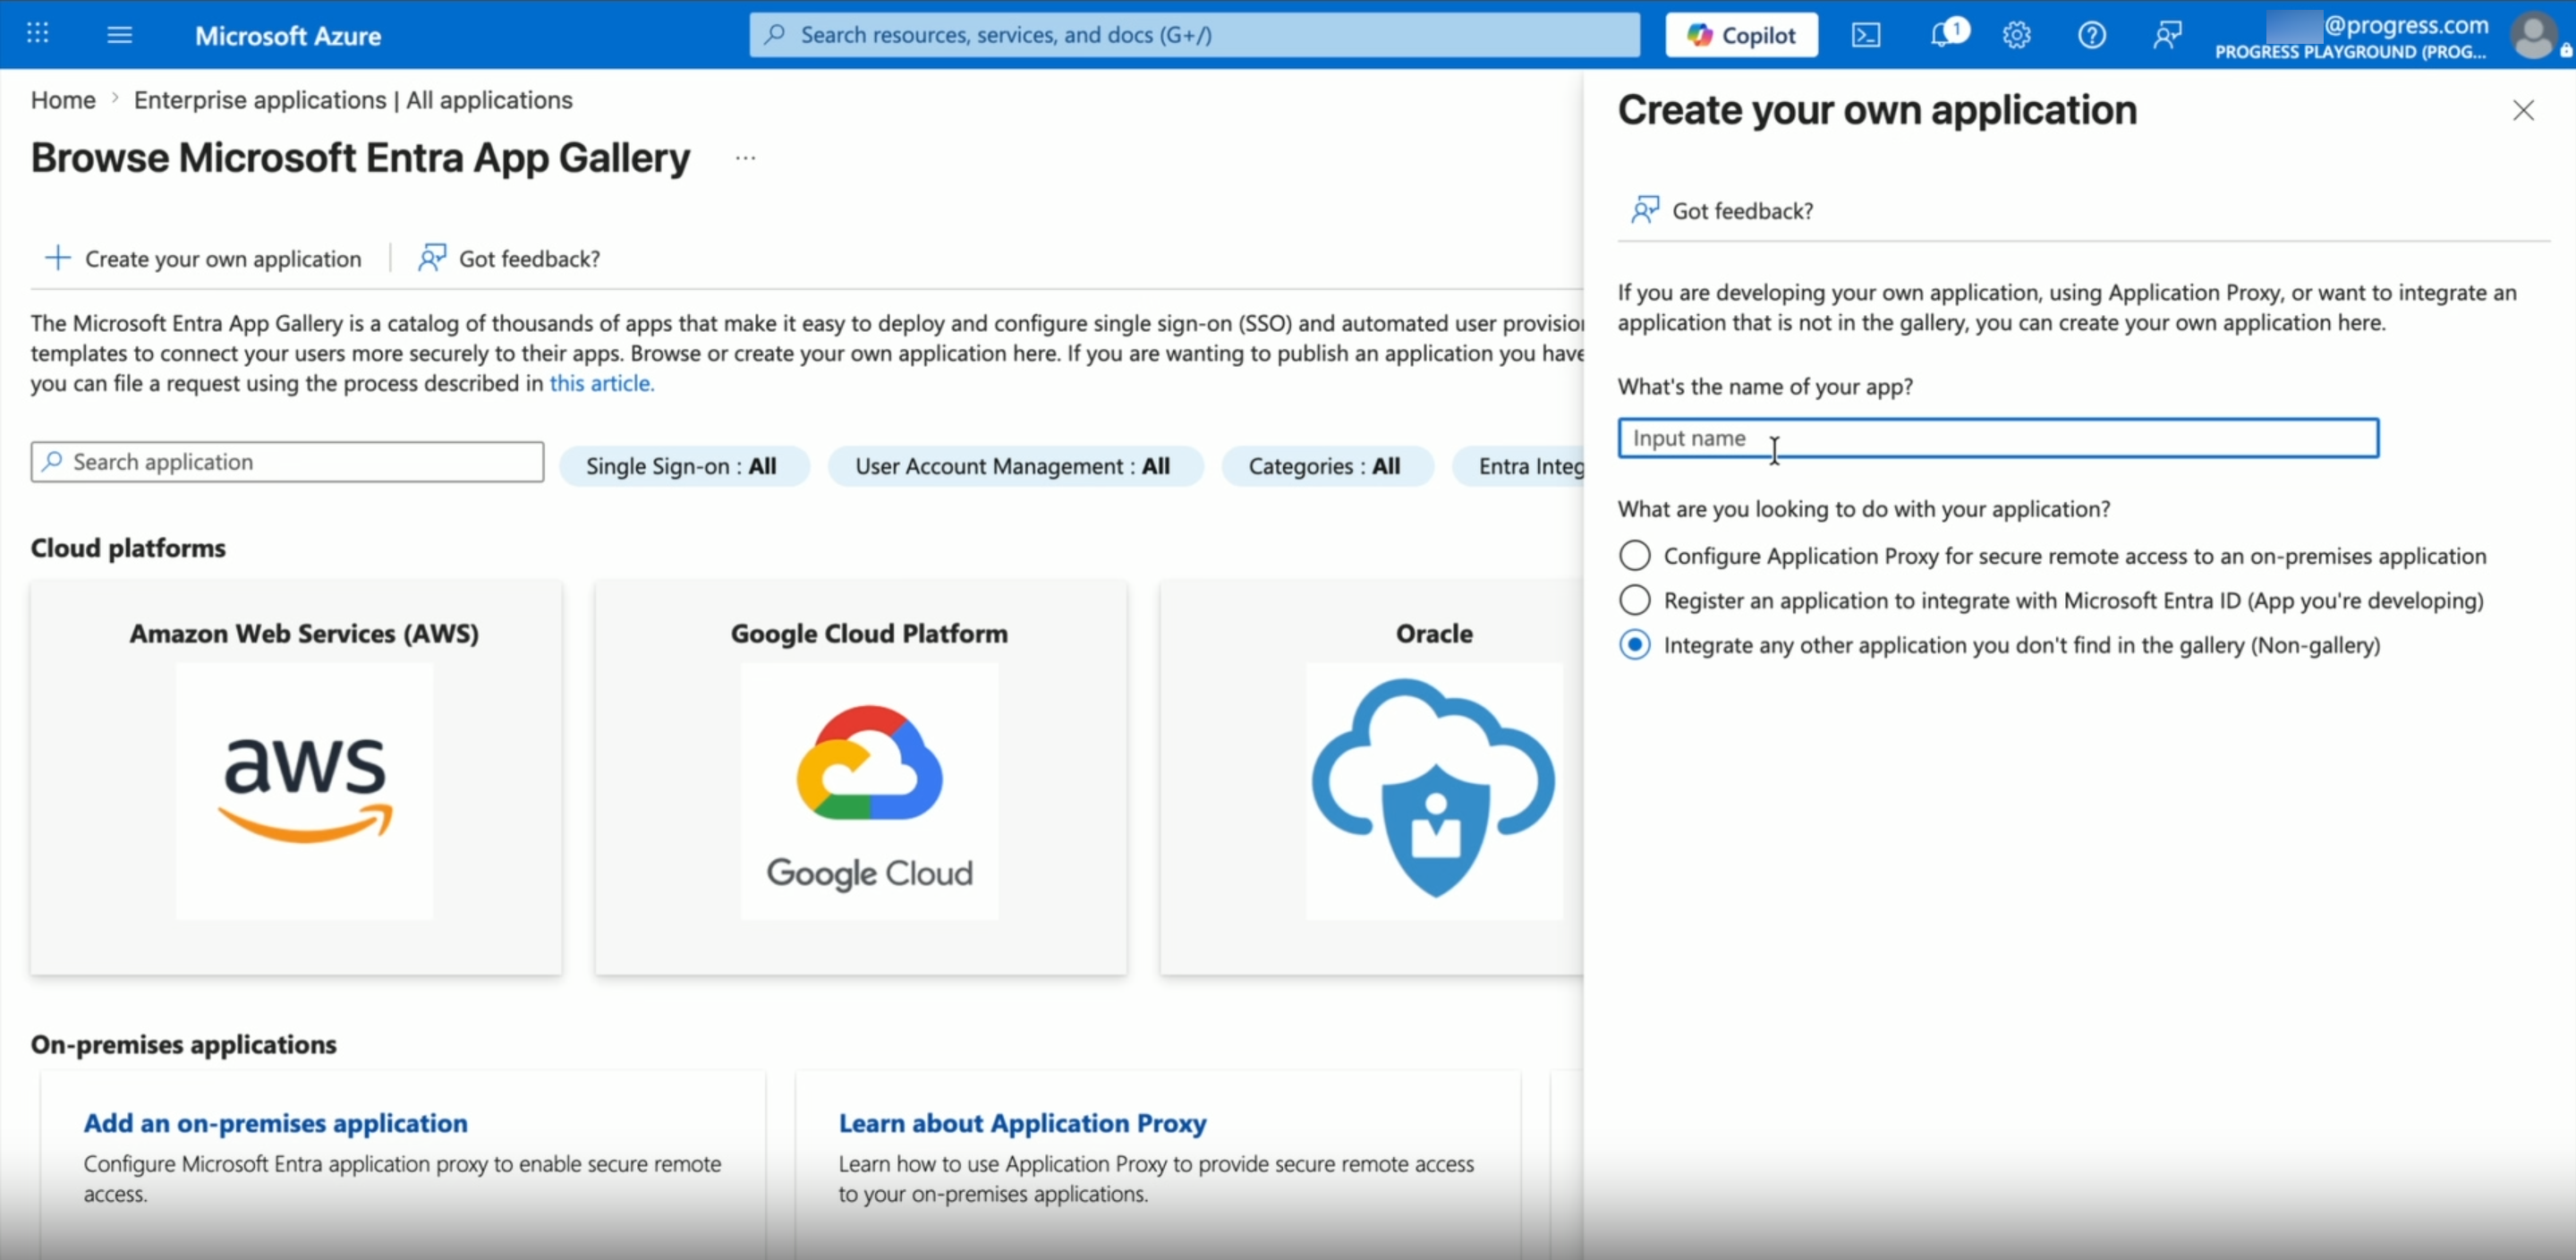
Enter a name for the app, select Integrate any other application you don't find in the gallery (Non-gallery), then select Create.
Step 3: Configure SCIM connectivity in Entra ID
-
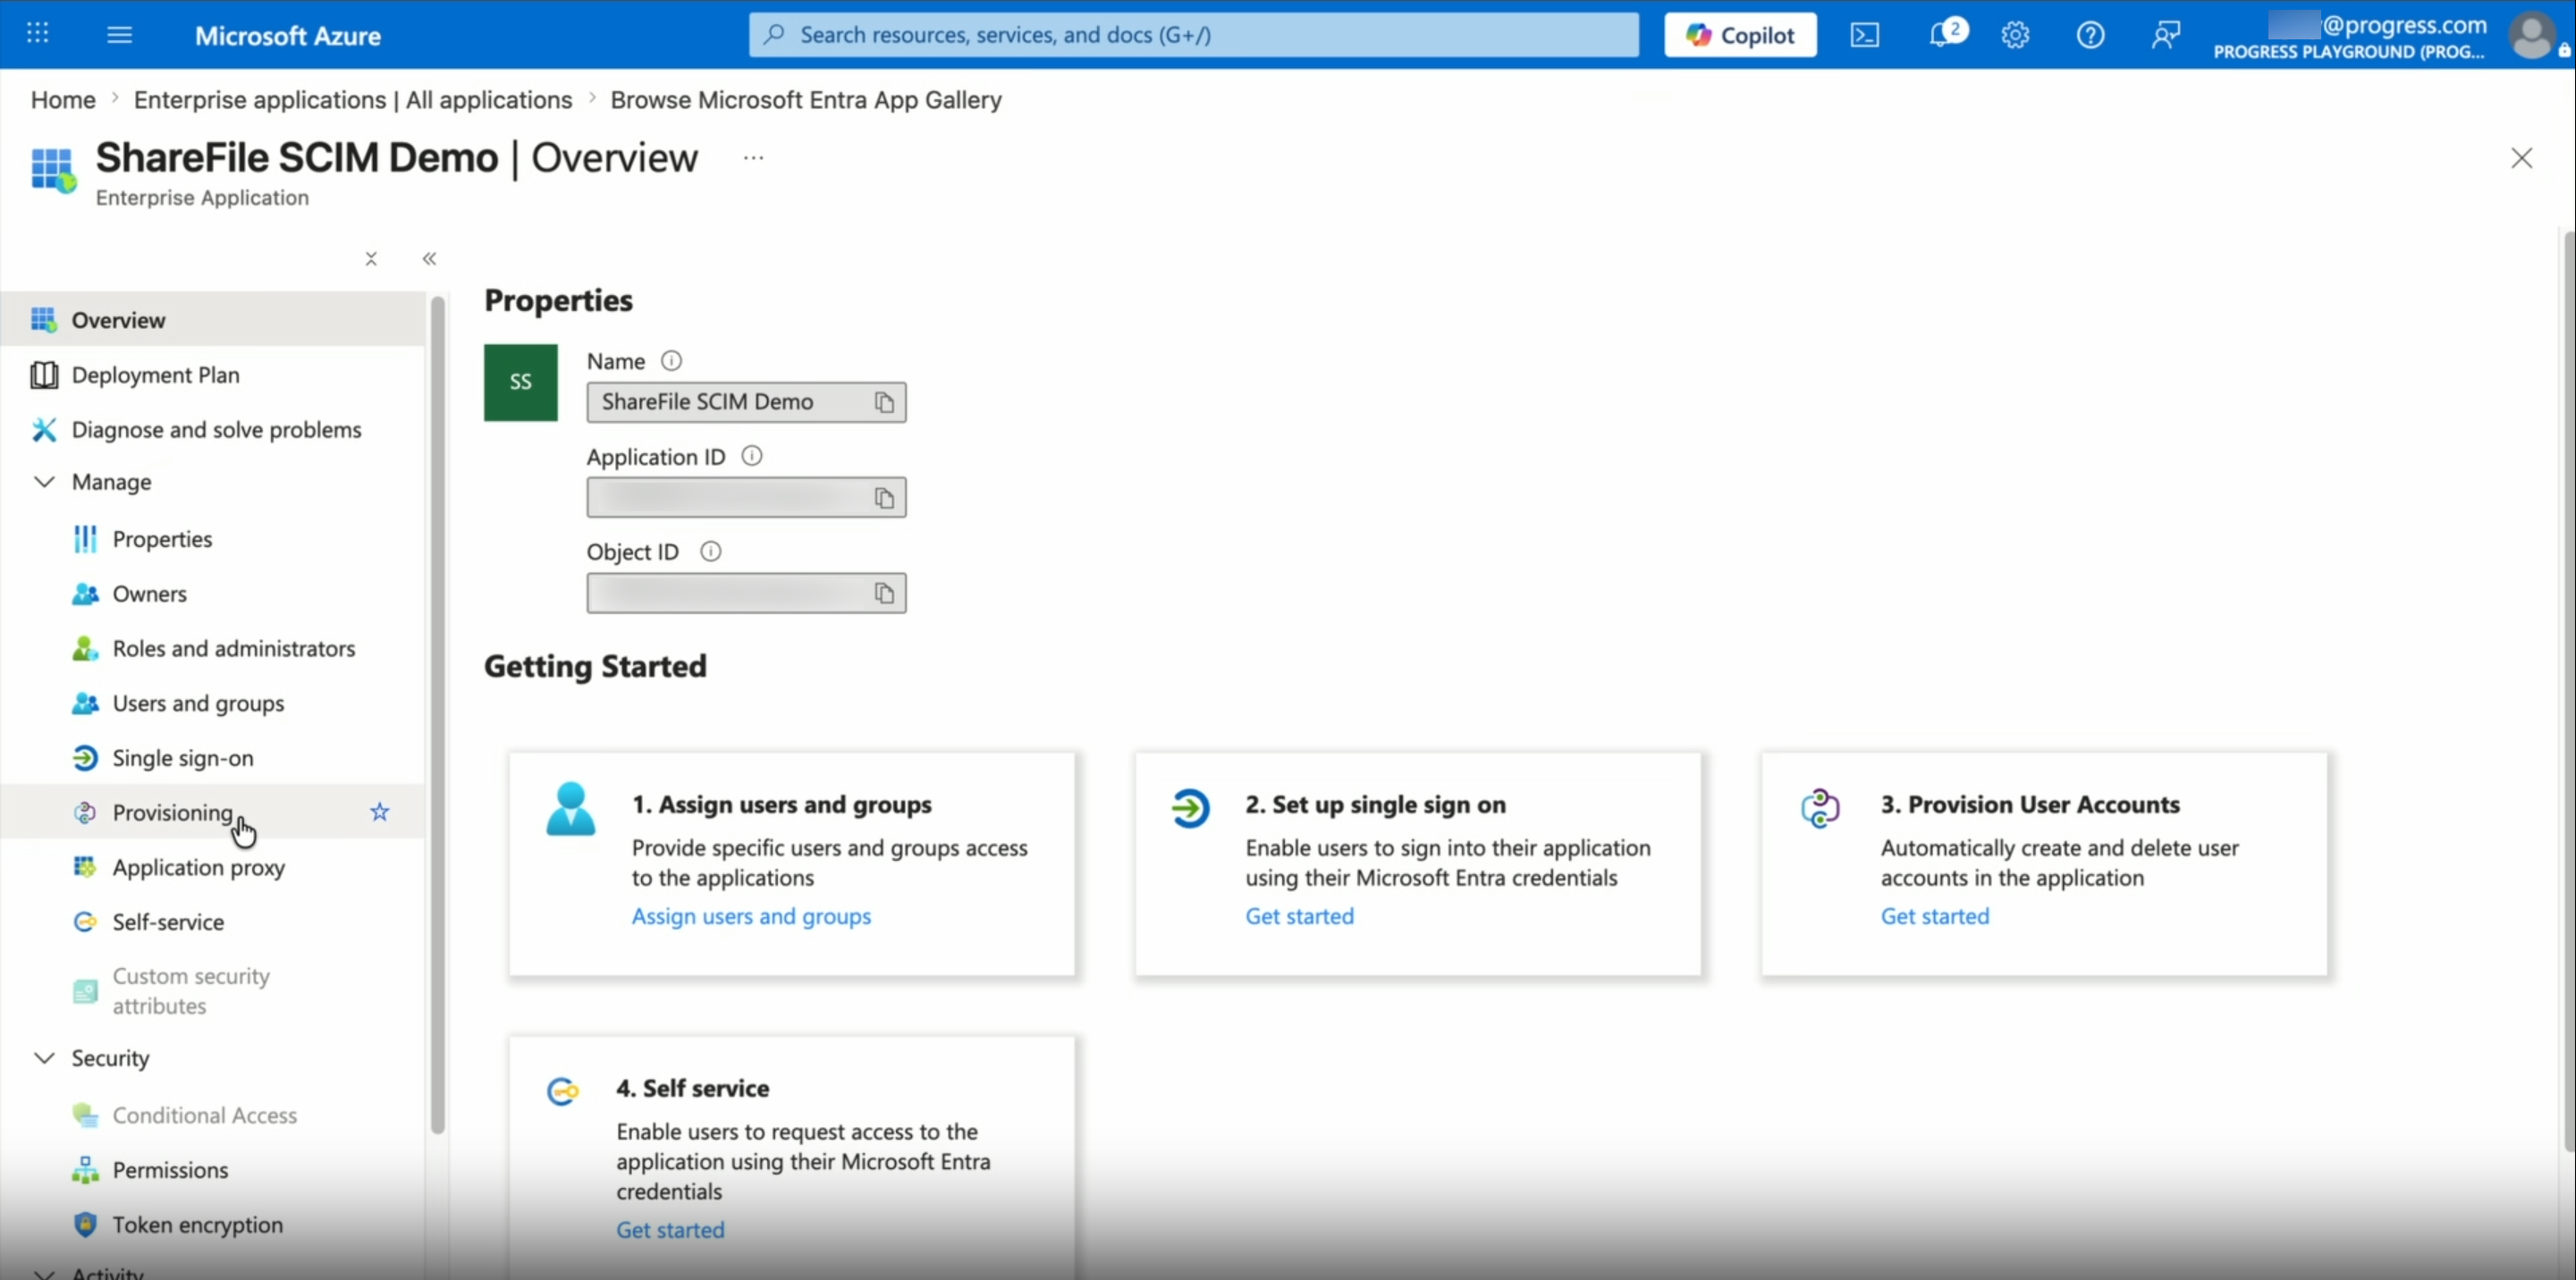
Open your ShareFile enterprise application. In the left navigation, select Provisioning.
-
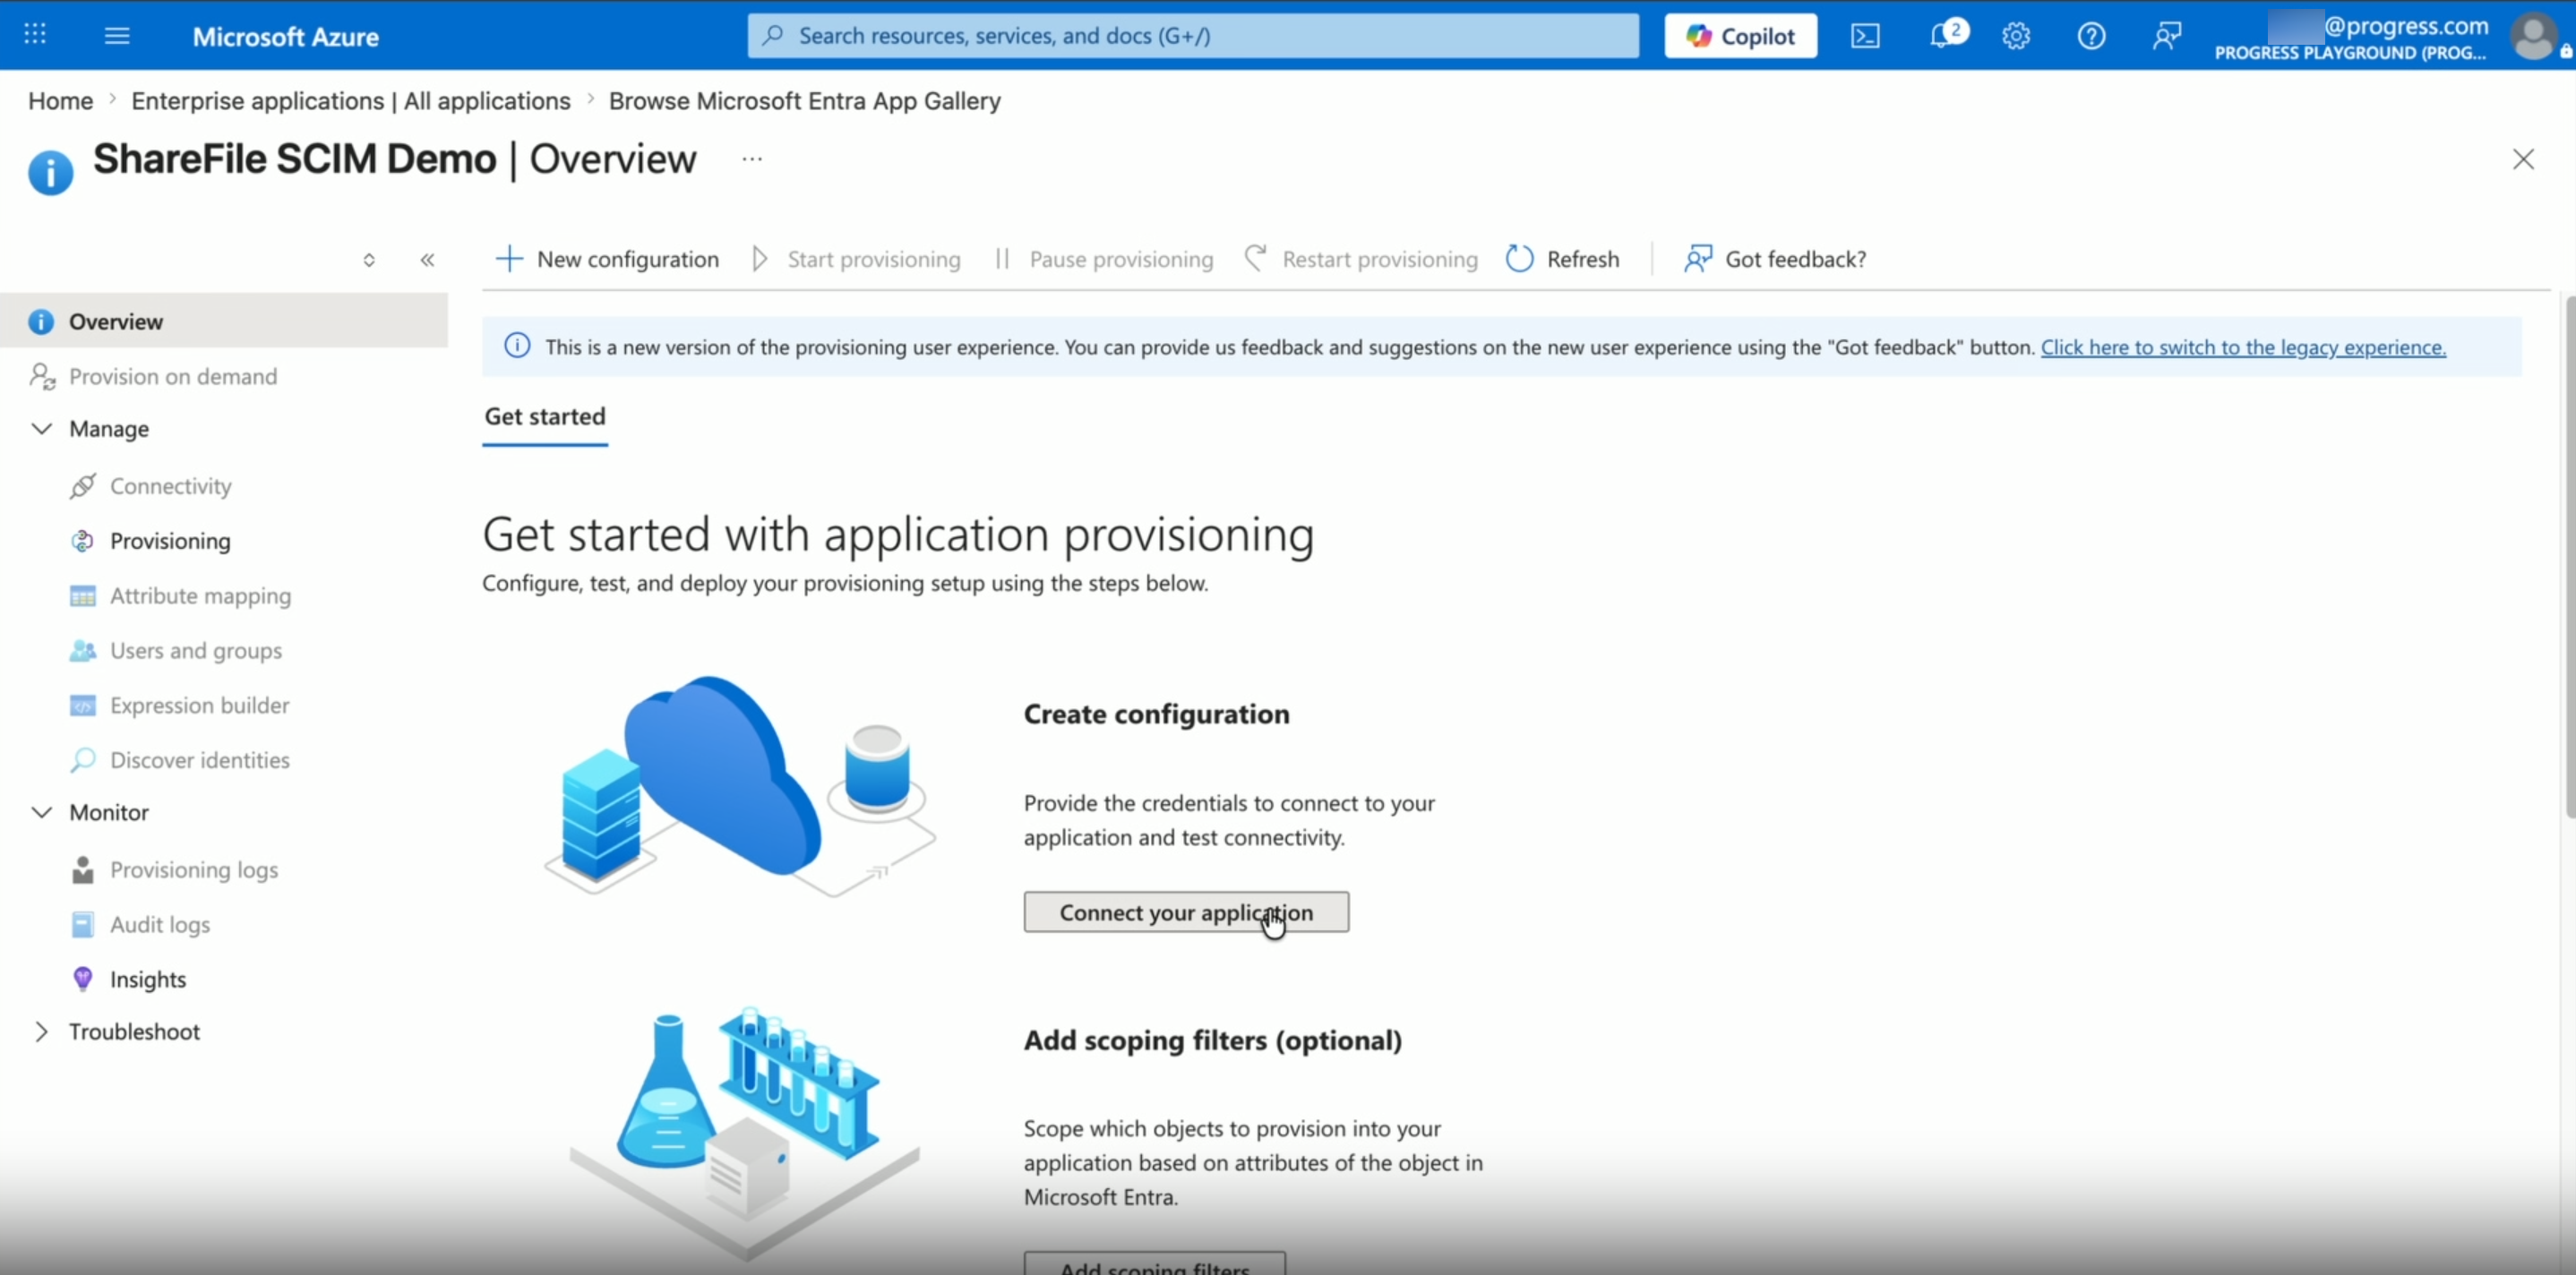
Select Connect your application to create a new provisioning configuration.
-
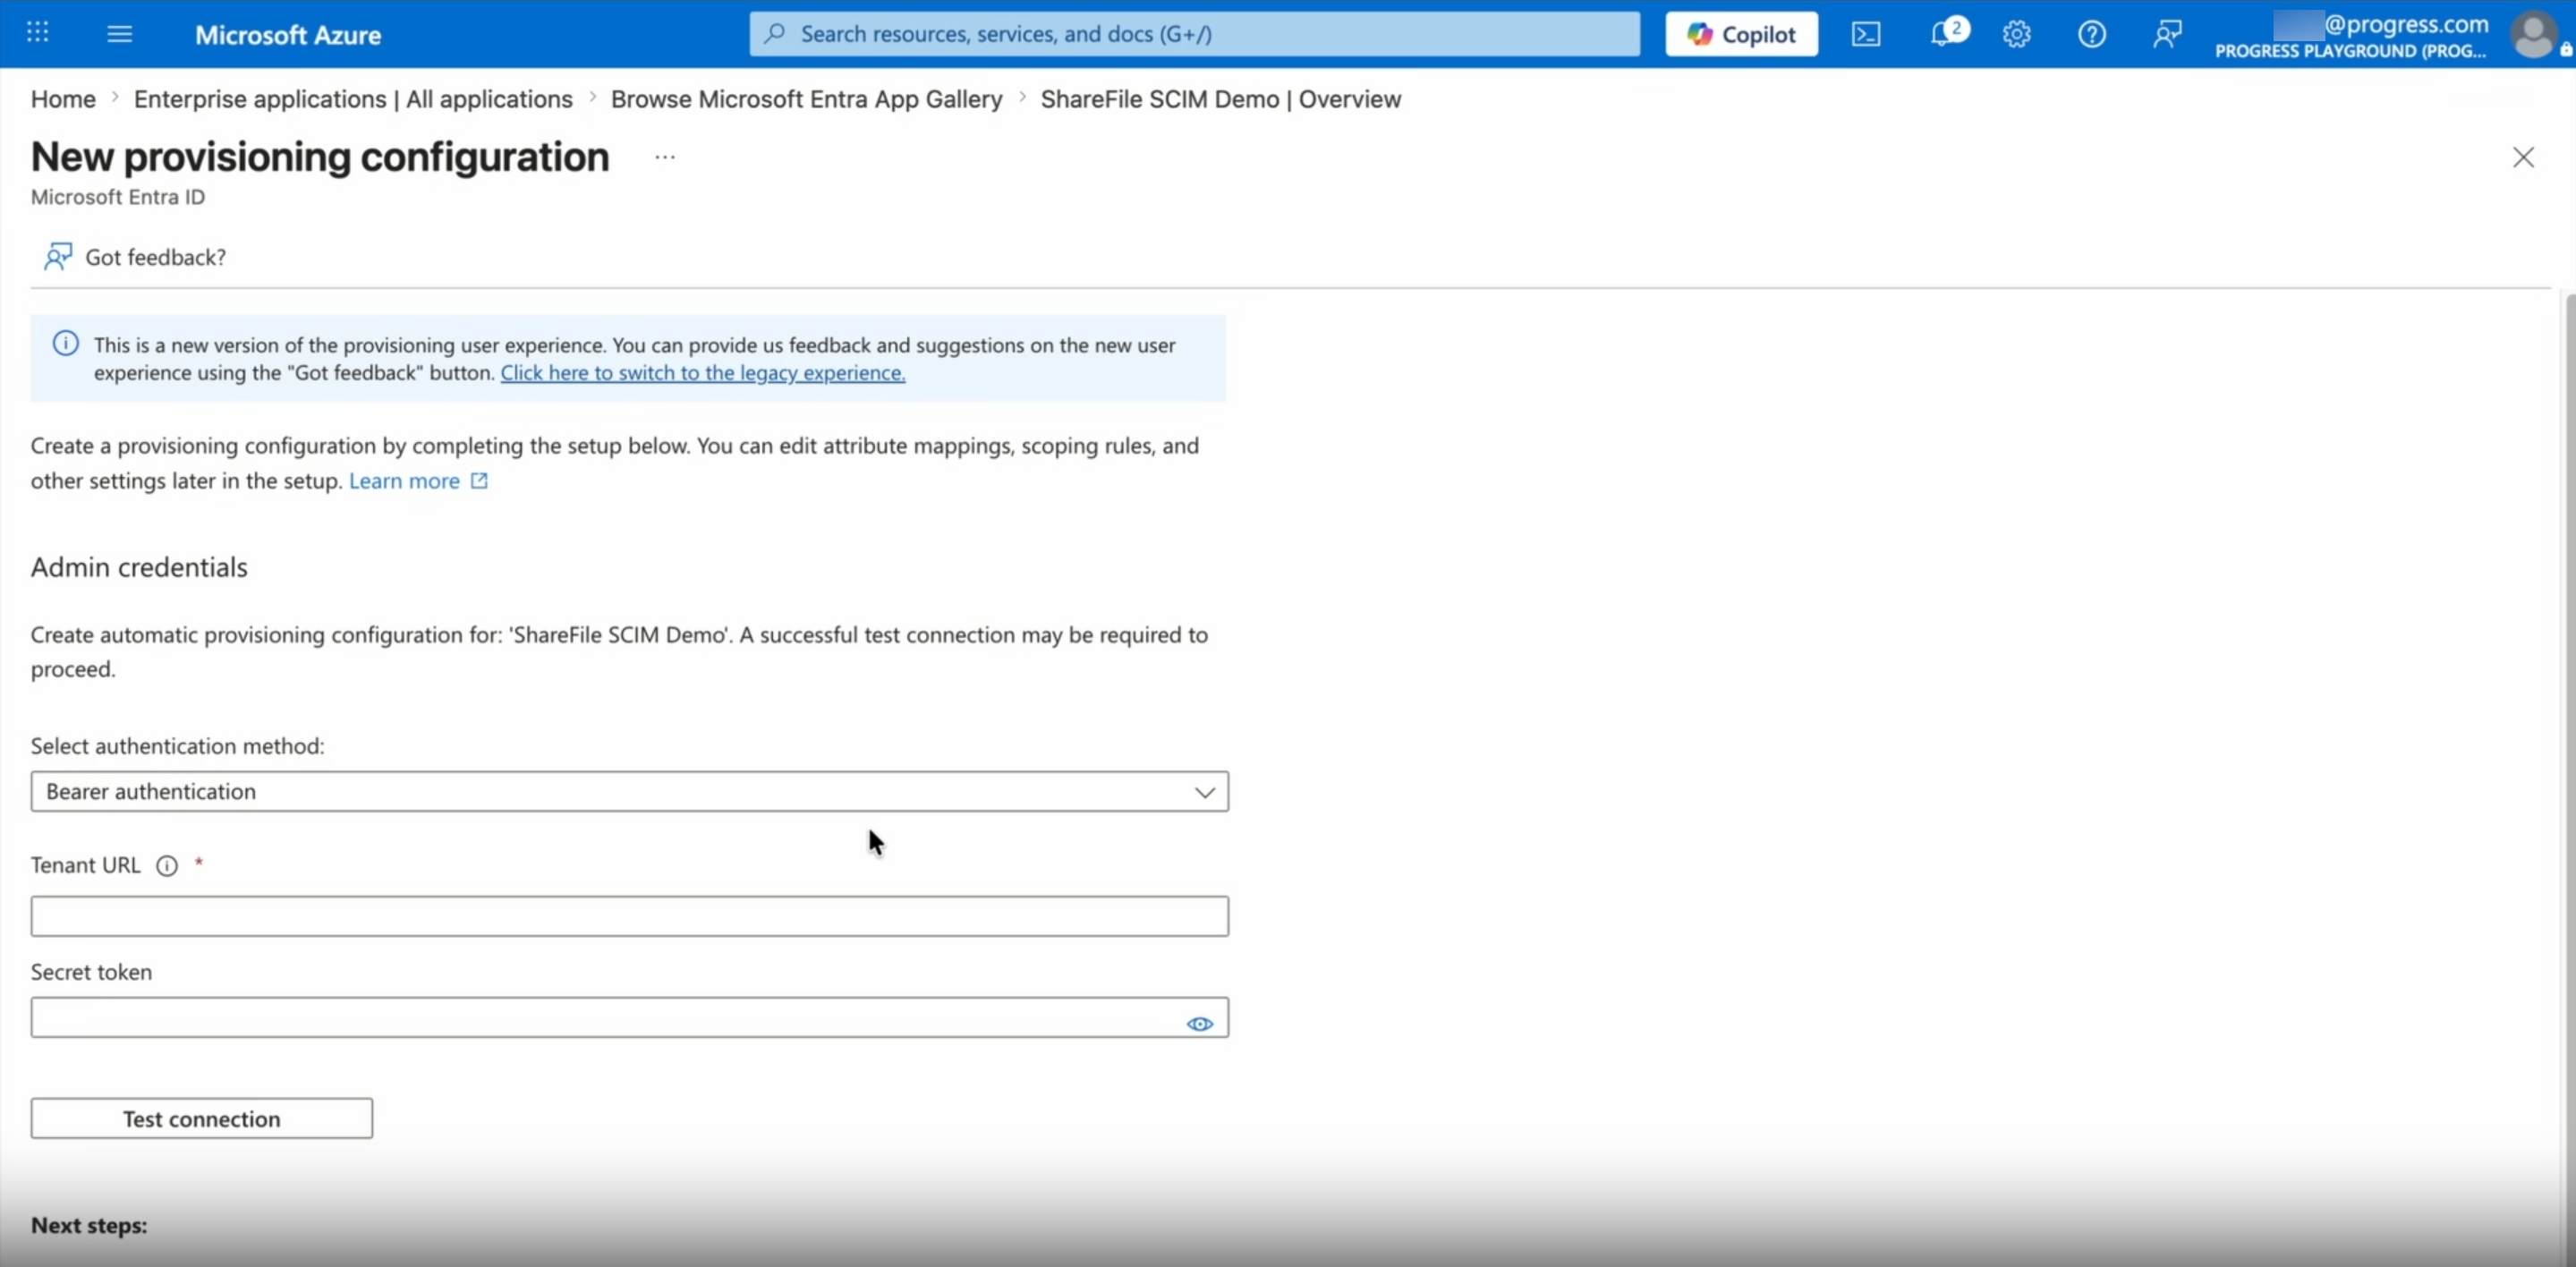
In the Admin credentials section, enter the ShareFile values:
- Set Authentication method to Bearer authentication
- Paste the ShareFile URL into Tenant URL
- Paste the ShareFile API Key into Secret Token
-
Select Test connection to verify the credentials.
-
Select Save to save the configuration.
Step 4: Configure user attribute mappings
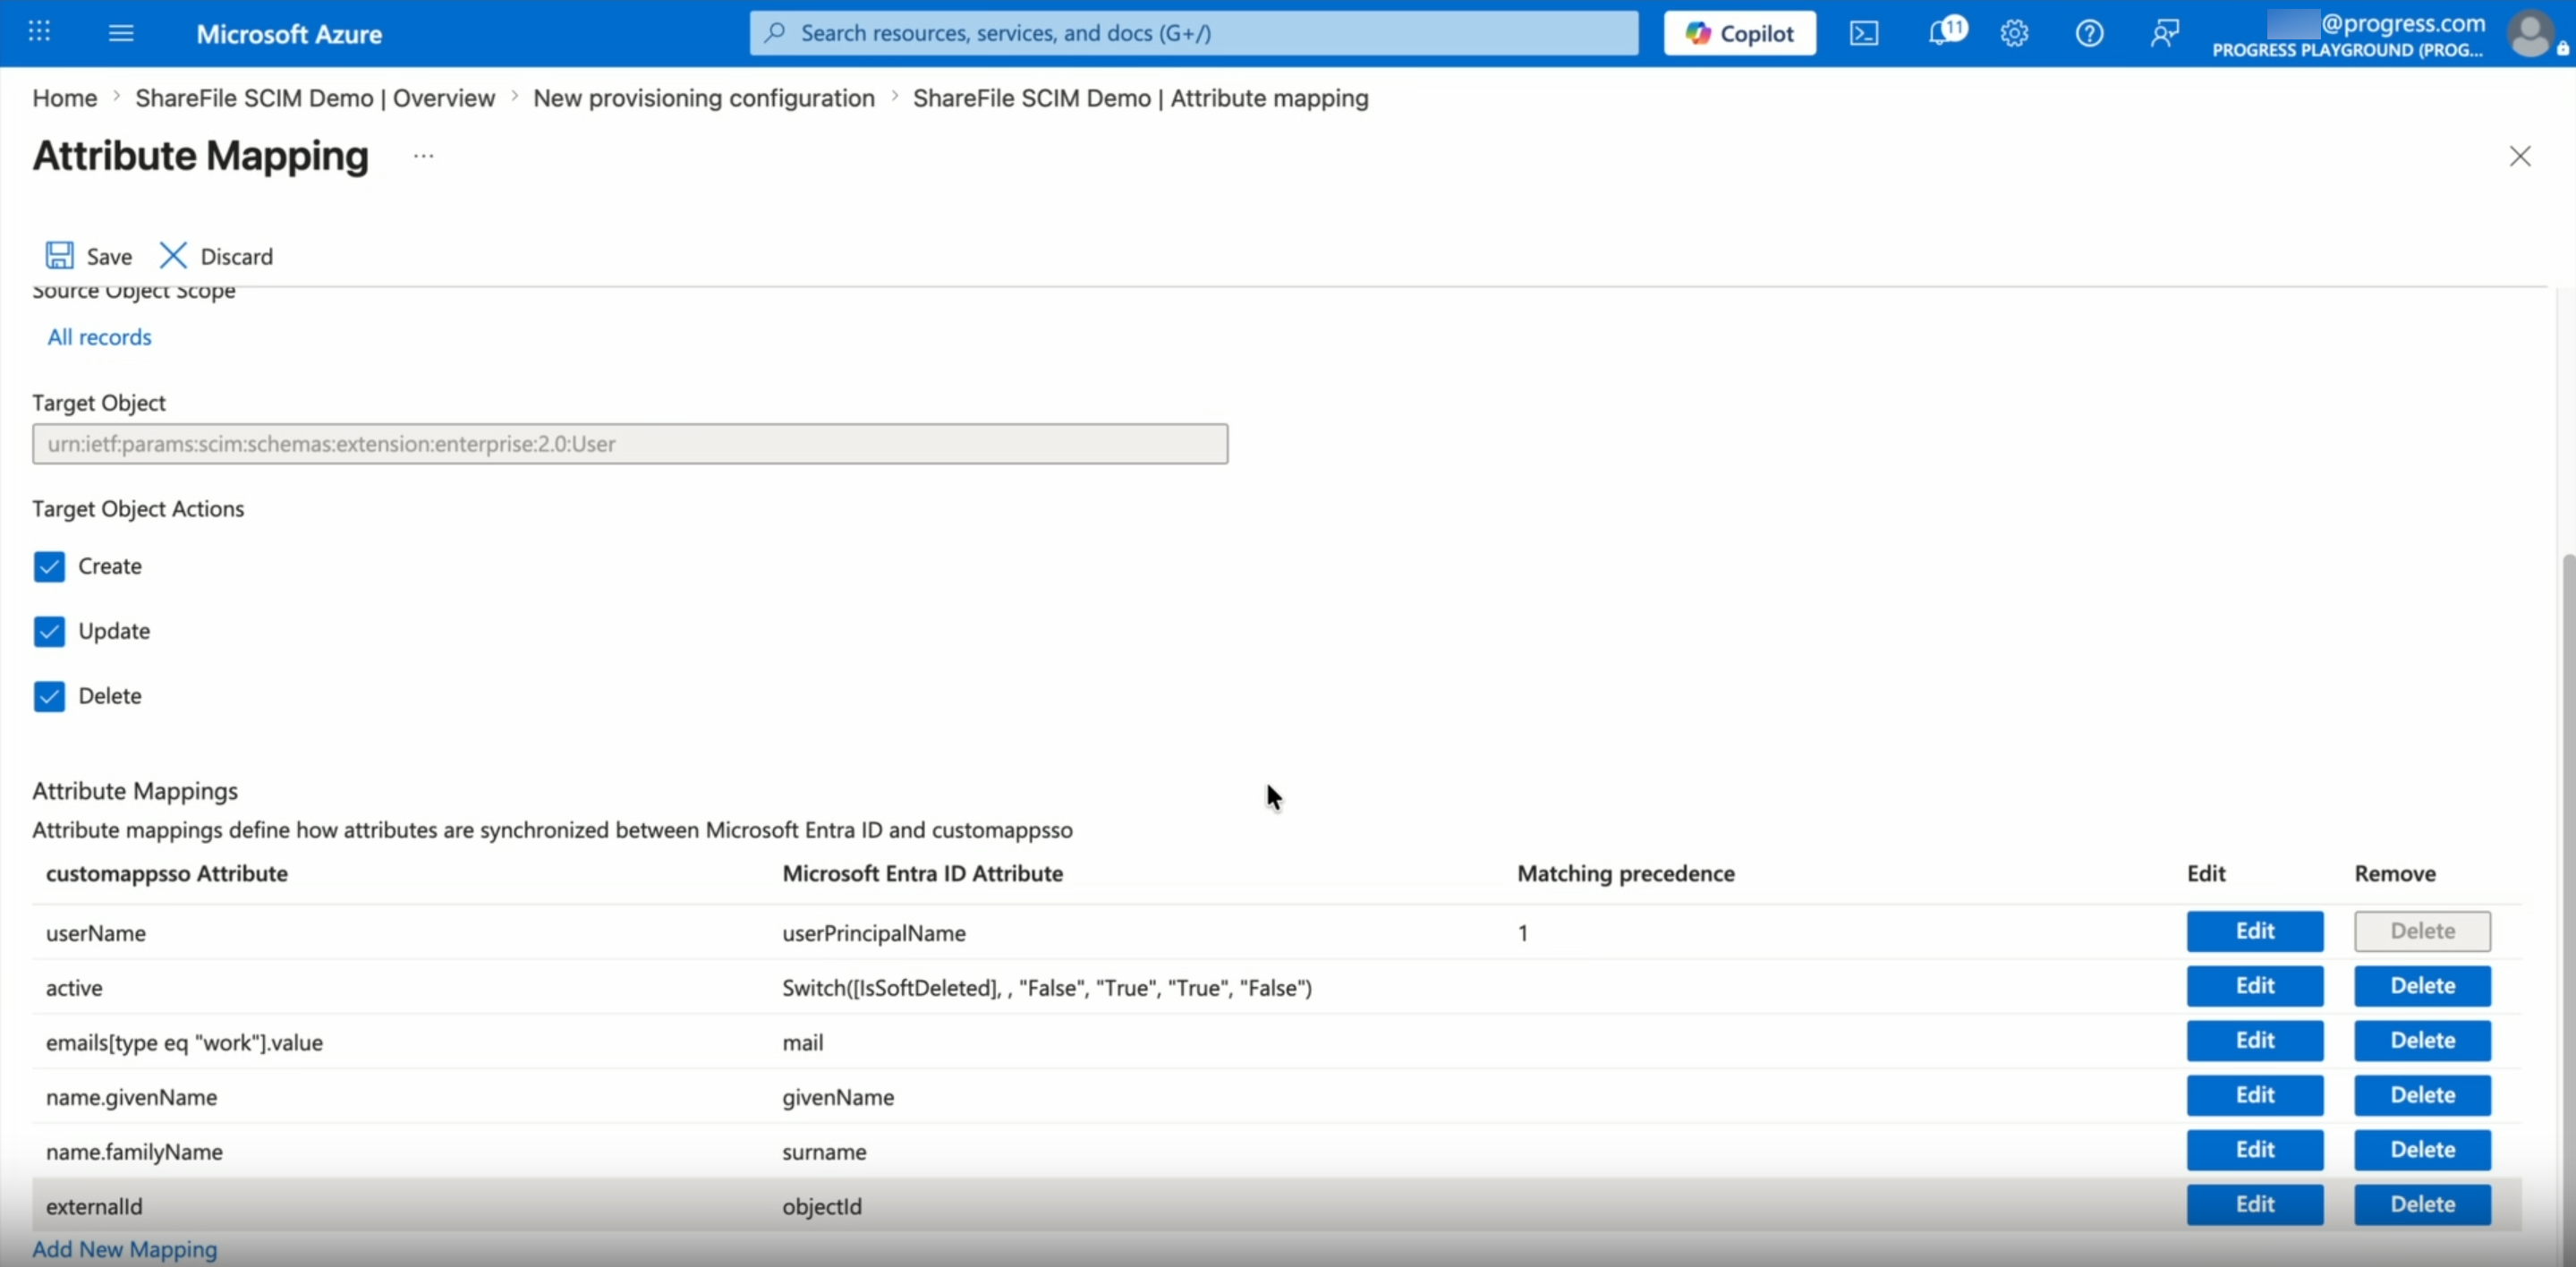
ShareFile only uses a subset of the attributes Entra can send. Keep the mappings listed below and remove any that ShareFile does not use.
-
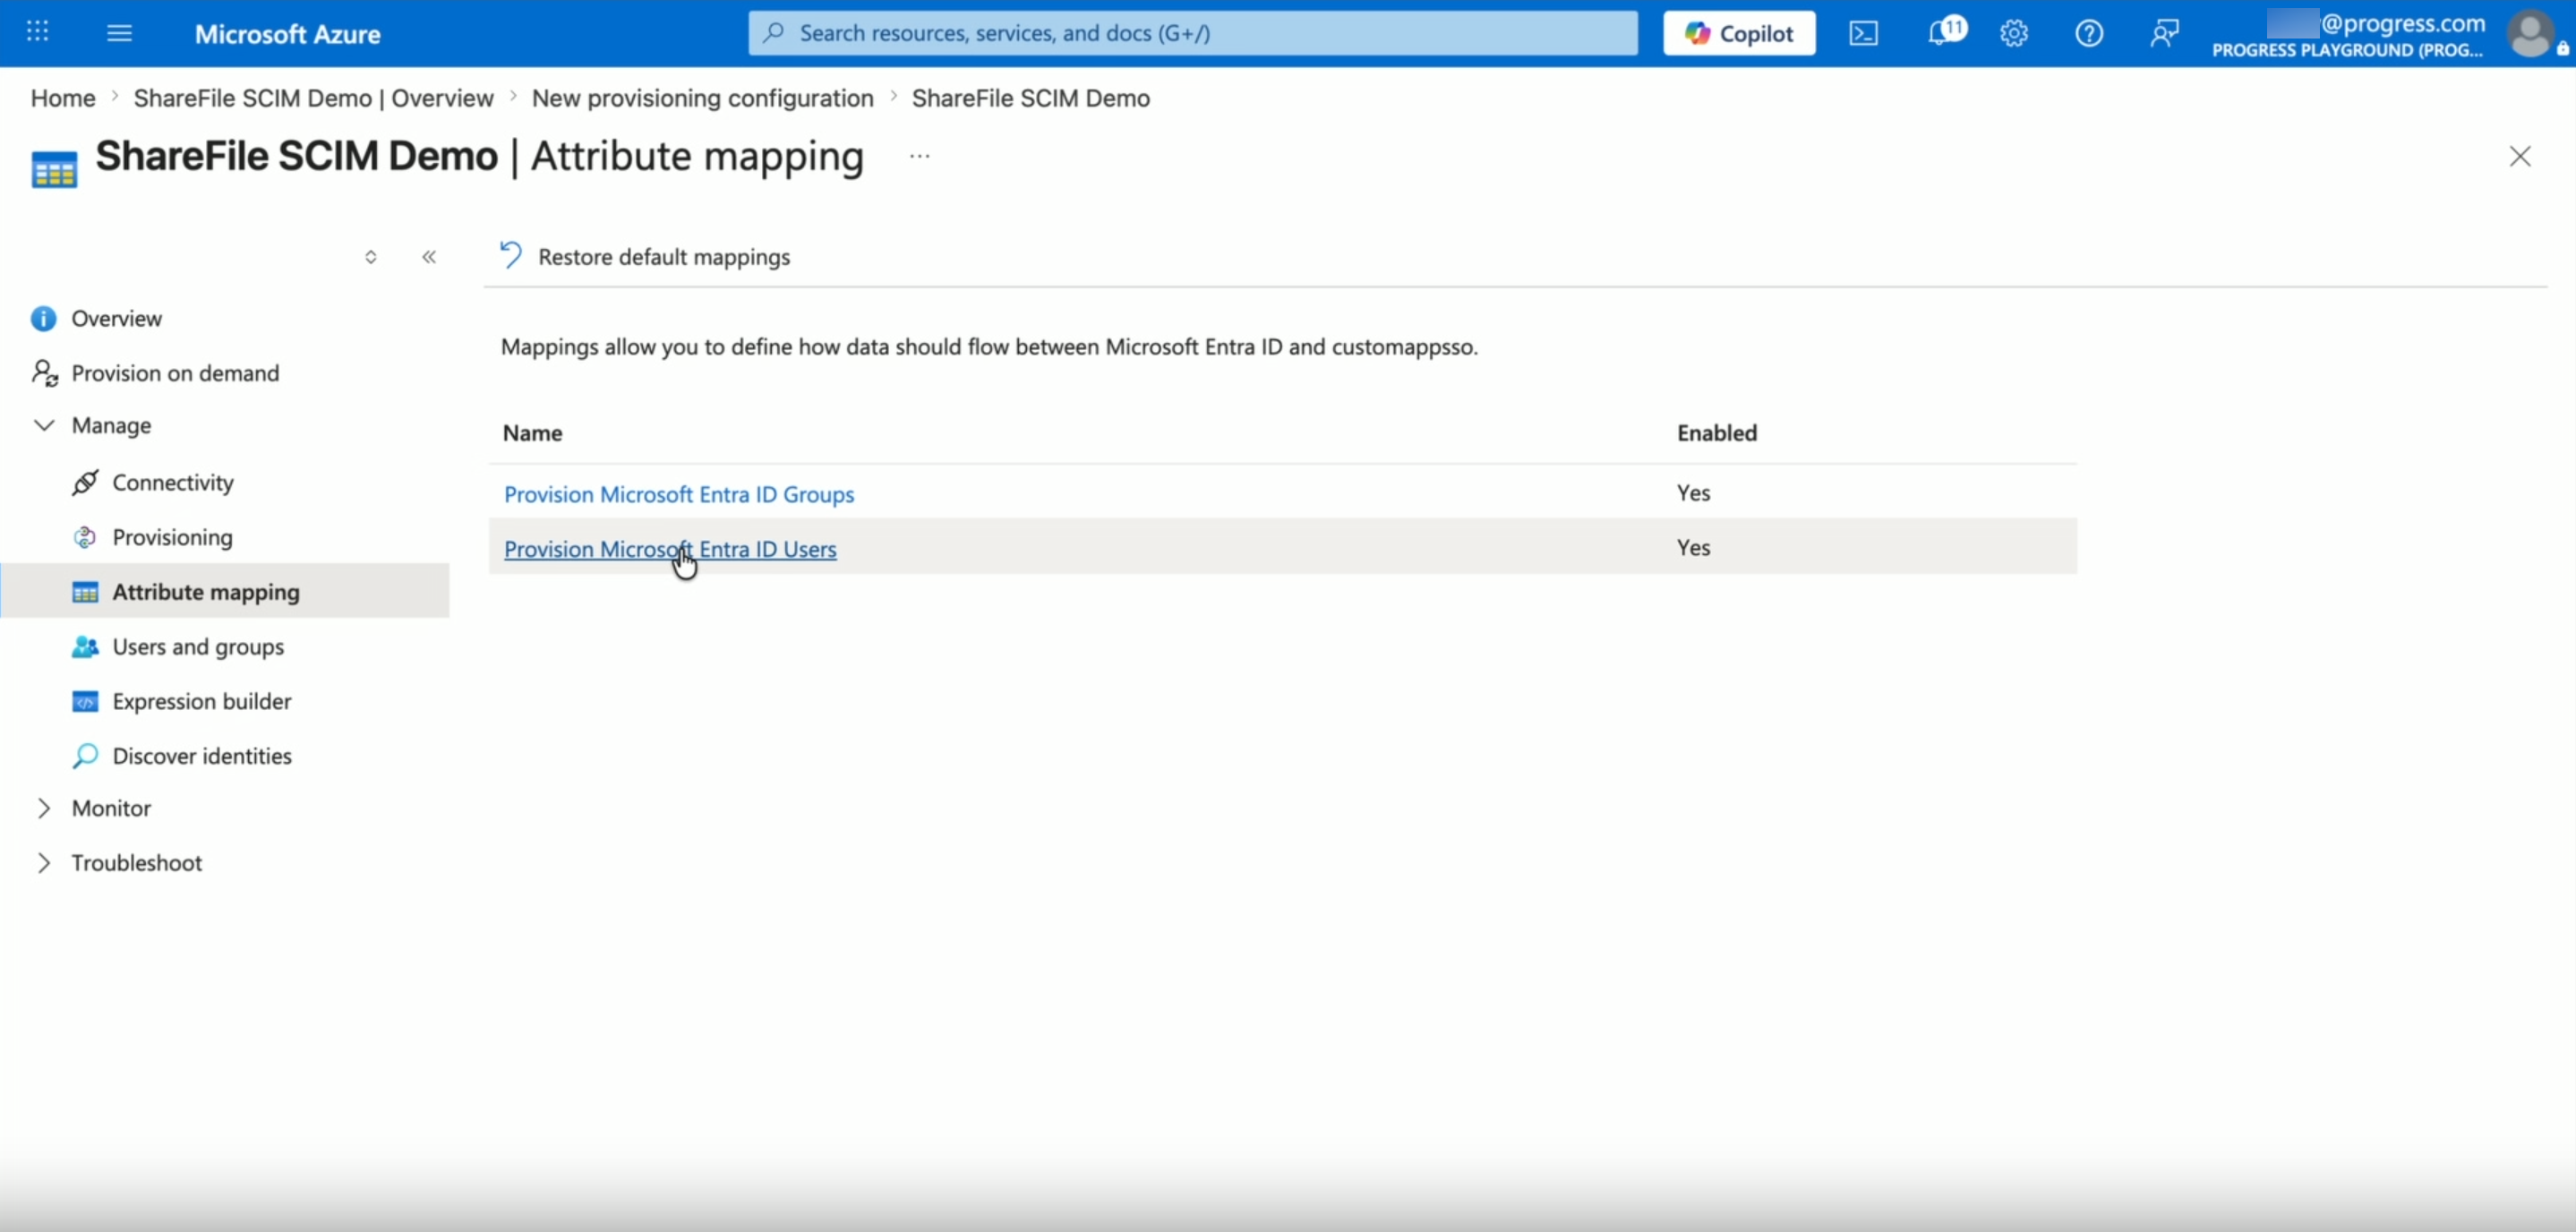
In the left navigation, select Attribute mapping.
-
Select Provision Microsoft Entra ID Users to open the user attribute mappings.
Supported user mappings
| ShareFile SCIM attribute | Required | Recommended Entra source | Notes |
|---|---|---|---|
userName | Yes | userPrincipalName | Use the same source as the user's primary ShareFile email when possible |
active | Yes | Entra default | Used for deactivation and reactivation |
name.givenName | Yes | givenName | Required for user creation |
name.familyName | Yes | surname | Required for user creation |
externalId | Yes | objectId | Use a stable Entra identifier |
emails[type eq "work"].value | Yes | userPrincipalName or mail | ShareFile requires an email on create |
emails[type eq "work"].primary | Recommended | True | Marks the work email as primary |
urn:ietf:params:scim:schemas:extension:enterprise:2.0:User:organization | Optional | companyName | Populates Organization/Company in ShareFile |
User mapping guidance
- Map
externalIdtoobjectId - Keep
userNameand the primary work email aligned - Remove unused mappings such as
displayName(ShareFile derives display name from given/family name),title,department,manager,costCenter, anddivision
Step 5: Configure group attribute mappings
Supported group mappings
| ShareFile SCIM attribute | Required | Recommended Entra source | Notes |
|---|---|---|---|
displayName | Yes | displayName | Used as the ShareFile group name |
externalId | Yes | objectId | Stable group identifier; required for idempotent sync |
members | Yes | members | Used to sync group membership |
Group mapping guidance
- Keep group mappings minimal and remove extra attributes ShareFile does not use:
name.formatted,addresses.*,phoneNumbers.* - Prefer groups with direct user membership
- Do not rely on nested groups for ShareFile membership sync
Step 6: Assign users and groups to the application
-
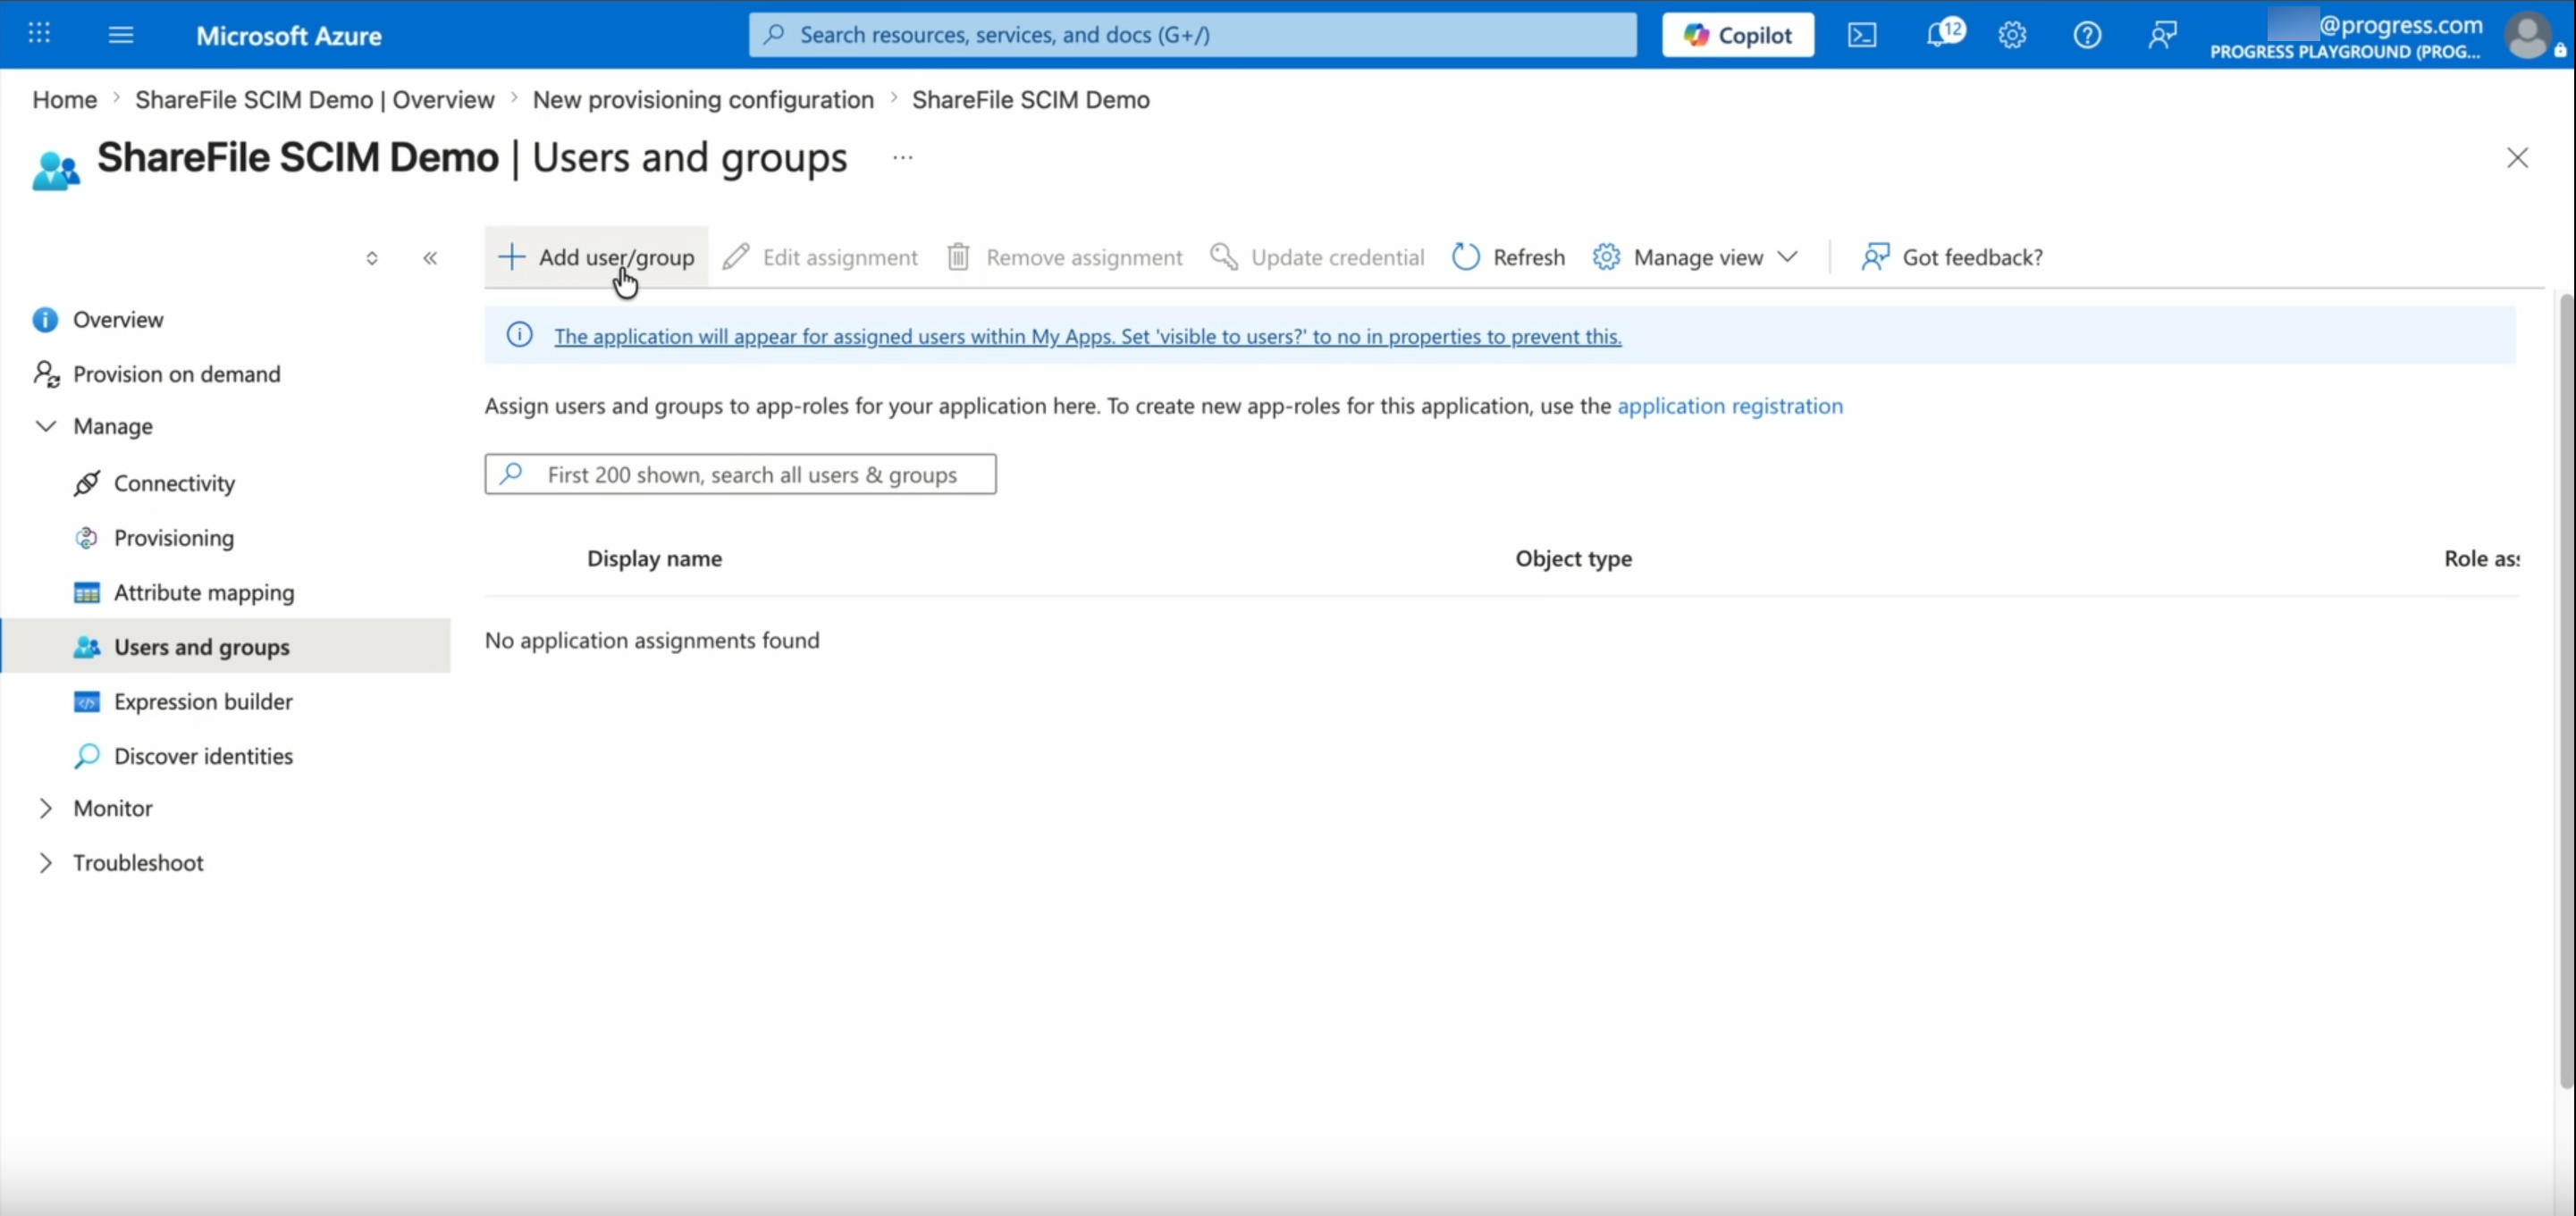
In the Entra enterprise application, open Users and groups.
-
Select + Add user/group.
-
Assign the users and groups you want ShareFile to provision.
-
If you want group sync, make sure the relevant groups are assigned.
Step 7: Start provisioning
-
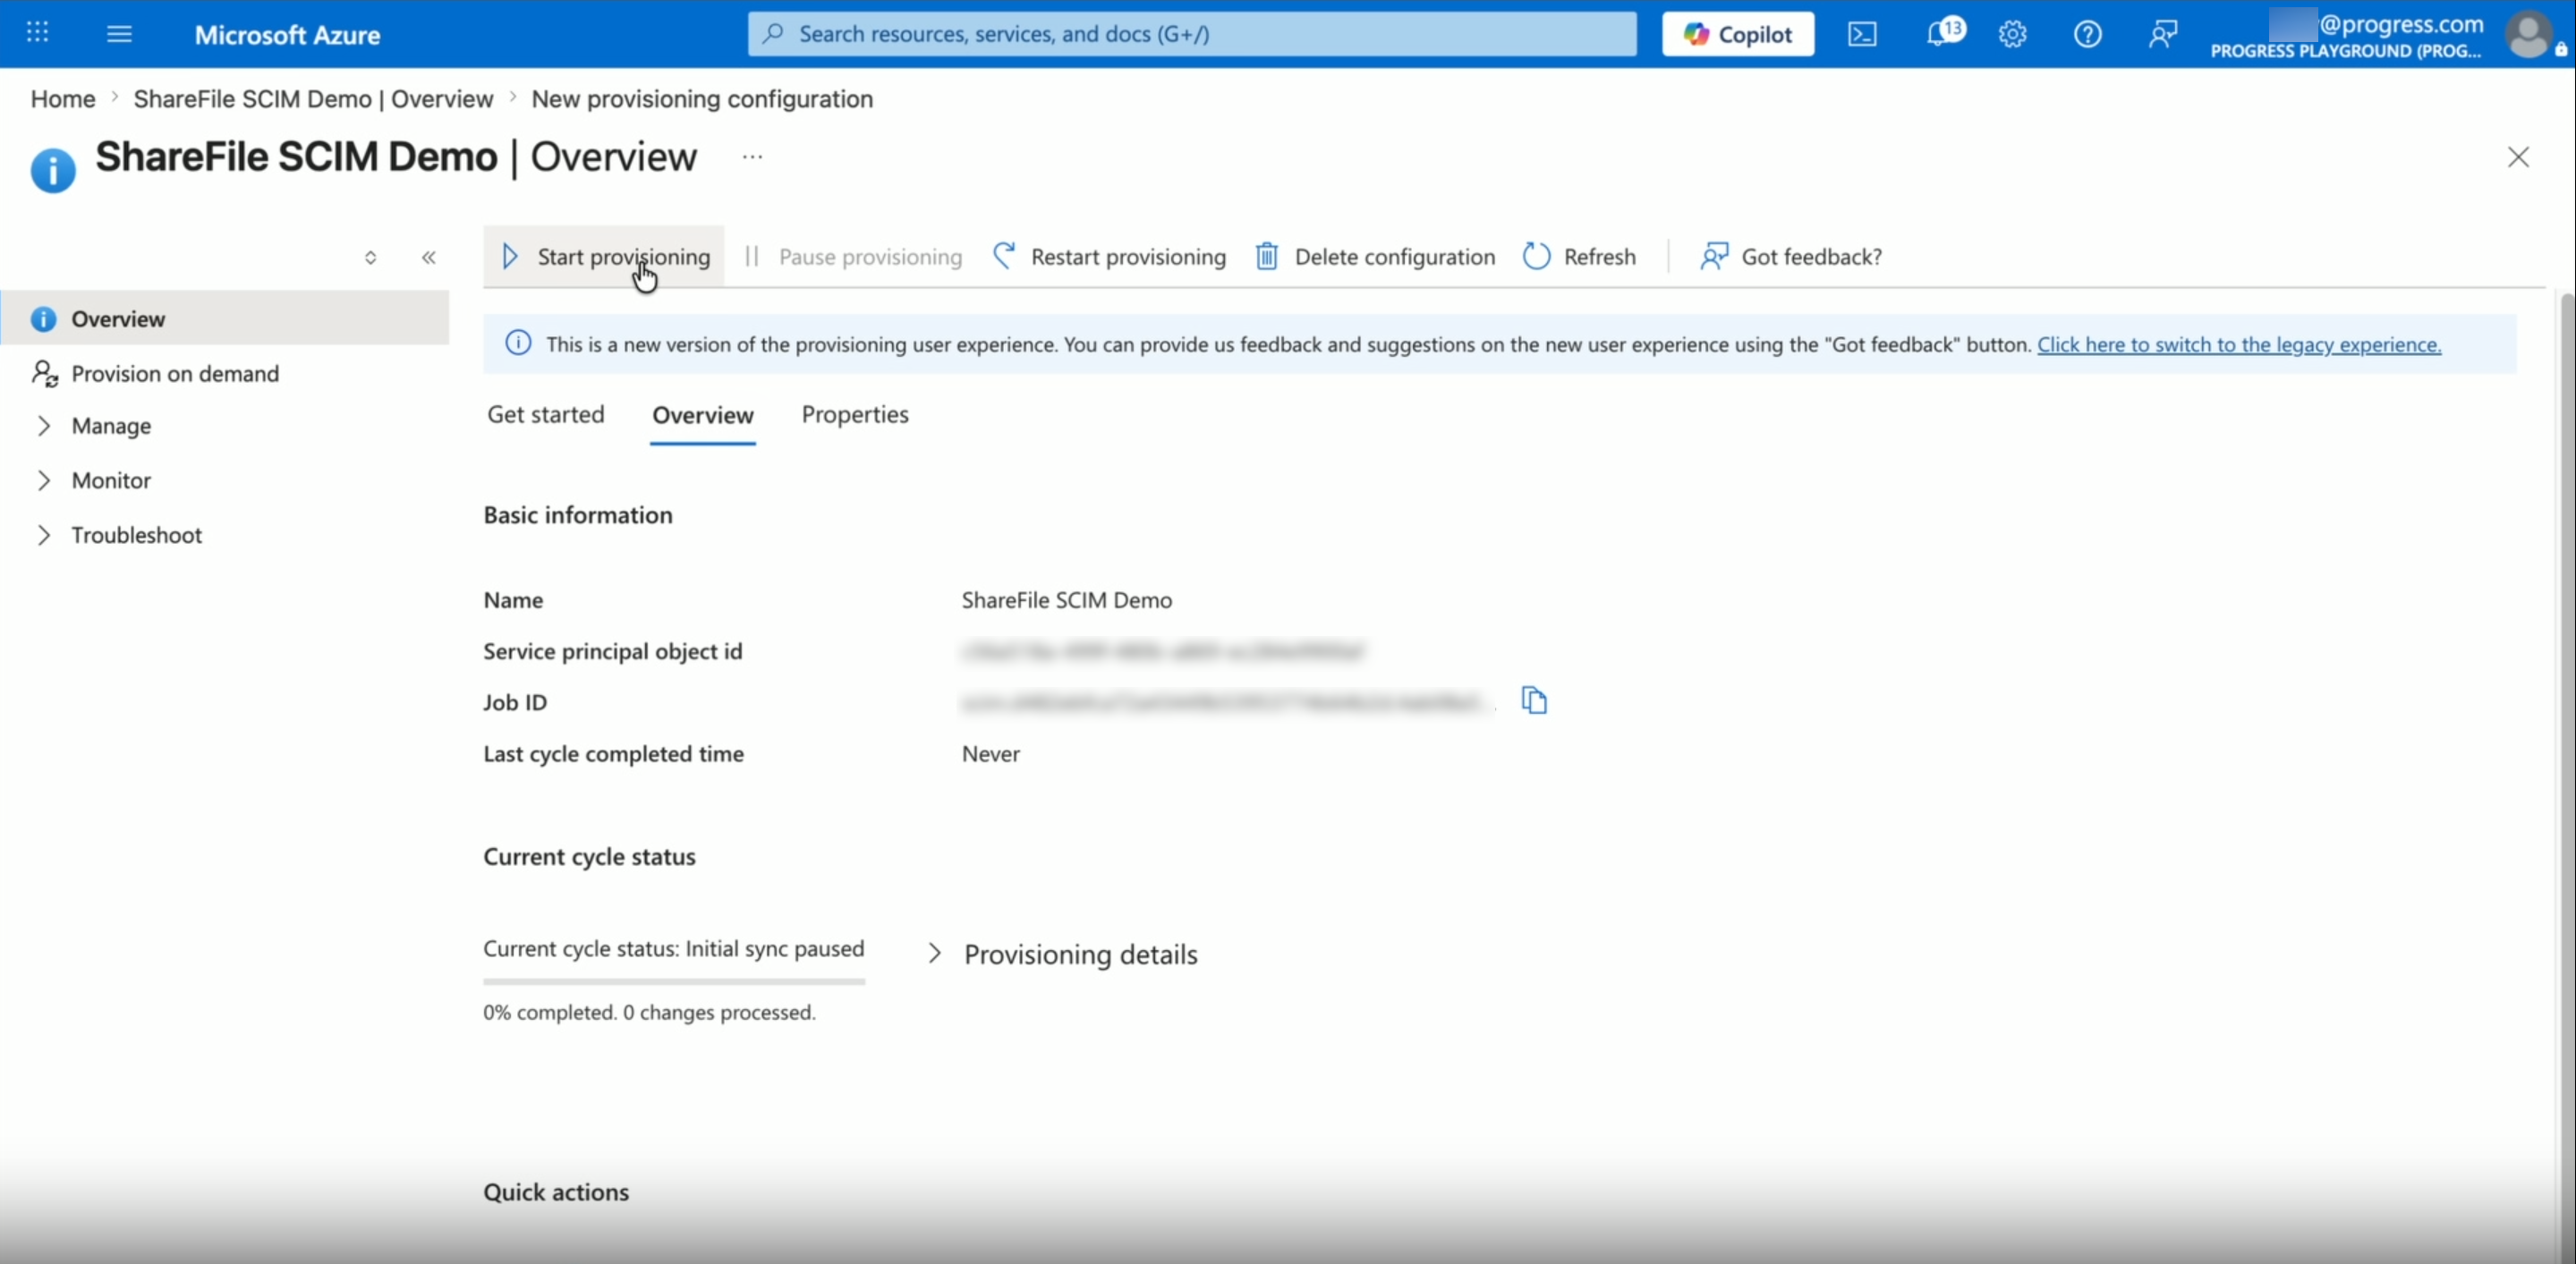
In the left navigation, select Overview.
-
Select Start provisioning.
-
Monitor Entra provisioning logs during the initial sync.
After provisioning starts:
- Assigned users are created in ShareFile
- Supported user updates sync automatically
- Users can be deactivated or reactivated through Entra
- Assigned groups are created in ShareFile
- Group membership changes sync to ShareFile
Troubleshooting
The ShareFile URL or API Key is missing
- Confirm the account is on an Enterprise plan
- Confirm SCIM is enabled under Account Settings > User Provisioning
Connection test fails in Entra
- Verify the ShareFile URL was pasted into Tenant URL
- Verify the ShareFile API Key was pasted into Secret Token
- Verify Authentication method is set to Bearer authentication
Users fail to provision
Check that the following mappings exist and are populated:
userNameactivename.givenNamename.familyName- Primary work email
externalId
Users provision, but company/organization is blank
Map urn:ietf:params:scim:schemas:extension:enterprise:2.0:User:organization to companyName.
Group membership is incomplete
- Confirm the group is assigned to the app
- Confirm the
membersmapping is present - Avoid nested groups