Configure your Client account
When you are invited to a ShareFile account as a Client contact, you receive an email from ShareFile Support (mail@sf-notifications.com) with instructions to create your account. Make sure your email spam filters allow inbound messages from this address.
Use the following instructions to sign into ShareFile for the first time after receiving a request email from your service provider.
-
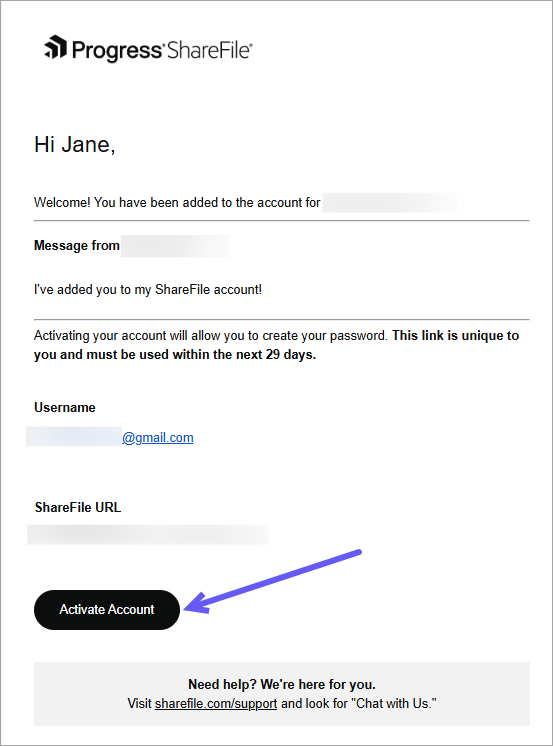
Open the email and select Activate Account. The email contains your username (email address) and your service provider's ShareFile URL, which is your sign-in page.
-
Save your service provider's ShareFile URL for future access or bookmark this page for convenience.
-
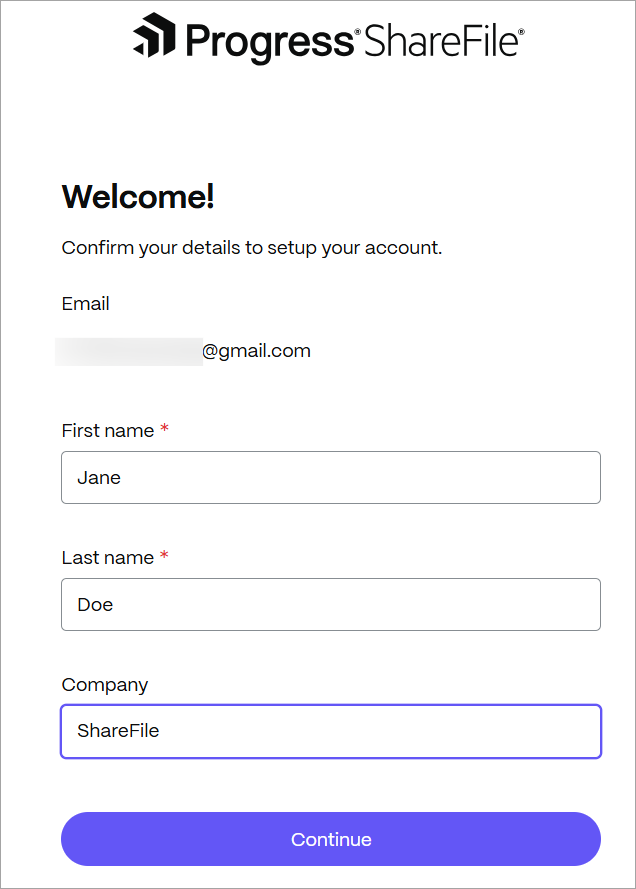
When the ShareFile Welcome screen displays, confirm your Email, First name, Last name and Company name. You can make edits if needed. Then, select Continue.
-
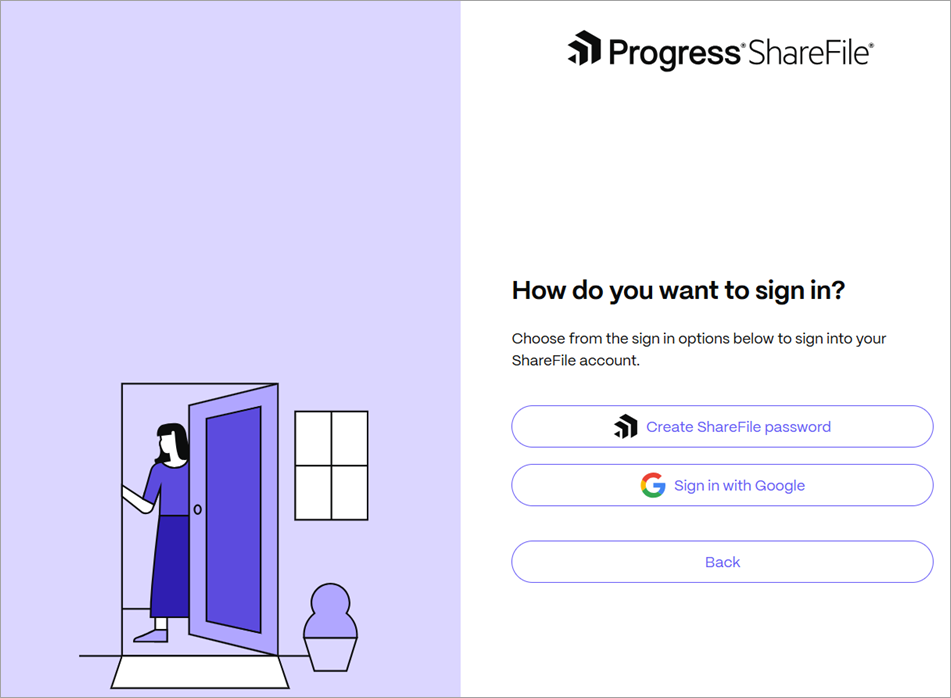
On the How do you want to sign in? screen, select your preferred sign-in method:
- To create a dedicated password, select Create ShareFile password. Make sure your password meets the password requirements.
- To sign in with your Google account, select Sign in with Google. For more information, see Set up social sign-in as a client.
-
Complete the sign up. You've successfully created your ShareFile client user account.
Set up multi-factor authentication
If your service provider requires multi-factor authentication (MFA), you will be asked to set it up during account activation.
To add an authenticator app, you might first need to complete initial sign-in with SMS verification using your phone number.
Note:
VoIP phone numbers, such as Google Voice, might not reliably receive SMS or voice MFA codes.
To complete the setup using a phone number:
-
Select your country.
-
Enter your phone number.
-
Select Text message (SMS), then select Continue.
-
Enter the verification code you receive.
-
Complete the remaining prompts to finish signing in. Your phone number is added as an MFA method after it is verified.
After you finish initial sign-in, you can add an authenticator app as an MFA method.