This content has been machine translated dynamically.
Dieser Inhalt ist eine maschinelle Übersetzung, die dynamisch erstellt wurde. (Haftungsausschluss)
Cet article a été traduit automatiquement de manière dynamique. (Clause de non responsabilité)
Este artículo lo ha traducido una máquina de forma dinámica. (Aviso legal)
此内容已经过机器动态翻译。 放弃
このコンテンツは動的に機械翻訳されています。免責事項
이 콘텐츠는 동적으로 기계 번역되었습니다. 책임 부인
Este texto foi traduzido automaticamente. (Aviso legal)
Questo contenuto è stato tradotto dinamicamente con traduzione automatica.(Esclusione di responsabilità))
This article has been machine translated.
Dieser Artikel wurde maschinell übersetzt. (Haftungsausschluss)
Ce article a été traduit automatiquement. (Clause de non responsabilité)
Este artículo ha sido traducido automáticamente. (Aviso legal)
この記事は機械翻訳されています.免責事項
이 기사는 기계 번역되었습니다.책임 부인
Este artigo foi traduzido automaticamente.(Aviso legal)
这篇文章已经过机器翻译.放弃
Questo articolo è stato tradotto automaticamente.(Esclusione di responsabilità))
Translation failed!
Workflow Automation: Images
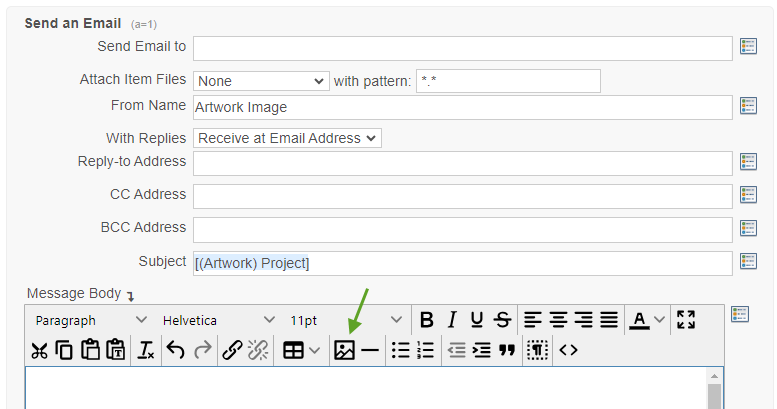
Whether you’re using a Send Email action or creating a PDF in Workflow Automation, sometimes you want to add an image to your action.
We know sometimes this can be tricky depending on where the image is hosted, who has access, and the way we suggest inserting an image. Below we’ll walk you through how to add an image using a Send Email action, however, the exact steps can also be used when creating a PDF.
Click on the Image icon
Enter the image file in the Source box. Note, the file type must be .img or .jpeg
We have a lock icon to constrain proportions. The Constrain Proportions lock lets you maintain the aspect ratio (the ratio of image width to image height). If you “lock” this option and change the image width and height, the image does not stretch or shrink. For example, if your image is square, it will remain square if you constrain proportions.
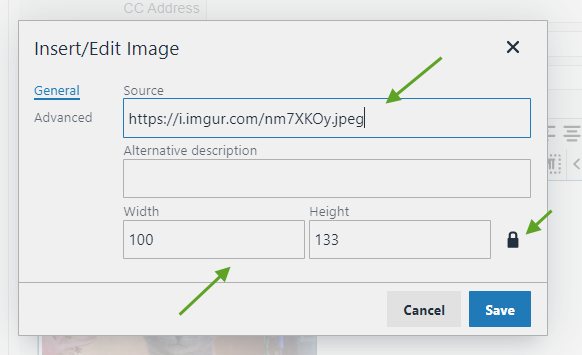
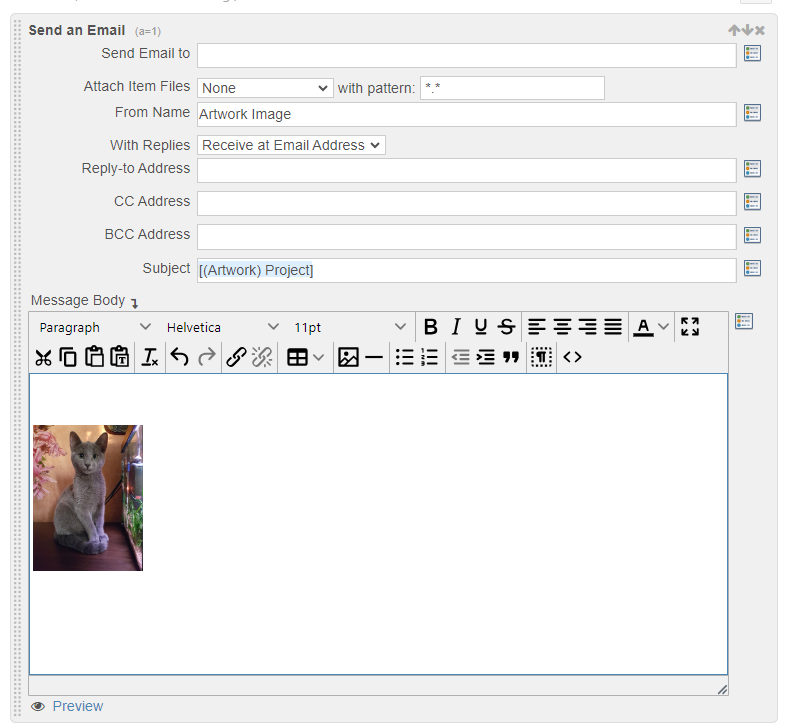
If the image type you’ve entered into the Source is successful, once you hit Save, your image will appear in the Message Body.
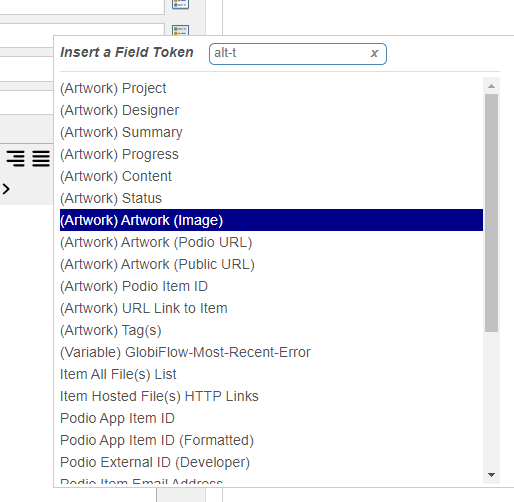
If your image is already hosted on a Podio item, you can use the Token selector to pull in the image.
Troubleshooting:
If you’re using a site to host your images, how do you find the correct file type to use in the Source?
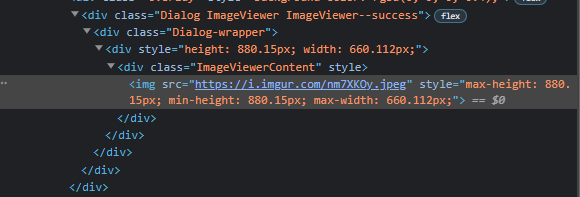
Right-click on your image and hit Inspect.
This will highlight the URL you need to use. You can click the link and copy from the source or sometimes this will open the image file in a new tab where the URL will be in the correct file format.
Please make sure you’re using a Public image if not already hosted in Podio.
Share
Share
In this article
This Preview product documentation is Citrix Confidential.
You agree to hold this documentation confidential pursuant to the terms of your Citrix Beta/Tech Preview Agreement.
The development, release and timing of any features or functionality described in the Preview documentation remains at our sole discretion and are subject to change without notice or consultation.
The documentation is for informational purposes only and is not a commitment, promise or legal obligation to deliver any material, code or functionality and should not be relied upon in making Citrix product purchase decisions.
If you do not agree, select I DO NOT AGREE to exit.