This content has been machine translated dynamically.
Dieser Inhalt ist eine maschinelle Übersetzung, die dynamisch erstellt wurde. (Haftungsausschluss)
Cet article a été traduit automatiquement de manière dynamique. (Clause de non responsabilité)
Este artículo lo ha traducido una máquina de forma dinámica. (Aviso legal)
此内容已经过机器动态翻译。 放弃
このコンテンツは動的に機械翻訳されています。免責事項
이 콘텐츠는 동적으로 기계 번역되었습니다. 책임 부인
Este texto foi traduzido automaticamente. (Aviso legal)
Questo contenuto è stato tradotto dinamicamente con traduzione automatica.(Esclusione di responsabilità))
This article has been machine translated.
Dieser Artikel wurde maschinell übersetzt. (Haftungsausschluss)
Ce article a été traduit automatiquement. (Clause de non responsabilité)
Este artículo ha sido traducido automáticamente. (Aviso legal)
この記事は機械翻訳されています.免責事項
이 기사는 기계 번역되었습니다.책임 부인
Este artigo foi traduzido automaticamente.(Aviso legal)
这篇文章已经过机器翻译.放弃
Questo articolo è stato tradotto automaticamente.(Esclusione di responsabilità))
Translation failed!
[Zapier] Saving new Podio items as Google Sheets rows
If you want to have your new Podio items added to your Google Sheets, you can do that using Zapier. You will need:
- A Podio account
- A Google Docs account
- A Zapier account
Getting your accounts ready
To connect your Podio account to Zapier, make sure you have a workspace set up on Podio, with the app that you wish to use connected to this workspace. For information on the basics of Podio, like setting up your workspaces and apps, start here. You can learn more about getting started with Podio on Zapier, here.
To link your Podio items to Google Sheets, make sure you have created a new sheet for this purpose. You can learn more about getting started with Google Sheets on Zapier here).
Note: Podio apps are assigned to a specific Workspace, so make sure you are creating the app you wish to use in the correct Workspace.
Connecting your accounts
Click here to save new Podio items as Google Sheets rows.
- Choose your Podio account from the list of accounts, or connect a new account.
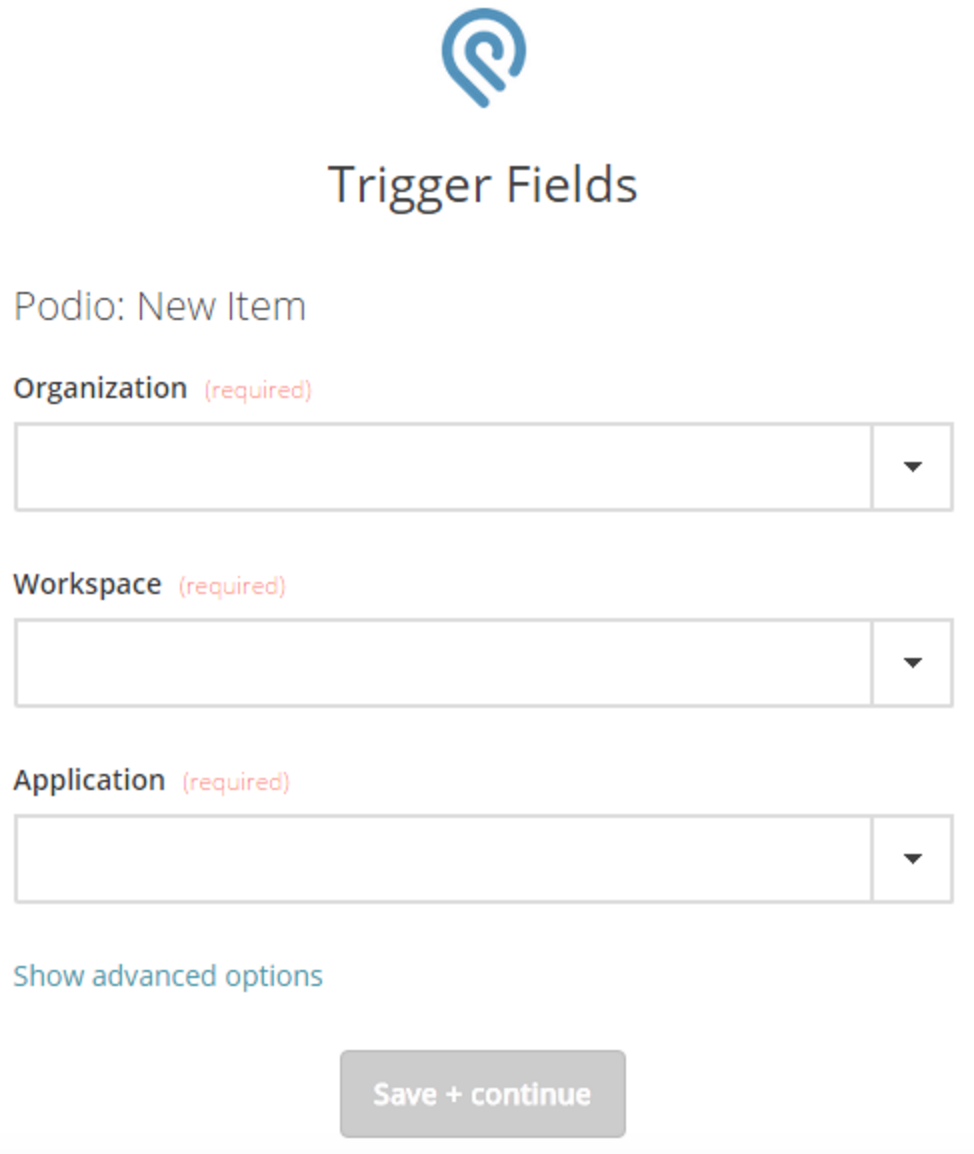
- Select your desired Organization, then Workspace, and then Application from the drop-down menus. When these fields are selected, click Save + Continue.

- Follow the directions for setting up your Google Sheets Spreadsheet in the shared Zap on the next screen.
- Choose your Google Sheets account from the list of accounts, or connect a new account.
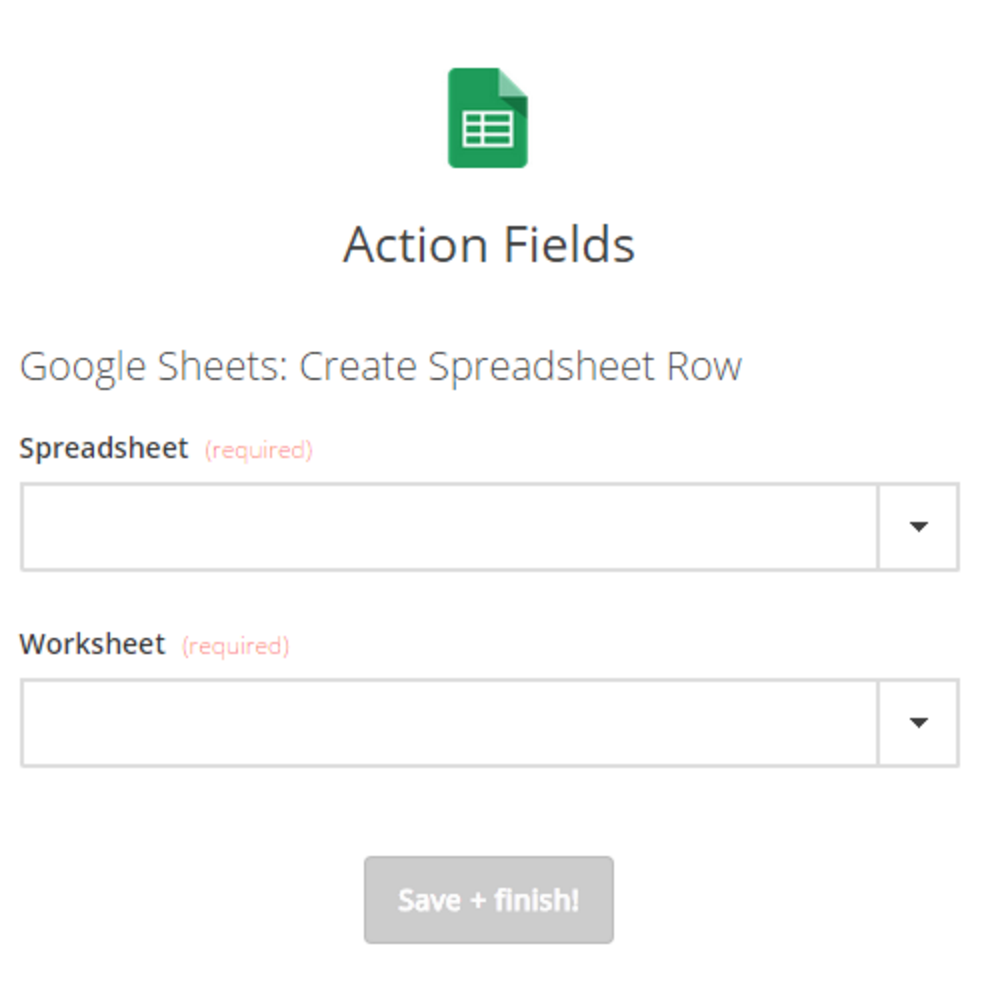
- Choose both the Spreadsheet and the Worksheet that you created for your Podio entries.

- Click Save + Finish.
Now test the Zap to make sure it works. Once you’re satisfied with the results, your new Podio items will be automatically added to your Google Sheets document.
Note: If you ever want to change this Podio and Google Sheets integration, just go to your Zapier dashboard and tweak anything you’d like.
You can also check out all that’s possible with Podio on Zapier, and other ways to connect Podio and Google Sheets.
Share
Share
In this article
This Preview product documentation is Citrix Confidential.
You agree to hold this documentation confidential pursuant to the terms of your Citrix Beta/Tech Preview Agreement.
The development, release and timing of any features or functionality described in the Preview documentation remains at our sole discretion and are subject to change without notice or consultation.
The documentation is for informational purposes only and is not a commitment, promise or legal obligation to deliver any material, code or functionality and should not be relied upon in making Citrix product purchase decisions.
If you do not agree, select I DO NOT AGREE to exit.