Workflow Automation: Advanced Formatting of PDF and Detail Table
This is an advanced user feature. Custom formatting can be done using CSS in the Source Code Editor. Having knowledge of HTML is an asset.
CSS (Cascading Style Sheets) is a form of HTML mark-up that provides web designers with greater control over typography and spacing between elements on a page.
(image)
Please note: Support only provides limited assistance in regards to troubleshooting/modifications of the source code.
GENERAL STYLE TIPS
Add one single style=”“ attribute to the opening tag of your desired element
< p style = " color:#CC0000 ; " >
Each style to be separated by semi-colon
< p style = " text-align:center ; color:#CC0000 ; padding:10px ; " >
To allow a particular style to be used for a an element across the entire document, put the style inside one < style > tag. You only need 1 style tag for your entire document. You can put all your styles in there if you want.
< style >< !-- <br> h1 {font-weight:bold; font-size:2em;}<br>p {font-family:'Times New Roman'; color:#CC0000;}<br>td {padding:20px;} -->< /style >
Add Padding
(some software doesn’t support margin)*
-
Add style=”padding-left:50px;”
-
Can use “padding-top”, “padding-right”, “padding-bottom”, or “padding-left”
-
Eg: < p style=”padding-left:50px;”>Text< /p >
Set Page Margin* (cannot be used to completely remove page margins)
-
Enclose with a < div>
-
Eg: < div style=”padding-left: 1in; padding-right: 1in;”>< /div>
Change Font Color
-
Add style=”color:#CC0000;”
-
Can also use words like “green”, “red”
-
Eg: < p style=”color:#CC0000;”>Text< /p>
Change Background Color
-
Add style=”background:#CC0000;”
-
Can also use words like “green”, “red”
-
Eg: < p style=”background-color:#CC0000;”>Text< /p>
Change Document Background Color**
-
Add style inside < style > tag body {background:#CC0000;}
-
You may need to check the printer settings to allow background images/color to be printed. By default, background images/colors are not printed.
-
Eg: < style >< !– body{background:#c00;} –>< /style >
Change Font Family
For PDF actions prior to July 20 2016.
- Add style=”font-family: ‘Times New Roman’, Times, serif;”
- Wrap any multi word font inside single quotes
- Eg: < p style=”font-family:’Times New Roman’, Times, serif;”>Text< /p>
Add Custom Font
For PDF actions after July 20, 2016.
-
Add an @import inside your style tags and use the URL of where your font is stored
-
Set the font family to the element you want
-
Eg:
< style >< !-- @ import url('https://fonts.googleapis.com/css?family=Mogra'); h1 {font-family: 'Mogra', cursive;} -->< /style >
Horizontally Align Text**
-
Add style=”text-align:top;”
-
Can use “left”, “right”, “center”, “justify”
-
Eg: < p style=”text-align:center;”>Text< /p>
Add Border to Element
-
Add style=”border:1px solid #CC0000;”
-
Can custom the thickness, color, style of the border
-
Eg: < p style=”border:1px solid #CC0000;”>Text< /p>
Position text inside table cell
-
Inside custom table add style=”vertical-align:top;”
-
To a Detail Table add vertical-align:top; to table element
-
Can use “top”, “middle”, “bottom”
-
Eg: < td style=”vertical-align:top;”>Text< /td>
HTML DETAIL TABLE TIPS

Table elements you can apply styles to:
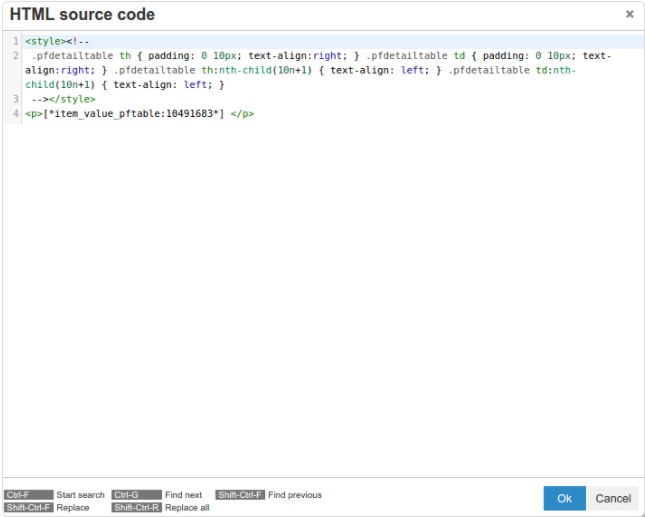
- pfdetailtable (Entire table)
- pfdetailtable th (Table headers)
- pfdetailtable td (Table cells)
Since each table inserted into the document are using the same class name, each new table inserted will inherit the styles that are set higher up in the code.
WHERE TO GO FOR MORE HELP
-
CSS and Text A Brief Guide to formatting text
-
HTML Goodies - CSS Basics for developers
-
HTML & CSS - Learn how with Tutorials at Codecademy
-
TinyMCE - the rich text editor Workflow Automations uses
-
wkhtmltopdf - the library Workflow Automations uses
-
mPDF - Library used prior to 07-20-2016 (mPDF has been discontinued)