This content has been machine translated dynamically.
Dieser Inhalt ist eine maschinelle Übersetzung, die dynamisch erstellt wurde. (Haftungsausschluss)
Cet article a été traduit automatiquement de manière dynamique. (Clause de non responsabilité)
Este artículo lo ha traducido una máquina de forma dinámica. (Aviso legal)
此内容已经过机器动态翻译。 放弃
このコンテンツは動的に機械翻訳されています。免責事項
이 콘텐츠는 동적으로 기계 번역되었습니다. 책임 부인
Este texto foi traduzido automaticamente. (Aviso legal)
Questo contenuto è stato tradotto dinamicamente con traduzione automatica.(Esclusione di responsabilità))
This article has been machine translated.
Dieser Artikel wurde maschinell übersetzt. (Haftungsausschluss)
Ce article a été traduit automatiquement. (Clause de non responsabilité)
Este artículo ha sido traducido automáticamente. (Aviso legal)
この記事は機械翻訳されています.免責事項
이 기사는 기계 번역되었습니다.책임 부인
Este artigo foi traduzido automaticamente.(Aviso legal)
这篇文章已经过机器翻译.放弃
Questo articolo è stato tradotto automaticamente.(Esclusione di responsabilità))
Translation failed!
Storage zones
Storage zone provides administrators the flexibility to choose between ShareFile-managed, secure cloud storage, or IT-managed storage zones (on-prem) storage within your own data center. In addition to allowing users the ability to create and manage on-premises storage zones, users also have the option of utilizing ShareFile-managed storage zones.
For more information about storage zones controller including components, data storage, and more, see Storage zones controller 6.x.
Managing public storage zones on your account
Administrators can choose to enable a customized subset of ShareFile-managed storage zones on their account. Storage zones can be viewed at Account settings > StorageZone. From the storage zones menu, select ShareFile Managed.
NOTE:
Contact ShareFile support if you require alternative ShareFile managed zones
From this menu, you can enable or disable specific zones on your account by clicking the check box to the left of the zone name. You can also edit the alias of a particular public zone by mousing over the Alias column to the right of the zone title. Edit the alias of a public zone to better suit the users on your account. In addition to editing your storage zones, you can see your current usage in the Usage column.
Selecting the default storage zone for a user
Account administrators can do the following:
-
designate the default storage zone for a specific user on their account
-
allow the user to create and manage storage zones
-
allow the user to select a zone when creating a root-level folder or project from blank projects.
Use the following steps to set up a user.
- To modify the settings for a user on your account, navigate to People > Browse Employees.
- Locate the user you would like to modify using the Browse or Search function, then use the Manage icon to open the user’s profile page.
- In the Employee User Settings section of the user page, use the Storage Location menu to choose the user’s default storage zone.
- In the User Access section, you can choose to allow the user the ability to create and manage zones by clicking the check box to the left of Creates and manage StorageZone.
- In the User Access section, if you want your user to have the ability to select a zone when creating a root-level folder, click the check box for Create and manage StorageZone.
Note:
- The feature to select SZ for Projects will only be available for premium, IA, and VDR accounts with multiple storage zone enabled.
- Only the files and folders of the project resides in the selected SZ.
- Once you have finished managing your user’s storage zone and permissions, select Save Changes.
Enabling Limit access to files based on their content
Enable the Limit access to files based on their content setting if you have one or more private storage zones configured to use a third party DLP system to scan and classify documents. With this setting enabled, sharing and access filters are applied to documents based on the results of the DLP scan. Use the settings on this page to define the sharing and access filters for each classification.
- Unscanned documents - Allow these actions for documents that your DLP system has not scanned. This includes all documents stored in ShareFile-managed storage zones or other storage zones where DLP is not enabled.
- Scanned: OK - Allow these actions for documents that your DLP system accepted.
- Scanned: Rejected - Allow these actions for documents that your DLP system rejected because they contain sensitive data.
Storage Zone Data Migration
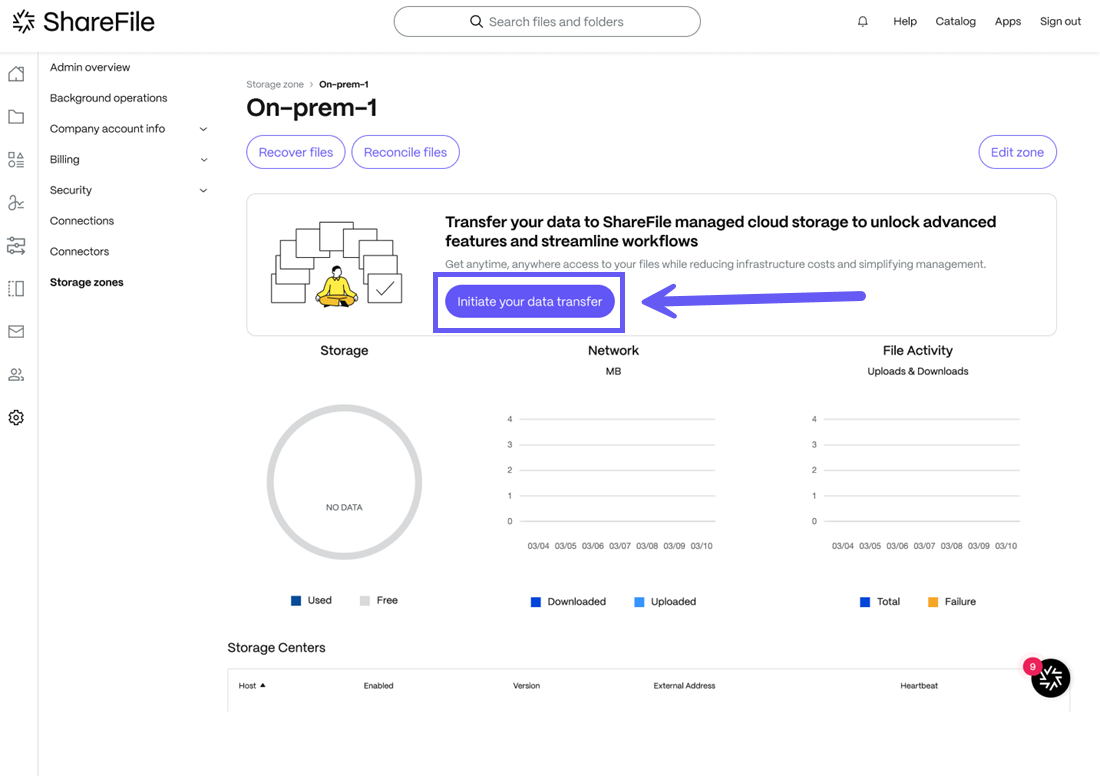
Master administrators can choose to migrate Customer-managed storage zones to ShareFile-managed cloud storage on their account. Storage zones can be viewed at Account settings > Storage > StorageZones.
From the storage zones menu, select Customer Managed. Click on the storage zone to migrate and the selected storage zone managegement screen will be displayed. To begin the migration process, click on the “Initiate your data transfer” button.
Data Migration for single Customer-Managed Storage Zone
Storage Zone Data Migration is successfully completed
-
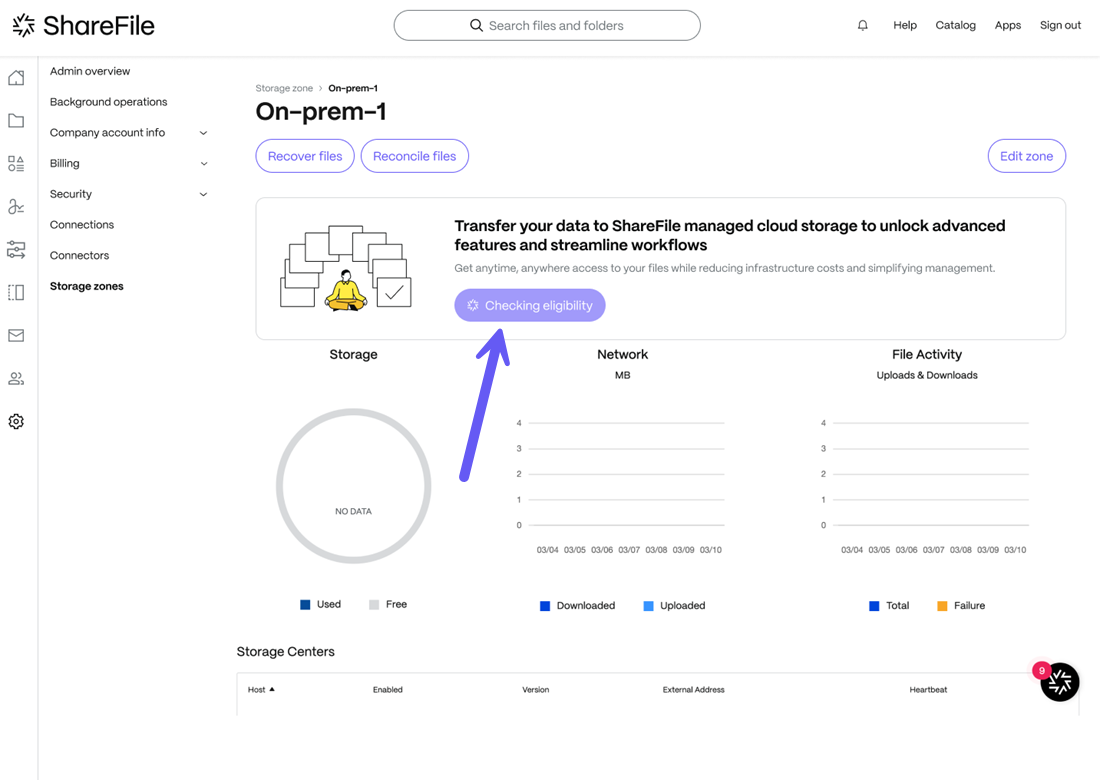
ShareFile checks your eligibility for the data transfer as shown in the screen below.
-
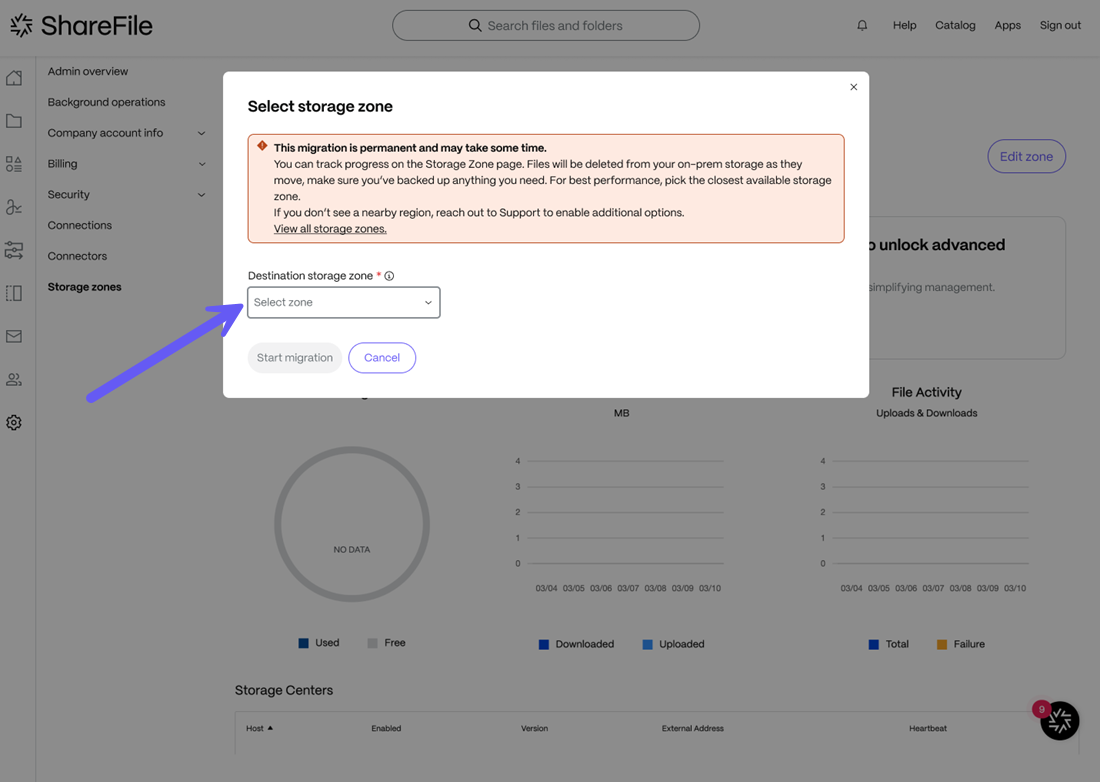
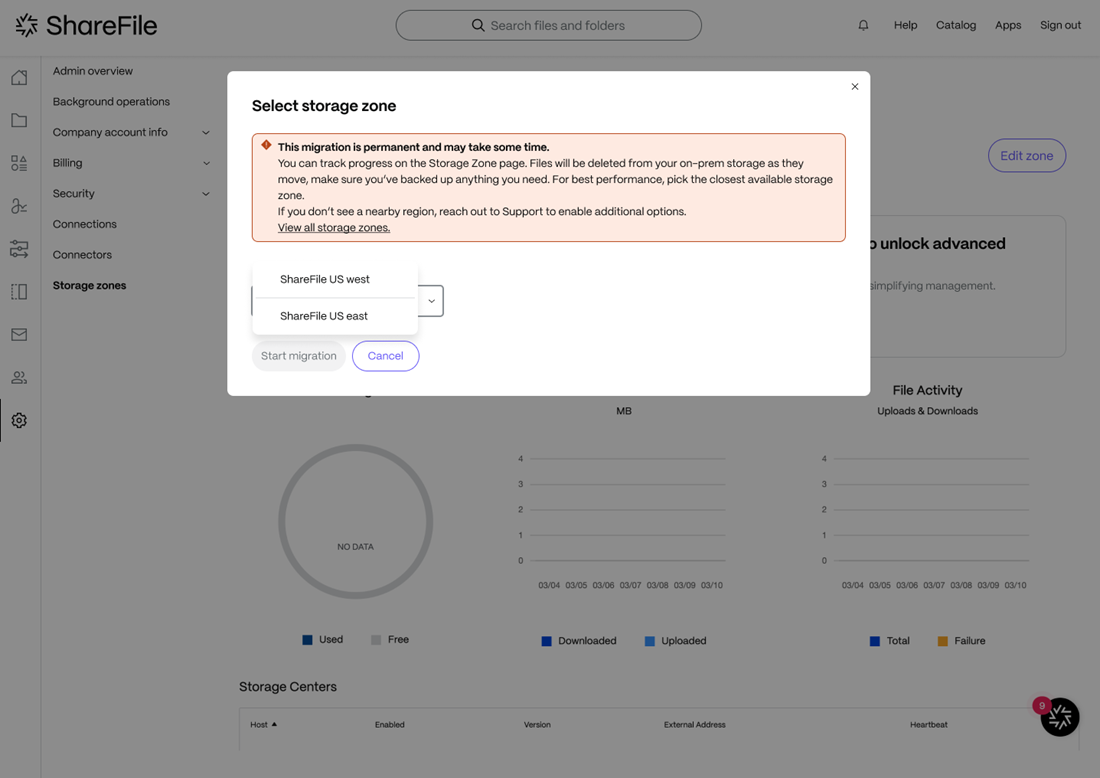
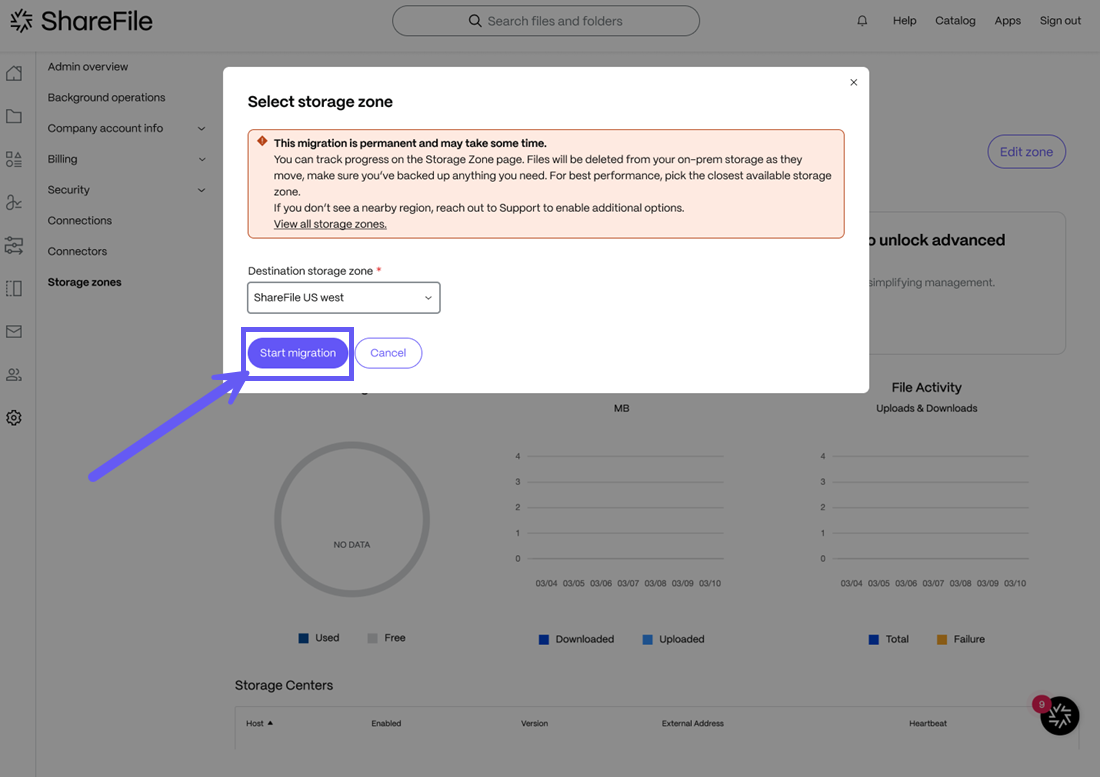
A success message is displayed as shown below and you can click on the Select Storage Zone button and you will be directed to select the destination storage zone where you want the data to be migrated.
-
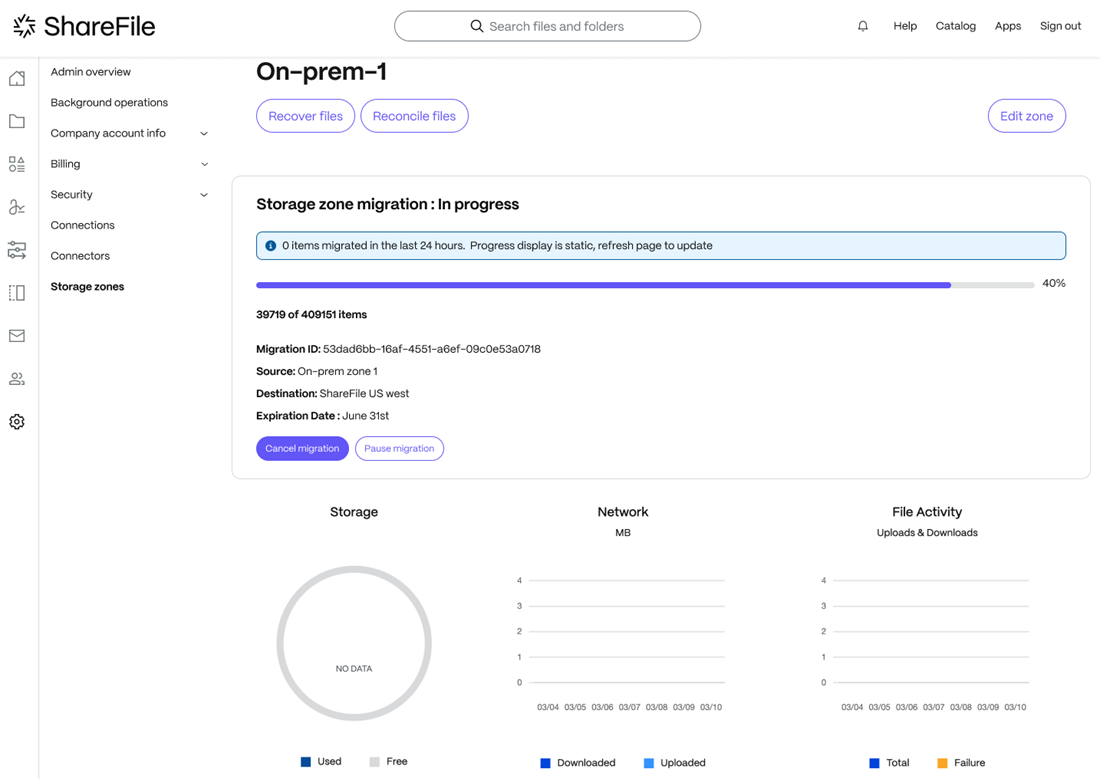
Once you have selected the ShareFile storage zone, click on the Start migration button and the data migration will begin as shown below.
-
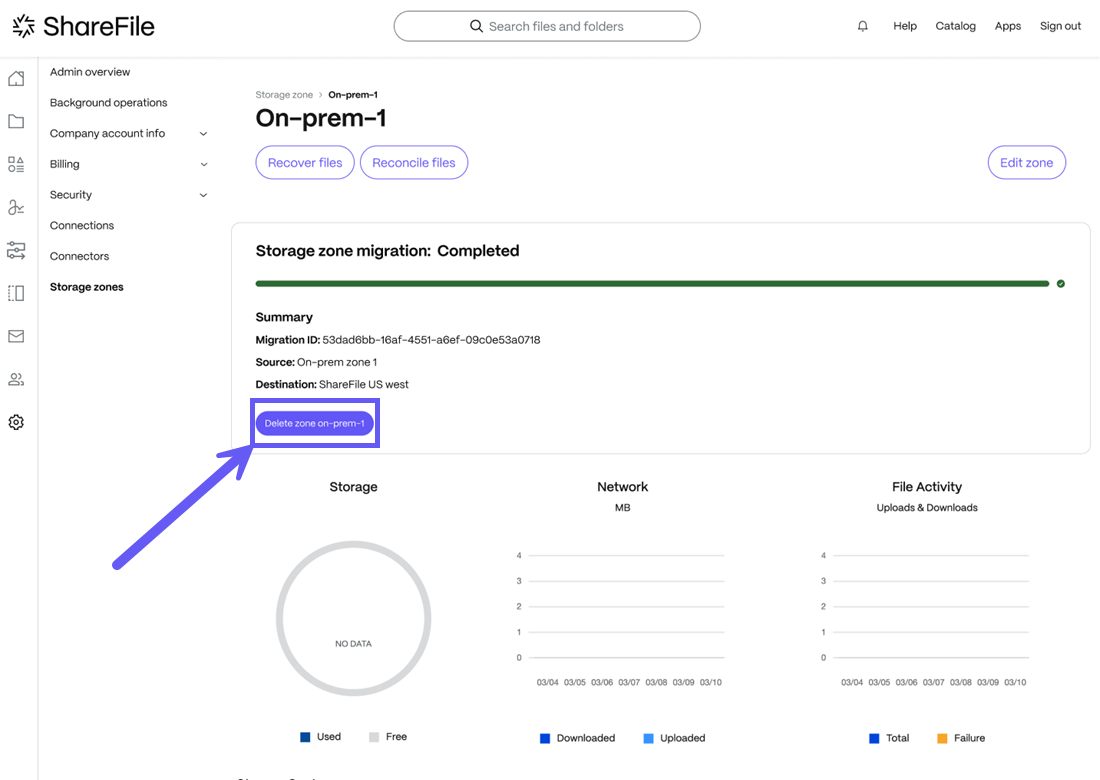
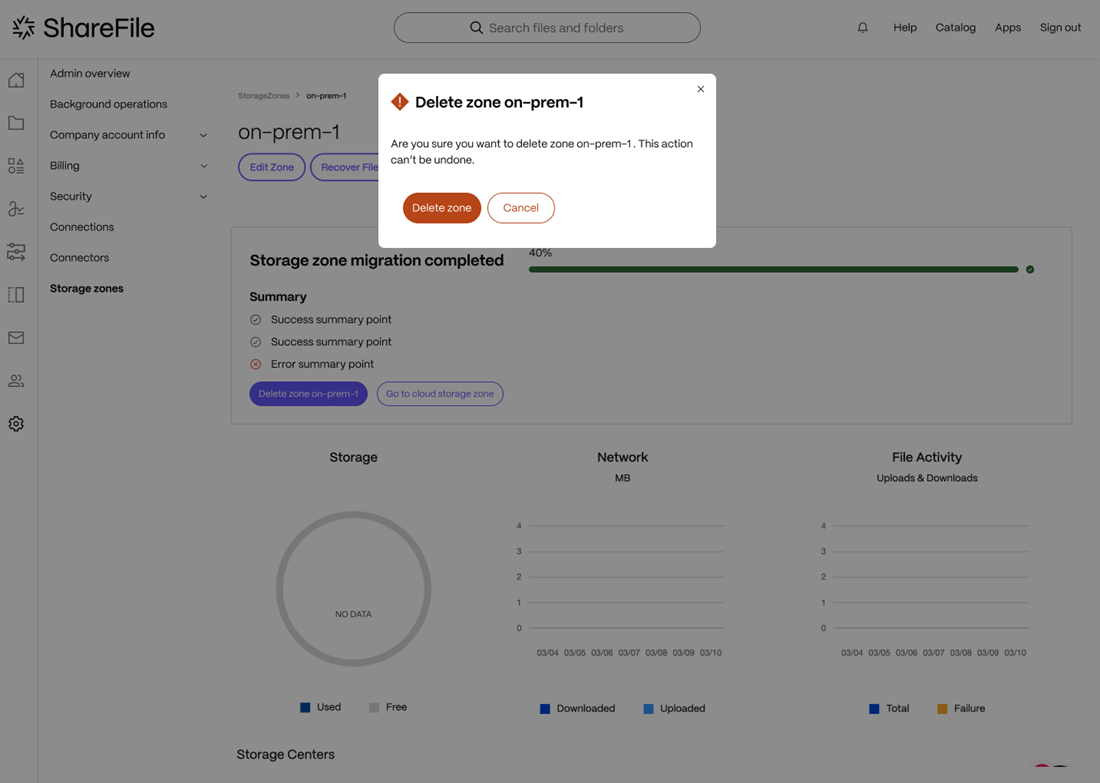
A success message is displayed upon completing the migration and you may choose to delete the existing Customer-managed storage zone as shown below:
Storage Zone Data Migration fails to clear eligibility checks
-
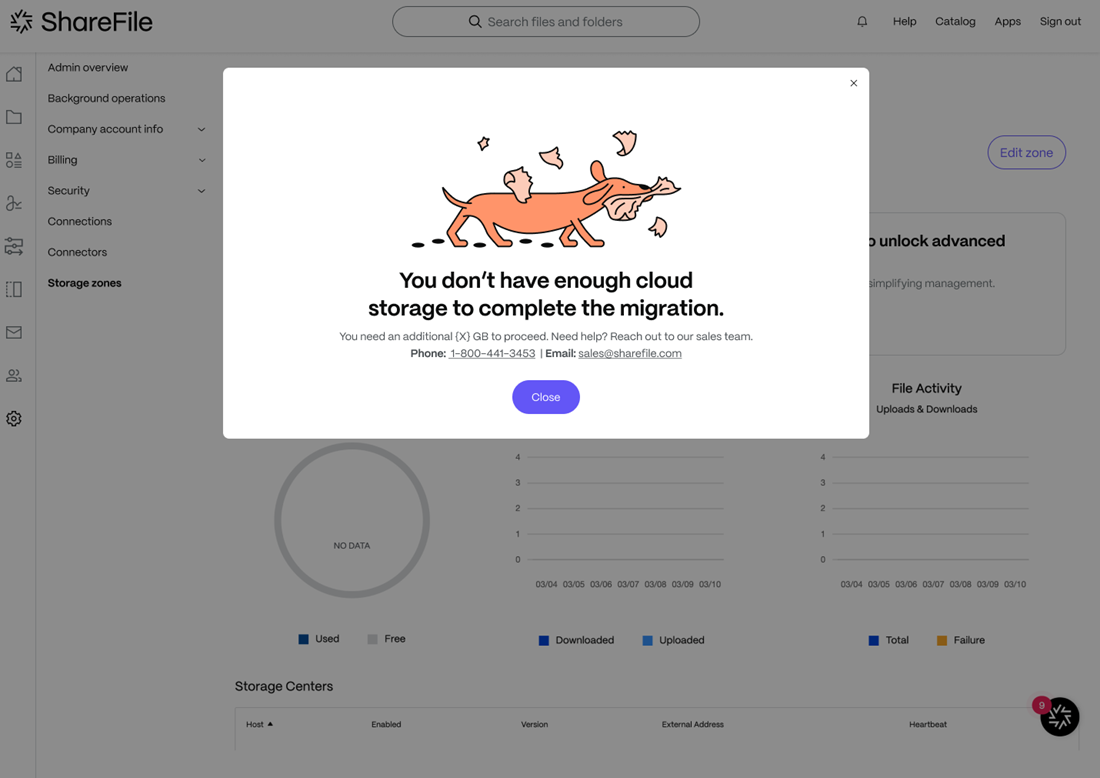
If the eligibility criteria is not met (Your account is not entitled to ShareFile cloud storage), then a warning message is displayed as shown below:
-
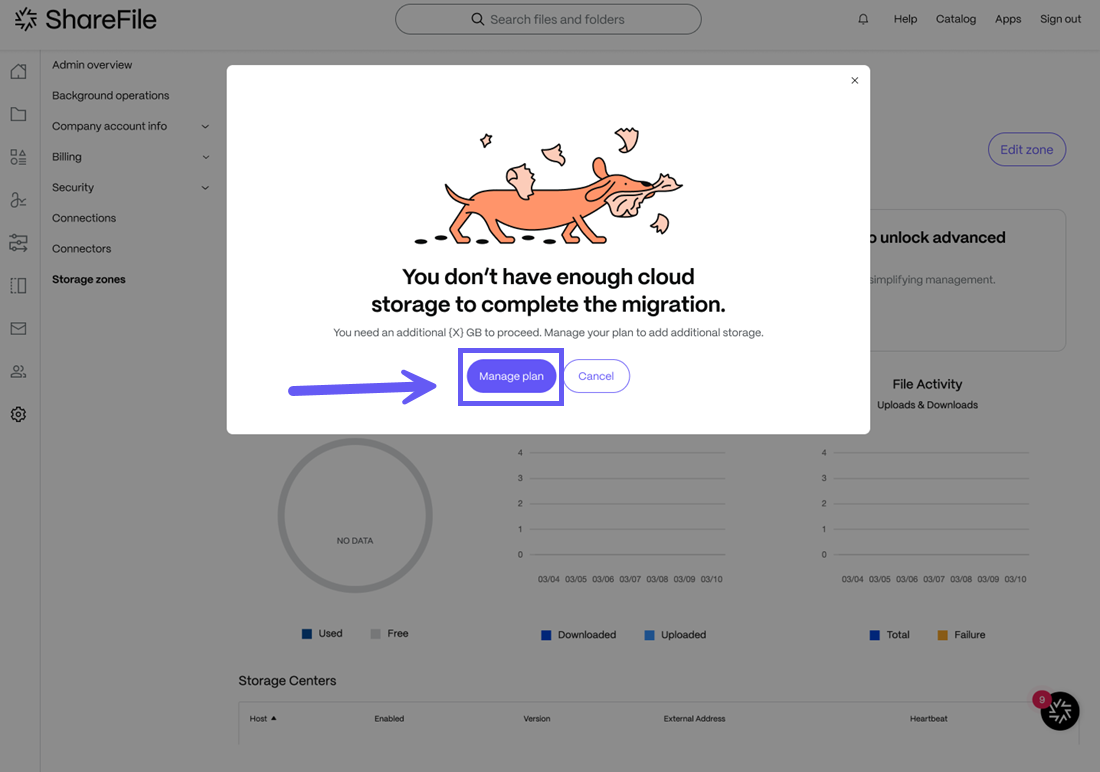
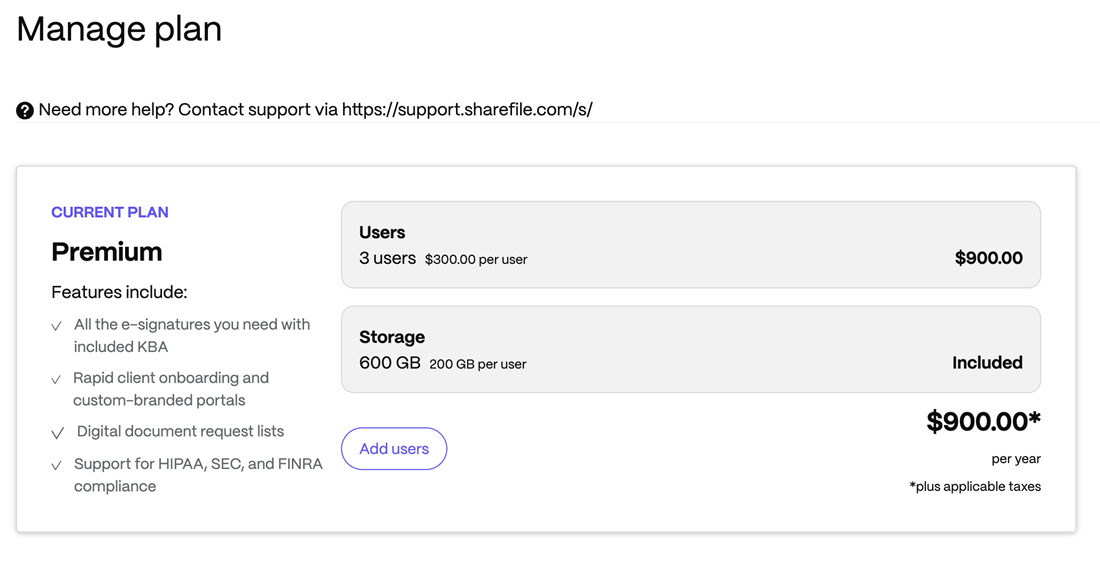
If you are on a SF Hybris billing type and you do not have sufficient cloud storage to migrate your data, the following warning message is displayed. You may click on the Manage plan button to purchase additional storage to complete the data migration process if you are a billing admin.
Storage Zone Data Migration is unsuccessful
-
ShareFile checks your eligibility for the data transfer as shown in the screen below.
-
A success message is displayed as shown below and you can click on the Select Storage Zone button and you will be directed to select the destination storage zone where you want the data to be migrated.
-
Once you have selected the ShareFile storage zone, click on the Start migration button and the data migration will begin as shown below.
-
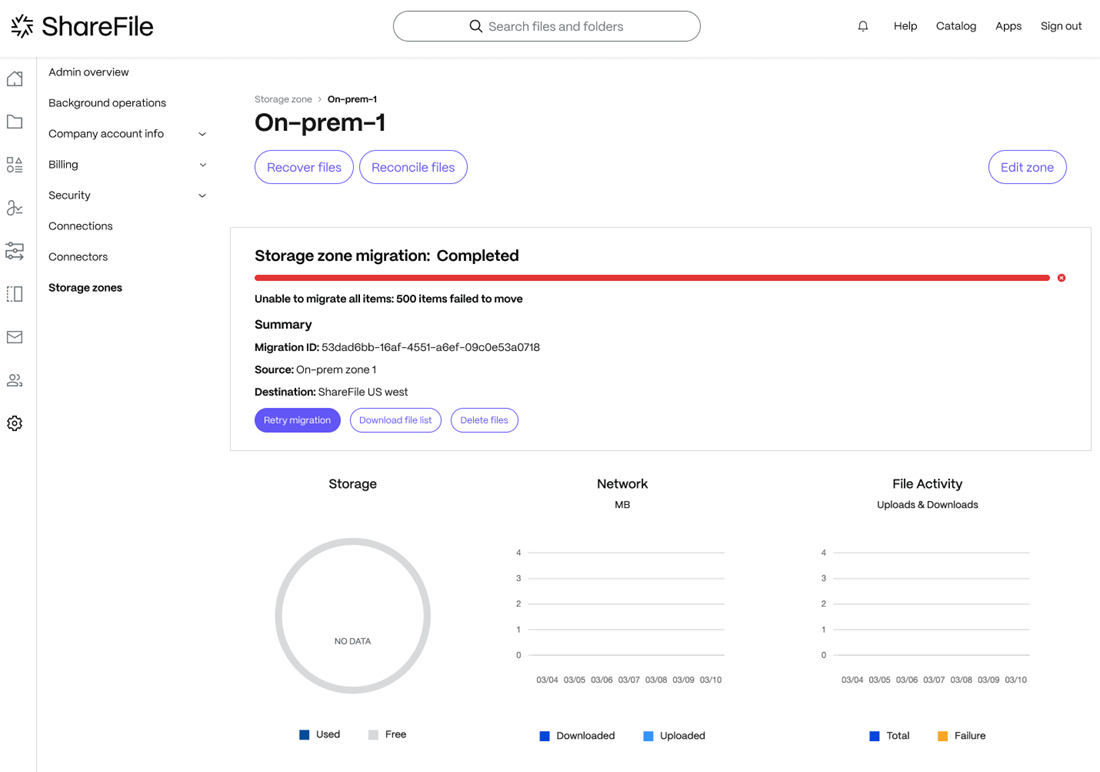
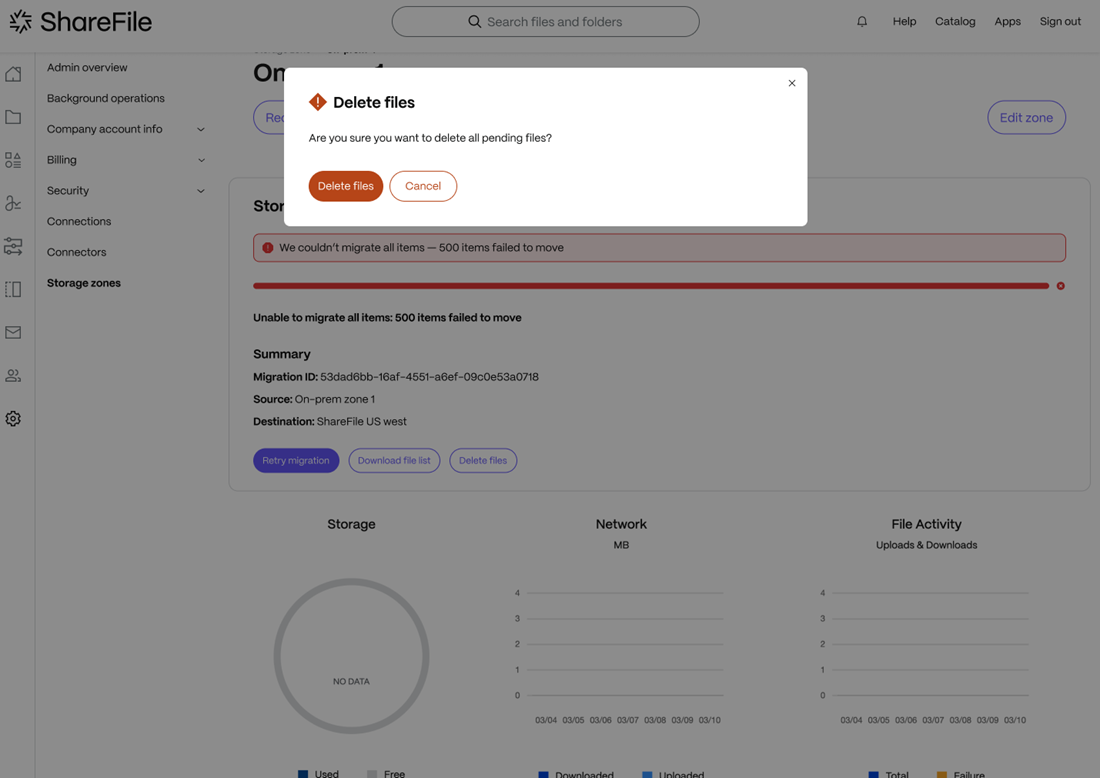
The data migration is completed but some files are not transferred due to some unknown reason. The following screen is displayed.
-
From the above screen, you may choose the Retry migration option to re-attempt the process. You can also choose to Download file list to get the list of files not migrated or you may select the Delete files option to delete the files which were not migrated as shown in the screen below:
Share
Share
This Preview product documentation is Citrix Confidential.
You agree to hold this documentation confidential pursuant to the terms of your Citrix Beta/Tech Preview Agreement.
The development, release and timing of any features or functionality described in the Preview documentation remains at our sole discretion and are subject to change without notice or consultation.
The documentation is for informational purposes only and is not a commitment, promise or legal obligation to deliver any material, code or functionality and should not be relied upon in making Citrix product purchase decisions.
If you do not agree, select I DO NOT AGREE to exit.