This content has been machine translated dynamically.
Dieser Inhalt ist eine maschinelle Übersetzung, die dynamisch erstellt wurde. (Haftungsausschluss)
Cet article a été traduit automatiquement de manière dynamique. (Clause de non responsabilité)
Este artículo lo ha traducido una máquina de forma dinámica. (Aviso legal)
此内容已经过机器动态翻译。 放弃
このコンテンツは動的に機械翻訳されています。免責事項
이 콘텐츠는 동적으로 기계 번역되었습니다. 책임 부인
Este texto foi traduzido automaticamente. (Aviso legal)
Questo contenuto è stato tradotto dinamicamente con traduzione automatica.(Esclusione di responsabilità))
This article has been machine translated.
Dieser Artikel wurde maschinell übersetzt. (Haftungsausschluss)
Ce article a été traduit automatiquement. (Clause de non responsabilité)
Este artículo ha sido traducido automáticamente. (Aviso legal)
この記事は機械翻訳されています.免責事項
이 기사는 기계 번역되었습니다.책임 부인
Este artigo foi traduzido automaticamente.(Aviso legal)
这篇文章已经过机器翻译.放弃
Questo articolo è stato tradotto automaticamente.(Esclusione di responsabilità))
Translation failed!
Encrypt emails
ShareFile Encrypted Email allows you to encrypt the body of your message to your recipient, along with any attachments, with industry-standard AES 256 bit encryption. This feature also includes the ability to compose and receive encrypted emails directly from the ShareFile web application.
Requirements
- This feature requires the latest version of the ShareFile Plugin for Microsoft Outlook. Download the latest version from the Apps page of your ShareFile account prior to using this feature.
- This feature must be enabled by an Administrator user on the account.
- The account must be either on an Advanced, Premium, or Industry Advantage plan to have access to this feature.
Limitations
- This feature is not supported for Archiving accounts.
- As a security best practice, Distribution Groups cannot be sent an Encrypted Email.
- You cannot use Encrypted Email to share a file located on a different storage zone.
- Send me a Copy of this email and Accesses per User are not supported for Encrypted Email messages.
- Due to security concerns, ShareFile does not offer a built-in method of printing encrypted email messages.
Enable Encrypted Email
To use the Encrypted Email feature, an Administrator user on the ShareFile account must enable it. If you are an Administrator user on the ShareFile account:
- Log in to the ShareFile web application.
- Got to Account settings > Advanced Preferences > Email Settings > Encrypted Email.
- Select Yes under Enable Encrypted Email.
- Save your changes.
Send an Encrypted Email via the Outlook Plugin
To encrypt an email message using the ShareFile Outlook Plugin, compose a new Outlook Email as you normally would.
Next, if you wish, you may attach any files to send to your recipients. Attach files by clicking the ShareFile Attach Files button in the ribbon, or you may attach files normally. Files attached normally will still be encrypted when they are automatically converted to ShareFile attachments.
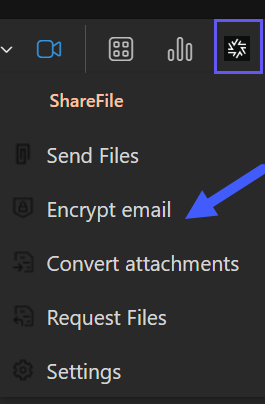
If you have attached your files using ShareFile Attach Files, the files will be displayed in the normal ShareFile banner. Files attached “normally” are converted on send. Your recipient will see the ShareFile banner, but you will not. Now you may Encrypt your message. To do so, click the Encrypt email option in the ribbon as shown below.
An encrypted email is denoted by a closed Lock icon. You may click Encrypt Email at any point when composing your email message. Please ensure that your Lock icon is closed prior to sending the email message. You can also verify that your message will be encrypted upon sending by a change to the Send button. It will now read Send Secure. Now that your email has been encrypted, click the Send Secure button. The email message will pause in the Outbox while the attachments are uploaded and the message is encrypted. Do not force the message to send from the Outbox, as this can create an error for your recipient.
Encrypted Email Options
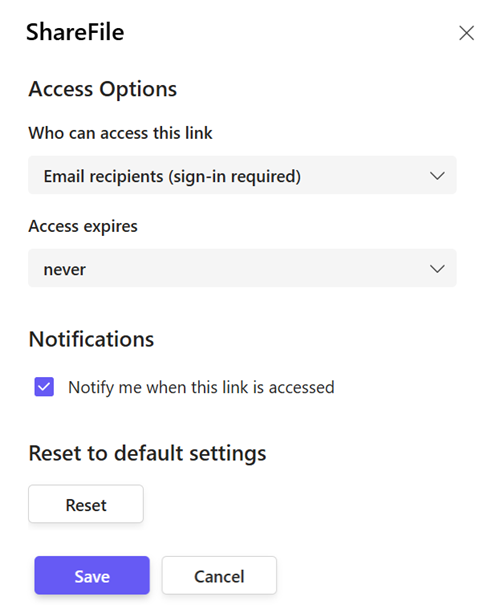
To change the settings of your Encrypted Email feature, click the Encrypt from the Options banner in Outlook:

Set permissions on the item and choose how recipients can interact with the message.
Encrypted Email Options for Individual Email
You can customize these settings for an individual email by clicking the dropdown menu beside Encrypt Email in your Outlook ribbon, and selecting Use Custom Settings.
Once you have customized your settings, click OK. The current email will be encrypted using the settings you chose. These settings will apply to the current Encrypted Email only.
NOTE:
If you choose to encrypt the entire email using ShareFile for Outlook after you have already attached files using ShareFile for Outlook, the link options (notification, access settings, file/link expiration, language) could change if you have different settings configured for Email Encryption.
The HTML banner in the email will update if the link expiration date but the other settings will need to be viewed under the Custom Settings.
Encrypted Email Receipt Notification
If you have chosen to be notified when your encrypted email has been viewed by your recipient, you will receive an automated email notification once it has been read.
How Do I Know My Email Was Encrypted?
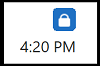
You can view your encrypted email in the Sent Messages folder of Microsoft Outlook. An encrypted email sent by ShareFile is denoted by a ShareFile and Lock icon beside the timestamp, as shown below.
When viewing the body of your Sent Message in Outlook, you will see a green line and the Encrypted icon in the message header, along with the text “You sent a secure message using ShareFile.”
Conversely, a recipient will see the above indicators when receiving an Encrypted Email, but without the Revoke Access button. The indicators described above will only appear to Microsoft Outlook users both sending and receiving Encrypted Email messages.
Send Encrypted Email From the Inbox
You can compose an Encrypted message from the ShareFile web app Inbox. When Encrypted Email is enabled on your account, any message created using the Compose button will automatically be encrypted.
- Navigate to your Inbox.
- Click the Compose button.
- Compose your message.
- Attach files as needed.
- Click Send.
- The message will pause while it is encrypted. Please do not navigate away from this page until you receive confirmation that your message was sent successfully.
After an Encrypted Message Has Been Sent
You can view encrypted emails you have sent from the Sent Messages section of your Inbox. Encrypted Emails are denoted in your Sent Messages by the presence of the Lock icon to the right of the email Expiration column. To view the message, click on its Subject line. To Expire a Link or Edit Message Options, click the checkbox to the left of the email and select the appropriate option.
Receive an Encrypted Email
When the recipient receives an email that has been encrypted via the ShareFile plugin, the message will be contained in a secure banner that includes a link to the encrypted message, as shown below.
If you were sent an Encrypted Email from a sender that is also a user on your ShareFile account (i.e., your Subdomains are the same), the message will automatically be decrypted when viewed in Microsoft Outlook, assuming you have the latest version of the Outlook plugin.
To view the email, click the View Encrypted Message button.
If the sender required that you submit your name and email before accessing the encrypted email, or required that you log in to your ShareFile account, you must do so now. The secure message will be displayed in the recipients default browser, where he or she can view the contents of the email message, download attachments and respond.
Reply to an Encrypted Email
Users will always be prompted to sign in for responding. Use the fields at the bottom of the message to send an encrypted reply. You can also attach files to your response.
Note:
New users to ShareFile must activate their account before they can reply to Encrypted Email messages. Please activate your account or reset your password to continue.
Enter your message and attachments and click the Send button. If you attached files, they will be uploaded prior to sending. Please do not close your browser during the upload process. The original sender will receive your response as an Encrypted Email message.
Revoke Access to an Encrypted Email
To revoke a recipient’s access to your Encrypted Email message, navigate to the Sent Messages folder of Microsoft Outlook. Click the Revoke Access option in the top right corner of your message. You must confirm the revoke action. Your recipient will no longer be able to access the encrypted email, including any message content or file attachments. You may also revoke access from the Sent Messages section of the ShareFile web app.
File Retention Policy and Encrypted Email Expiration
Currently, the account-wide File Retention Policy also applies to Encrypted Email messages and attachments. If your account currently utilizes a file retention policy, that setting will override the Encrypted Email expiration setting chosen when creating your encrypted message.
In order to retain access to messages and their attachments indefinitely, please update the retention policy of your Personal Folders directory accordingly. Note: Updating the account-wide retention policy is not retroactive - current users on the account must update their own policy.
Share
Share
In this article
- Requirements
- Limitations
- Enable Encrypted Email
- Send an Encrypted Email via the Outlook Plugin
- Encrypted Email Options
- Encrypted Email Options for Individual Email
- Encrypted Email Receipt Notification
- Send Encrypted Email From the Inbox
- After an Encrypted Message Has Been Sent
- Receive an Encrypted Email
- Reply to an Encrypted Email
- Revoke Access to an Encrypted Email
- File Retention Policy and Encrypted Email Expiration
This Preview product documentation is Citrix Confidential.
You agree to hold this documentation confidential pursuant to the terms of your Citrix Beta/Tech Preview Agreement.
The development, release and timing of any features or functionality described in the Preview documentation remains at our sole discretion and are subject to change without notice or consultation.
The documentation is for informational purposes only and is not a commitment, promise or legal obligation to deliver any material, code or functionality and should not be relied upon in making Citrix product purchase decisions.
If you do not agree, select I DO NOT AGREE to exit.