This content has been machine translated dynamically.
Dieser Inhalt ist eine maschinelle Übersetzung, die dynamisch erstellt wurde. (Haftungsausschluss)
Cet article a été traduit automatiquement de manière dynamique. (Clause de non responsabilité)
Este artículo lo ha traducido una máquina de forma dinámica. (Aviso legal)
此内容已经过机器动态翻译。 放弃
このコンテンツは動的に機械翻訳されています。免責事項
이 콘텐츠는 동적으로 기계 번역되었습니다. 책임 부인
Este texto foi traduzido automaticamente. (Aviso legal)
Questo contenuto è stato tradotto dinamicamente con traduzione automatica.(Esclusione di responsabilità))
This article has been machine translated.
Dieser Artikel wurde maschinell übersetzt. (Haftungsausschluss)
Ce article a été traduit automatiquement. (Clause de non responsabilité)
Este artículo ha sido traducido automáticamente. (Aviso legal)
この記事は機械翻訳されています.免責事項
이 기사는 기계 번역되었습니다.책임 부인
Este artigo foi traduzido automaticamente.(Aviso legal)
这篇文章已经过机器翻译.放弃
Questo articolo è stato tradotto automaticamente.(Esclusione di responsabilità))
Translation failed!
ShareFile Data Migration Tool
Use the ShareFile Data Migration tool to move large amounts of data from a local source to your ShareFile account. This guide walks you through your first migration.
- Prerequisites
- Set up and configure the migration environment
- Authenticate and connect
- Starting a migration
- Migrate folders with permissions
- Schedule and monitor migration jobs
- Ensure data integrity and completeness post-migration
- Best practices
- Running into issues?
Prerequisites
Before you begin using ShareFile’s migration tool, make sure you have the following prerequisites in place:
- System Requirements: Make sure your machine has .NET Framework 4.6.2 or later. If not, the migration tool will install it automatically.
- Storage Space: Make sure that you have enough storage space on the server or computer where your data currently resides.
- Permissions and Credentials: Make sure that you have the necessary permissions and credentials for both the source and destination (ShareFile) locations.
Set up and configure the migration environment
To begin, download the ShareFile Migration Tool (SFMT) installation file. Once downloaded, run the installation file to set up the tool. If you do not have .NET Framework 4.6.2 or later installed on your machine, it will be installed automatically. For best results, install the migration tool on the server or computer where your data currently resides.
Note:
The installation will require you to be an administrator on the server or computer you are on.
Authenticate and connect
After installation, launch the migration tool and sign in to your ShareFile account. The tool supports automatic sign-in, and your sign-in details are encrypted and stored securely.
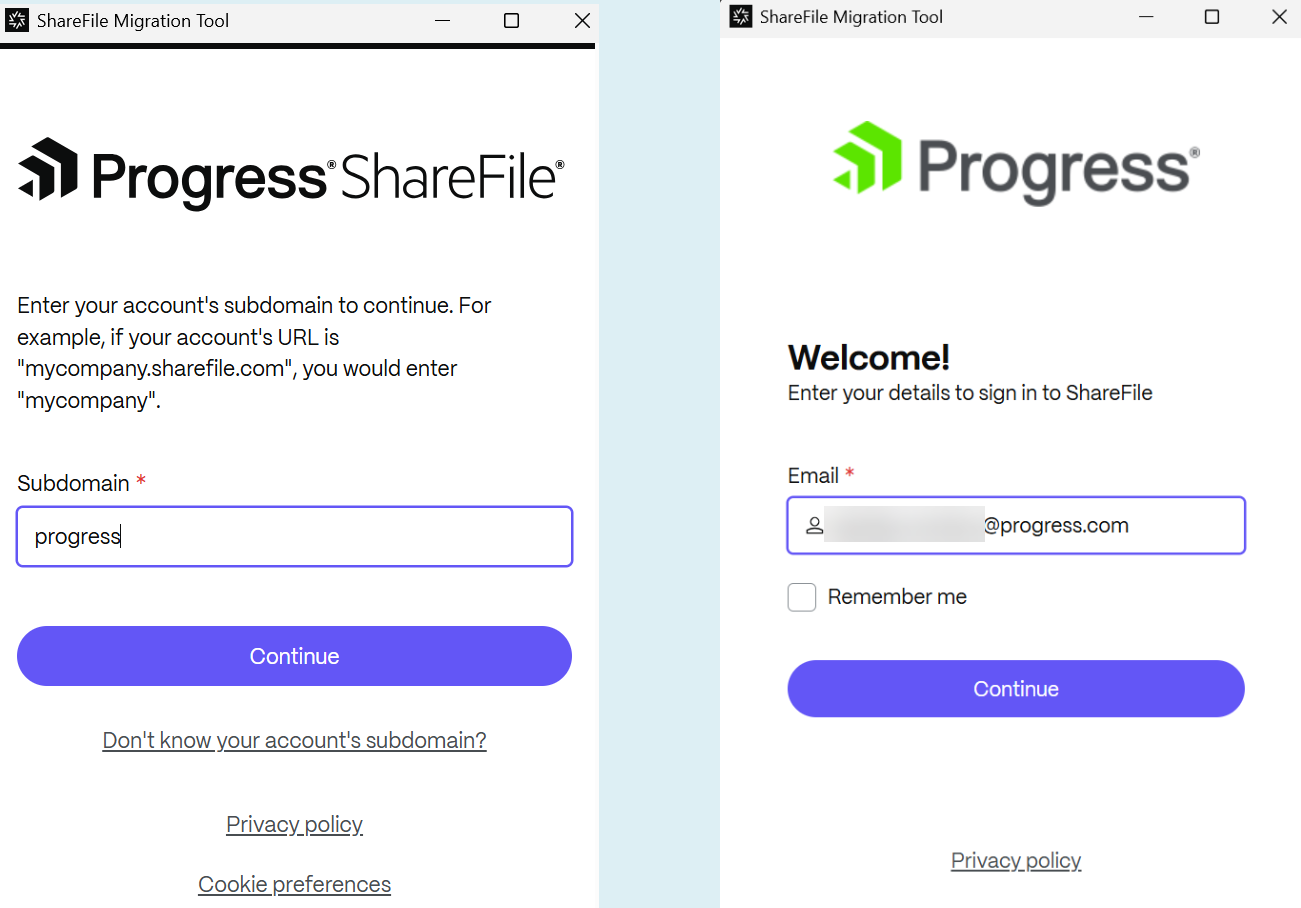
Notes:
- Enter your subdomain. For example, if your full URL is acme.sharefile.com, just put in acme.
- Use your company login (SSO) if one is available. If not, enter your ShareFile’s email address and password. If enabled, leverage complete two-factor authenticator.
Starting a migration
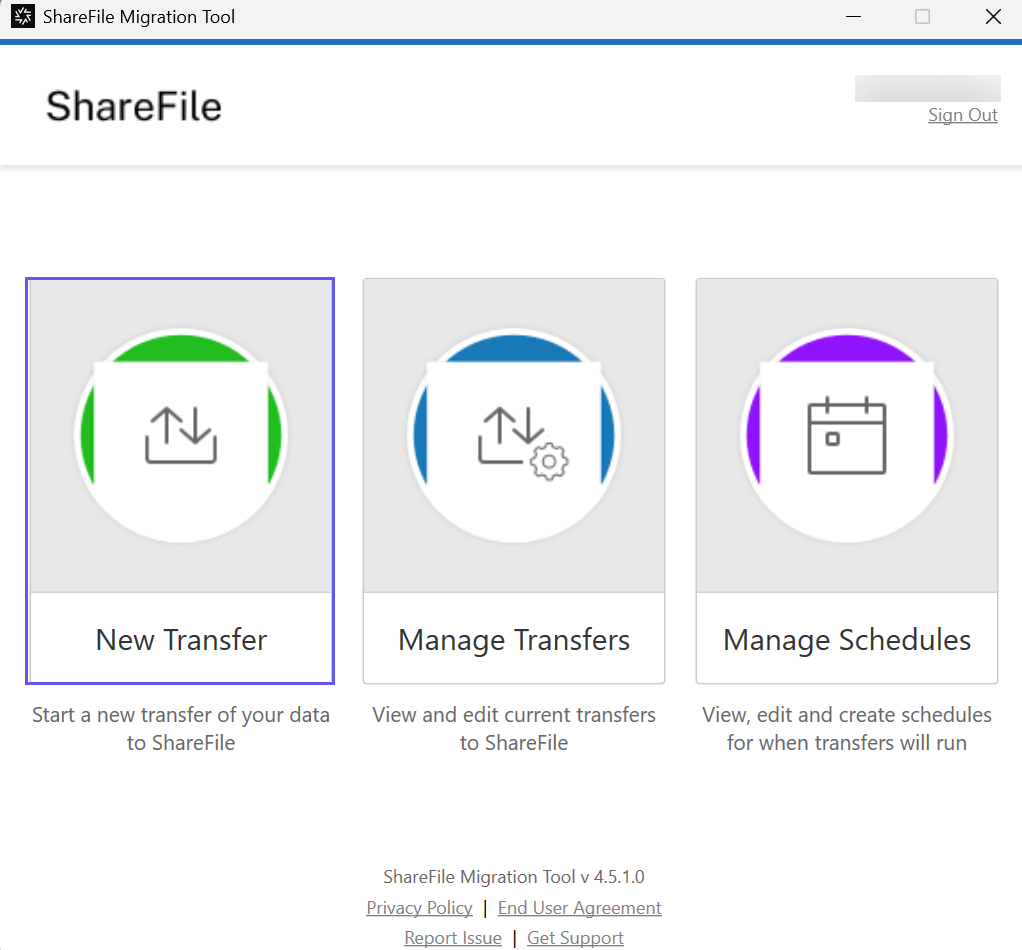
On the home screen, select the New Transfer option.
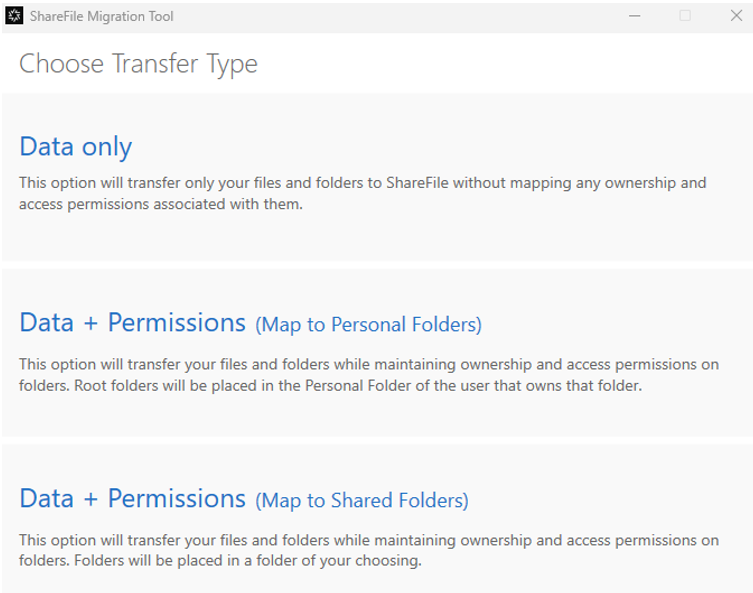
You have three options to choose from: Data Only, Data + Permissions (Map to Personal Folders) and Data + Permissions (Map to Shared Folders). The last two options require you to access your organizer’s Active Directory to help match permissions to the folders they have access to and match them in ShareFile.
Let’s start with Data Only as it is the most direct way to move data to ShareFile. Simply select the folder you want to move to ShareFile from the Browse button. Then choose where you would like to place it in your ShareFile account. You can choose either your Personal Folder or Shared Folders.
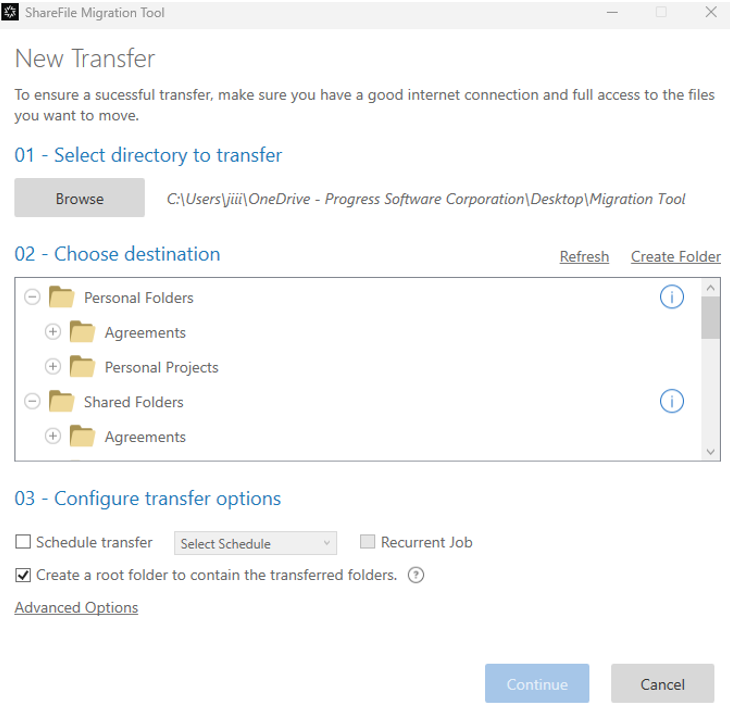
Next, you can set a schedule to transfer the data. Use this option if the folder contains a large amount of data and you want to send data after hours or on slow parts of the day where data transferring may work best. You can set the Recurrent Job option which will pick up any newly added files to the folder during the scheduled job times. Choose the drop-down menu and select the Create New Schedule option to make your schedule.
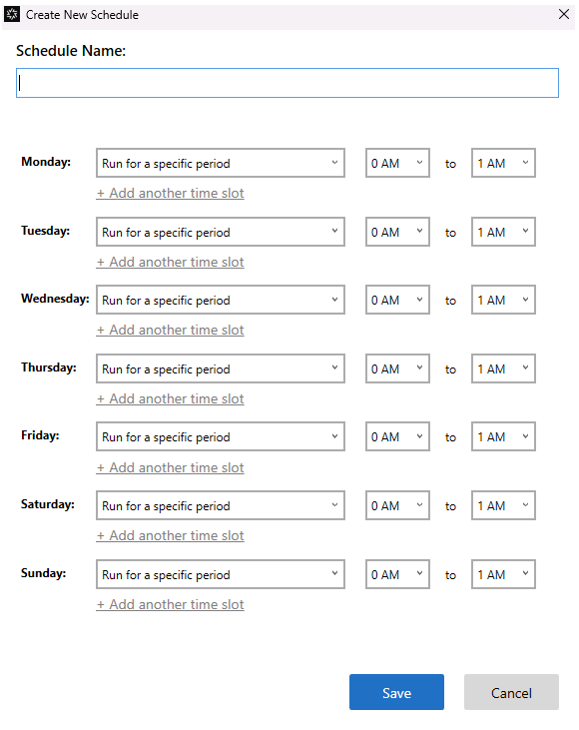
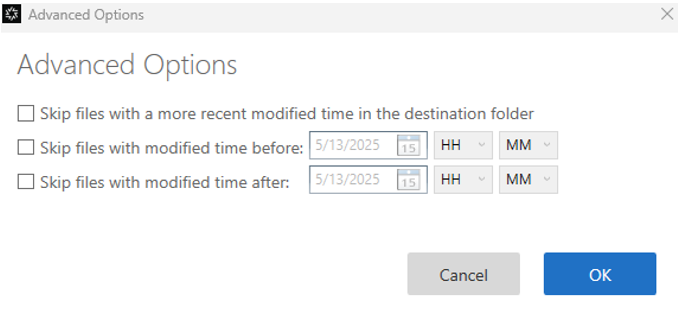
The last few options include:
-
Create a root Folder to contain the transferred folders – this creates a new top/root level folder for your transferred data
-
Advanced option – Here, you can tell the application to skip certain files based on their modified date. This is helpful when you are looking for only data modified before or after a specific date.
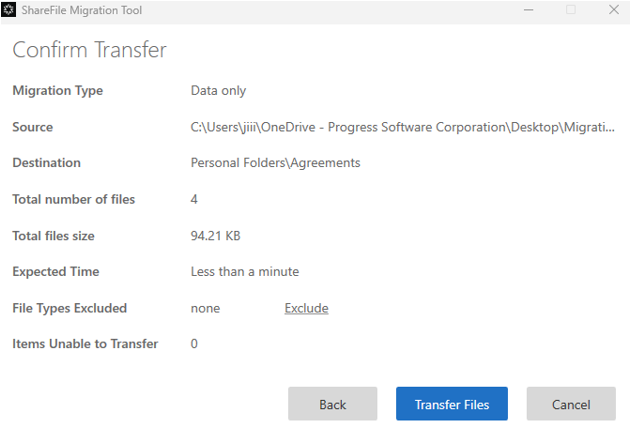
After you select Continue, the tool shows migration statistics and an additional option to Exclude certain file types. Choose the Transfer Files button to kick off the migration.
The transfer view shows progress. You can exit and review transfers later from Manage Transfers on the home page.
Migrate folders with permissions
The tool can also match folder permissions based on Active Directory user access while you migrate data to ShareFile. You either have the option to do this for users’ Personal Folders and/or you can select a folder in ‘Shared Folders’ to bring in data that maintains ownership and access.
Choose the New Transfer option on the home screen and choose the option that suits you best. Make sure user accounts already exist in ShareFile so the tool can match Active Directory permissions. You can have multiple jobs and transfers occurring at the same time.
Data + permissions (Map to Personal Folders)
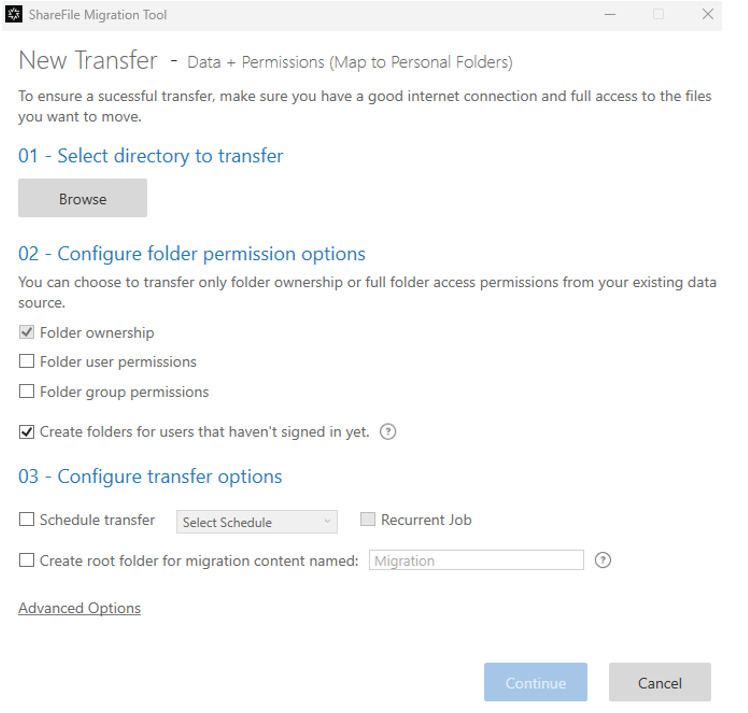
Begin by using the Browse button to select the data you need to migrate to ShareFile. Then choose which permission options you would like to migrate with it:
- Folder ownership – Just assigns the owner of the folder.
- Folder user permissions – Assigns users’ permissions (view, download, etc.).
- Folder group permissions – Assigns distribution groups permissions (same as above but for groups only).
- Create folders for users that haven’t signed in yet – Due to the user’s personal folder being made on the first login, you can check this so it enforces the creation of said folders.
Lastly, the last few options are described in the previous chapter above. These are for setting a schedule to run and if you want it to make a designated folder to consolidate the migrated data. You can also use the Advanced Option link to help skip files based on last modified date. Click Continue once ready to proceed.
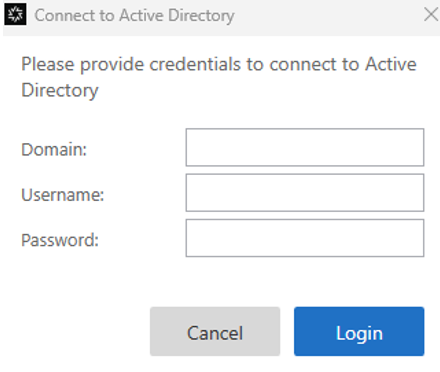
You will then be prompted to provide your Domain along with a Username and Password of a user that can access your Active Directory list of users. This should be a service account or an admin account which can read user’s permissions/rights.
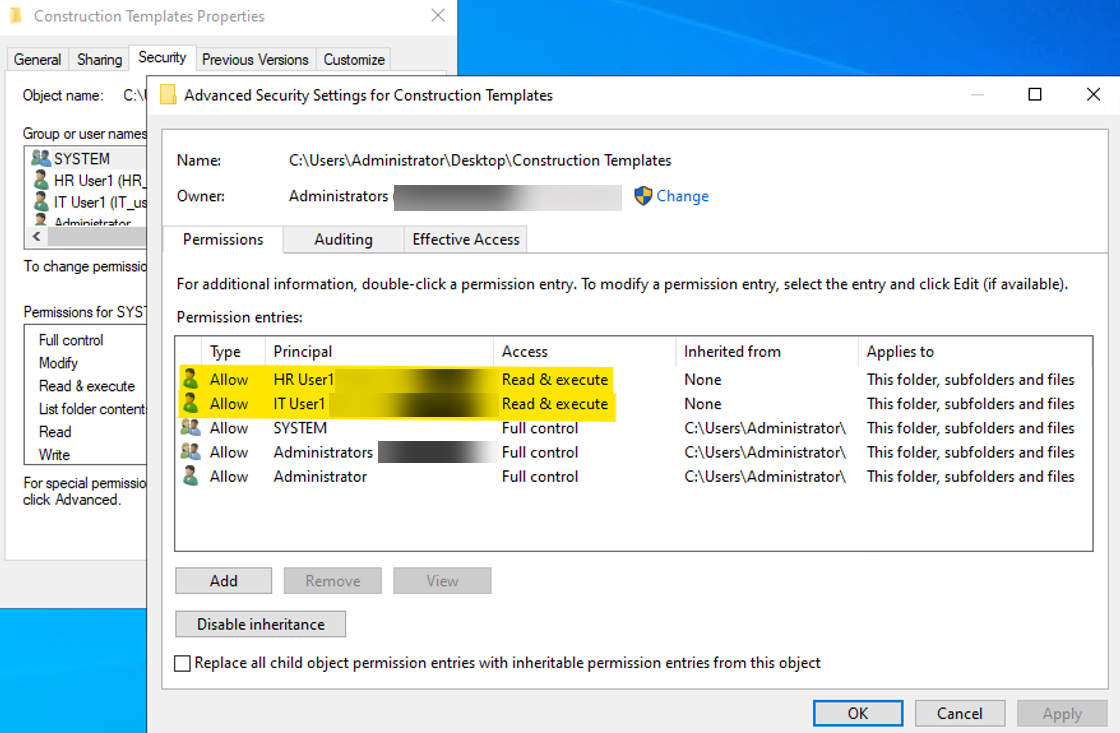
The tool then displays Active Directory users which can help match permissions on the folder you are migrating over. Once completed, you can continue to kick off the migration just like we did in the previous chapter.
Data + permissions (Map to Shared Folders)
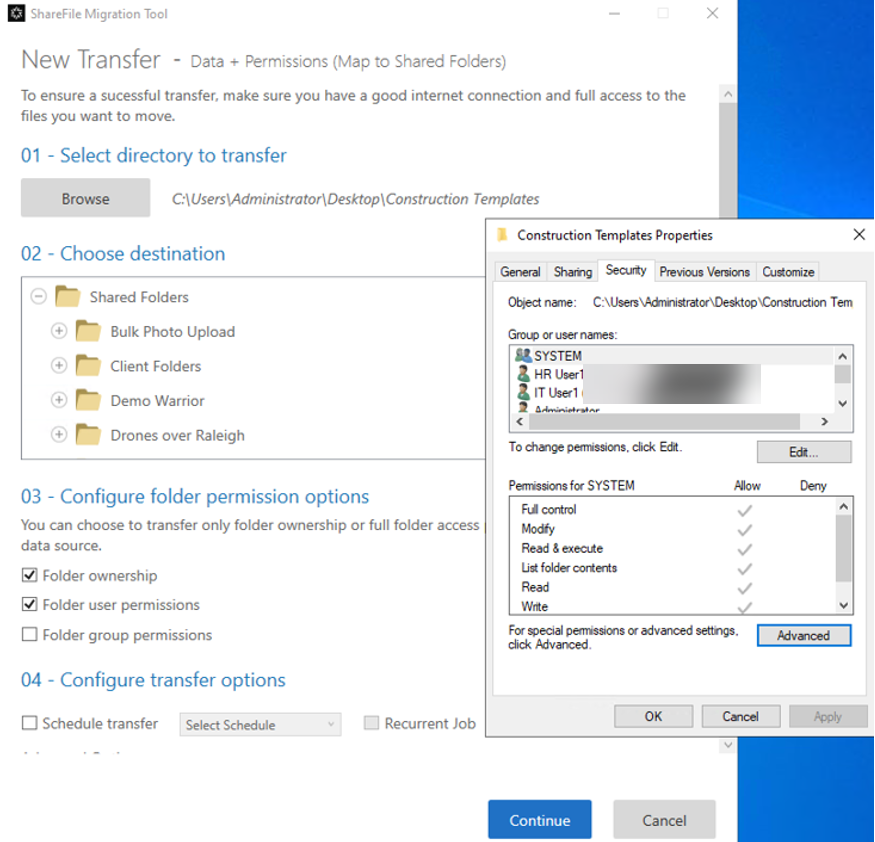
This option works like the previous option. The difference is that you select a destination in Shared folders instead of users’ personal folders.
Choose the destination folders which will include the directory you are transferring. Matching user access from Active Directory to users in ShareFile is the same from the above operation.
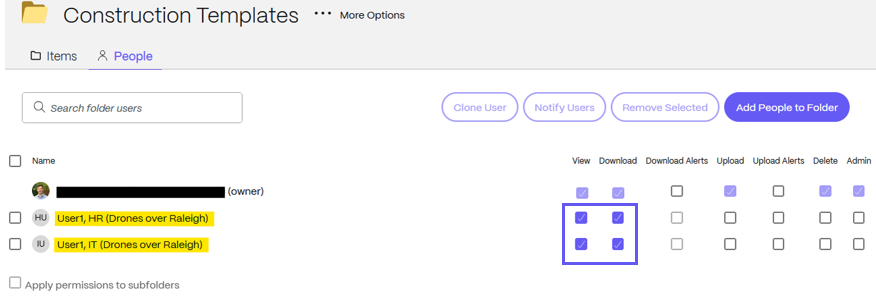
You can confirm that the permissions were applied by checking on the folder that you migrated to ShareFile and view the People section when in the folder.
Schedule and monitor migration jobs
The tool allows you to schedule migration jobs at convenient times to minimize disruption.
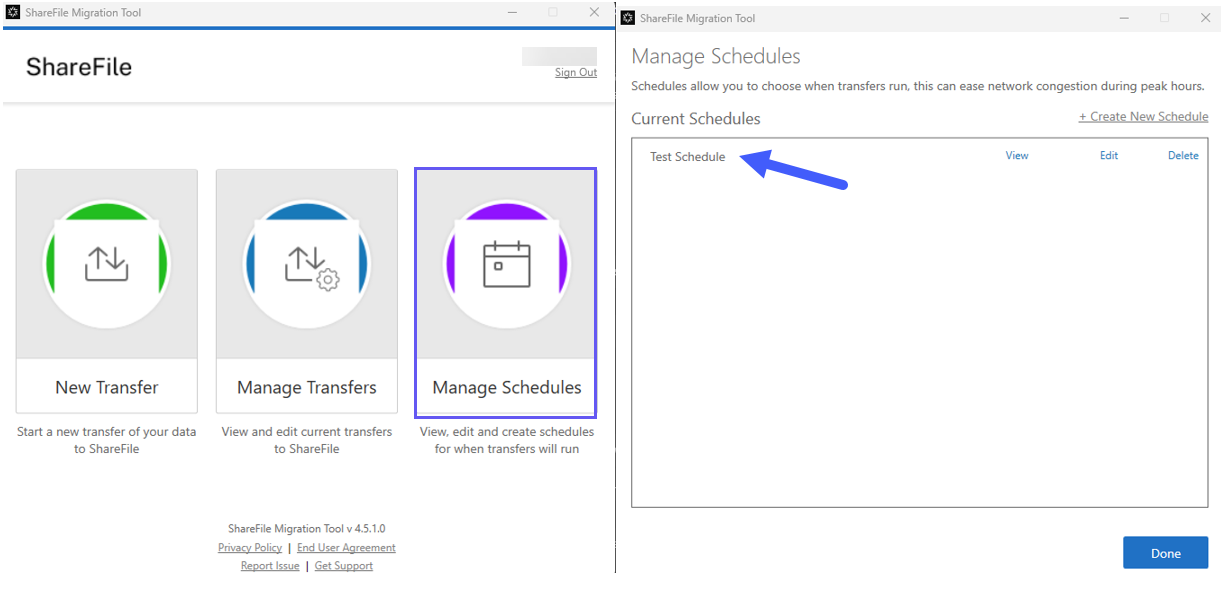
You can monitor the progress of your migration jobs and receive notifications upon completion.
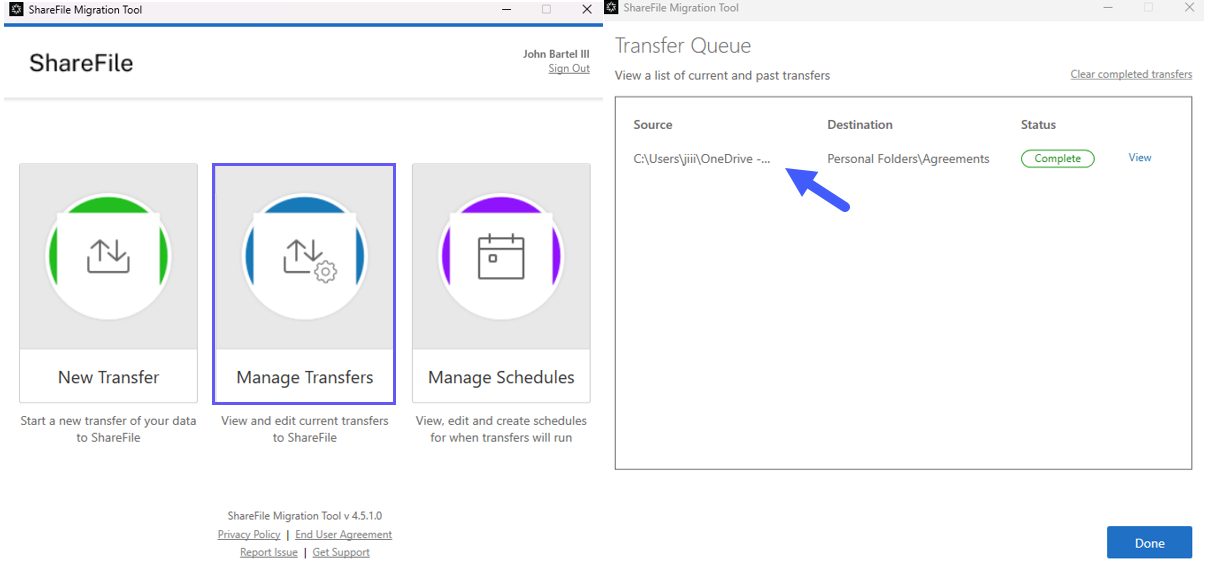
Here, you can also stop the Recurring Job sync if you selected that when setting up the schedule. You can review completed job stats as well in case you need to understand what occurred during a migration.
Notes:
Schedule migration jobs during off-peak hours to minimize disruption.
Regularly monitor the progress of your migration jobs.
Ensure data integrity and completeness post-migration
After the migration is complete, verify that all data has been transferred successfully. Check that the shared folders and permissions have been correctly mapped to the new accounts. Run a Storage Detail report to confirm the data size and file counts are correct. Preview individual files in ShareFile to ensure data integrity remained intact.
Notes:
Verify that all data has been transferred successfully.
Check that shared folders and permissions are correctly mapped to new accounts.
Best practices
To ensure a smooth and successful migration, consider the following best practices:
- Pre-Migration Assessment: Conduct a thorough pre-migration evaluation to identify high-priority files, large data sets, and sensitive data. This helps prevent errors and ensures that critical data is migrated without corruption or loss. Also review any stale data that may not need to be migrated to ShareFile. This can help reduce the time and amount of data you need to transfer.
- Run from a Stable, Trusted Environment: Install and run the tool on a machine that you trust has plenty of hardware resources, has a stable internet connection and can be kept on for the duration of the migration if you have a schedule setup or if the migration is uploading large amounts of data.
- Review our File Name Restrictions: Be cautious with special characters in file and folder names that ShareFile cannot support. Read more here.
- Post-Migration Validation: After the migration, validate the data integrity and completeness by running reports and checking permissions and access controls.
Running into issues?
If you encounter any issues along the way, you may reach out to Support and use the Chat with Us feature to reach out to a support agent. Please detail as much as possible so we can accurately assess the problem.
Share
Share
This Preview product documentation is Citrix Confidential.
You agree to hold this documentation confidential pursuant to the terms of your Citrix Beta/Tech Preview Agreement.
The development, release and timing of any features or functionality described in the Preview documentation remains at our sole discretion and are subject to change without notice or consultation.
The documentation is for informational purposes only and is not a commitment, promise or legal obligation to deliver any material, code or functionality and should not be relied upon in making Citrix product purchase decisions.
If you do not agree, select I DO NOT AGREE to exit.