This content has been machine translated dynamically.
Dieser Inhalt ist eine maschinelle Übersetzung, die dynamisch erstellt wurde. (Haftungsausschluss)
Cet article a été traduit automatiquement de manière dynamique. (Clause de non responsabilité)
Este artículo lo ha traducido una máquina de forma dinámica. (Aviso legal)
此内容已经过机器动态翻译。 放弃
このコンテンツは動的に機械翻訳されています。免責事項
이 콘텐츠는 동적으로 기계 번역되었습니다. 책임 부인
Este texto foi traduzido automaticamente. (Aviso legal)
Questo contenuto è stato tradotto dinamicamente con traduzione automatica.(Esclusione di responsabilità))
This article has been machine translated.
Dieser Artikel wurde maschinell übersetzt. (Haftungsausschluss)
Ce article a été traduit automatiquement. (Clause de non responsabilité)
Este artículo ha sido traducido automáticamente. (Aviso legal)
この記事は機械翻訳されています.免責事項
이 기사는 기계 번역되었습니다.책임 부인
Este artigo foi traduzido automaticamente.(Aviso legal)
这篇文章已经过机器翻译.放弃
Questo articolo è stato tradotto automaticamente.(Esclusione di responsabilità))
Translation failed!
Create client entities in bulk
Article applies to:
- ShareFile Employee users
ShareFile Admins and Employees can create multiple client entities and their primary contacts at once within the ShareFile Client Hub by uploading a populated data template. This workflow saves time when you need to set up multiple clients at the same time.
Prerequisites:
Employee user must have acess to the ShareFile client hub.
Employee user msut have the necessary permissions to create or manage clients.
A spreadsheet application (such as Microsoft Excel) to edit the downloadable template
To create bulk clients:
-
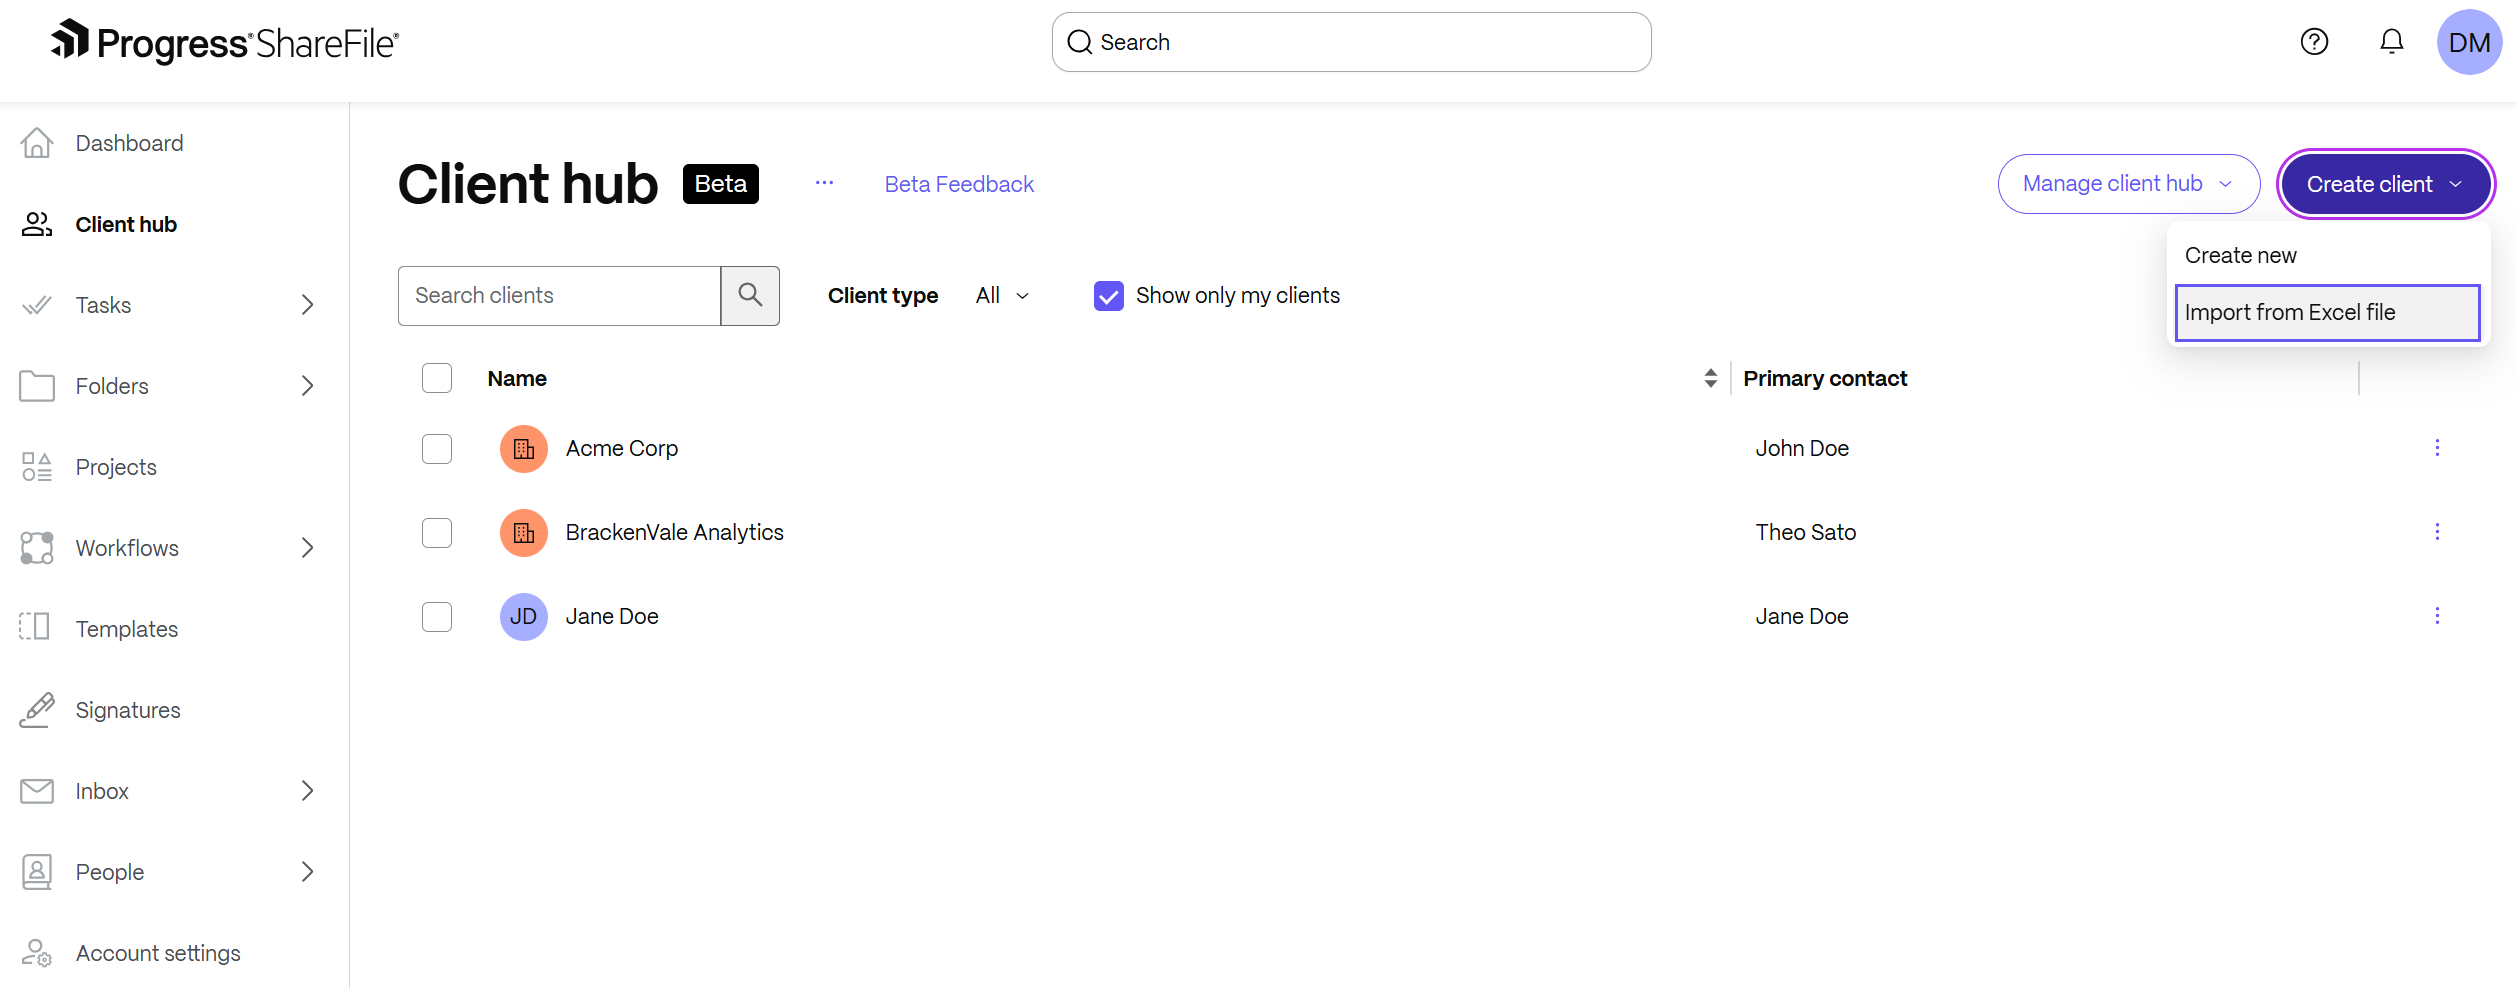
Navigate to the Client Hub: From the main ShareFile dashboard, select Client Hub from the left-hand navigation menu.
-
Initiate the import: Click the Create client button in the top right corner and select Import from Excel file from the dropdown menu.
-
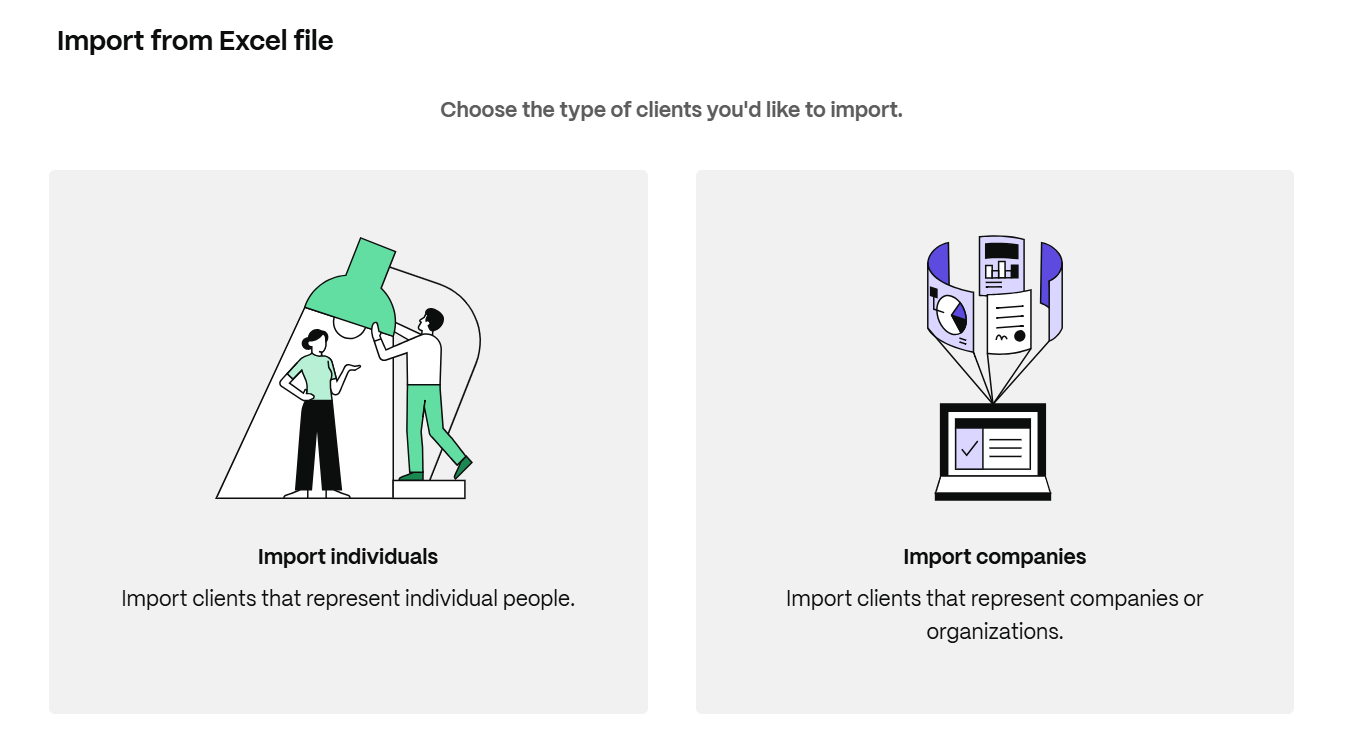
Choose the import type: Select whether you’re importing Individuals or Companies.
Note:
Use the provided templates (company-client-import-template.xlsx for companies, individual-client-import-template.xlsx for individuals) to ensure your data imports correctly. You can import up to 100 clients per file.
-
Prepare your data:
- Download the appropriate template and open it in Excel
- Fill in your client information using the template structure. Required columns typically include: Client Name (for Company type), Client Type (Individual or Company), Contact First/Last Name, and Contact Email
-
Upload the file: In the ShareFile interface, click Browse to select your file or drag and drop it into the designated area.

-
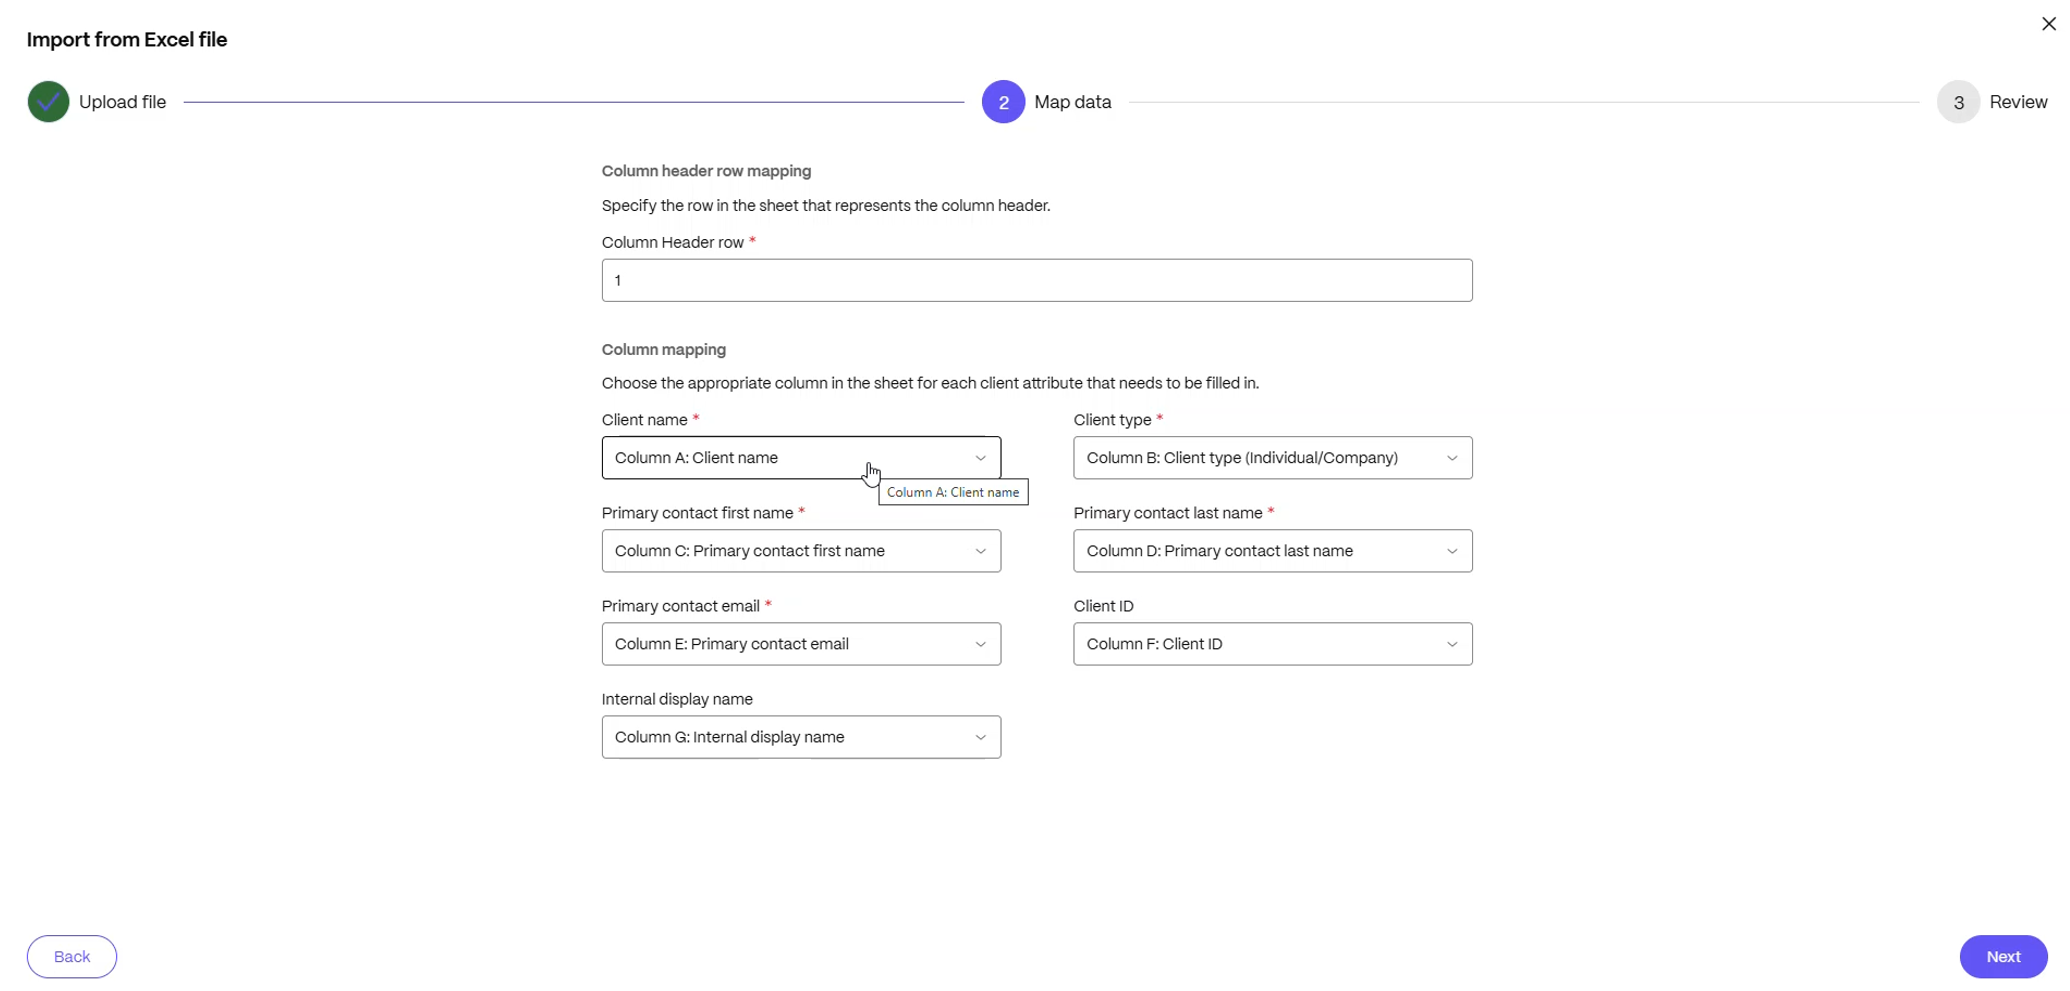
Map your data: Click Next to proceed to the mapping step.
- Column header row: Specify which row contains your headers (usually row 1)
- Column mapping: Ensure the ShareFile fields (such as Client name and Client type) match the correct columns from your Excel file
Note:
If you’re using the official ShareFile template, the mappings should align automatically.
-
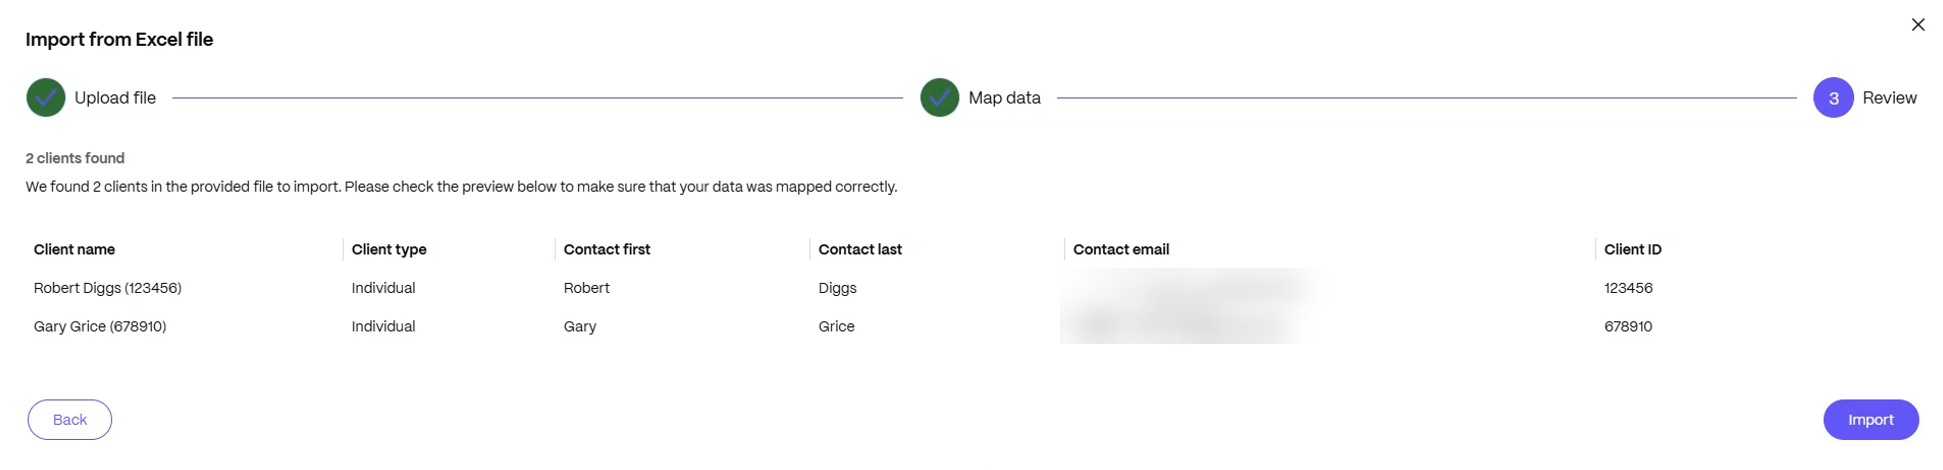
Review and import: Click Next to go to the review step.
- Verify that the client names, types, and contact details appear correctly in the preview
-
Click Import when everything looks accurate
-
Confirm success: A progress indicator appears while the import processes. Once complete, you’ll see a list of successfully imported clients.
- Click Close to return to the Client Hub
- Click View to open a specific client record

-
Configure your clients: Navigate to each newly created client to assign team members, set up Projects, Tax engagements, or connect files and folders.
Share
Share
In this article
This Preview product documentation is Citrix Confidential.
You agree to hold this documentation confidential pursuant to the terms of your Citrix Beta/Tech Preview Agreement.
The development, release and timing of any features or functionality described in the Preview documentation remains at our sole discretion and are subject to change without notice or consultation.
The documentation is for informational purposes only and is not a commitment, promise or legal obligation to deliver any material, code or functionality and should not be relied upon in making Citrix product purchase decisions.
If you do not agree, select I DO NOT AGREE to exit.