This content has been machine translated dynamically.
Dieser Inhalt ist eine maschinelle Übersetzung, die dynamisch erstellt wurde. (Haftungsausschluss)
Cet article a été traduit automatiquement de manière dynamique. (Clause de non responsabilité)
Este artículo lo ha traducido una máquina de forma dinámica. (Aviso legal)
此内容已经过机器动态翻译。 放弃
このコンテンツは動的に機械翻訳されています。免責事項
이 콘텐츠는 동적으로 기계 번역되었습니다. 책임 부인
Este texto foi traduzido automaticamente. (Aviso legal)
Questo contenuto è stato tradotto dinamicamente con traduzione automatica.(Esclusione di responsabilità))
This article has been machine translated.
Dieser Artikel wurde maschinell übersetzt. (Haftungsausschluss)
Ce article a été traduit automatiquement. (Clause de non responsabilité)
Este artículo ha sido traducido automáticamente. (Aviso legal)
この記事は機械翻訳されています.免責事項
이 기사는 기계 번역되었습니다.책임 부인
Este artigo foi traduzido automaticamente.(Aviso legal)
这篇文章已经过机器翻译.放弃
Questo articolo è stato tradotto automaticamente.(Esclusione di responsabilità))
Translation failed!
Projects
Projects is a feature for ShareFile Premium users to improve their client collaboration workflows.
ShareFile Projects is a space centered around document collaboration. Projects is offered both in internal ShareFile accounts and external user portals. Projects enable users to track and engage in client collaboration, such as Document requests, all in one place.
TIP:
For a list of FAQs for both ShareFile Projects and Document requests, see FAQ - Projects and Document Request.
Creating a Project
-
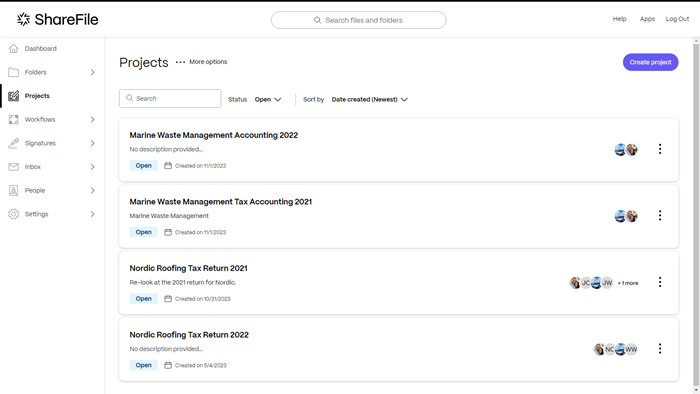
Navigate to Projects in the left side menu.
-
Select Projects.
-
Select Create project.
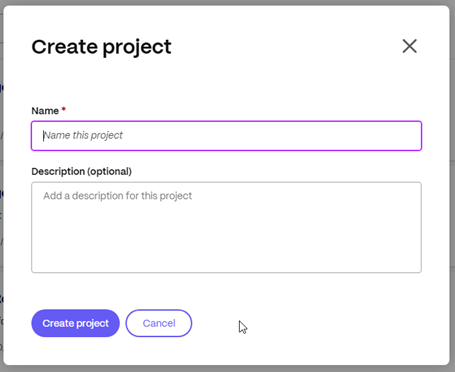
The create project pop-up displays.
-
Type in a name and optional description for the project. This can be edited later if necessary.
-
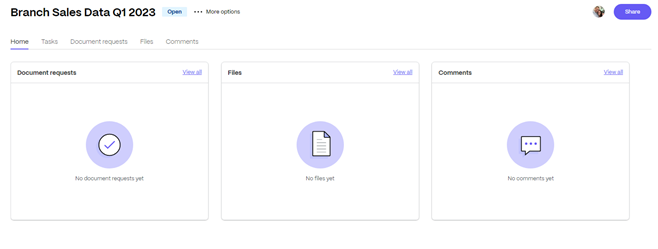
Select Create project. The new project dashboard displays.
Manage Project users
The following information explains the process of managing the users on a particular project.
Warning:
The role that can add additional Project Owners is the current Project Owner only. So prior to deleting a user who is the Project Owner, you must assign an additional Project Owner. If a new Project Owner is not assigned before removing the current Project Owner, a new Project Owner can not be added and the Project cannot be deleted.
Owner / Contributor Description
| Role | Description |
|---|---|
| Client Contact | Can only edit and delete their own content in the project unless the client is provided access with the ability to add other contributors within their organization. |
| Team member | Are counterparts in the project owners organization and can assist with anything in the project. They cannot delete the project owner or other team members from the project. |
| Owner | Can edit and delete anything in the project and has the ability to delete the projects they created. Project owners can also add team members from their organization to work on the project. |
| Custom Limited | Limits permission so they can only see the name of the project and its description. It also limits the permissions they can be granted to those available to a client user. |
| Custom | Assumes no permissions or role (client or employee) and lets a project owner choose only the permissions that a user should have. |
Inviting users
Project owners can invite users to a specific project they own and can provide those users default access roles or custom access.
The following instructions include the steps necessary to invite new users including both contributors and team members.
-
Select … More options then Manage project users. The Manage project users pop-up displays.
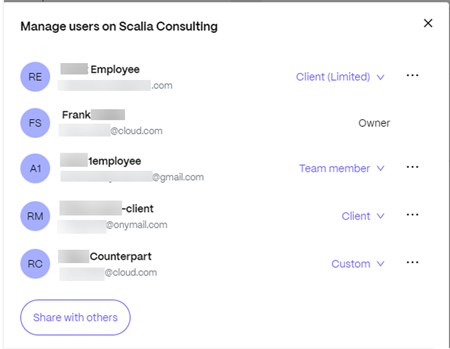
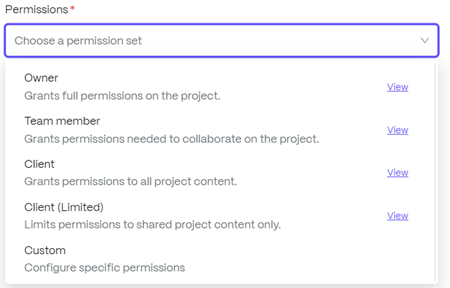
Project users can be an internal user (owner or team member, client, client limited or custom)
Note:
There are additional capabilities accessible now by the 3 dot menu to the right of a Project User.
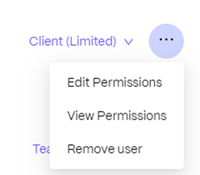
For more information, see Managing user permissions
-
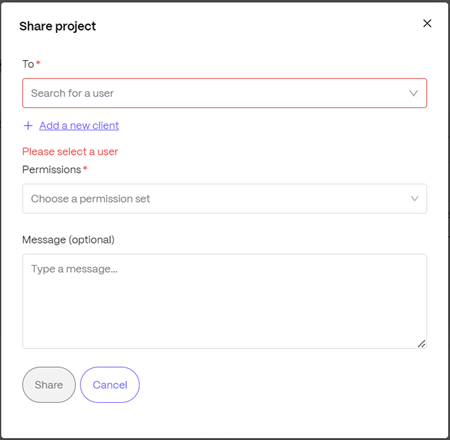
Select Share to add other users to the project.
-
Type the name of the user you want to add.
-
Choose the permission set based on the type of user you are inviting. For more information regarding permissions, see Managing user permissions.
-
Provide an optional message for the user.
-
Select Share.
Managing user permissions
View Permissions
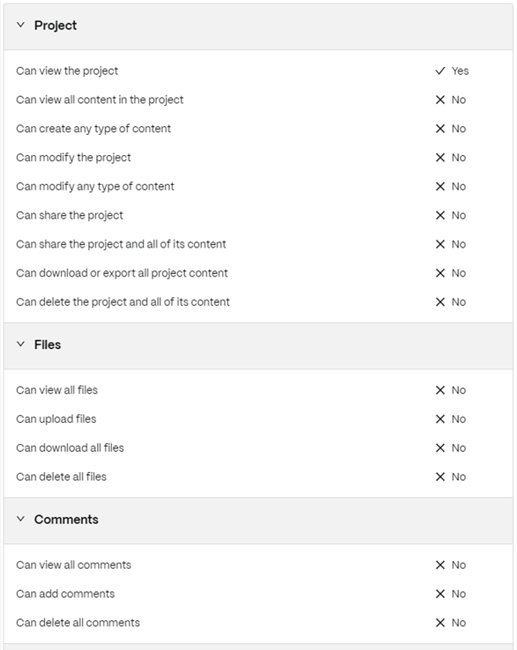
Select View Permissions to review what a particular user is able to do in the shared project.
Edit Permissions
Select Edit Permissions to make changes to what a particular user is able to do in the shared project.
This allows you as the Project owner the ability to customize each users access in the project.
Note:
Some permissions are automatically modified based on your selections. You can change those permissions as needed.
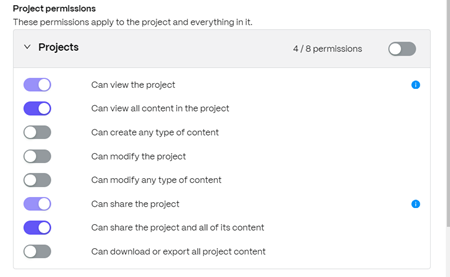
Project permissions
These permissions apply to the project and everything in it.
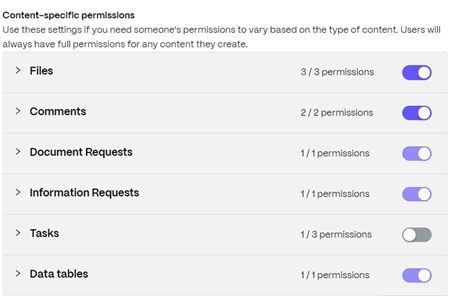
Content specific permissions
Use these settings if you need a user’s permissions to vary based on the type of content.
Note:
Users always have full permissions for any content they create.
Remove User
Select Remove User to remove a particular user from the project. You can add the user back by inviting them to the project again.
Tasks
Tasks allows you to organize and track back-office work related to a client project inside the project itself. For complete information on how to use this feature in Projects, see Tasks.
Document requests
Document requests is a request list tool to request and collect documents securely and digitally. For complete information on the process of using document requests to complete tasks on both the service provider side and the client side, see Document Requests.
Upload files
The following information explains the steps necessary to add files to a project.
Files such as .docx, .pdf, .jpg, .xlsx, and more, can be shared across the project with the invited users.
-
Select the Files tab in the Projects dashboard or select View all in the Files tile to access or add files.
-
Select Upload a file.
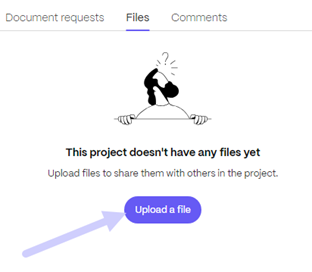
The file upload pop-up displays.
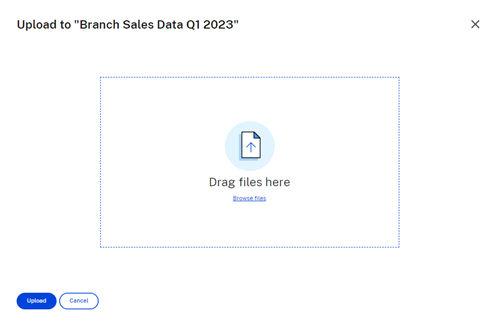
-
You can drag the file to the Drag files here section or select Browse files to navigate to the file to upload.
-
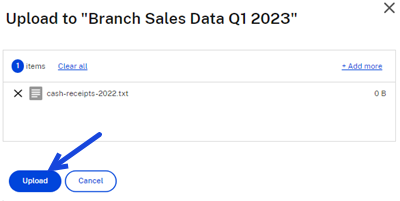
Select Upload. The upload window displays allowing you the option to add more items. Once you have selected the required files, select Upload to complete the process.
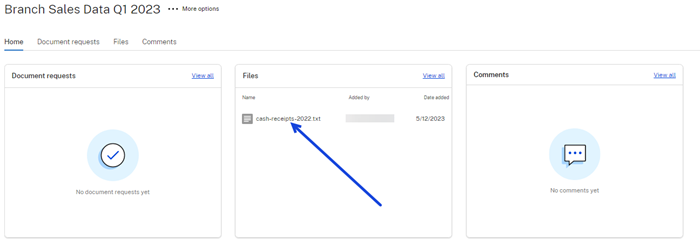
The file is available for assigned project users to review.
Add Description in Files and Folders Inside Projects
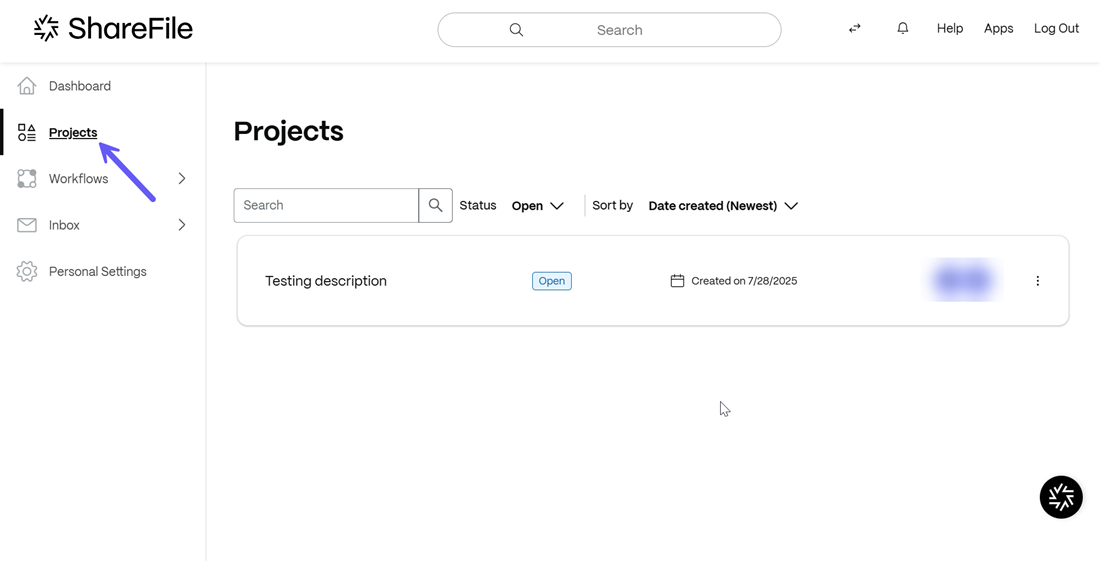
You can now add descriptions in files and folders inside ShareFile projects. To do so, login to your ShareFile account and from the dashboard, go to the Projects section and access the desired project.
From the selected project, go to the Files section and select any file or folder where you want to add the description as shown below:
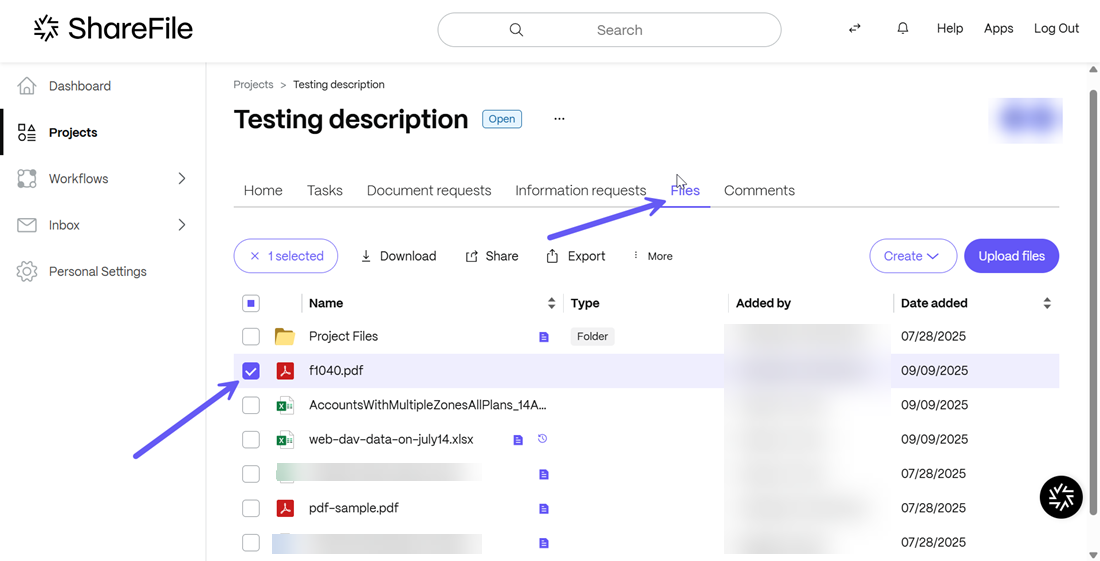
There are 2 ways to Add description to the file inside the project in ShareFile. You may choose any one of the following methods to add a description:
From The Context Bar
-
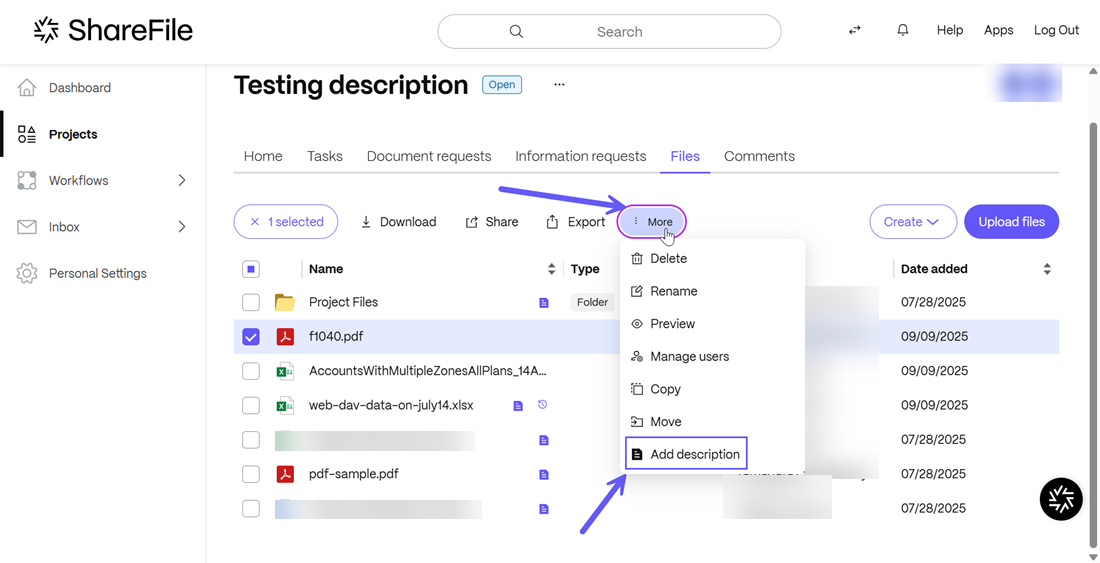
You can select the file/folder by clicking on the checkbox and then click on the More option and select Add description from the drop-down list as shown below:
-
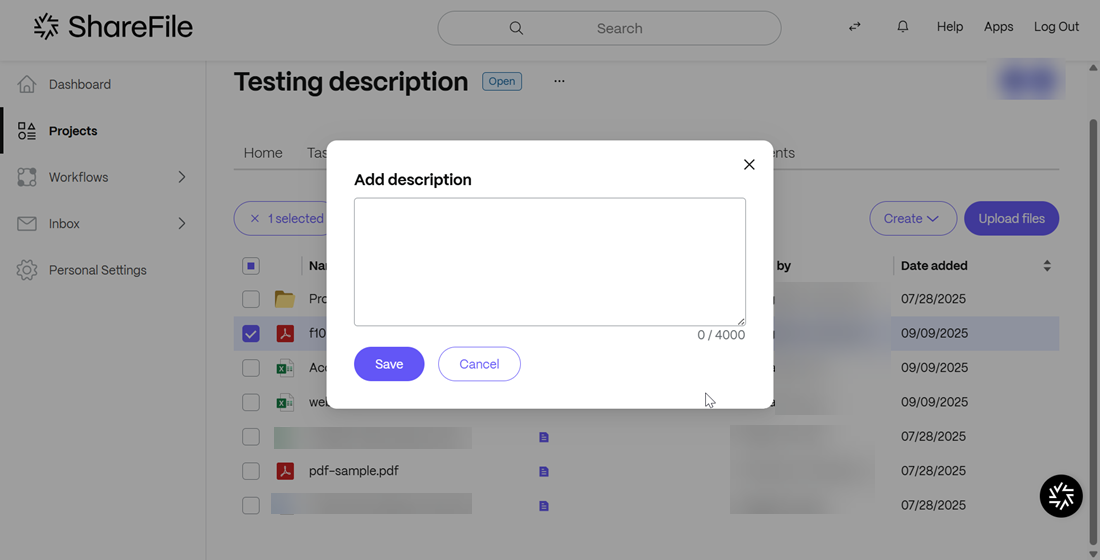
The Add description window opens.
-
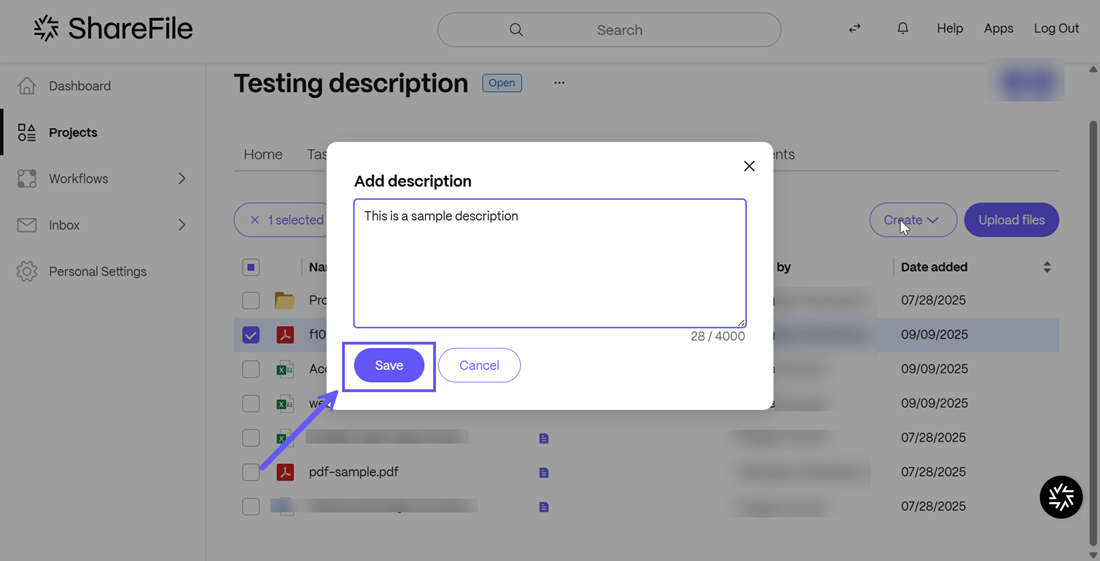
After the description has been entered, click on the Save button.
-
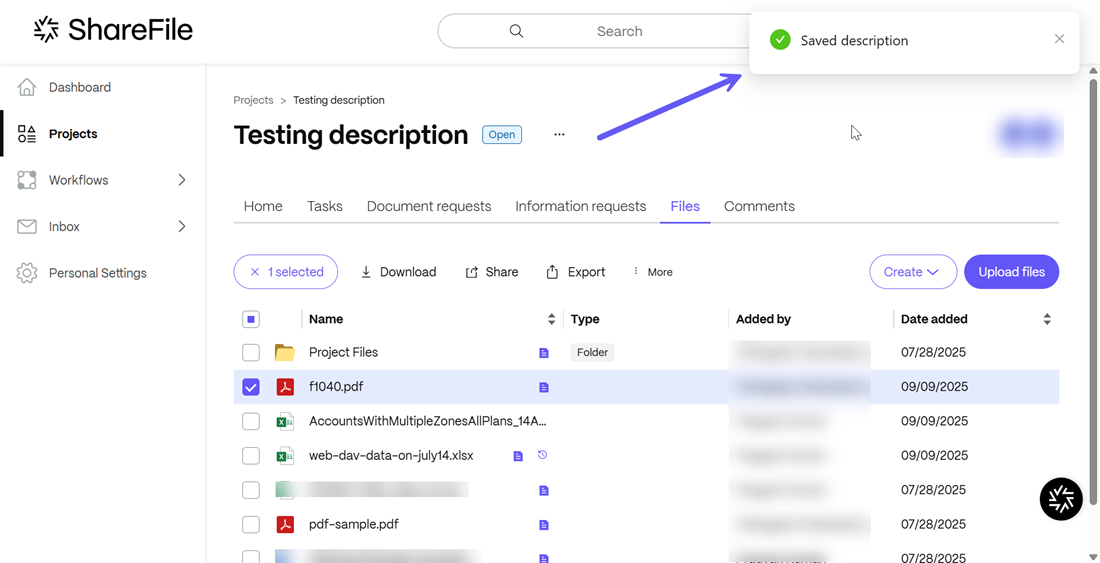
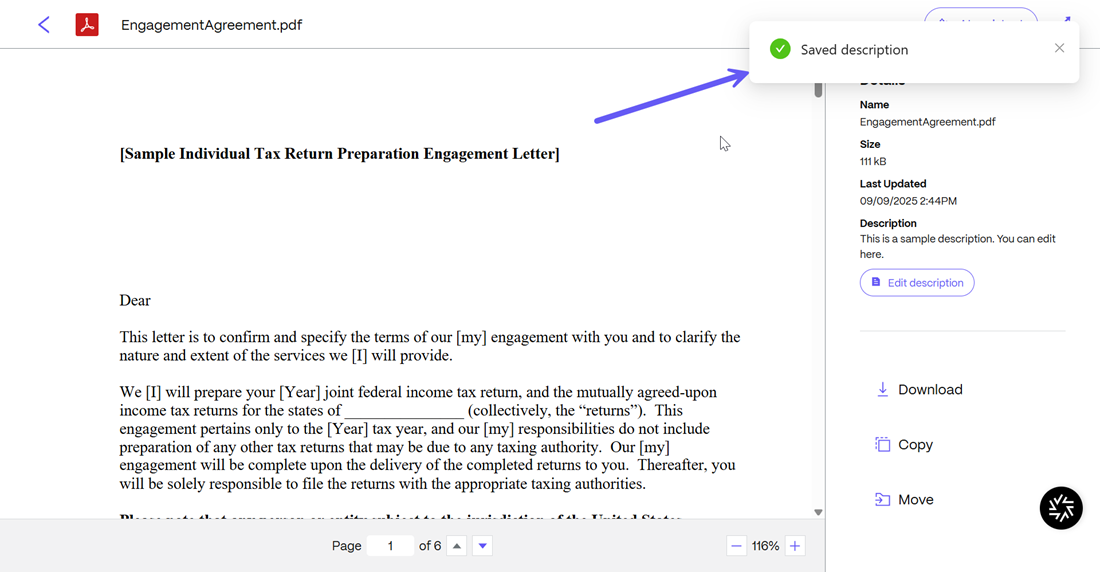
You can also click on the Edit description button to go back and edit the description created. Once done, click on Save and the description will be updated.A success message stating “Saved description” is displayed as shown below:
From The Content Viewer
-
You can also open any file and from the preview window that opens, select the Add description button on the right.
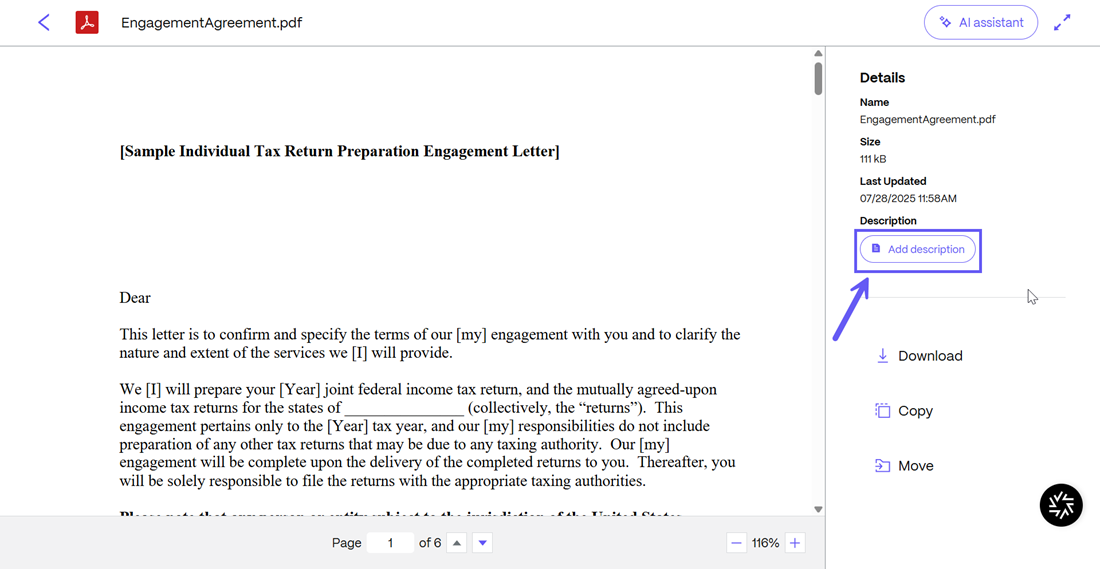
-
The Add description window opens. After the description has been entered, click on the Save button.
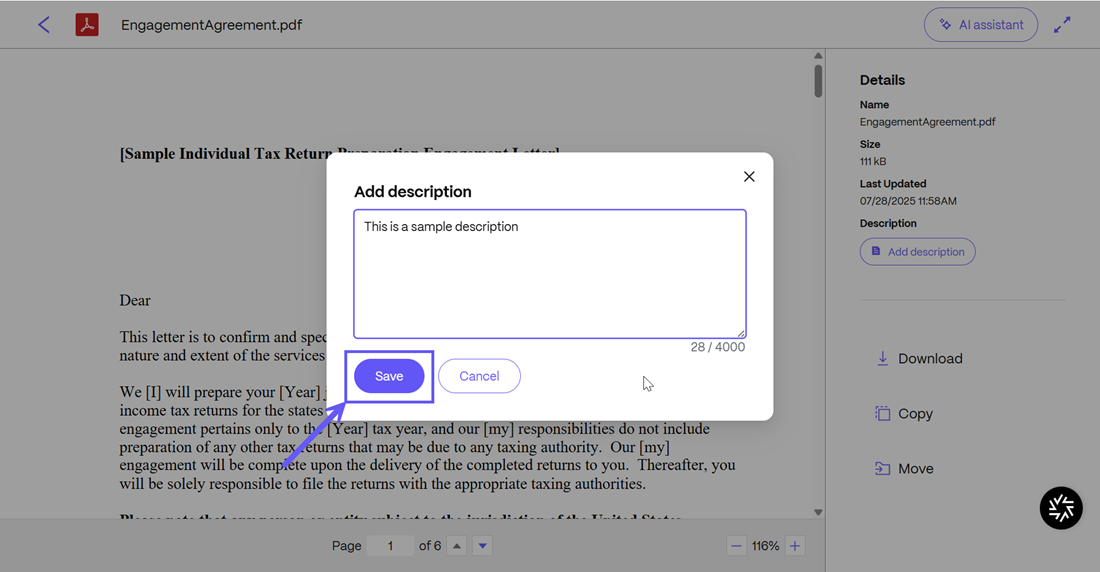
-
Upon success, the Saved description notification is displayed.
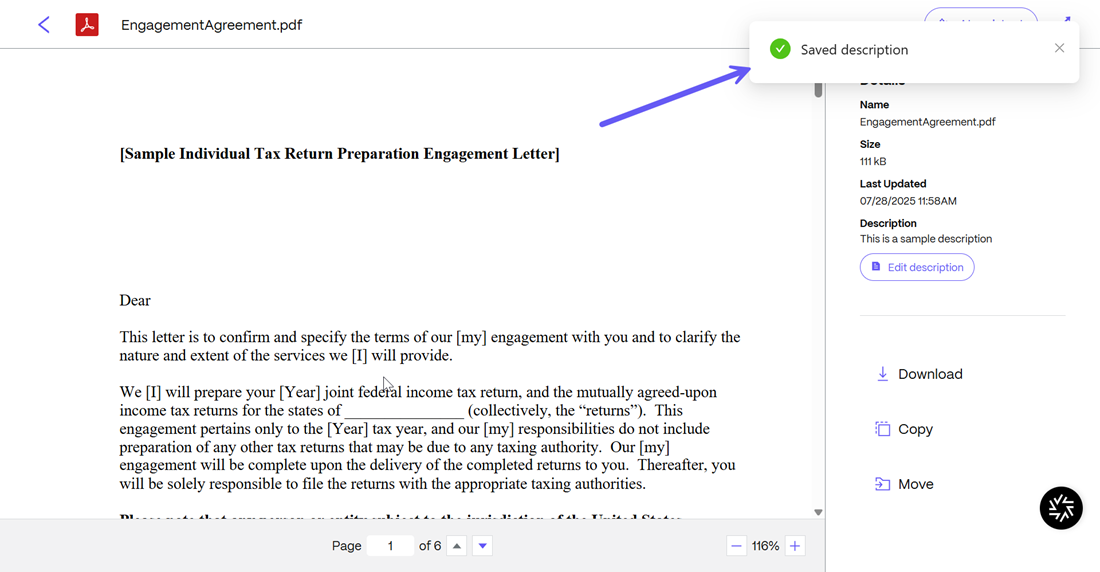
Edit Description In Projects
-
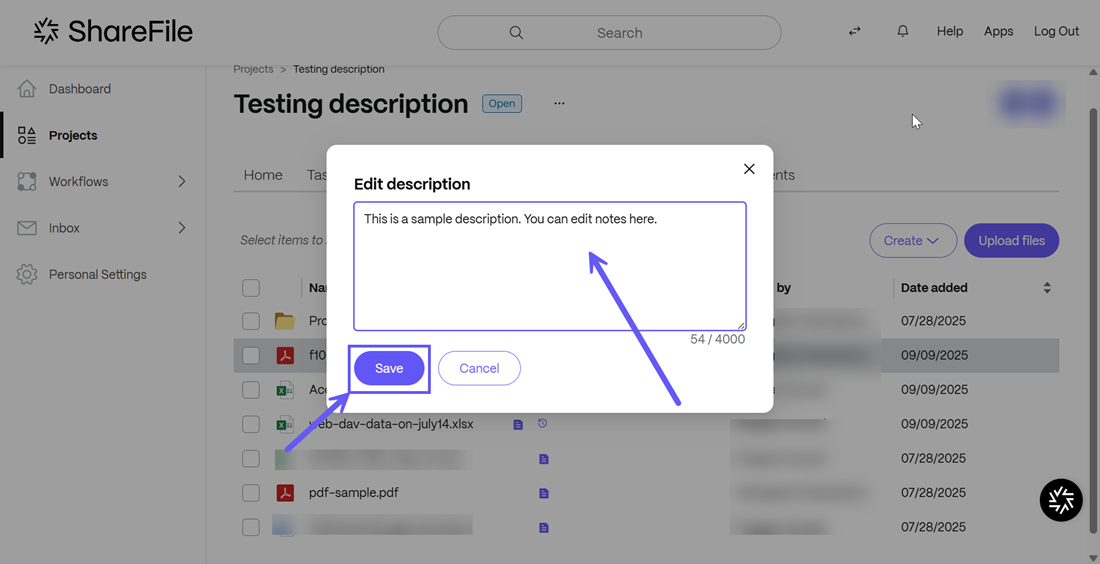
Once a description has been added, you can also edit descriptions directly from the Files menu in your project. To do so, simply click on the description label next to any file/folder. From the Edit description menu that opens, edit the description and click on Save as shown below:
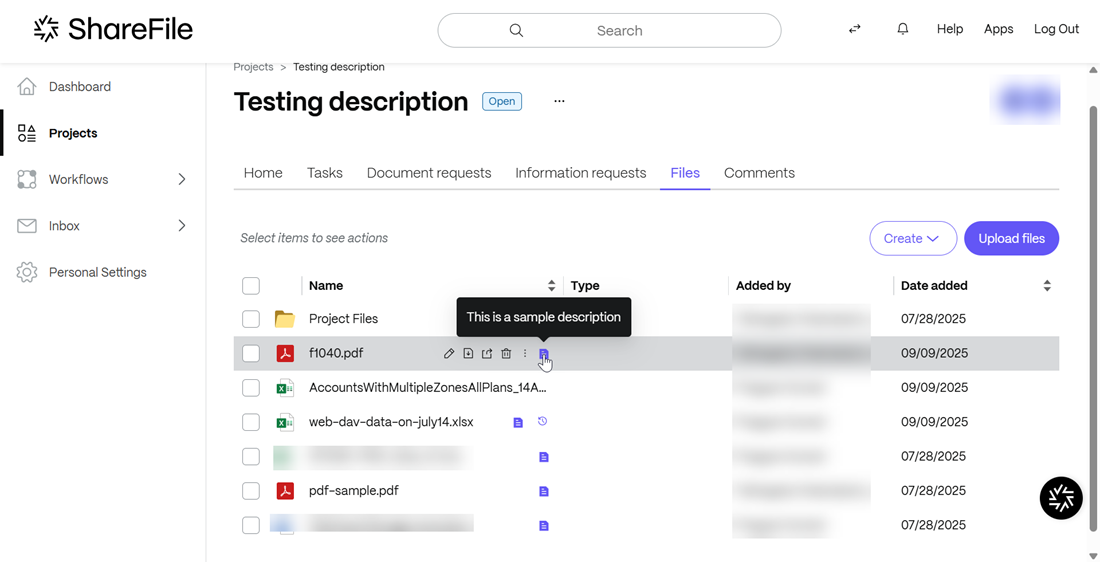
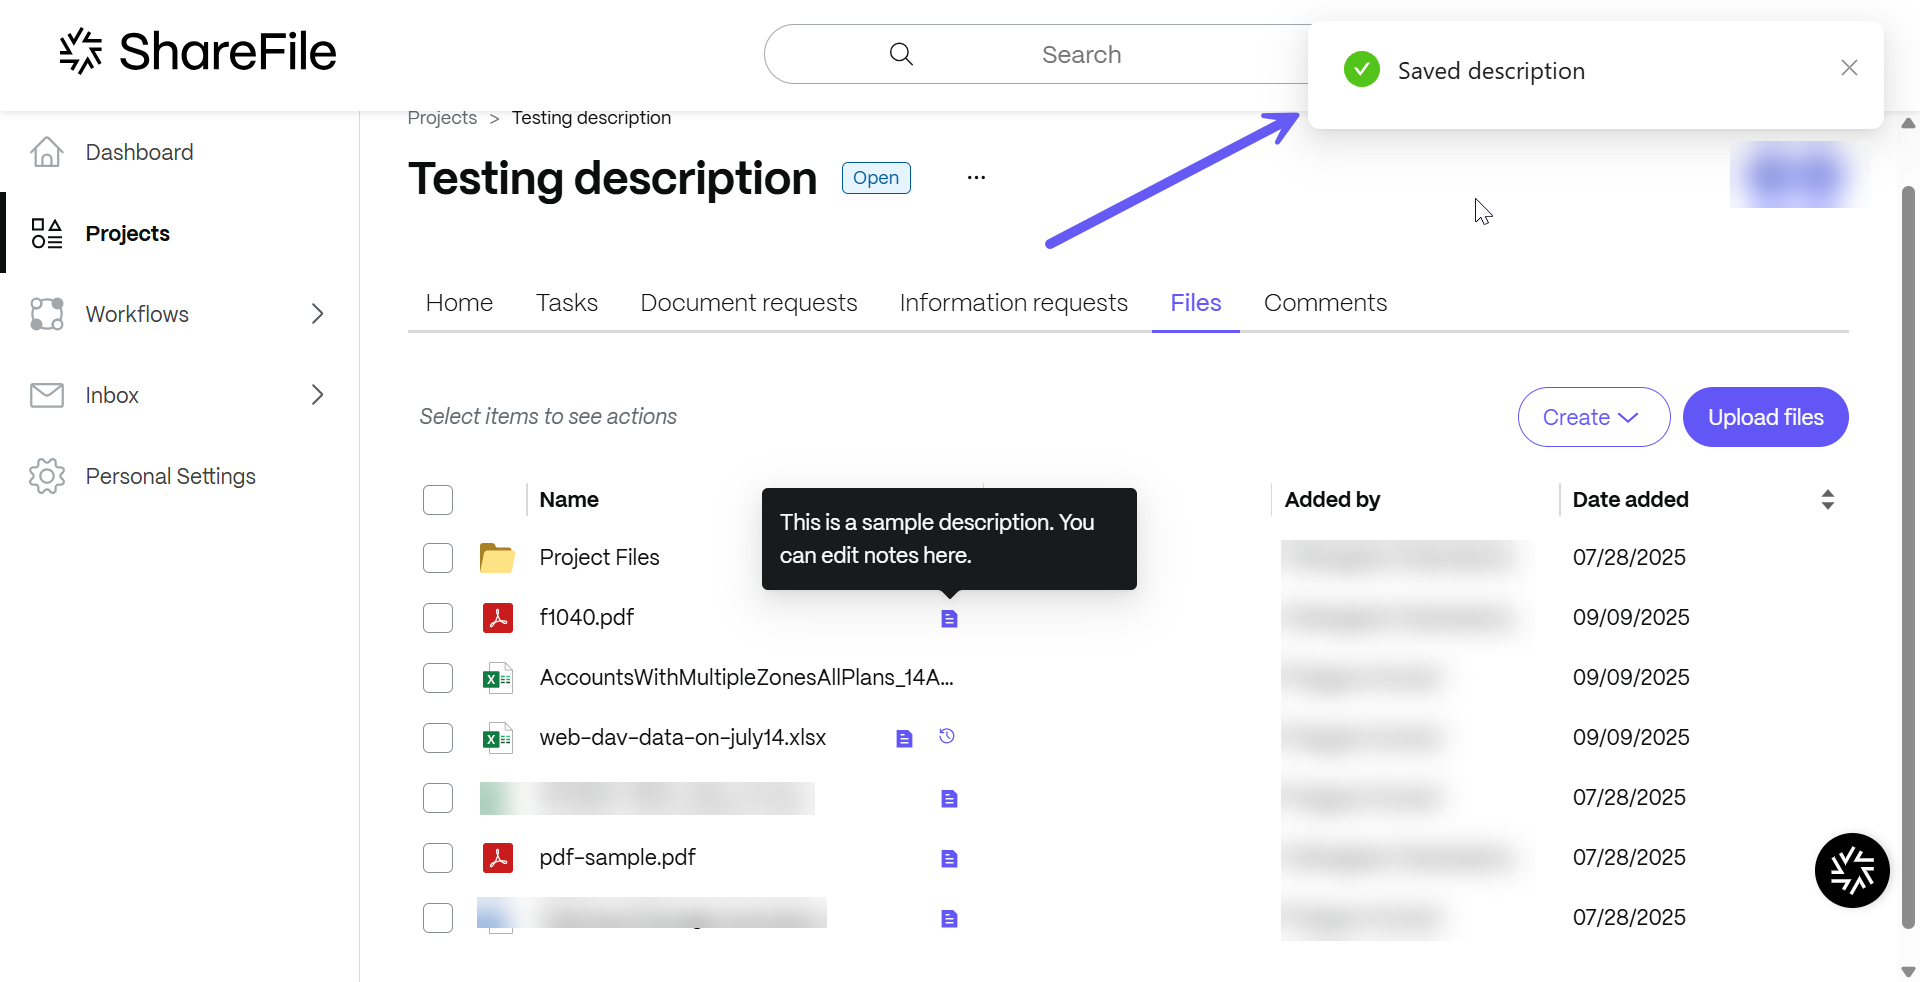
Upon success, the Saved description notification is displayed.
-
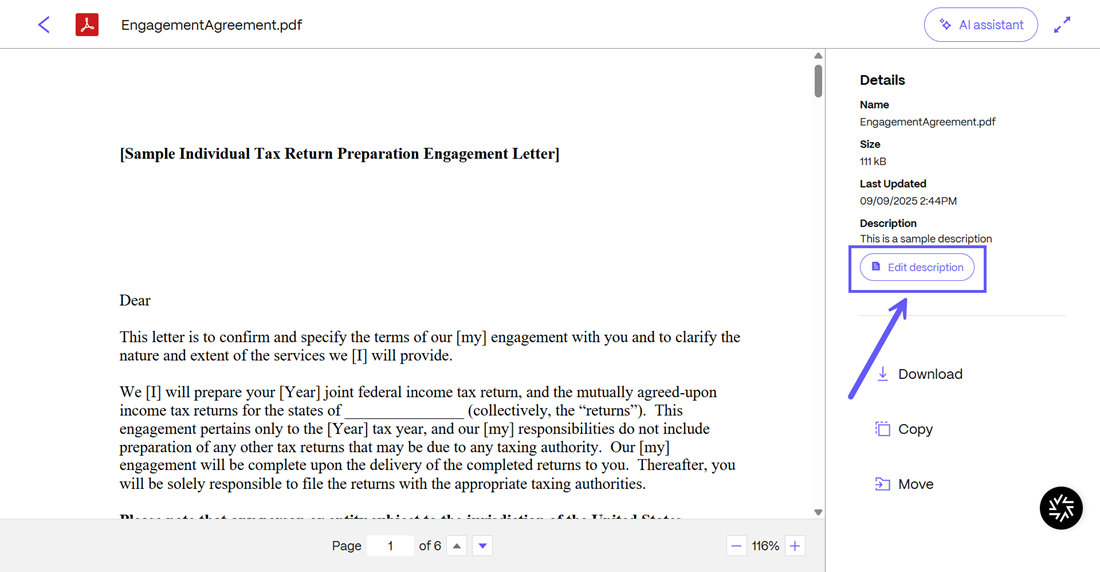
You can also edit the descriptions in a file or a folder. To do so, simply open the file/folder and click on the Edit description button to go back and edit the description created. Once done, click on Save and the description will be updated.
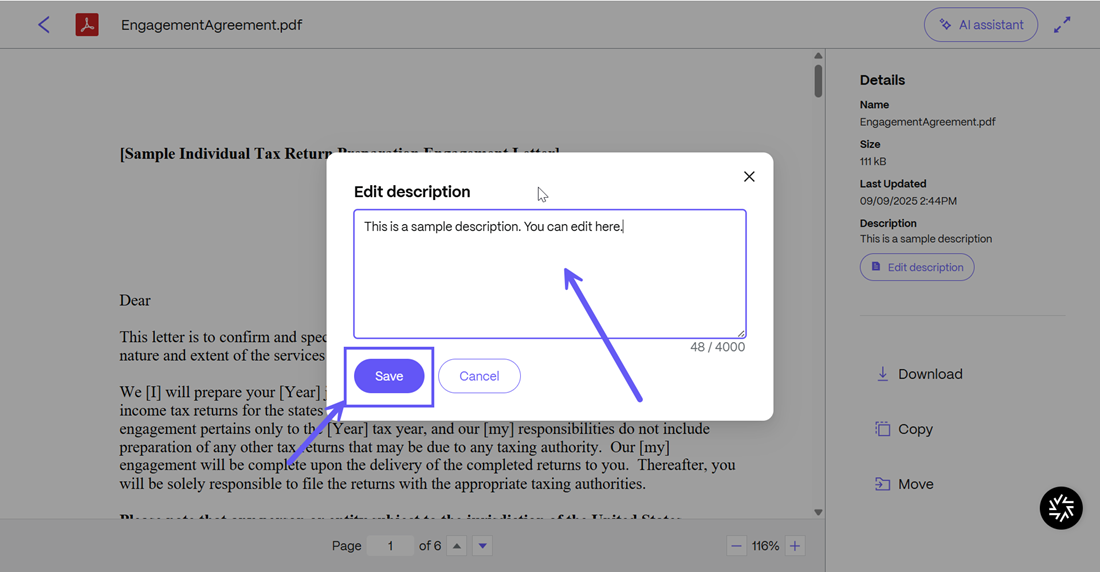
Upon success, the Saved description notification is displayed.
Note:
The description will always remain associated with the individual file irrespective of the version history of the document.
Comments
Comments are used to communicate in the project with other assigned project users.
-
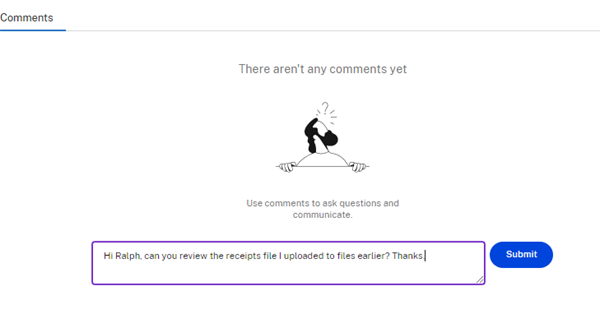
Select View all in the Comments tile on projects dashboard. This opens the Comment viewer.
-
Type in a comment using the text box. Select Submit.
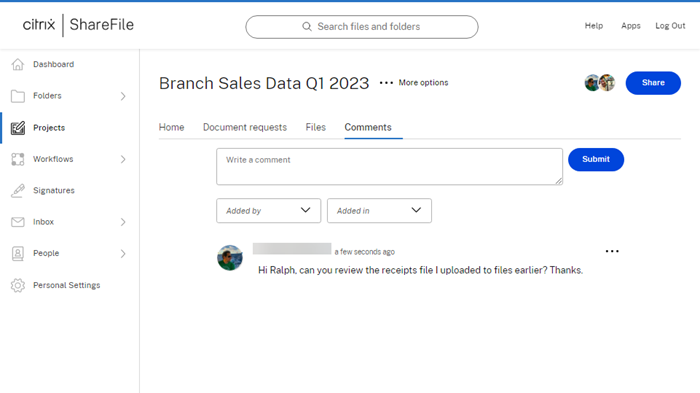
All assigned project users can review the comments and provide their own comments or respond to the previous comments.
Delete a Project
See Delete Projects for information on how to delete a project.
Create activity report
ShareFile projects allow you to create an activity report during the entire process of the completion of the project.
Use the following instructions to create a project activity report.
-
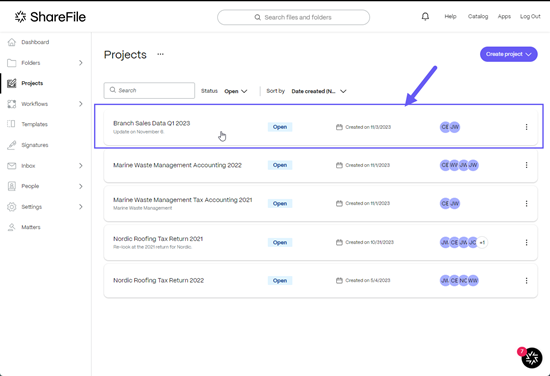
Select the project you want to create an activity report for.
-
Select … next to the project name then select Create activity report from the drop-down menu.
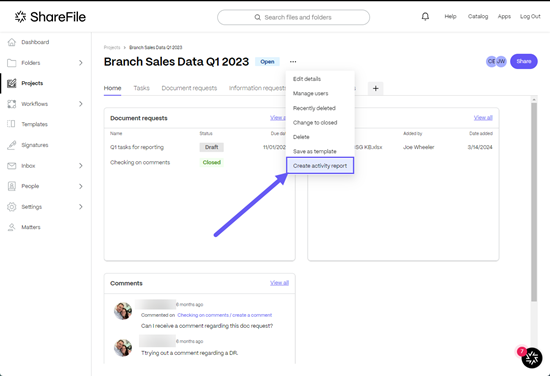
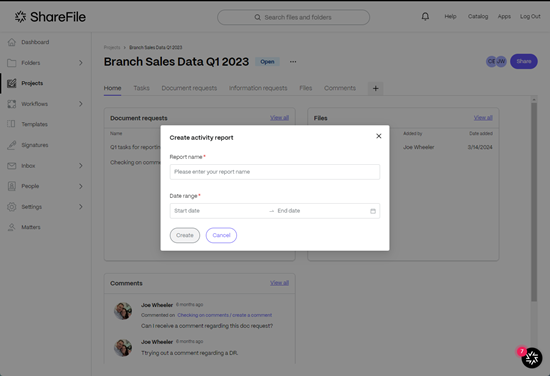
The Create activity report pop-up displays.
-
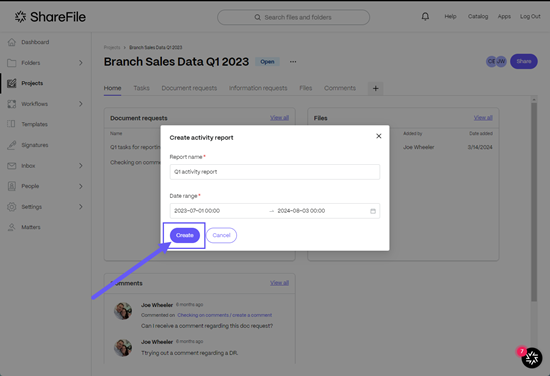
Enter the Report name.
-
Enter the Date range for the report.
-
Select Create.
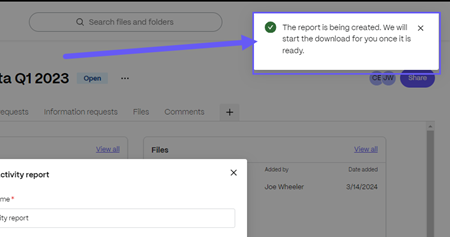
A message displays stating “The report is being created. We will start the download for you once it is ready.”
-
Use your browser download icon to access the download folder for the report.
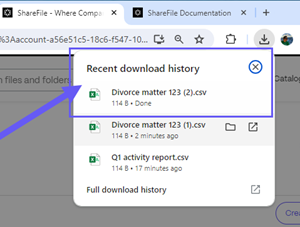
-
Select the application you want to open the report with from the Select an app to open this .csv file pop-up.
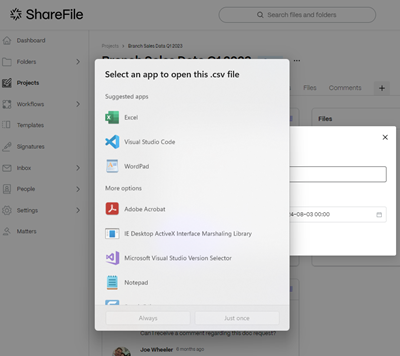
-
The .csv file opens in the application you selected.
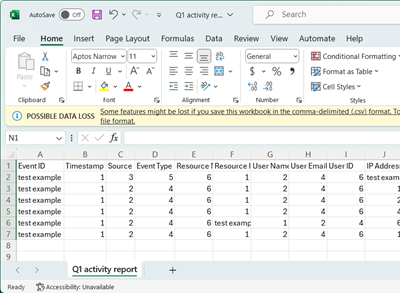
Share
Share
This Preview product documentation is Citrix Confidential.
You agree to hold this documentation confidential pursuant to the terms of your Citrix Beta/Tech Preview Agreement.
The development, release and timing of any features or functionality described in the Preview documentation remains at our sole discretion and are subject to change without notice or consultation.
The documentation is for informational purposes only and is not a commitment, promise or legal obligation to deliver any material, code or functionality and should not be relied upon in making Citrix product purchase decisions.
If you do not agree, select I DO NOT AGREE to exit.