This content has been machine translated dynamically.
Dieser Inhalt ist eine maschinelle Übersetzung, die dynamisch erstellt wurde. (Haftungsausschluss)
Cet article a été traduit automatiquement de manière dynamique. (Clause de non responsabilité)
Este artículo lo ha traducido una máquina de forma dinámica. (Aviso legal)
此内容已经过机器动态翻译。 放弃
このコンテンツは動的に機械翻訳されています。免責事項
이 콘텐츠는 동적으로 기계 번역되었습니다. 책임 부인
Este texto foi traduzido automaticamente. (Aviso legal)
Questo contenuto è stato tradotto dinamicamente con traduzione automatica.(Esclusione di responsabilità))
This article has been machine translated.
Dieser Artikel wurde maschinell übersetzt. (Haftungsausschluss)
Ce article a été traduit automatiquement. (Clause de non responsabilité)
Este artículo ha sido traducido automáticamente. (Aviso legal)
この記事は機械翻訳されています.免責事項
이 기사는 기계 번역되었습니다.책임 부인
Este artigo foi traduzido automaticamente.(Aviso legal)
这篇文章已经过机器翻译.放弃
Questo articolo è stato tradotto automaticamente.(Esclusione di responsabilità))
Translation failed!
Feedback and Approval Workflow
Feedback and Approval Workflow allows you to quickly and easily collaborate on projects and content, submit files for approval to an individual or a series of users, or collect feedback on files in the form of comments and annotations.
Note:
ShareFile offers two document approval tools:
- Document review and approval flow — for project-tracked, client-facing review, and
- Feedback and Approval Workflow — for internal review with annotations and sequential approvers.
Various customization, notification, and reporting settings are available.
IMPORTANT:
FiIes uploaded during workflows are stored in the Workflows folder which is automatically created in the Personal Folders section of your account. Do NOT delete or change the Workflows folder name. Notes
- This is an account-wide feature that cannot be enabled or disabled for specific users
- To use your company logo in Workflow email notifications, the logo must be set in Advanced Appearance Options.
- Client users cannot initiate approval and feedback workflows
- This feature requires the latest version of Google Chrome or FireFox, or Internet Explorer 11 or later.
- Please ensure pop-ups are allowed when using the Approvals feature
- Currently, sending an Approval or Feedback workflow to a Distribution Group or other Distribution List is not supported. Exact emails are required.
- Currently, a copy of an approved or annotated file that includes all annotations or comments cannot be exported or printed from the ShareFile system.
- Currently, Account owners cannot view all workflows created within the account unless the workflows have been shared with the Admin directly.
- “Sequential Approval” is not supported when creating a workflow from the Outlook Plugin
- Users without a “Home Folder”, otherwise known as a Personal Folder, cannot begin a workflow with a file located on their computer. You must first upload the file to ShareFile before initiating the approval workflow. If you do not have a personal folder, this feature was likely disabled by an Admin on your account.
- Workflow File Size Limit - PDF 100 MB, All other files 20 MB.
- All Client Approvers must be listed of the Shared Address Book, or they will not be found in the search when entering their email address.
Launch Feedback and Approval Dashboard
There are multiple ways to launch the Feedback and Appoval Dashboard:
-
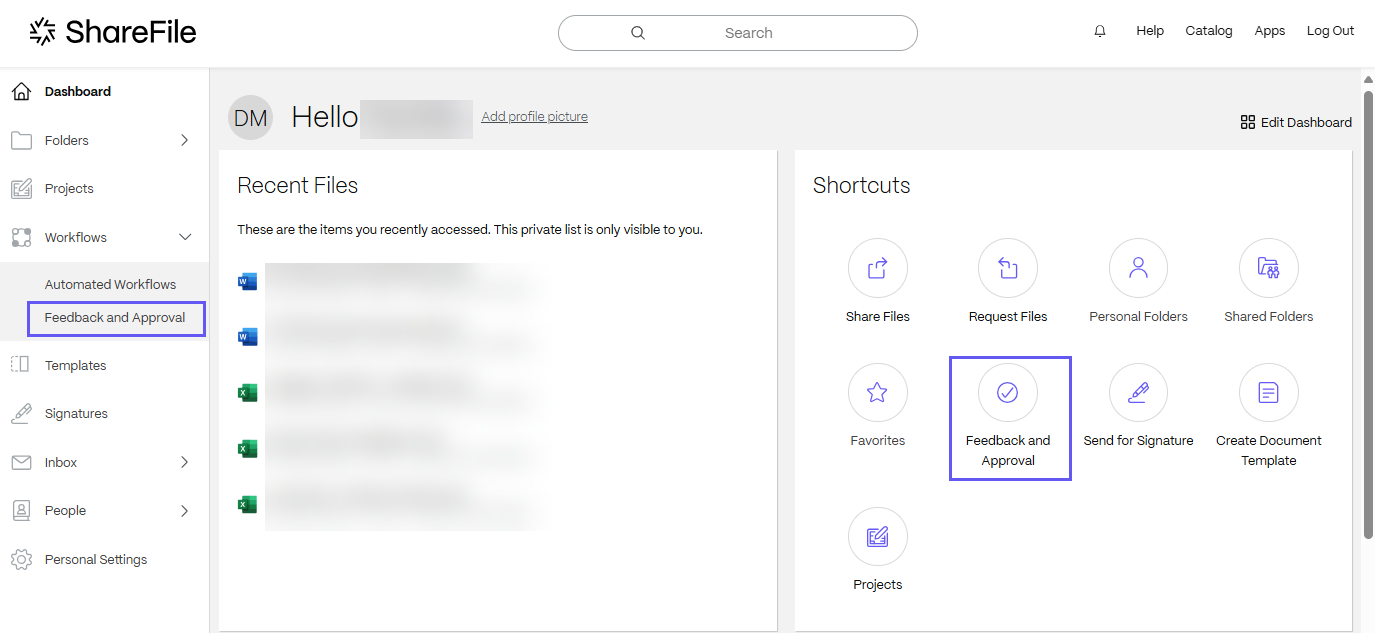
From the ShareFile web app, select Feedback and Approval from the Shortcuts section or from the left navigation under Workflows:
-
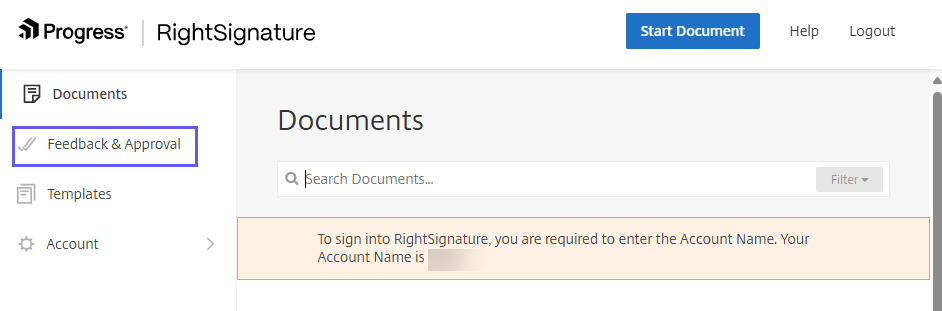
From RightSignature, Feedback and Approval is available on the left navigation menu:
-
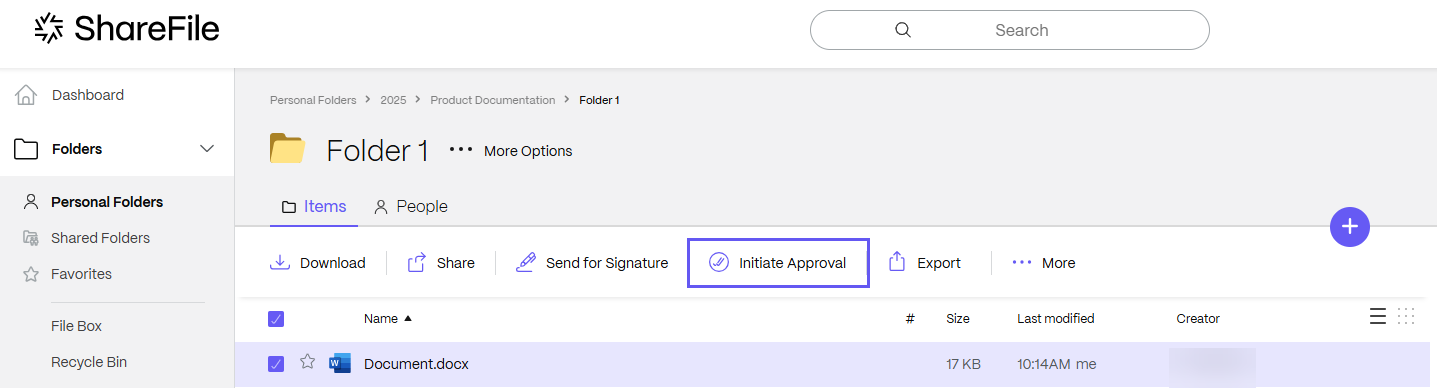
Select a file within your account, choose to Share the file and select Initiate Approval.
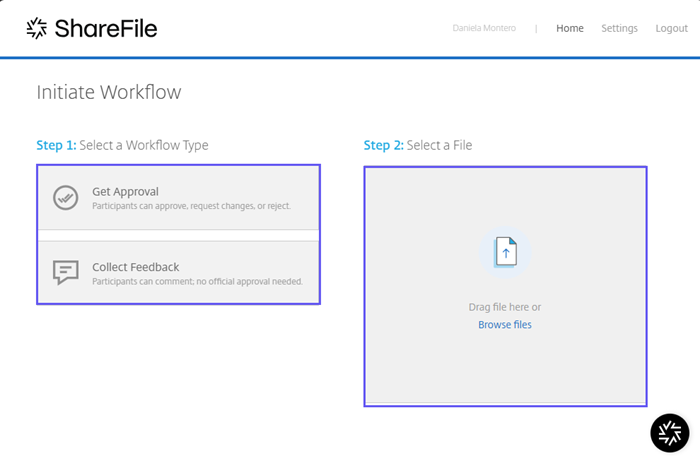
Initiate Workflow
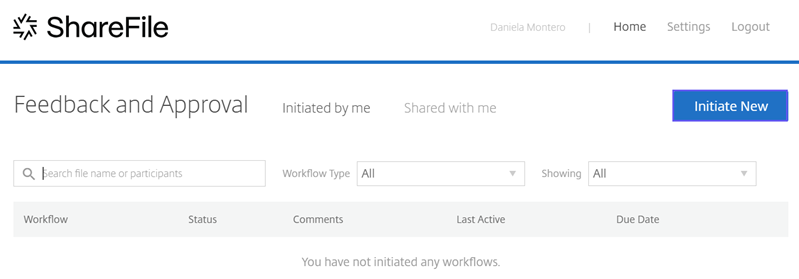
From the Feedback and Approval Dashboard, select Initiate New.
- Select a Workflow Type Get Approval or Collect Feedback.
- Select a file to browse or drag a single file from your computer, or browse files from ShareFile.
Get Approval
When selecting Get Approval, participants can approve, request changes, or reject your file.
- Assign Due Date - You have the option of designating a Due Date for file approval. By default, approval and feedback workflows last a period of 30 days.
- Add Approvers - Add an approver (or multiple approvers) to your file. Begin typing the name or email of a user on your ShareFile account to select them from a list. Recipients do not have to be users on your ShareFile account to approve files, but you cannot set yourself (the creator of the workflow) as an approver.
- Add Another Approver - Use this option to add multiple approvers to your file.
- Add distribution group - Use this option to automatically create approvers for each member of a distribution group. These individuals will retain access to the workflow even if removed from the distribution group.
- Require participants to login - This option is selected by design. If unselected, any person with a link to the workflow will be able to review the content and this can put your data at risk. We recommend using links that require recipients to log into ShareFile instead.
- Every Approver must re-approve newly uploaded versions - This option is selected by design. Users are re-prompted for approval when new versions are uploaded.
- Approvers must approve in order - This option becomes available once multiple approvers have been added. When selected, you may click-and-drag the approvers into a specific order. An approvers is not sent a notification from the ShareFile email system until the preceding approver in the order has completed their review.
- Add CC’s - CC’d users are notified of the approval workflow via email and may view and comment on the file, but are not able to approve or reject during the workflow.
- Add a Message - Compose a message to be included within the email notification. When you’re ready, begin the workflow! Once your file has been sent, it will automatically open in a file previewer. You can review the status of your workflow at the Approvals Dashboard.
Approving a File
Your recipient will receive an email notification that contains a secure link to review the file. Clicking this link will load the file in a preview and approval pane.
- Preview Pane - Using the pane on the left, an approver can view the file, flip through pages, and zoom if needed. If viewing a supported file, an approver may highlight and comment on text, as well as use “@” commands to notify users of important areas or errors. The pane on the right allows participants to review activity and provide additional comments.
- Approve - Click the Approve button to approve the file. A notification will be sent to the original sender.
- Request Changes - Approvers should use this to request changes be made to the file. The original sender will receive an email notification with a link they can use to view annotations and comments.
- Reject - Click the Reject button to reject the file. A notification will be sent to the original sender. When rejecting a file, don’t forget to include comments
Collect Feedback
When requesting feedback, recipients can provide comments without explicitly approving the file.
- Assign Due Date - You have the option of designating a Due Date for feedback. If a date is specified, the workflow will automatically close on that date. By default, approval and feedback workflows last a period of 30 days.
- Add Participants - Add a participant (or multiple participants) to your file. Begin typing the name or email of a user on your ShareFile account to select them from a list. Recipients do not have to be users on your ShareFile account in order to provide feedback.
- Add Another Participant - Use this option to request feedback from multiple recipients.
- Automatically end feedback when all participants have submitted - Once all participants have submitted feedback, the workflow will automatically close.
- Re-request feedback when a new version is uploaded - Check this option if you wish for users to be re-prompted for feedback when a new version of the file is uploaded. This is useful for iterative projects.
- Add CC’s - CC’d users are notified of the feedback workflow via email and may view and comment on the file.
- Add a Message - Compose a message to be included within the email notification. When you’re ready, begin the workflow! Once your file has been sent, it will automatically open in a file previewer. You can review the status of your workflow at the Approvals Dashboard.
Providing Feedback
Your recipient will receive an email notification that contains a secure link to review the file. Clicking this link will load the file in a preview pane.
- Preview Pane - Using the pane on the left, a participant can view the file, flip through pages, and zoom if needed. If viewing a supported file, a participant may highlight and annotate text, as well as use “@” commands to notify users of important areas or errors. The pane on the right allows participants to review activity and provide additional comments.
- Submit Feedback - Click the Submit Feedback button to send a notification that you have provided feedback. A notification will be sent to the original sender.
Tracking File Versions
During a workflow, you can download the current version of a file, upload new versions of a file, or navigate between file versions to compare and review past annotations. Versions can be managed near the top of the preview pane.
- Version Drop-Down - Use the drop-down menu shown above to switch between versions. Versions are enumerated based on the order they were uploaded.
- Download a Version - To download the current version of the file, click the Download button near the top of the preview pane. The version of the file currently being viewed will be downloaded to your computer.
- Upload a Version - To upload a new version of the file, click the New Version button. Upload the new version of your file from its location on your computer. New versions of a file must have the SAME file name as the original in order to count as a new version.
- Version Notifications - Workflow participants will automatically receive notifications when new versions of a file have been uploaded. If you chose to require approval or feedback for new versions of a file, a request to review the new version will automatically be sent to them.
Supported File Types
- Any file type can be submitted for approval or feedback. All file types allow comments in the comment pane.
- Only the following file types can be rendered in the approval preview pane and annotated within the previewer: doc, docx, pdf, txt, rtf, jpeg, png, gif, ppt, and pptx.
- Video and Audio files can be previewed and commented on via the comment pane, but not annotated within the previewer.
- Spreadsheet file rendering (Excel types) is in development.
Cloud Rendering
Cloud Rendering is an administrative setting available for accounts with storage zones. This feature will allow you to use our Feedback & Approval Workflows and Custom Workflows features with files that reside on-premises.
This feature must be enabled by an administrator user on the account. Administrators can enable Cloud Rendering in Account settings > Advanced Preferences > File Settings > Cloud Rendering.
If Cloud Rendering is enabled, ShareFile cloud keeps a temporary copy of the files (Images, Audio, PDF etc.) involved in your workflow.
When the workflow completes:
- ShareFile cloud moves the files to the selected on-premise folder.
- If an end user views any file related to a completed workflow, ShareFile will make a temporary copy of the file from on-premise to ShareFile cloud cache.
- A file will be available for up to 1 week in ShareFile cloud cache after the last time the file is viewed.
If Cloud Rendering is disabled, end users will not be able to use Feedback and Approval or Custom Workflow features with files stored on Customer Managed StorageZones.
Workflow Branding - Logo
For Workflow notifications to utilize the logo you have set for the account, ensure that the company logo is set in Account settings > Account and Reporting > Edit Company Branding > Edit Account Appearance > Logo.
If a logo is not set, the default “ShareFile” logo will be used.
Share
Share
This Preview product documentation is Citrix Confidential.
You agree to hold this documentation confidential pursuant to the terms of your Citrix Beta/Tech Preview Agreement.
The development, release and timing of any features or functionality described in the Preview documentation remains at our sole discretion and are subject to change without notice or consultation.
The documentation is for informational purposes only and is not a commitment, promise or legal obligation to deliver any material, code or functionality and should not be relied upon in making Citrix product purchase decisions.
If you do not agree, select I DO NOT AGREE to exit.