This content has been machine translated dynamically.
Dieser Inhalt ist eine maschinelle Übersetzung, die dynamisch erstellt wurde. (Haftungsausschluss)
Cet article a été traduit automatiquement de manière dynamique. (Clause de non responsabilité)
Este artículo lo ha traducido una máquina de forma dinámica. (Aviso legal)
此内容已经过机器动态翻译。 放弃
このコンテンツは動的に機械翻訳されています。免責事項
이 콘텐츠는 동적으로 기계 번역되었습니다. 책임 부인
Este texto foi traduzido automaticamente. (Aviso legal)
Questo contenuto è stato tradotto dinamicamente con traduzione automatica.(Esclusione di responsabilità))
This article has been machine translated.
Dieser Artikel wurde maschinell übersetzt. (Haftungsausschluss)
Ce article a été traduit automatiquement. (Clause de non responsabilité)
Este artículo ha sido traducido automáticamente. (Aviso legal)
この記事は機械翻訳されています.免責事項
이 기사는 기계 번역되었습니다.책임 부인
Este artigo foi traduzido automaticamente.(Aviso legal)
这篇文章已经过机器翻译.放弃
Questo articolo è stato tradotto automaticamente.(Esclusione di responsabilità))
Translation failed!
ShareFile Client Mobile App (Beta)
Overview
ShareFile for Clients is a fast and smart way to securely exchange files and information with the businesses and professionals you trust. From uploading sensitive documents to completing tasks and forms, ShareFile for Clients keeps you connected, organized, and moving forward — on the go.
Designed for simplicity and speed, the ShareFile for iOS Client application lets you:
- Instantly upload documents from your device.
- Scan and send files using your phone’s camera.
- Complete tasks assigned by businesses in just a few taps.
- Respond to forms and surveys.
- Sign documents with ease.
Keep every interaction secure, private, and professionally managed. Wherever business takes you, ShareFile for Clients makes collaboration with your service providers seamless – so you can get more done, with confidence.
Download ShareFile for Clients for iOS on the Apple Store (Note: ‘App Store’ here will be a hyperlink text with the link to the Play Store page for the app)
Beta Testing Setup Instructions
Install ShareFile for Client in iOS
Requires installing TestFlight.
-
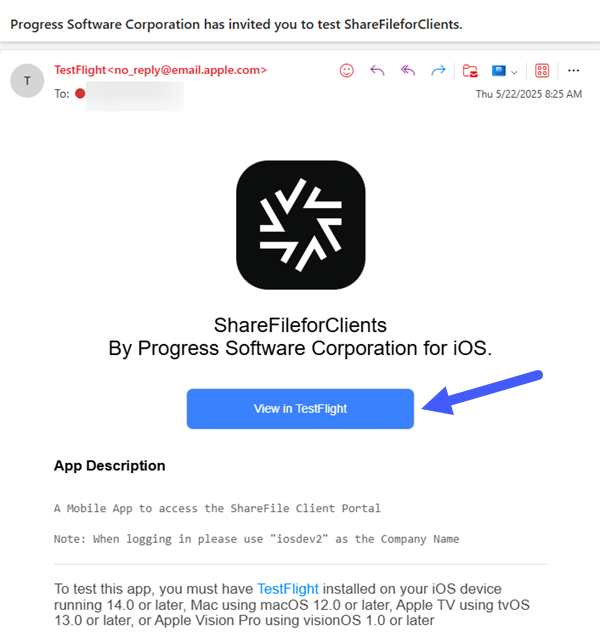
You will receive an email from TestFlight (no_reply@email.apple.com) on your registered email id with the following subject “Progress Software Corporation has invited you to test ShareFileforClients.”
-
From the email invite, click View in TestFlight
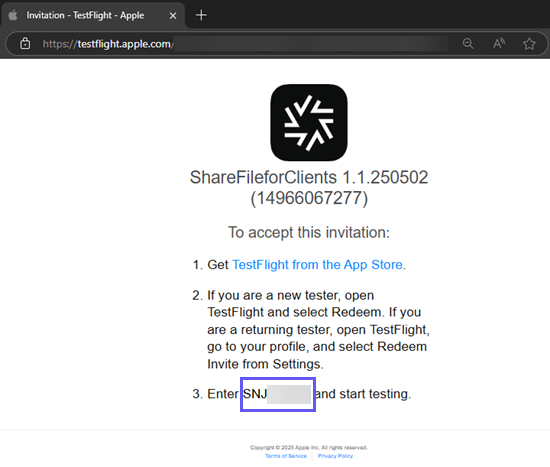
The TestFlight invitation opens in a new tab with your invitation code:
-
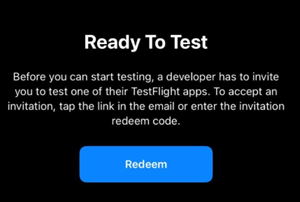
Download TestFlight from the App Store on your iOS device and agree the app terms and conditions.
-
Sign in to TestFlight with your Apple ID.
-
Click Redeem button.
-
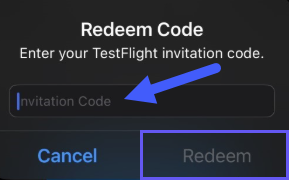
Enter your TestFlight Invitation Code and select Redeem to confirm.
-
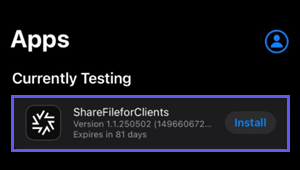
The ShareFile for Clients application diplays under the Currently Testing section of the TestFlight app:
-
Install ShareFile for Clients application and begin testing.
Install ShareFile for Client in Android
-
Access the ShareFile Client app on the Play Store. Follow either of the two steps:
-
Via Email Link - You will receive an email at the address you provided. Make sure this is the same email linked to your Google Play Store account on your mobile device. The email will contain a direct download link—just tap it to install the app.
-
Via Search - Open the Play Store and search for: com.sharefile.mobile.clients. Make sure that you are signed in with the same email on Play Store that you had provided to us.
-
-
Install the ShareFile for Clients application.
ShareFile Client Mobile App (Beta) user guidance
Upload files
To upload files:
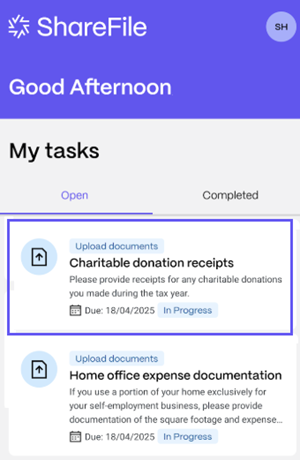
- Open the ShareFile for Clients mobile application and authenticate.
-
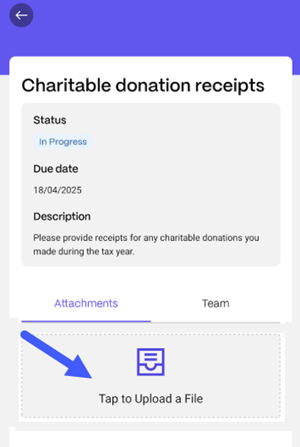
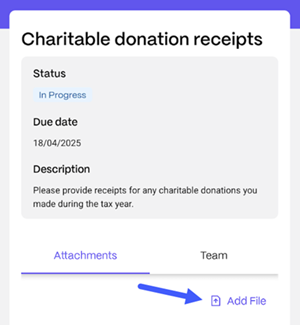
From your Open tasks, click on a Document Request to open the task.
-
Once the task is opened, click on Tap to Upload a File.
-
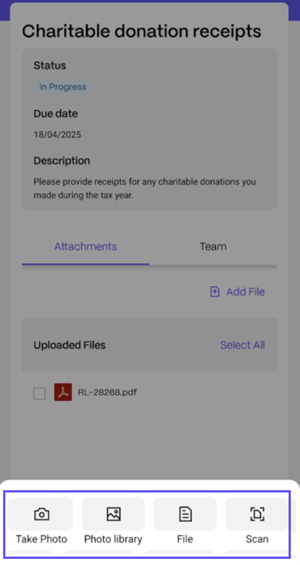
Choose the type of file that you want to upload. You can: take a photo, upload a photo from your library, upload a file or scan a document.
Note:
If you want to upload multiple files to the Document Request, click Add File. You’ll be prompted to select the file type for each upload.
-
Once you finalized uploading files, click Submit for Review.
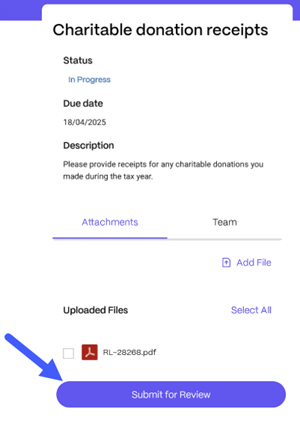
You receive a confirmation message and the Document Request displays under your Completed tasks.
Scan Documents
- Open the ShareFile for Clients App and authenticate.
-
From your Open tasks, click on a Document Request to open the task.
-
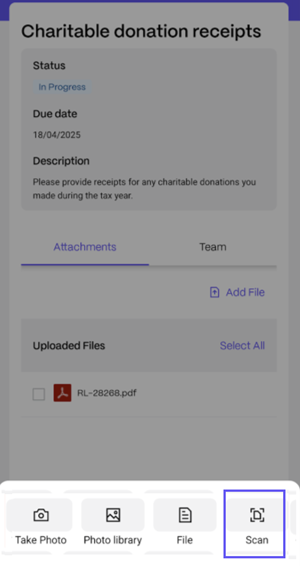
Click Tap to Upload a File.
-
Click Scan.
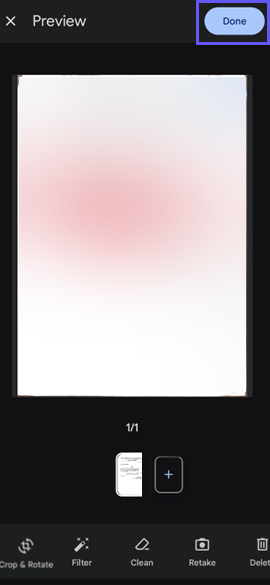
The Auto Capture option is selected by default, position your camera to fit the document to be scanned within the view and the page will be captured automatically.
-
Click Done to upload the scanned document.
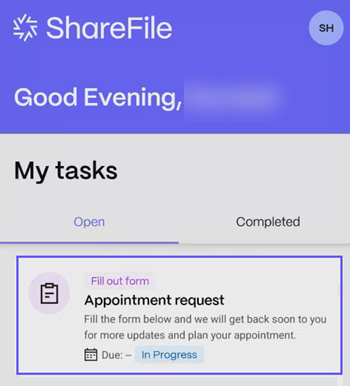
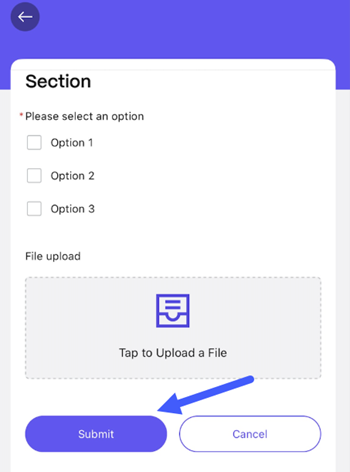
Fill out forms
To fill out forms:
- Open the ShareFile for Clients App and authenticate.
-
From yout Open tasks, select an Information Request that has been assigned to you. Click to open it.
-
Fill out the sections within the form. Sections marked with a red asterisk need to be filled mandatorily.

You can upload files by selecting Tap to Upload a file.
-
Click Submit once you are done filling out the form to submit it.
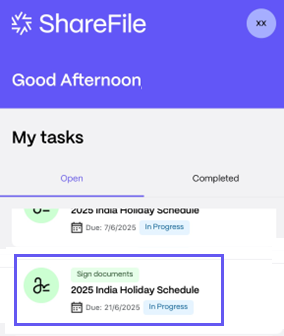
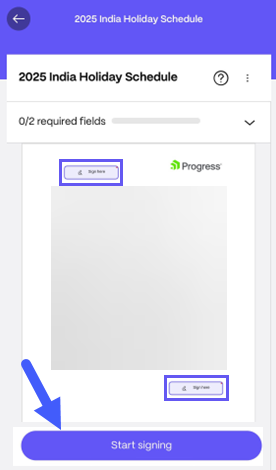
Sign documents
To sign documents:
-
Open the ShareFile for Clients App and sign in to your Client account.
-
From your open tasks, select a Signature Request, click to open it.
-
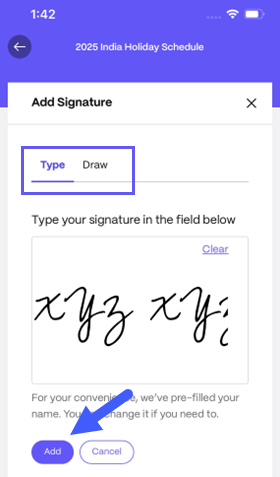
Click Start Signing and then click the box labelled Sign Here to add your signature.
-
Choose to either Type or Draw your digital signature and click Add to sign.
-
Once you sign on all the required places, click Submit Document to submit it for review.
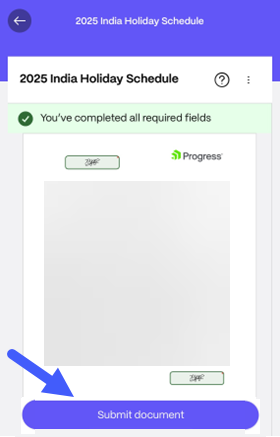
You are prompted to verify your identity post submitting to complete the signing process. You will receive an email with instructions on how to verify.
This Preview product documentation is Citrix Confidential.
You agree to hold this documentation confidential pursuant to the terms of your Citrix Beta/Tech Preview Agreement.
The development, release and timing of any features or functionality described in the Preview documentation remains at our sole discretion and are subject to change without notice or consultation.
The documentation is for informational purposes only and is not a commitment, promise or legal obligation to deliver any material, code or functionality and should not be relied upon in making Citrix product purchase decisions.
If you do not agree, select I DO NOT AGREE to exit.