This content has been machine translated dynamically.
Dieser Inhalt ist eine maschinelle Übersetzung, die dynamisch erstellt wurde. (Haftungsausschluss)
Cet article a été traduit automatiquement de manière dynamique. (Clause de non responsabilité)
Este artículo lo ha traducido una máquina de forma dinámica. (Aviso legal)
此内容已经过机器动态翻译。 放弃
このコンテンツは動的に機械翻訳されています。免責事項
이 콘텐츠는 동적으로 기계 번역되었습니다. 책임 부인
Este texto foi traduzido automaticamente. (Aviso legal)
Questo contenuto è stato tradotto dinamicamente con traduzione automatica.(Esclusione di responsabilità))
This article has been machine translated.
Dieser Artikel wurde maschinell übersetzt. (Haftungsausschluss)
Ce article a été traduit automatiquement. (Clause de non responsabilité)
Este artículo ha sido traducido automáticamente. (Aviso legal)
この記事は機械翻訳されています.免責事項
이 기사는 기계 번역되었습니다.책임 부인
Este artigo foi traduzido automaticamente.(Aviso legal)
这篇文章已经过机器翻译.放弃
Questo articolo è stato tradotto automaticamente.(Esclusione di responsabilità))
Translation failed!
Data Tables
Using Data Tables in a ShareFile Projects is a way to organize data in projects with a structured manner. This data might be:
- Project related data
- Data from third party apps
Adding a tab in ShareFile Projects
-
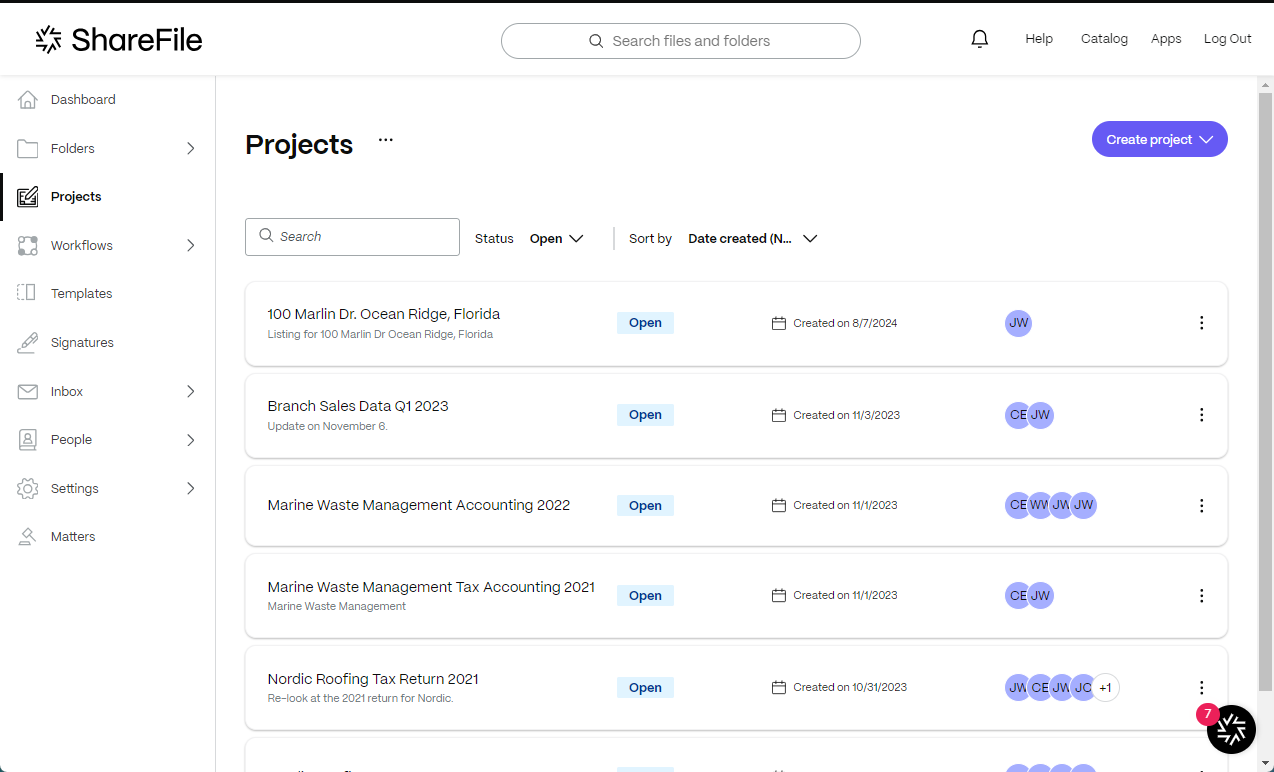
Navigate to Projects in your ShareFile account.
-
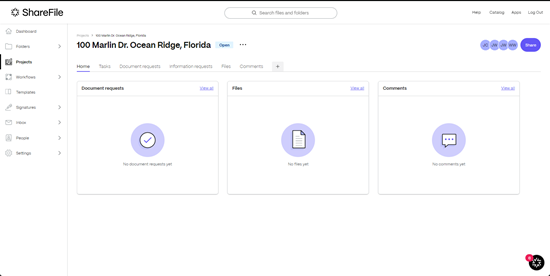
Select an existing project or select Create Projects. For these instructions, we selected an existing project.
-
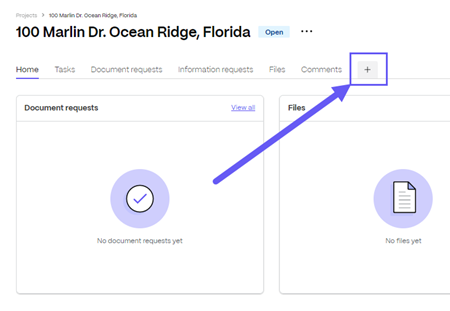
Select + to open the Add a tab.
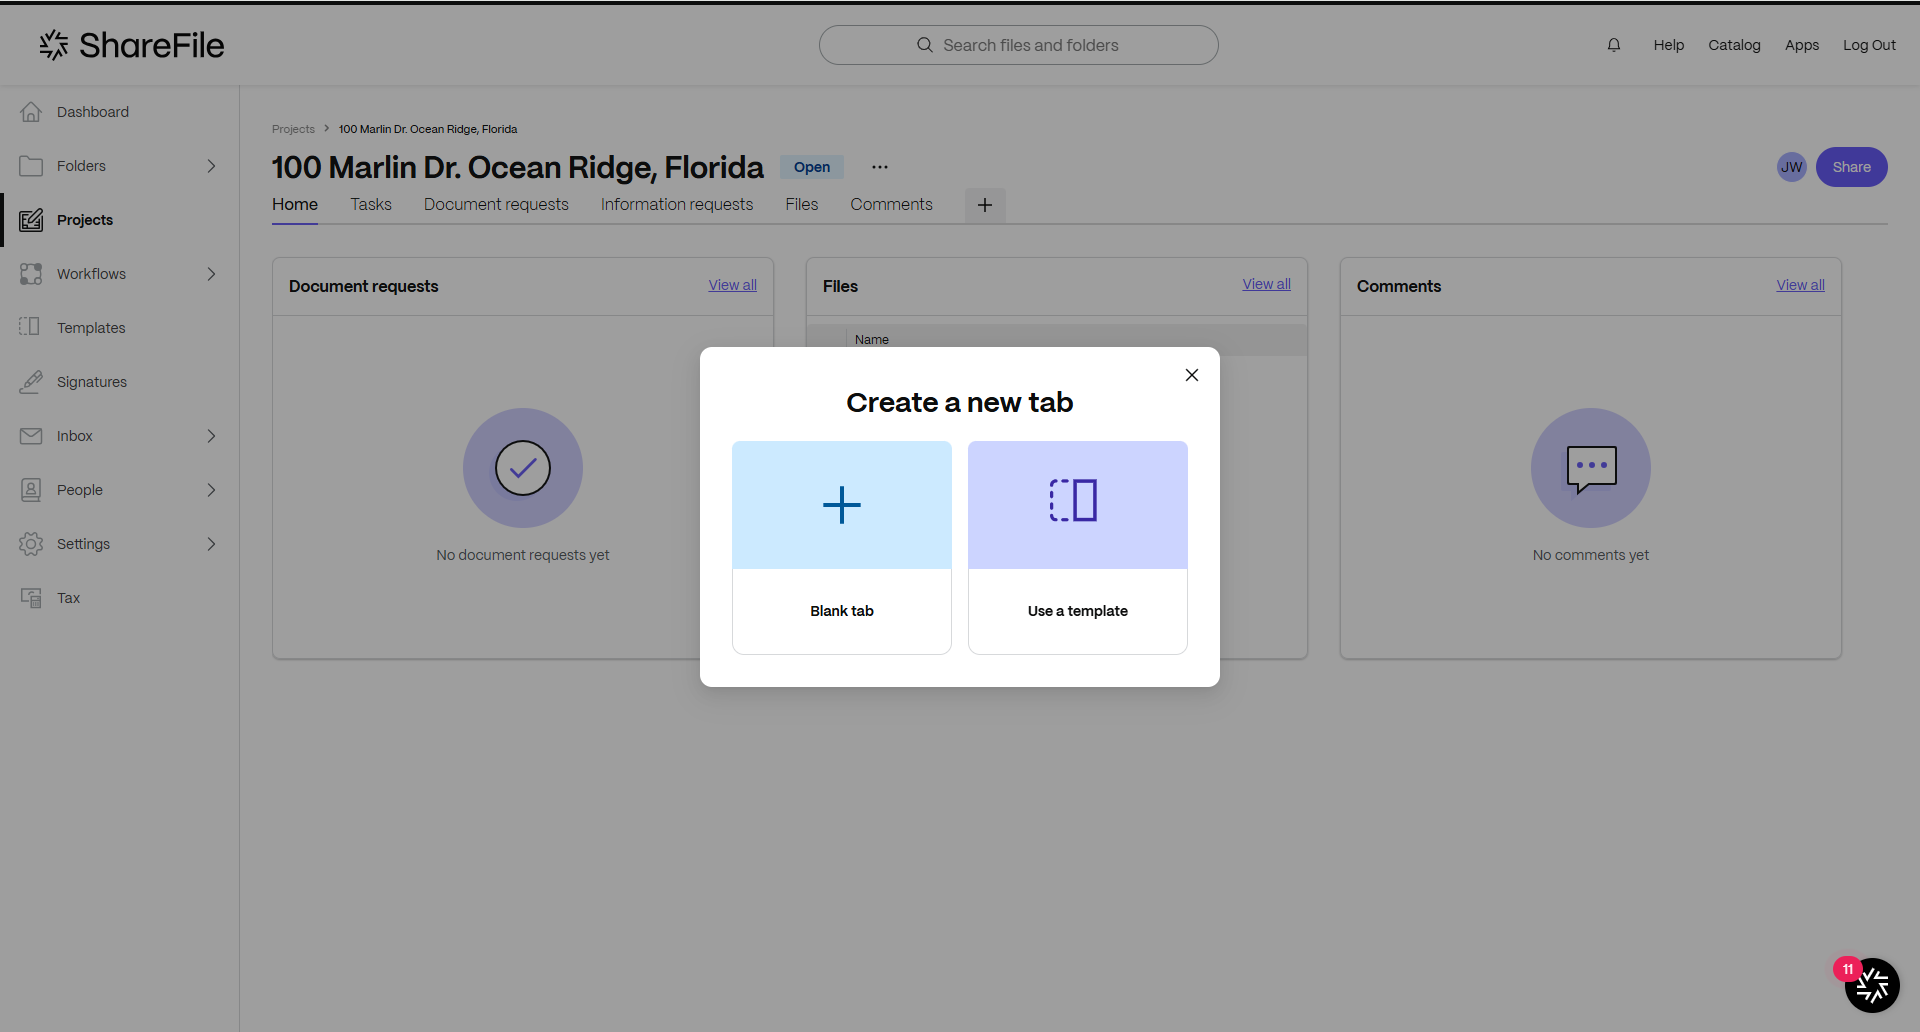
The Create a new tab popup displays.
-
Select Blank tab.
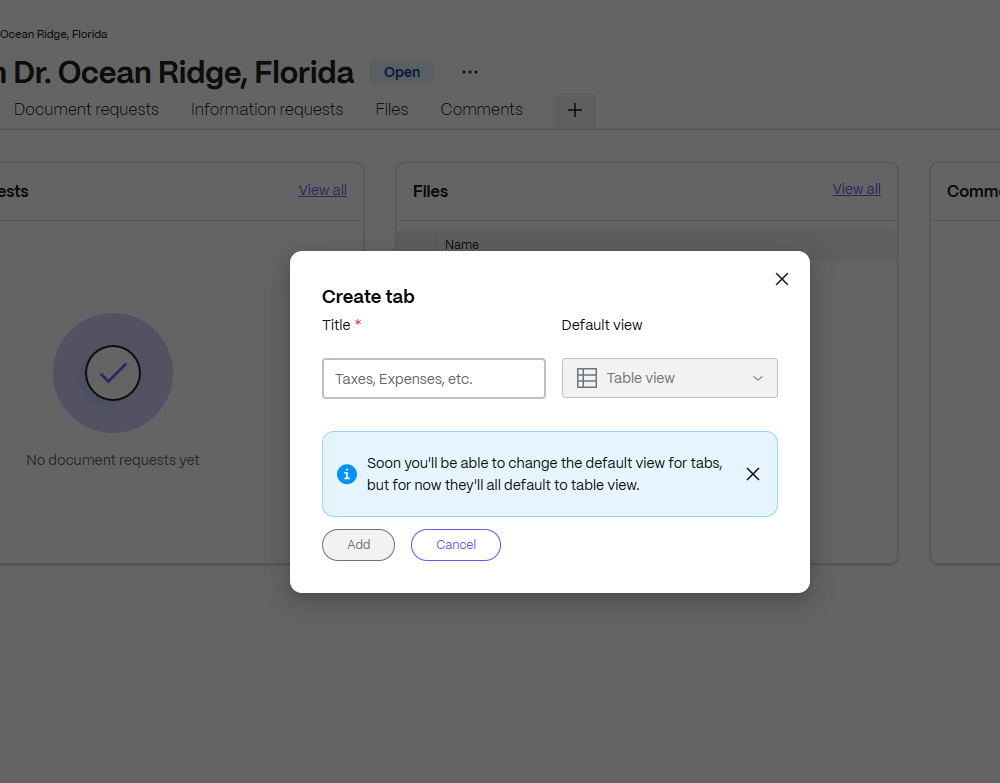
The Create tab screen displays.
-
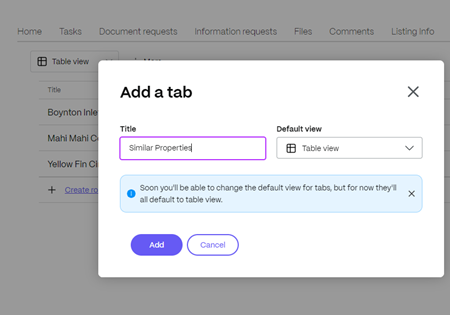
Type in a title for the Tab name.
-
Select Add.
Note:
Soon you will have the ability to change the default view for tabs, but for now they’ll all default to Table view.
-
Select Add.
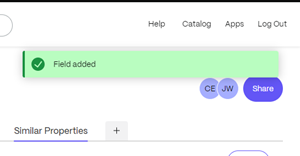
The new Tab is added to your Project.

-
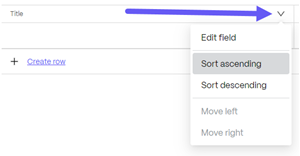
Click inside the cell under Title to type in a title for the row.
-
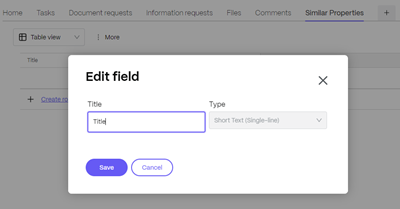
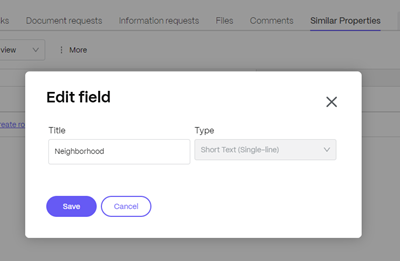
Select + Add to open the Add field popup for the row.
-
Type in a title for the field.
-
From the Type list, select from the following list of field types:
- Short text (single-line) - for short descriptions or questions.
- Long text (multi-line) - for longer explanations or descriptions allowing the use of Rich Text Formatting including fonts, bold, italics, bullets, and other popular formatting options.
- Person
- Date
- Category
- Files
-
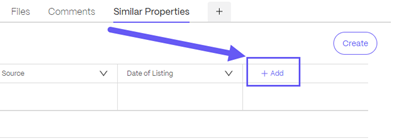
Select Add in the next column to add another field. Repeat this process until you complete your table.
-
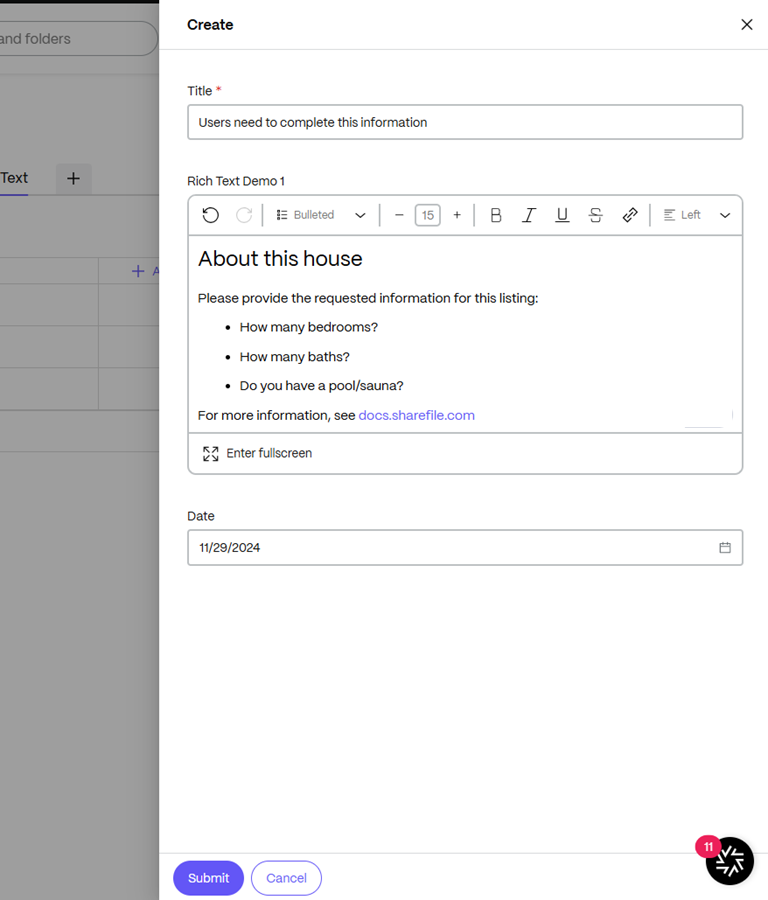
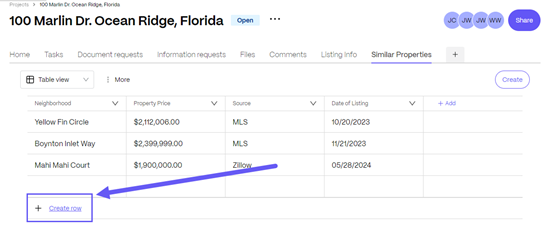
Select Create row to add rows.
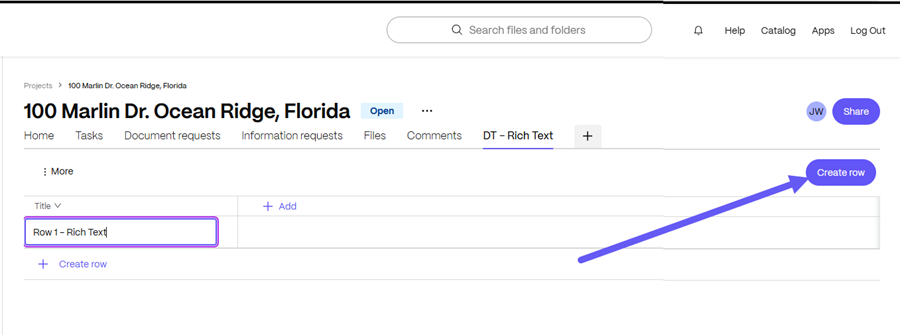
The Create page editor displays.
-
Type in a title for the row.
-
Using the Rich text editor, create a row description for the users.
-
Select a date for the field.
-
Select Submit.
Rich Text Formatting for Long text (multi-line) fields
The following steps explain the steps to access and use Rich Text Formatting for Long text (multi-line) fields
-
When adding a field, select Long text (multi-line) to use Rich Text Formatting.

-
Once the field is created, select the field to open the editor for multi-line editing.
Note:
Select Enter fullscreen to make the editing space larger for easier formatting.
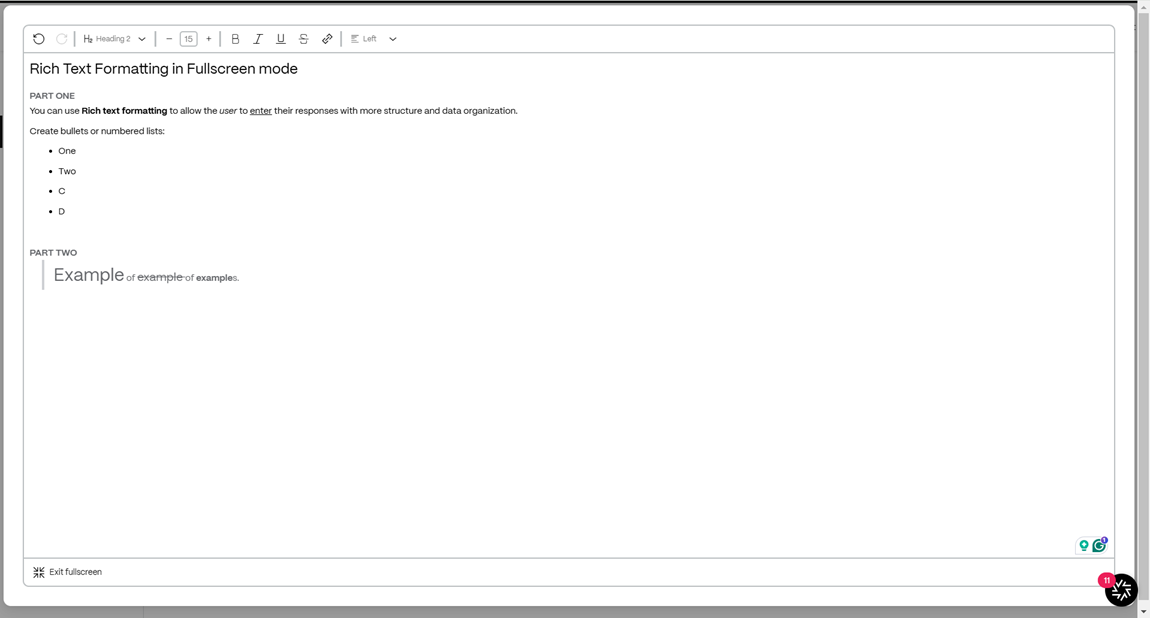
When finished, select Exit fullscreen to return to the table.
File Attachment Functionality in ShareFile Data Table
The ShareFile data table now supports file attachment functionality to enhance your project management capabilities. This feature allows users to upload or link files directly within project records to help manage and access important documents.
Record Creation and File Attachment
When creating a new record in the data table, you can now attach files as part of the data entry process.
Upload Files To Any Record
You can create a new record in an existing project to use this feature. When creating a new record in the data table, you can now attach files as part of the data entry process. You can use the right side panel to add files:
Right Side Panel Attachment: While creating the record in the data table, users can attach/upload files from the right side panel when creating a record. This allows for easy browsing and selection of files to be linked to the record. To do this, simply navigate to the Create button on the top right corner as shown below:
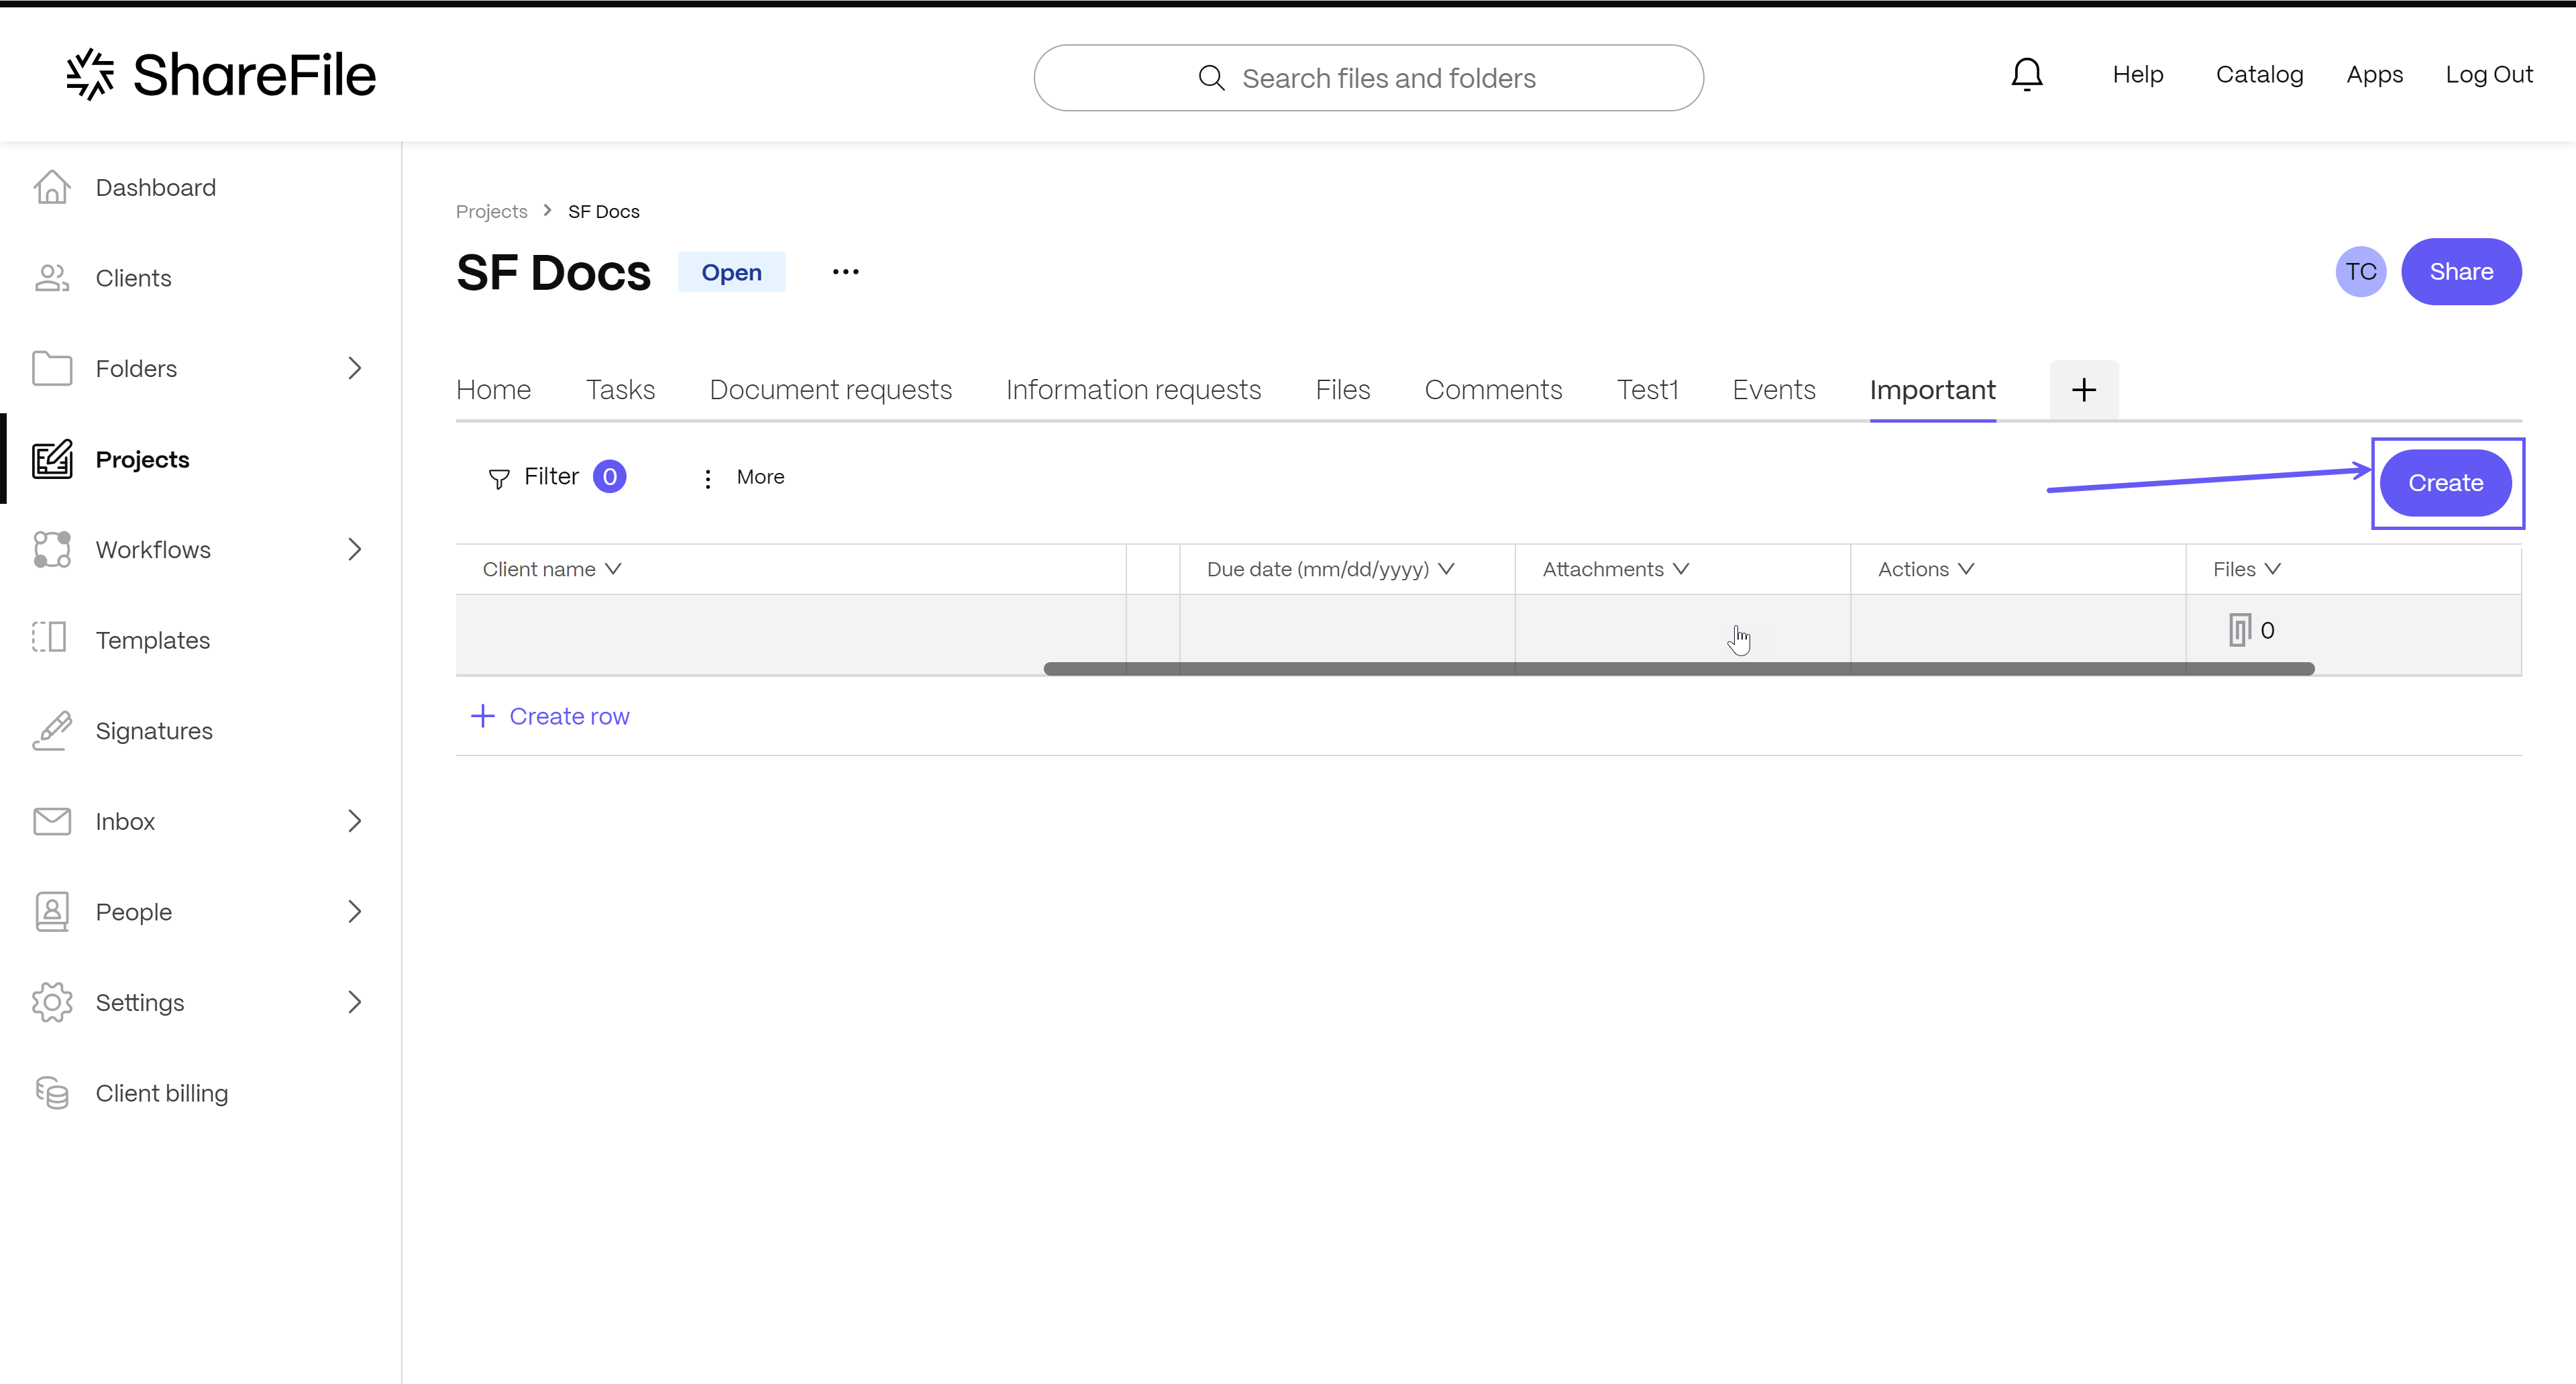
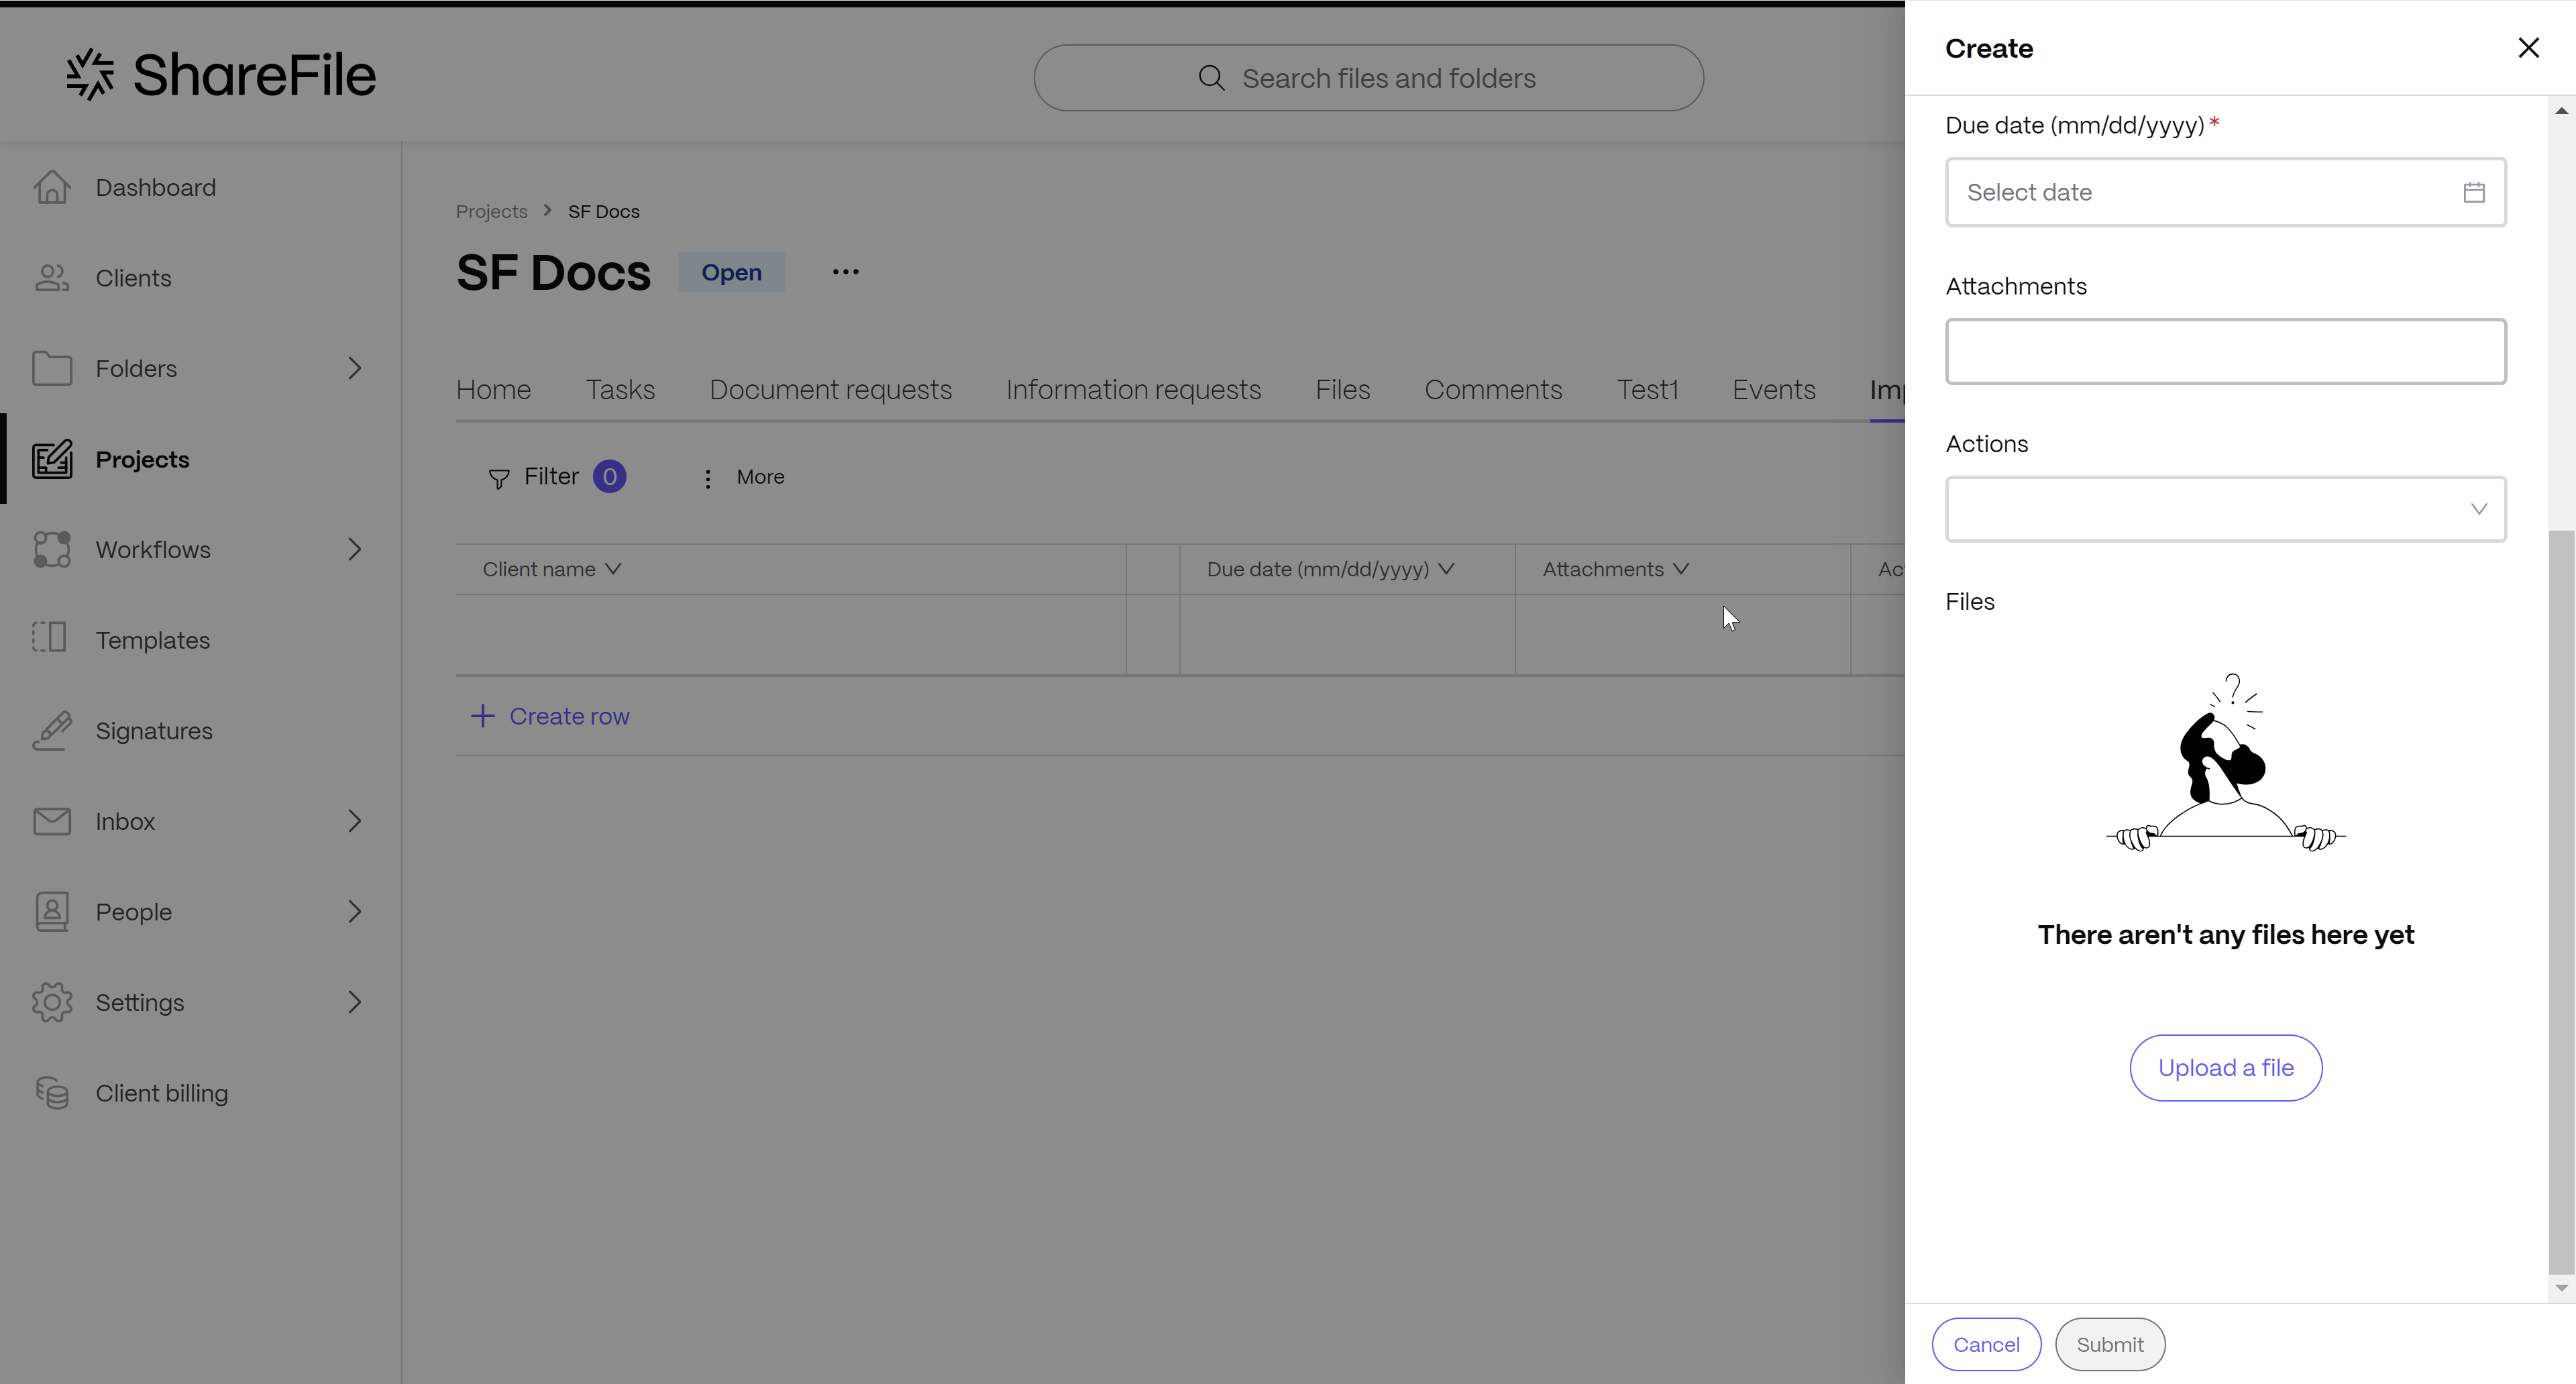
The right side panel opens. At the bottom. click on the Upload a file button, browse for the required file, and select it to be linked to the record.
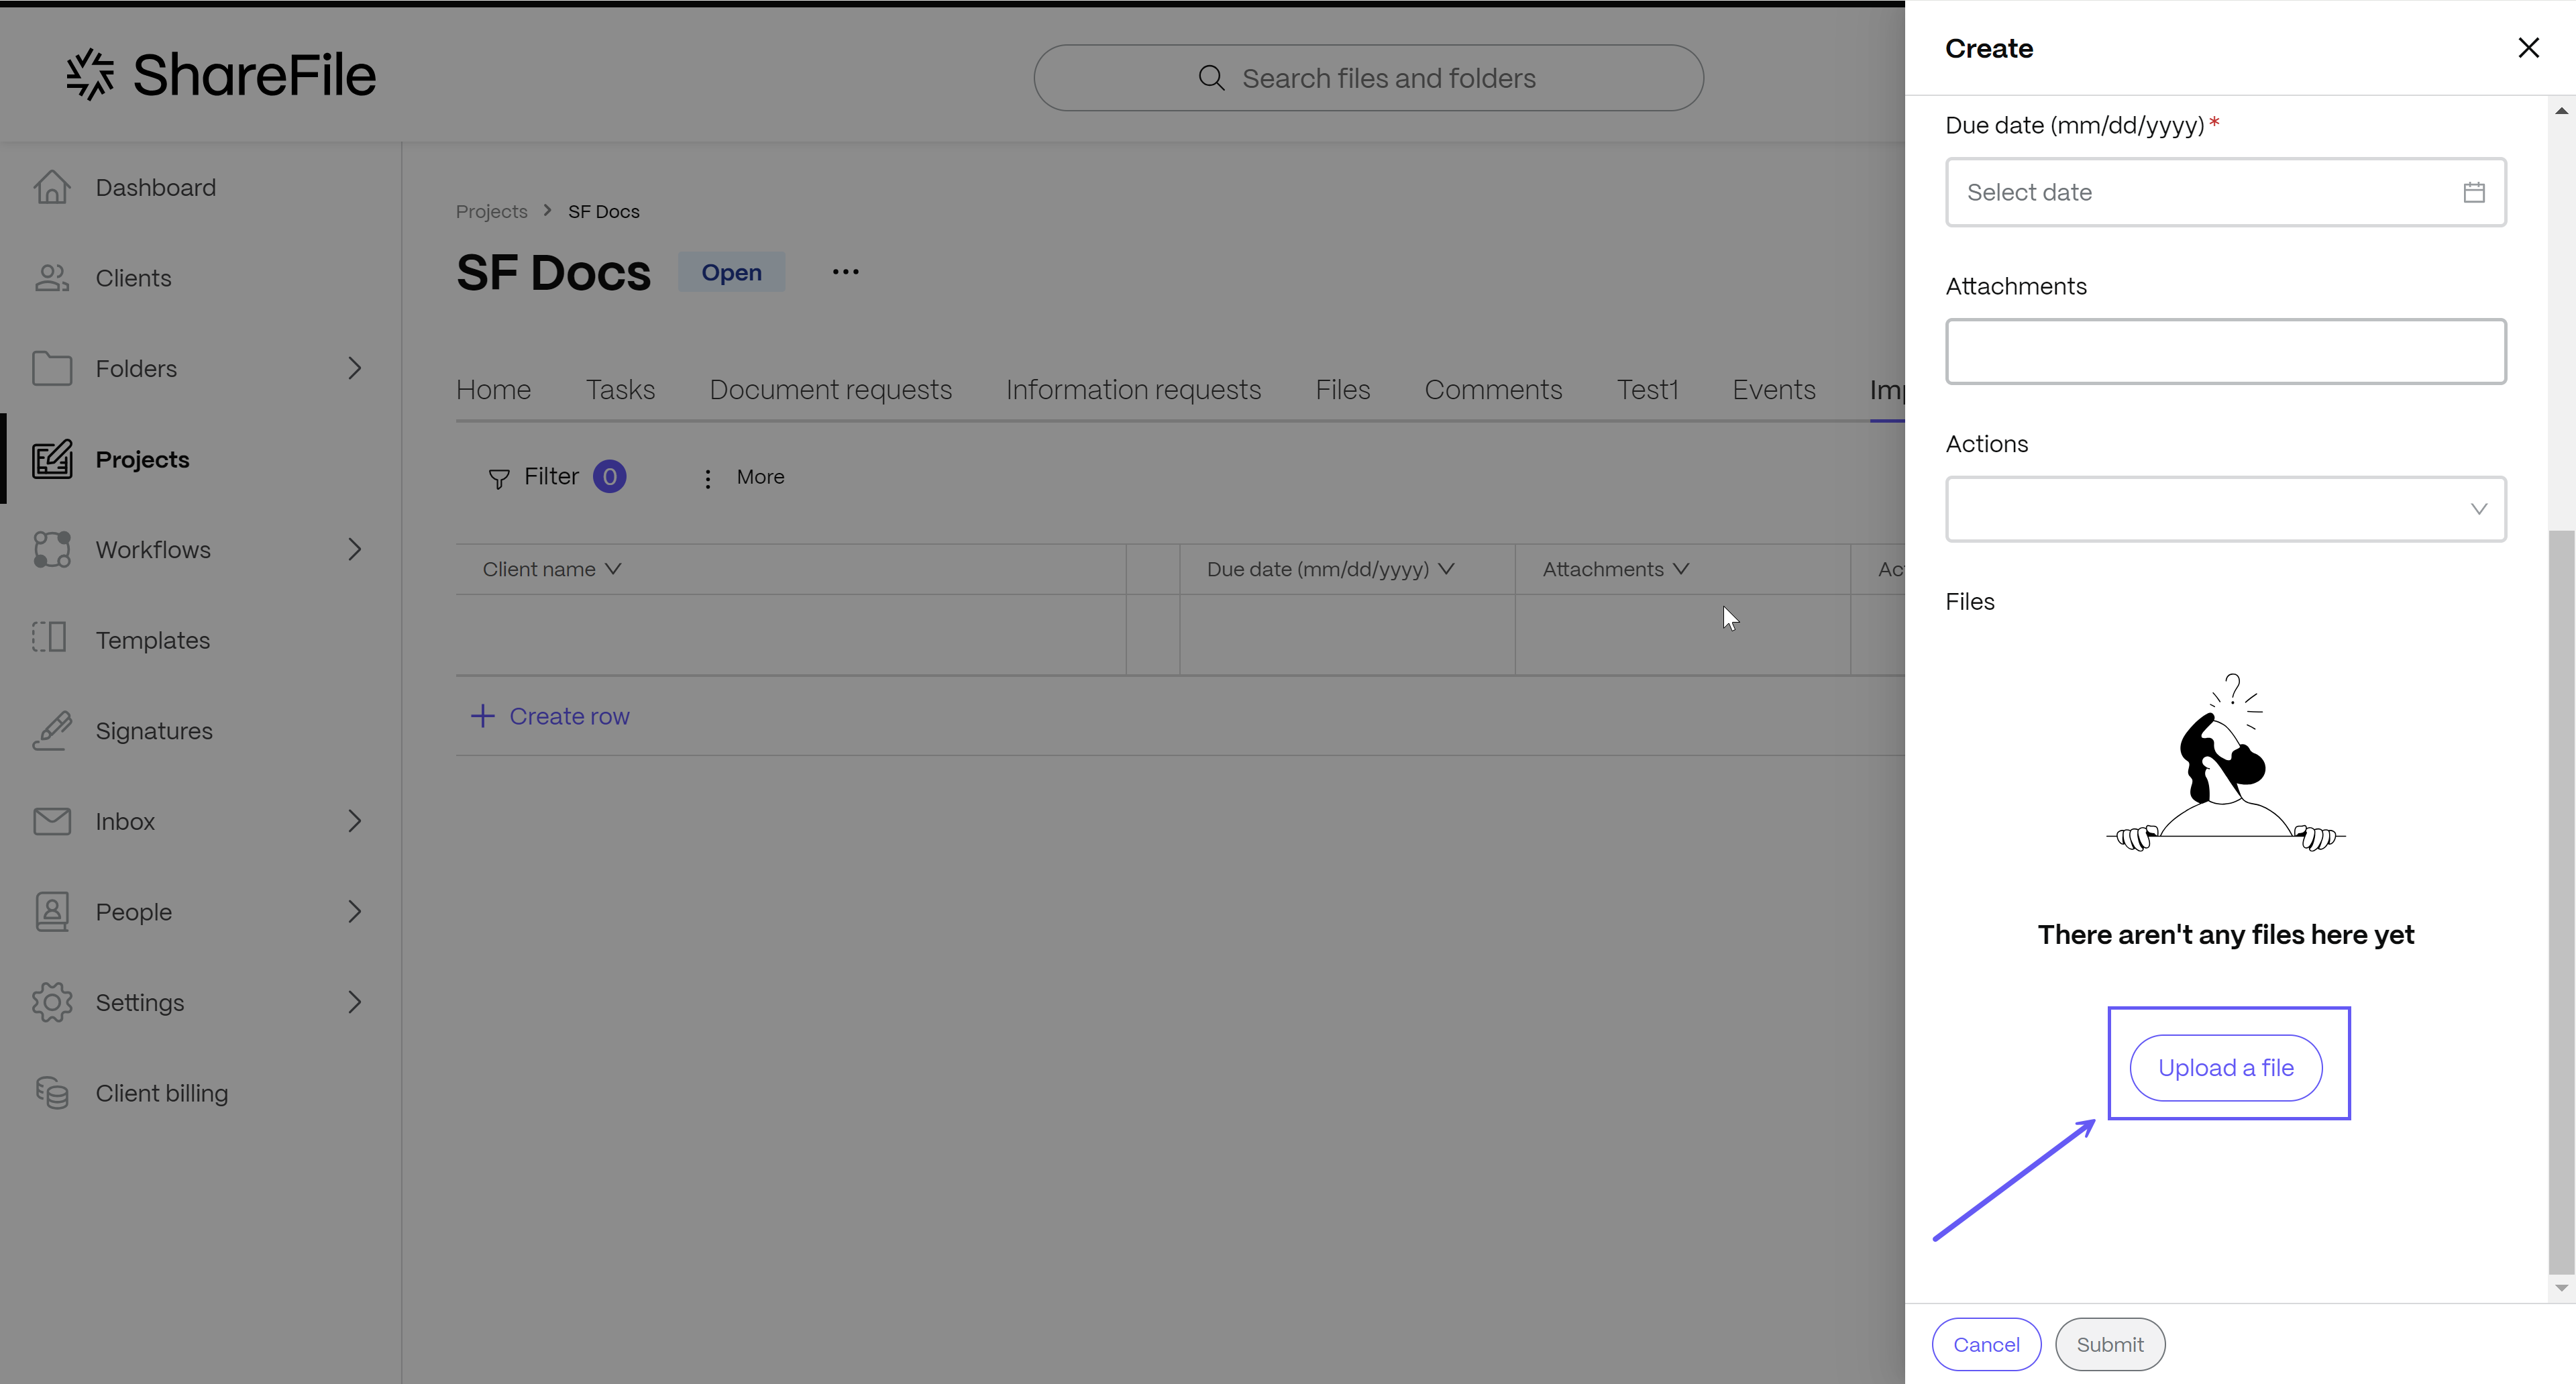
A success message is displayed with the name of the newly created row added as a record is displayed on the top right of the screen as shown below:

Link File To Any Record
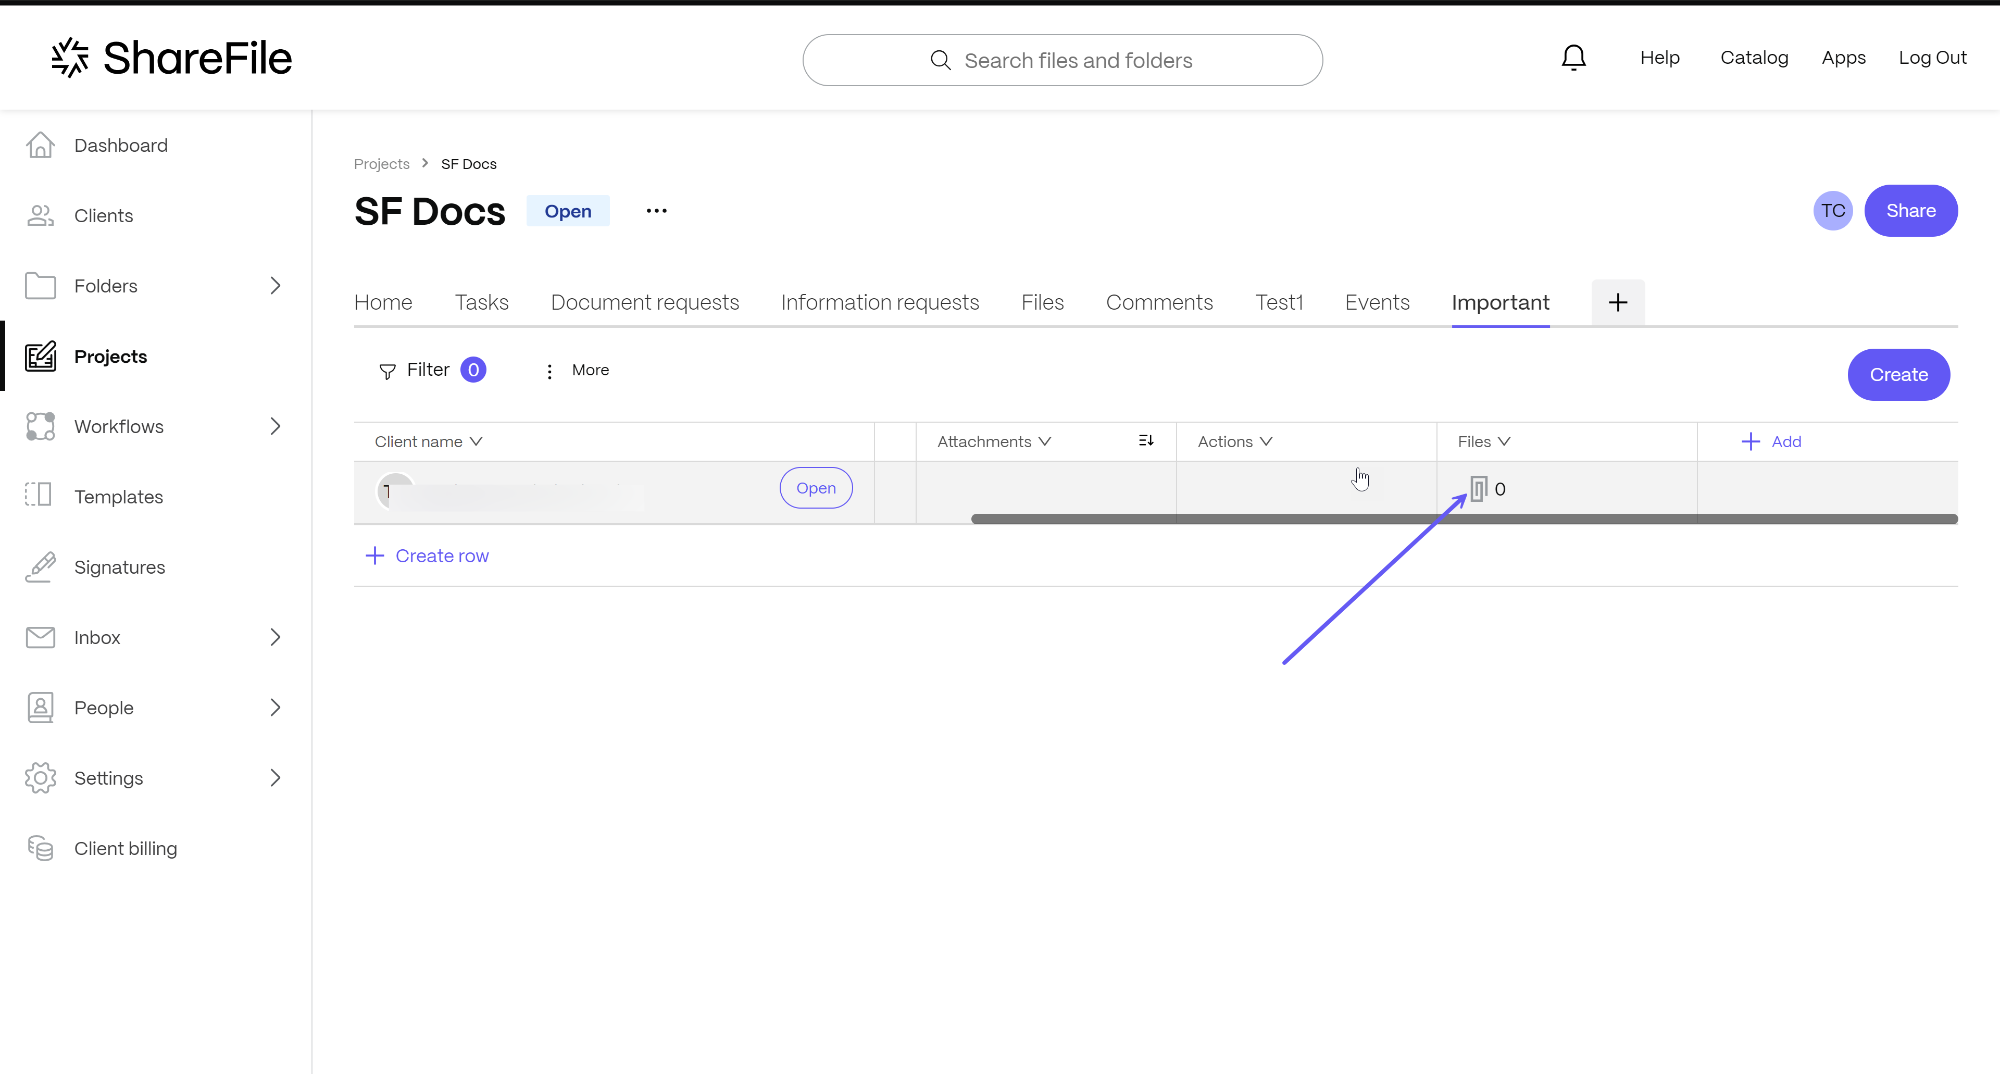
You can link files directly to an existing record by clicking on the cell designated for file attachment within the data table. This action will prompt a file upload interface, allowing you to attach the desired files to the specific record. To do this, first select the location of the cell Documents for file attachment within the data table. Click on the paper clip icon in the cell to open the file upload interface.
Click on the Upload a file link to browse for the file and attach it directly to the record.
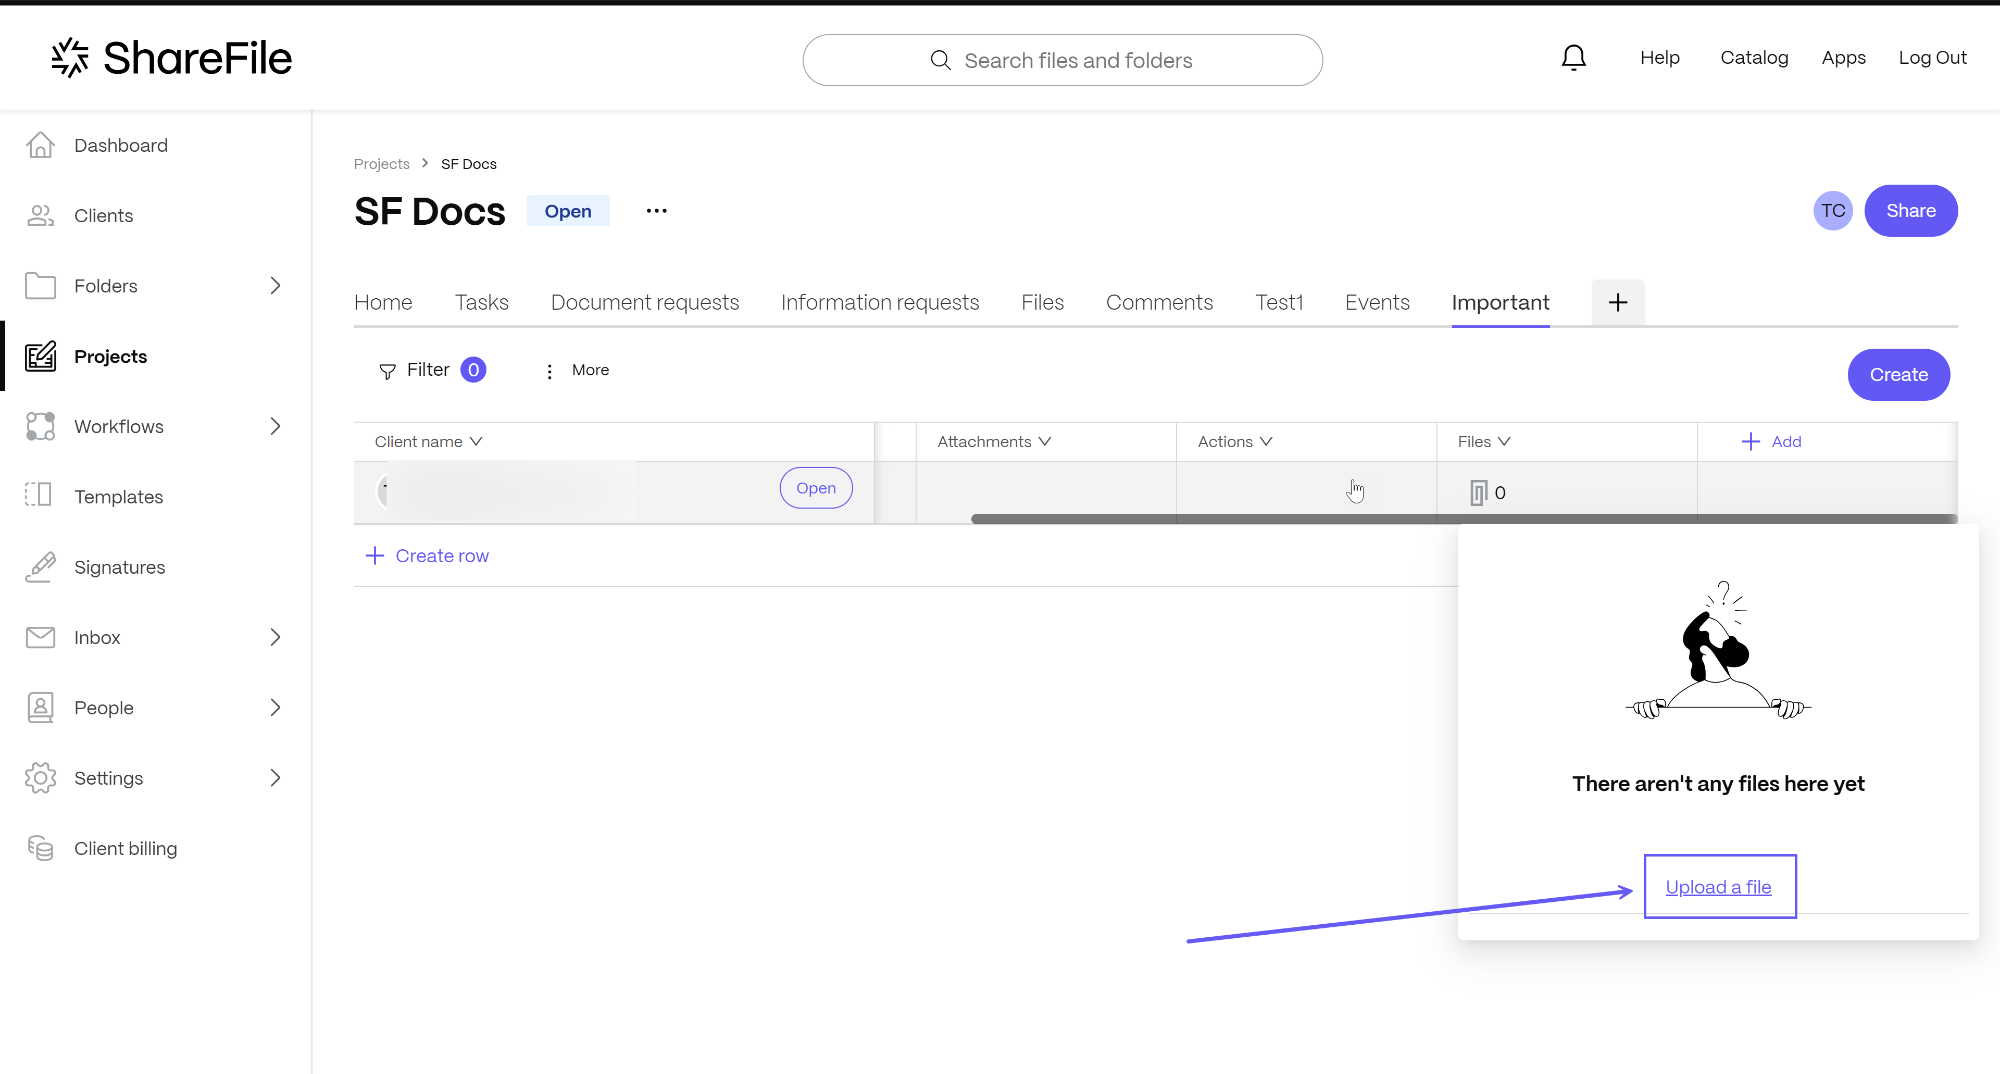
Delete File From Any Record
You can also delete any attached file from a given record. To do so, go to the specified cell where the files are attached. Click on the cell to display the attached file and hover the mouse over the attached file name. A trash can symbol will appear on the right side of the file name. Click on the same as shown below:
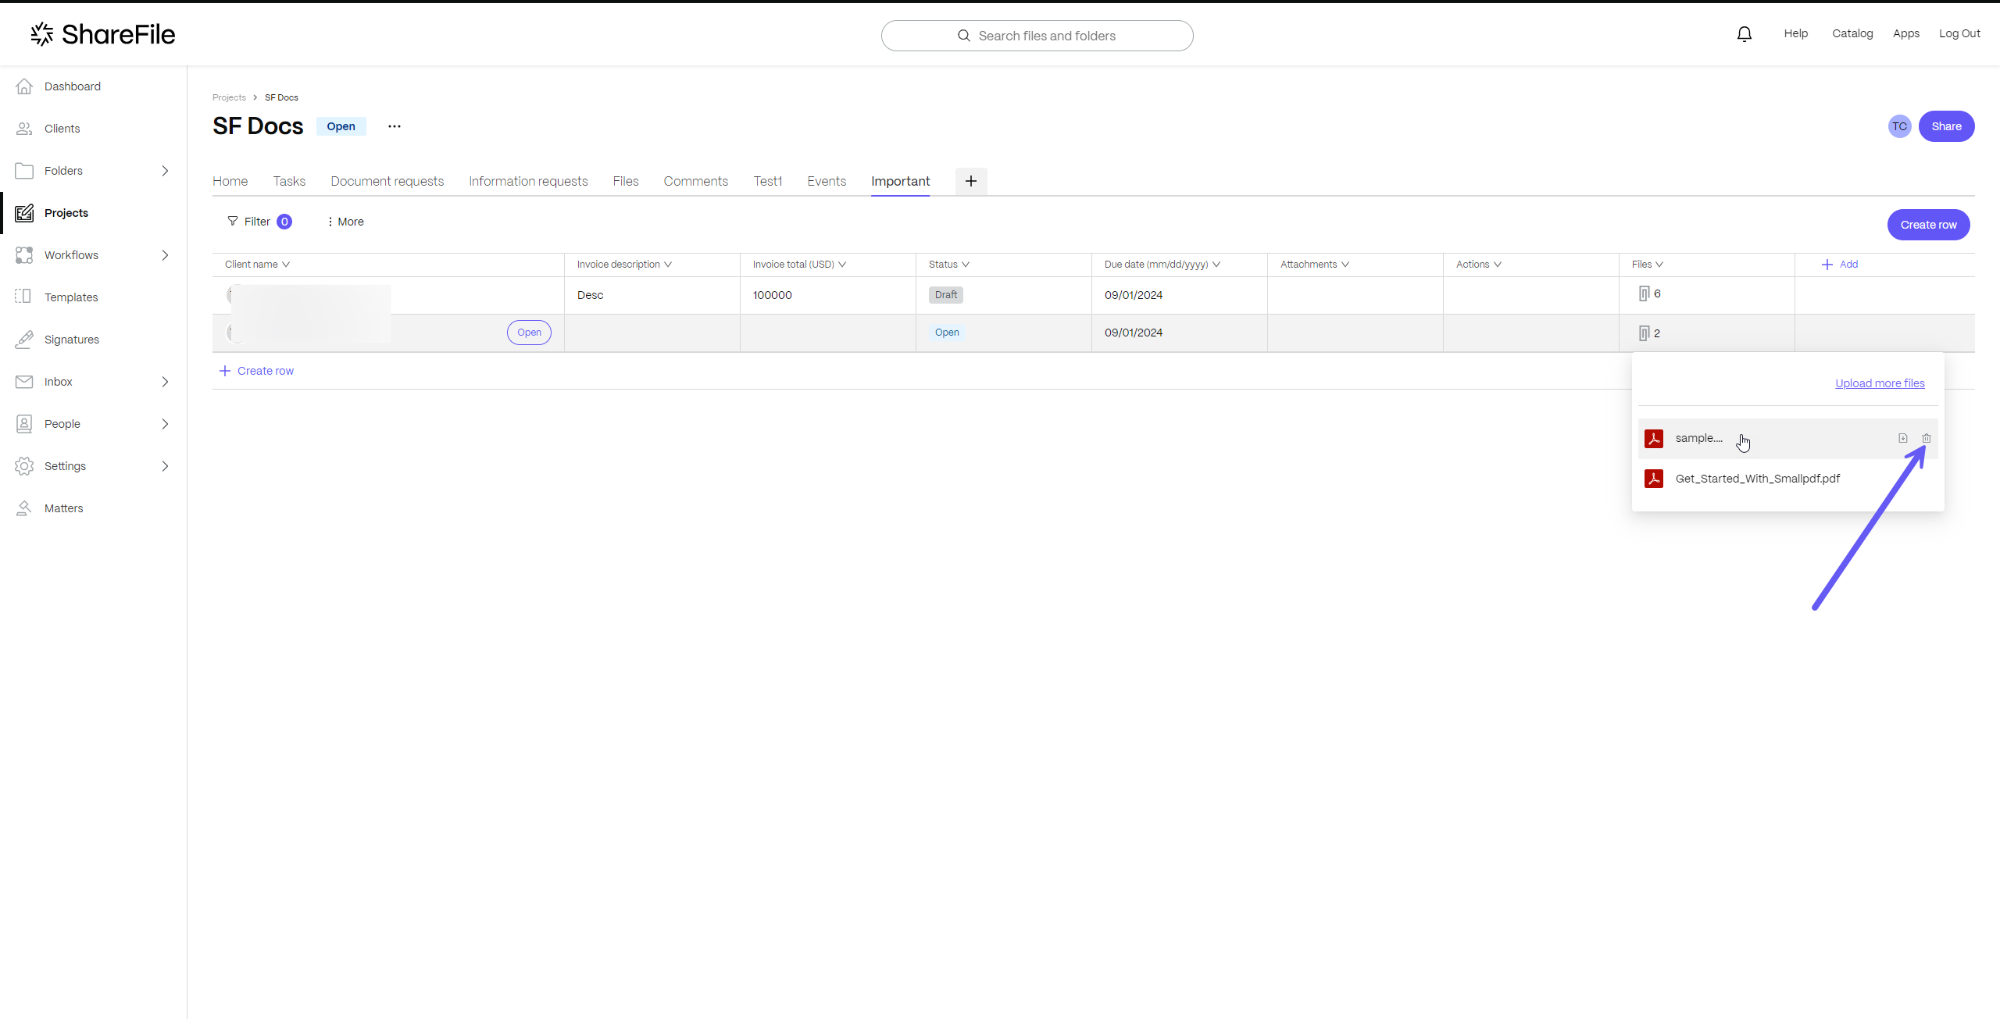
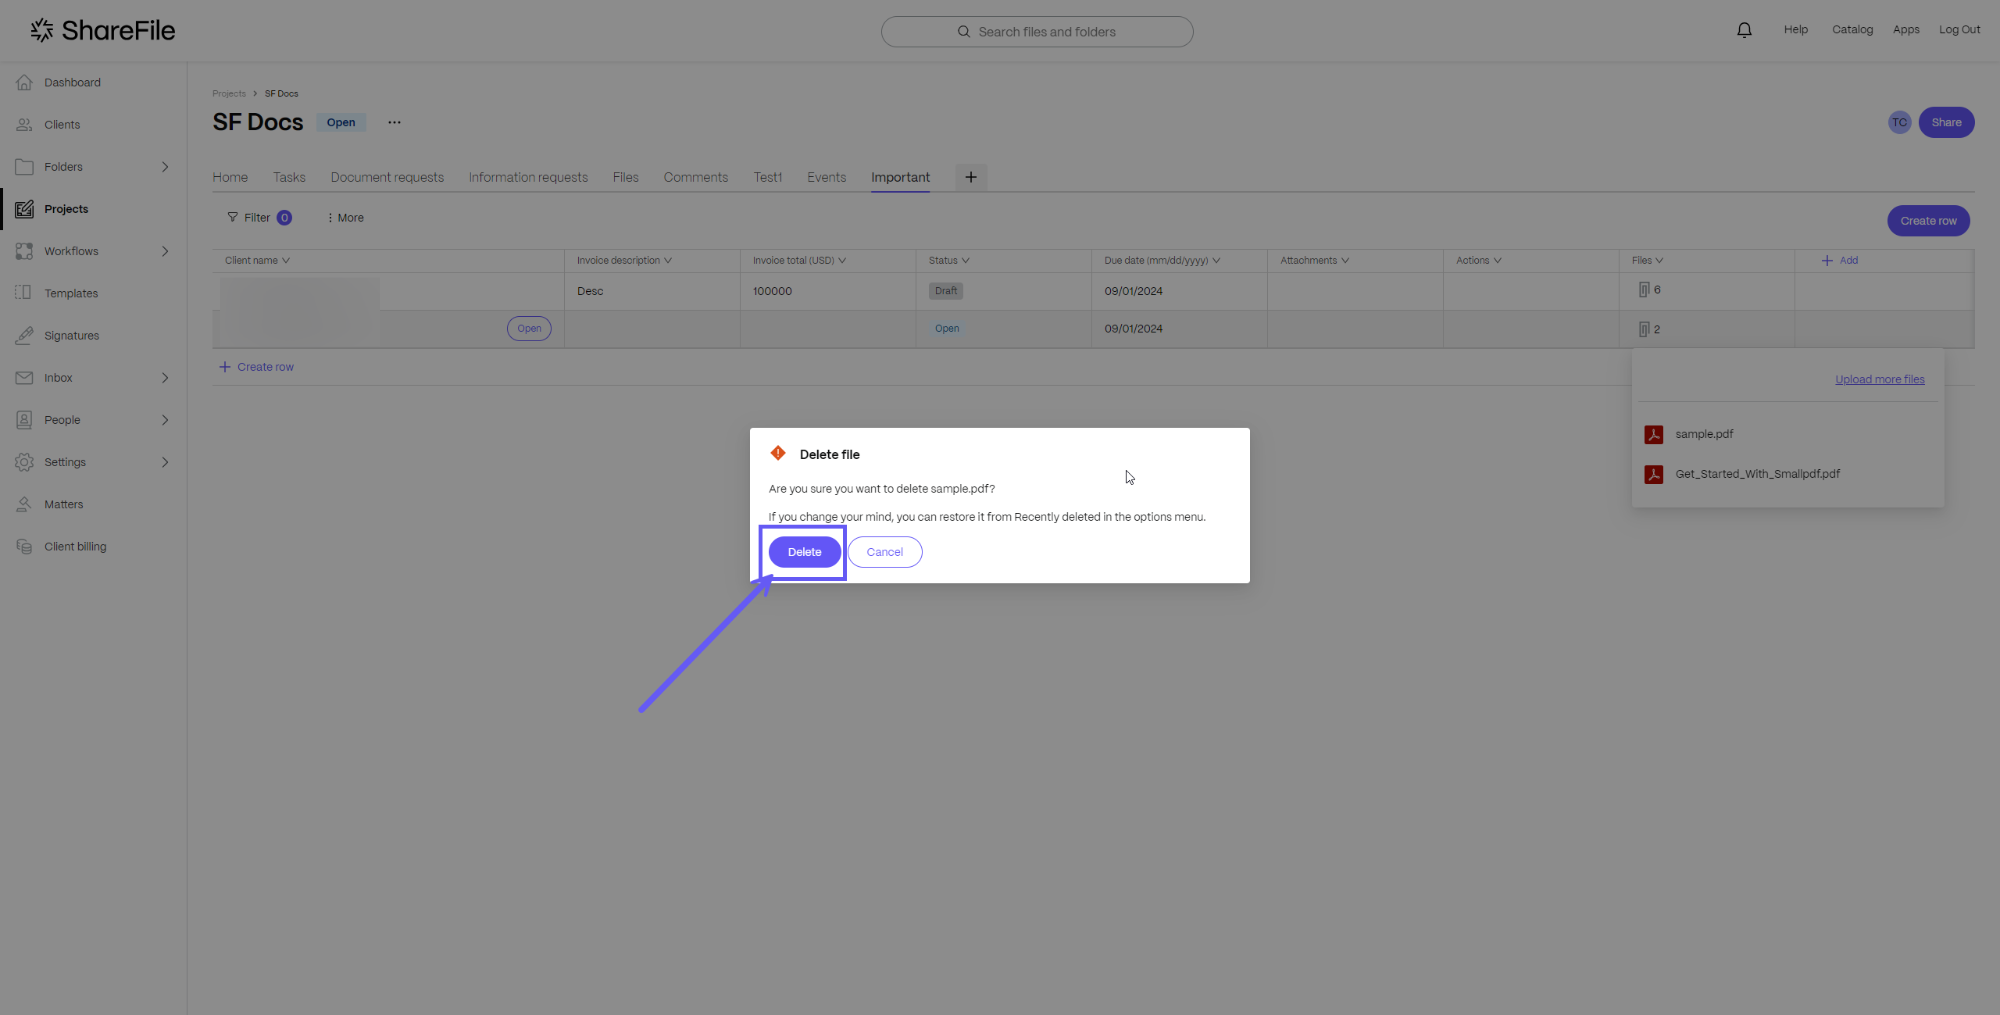
A dialog box will appear asking for delete confirmation. Click on the Delete button to confirm.
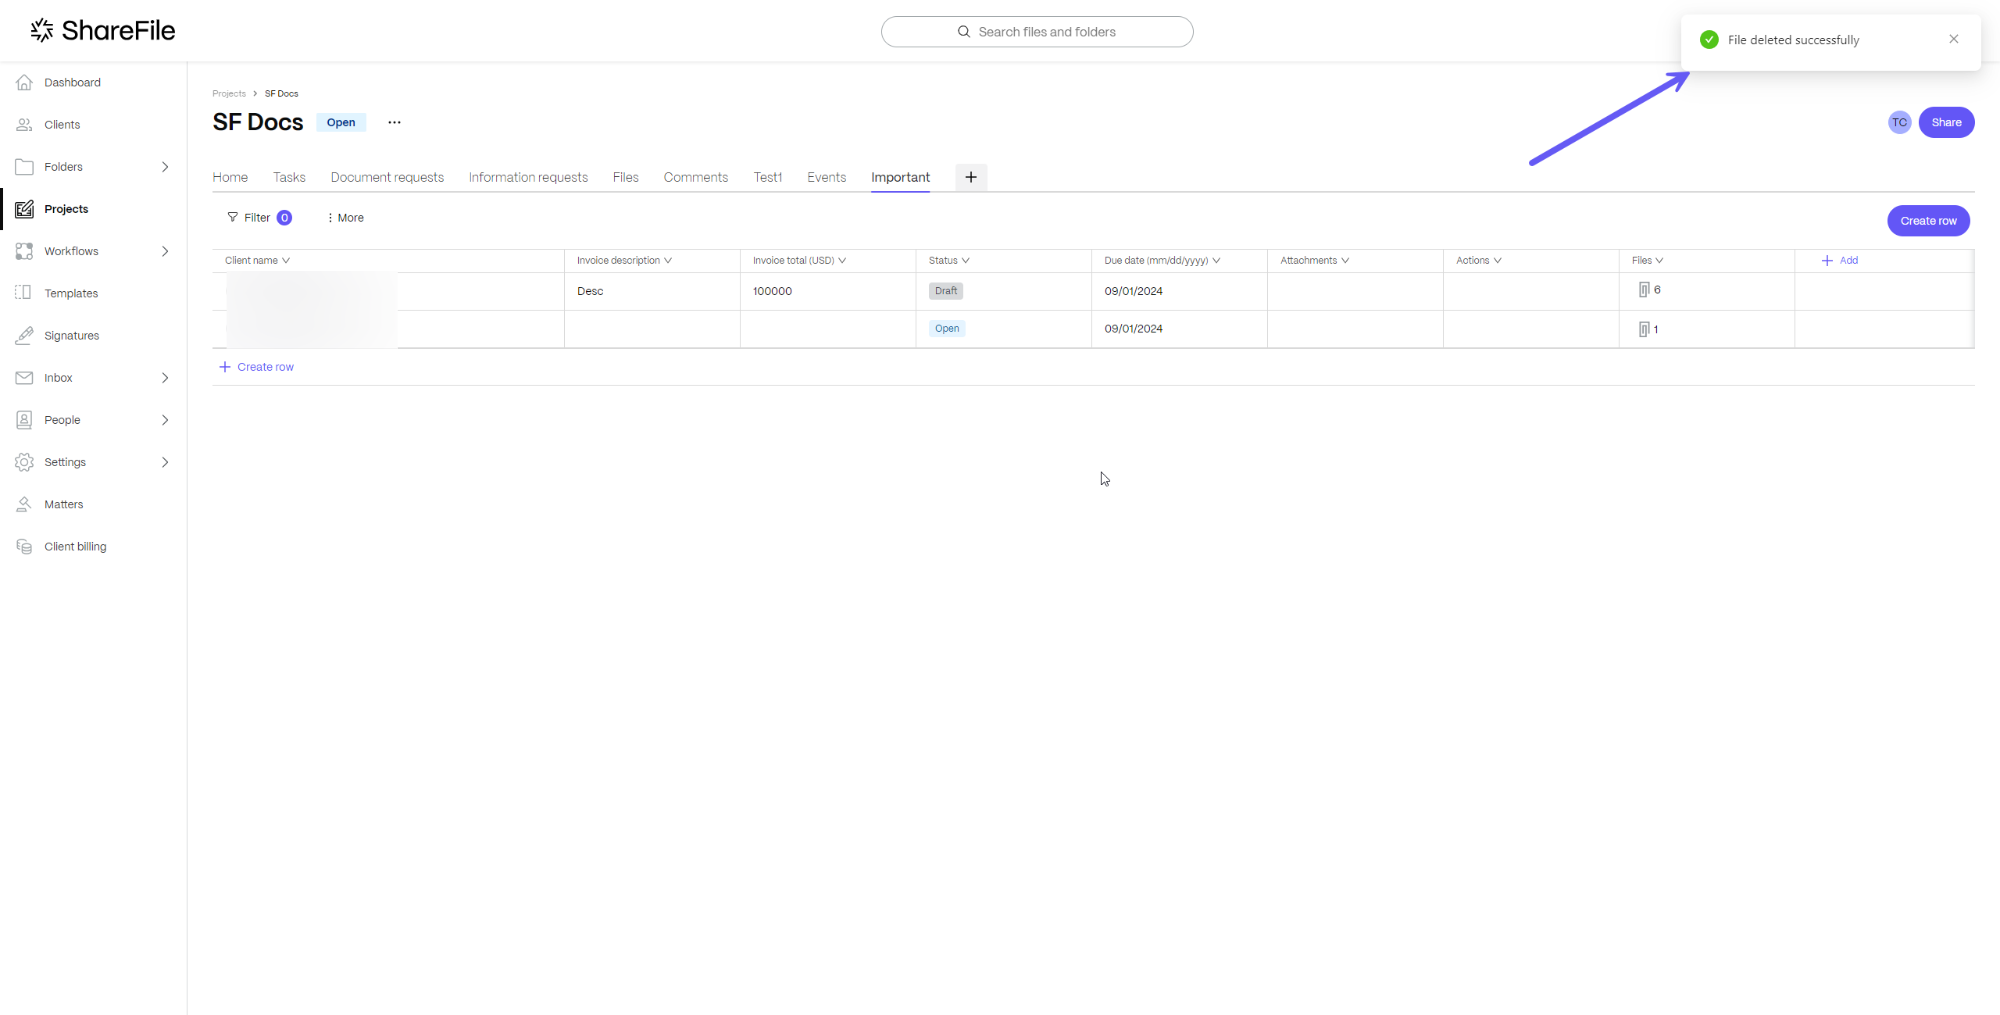
Upon successful deletion, a success message will be displayed on the top right corner of the screen.
Note:
Next to the delete symbol in the field cell, you can also find the Download button which you can use to download the file attachment.
Update file from any record
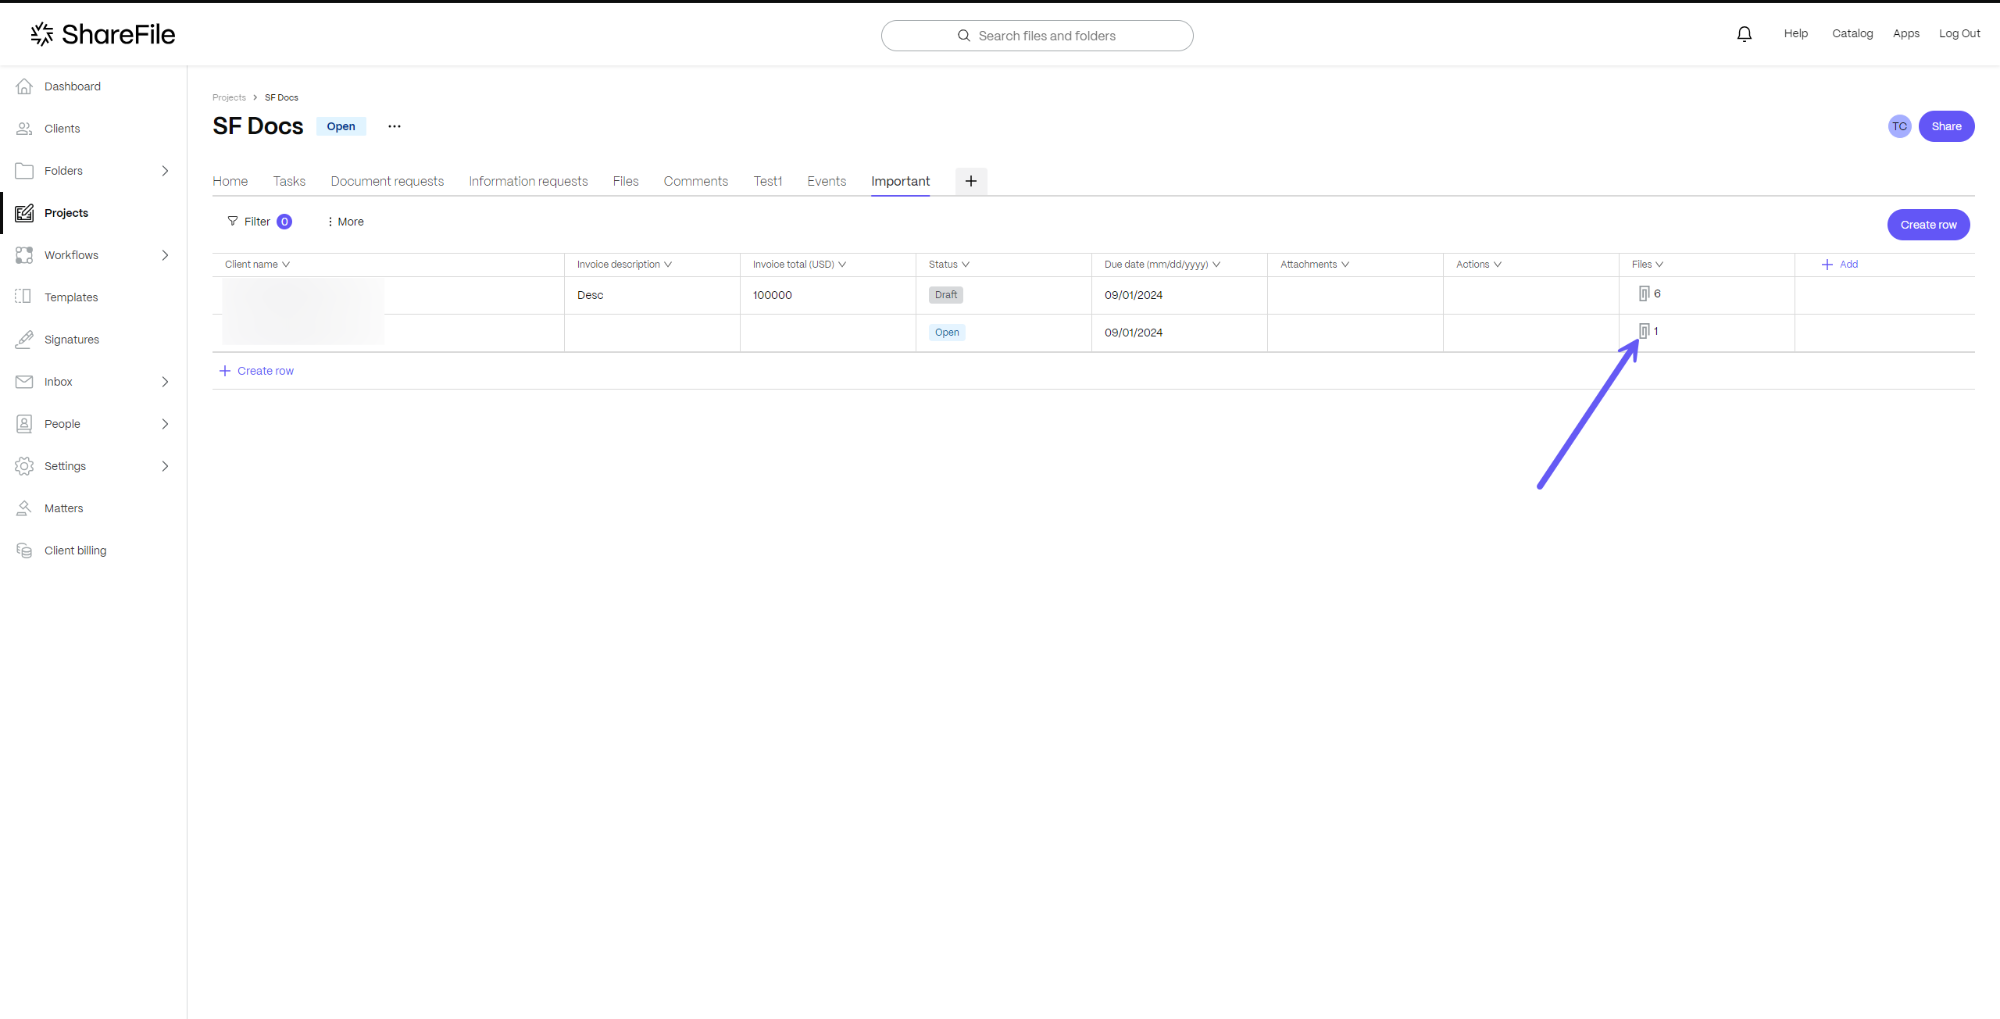
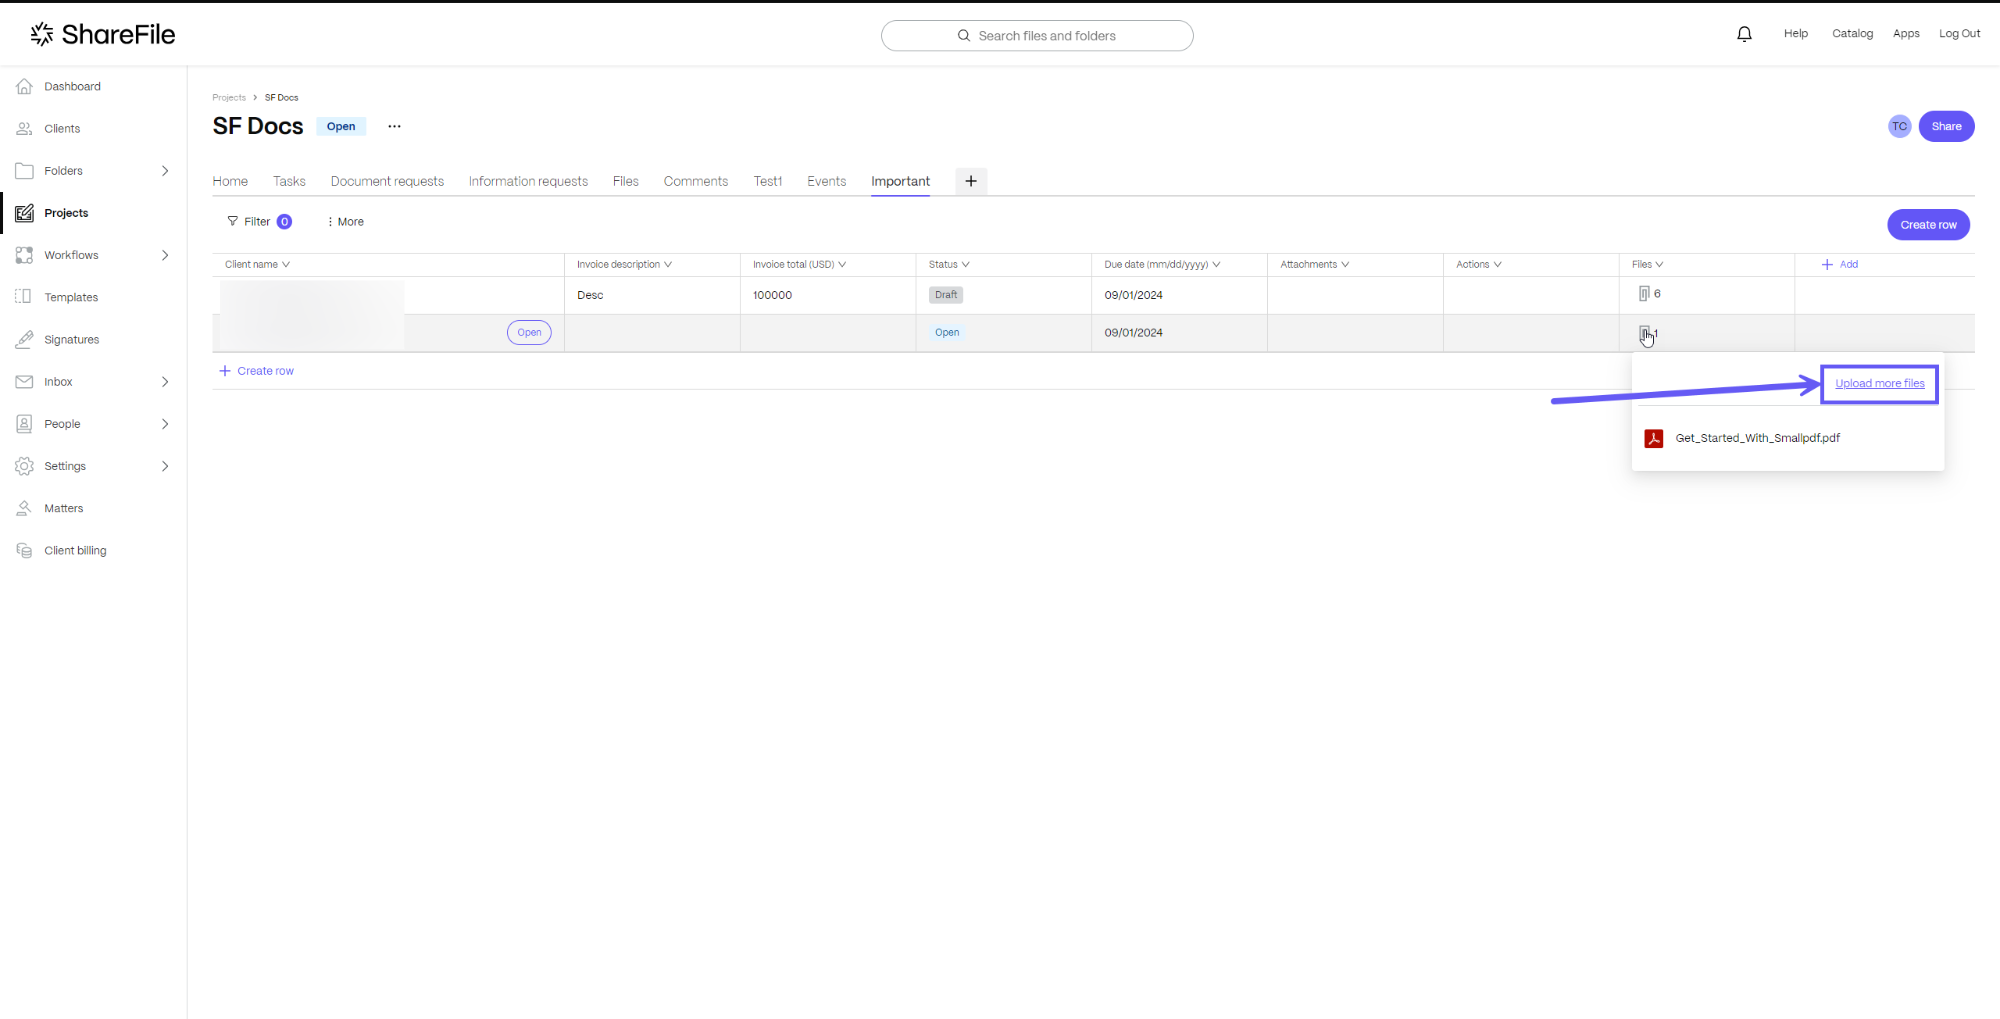
You can also attach more than 1 file to any record. Simply go to the specified cell and click on the file attachment icon next to the number (of files currently attached) in the field as shown below:
From the box that opens, select the Upload more files option.
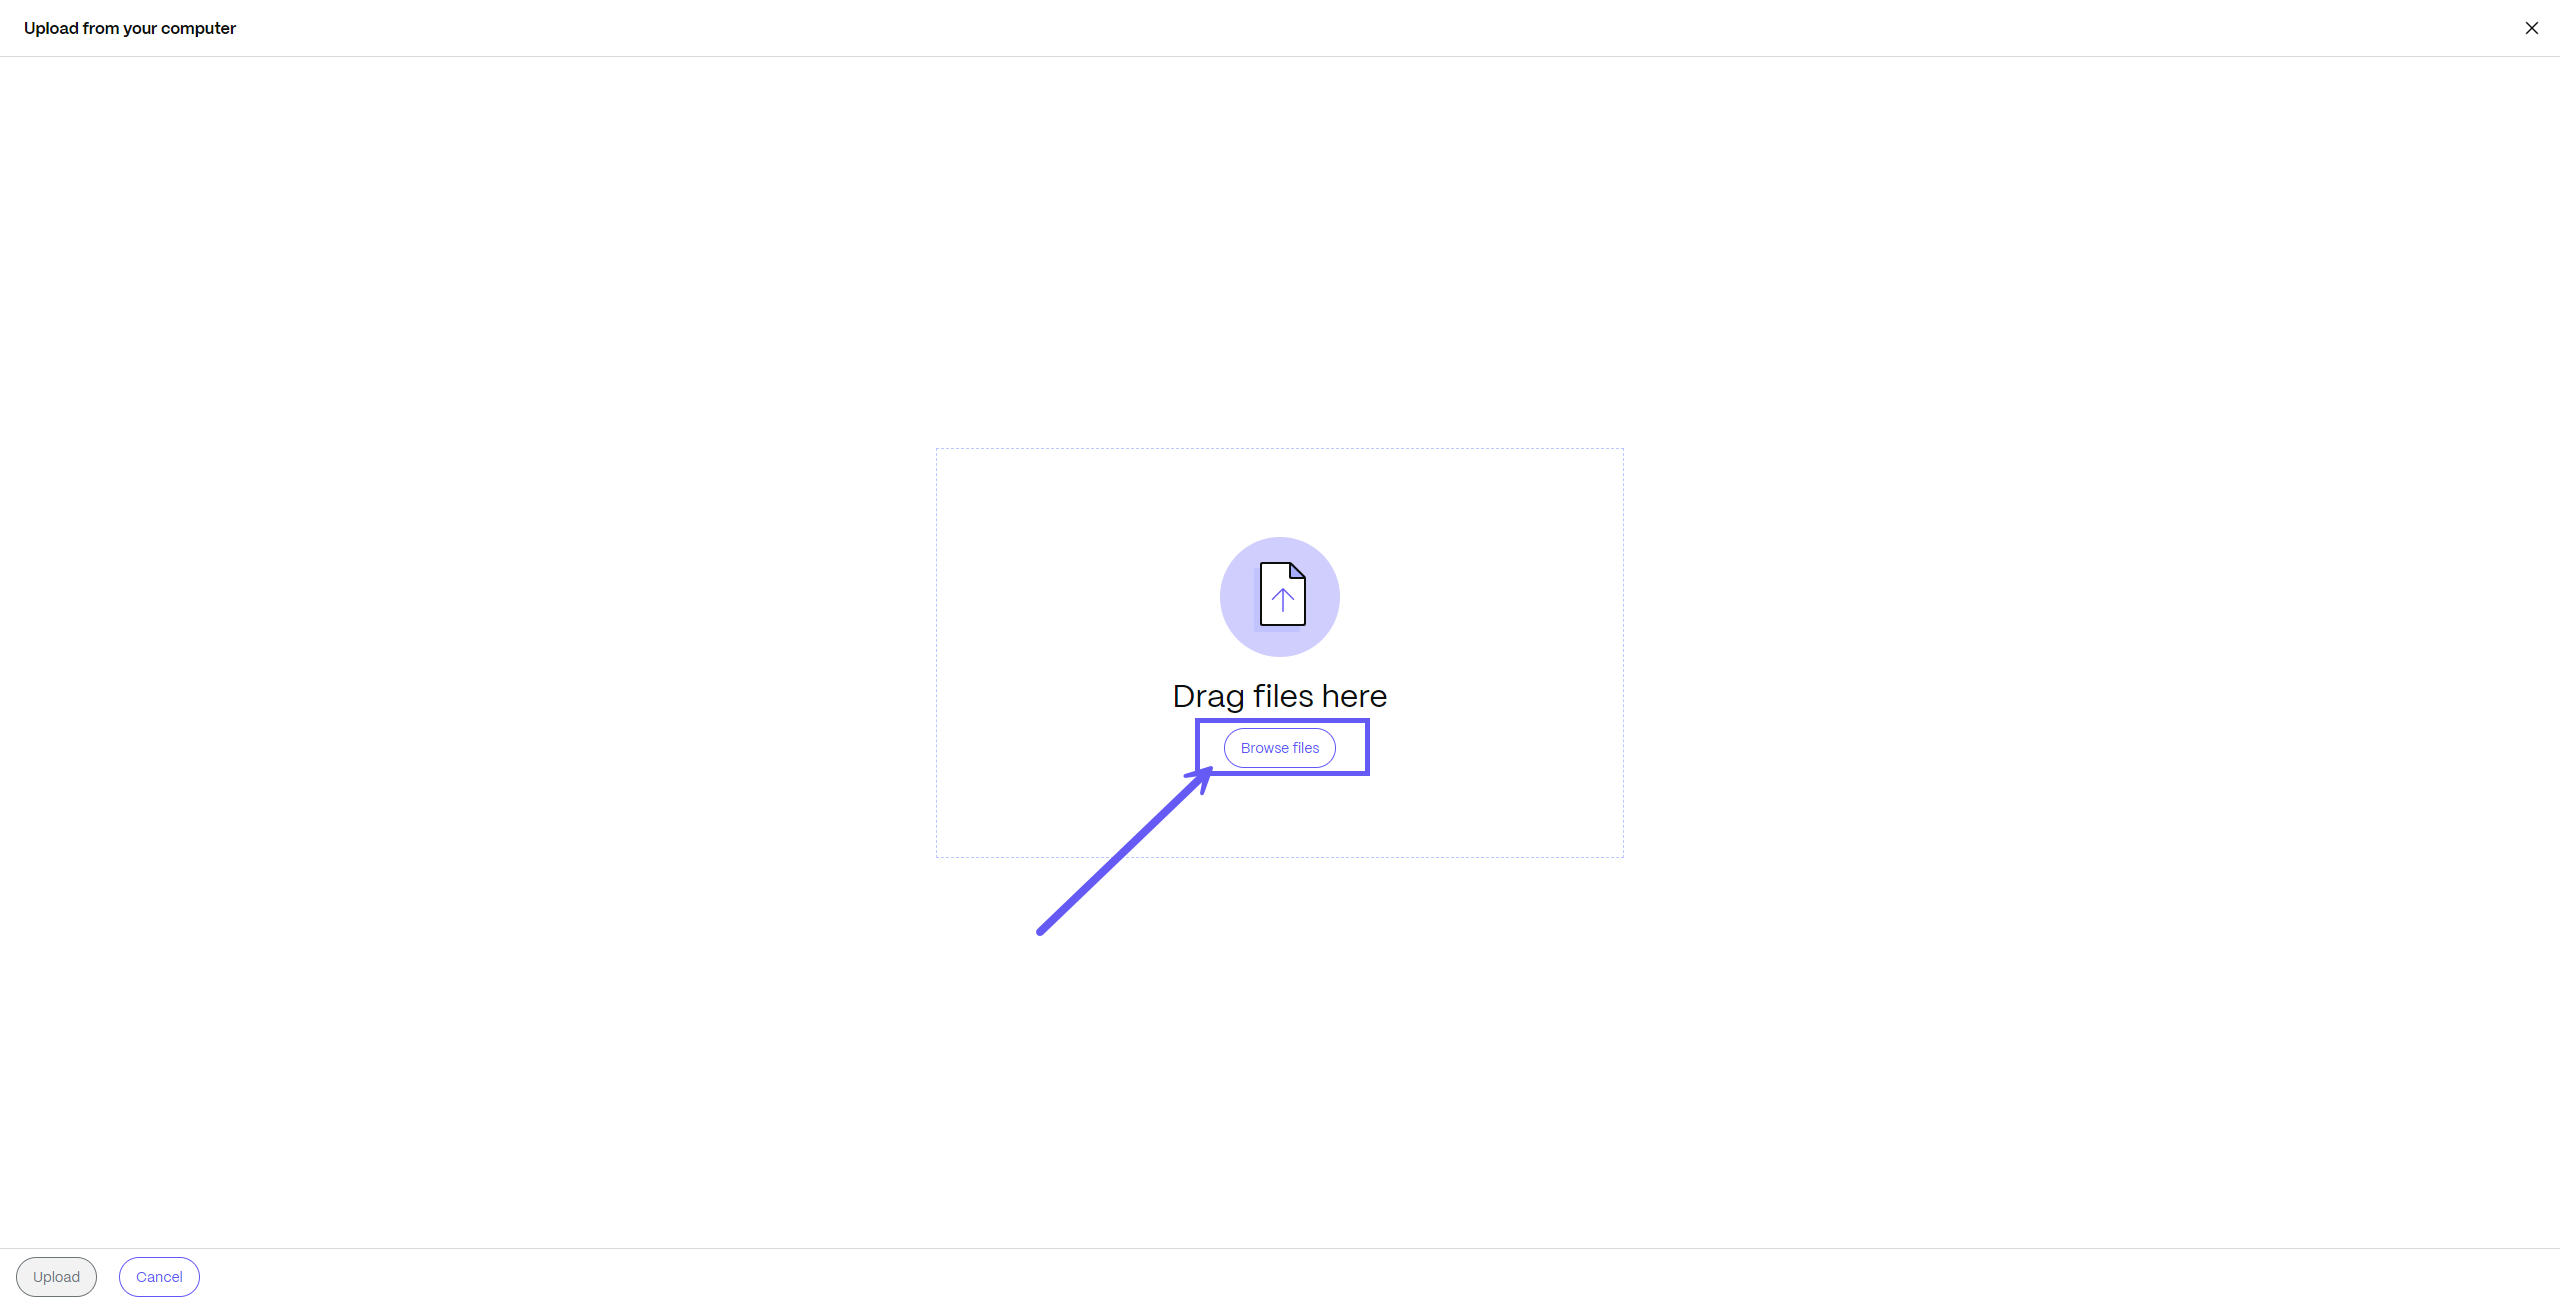
The upload files screen opens. Click on the Browse files option to add one or more files to the field.
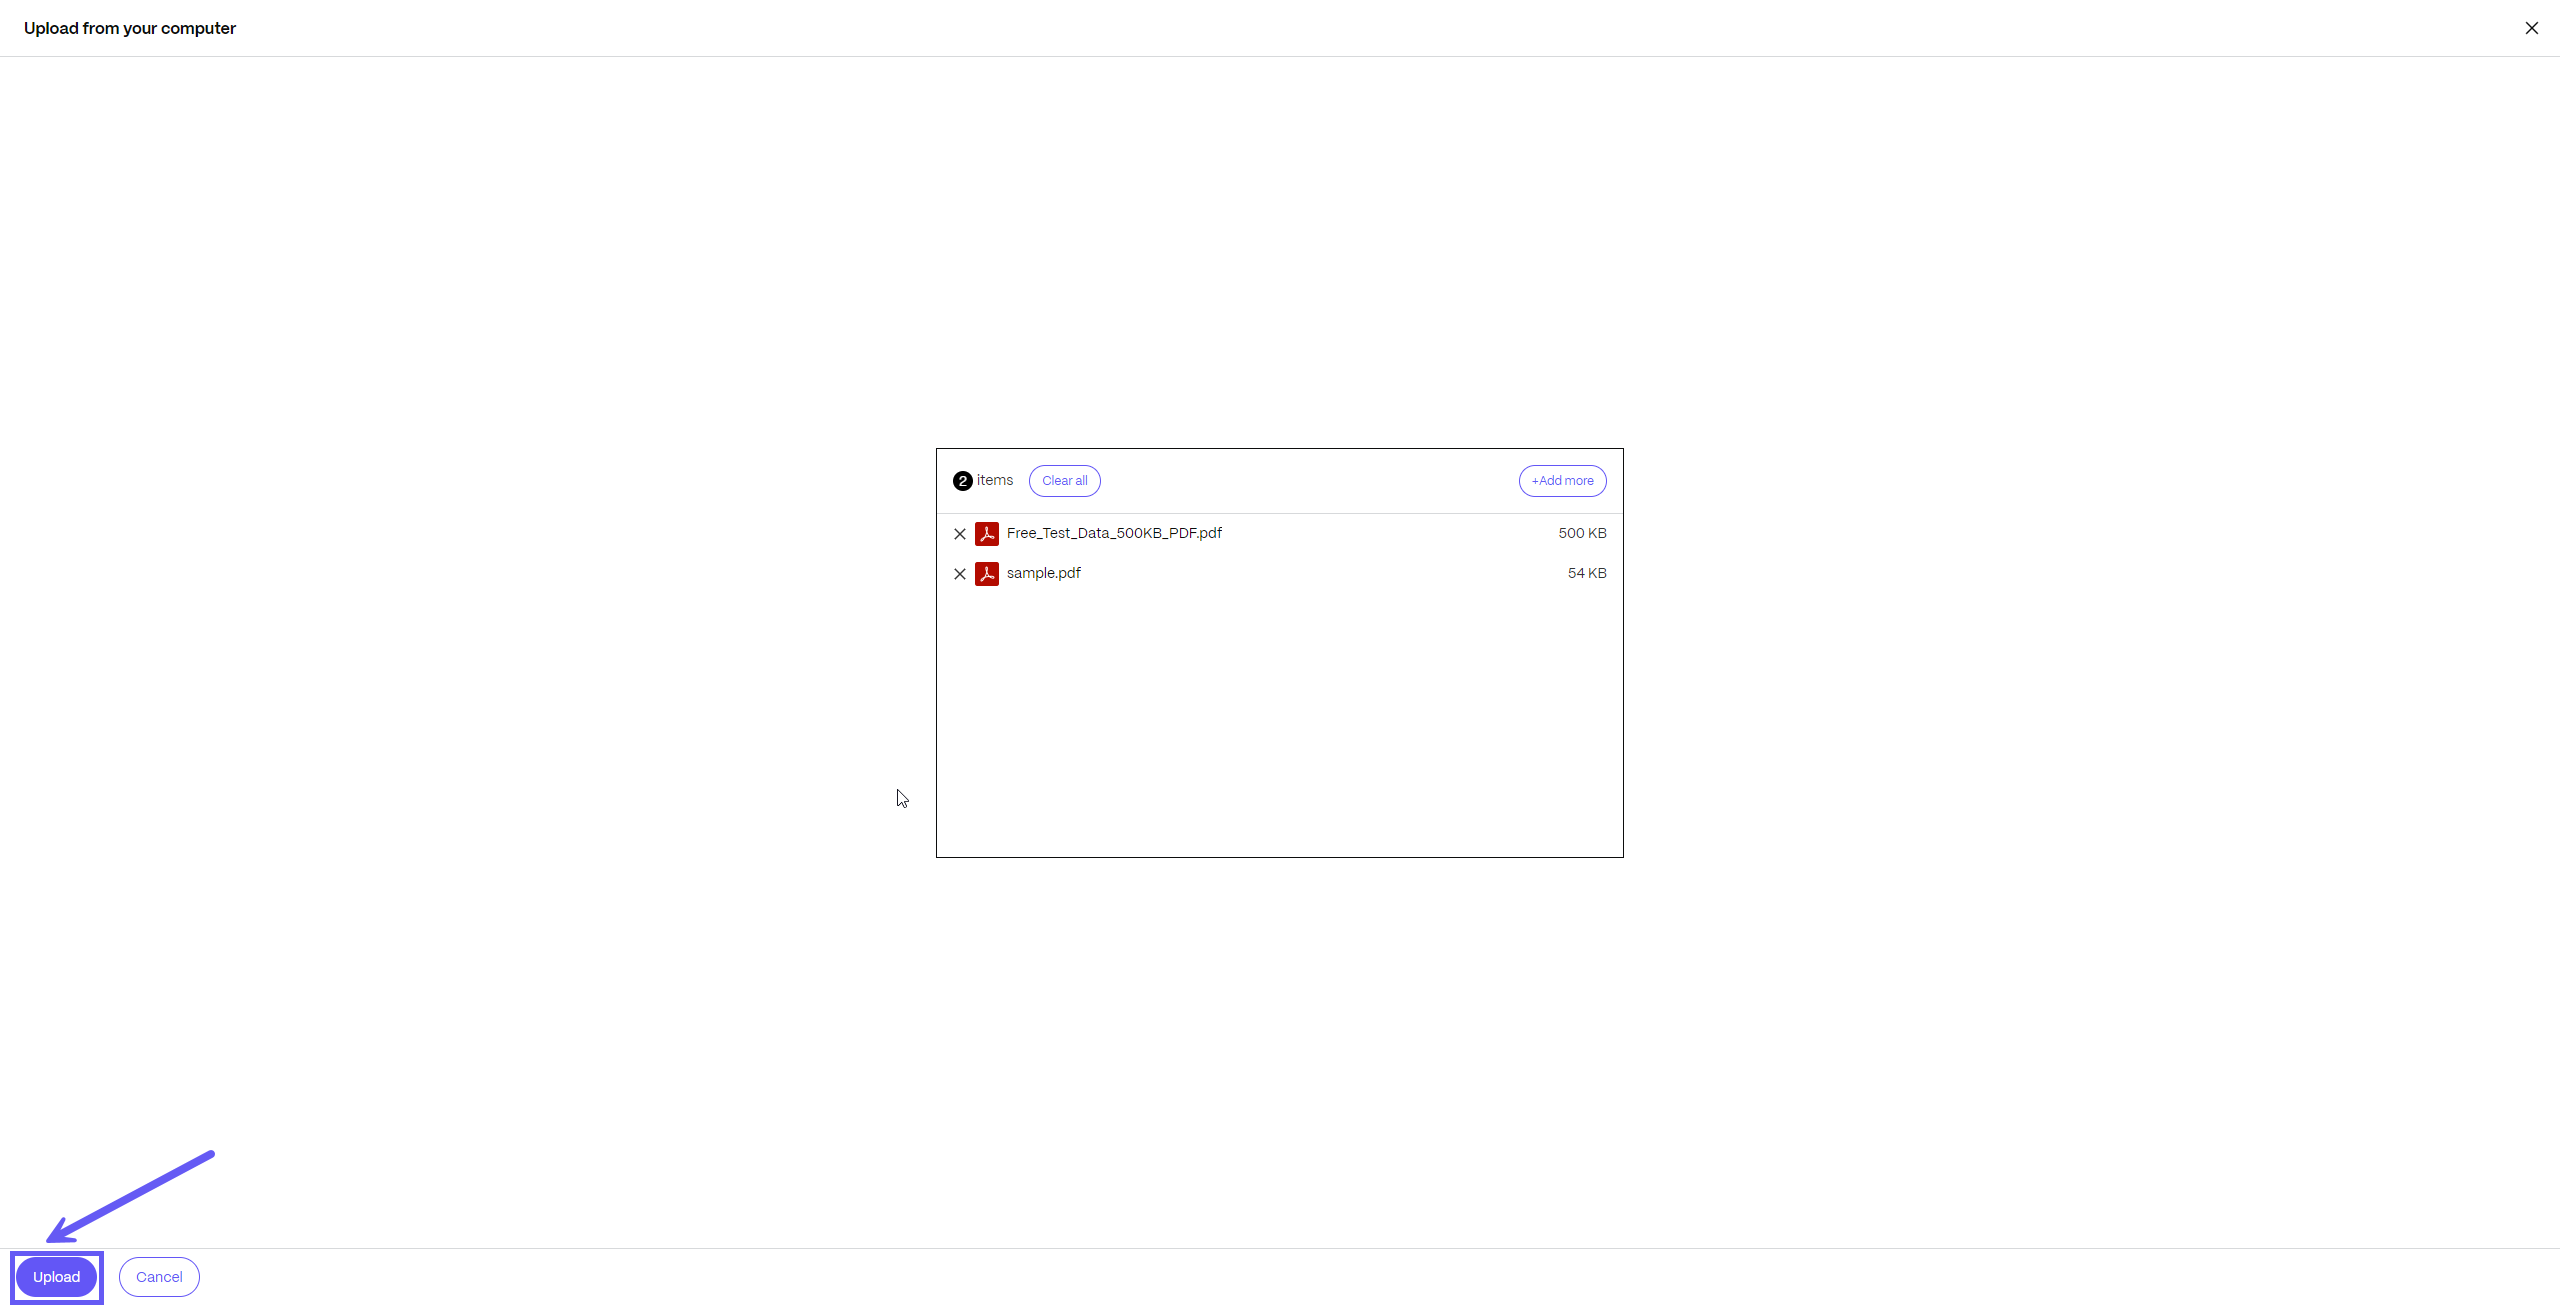
Once all the files are added, they will be displayed on the screen. Click on Upload to add them to the field.
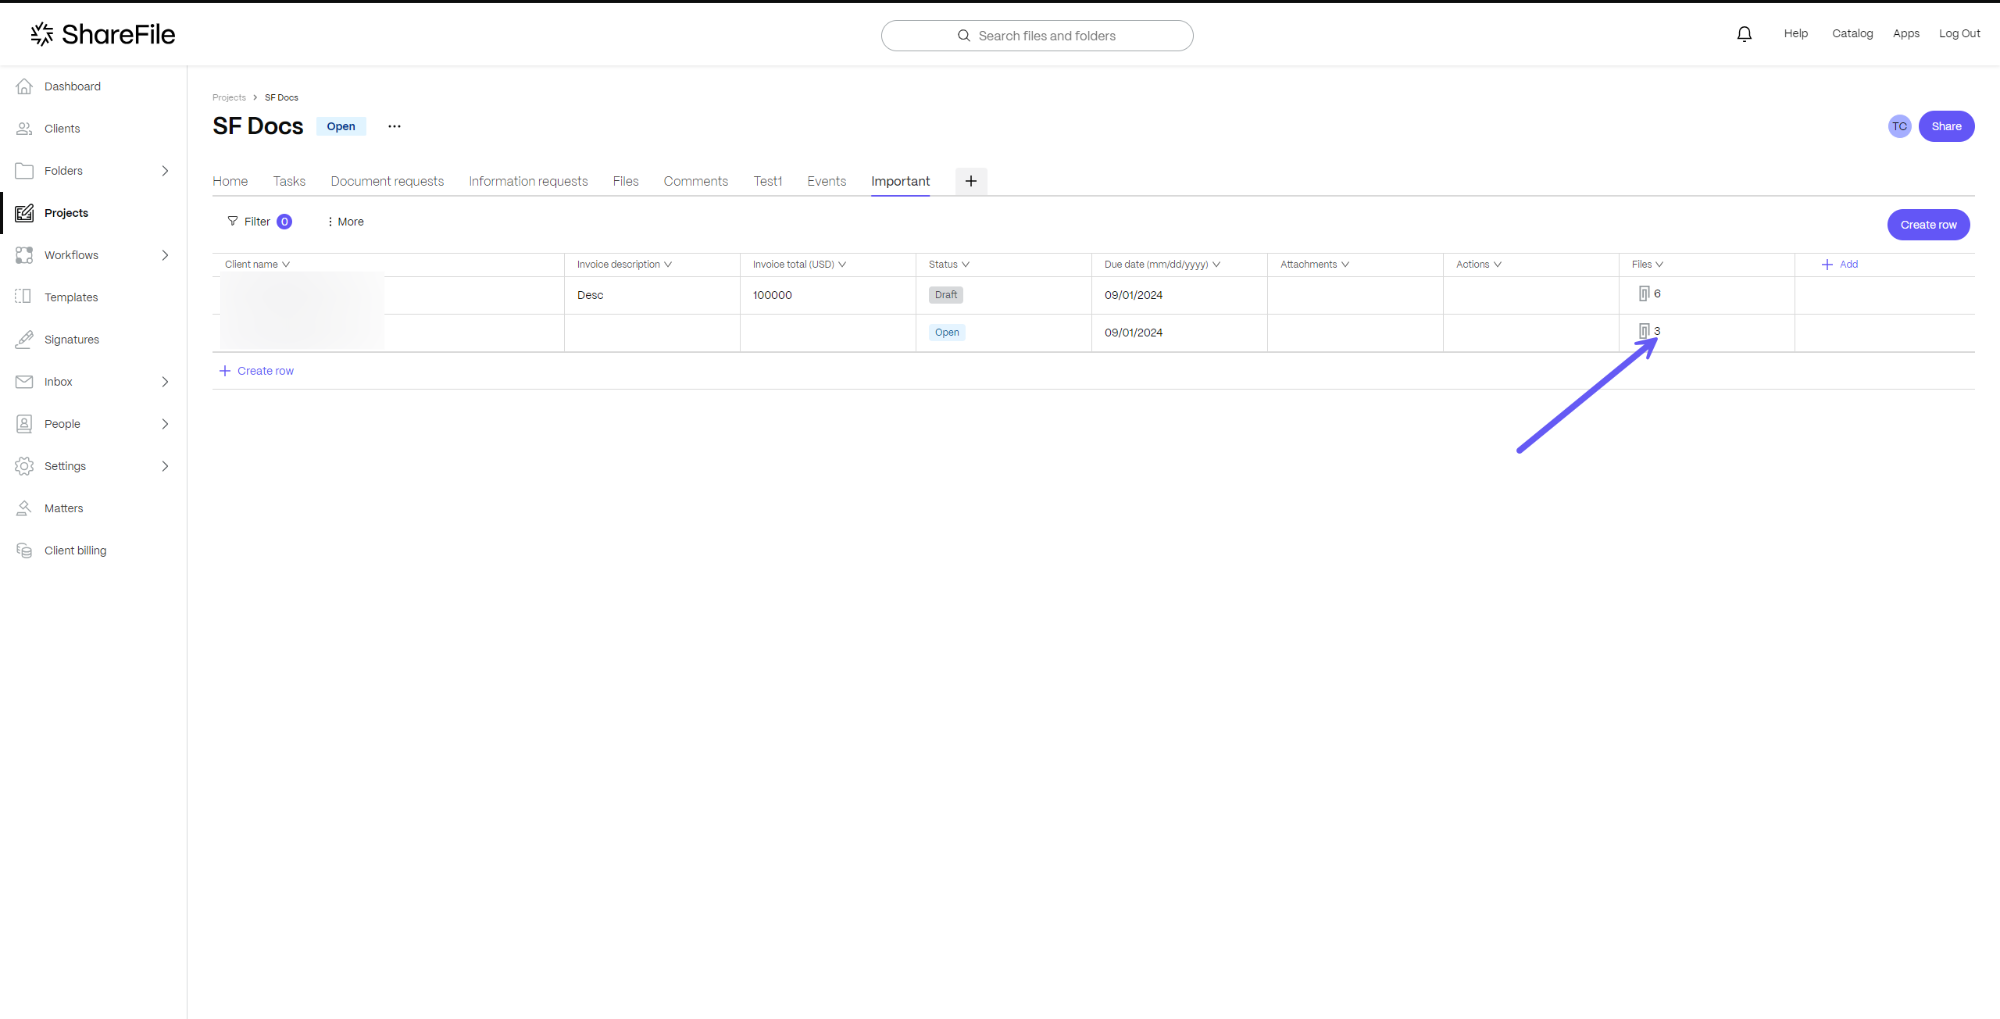
The files will be added and the number of files attached will be updated accordingly. In the example above, the number of files changes from 1 to 3.
Note:
- Project-Specific File Access: Files and folders added outside the projects cannot be accessed in the file attachment section. Only files within the project’s scope are available for attachment.
- Pre-Release File Attachments: Any files that were attached to projects before this functionality cannot be accessed or added to the new records. This functionality only applies to files uploaded or linked after the release.
If you have any questions or need further assistance, please feel free to reach out to our support team at https://support.sharefile.com/s/ .
Comment Capability at record level
You can now access comment capability at record level to enable seamless collaboration between customers using table for storing structured data such as Timesheet, Client Billings, Asset Repositories etc.
How users can utilize this feature
-
All data tables created within a project will have comment capability available at every record level. Once a user adds a title to a record, indicating it is an active record, the comment icon gets active. User can click on the Comment icon next to each record in the data table or can open the record and user can navigate to the Comments section by clicking on the comment icon to add their comment.
- Anyone with whom a project has been shared can view and add comments.
- In case a record in a data table is assigned to a client, then the client will get an option to add or view comments from their client portal.
- When a comment is added by a user, it will get updated in the Comments tab and appear in the shortcut widget on the Home tab. User can click the hyperlink to quickly navigate to the Comment section.
Steps to access the comment capability
-
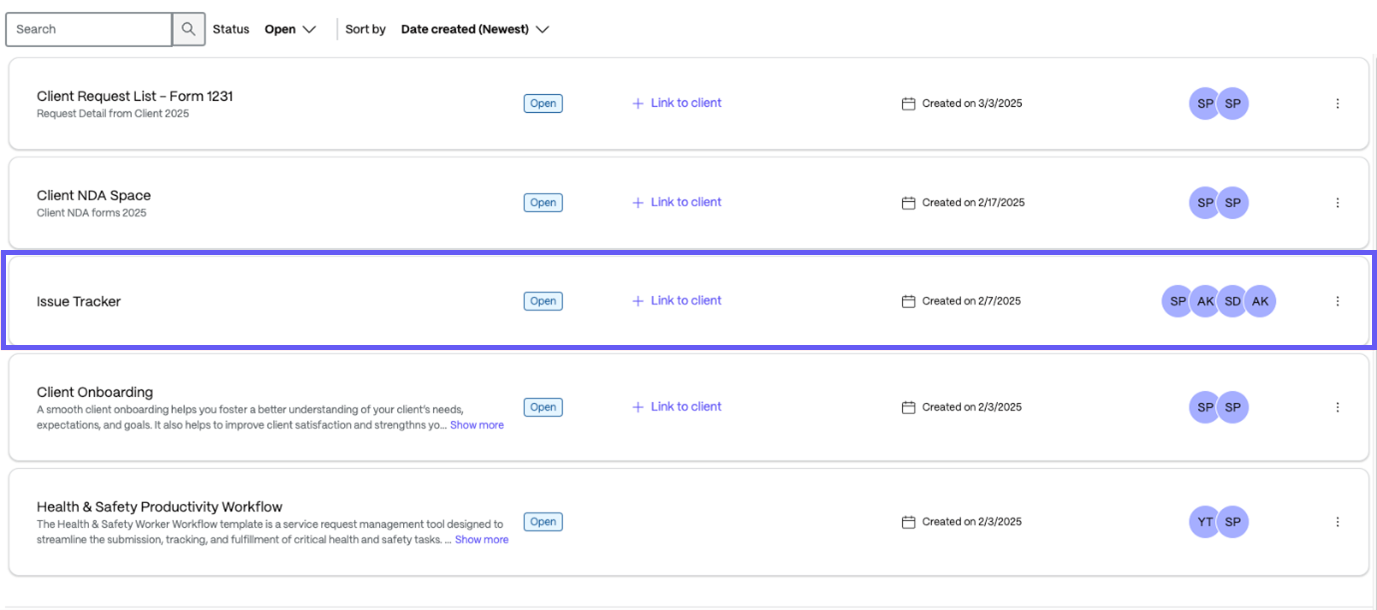
Click on the Project that you have created.
-
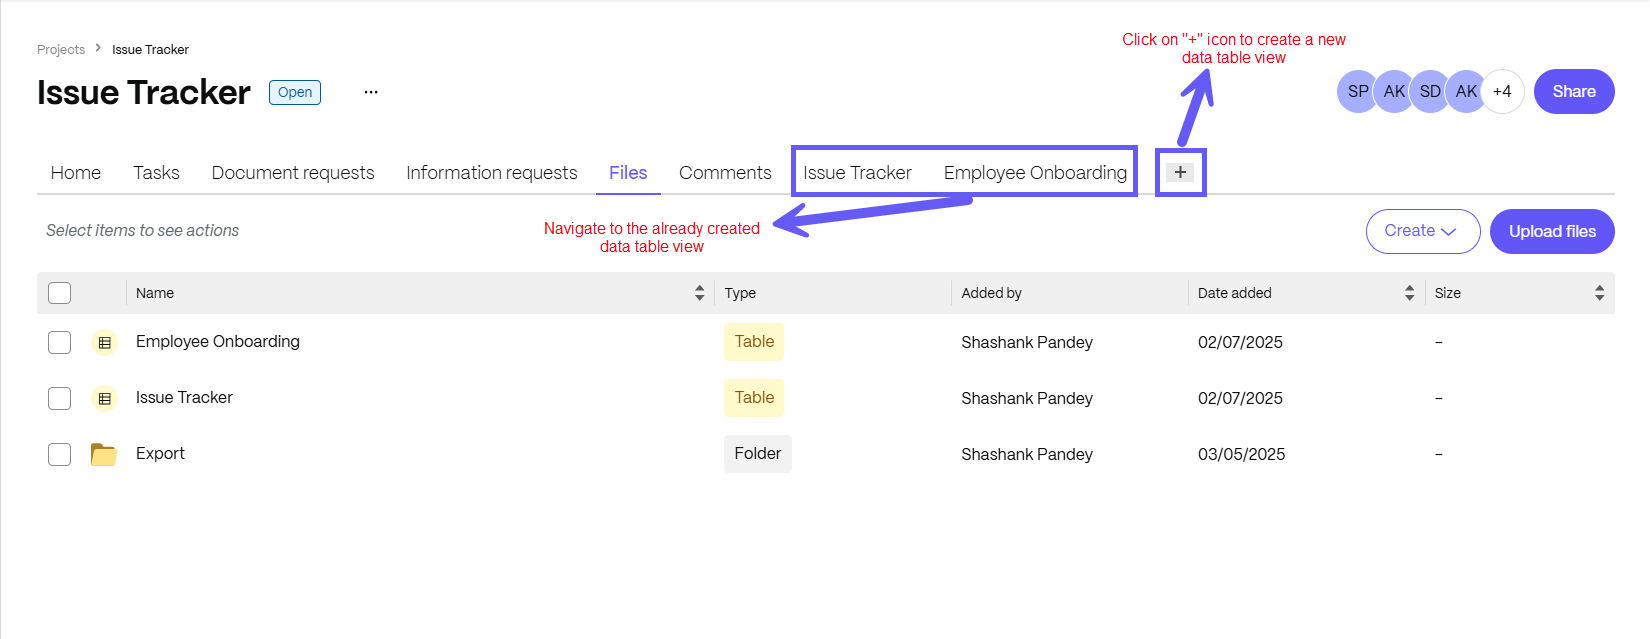
Select an existing project or create a data table. In these instructions, we selected an existing project and navigate to the already created data table view.
-
To create a new table, you can select the ’+’ icon or choose from the available templates.
-
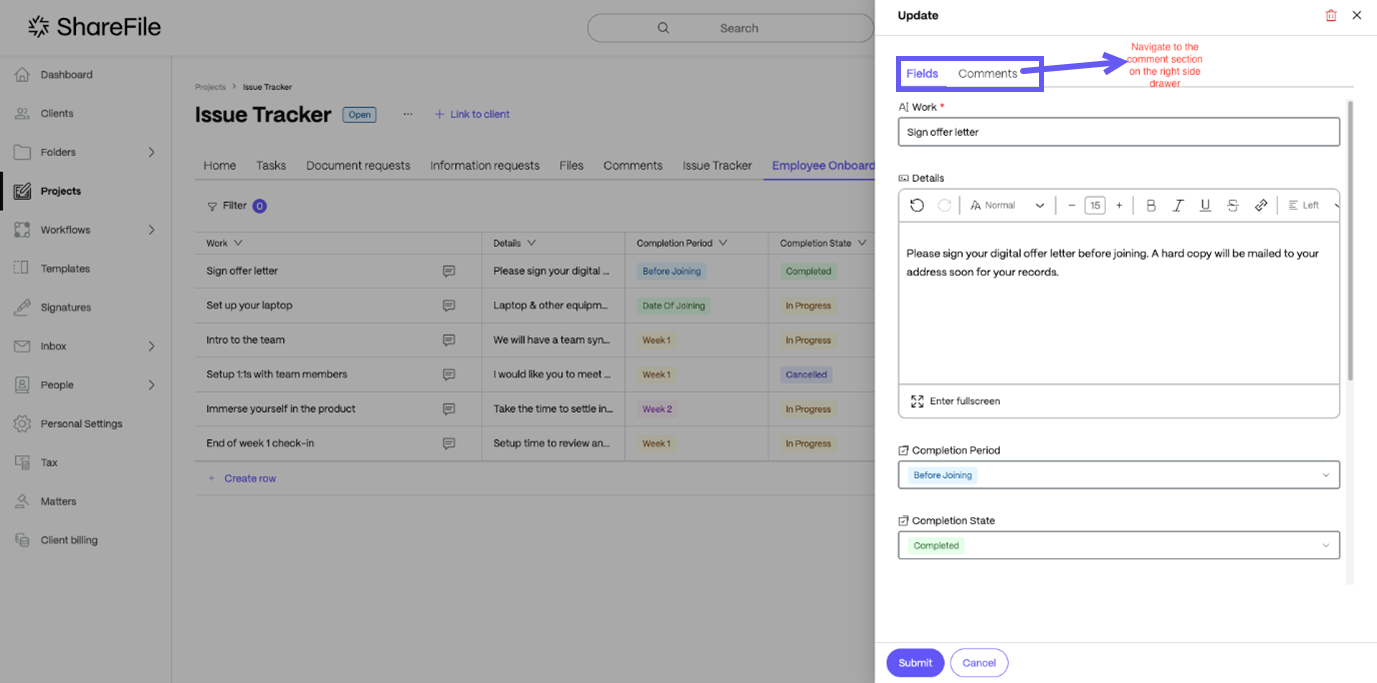
Navigate to Employee Onboarding, then click on existing record or add a new record by providing the necessary details.

-
To view or add a new comment, click on the comment icon available in the first column and it will redirect to the comments section of a selected project.

-
Users can also open the record and navigate to the comments section in the right- side drawer.
-
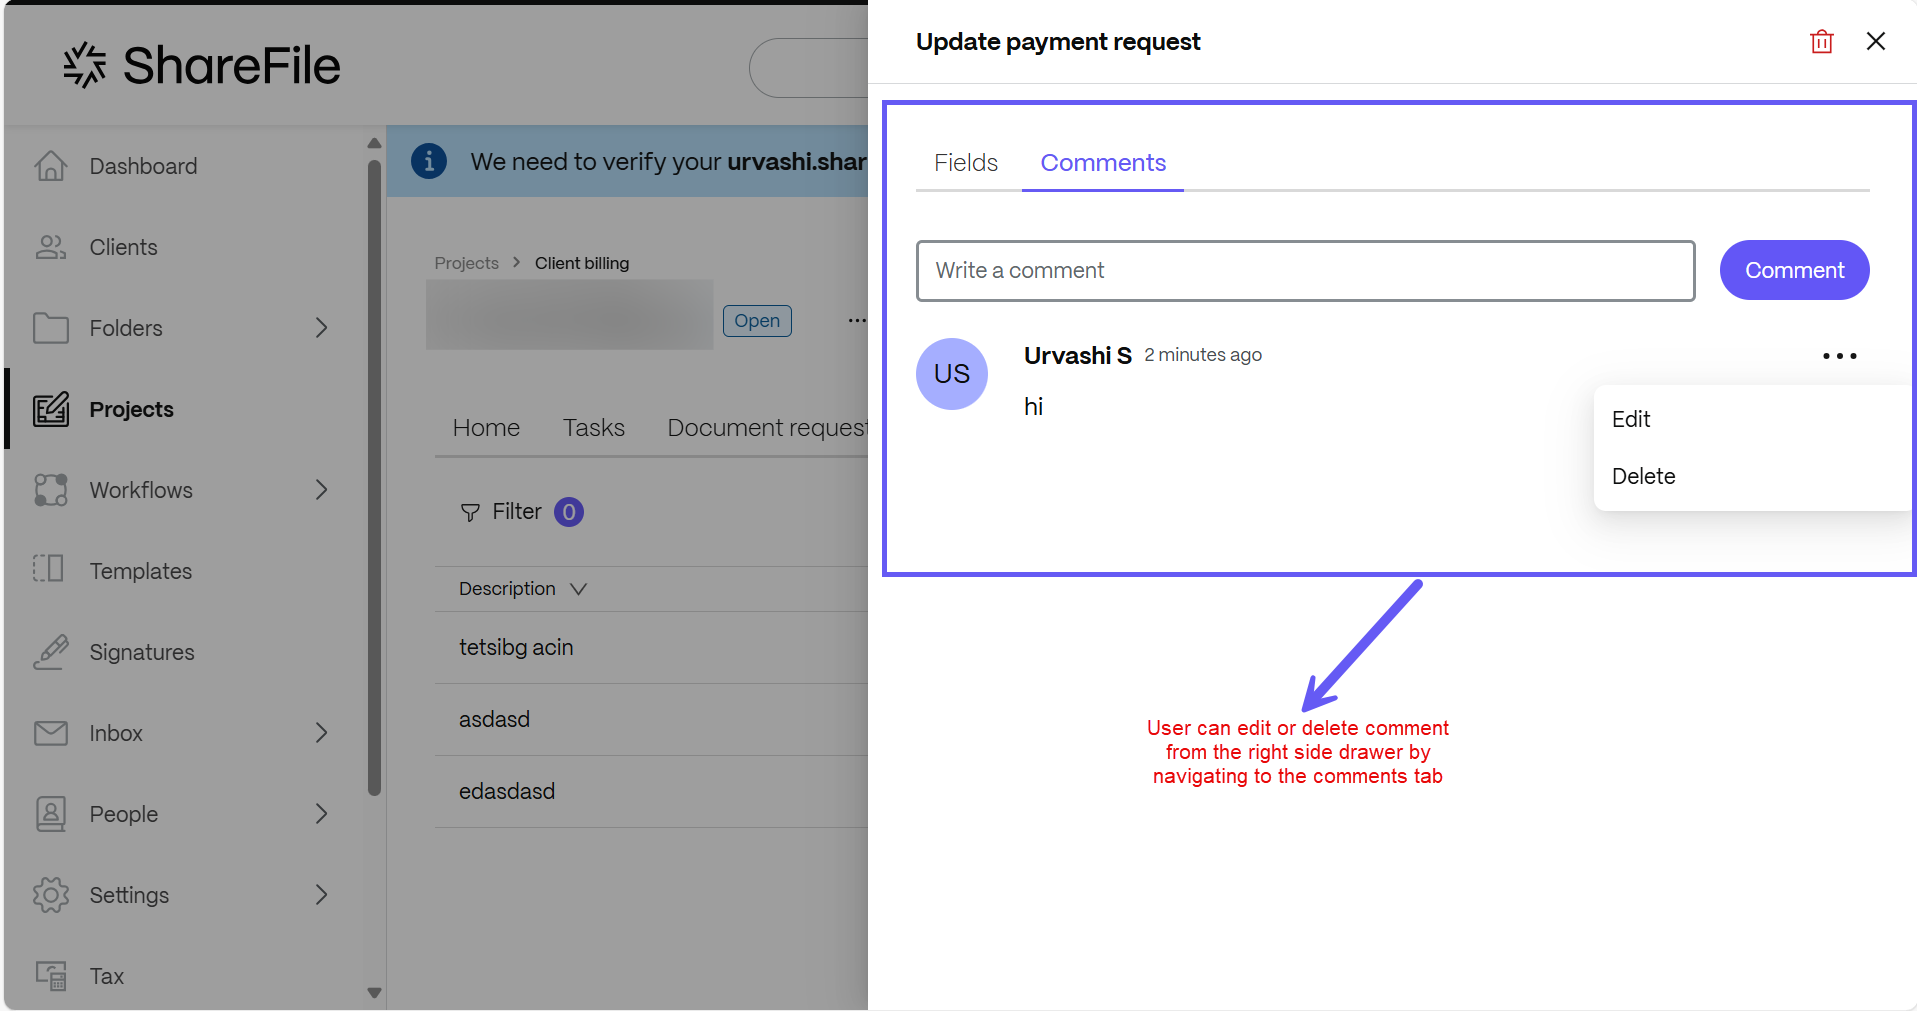
You can add a comment at the record level and click the Comment button. Users can also view and edit comments next to each record in the data table by clicking on the three- dot icon.
-
After the comment has been posted, it will automatically get updated in the Comments tab, allowing users to view comments, access hyperlinks and navigate to the comment section by clicking on it.
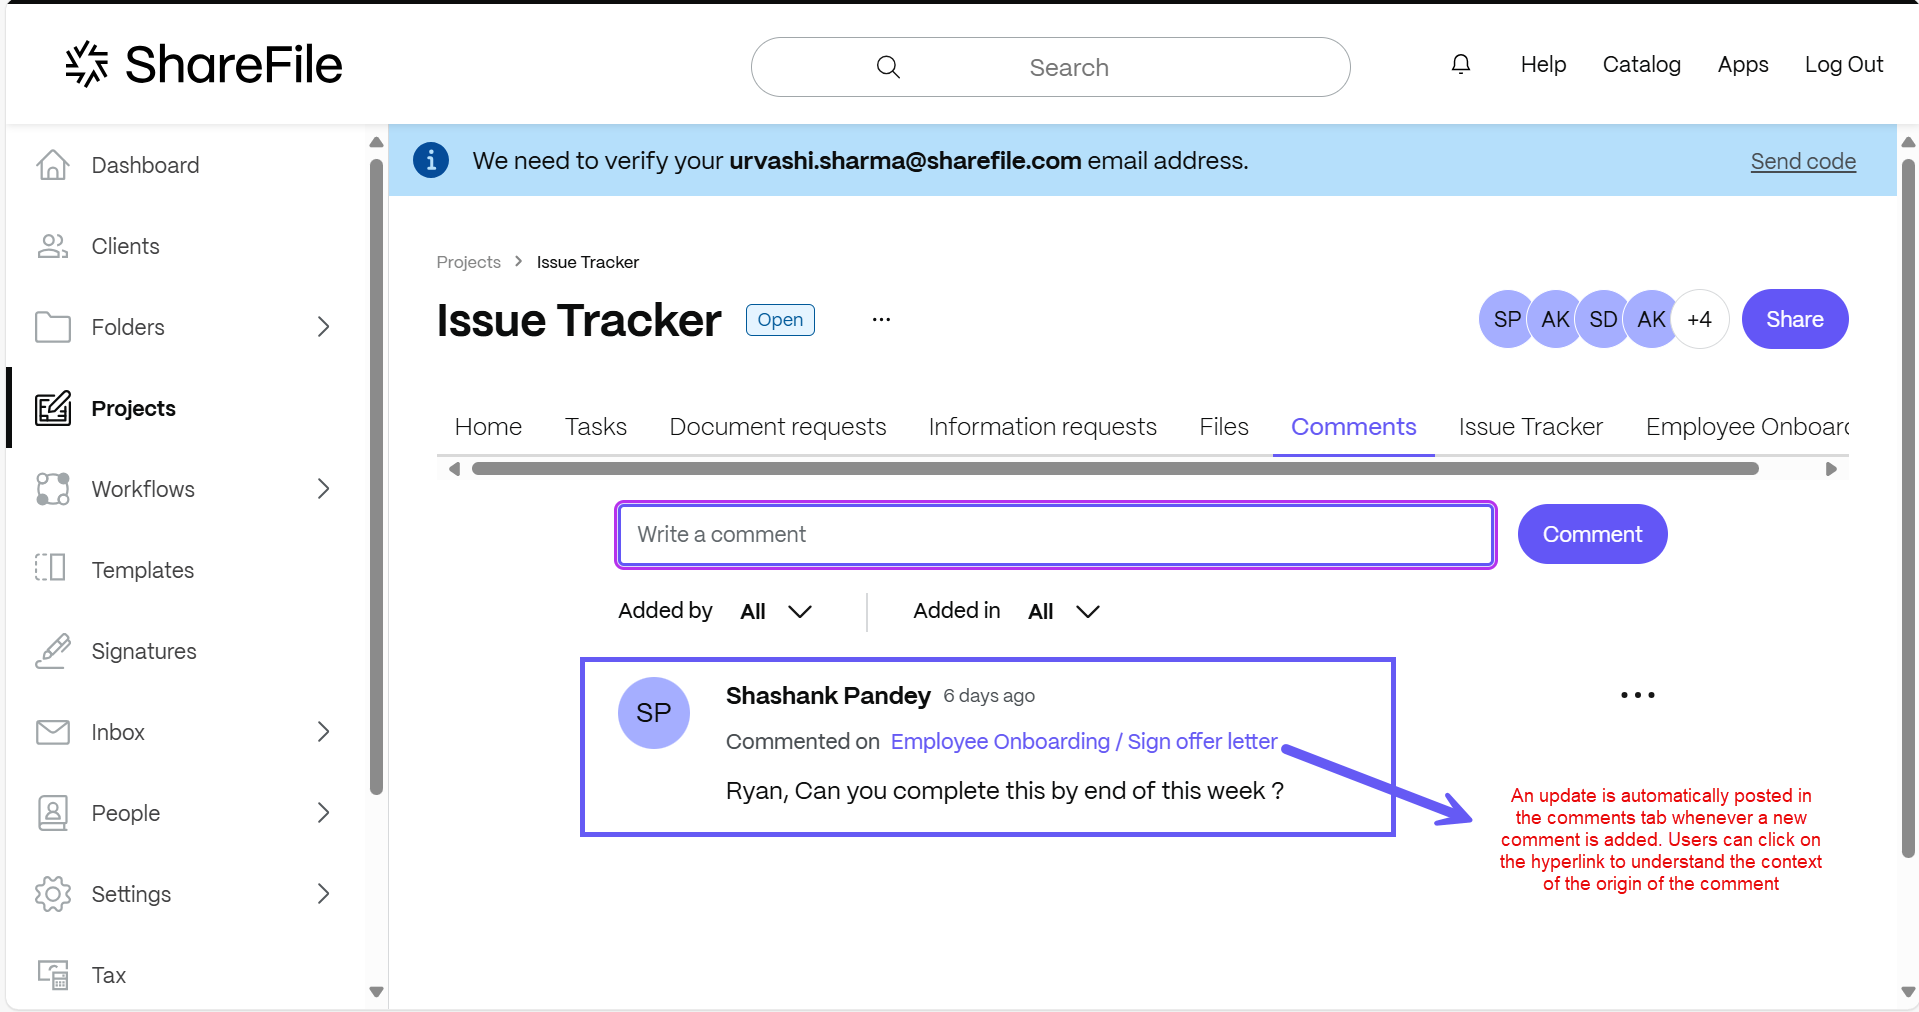
The functionality mentioned above also ensures that users have visibility to any conversation and collaboration taking place at the project level or a record level in the data table. The hyperlinks help users keep track of the context of the comments made in the project.
Note:
Users who are part of a project can access both the data table and the comments section.
FAQs
Can I mention a team member in the comment section, so that they receive a real-time notification?
No, mentions are not yet available in the comment section. We will be introducing mention capability with real-time notifications soon.
Can I upload a file in the comment space?
No, Users cannot upload a file using the comment section. We will be introducing this capability in upcoming versions.
Can clients also comment at the record level?
No, clients do not have access to the assigned record when using the table view, and as a result, comments are not visible to them. Clients can only access comments if you use a client task-specific table template, which allows you to create and assign a task that include comment access. In the template section, you can find the template under the name Tasks.
Share
Share
This Preview product documentation is Citrix Confidential.
You agree to hold this documentation confidential pursuant to the terms of your Citrix Beta/Tech Preview Agreement.
The development, release and timing of any features or functionality described in the Preview documentation remains at our sole discretion and are subject to change without notice or consultation.
The documentation is for informational purposes only and is not a commitment, promise or legal obligation to deliver any material, code or functionality and should not be relied upon in making Citrix product purchase decisions.
If you do not agree, select I DO NOT AGREE to exit.