This content has been machine translated dynamically.
Dieser Inhalt ist eine maschinelle Übersetzung, die dynamisch erstellt wurde. (Haftungsausschluss)
Cet article a été traduit automatiquement de manière dynamique. (Clause de non responsabilité)
Este artículo lo ha traducido una máquina de forma dinámica. (Aviso legal)
此内容已经过机器动态翻译。 放弃
このコンテンツは動的に機械翻訳されています。免責事項
이 콘텐츠는 동적으로 기계 번역되었습니다. 책임 부인
Este texto foi traduzido automaticamente. (Aviso legal)
Questo contenuto è stato tradotto dinamicamente con traduzione automatica.(Esclusione di responsabilità))
This article has been machine translated.
Dieser Artikel wurde maschinell übersetzt. (Haftungsausschluss)
Ce article a été traduit automatiquement. (Clause de non responsabilité)
Este artículo ha sido traducido automáticamente. (Aviso legal)
この記事は機械翻訳されています.免責事項
이 기사는 기계 번역되었습니다.책임 부인
Este artigo foi traduzido automaticamente.(Aviso legal)
这篇文章已经过机器翻译.放弃
Questo articolo è stato tradotto automaticamente.(Esclusione di responsabilità))
Translation failed!
ShareFile Reports
To see how your ShareFile account is being used, you can create recurring and non-recurring reports that track usage, access, messaging, storage, and other details.
Prerequisites
- An Administrative user on the ShareFile account.
- An Employee user with the Allow this user to access account-wide reporting permission.
- If running a report for a specific user, that user must be a member of the Shared Address Book.
Create report
To create a ShareFile report:
-
Sign into ShareFile.
-
Navigate to Account settings > Account and Reporting > Reporting.
-
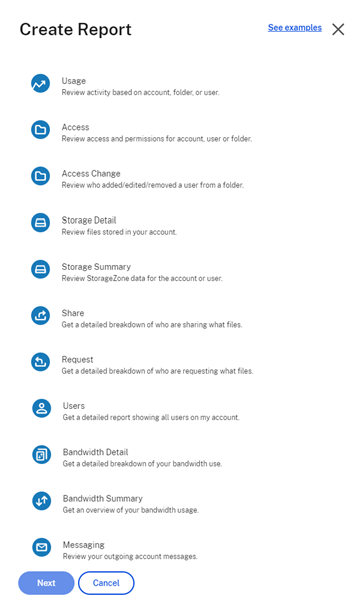
Select the Create Report button and choose the type of report you want to run, then click Next.
-
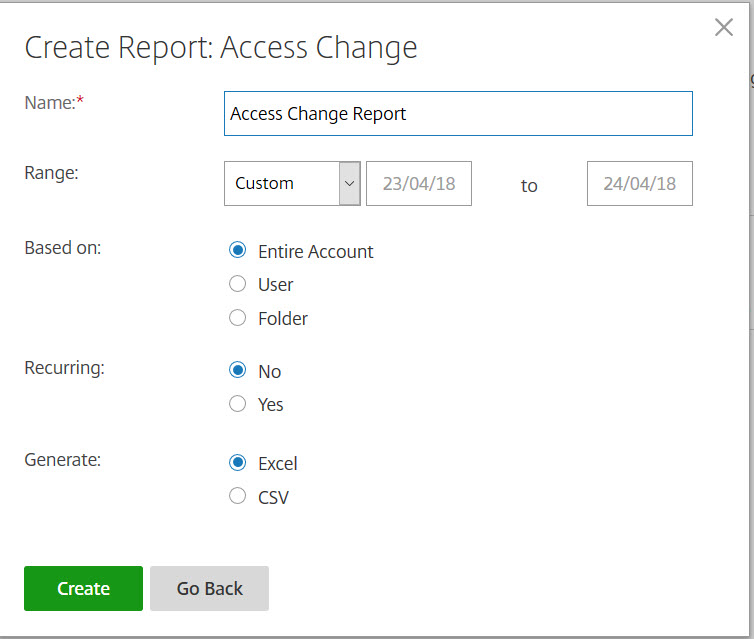
Fill in the details as required and click Create. Reports can be generated as Excel or CSV files.
Recurring report:
To create a recurring report, follow the earlier steps through Step 3. Then, choose Recurring as Yes, fill in the other details as required and click Next.
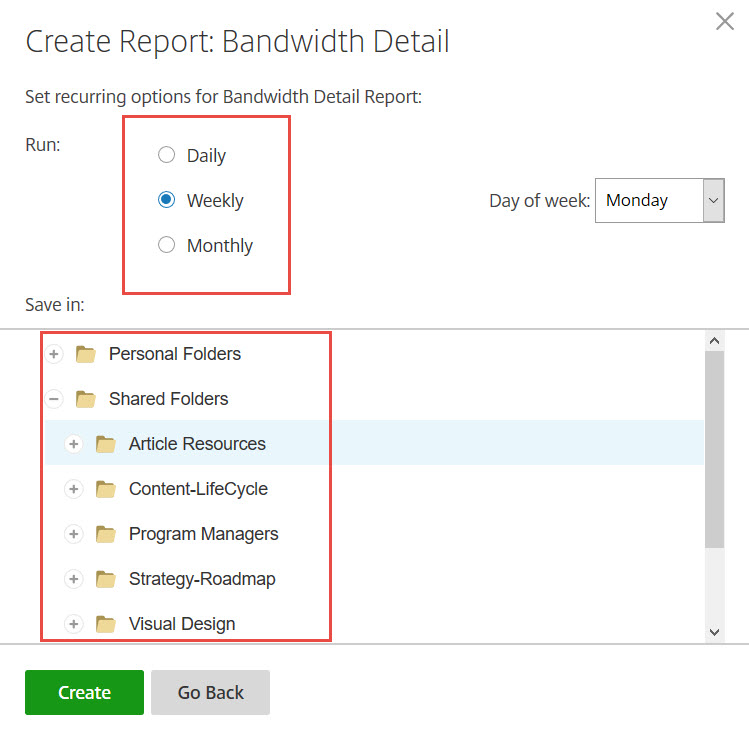
Choose Daily, Weekly, or Monthly based on your needs. Choose the folder where you want the recurring reports to be saved on your account and click Create.
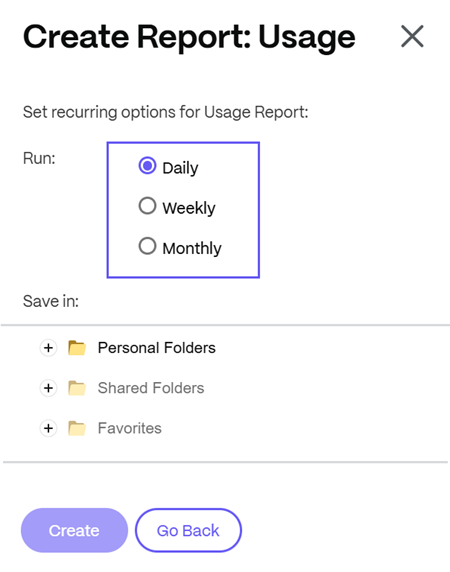
Do not remove the destination folder from the system. If you do, future recurring reports might fail.
Report Pending:
Allow time for your report to be processed and completed. Depending on the amount of time and the final size of your report, the time it takes for the report to finish might vary.

View Completed Report:
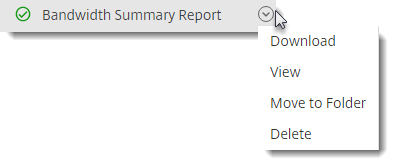
You can view, download, move, or delete reports at any time by returning to the Reporting menu and accessing the list to the right of the Report Title.
Report types
Select the Report name for more information.
- Usage
- Access
- Access Change
- Storage Detail
- Storage Summary
- Share
- Request
- Users
- Bandwidth Detail
- Bandwidth Summary
- Messaging
Limitations
-
All recurring reports are run based on Eastern Standard Time.
-
ShareFile does not provide or support customized reports.
Notes:
- If a report fails to download due to a large amount of data, you can run the report in CSV format instead of XLSX.
- Only the last 10 reports display under Recent Reports. You can either choose to Download or Move to folder to find reports later.
- Reports cover the account lifetime but can only be run in 90 day increments.
Share
Share
In this article
This Preview product documentation is Citrix Confidential.
You agree to hold this documentation confidential pursuant to the terms of your Citrix Beta/Tech Preview Agreement.
The development, release and timing of any features or functionality described in the Preview documentation remains at our sole discretion and are subject to change without notice or consultation.
The documentation is for informational purposes only and is not a commitment, promise or legal obligation to deliver any material, code or functionality and should not be relied upon in making Citrix product purchase decisions.
If you do not agree, select I DO NOT AGREE to exit.