This content has been machine translated dynamically.
Dieser Inhalt ist eine maschinelle Übersetzung, die dynamisch erstellt wurde. (Haftungsausschluss)
Cet article a été traduit automatiquement de manière dynamique. (Clause de non responsabilité)
Este artículo lo ha traducido una máquina de forma dinámica. (Aviso legal)
此内容已经过机器动态翻译。 放弃
このコンテンツは動的に機械翻訳されています。免責事項
이 콘텐츠는 동적으로 기계 번역되었습니다. 책임 부인
Este texto foi traduzido automaticamente. (Aviso legal)
Questo contenuto è stato tradotto dinamicamente con traduzione automatica.(Esclusione di responsabilità))
This article has been machine translated.
Dieser Artikel wurde maschinell übersetzt. (Haftungsausschluss)
Ce article a été traduit automatiquement. (Clause de non responsabilité)
Este artículo ha sido traducido automáticamente. (Aviso legal)
この記事は機械翻訳されています.免責事項
이 기사는 기계 번역되었습니다.책임 부인
Este artigo foi traduzido automaticamente.(Aviso legal)
这篇文章已经过机器翻译.放弃
Questo articolo è stato tradotto automaticamente.(Esclusione di responsabilità))
Translation failed!
Automated Workflows
Automated Workflows in ShareFile allow you to set up automation for common business workflows, repetitive tasks, and client outreach processes. It also enables you to easily track and manage the progress of accelerated agreements. See Accelerated Agreements for more information.
Prerequisites
- Must have a ShareFile Premium account
Tracking My workflows
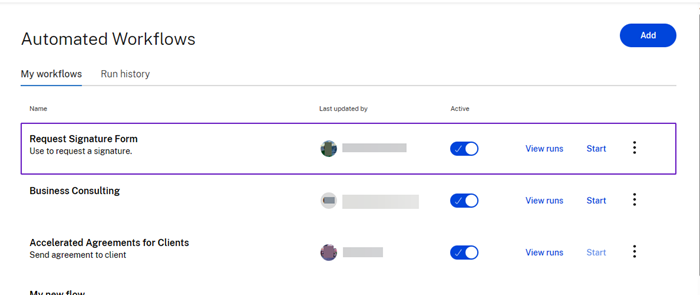
The My workflows dashboard allows you to review and manage all the workflows created in your account.
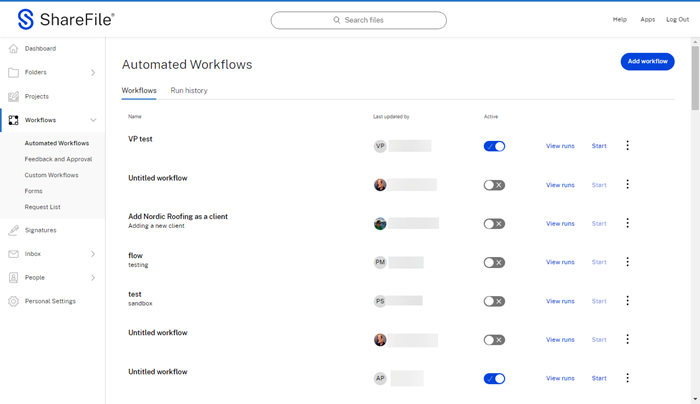
My workflows descriptions
| Column | Description |
|---|---|
| Name | Workflow name |
| Last updated by | Last employee to edit the workflow |
| Active | Use this toggle to Enable / Disable a workflow. |
| View runs | Select View runs to see the Run history. |
| Start | Select Start to initiate a new workflow run for the specific workflow. |
| Vertical ellipses | Select to check for more Options: Preview / Edit / Delete |
Note:
Edit and Delete options are only visible for workflows where you have edit access.
Run history
This screen displays the details of the agreement workflow.
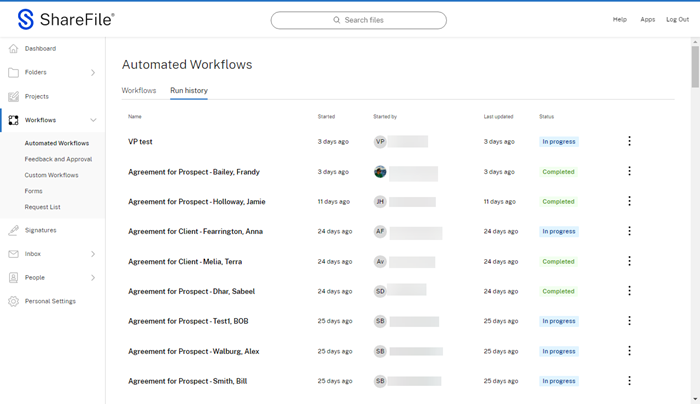
Run history descriptions
| Column | Description |
|---|---|
| Name | Workflow run name. |
| Started | Initial start time for the workflow run. |
| Triggered by | Name of employee who started the workflow. |
| Last updated | Latest activity time. |
| Status | Current status of the workflow. |
| Vertical ellipses | Select to view the Run history details or to cancel a flow that is In progress. |
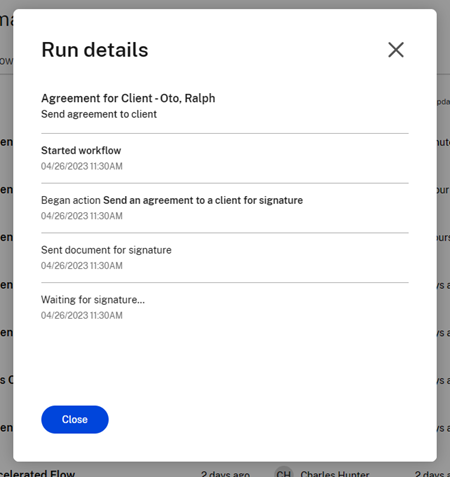
Run history details
Run details provides you with an up to date status on where your automated workflow stands in the process. It includes the date and time for all actions up to the end of the defined process.
Tracking My Accelerated Agreements Workflows
Prospective client
When initiating an agreement for a prospective client, you can track the workflow runs by going to Automated Workflows > My Workflows. Select View runs for the workflow named “Accelerated Agreements for Prospects.”

You are directed to the run history specific to this workflow. Each run highlights the name of the prospective client specific to it:
Run name: Agreement for Prospect - Prospective Client’s last name, first name
Existing client
When initiating an agreement for an existing client, you can track the workflow runs by going to Automated Workflows > My Workflows. Select View runs for the workflow named “Accelerated Agreements for Clients.”

You are directed to the run history specific to this workflow. Each run highlights the name of the client specific to it:
Run name: Agreement for Client - Client’s last name, first name
Tip:
Once you are in the Run History for either of these workflows, you can track the workflow runs by checking the run status and run details. You also have the ability to cancel a run if needed. Refer to the Run history section for more information.
Creating an Automated Workflow
Use the following steps to create a new automated workflow.
-
Navigate to Workflow > Automated Workflows to open the dashboard.
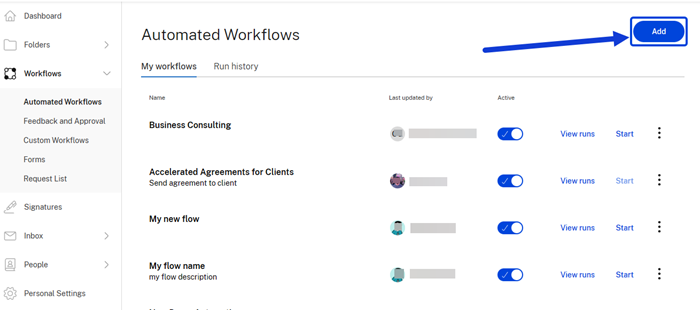
-
Select Add. The workflow designer window displays.
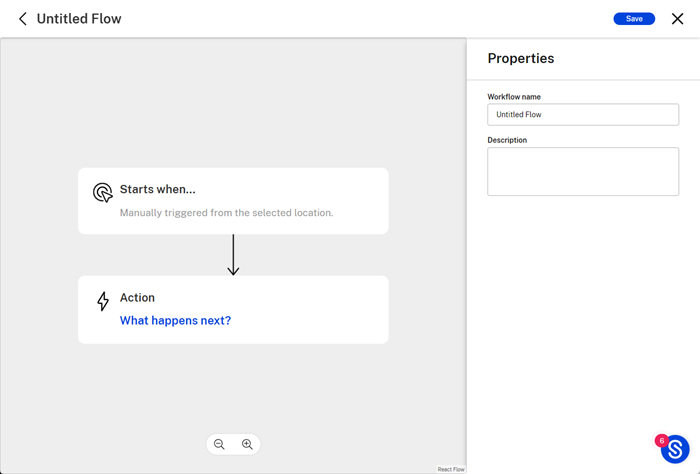
-
Under Properties, type in a name for your new workflow in the corresponding field. This is the name of the workflow that appears in the Automated Workflows dashboard once completed. You can add an optional description in the field below the name.

-
Select Save.
-
Select the Starts when… button on the Automated Workflow designer screen. This opens the Action editor.
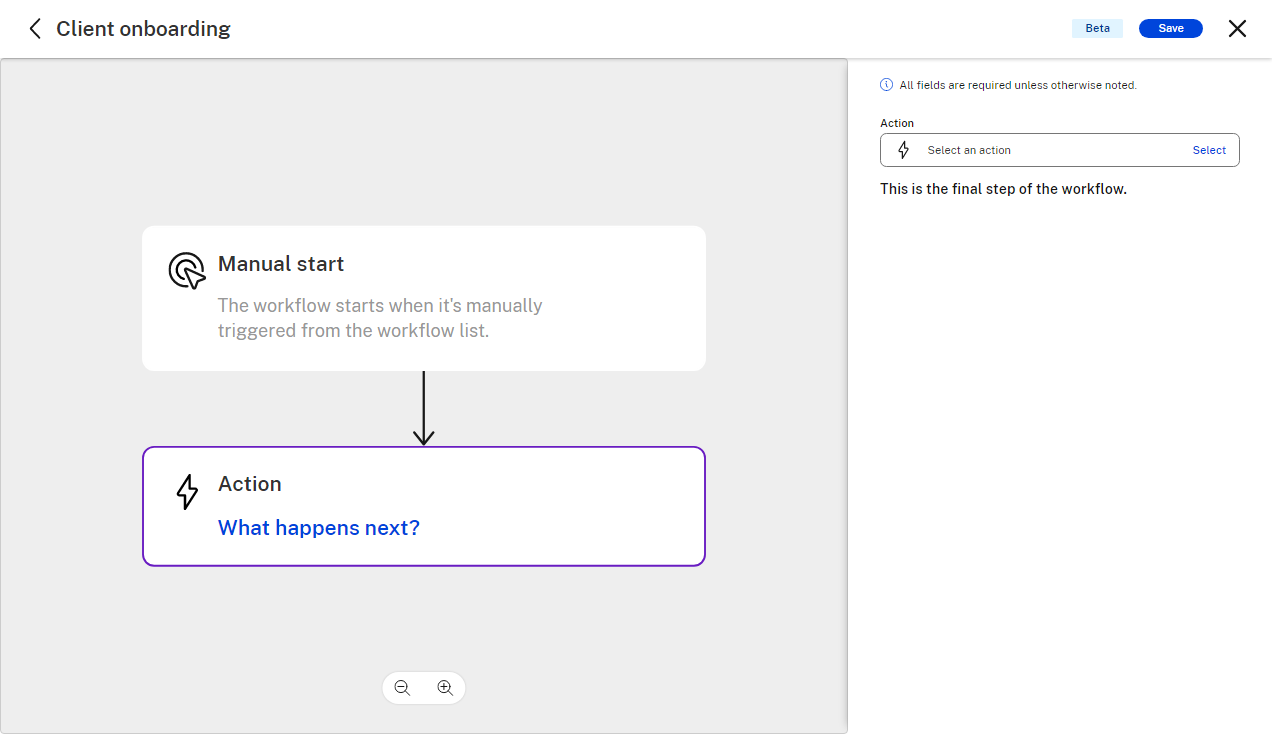
Note:
The defaults for “What triggers this workflow?” and “Where can this workflow be triggered?” are set to Manual start and Workflow list for now. There will be added functionality to the trigger presets in future releases.
-
Select Action to request the necessary information for the user running this workflow.
Tips:
-
Variables are typically information that would need to change for every workflow run and cannot be set as a constant value in the workflow configuration.
-
These variables are referred to later in one or more actions of this workflow.
-
You can add multiple actions, set them as either required or optional for workflow run execution, or delete them.
-
-
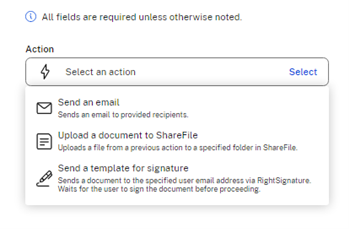
Select the Action button on the Automated Workflow designer screen or the What happens next? link. This opens the Action editor. Select the required Action category. You can add multiple actions to a workflow with each action pertaining to a single action category.
Note:
We currently have three action types. There will be added functionality to the automated action library in future releases.
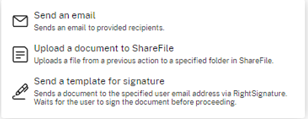
-
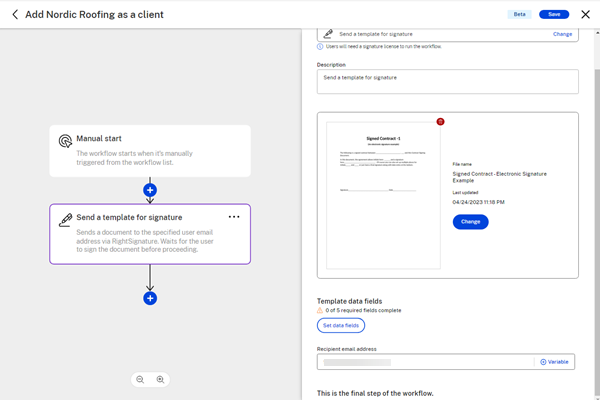
Select Send template for signature. This opens the Action Category description screen and in the flow, explains what is needed.
Note:
This action uses our native e-signature integration via RightSignature. So you must have RightSignature access to configure and use this action successfully.
-
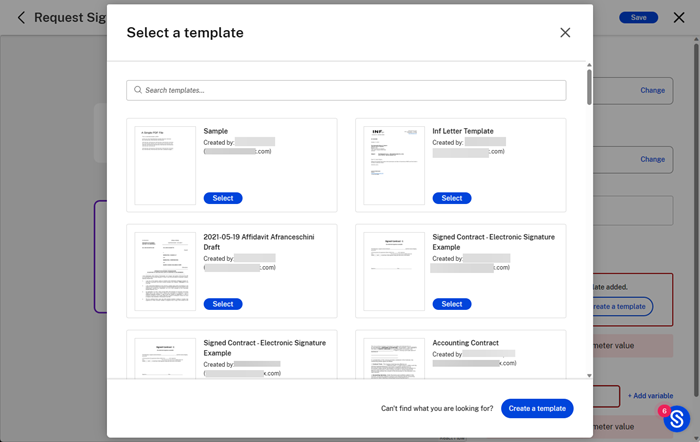
You can choose an existing template or create a template. In this step, we select an existing template.
Note:
For information on creating a template, see Create auto-fill agreement templates.
Note:
If the selected template has data/merge fields, then you get the option to “Set data fields” to choose values to be auto-filled in the template.
-
For the Recipient Email Address, you have the option to either add a constant value or choose a variable by clicking on the Add variable link.
Note:
Since recipient addresses would ideally be different for each workflow run, you can click on the + Add variable link next to the email field. This will give you the option to choose from the list of all Trigger Variables you added in the Trigger section. If you did not add any Trigger variable or do not find the appropriate variable on the list, you can anytime go back to the Trigger section to add another appropriate variable.
-
After successfully configuring one action, you can choose to either save the workflow and exit or add more actions.
-
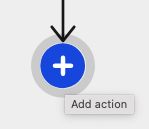
Select the blue + sign to add another action.
-
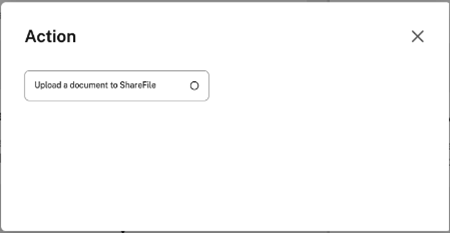
If you choose the File action category, you get to choose the exact action type available under the File action category.
-
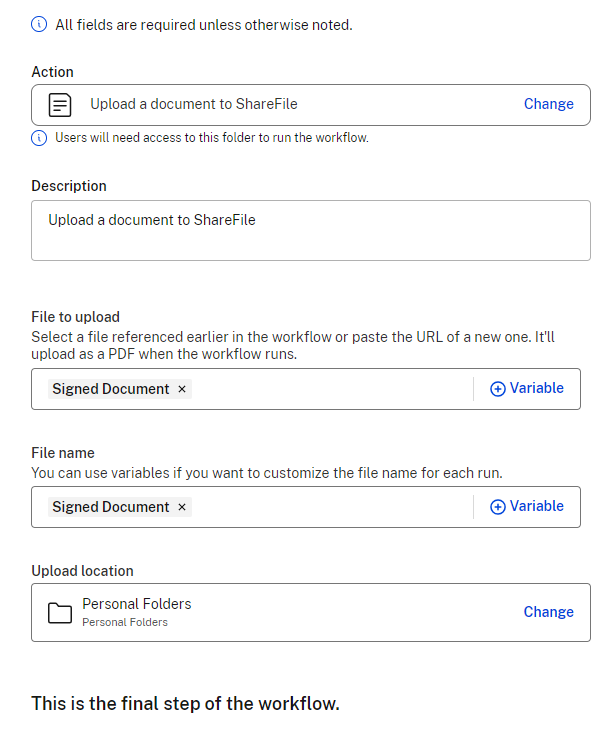
Select Upload a document to ShareFile. This opens the Action Category description screen and in the flow, explains what is needed.
-
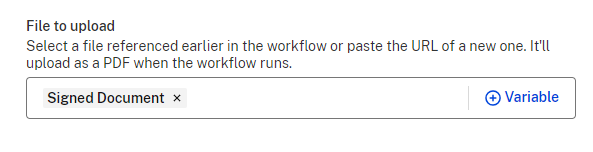
For File to Upload, if you have an action prior to this step in the workflow that generates a file, you can select that file as a reference by clicking on + Add variable. For example, if you have used a signature action prior to this step, then the Signed Document will be available as a variable here.
-
For File Name you either enter a constant file name for every workflow run or choose a variable name. If you need a different file name for every different run of this workflow, click on the + Add variable link next to the File name field. This will give you the option to choose from the list of all Trigger Variables you added in the Trigger section. If you did not add any Trigger variable or do not find the appropriate variable on the list, you can anytime go back to the Trigger section to add another appropriate variable.

-
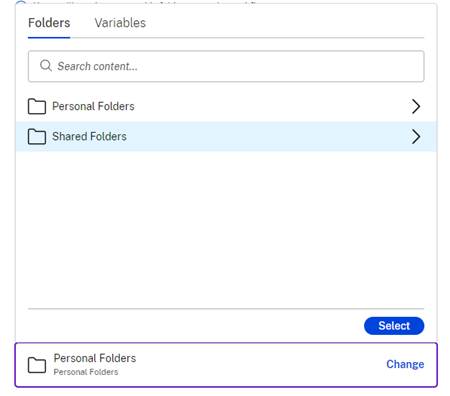
Select a Folder from your ShareFile folder structure to be configured as a Destination Folder for this workflow action.
-
Verify your selections on the right. After successfully configuring this action, you can choose to either save the workflow and exit or add more actions. Select the blue + sign to add another action. Or, select Save and then X to exit the workflow designer screen.
-
Select Save.

The new automated workflow is available to use from the Automated Workflows dashboard. If it is not set as “Active”, you can toggle it to enable the workflow before starting it.
Action variable descriptions
Send an email action
Use the Send an email action to trigger automatic emails to clients when using accelerated agreements in ShareFile
-
When in the Select an action field, select the Send an email action.
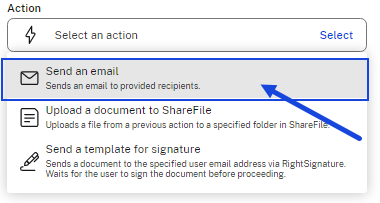
The variable fields screen dsiplays for the Send an email action.

-
Complete the following variable fields:
- Description (optional) - provide a description if desired.
- Recipients - enter one email address per field. You can also add CC recipients and BCC recipients (both are optional).
- Email subject - add a subject to be used for the email action.
- Email content - provide information regarding purpose for the email.
- Add reply to recipient (optional) - use to select people to receive any replies sent by the recipient.
-
Select Save to complete the settings for the Send an email action.
Video: Automated Workflows
The following 3 minute and 14 seconds video provides how to increase efficiency of your workflows with ShareFile.
Share
Share
This Preview product documentation is Citrix Confidential.
You agree to hold this documentation confidential pursuant to the terms of your Citrix Beta/Tech Preview Agreement.
The development, release and timing of any features or functionality described in the Preview documentation remains at our sole discretion and are subject to change without notice or consultation.
The documentation is for informational purposes only and is not a commitment, promise or legal obligation to deliver any material, code or functionality and should not be relied upon in making Citrix product purchase decisions.
If you do not agree, select I DO NOT AGREE to exit.