This content has been machine translated dynamically.
Dieser Inhalt ist eine maschinelle Übersetzung, die dynamisch erstellt wurde. (Haftungsausschluss)
Cet article a été traduit automatiquement de manière dynamique. (Clause de non responsabilité)
Este artículo lo ha traducido una máquina de forma dinámica. (Aviso legal)
此内容已经过机器动态翻译。 放弃
このコンテンツは動的に機械翻訳されています。免責事項
이 콘텐츠는 동적으로 기계 번역되었습니다. 책임 부인
Este texto foi traduzido automaticamente. (Aviso legal)
Questo contenuto è stato tradotto dinamicamente con traduzione automatica.(Esclusione di responsabilità))
This article has been machine translated.
Dieser Artikel wurde maschinell übersetzt. (Haftungsausschluss)
Ce article a été traduit automatiquement. (Clause de non responsabilité)
Este artículo ha sido traducido automáticamente. (Aviso legal)
この記事は機械翻訳されています.免責事項
이 기사는 기계 번역되었습니다.책임 부인
Este artigo foi traduzido automaticamente.(Aviso legal)
这篇文章已经过机器翻译.放弃
Questo articolo è stato tradotto automaticamente.(Esclusione di responsabilità))
Translation failed!
Accelerated Agreements
Accelerated Agreements is a feature for ShareFile Premium users to improve their client onboarding process. This feature reduces onboarding cycle time.
Other benefits of the feature include:
- Send one-click agreements
- Automated client onboarding experience
- Send agreements for signature inside ShareFile
- Create and use agreement templates in ShareFile
- Auto-fill Agreement templates, see Create auto-fill agreement templates.
- Use automated workflows to track progress, see Automated Workflows for more information.
TIP:
For Salesforce Leads and Quickbook Customers, see Integrations for steps on how to add prospective client data from these tools.
Prerequisites
- Must have a ShareFile Premium account
- Employee user must have an Admin assigned RightSignature account.
One-click agreements
Accelerated agreements in ShareFile allow to send one-click agreements for existing clients.
Send one-click agreements
-
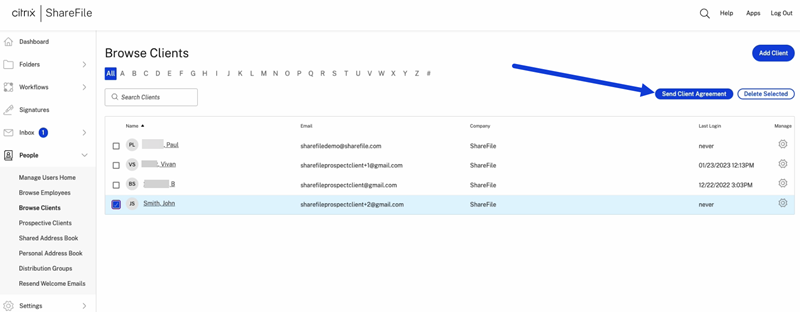
From your ShareFile dashboard, navigate to People > Browse client contacts.
-
Select the current client from the list by checking the box next to their name.
-
Select Send Client Agreement.
-
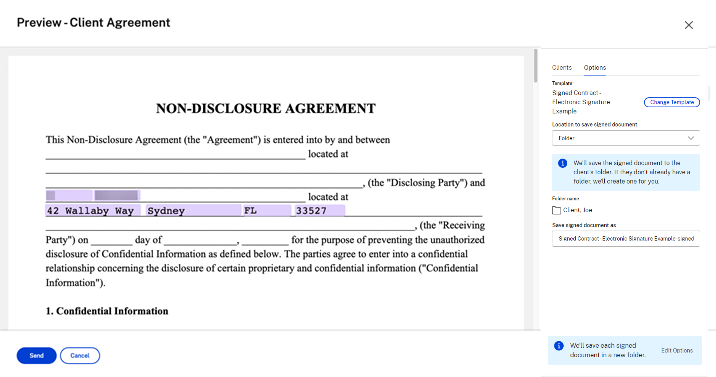
Once the Preview - Client agreement displays, review the information then select Send.
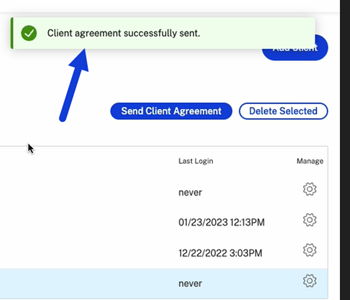
The “Client agreement successfully sent.” confirmation message displays.
Automated client onboarding
Adding a new prospective client
-
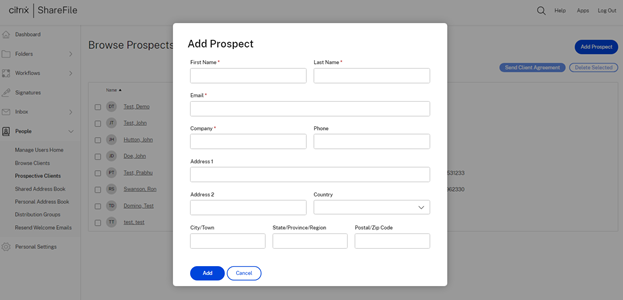
In your ShareFile Premium account, navigate to People > Prospective Clients to open the Browse Prospects screen.
-
Select Add Prospect then complete the form.
-
Select Add. The Prospective client added successfully banner displays.
-
Select the new prospect from the list by checking the box next to their name.

-
Select Send Client Agreement. The Select a template screen displays.
-
Choose the template that you want to use for the selected client. For more information, see Create auto-fill agreement templates.
-
Review the auto-filled template on the Preview - Client Agreement screen then click Send.
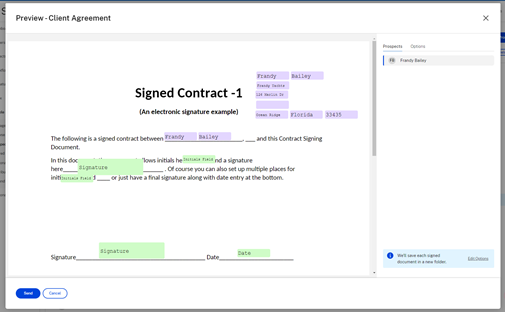
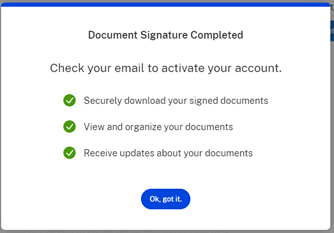
The prospective client receives a Review & Sign Document request email from your ShareFile account. Once they complete the form, they click Submit. The Document Signature Completed screen displays. They’re asked to check their email to activate their account.
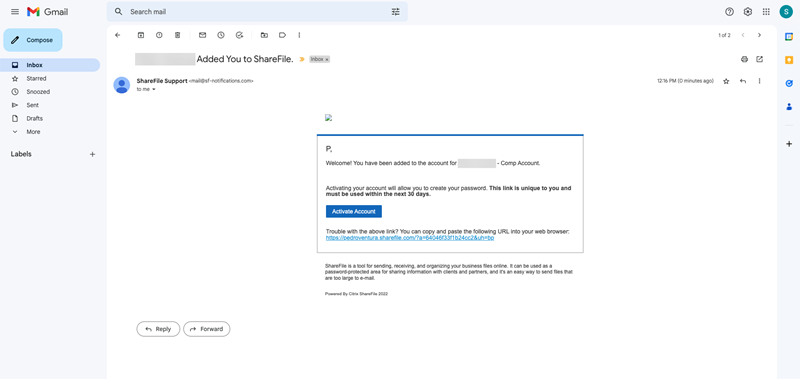
Once the client activates their ShareFile account access, they can sign into ShareFile and view their signed agreements.
The employee is notified that the client has completed the agreement and can review it in ShareFile.
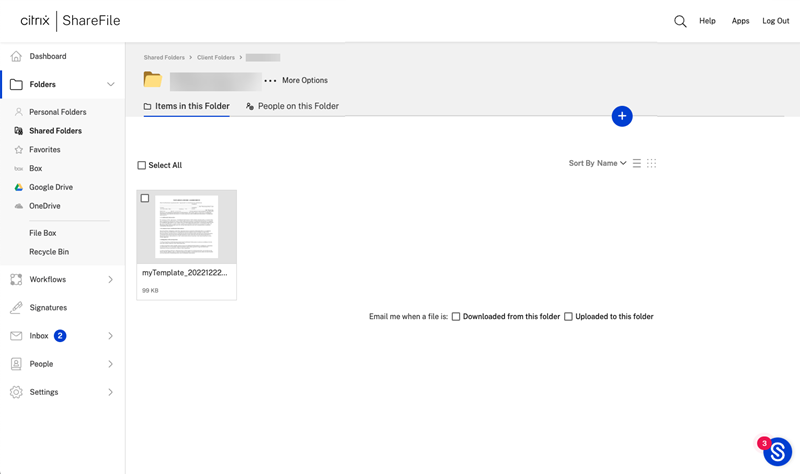
A folder is created under the client’s name and is automatically shared.
Automated existing client workflow
-
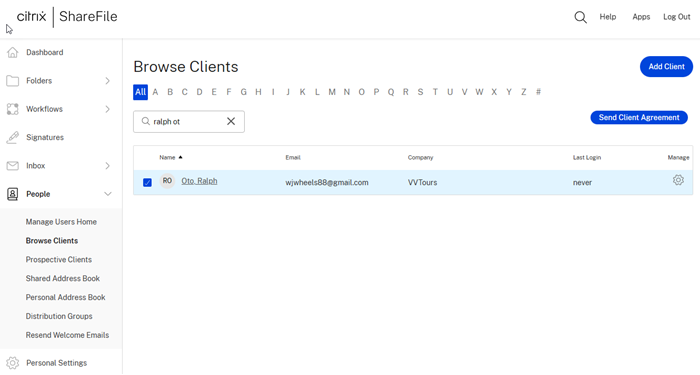
In your ShareFile Premium account, navigate to People > Browse client contacts.
-
Select the client from the list by checking the box next to their name.
-
Select Send Client Agreement. The Select a template screen displays.
-
Choose the template that you want to use for the selected client. For more information, see Create auto-fill agreement templates.
-
Review the auto-filled template on the Preview - Client Agreement screen then click Send.
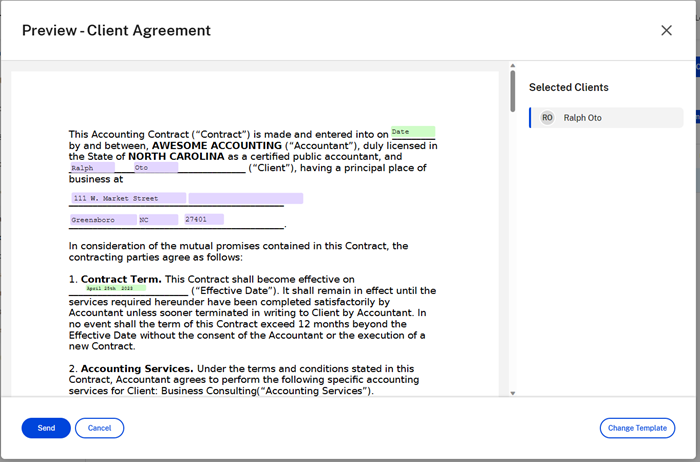
The prospective client receives a Review & Sign Document request email from your ShareFile account. Once they complete the form, they click Submit. The Document Signature Completed screen displays. They’re asked to check their email to activate their account.
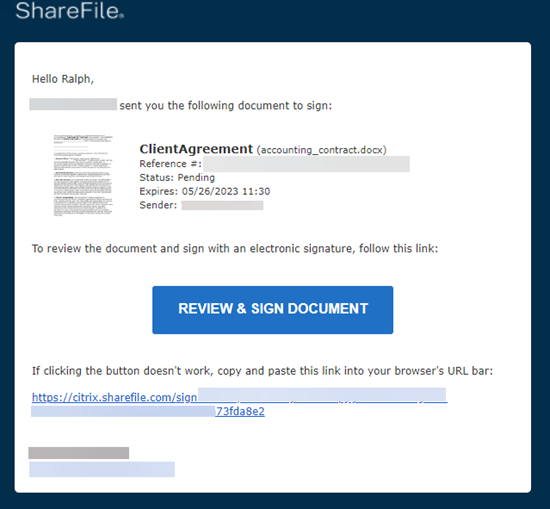
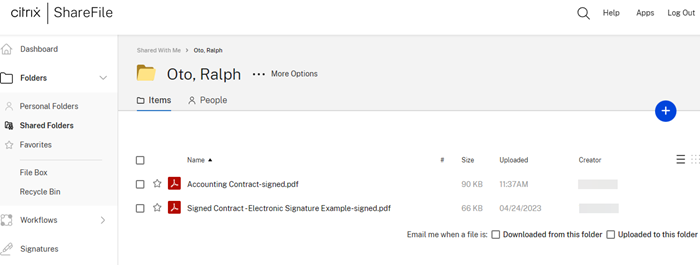
The client can sign into ShareFile and view their signed agreements.
The employee can track the status of the client’s activity in the Automated Workflows dashboard. See Automated Workflows for more information.

Client side agreement completion
As a recipient of an accelerated agreement, use the following steps to complete the signature and document request process.
-
Check your email for the document or signature request.

-
Select REVIEW & SIGN DOCUMENT to access the document.
-
After completing the request, select Submit signature then confirm by selecting Submit.
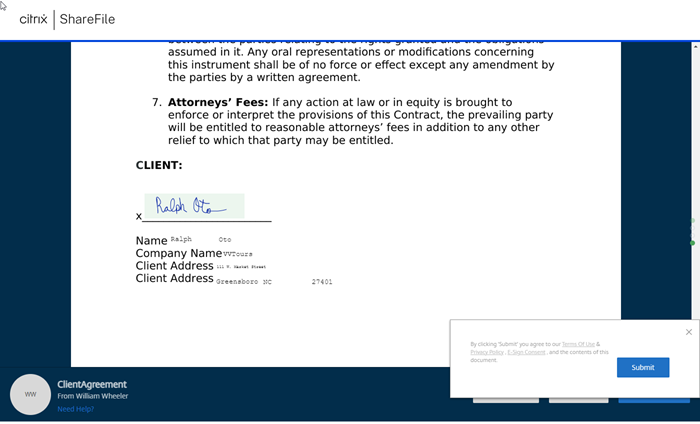
The Document Signature Completed popup displays confirming your submission and asks you to check your email to activate your account.
-
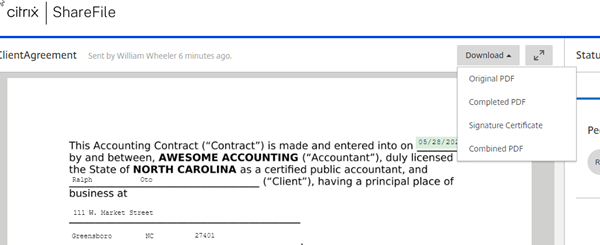
You have the option to download the document from the Download dropdown list.
Create auto-fill agreement templates
Accelerated Agreements is a new feature that allows you to create auto-fill agreement templates to automate the prospective client onboarding experience.
TIP:
For Salesforce Leads and Quickbook Customers, see Integrations for steps on how to add prospective client data from these tools.
Use the instructions below to create auto-fill templates.
Instructions
-
In your ShareFile Premium account, navigate to People > Prospective Clients to open the Browse Prospects screen.
-
Select an existing Prospect or click Add Prospect. For more information on adding a prospect, see Accelerated Agreements.

-
Select the new prospect from the list by checking the box next to their name.

-
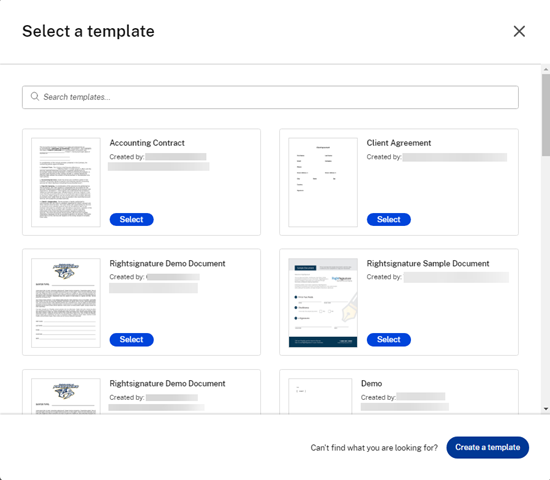
Select Send Client Agreement. The Select a template screen displays.
-
Select Create a Template. The Upload screen displays.
-
Select Upload a File to browse for a document in your system or select Choose from Cloud.
-
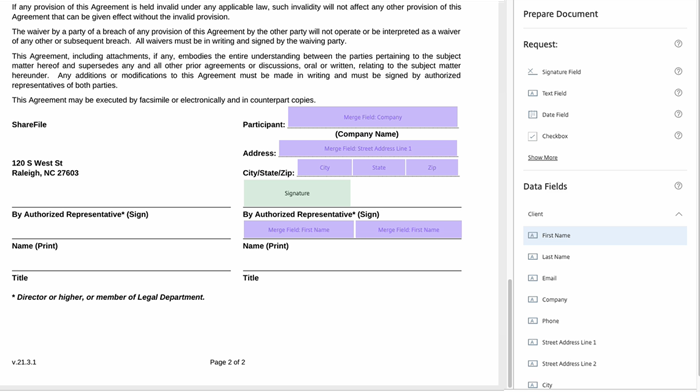
Once the document template is displaying in the Prepare template screen, use the right pane to expand the Data Fields for Prospect. Customize the template utilizing the data fields.
-
Select Create Template to save the template.
Notes:
-
The template is created under the filename of the document uploaded.
-
The template is saved under your RightSignature account and is available for any future agreements.
-
Templates can be edited or deleted under the RightSignature Templates screen.
-
-
Use the Preview - Client Agreement screen to review. If correct, select Send.
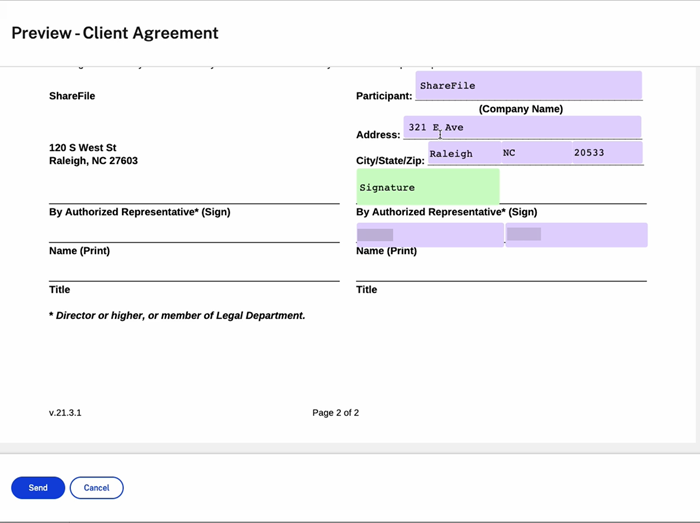
The client will receive and email requesting action.
Share
Share
This Preview product documentation is Citrix Confidential.
You agree to hold this documentation confidential pursuant to the terms of your Citrix Beta/Tech Preview Agreement.
The development, release and timing of any features or functionality described in the Preview documentation remains at our sole discretion and are subject to change without notice or consultation.
The documentation is for informational purposes only and is not a commitment, promise or legal obligation to deliver any material, code or functionality and should not be relied upon in making Citrix product purchase decisions.
If you do not agree, select I DO NOT AGREE to exit.