Information requests
Information requests are a tool to request and collect information securely and digitally. Information requests are found and initiated in the Projects tab in ShareFile Premium, Industry Advantage and VDR plans. The information request form helps the Service provider get specific and required information.
Auto-save on information request forms is enabled allowing clients to complete them in multiple sessions with progress saved automatically.
We recommend watching this video about Information requests in ShareFile projects:
Creating Information requests in ShareFile Projects - service provider
Creating and assigning information requests on the service provider side is available in the Projects folder for the specific client under the Information requests tab. The following instructions provide the steps necessary to create information request forms and assign.
-
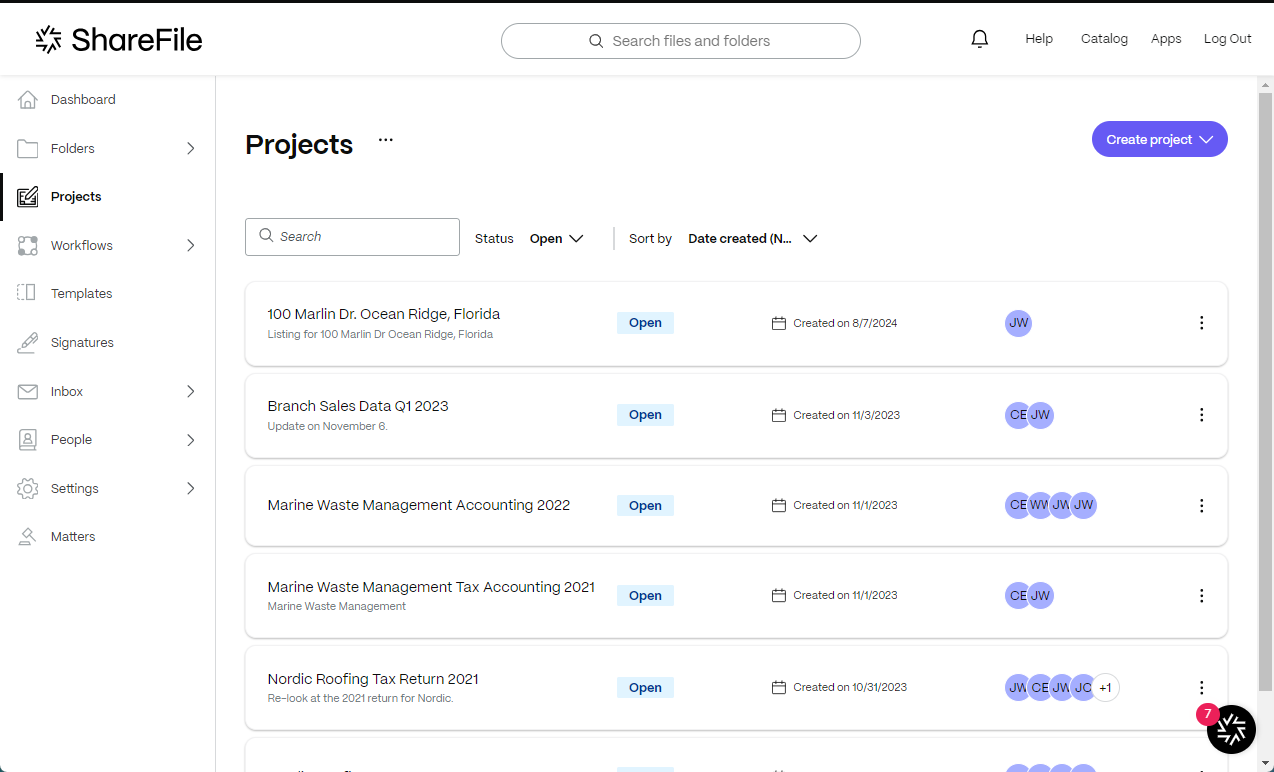
Navigate to Projects in your ShareFile account.
-
Select an existing project or select Create Projects. For these instructions, we selected an existing project.
-
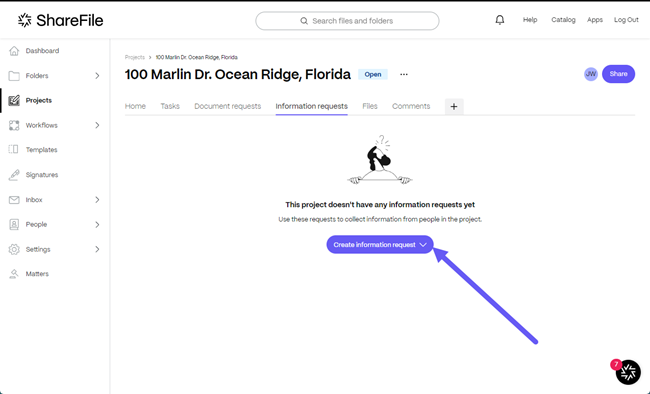
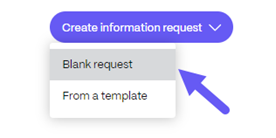
Select Create an information request then Blank request from the dropdown.
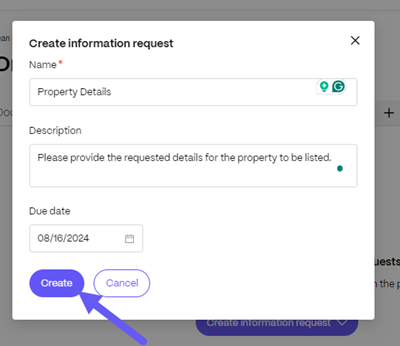
The Create Information request popup displays.
-
In the Name field, type in a name for the request.
-
In the Description field, you can provide an optional description for the request.
-
Select a Due date from the dropdown calendar.
-
Select Create.
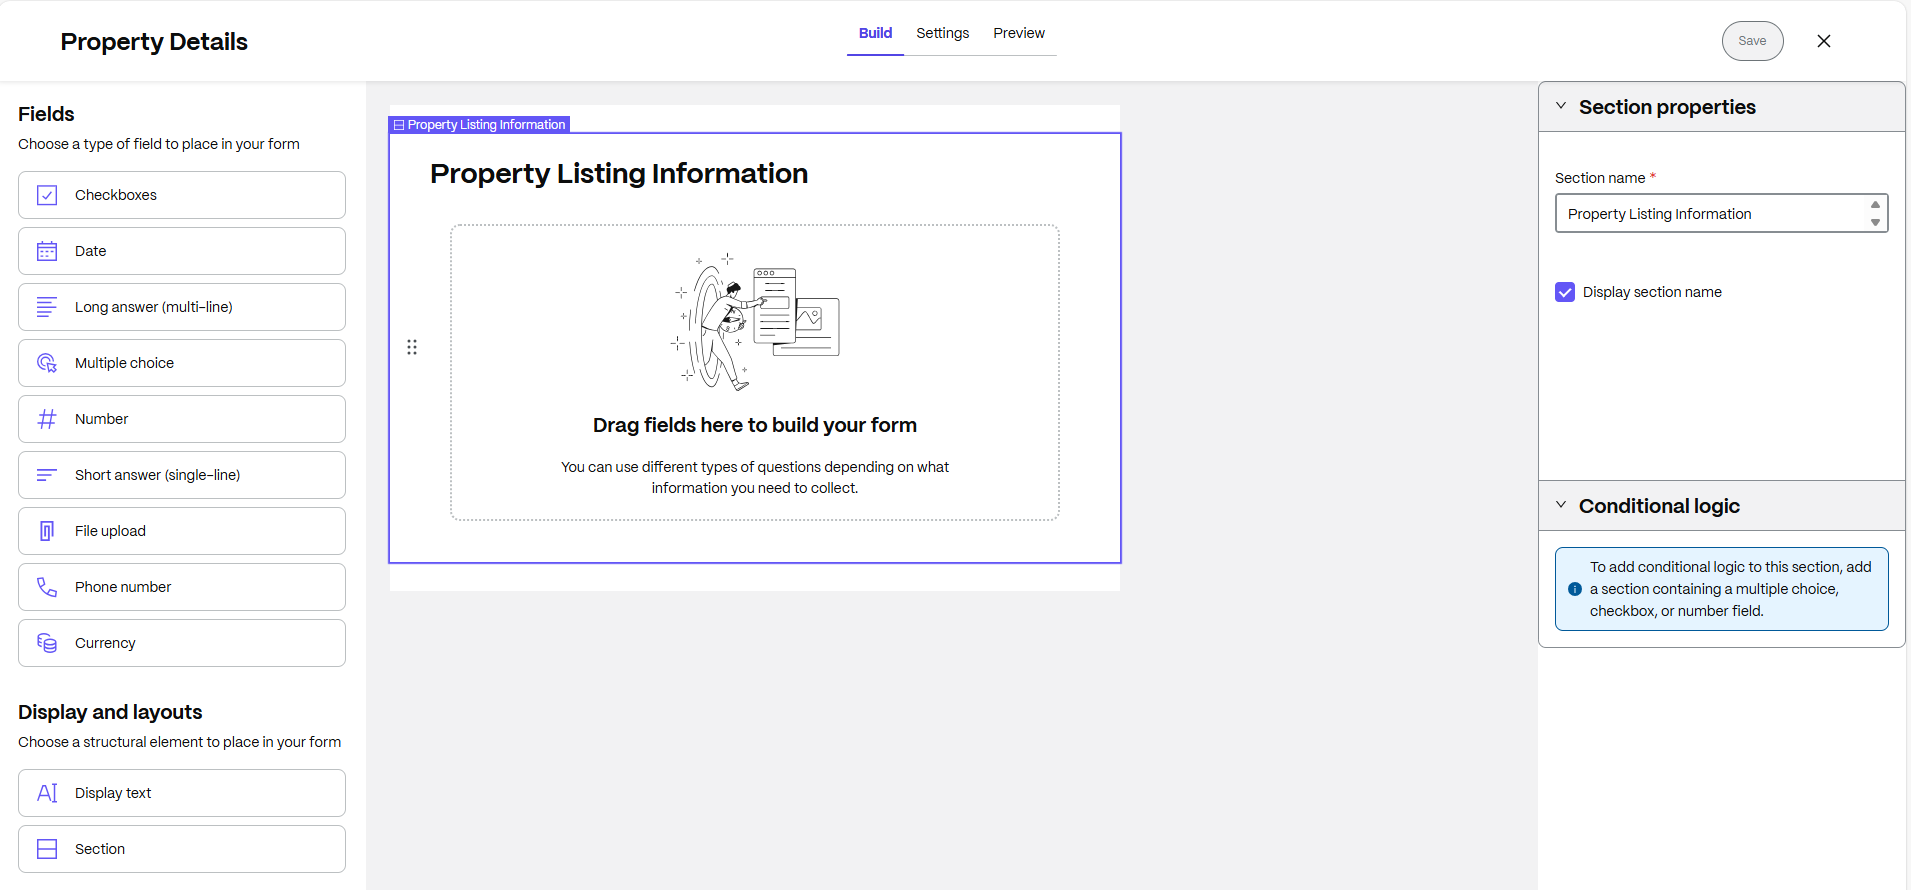
You are then redirected to the Information Request builder dashboard.
-
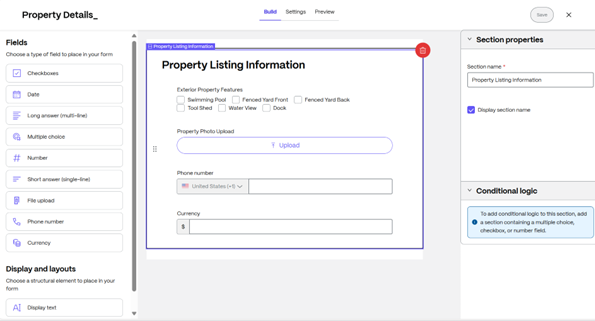
Select from the following fields to build out the request for specific information.
-
Checkboxes - Use this field type to create lists of possible items for recipients to select from. Options include:
- Question or Label for the Checkbox created.
- Required checkbox to require the recipient to complete the requested information.
- Hint text to assist in the defining of checkboxes.
- Options allow you to name each of the checkboxes for more details.
- Options Layout to choose either Horizontal or Vertical display.
-
Date - Use this to require a date for when the information request was completed.
-
Long answer (multi-line) - Use this field to allow the user to add as much information as need for the request. Options include:
- Required checkbox to require the recipient to complete the requested information.
- Question or Label for the field created.
- Hint text to assist the user in what kind of information is being requested.
-
Multiple choice - Use this field to allow the user to select between several options offered.
- Required checkbox to require the recipient to complete the requested information.
- Question or Label for the field created.
- Hint text to assist the user in what kind of information is being requested.
- Options allow you to name each of the multiple choice items.
- Options Layout to choose either Horizontal or Vertical display.
-
Number - Use this field to allow the user to add a number. For example, the number of bedrooms in a real estate listing.
- Required checkbox to require the recipient to complete the requested information.
- Question or Label for the field created.
- Hint text to assist the user in what kind of information is being requested.
-
Short answer (single-line) - Use this field to answer a single question. Options include:
- Required checkbox to require the recipient to complete the requested information.
- Question or Label for the field created.
- Hint text to assist the user in what kind of information is being requested.
-
File Upload - Use this to upload information including documents, photos, and other requested information.
-
-
Select Phone Number to provide your clients or prospective clients with an option to add their phone number or contact information.
-
Required checkbox to require the recipient to complete the requested information.
-
Question or Label for the field created.
-
Hint text to assist your client user in understanding what kind of information is being requested.
-
-
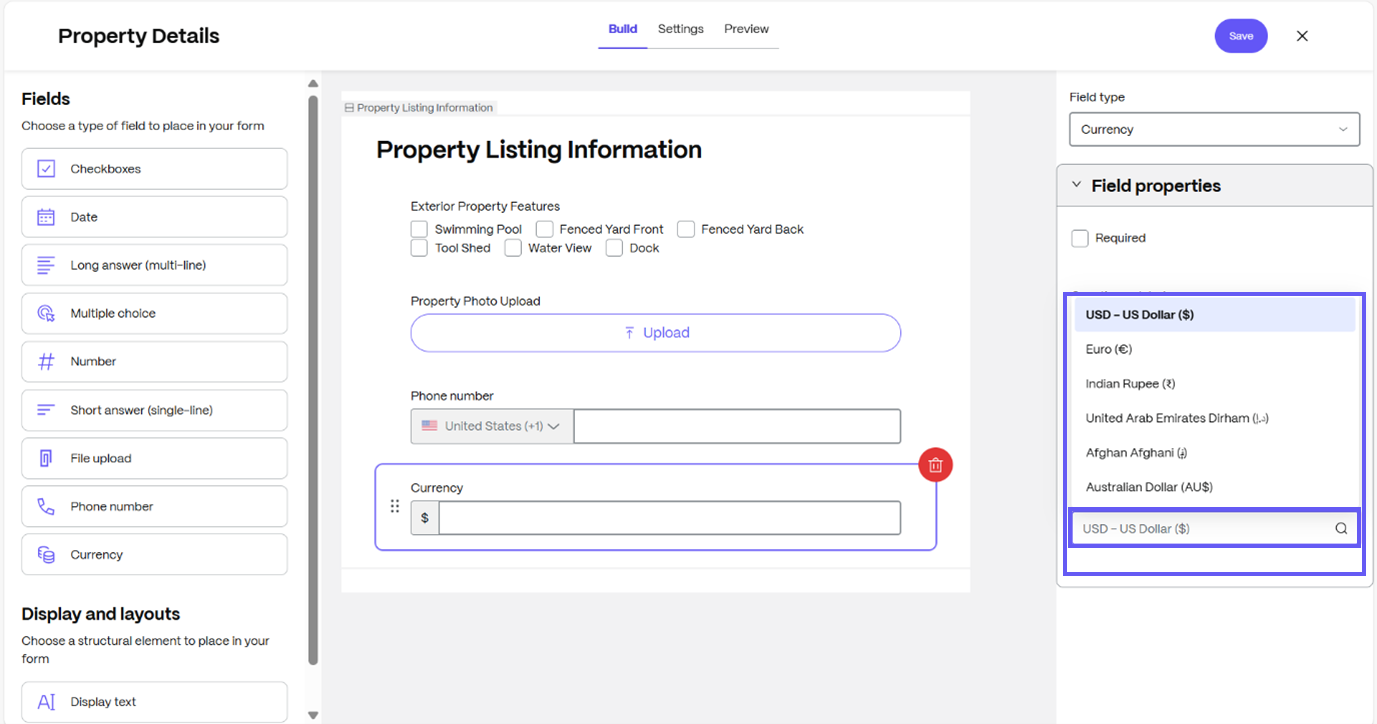
Select Currency to provide your clients or prospective clients with an option to select their respective currency.
-
Required checkbox to require the recipient to complete the requested information.
-
Question or Label for the field created.
-
Hint text to assist your client user in understanding what kind of information is being requested.
-
Currency Type Field which will allow users to select their respective currency based on their country where their business is located.
-
-
Select from Display and Layouts to select a structural element to place in your form including conditions.
-
Display text - Use this field to enter a title or provide other information to assist the recipient in providing as much detailed information as required.
- Display text enter the text to assist the recipient.
- Text size select from *Small, Medium, or Large.
-
Section - Use this to add sections to your request that can also contain conditions. For more information on creating conditional items in an Information request, see Creating a conditional request
-
-
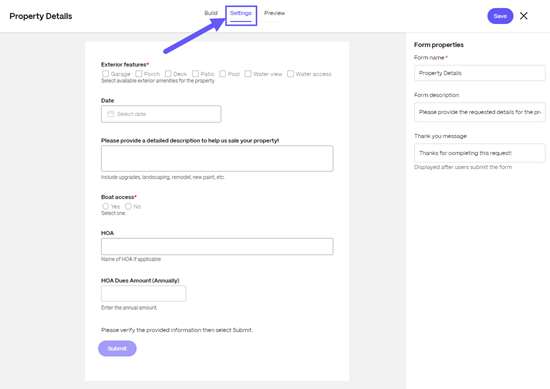
Once you have completed the Build section, select Settings to review the field settings.
-
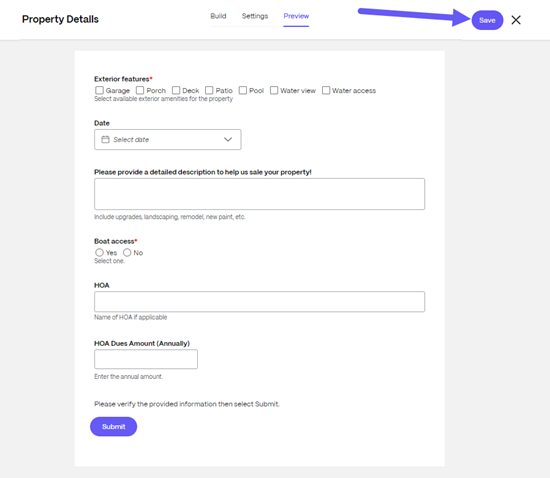
Select Preview to see how the request will look to the recipient.
-
Select Save.
-
Select X to go back to the project where the Information Request was initiated from.
Creating a conditional request
Use the following instructions to complete a conditional request for an Information Request.
-
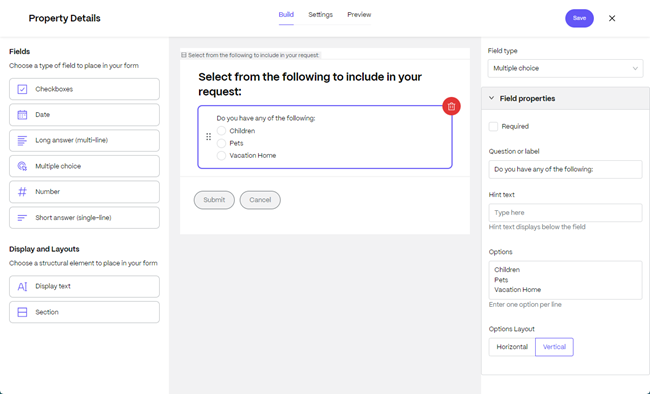
While in the Information Request builder, select a field to create the conditional response for. In this example, we chose Checkboxes.
Note:
For now, only Checkboxes, Multiple choice, and Number fields can be used with conditional requests.
-
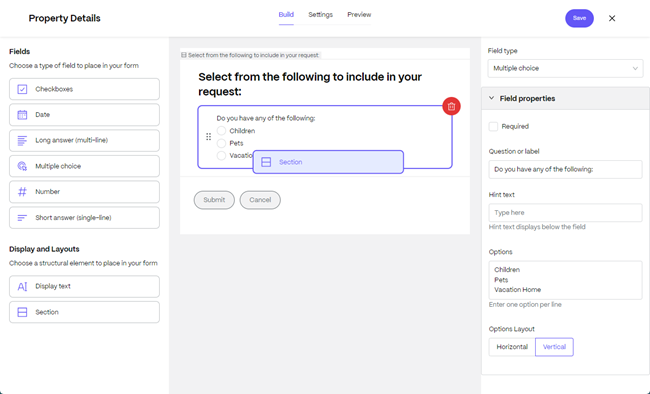
Once you define the field, drag a Section from Display and Layouts to the build.
Note:
Drag and drop sections can be added before, after, or in between sections. You cannot insert a new section into a section.
-
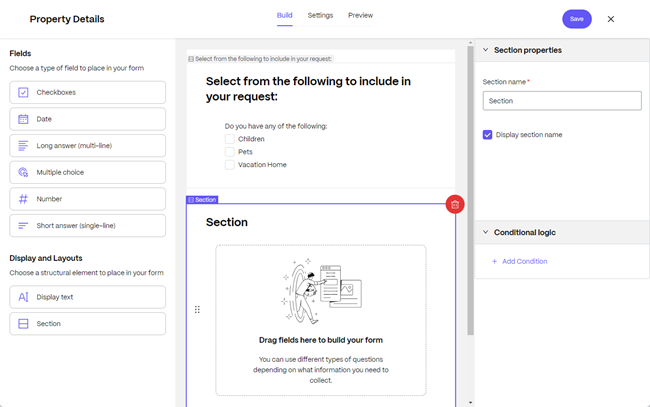
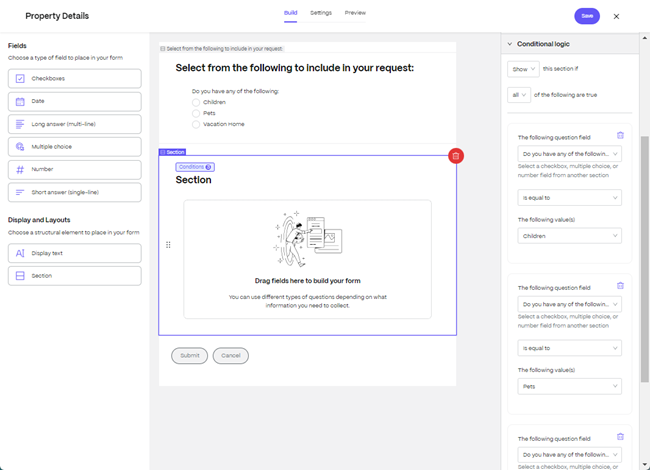
Select the Section you want to show/hide, then you will see the option to add Conditional logic in the Section properties.
-
Select Add Condition.
-
In Conditional logic set the parameters using the following coniditional fields:
Note:
Conditional dropdown selections might vary from the descriptions below with an example being if you select checkboxes, one selection available will be “has any of”.
-
Show/Hide dropdown - in the section if you desire a selection to be displayed or hidden.
-
The following question field dropdown - allows you to select which question in the previous section(s) you want to create a condition for. In this example, it is Do you have any of the following:
-
Condition dropdown - select from the following conditions:
- is equal to
- is not equal to
- has no selection
- has any selection
-
The following value(s) - the values created in the previous section.
-
-
Once the selections for the conditions are made, select Save.
Assign an Information request
The Shareable links feature allows users to share forms efficiently with Project Members and External Clients. This documentation below provides a step-by-step guide on how to use this feature.
Access the Information Request that needs to be shared
- Navigate to the form you want to assign and share with your assignees or clients.
-
Click the Assign button. This action opens a dailog box.

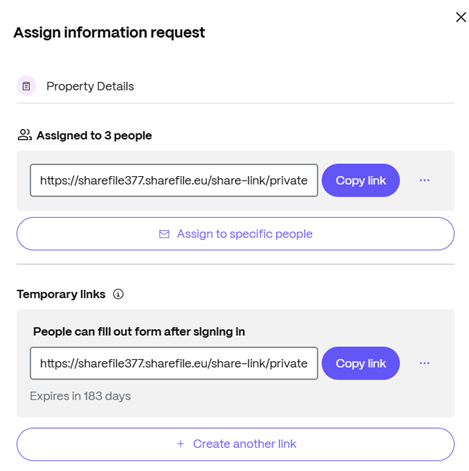
Create and Share Permanent Link for Assignees and Clients
-
A Permanent link is displayed and assigned to all project users within the dailog box.
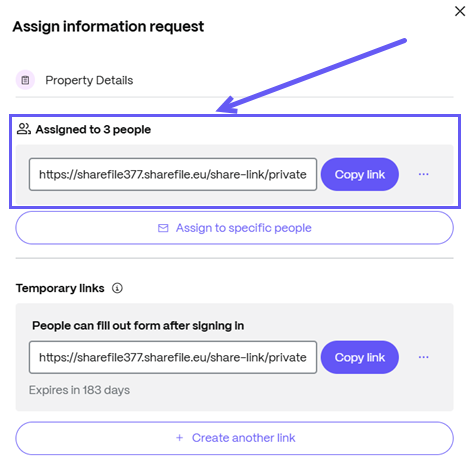
Usage: Click on Copy Link and share this with any member already assigned to the Information Request.
Note:
Users who do not have Assignee permission will not be able to fill out the Information Request using this link.
Assign to Specific People
-
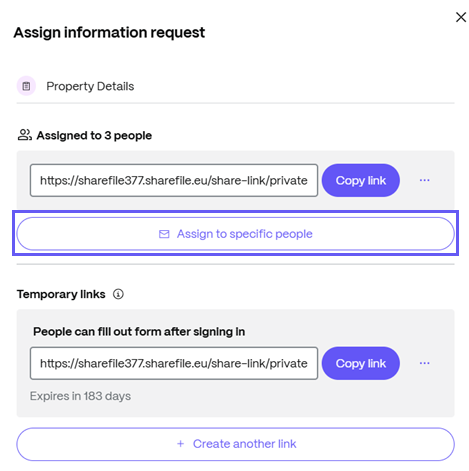
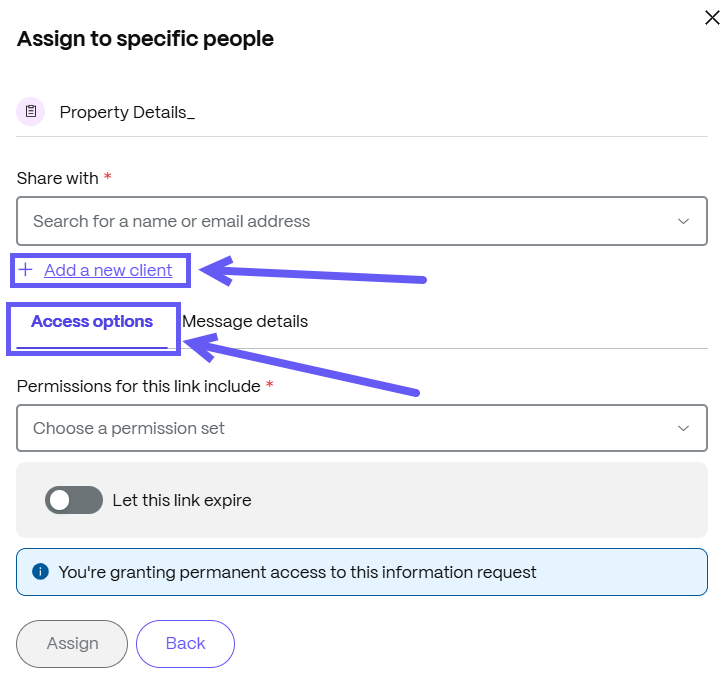
If the client is not part of ShareFile, click Assign to specific people in the dialog box to add users as shown below.
-
Enter the client’s details to assign the Information Request if the client is already added to the ShareFile account.
Add new Clients
-
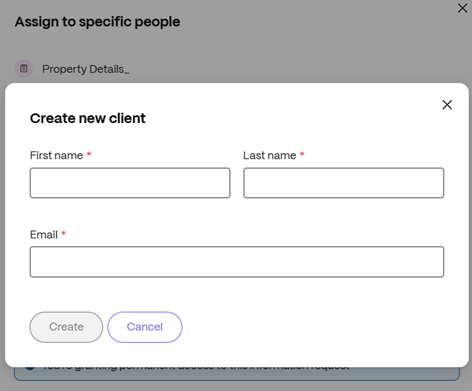
Click on Add a new client if the client has not been added.
-
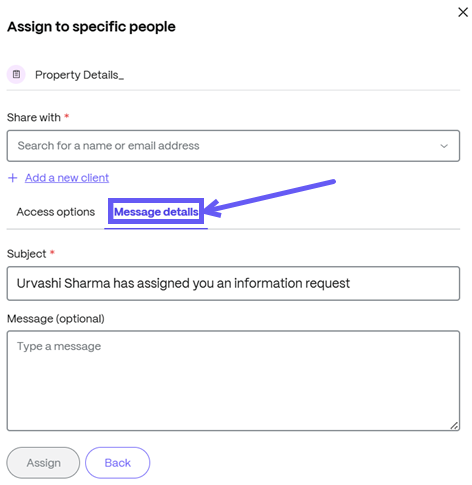
Users can add access permissions under the Access options section and add an email message under the Message details tab, which should be sent to the assignee once the Information Request has been assigned.
Note:
In this scenario, when creating a Permanent link, an email is sent to the client assigned to the Information Request. Additionally, you can share the Temporary link with the client via third-party tools such as Gmail and Outlook.
Create and Share a Temporary Link for External Clients
-
To share the form with clients not included in the project, click the Create Link button under the Temporary Links section. A temporary link is generated.
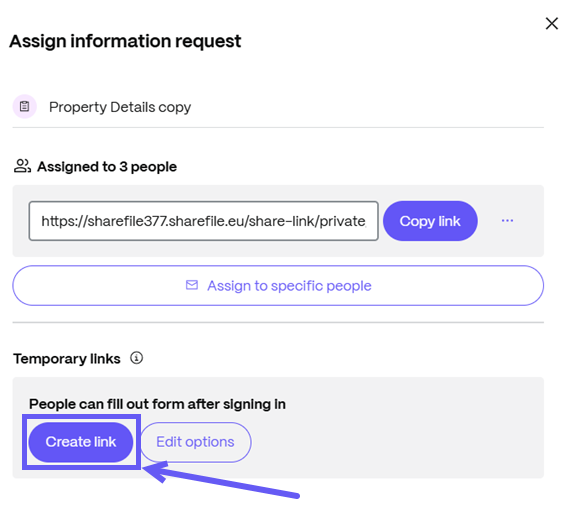
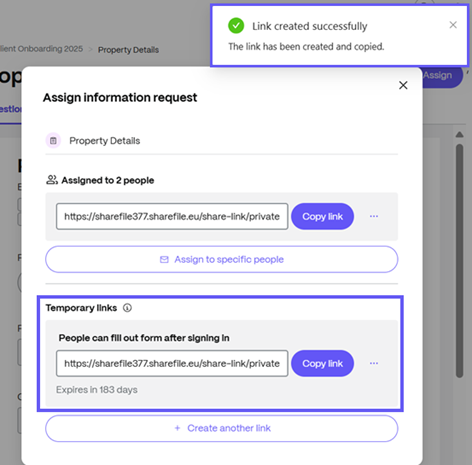
Usage: Share this temporary link with your clients. Existing ShareFile clients can use this link to log in and access the Information Request on the client portal.
Edit Access for Temporary Link
-
To edit access for the temporary link, click on three-dot icon and select Edit options.
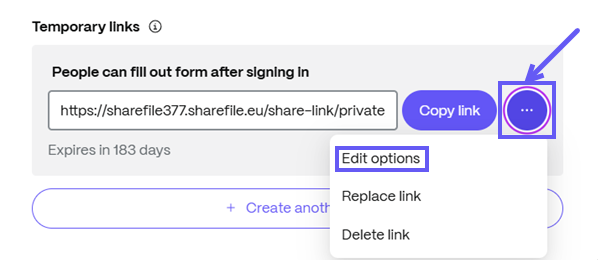
-
Users can provide access as a Reviewer if the Information Request form needs to be reviewed, or as an Assignee if the Information Request form needs to be assigned and filled out.
-
Users can also define the role who will have access to the Information Request- client or employee, by selecting the relevant option from the Who can access the link dropdown field.
-
Additionally, users can set the expiration period from the Access expires dropdown field.
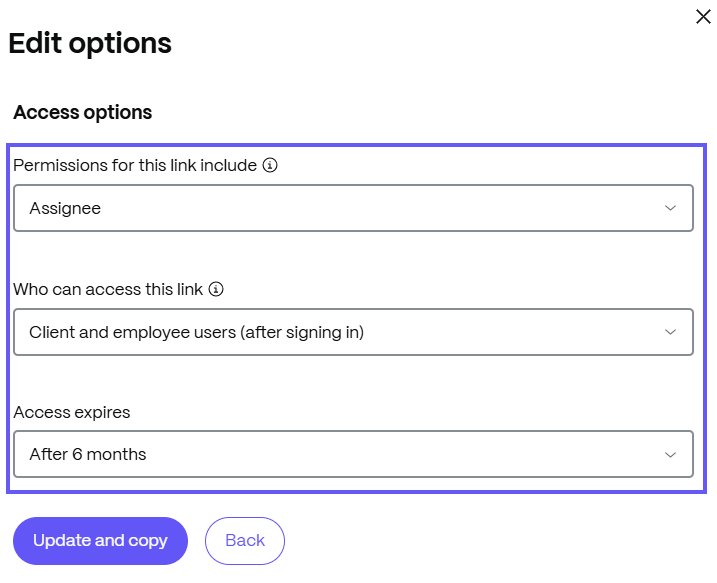
Assigned Information request - assignee
The following information provides you, the assignee, with the steps necessary to respond to an assigned information request.
-
Access your email to open the ShareFile Information Request message.
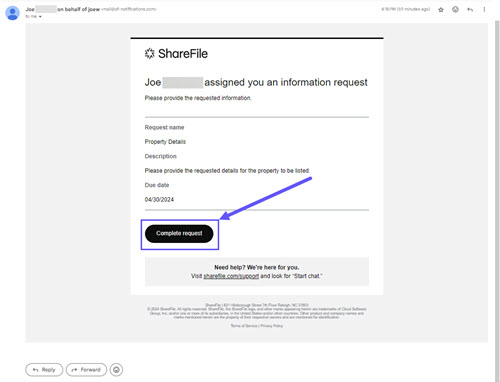
-
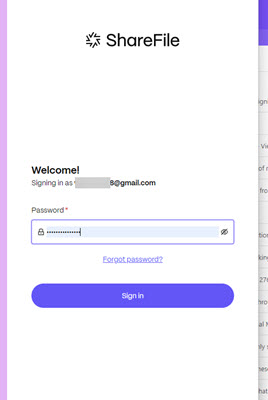
Once you receive a Information Request in your email, select Complete request.
Note:
You might be required to sign in.
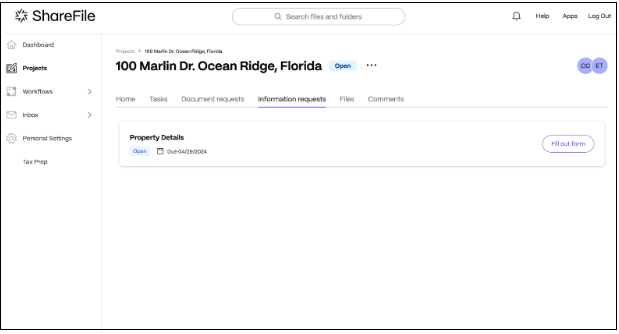
Your ShareFile account opens to the projects page displaying the request.
-
Select Fill our form to fill the request.
-
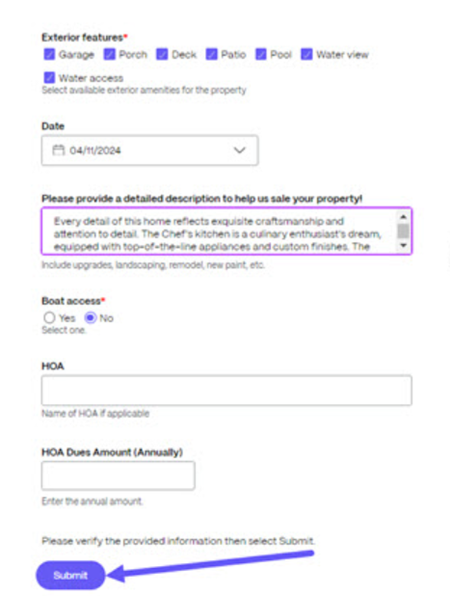
Complete the information request form then select Submit.
Once you have submitted the form, the Success message displays on the right side of the page. In order to edit any response, please contact the service provider.
Temporary Link and Form Submission: Assignee View
-
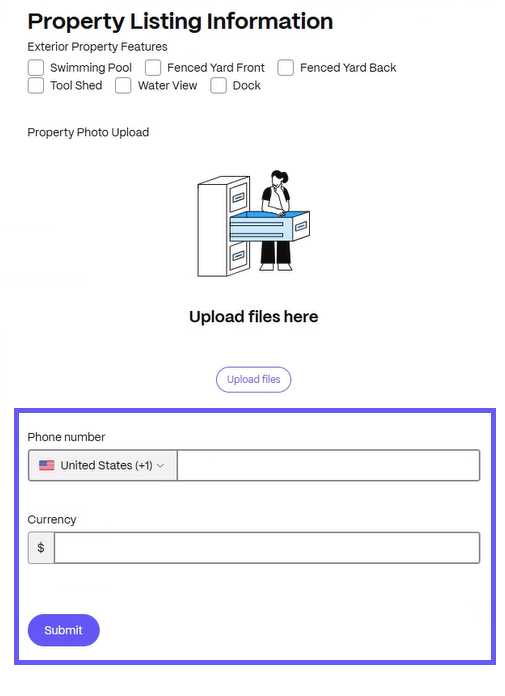
Clients who receive the temporary link can log in to the client portal and access the form.
-
Users can fill out and submit the form after logging in.
Information request review - service provider
Tracking assigned information requests on the service provider side is available in the Projects folder for the specific client under the Information requests tab. The following instructions provide the steps necessary to open and review information requests completed by the assignee.
-
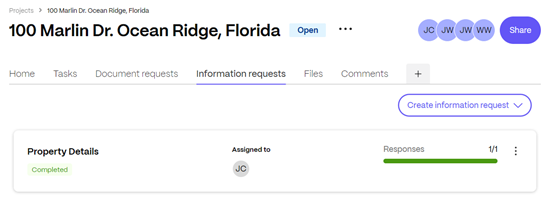
Navigate to the Information requests tab in the project.
-
Select the completed Information request from the list to open.
The Questions/Responses screen displays.
-
Select the Responses tab, then select Open.
The requested information provided by the client displays for review.
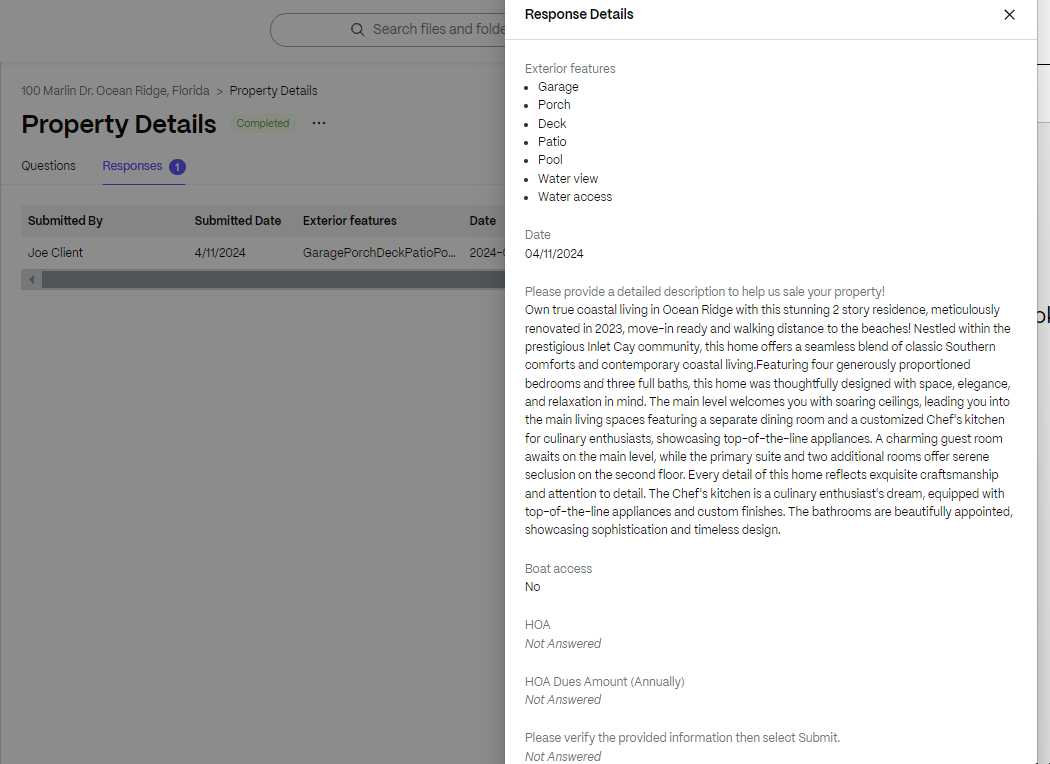
NOTE:
The above image displays the view visible to the SF user when a single response has been submitted. For multiple response, please refer to Export Information Request responses - CSV Format.
-
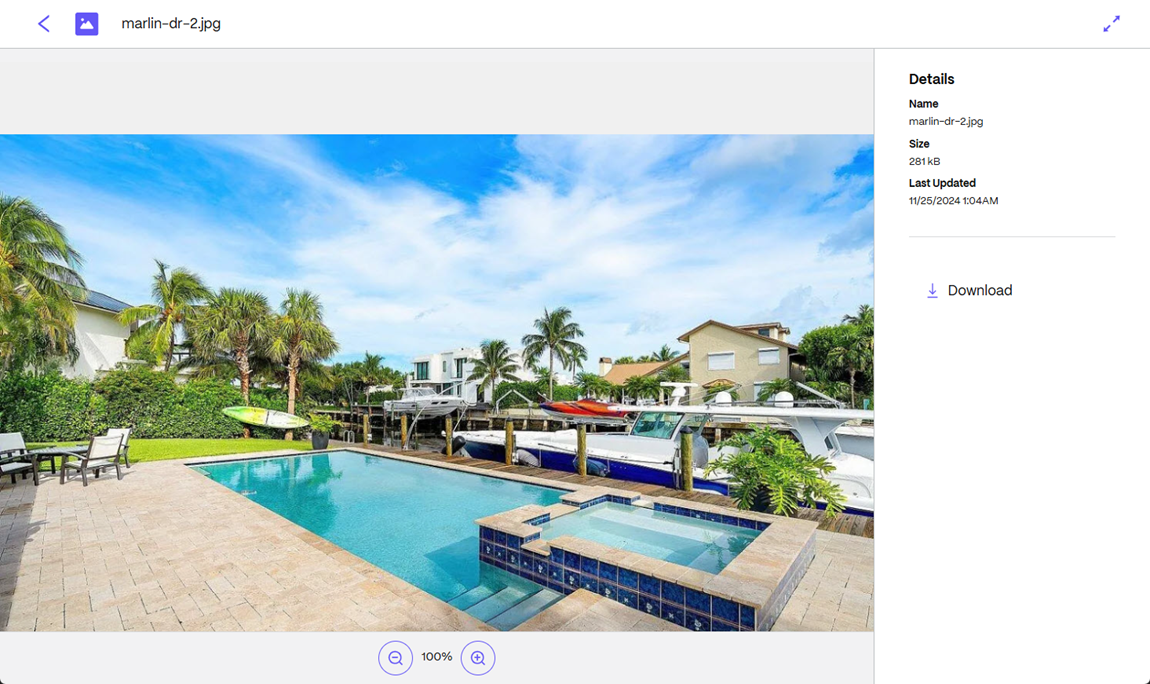
Select the item to open the ShareFile viewer.
Export Information Request responses - CSV Format
Use the following instructions to export Information Request responses in CSV format.
-
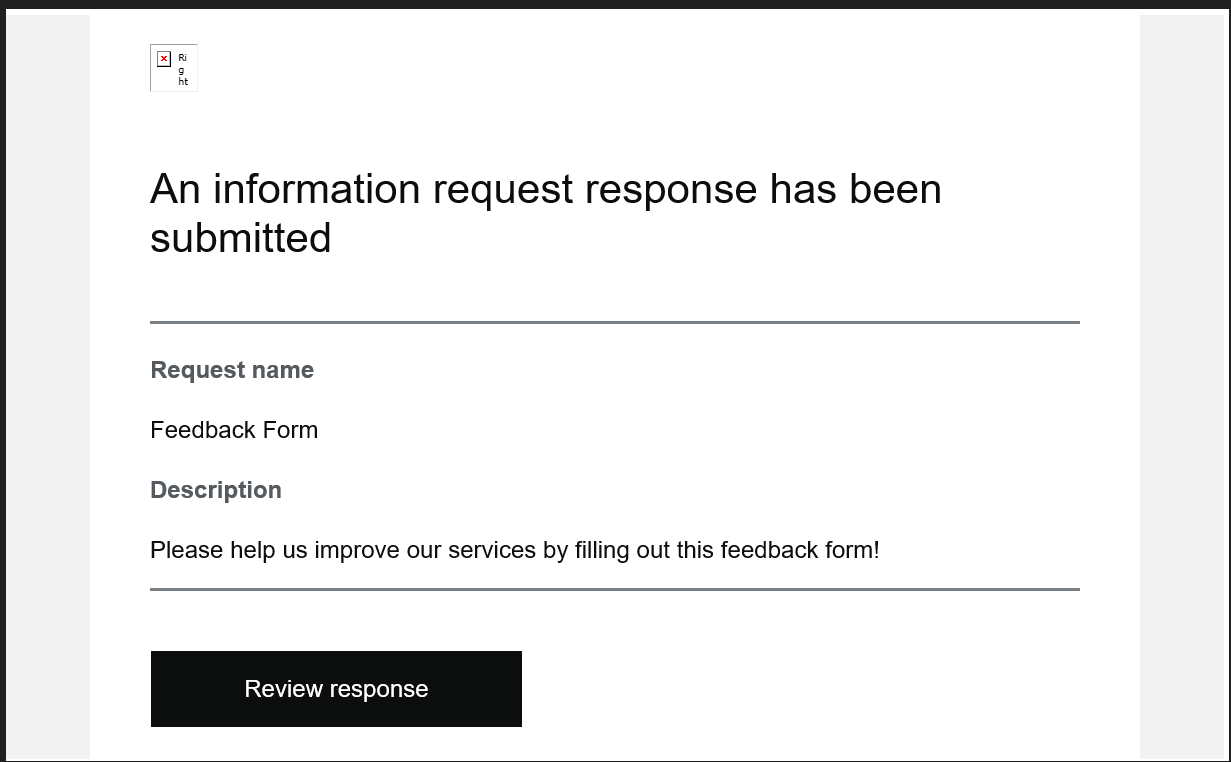
Access your email to open the ShareFile Information Request response submitted by the client.
-
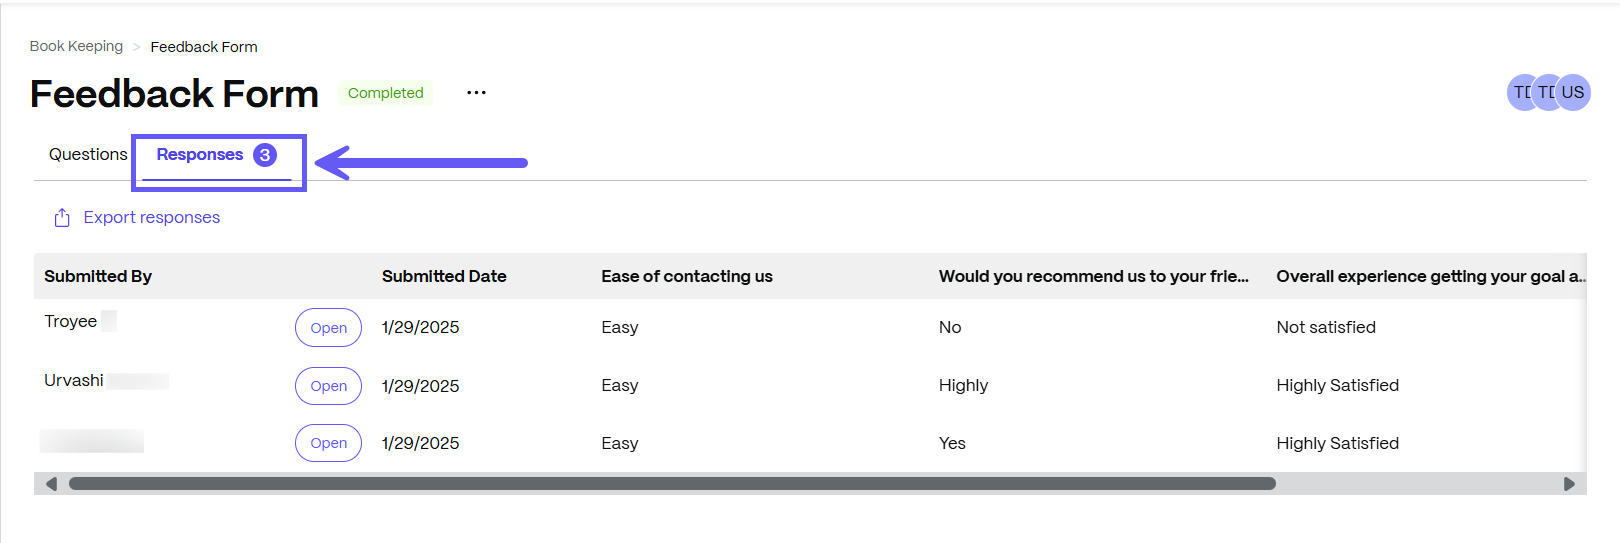
Navigate to Responses tab and the responses submitted by the client displays for review.
-
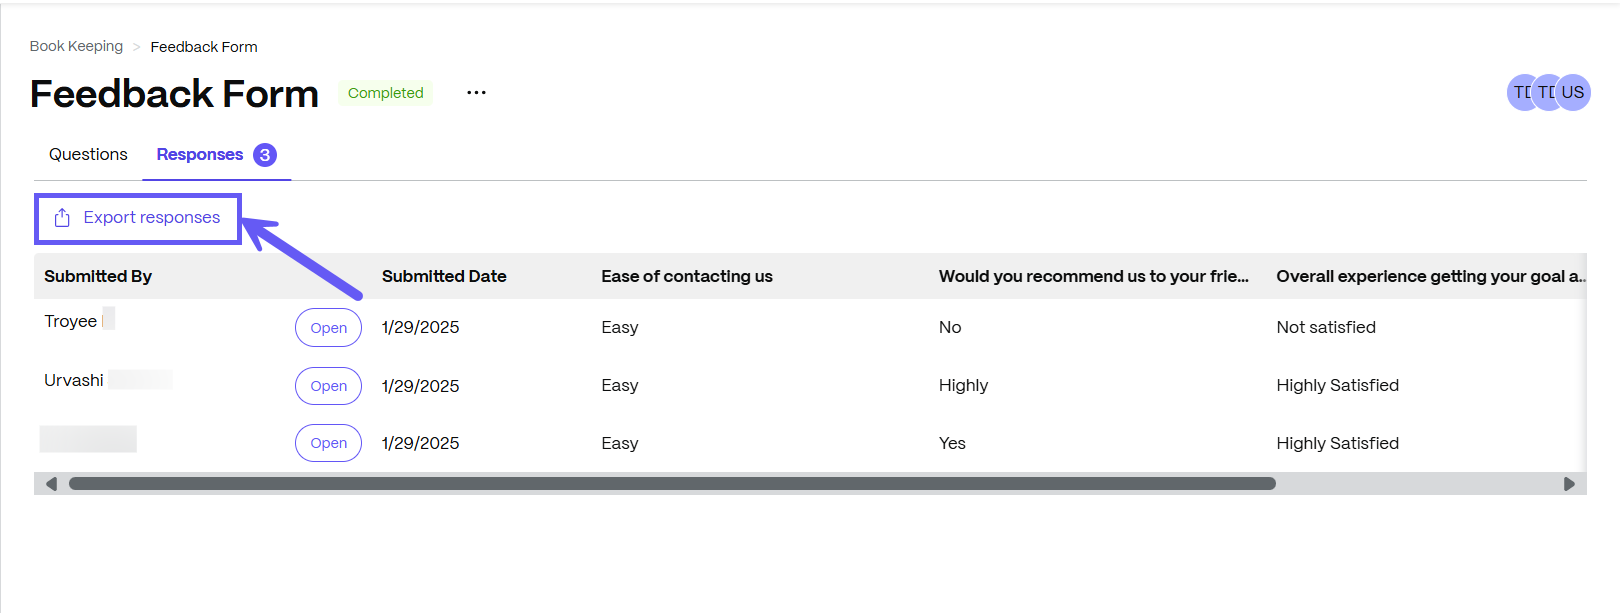
Click on Export responses to export in CSV format.
-
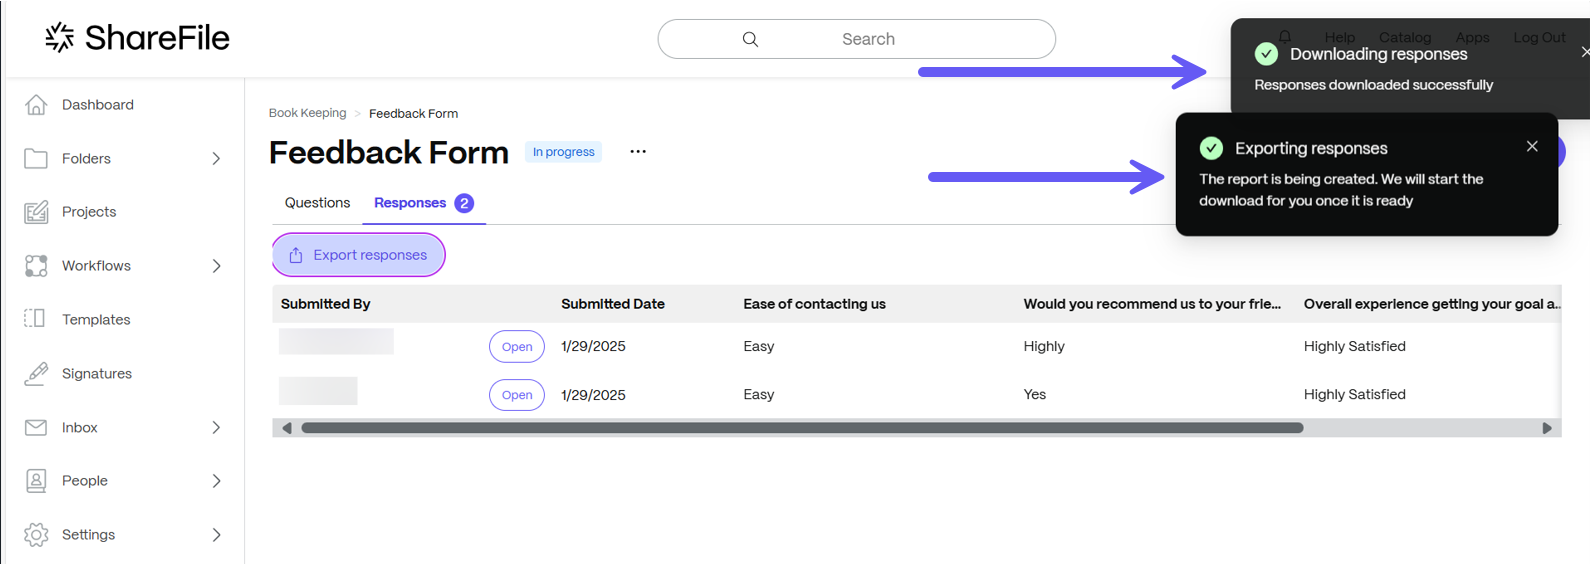
The Exporting responses and Downloading responses message displays on the top right corner.
-
Once you have exported the responses, the file will automatically download to your local device.
-
You can now preview the file in CSV format.
Delete an Information request
Use the following instructions to delete an information request.
-
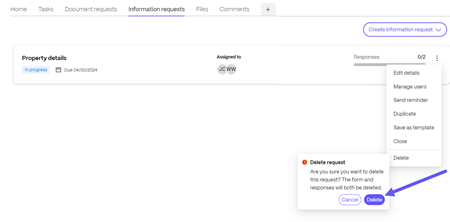
Select the three vertical dots next to the Information Request you want to delete to open the menu.
-
Select Delete.
-
Confirm you want to delete the request by select Delete on the confirmation.
Due Date Reminders
The Reminder feature helps ensure the timely completion of document requests by automatically notifying contributors and enabling manual follow-ups.
Automatic Reminder Notifications
-
Scenario: The client receives a reminder before the due date.
-
Trigger: A due date is set for the Information Request.
-
Action: The client will automatically receive a reminder 10 business days before the due date.
-
Purpose: Keeps assignees or clients aware of upcoming deadlines and reduces the need for manual follow-ups.
-
Manual Reminder Option
-
Scenario: The owner can send a reminder to the client any time before the due date.
-
Trigger: The service provider identifies an uncompleted information request in a specific project.
-
Action Flow:
-
Navigate to the Information Request tab and click on the form which is yet to receive a response.
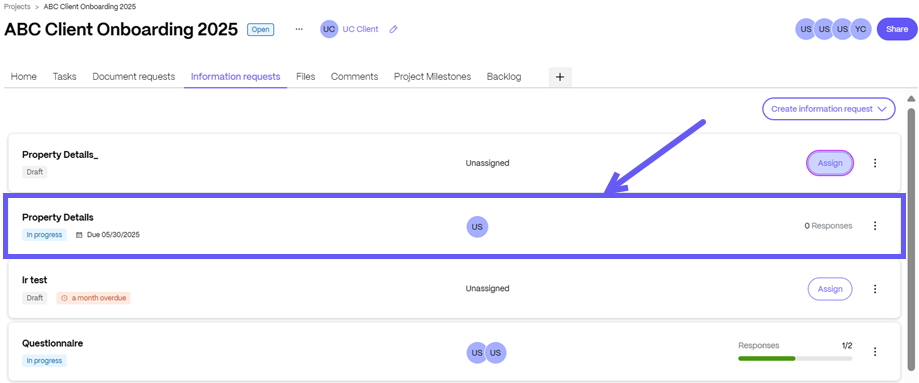
-
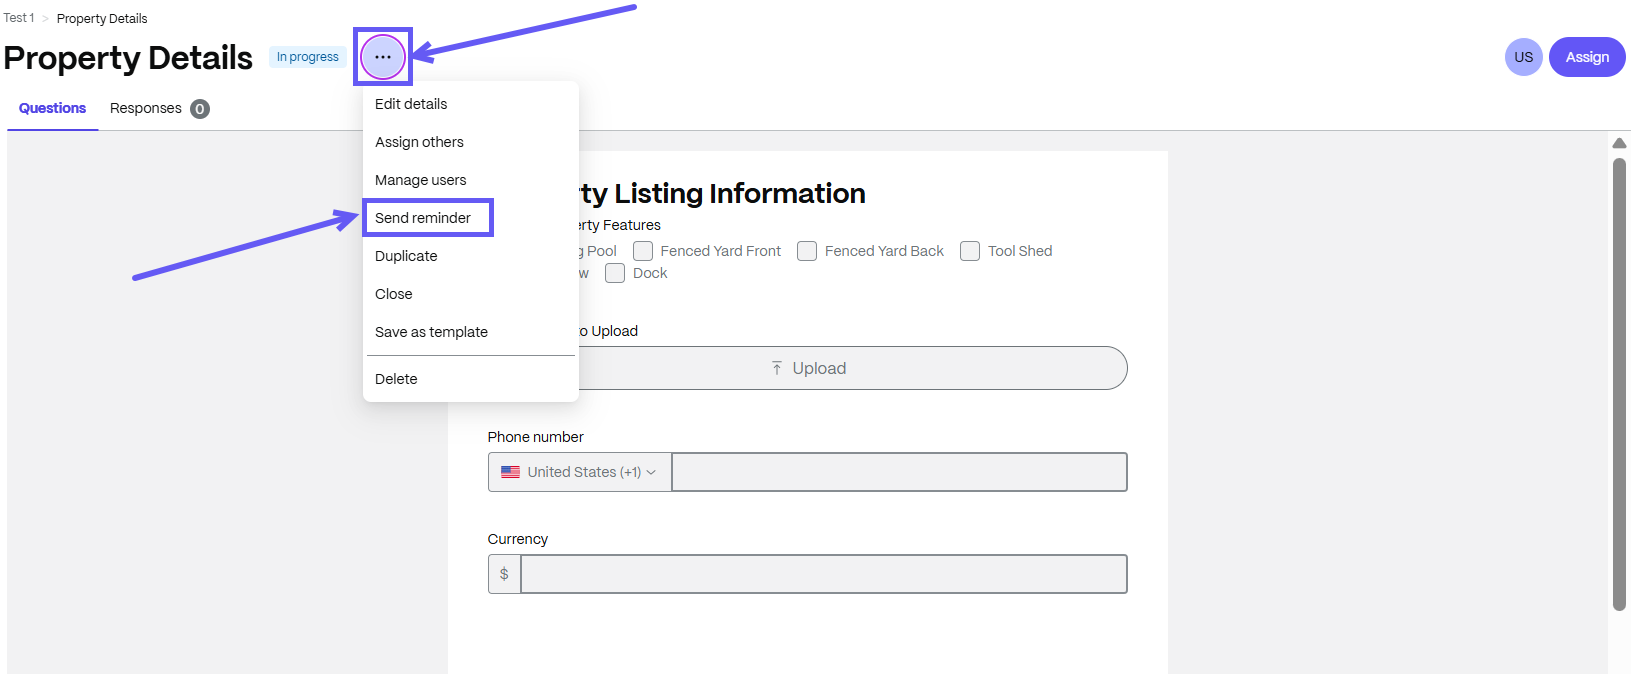
Click the three dot icon and select Send Reminder from the dropdown.
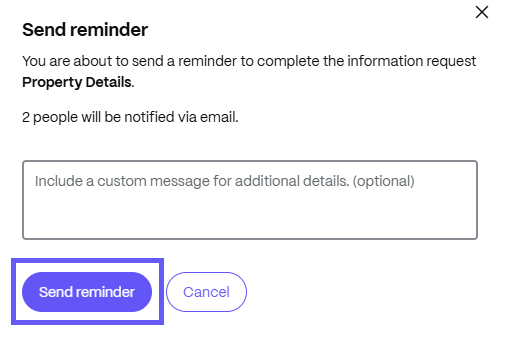
- A message window appears, where you can create your custom reminder message and click on Send Reminder button to trigger the reminder notification.
-
The reminder is sent to the Assignee or Client.
-
-
Purpose: Ideal for nudging assignees who may have missed the automated reminder or need a personalized follow-up.
-
Post-Due Date Reminder
-
Scenario: The due date has passed, but the request remains incomplete.
-
Trigger: The due date has elapsed.
-
Action: The client or assignee will continue to receive reminder notifications for up to 30 days after the due date.
-
Purpose: This ensures that overdue requests are not forgotten and encourages completion even after the deadline.
-
In this article
- Creating Information requests in ShareFile Projects - service provider
- Creating a conditional request
- Assign an Information request
- Assigned Information request - assignee
- Information request review - service provider
- Export Information Request responses - CSV Format
- Delete an Information request
- Due Date Reminders