Income Tax Return solution
Overview
Streamline your tax client engagements, individual and business returns, with this ready-to-use solution. It simplifies the entire client lifecycle and enhances the experience by making processes more transparent and efficient.
This includes:
- Editable templates for individual and business tax preparation — forms 1040, 1065, 1120-S, 1120-C, and 990. Or create a custom template for your firm or country needs!
- A pre-designed engagement letter and onboarding workflow.
- Customizable, templated request lists and digital forms to gather PBC documents and data.
- Ability to transfer files easily between ShareFile and accounting software like QuickBooks, CCH, Drake, Lacerte, ProSeries, UltraTax, and others.
- Generate payment requests by connecting to your payment processing vendor, QuickBooks or Stripe, to seamlessly send client payments request in one tool.
- Integrated e-signature with knowledge-based authentication for finalizing 8879s.
Notes:
- The Income Tax Return solution is available in the ShareFile Industry Advantage plan. See Plans & Pricing for additional information.
- See FAQ - Income Tax Return solution for common questions about this solution.
Install the solution
IMPORTANT:
- Installing the Income Tax Return solution will automatically update the client portal experience for all client users, offering a new client portal experience. See Instructions for the Client - New Client Experience for the downloadable PDF instructions.
- When a solution is installed, it becomes available to all Employee users associated with the account. Only users with SuperUser, Account Owner, or AdminManageEmployees roles can install or uninstall solutions.
To install the Income Tax Return solution:
- Open ShareFile in your web browser.
- From the ShareFile Dashboard, click the user icon located in the upper right corner of the screen.
-
Select Catalog from the dropdown options.
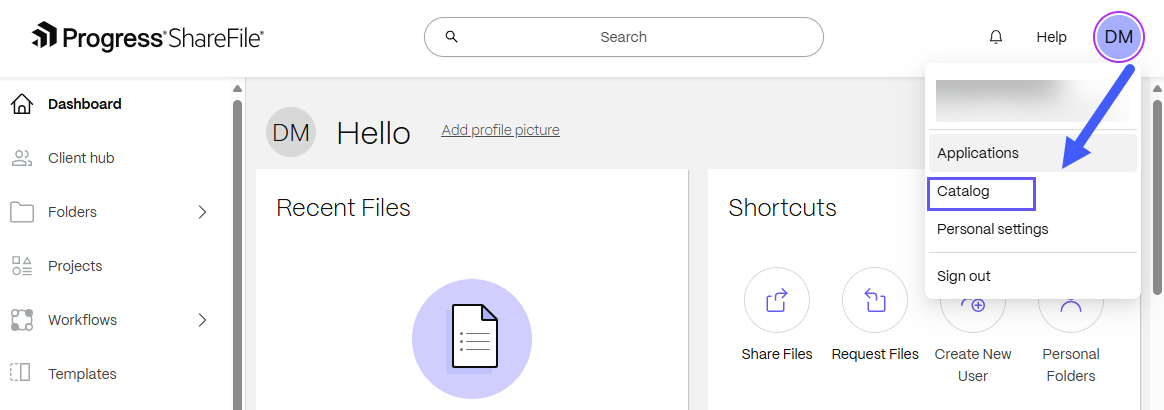
The ShareFile Catalog page opens in a new tab with the available solutions. Click on any tile to access the solution overview.

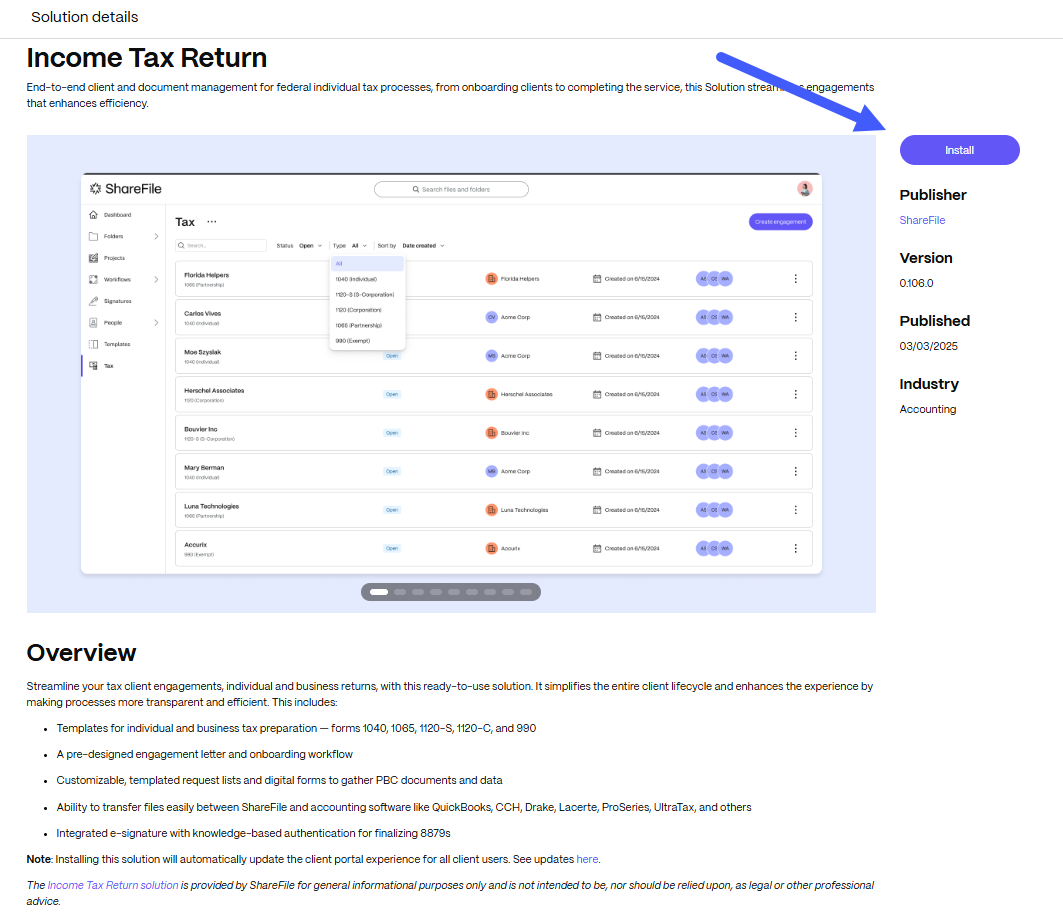
-
Select Income Tax Return and click Install.
-
The “Welcome…” message displays:
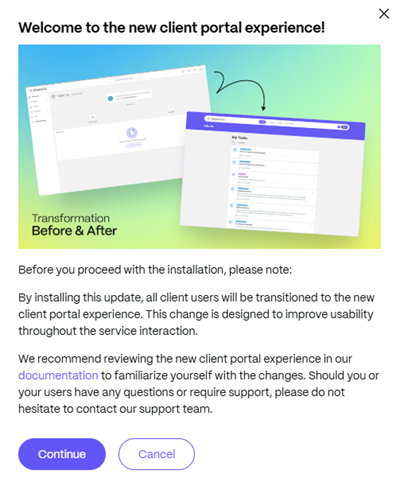
-
Select Continue. The Install solution confirmation message displays:
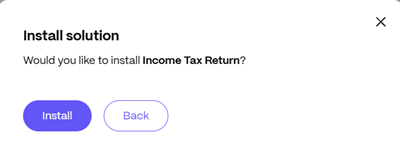
-
Click Install. A message displays letting you know the installation started:

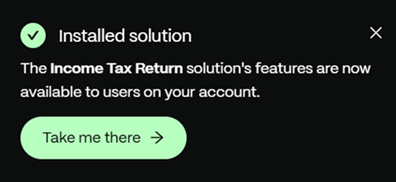
Once the installation completes, you receive a confirmation message:
-
The Tax solution is added to the left navigation menu on your ShareFile account:
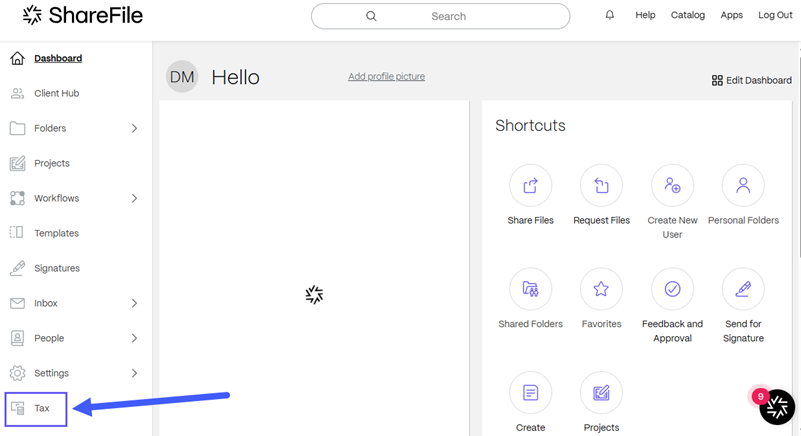
Access the income tax return solution
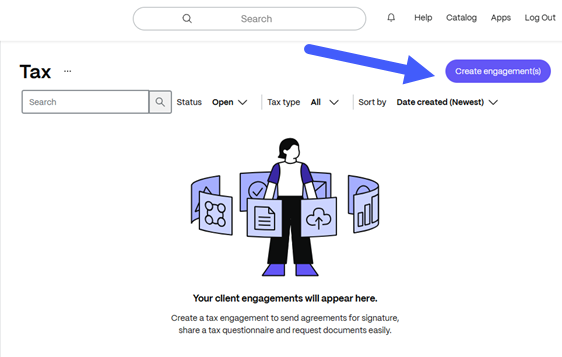
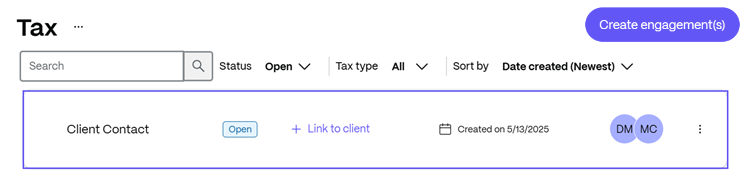
To access the income tax return solution, select Tax from the left navigation menu. The income tax return solution dashboard displays:

From the income tax return solution dashboard, you can create engagements, link them to clients, filter by engagement status and tax type and sort the engagements.
Create engagement(s)
-
From the income tax return solution dashboard, click Create engagement(s).
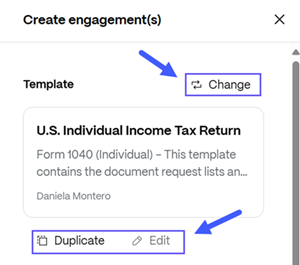
The Create engagement(s) screen opens and displays the U.S. Individual Income Tax Return template by design, , however this can be changed or edited completely if needing to customize by firm or country needs. See define engagement details to change, duplicate or edit a template.
- Select one or more contacts (required) - We will create an engagement for each of the contacts you select.
- Select tax year (required) - Select a year from the list provided.
-
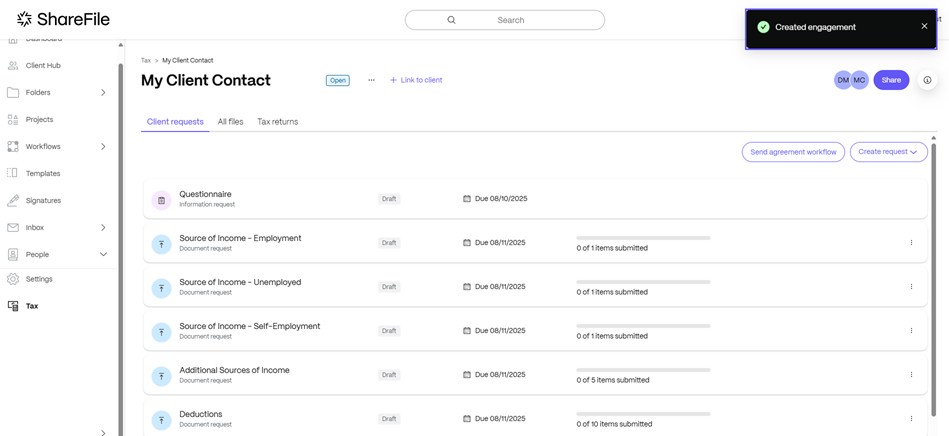
Click Create engagement(s).
Once the process completes, a confirmation message displays and the client’s required tasks and requests display in the Tax portal:
Define engagement details
When you create an engagement, the U.S. Individual Income Tax Return template is used by default. However, you have the option to change, duplicate, or edit the template.
Change template
To change the template:
- From the income tax return solution dashboard, click Create engagement(s).
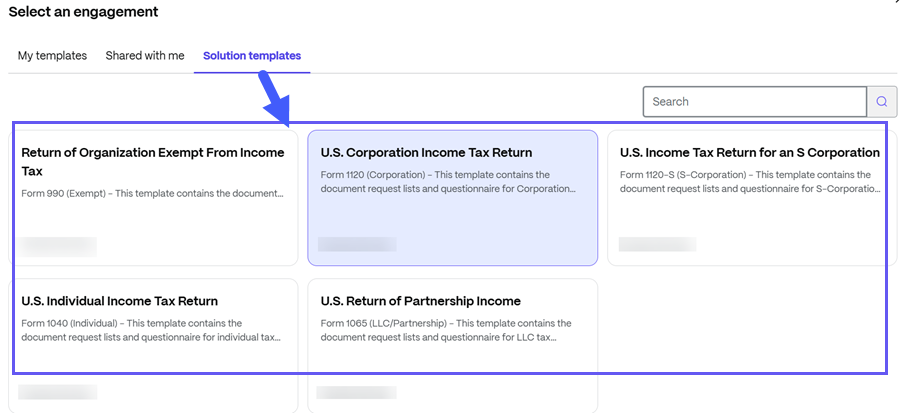
- From the Create engagement(s) screen, select Change.
-
Click an engagement from the solution templates options to select it.
Duplicate templates
To make a duplicate of a solutions template (required in order to Edit):
- From the income tax return solution dashboard, click Create engagement(s).
- From the Create engagement(s) screen, select Change to choose the template that you want to copy.
- Once you select the desired template, click Duplicate.
- Enter a name for the template. This name will show up in the template gallery.
- Add a template description (optional).
- Click Duplicate. The Edit template screen displays.
- You can choose to edit template or save changes.
Edit templates
Note:
Templates provided with the income tax return solution can’t be edited. Make sure you make a duplicate of the template first.
- From the income tax return solution dashboard, click Create engagement(s).
- From the Create engagement(s) screen, select Change to choose the template that you want to edit.
-
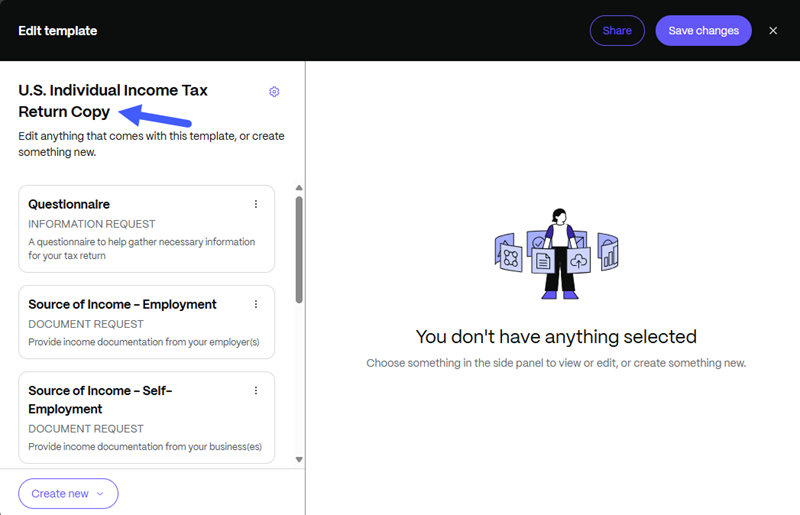
Once you select the desired template, click Edit. The Edit template screen displays:
-
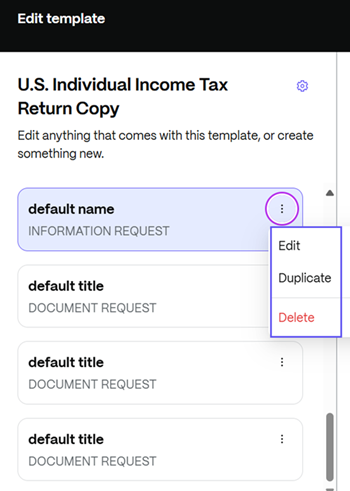
From the left options, select the items that you want your template to include. You can edit, duplicate or delete items:
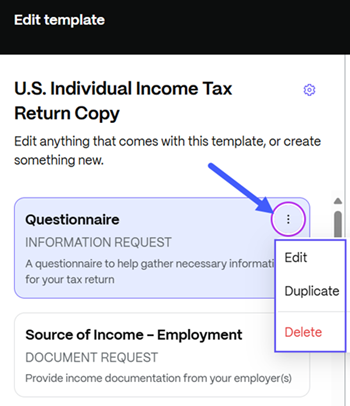
-
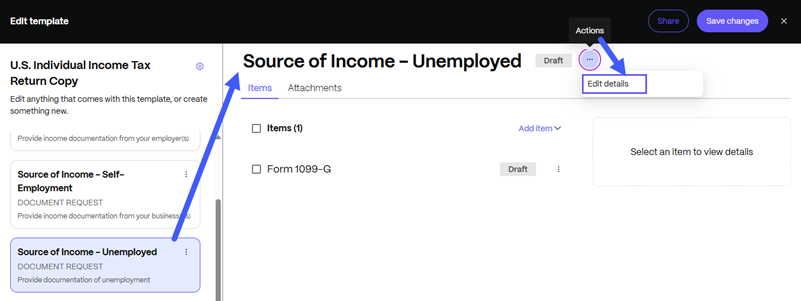
When you click on an item, the details of that item will appear in a side window. Select Edit to customize these details.
Notes:
- Each item is unique and has its own set of customizable fields/sections.
- Items will show a Draft status until you save the changes.
- In some cases, the Edit option is available under Actions > Edit details. See below image as reference:
- Select Save changes once you finish customizing the template.
Create templates
Note:
Templates provided with the income tax return solution can’t be edited. Make sure you make a duplicate of the template first.
- From the income tax return solution dashboard, click Create engagement(s).
- From the Create engagement(s) screen, select Change to choose the template that you want to edit.
-
Once you select the desired template, click Edit. The Edit template screen displays:
-
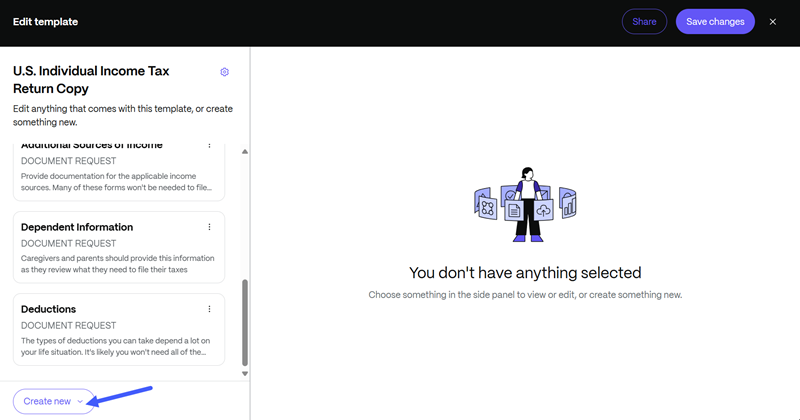
From the left navigation options, select Create new:
-
Choose if you want to create a Document request or an Information request:

-
From the left options, select the items that you want your template to include. You can edit, duplicate or delete items:
-
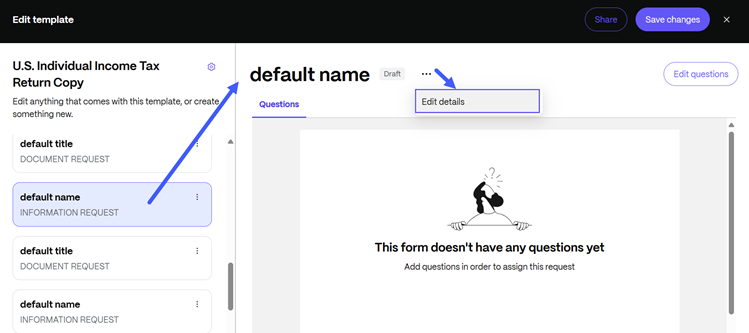
When you click on an item, the details of that item will appear in a side window. Select Edit to customize these details.
Notes:
- Each item is unique and has its own set of customizable fields/sections.
- Items will show a Draft status until you save the changes.
- In some cases, the Edit option is available under Actions > Edit details. See below image as reference:
- Select Save changes once you finish customizing the template.
Create engagements in bulk
The Bulk Create feature enables you to create multiple engagements simultaneously, enhancing efficiency, minimizing manual errors, and streamlining workflows for users who handle a high volume of recurring engagements.
To bulk create engagements:
-
From the income tax return solution dashboard, click Create engagement(s).
The Create engagement(s) screen opens and displays the U.S. Individual Income Tax Return template by design. See define enagement details to change, duplicate or edit a template.
-
Select one or more contacts - Search multiple users from your directory. We will create an engagement for each of the contacts you select.
-
Preview the list of clients to ensure all selected contacts are correct.
-
Click Create engagement. Once the process completes, a confirmation message displays.
Note:
Bulk creation of engagements is handled as a backend process. Once the process is complete, refresh the engagements page to view the newly created engagements.
Transparent Progress on Long-Running Automation Processes
Overview
Transparent Automation Progress by ShareFile gives users confidence that the process automations are working as expected by surfacing real-time status, progress, and outcomes directly in the ShareFile UI. Instead of guessing whether something is happening behind the scenes, you can now see exactly what’s running, what’s completed, and when action may be required.
This new enhancement introduces transparent, real-time visibility into automation execution across ShareFile. Users can clearly see when an automation starts, is running, completes, or fails, reducing uncertainty, duplicate actions, and support requests.
Who Benefits
Enabled for ShareFile Plans
-
Plans: All ShareFile plans
-
Typical users:
- Employee users executing automations
- Admins monitoring operational workflows
- Support teams handling automation-related tickets
Platform Scope
- Available on: Web
- Not available on: Mobile (initial release)
Key Capabilities
| Capability | What It Does | Who Sees It |
|---|---|---|
| Automation start confirmation | Confirms immediately when an automation is triggered. | Employee user |
| Real-time status visibility | Shows whether an automation is running, completed, or failed. | Employee user |
| Long-running progress indicator | Displays “Processing” state with progress or step indication when applicable. | Employee user |
| Automation activity surface | Central place to view ongoing and recent automation activity. | Employee user, Admin |
| Failure visibility | Clearly indicates when an automation fails and requires attention. | Employee user, Admin |
Activation & Availability
Is Transparent Automation Progress enabled by default?
Yes, it is enabled for all supported automation types.
How to enable the automation feature?
No action required for the users. Supported automations automatically surface progress and status when triggered.
How to disable the automation feature?
It is currently not configurable in the initial release.
Known Limitations
- Not all automations will display real-time progress. Automations that:
- Run for extremely long durations (days, weeks, months)
- Pause for human interaction
- Execute fully in the background without user impact may not surface progress to avoid UI noise.
-
Estimated completion times may not be available for all automation types.
- Mobile support is not included in the initial release.
Example Use Case
Typical Scenario
A user triggers an automation to create engagements for multiple clients.
Without Transparent Automation Progress
The automation runs in the background with no visible feedback. The user is unsure if the process started, retries the action, or contacts support.
With Transparent Automation Progress
The user immediately sees confirmation that the automation has started. can track its processing status, and is notified upon completion or failure. Confidence increases, duplicate actions are avoided, and the workflow completes smoothly.
Frequently Asked Questions
What does Transparent Automation Progress show me?
It shows when an automation has started, is running, has completed, or has failed, so you always know what’s happening in the background.
Which automations support real-time progress?
Real-time progress is available for supported, bounded automations such as:
- Creating engagements for multiple clients
- Exporting files to third-party systems
- Template runs
Not all automations are eligible.
Why don’t I see progress for every automation?
Some automations:
- Run for very long periods
- Pause for human input
- Execute entirely in the background
To avoid UI clutter, the automation processes do not display real-time progress.
Where can I see automation progress?
Automation activity appears in notification center.
Will I get notified when an automation finishes?
Yes. You’ll see a clear status update when an automation completes or fails.
Can I see what step the automation is currently on?
When available, the UI will show the current stage or processing state of the automation. This may vary by automation type.
Does this change how automations work?
No. This feature only improves visibility. The underlying automation logic remains unchanged.
Can I turn off automation progress notifications?
No. Automation progress visibility is enabled by default for supported automations and cannot be disabled in the initial release.
Why don’t I see this feature?
Make sure:
- You’re using the web platform.
- You are running an automation that supports real-time progress.
Is this available on mobile?
No. Transparent Automation Progress is web-only in the initial release.
What happens if an automation fails?
You’ll see a failure status in the UI, indicating that the automation did not complete successfully and may require attention.
Does this feature show estimated completion time?
Estimated time is shown only when it can be reliably calculated. Some automations may display a generic “Processing” status instead.
Who can see automation progress?
Employee users running automations can see progress. Admins may also see automation status depending on their role and permissions.
Will this help reduce duplicate work?
Yes. By clearly showing automation status, users are less likely to retry actions or manually repeat tasks.
Send agreement workflow
To send agreements to clients:
-
From the Tax portal, click an engagment to view client requests:
-
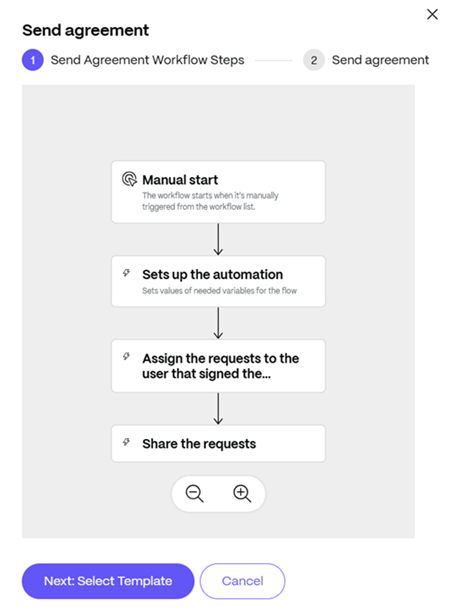
Select Send agreement workflow:

The Send agreement popup displays with the Workflow steps:
-
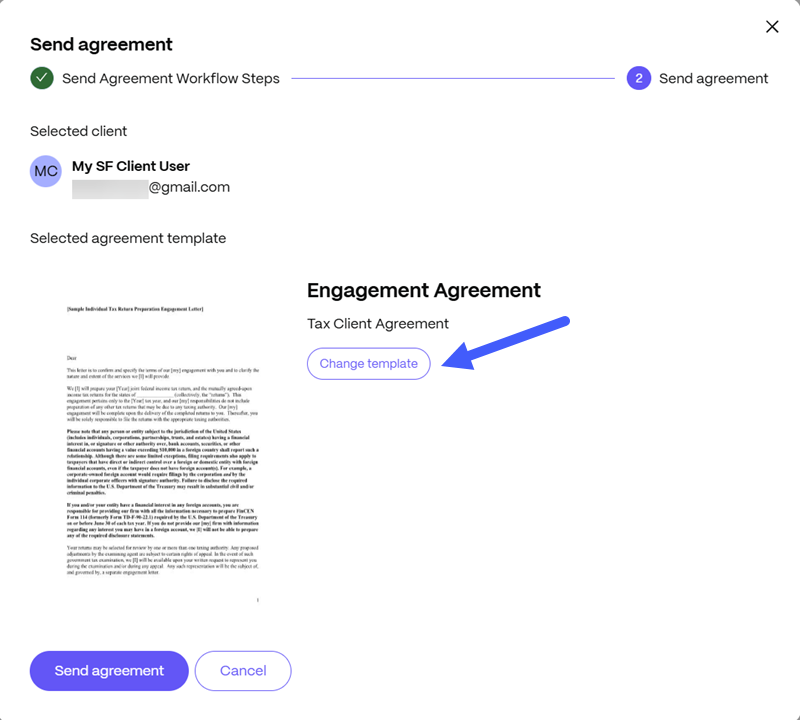
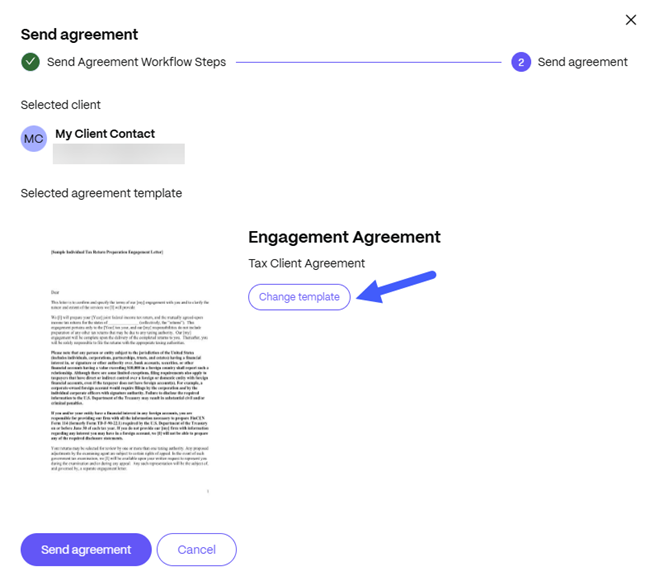
Click Next: Select Template. The Send agreement screen displays with the Engagement Agreement template included in the income tax return solution and the client’s name. You can:
-
Preview the file - Click the document to preview the file.
Note:
The sample agreement we provide is a sample that cannot be modified and is not indended for client use.
-
Change template - Select Change template to modify the template. See Create a new engagement agreement template for more information.
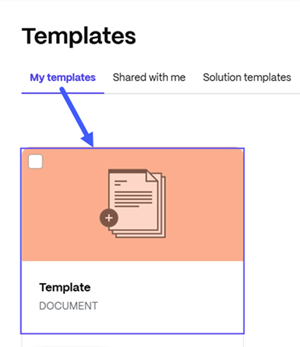
Choose the template from My templates:
-
-
Click Send agreement. The Started Onboarding Agreement Flow confirmation message displays:

The client receives an email notification from noreply-sf-notifications advising a document was sent.
You can monitor the clients’ progress on the Tax portal. As clients fulfill their requests, the status of each task is updated:
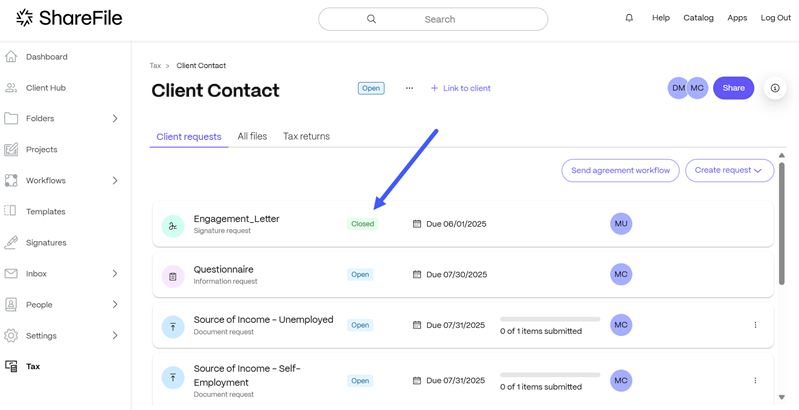
Note:
If the Send agreement workflow was used, that completion of the signature request will trigger other information/document requests to open.
Create a new engagement agreement template
To modify an engagement agreement, you need to first create a new signature template using ShareFile merge fields.
Note:
The template must include only one signer role and only one Variable of source record Client; otherwise, the template will not populate correctly within the solution.
To create a new signature template:
-
Select Templates from the left navigation menu. The Templates library displays:

-
From the Templates library, click Create and select Document template.
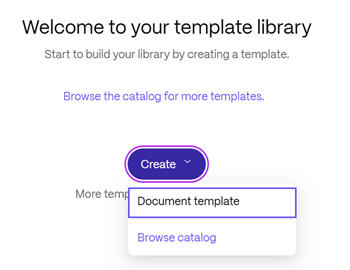
The multi-step form for creating a template displays:
-
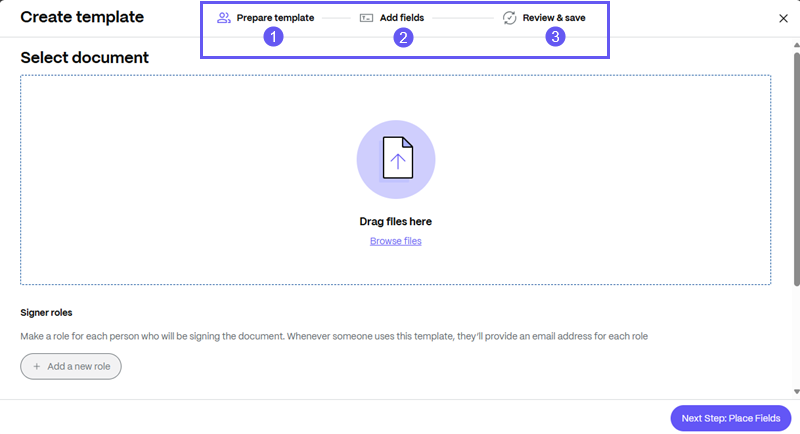
From the Create template form:
- Step # 1: Prepare template - Select document - Drag or Browse files from ShareFile or from your computer to add a PDF document.
- Click Add a new role to add one signer role.
- ClickAdd a new variable to create one variable.
- Select Client for the source record.
Click Next Step.
- Step # 2: Place Fields
- Signer Filled - Using these fields, you can add fields that need to be filled by users who receive the document created from this template.
- System filled - These fields are dynamically populated from the variable.
- Annotate document - Use the Signature, Text and Checkbox fields to add labels and annotate your PDF documents. Drag and drop each field onto the document and position it where it is most convenient for you.
Example
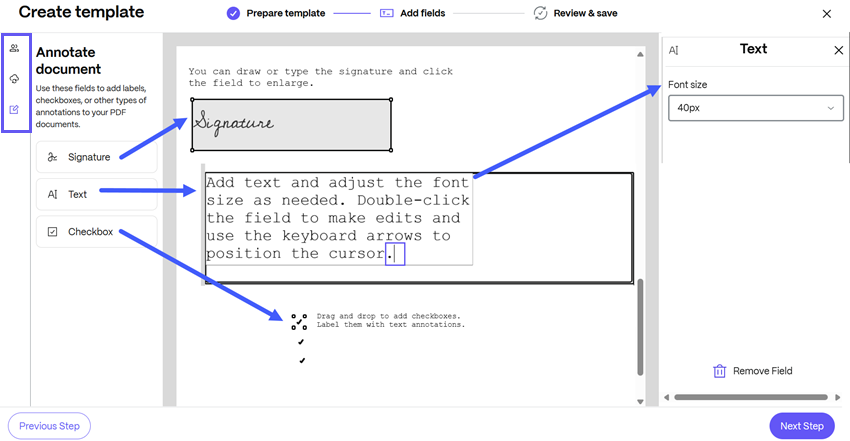
Click Next Step.
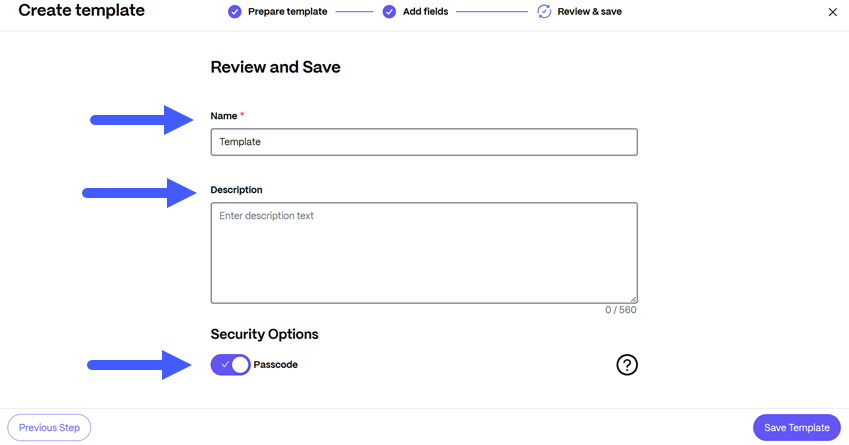
- Step # 3: Review and Save - In this section of the form you review and save the template.
- Name - Enter a template name (required).
- Description - Enter a description for the template (optional).
- Security Options - Click the toggle to add a passcode for recipients to access the document. If selected, a five-digit password will be required.
Example
-
Click Save Template. A confirmation message displays and the template becomes available in the Templates library under My templates:
-
After creating the template, navigate back to the Send agreement workflow solution.
-
From the Send agreement screen, select Change template
-
Choose the template from My templates
- Step # 1: Prepare template - Select document - Drag or Browse files from ShareFile or from your computer to add a PDF document.
Send for approval
Once the client starts completing items, you can submit them for approval. To send files for approval:
-
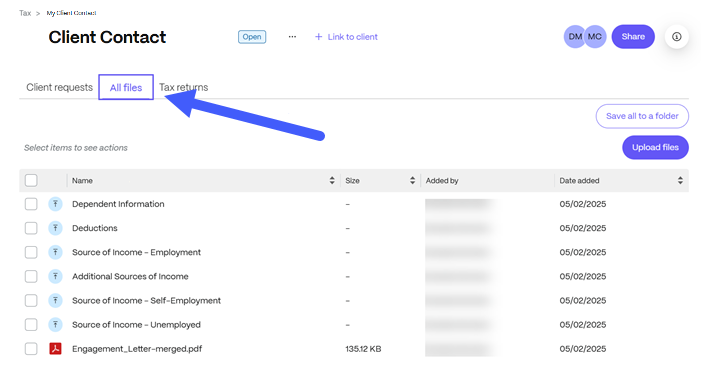
From the Tax portal, click an engagment to view client requests:
-
Click the All files tab.
-
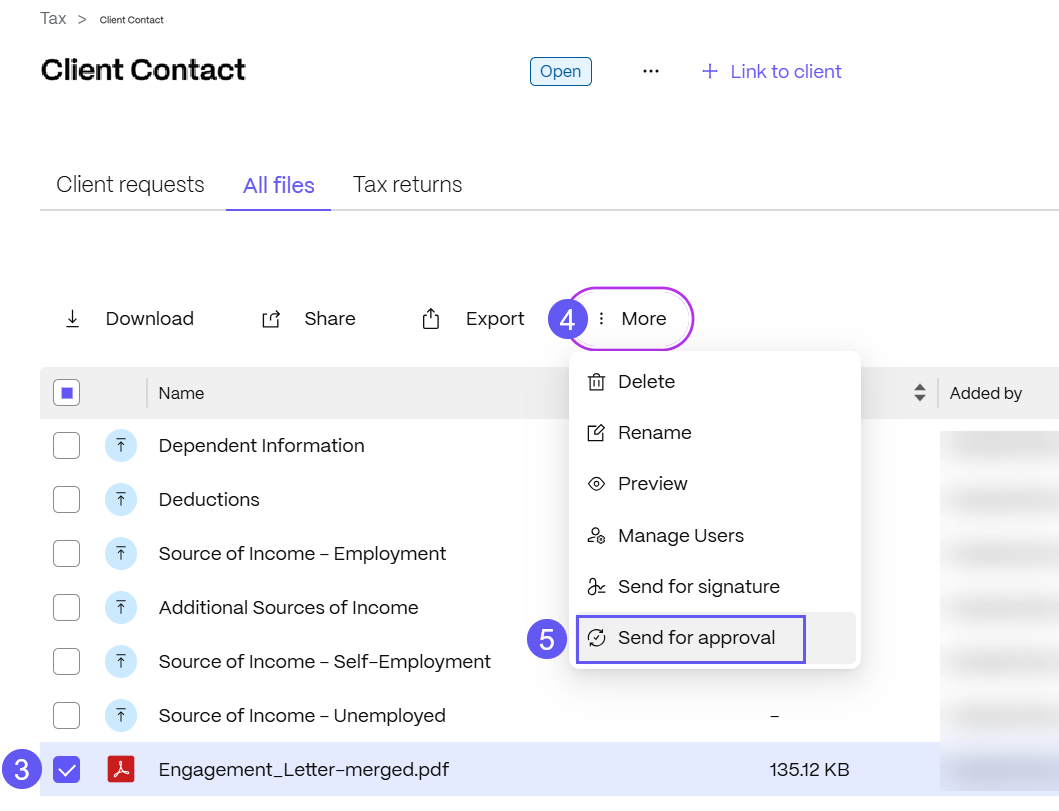
Select the file you want to submit for approval.
-
Click More (…) to expand file options.
-
Select Send for approval.
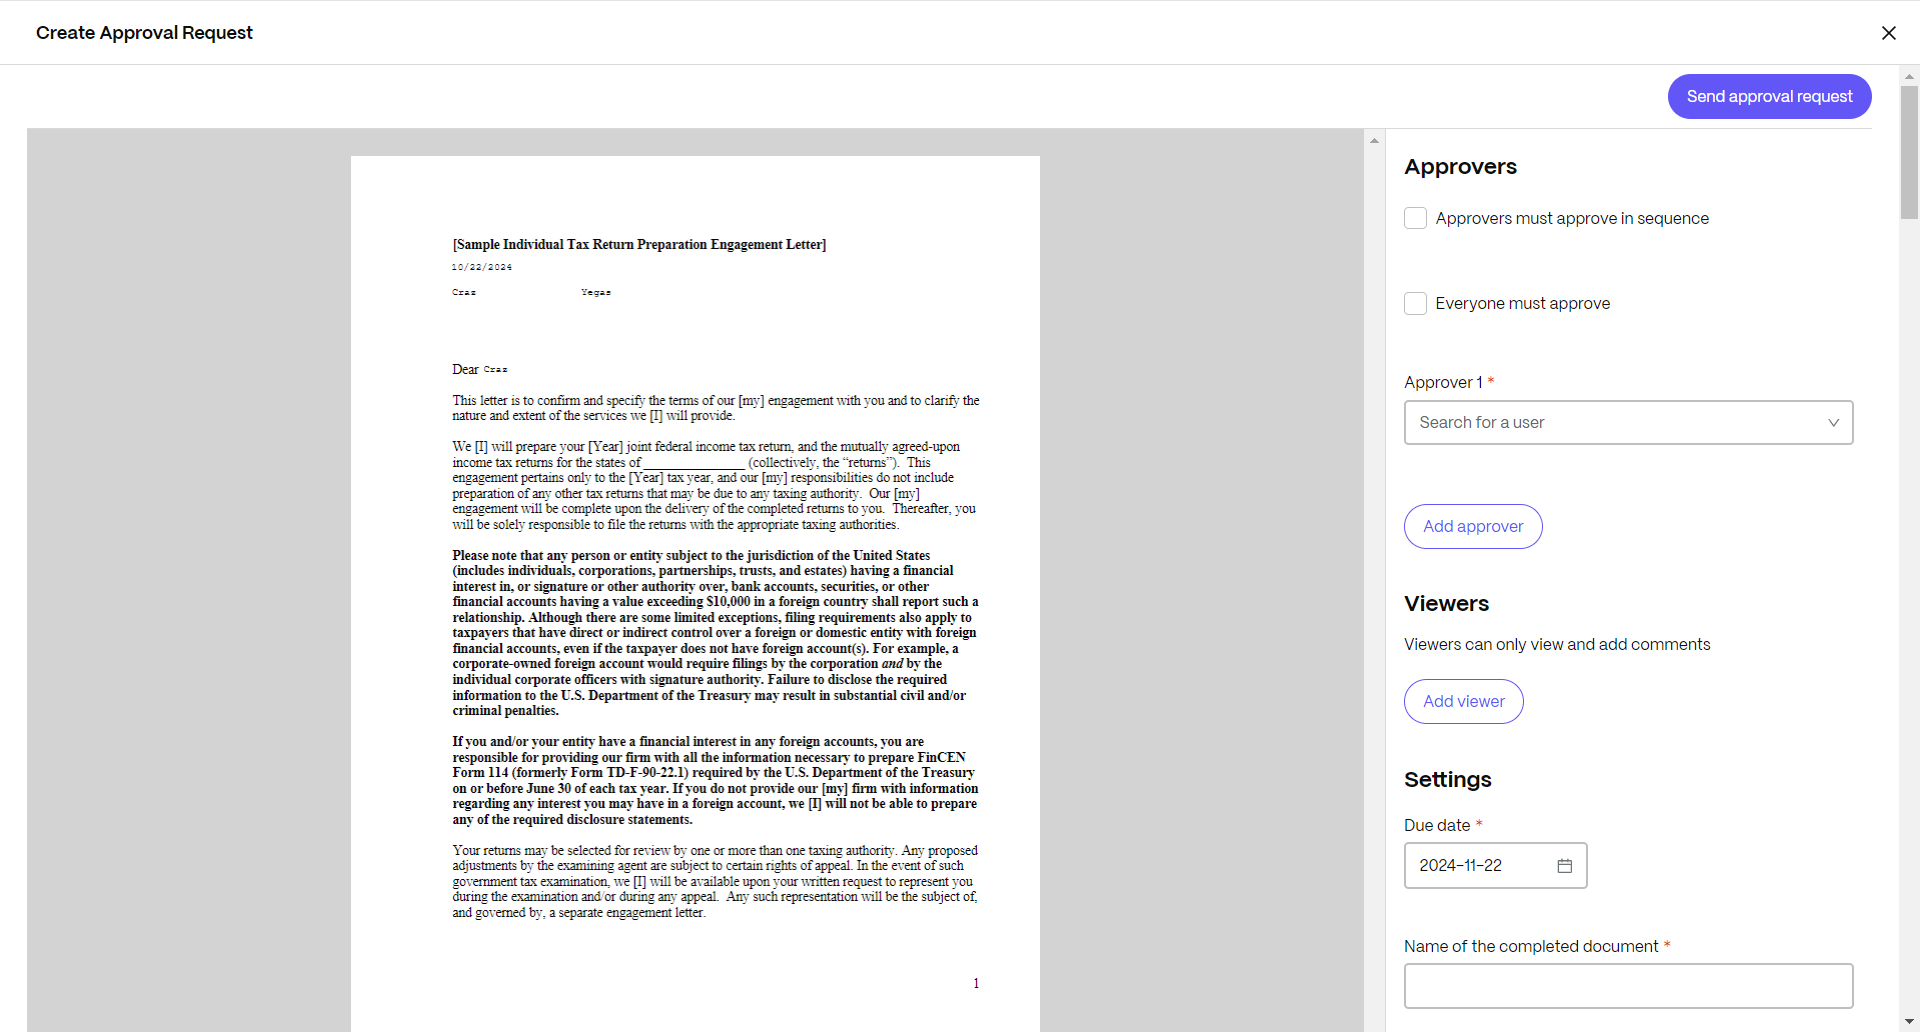
The Create Approval Request page displays:
-
You can:
- Select if Approvers must approve in sequence - Check this box if multiple approvers are included in the request and need to sign in a particular sequence.
- Select if Everyone must approve - Check this box if multiple approvers are included in the request and it requires approval from everyone.
- Add Approvers - Enter the name(s) of the approver(s) if multiple approvers are necessary.
- Add Viewers - Send the document to individuals that will have the ability to view and add comments
- Enter a Due date - Select a due date from the dropdown calendar.
- Add a Name of the completed document
- Send a Message for all approvers (optional)
-
Once all the required fields are selected, click Send approval request.
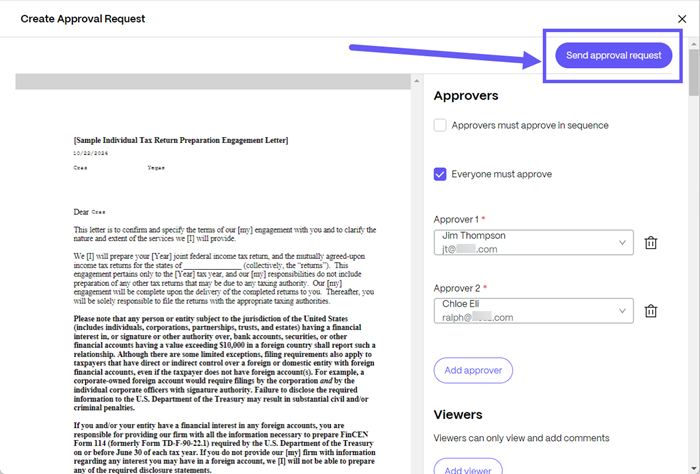
The approval request is submitted.
Signature requests
To send a signature request:
-
Select Tax from the left navigation menu. The income tax return solution dashboard displays:
-
Click an engagement to view client requests.
-
Select Create request, then click Signature request.
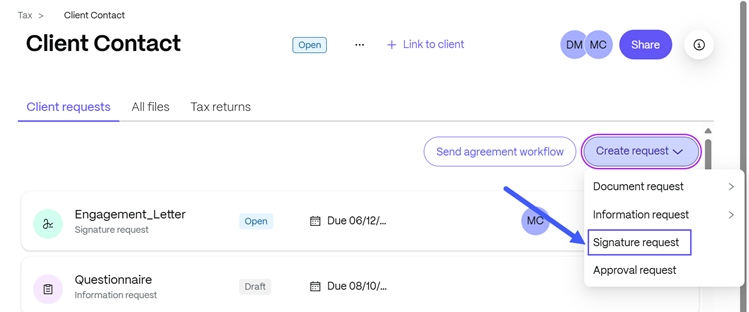
The Signature request screen displays:
-
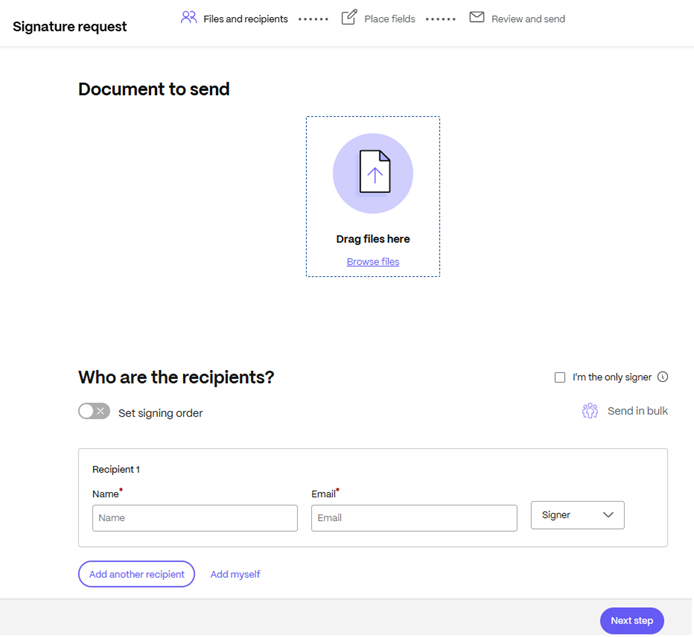
From the Signature request screen:
-
Select a Document to send - Drag and drop a file or select Browse files.
- Under “Who are the recipients? section:
- If you are the only signer of the document, check the box I’m the only signer to sign the document yourself and then share it.
- If you require others to access the document, enter the recipient(s) Name and Email. Choose if the recipient is to be a signer or a viewer of the document.
- Add another recipient is an option if you must send the same document for multiple signers listed. For more information, see Additional Signers.
- If multiple recipients are added, you can Set signing order. This toggle allows you to stagger the requests based on the order set. For more information, see Set signing order.
-
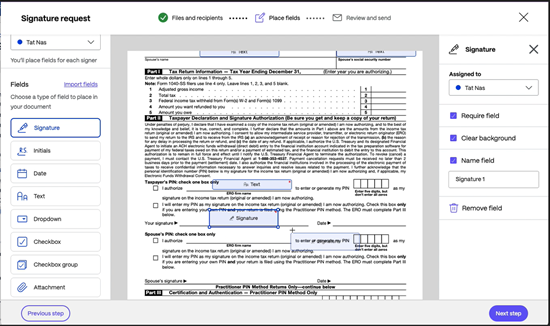
Click Next Step. The Signature request - Place fields screen displays.
-
Select the fields that you want to add to the document and drag them. Then, click Next Step.
- Verify the Document name and edit if necessary.
- Verify the recipient’s name and role in the request.
- Add an optional note for the signer.This note will be included in the email notification that goes out to signers.
- Set the expiration for the request.
- Under Security options:
- Select the Passcode toggle to generate a 6 digit code the signer needs to access the documents.
- Select the Knowledge-Based Authentication toggle to require recipients to verify their identity with a knowledge-based quiz. Each signer will need to independently verify before signing the document.
- Click Edit Default Settings to change your settings for reminders, email attachmets, and signature types. Any changes you make here will be applied to all in progress signature requests.
- Click Send signature request. A confirmation message displays.
-
Create payment requests
This solution feature allows you to streamline the billing process and generate payment requests right from inside the solution. This feature will require a payment processing vendor to use. Currently, we connect with Stripe.
You can initiate a payment request from any client onboarding space.
Notes:
Sharing the payment connector with relevant users is a requisite for enabling payment requests within engagagements - this action must be performed by an Administrator.
The EU control plane does not support this feature.
To create a payment request:
-
Select Tax from the left navigation menu. The income tax return solution dashboard displays:
-
Within the engagement, select Payment requests:

-
From the Payment requests tab, click Create request:
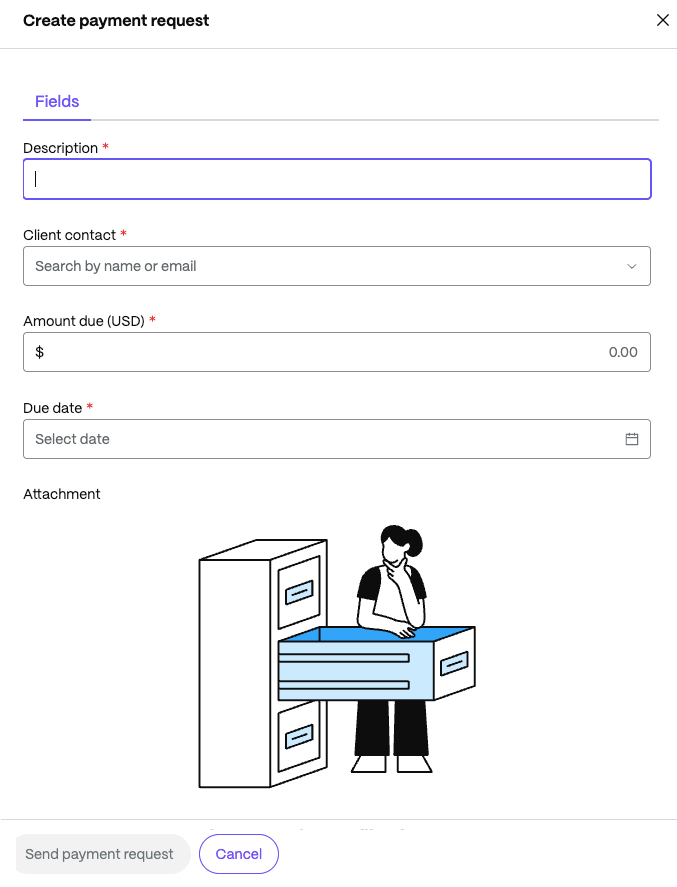
- From Create payment request window:
- Enter a Description.
- Add a Client - You can search clients by name or email.
- Enter the Amount due (USD) - Type the amount due in USD currency.
- Select a Due date - Choose due date from the calendar.
- Add an attachment (optional).
-
Click Send payment request. A confirmation message displays:
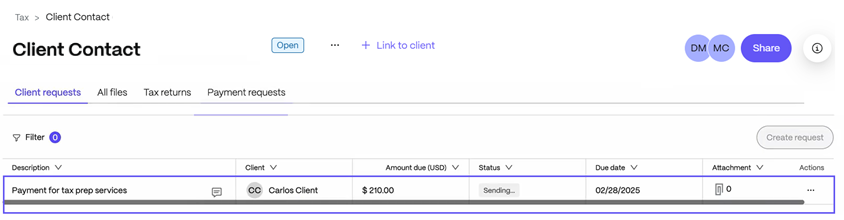
The payment request displays in the Tax portal - payment requests tab:
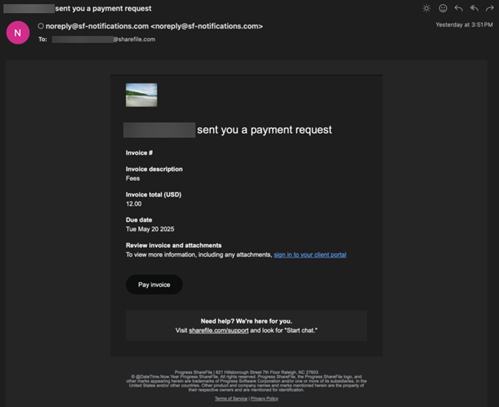
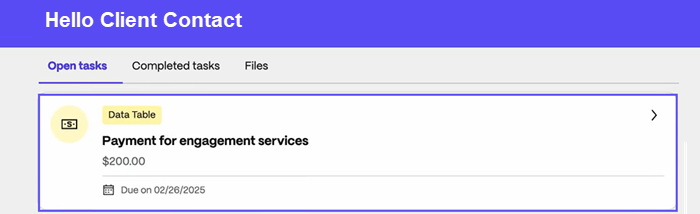
The client receives an email notification from noreply@sf-notifications.com advising a payment request was sent and can see this task/notification from their client portal:
Connect the solution to Stripe accounts
After installing the Income Tax Return solution, you can kickoff payment requests by connecting it to your Stripe accounts. This streamlines the client tasks in one tool and removes context jumping between tools.
To establish the connection:
- Open ShareFile in your web browser.
- From the ShareFile Dashboard, click the user icon located in the upper right corner of the screen.
-
Select Catalog from the dropdown options.
The ShareFile Catalog page opens.
-
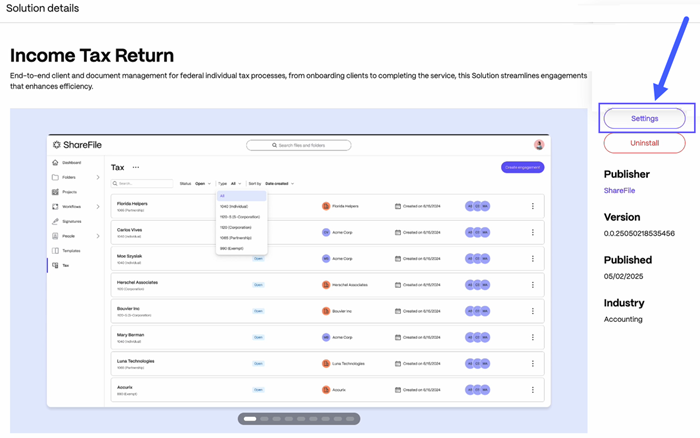
Select the Income Tax Return tile, and click Settings:
The Tax Configuration window opens.
-
Select a configured Stripe connector from the drop-down list:
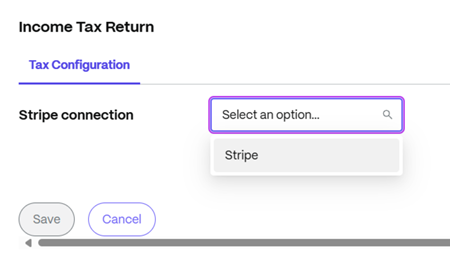
- Click Save and close the Tax Configuration window. The connection is established.
Note:
Only admins can connect the solution to the payment processing vendor, otherwise the payment requests tab will not appear for users.
Export - Save all to a folder
To export files to a ShareFile folder:
-
Select Tax from the left navigation menu. The income tax return solution dashboard displays:
-
Click an engagement to view client requests.
-
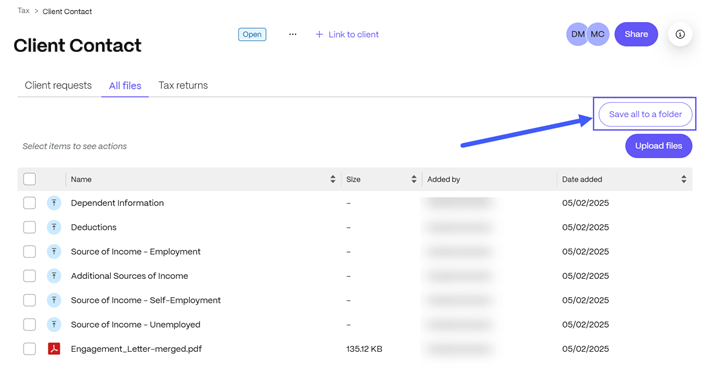
Click the All files tab.
-
Select Save all to a folder.
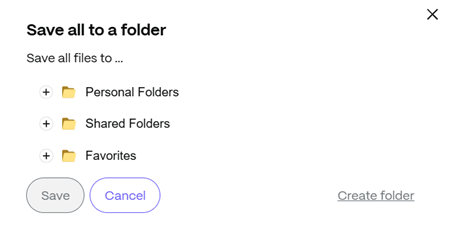
The Save all to a folder screen displays:
-
Navigate to the folder you want to save all the files to or select Create folder.
Important:
- To create a folder, you must first select where you want to create the folder from an existing root folder. The Create folder option will not be available until you do.
- Do not save the files to the shared folder that was made upon engagement creation. This will create a sync loop.
-
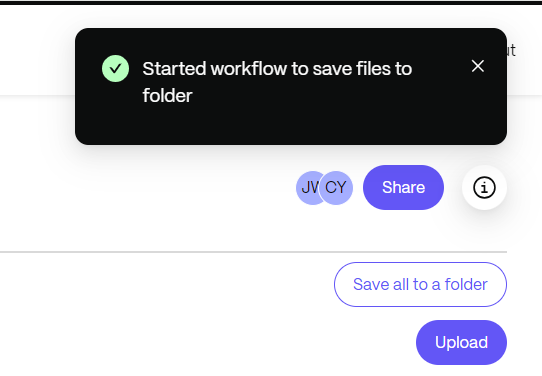
Once you select or create a new folder, click Save. The Started workflow to save files to folder message displays briefly:
-
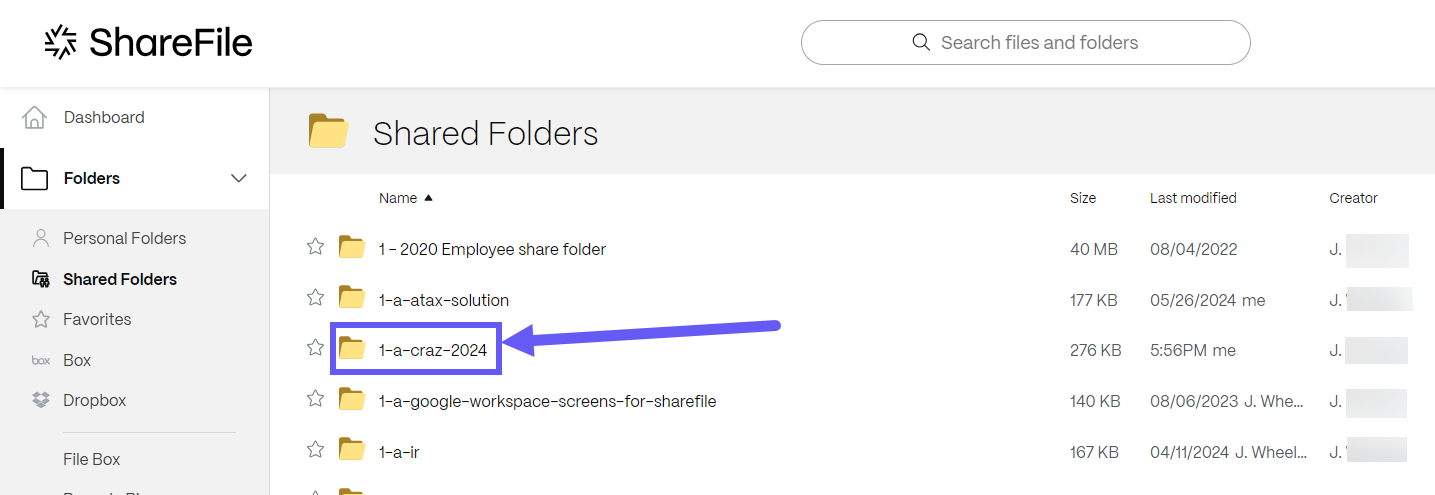
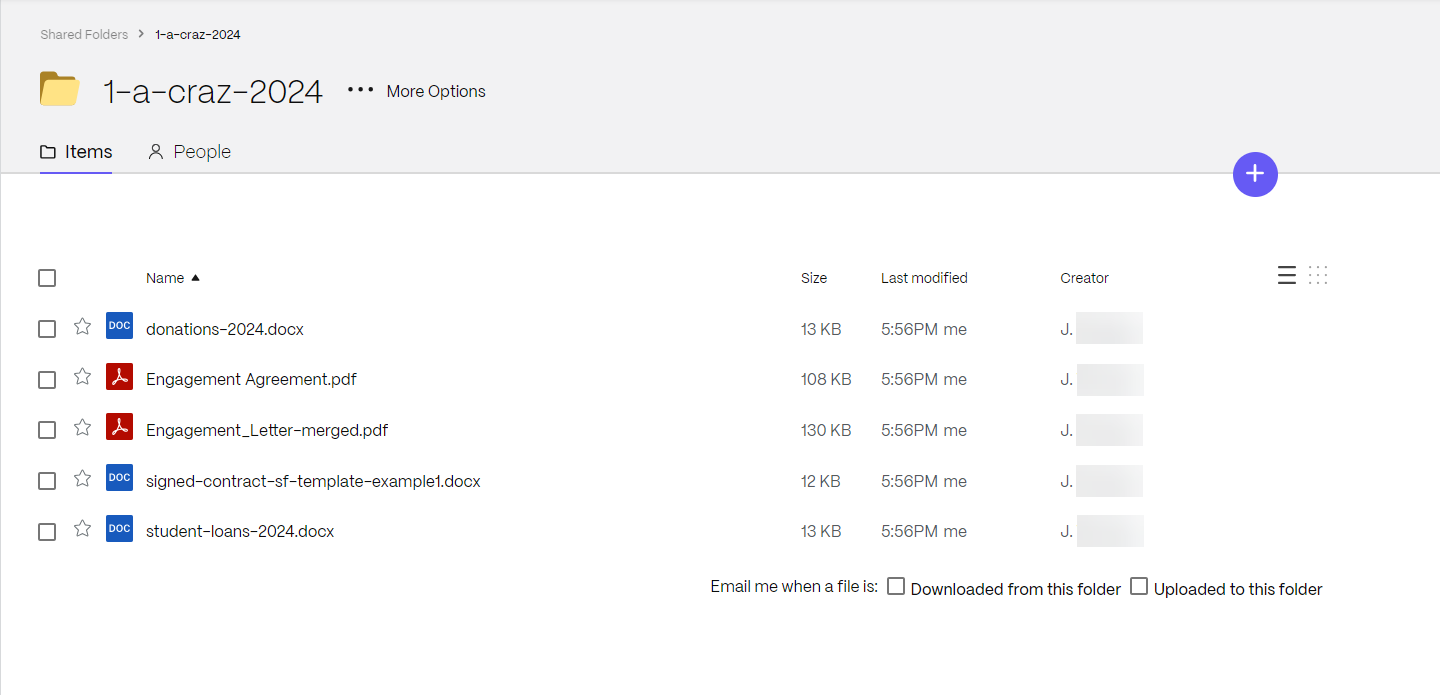
Navigate to the ShareFile folder where you saved the files:
-
Select it to access the stored engagement files.
Note:
This functionality can be used repeatedly, automatically creating new versions on top of existing ones and incorporating any new content.
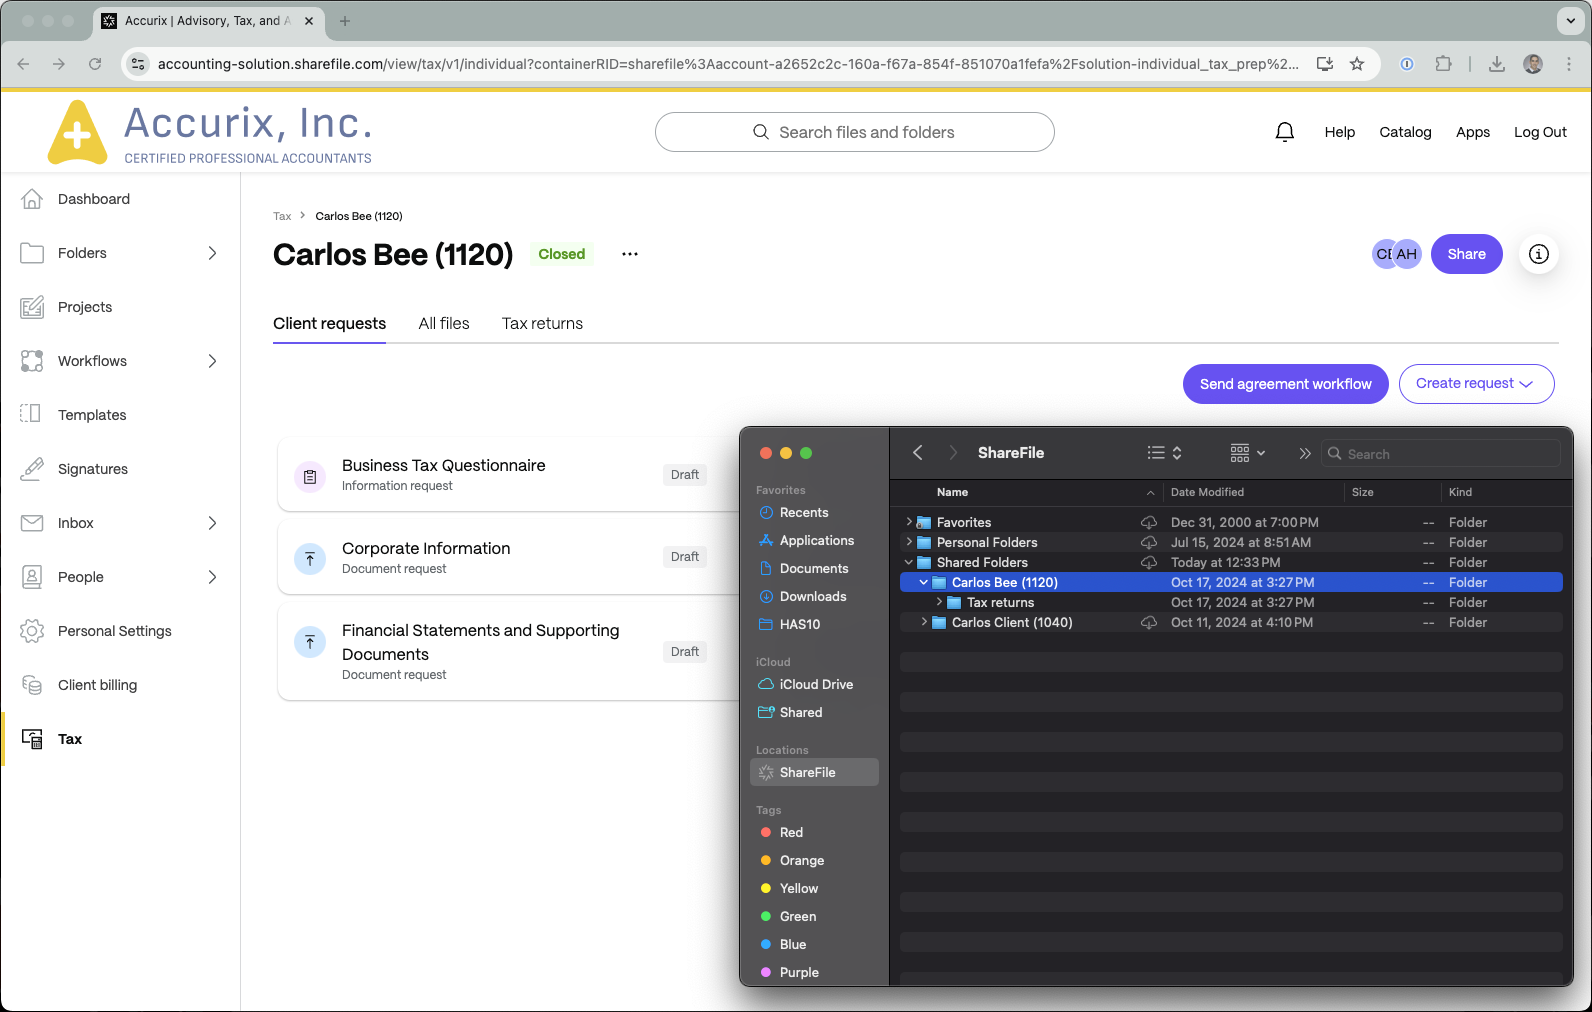
Import third-party files into an engagement
When an engagement is created, a shared folder with the same name is automatically generated. This folder serves as a place to add files to the engagement. The intention is that files from third party software can be directly downloaded into this shared folder, making them available within the engagement.
For seamless use, we recommend enabling the setting that allows you to choose the save location of downloaded files.
-
In Chrome: … (three dots) > Settings > Downloads > Ask where to save each file when downloading.
-
In Edge: … (three dots) > Settings > Downloads > Ask me what to do with each download.
-
In Firefox: Menu icon > Settings > General (Files and Applications) > Always ask where to save files.
Advisory:
Starting September 9, 2025, the EU control plane will no longer support the following integrations:
- Salesforce File Export
- QuickBooks File Export
- FreshBooks File Export
- Pipedrive File Export
- QuickBooks Document Generator
- Salesforce Document Generator
In this article
- Overview
- Install the solution
- Access the income tax return solution
- Create engagement(s)
- Define engagement details
- Create engagements in bulk
- Send agreement workflow
- Send for approval
- Signature requests
- Create payment requests
- Connect the solution to Stripe accounts
- Export - Save all to a folder
- Import third-party files into an engagement