Create a PDF document template
There are five ways to create a document template in ShareFile:
-
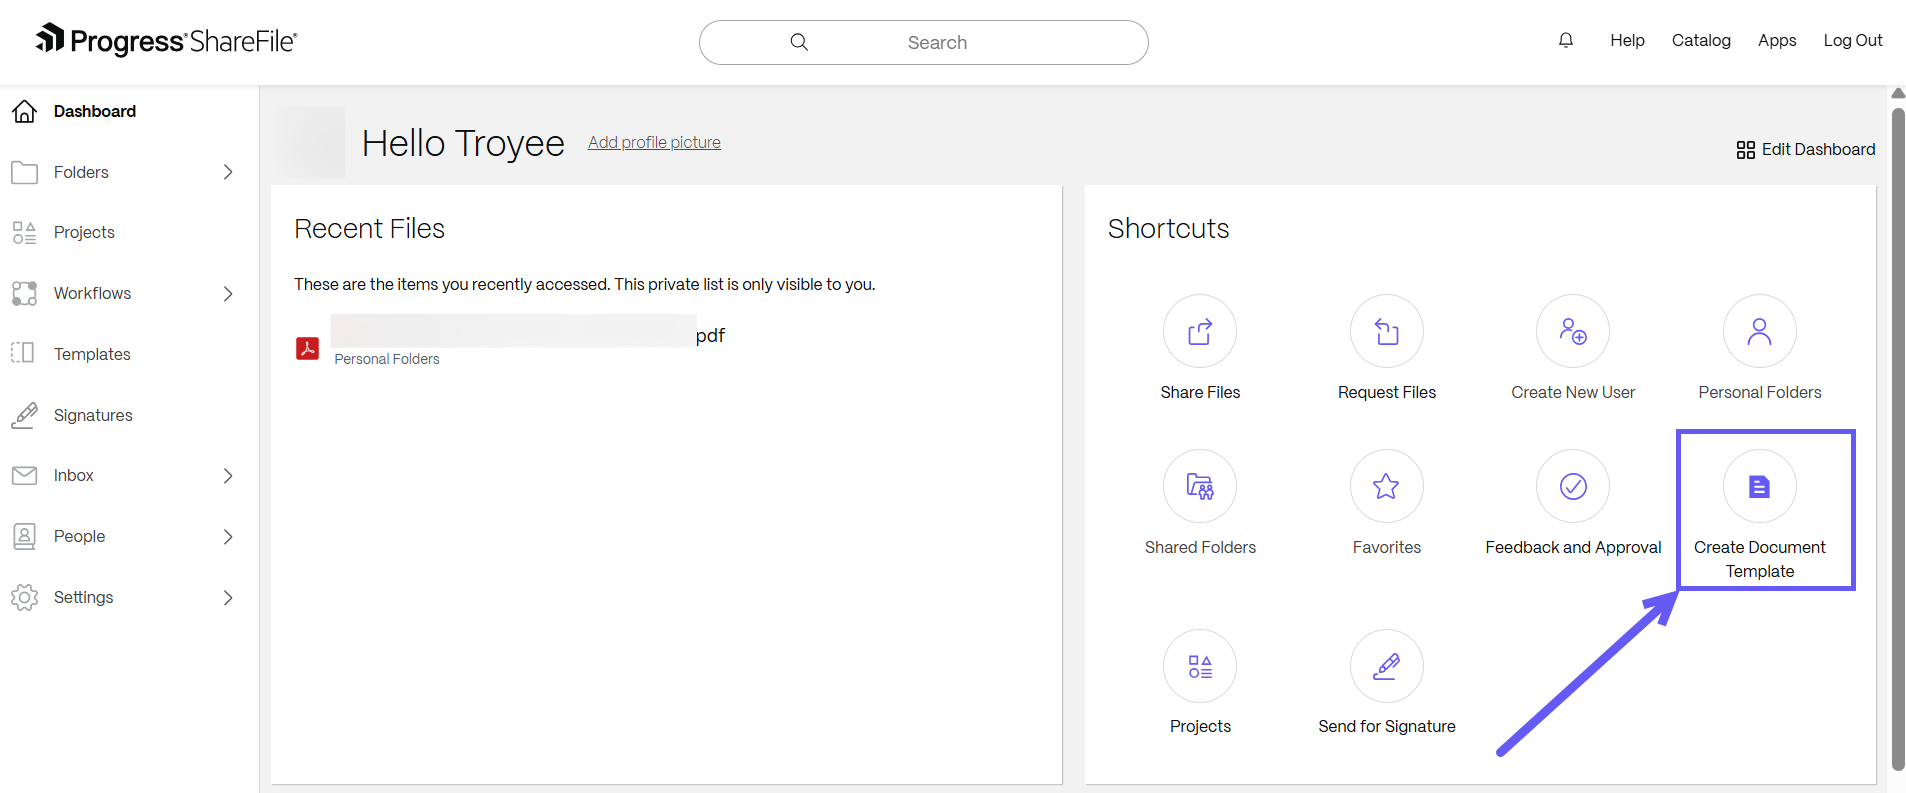
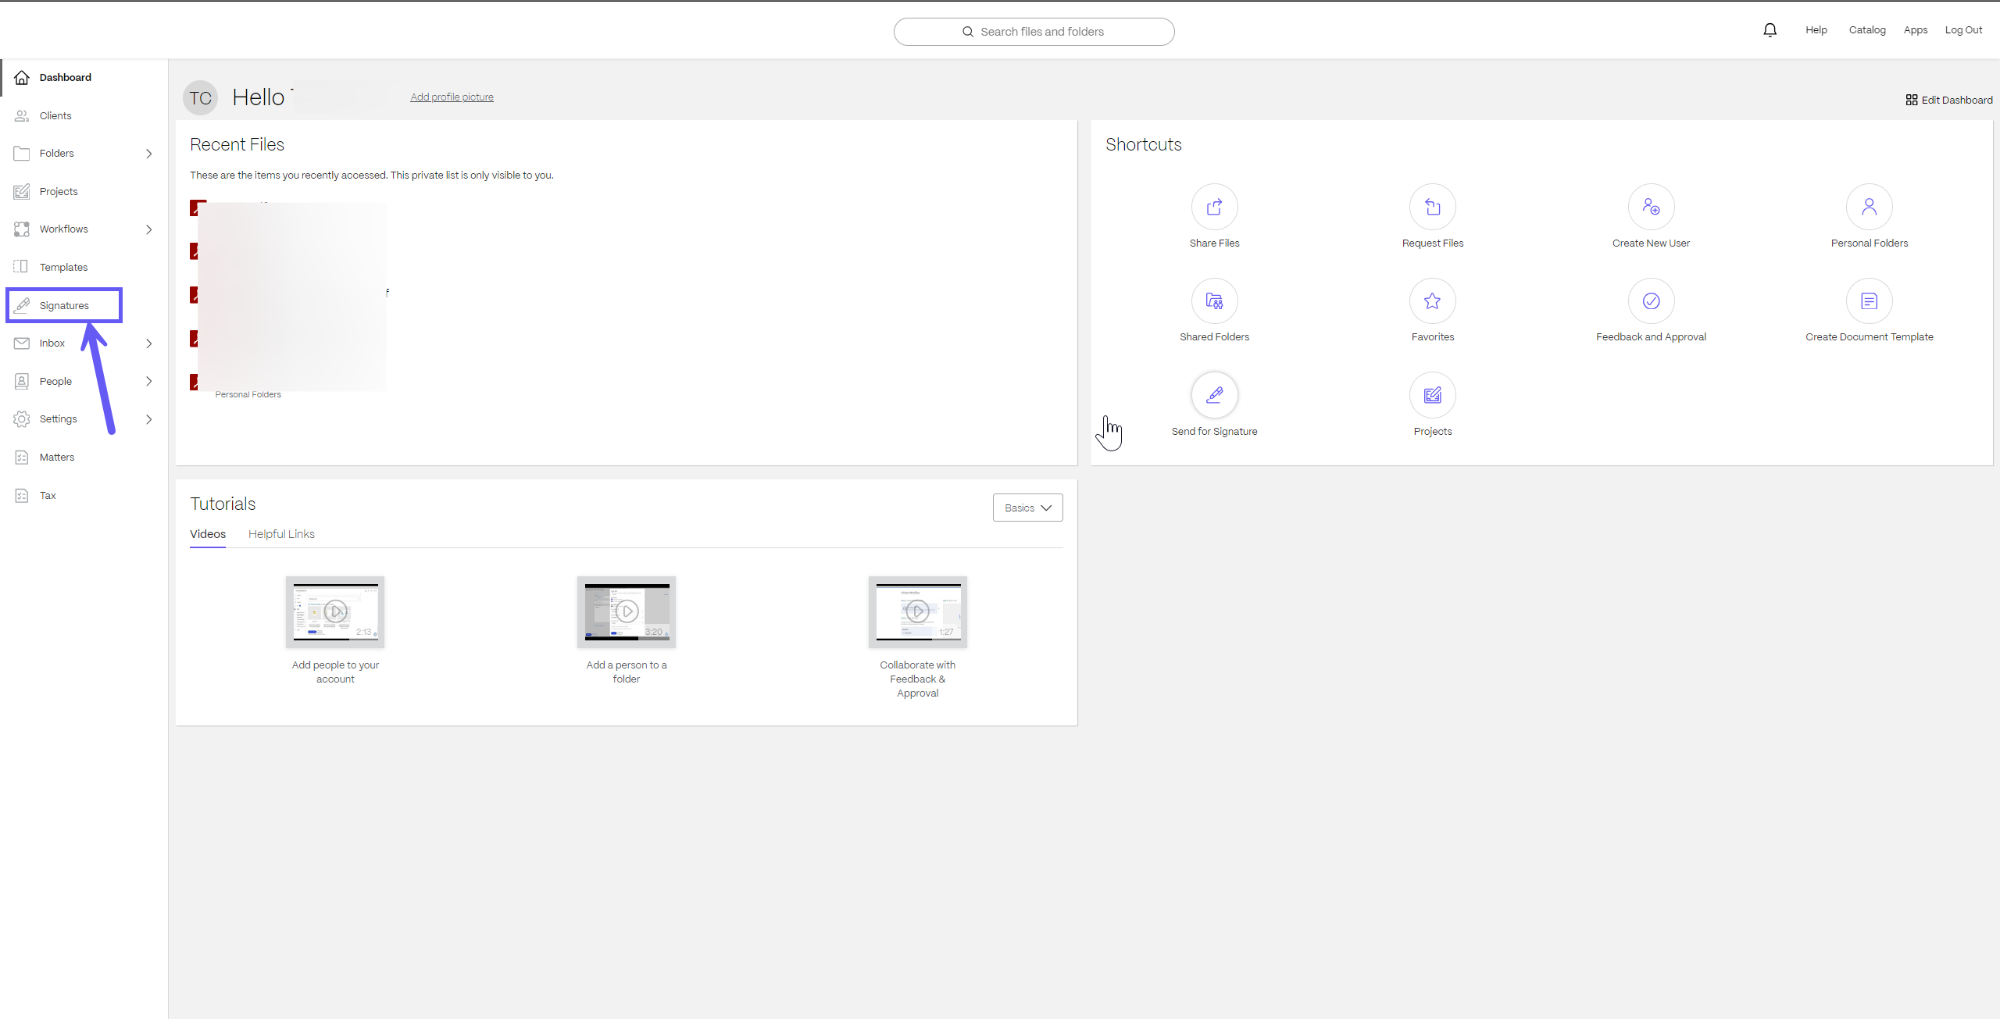
Open ShareFile then select Create template from Shortcuts on the dashboard.
-
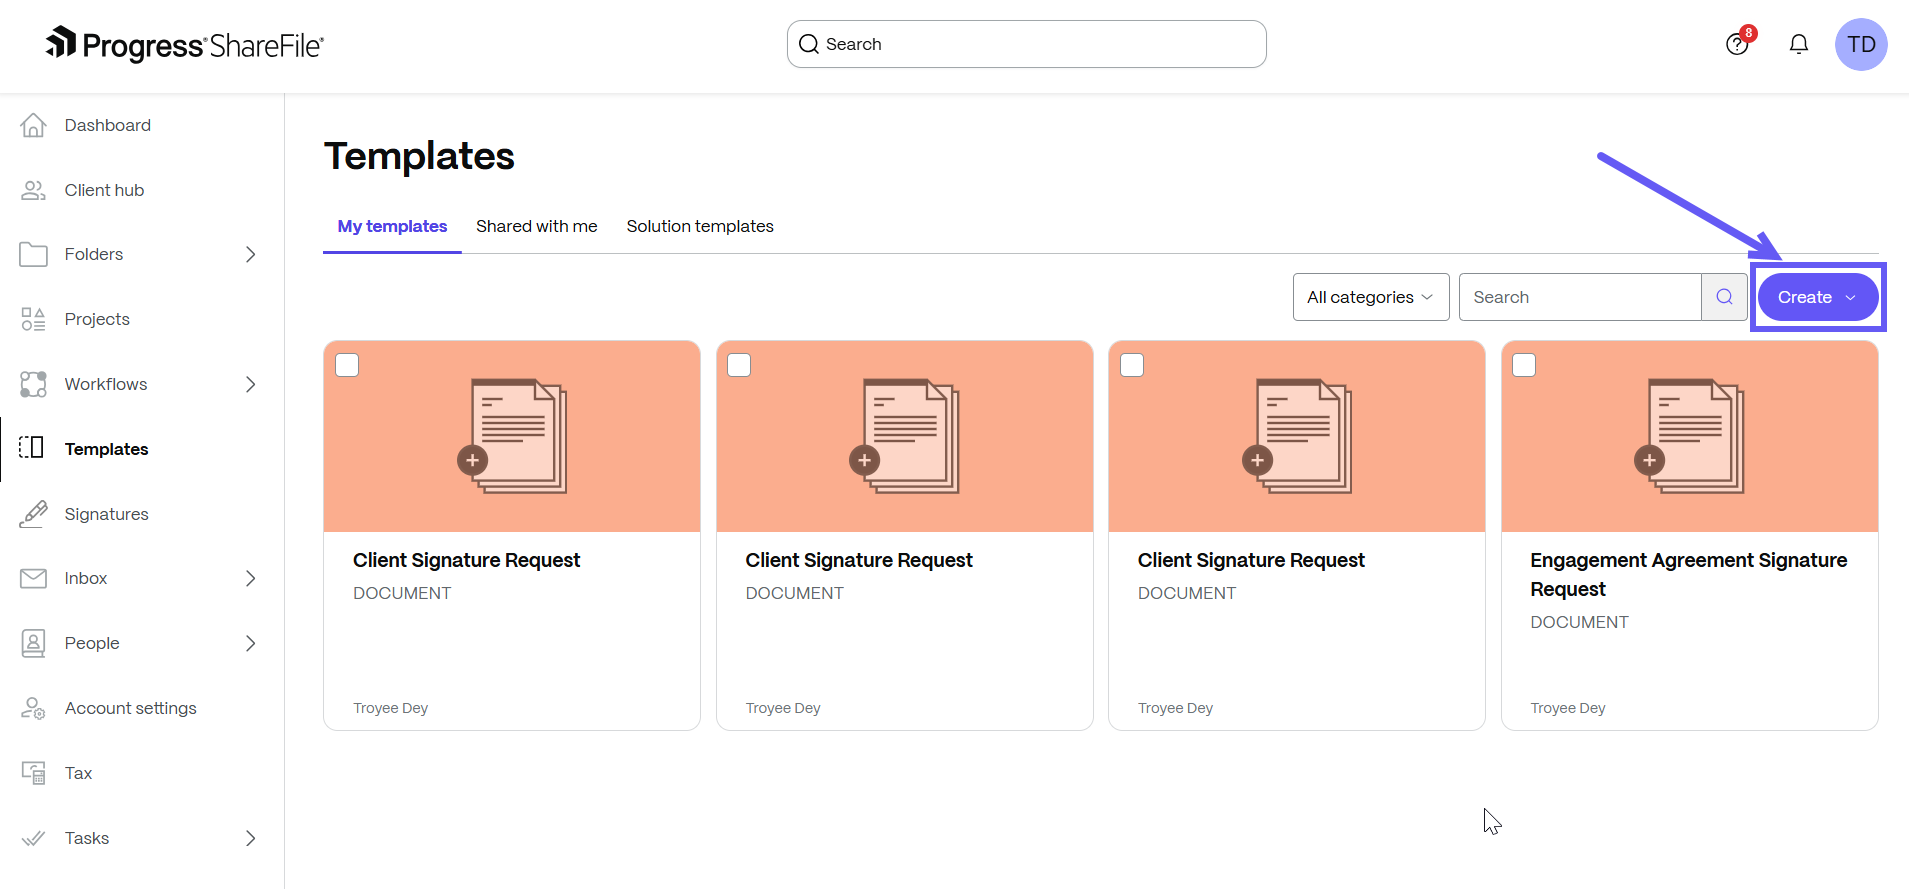
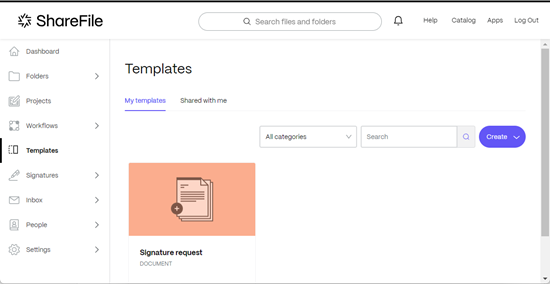
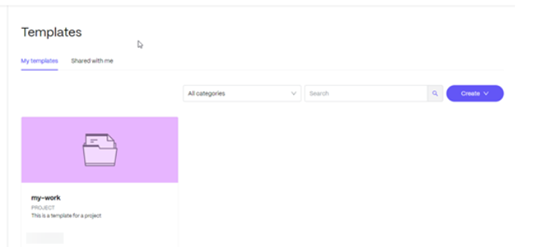
Open ShareFile and navigate to Templates.
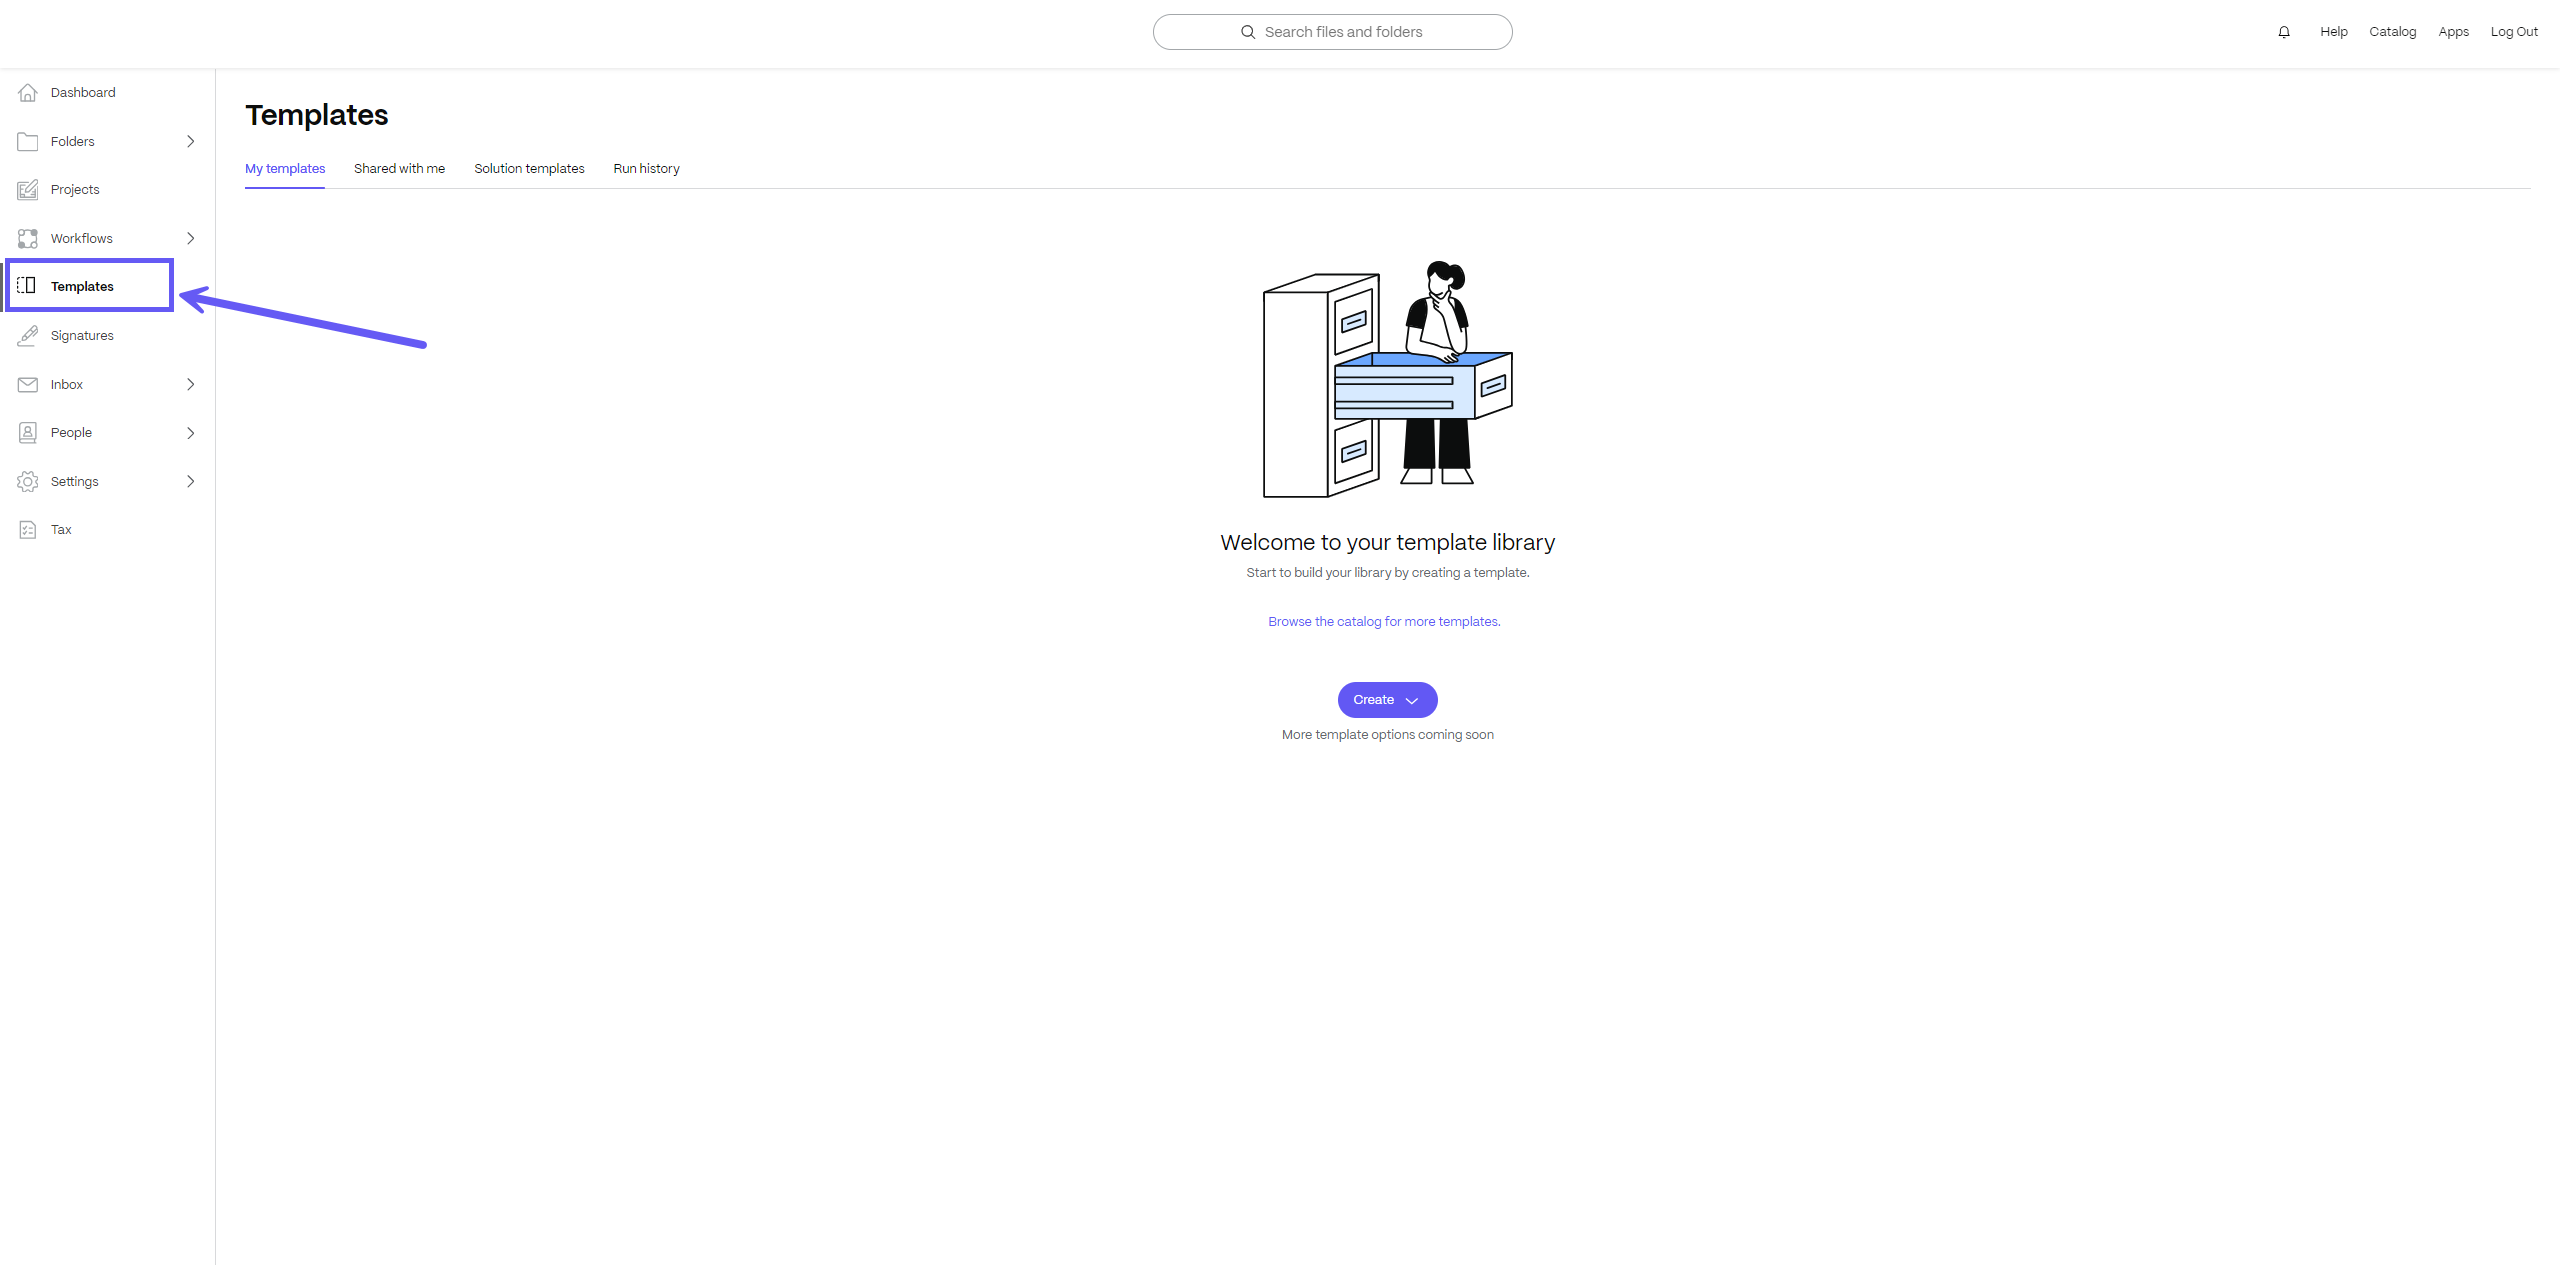
The Templates page displays. Select Create > Document template.

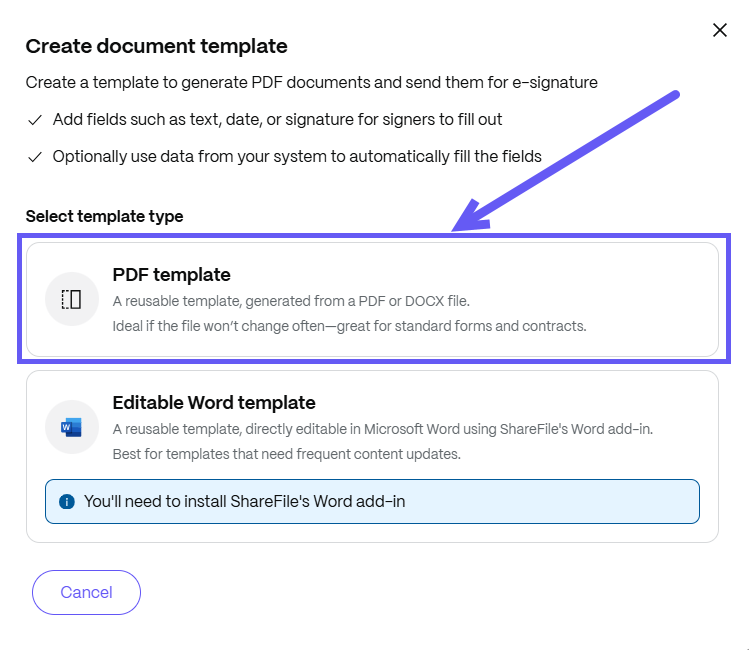
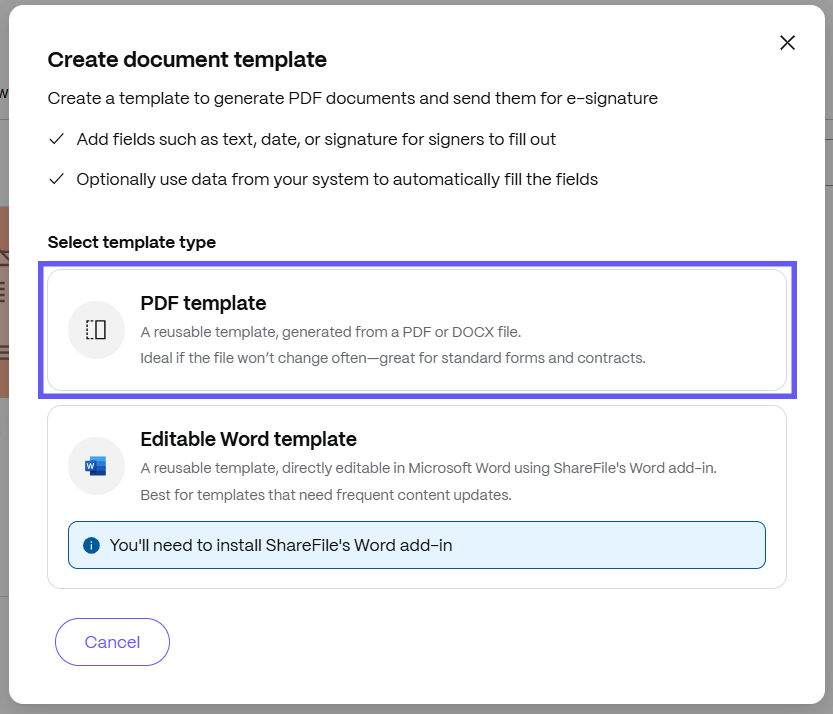
Click on PDF template generated from a PDF or .docx file.
Notes:
When creating a PDF template, you can upload either a PDF or a .docx file from your local device or directly from ShareFile.
-
PDF Templates are ideal for standard forms and contracts that don’t require frequent editing.
-
Editable Word Templates are best for documents that need regular content updates. These templates can be edited directly in Microsoft Word using the ShareFile Word Add-in and are suitable for documents that will be sent for signature. For more information about Editable Word Templates, see Microsoft Word
-
-
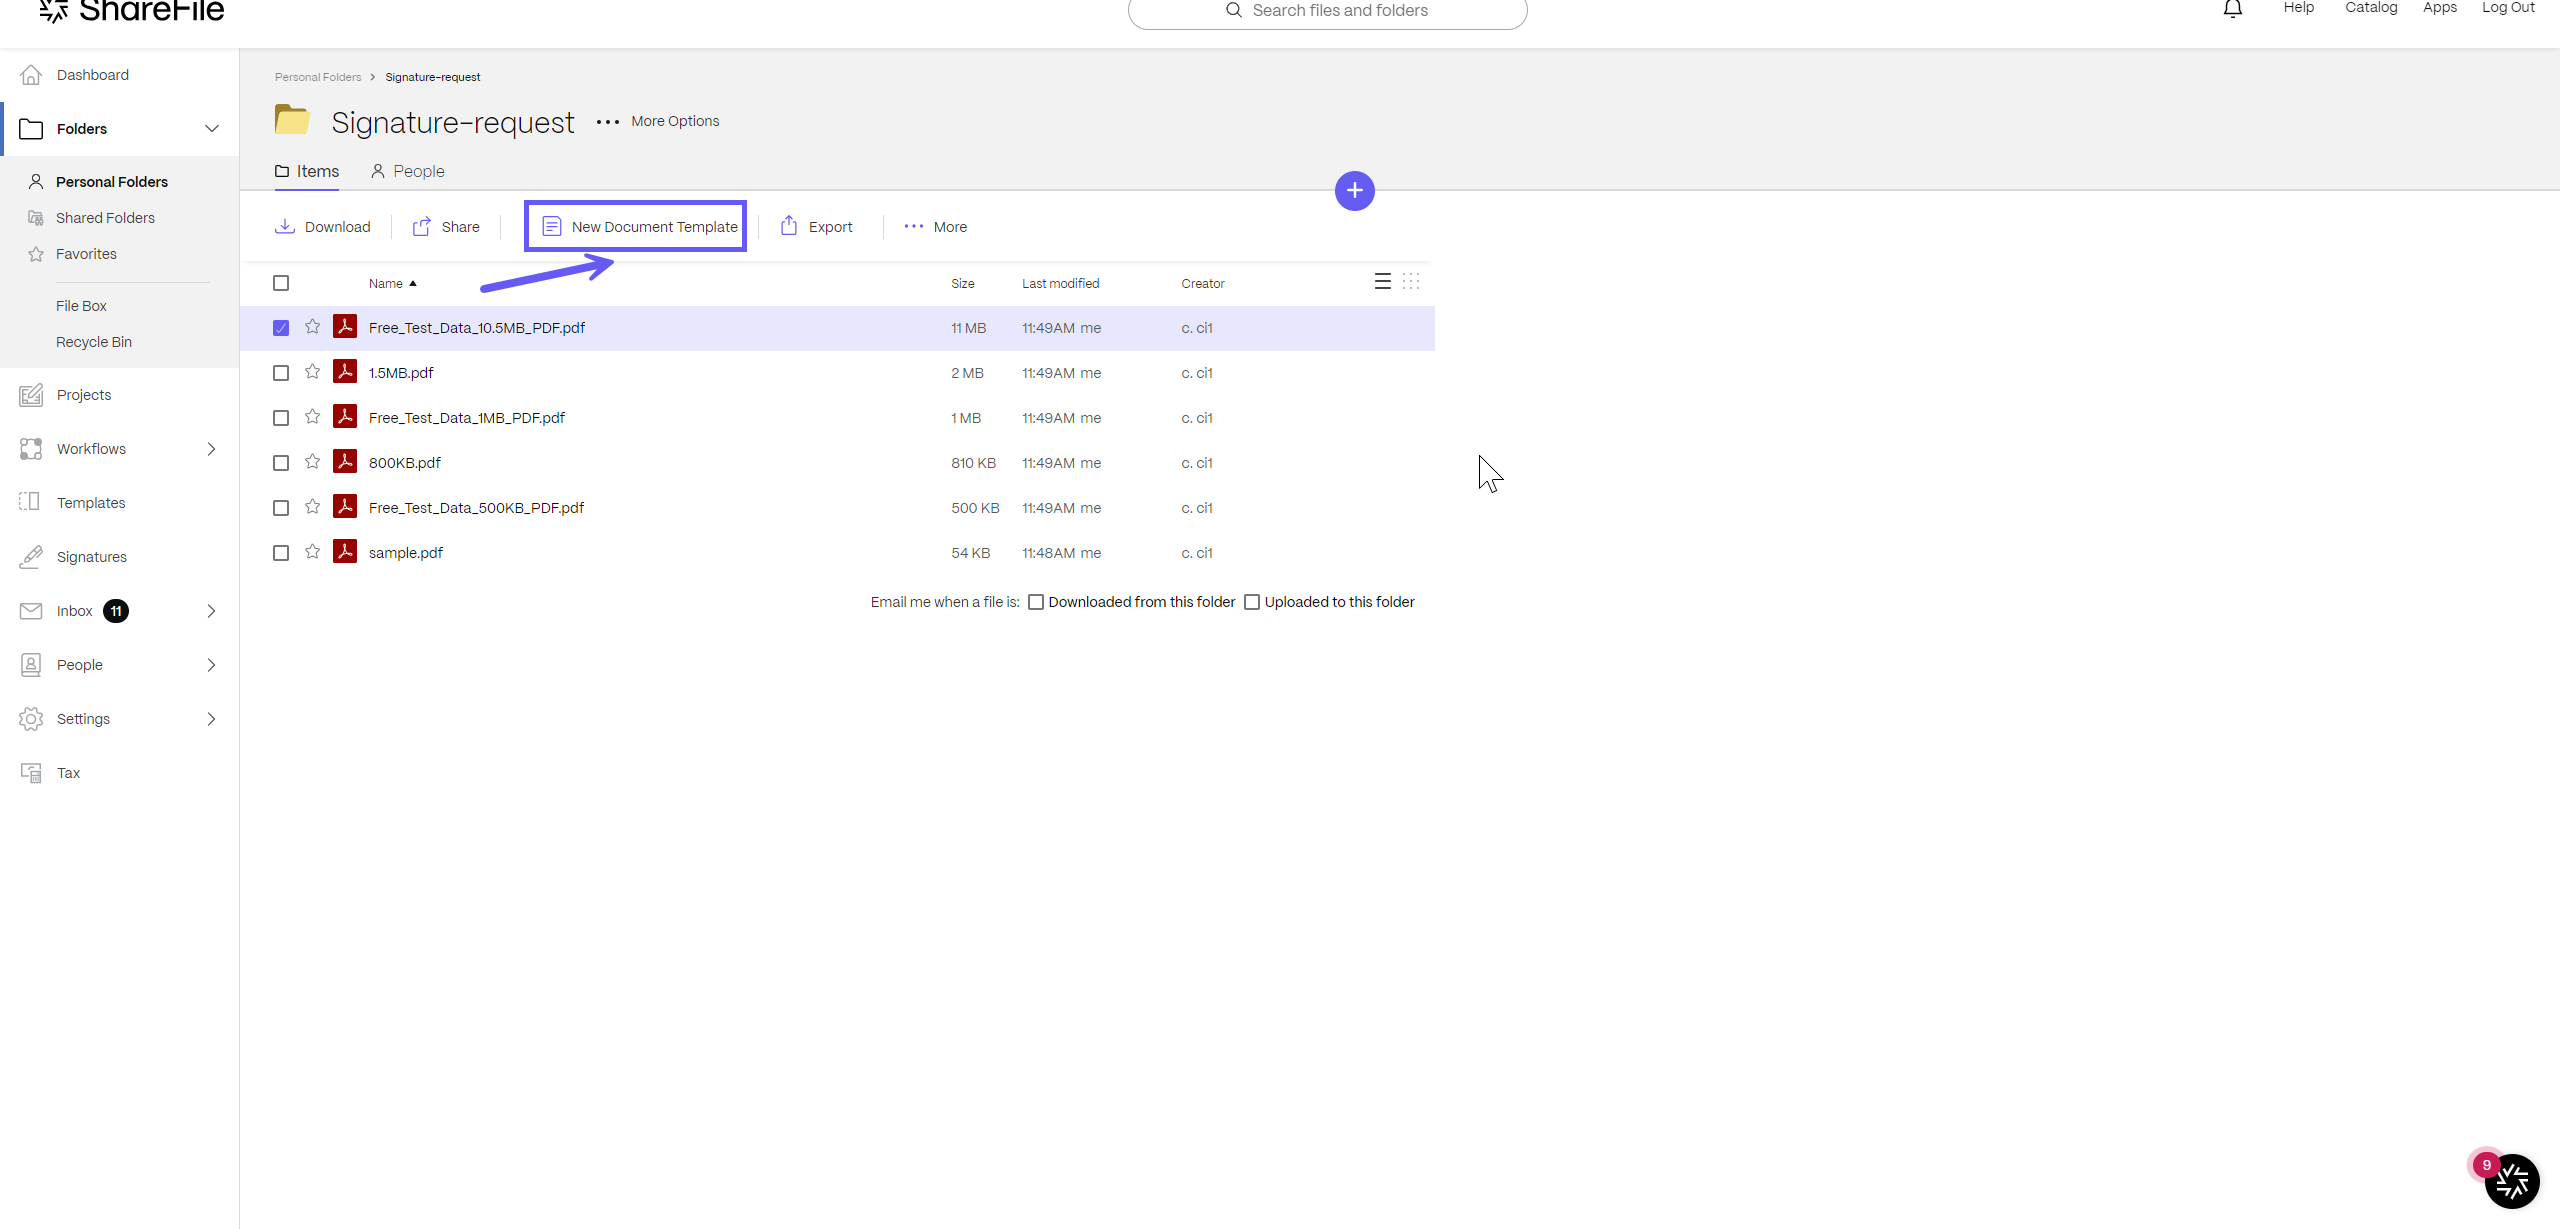
Open ShareFile and navigate to Folders > select a PDF file > Create new template.
-
Open ShareFile and navigate to Folders > select a PDF file > Right-click to open the menu > select Create new template.
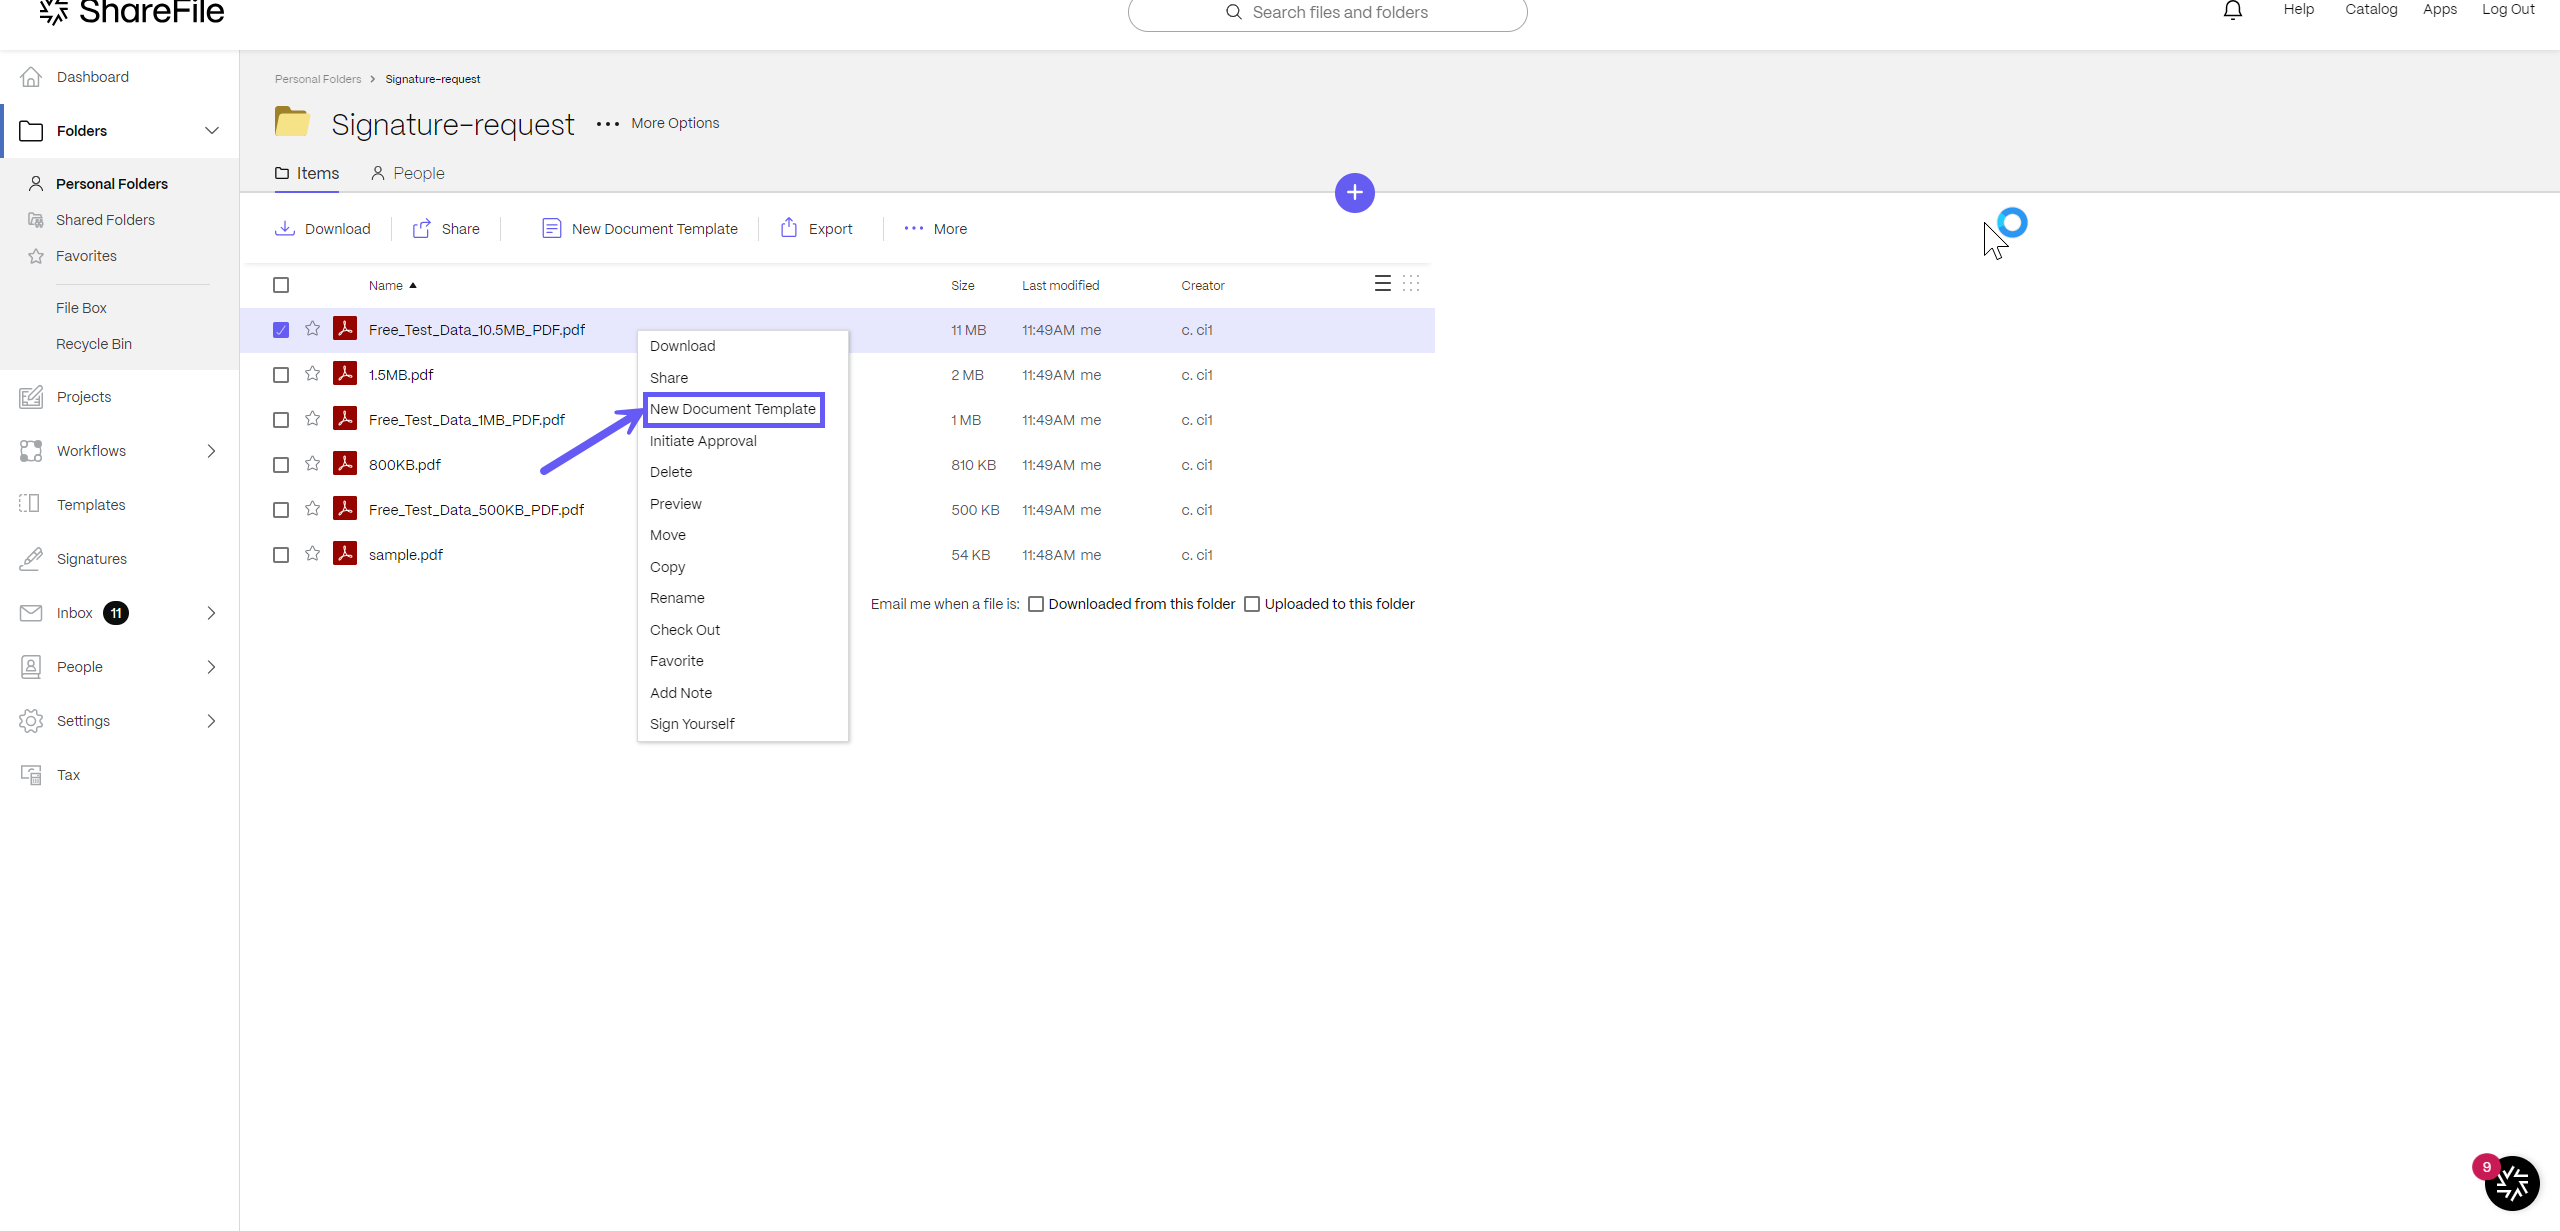
-
Open ShareFile and navigate to Folders > select a PDF file to open in Preview. Select New document template from the Preview menu.
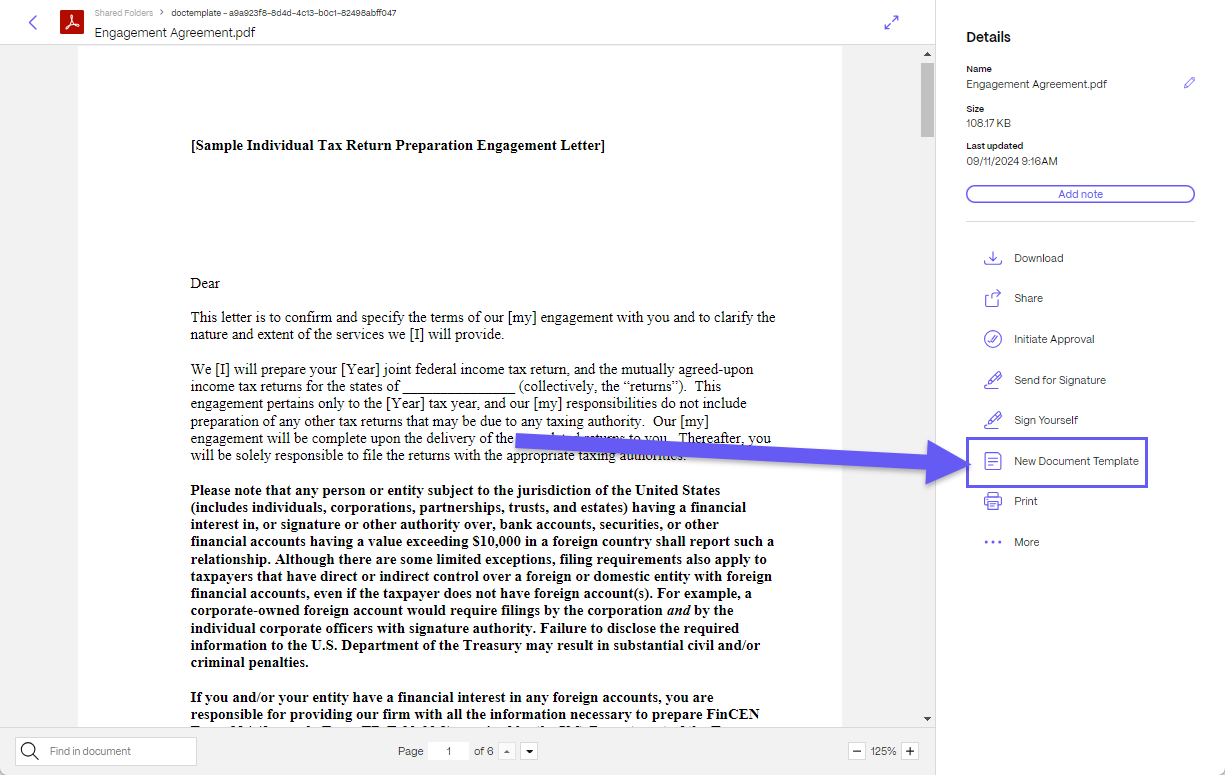
For more information, see Template Library.
Steps to create a PDF document template
-
In ShareFile, navigate to Templates.
-
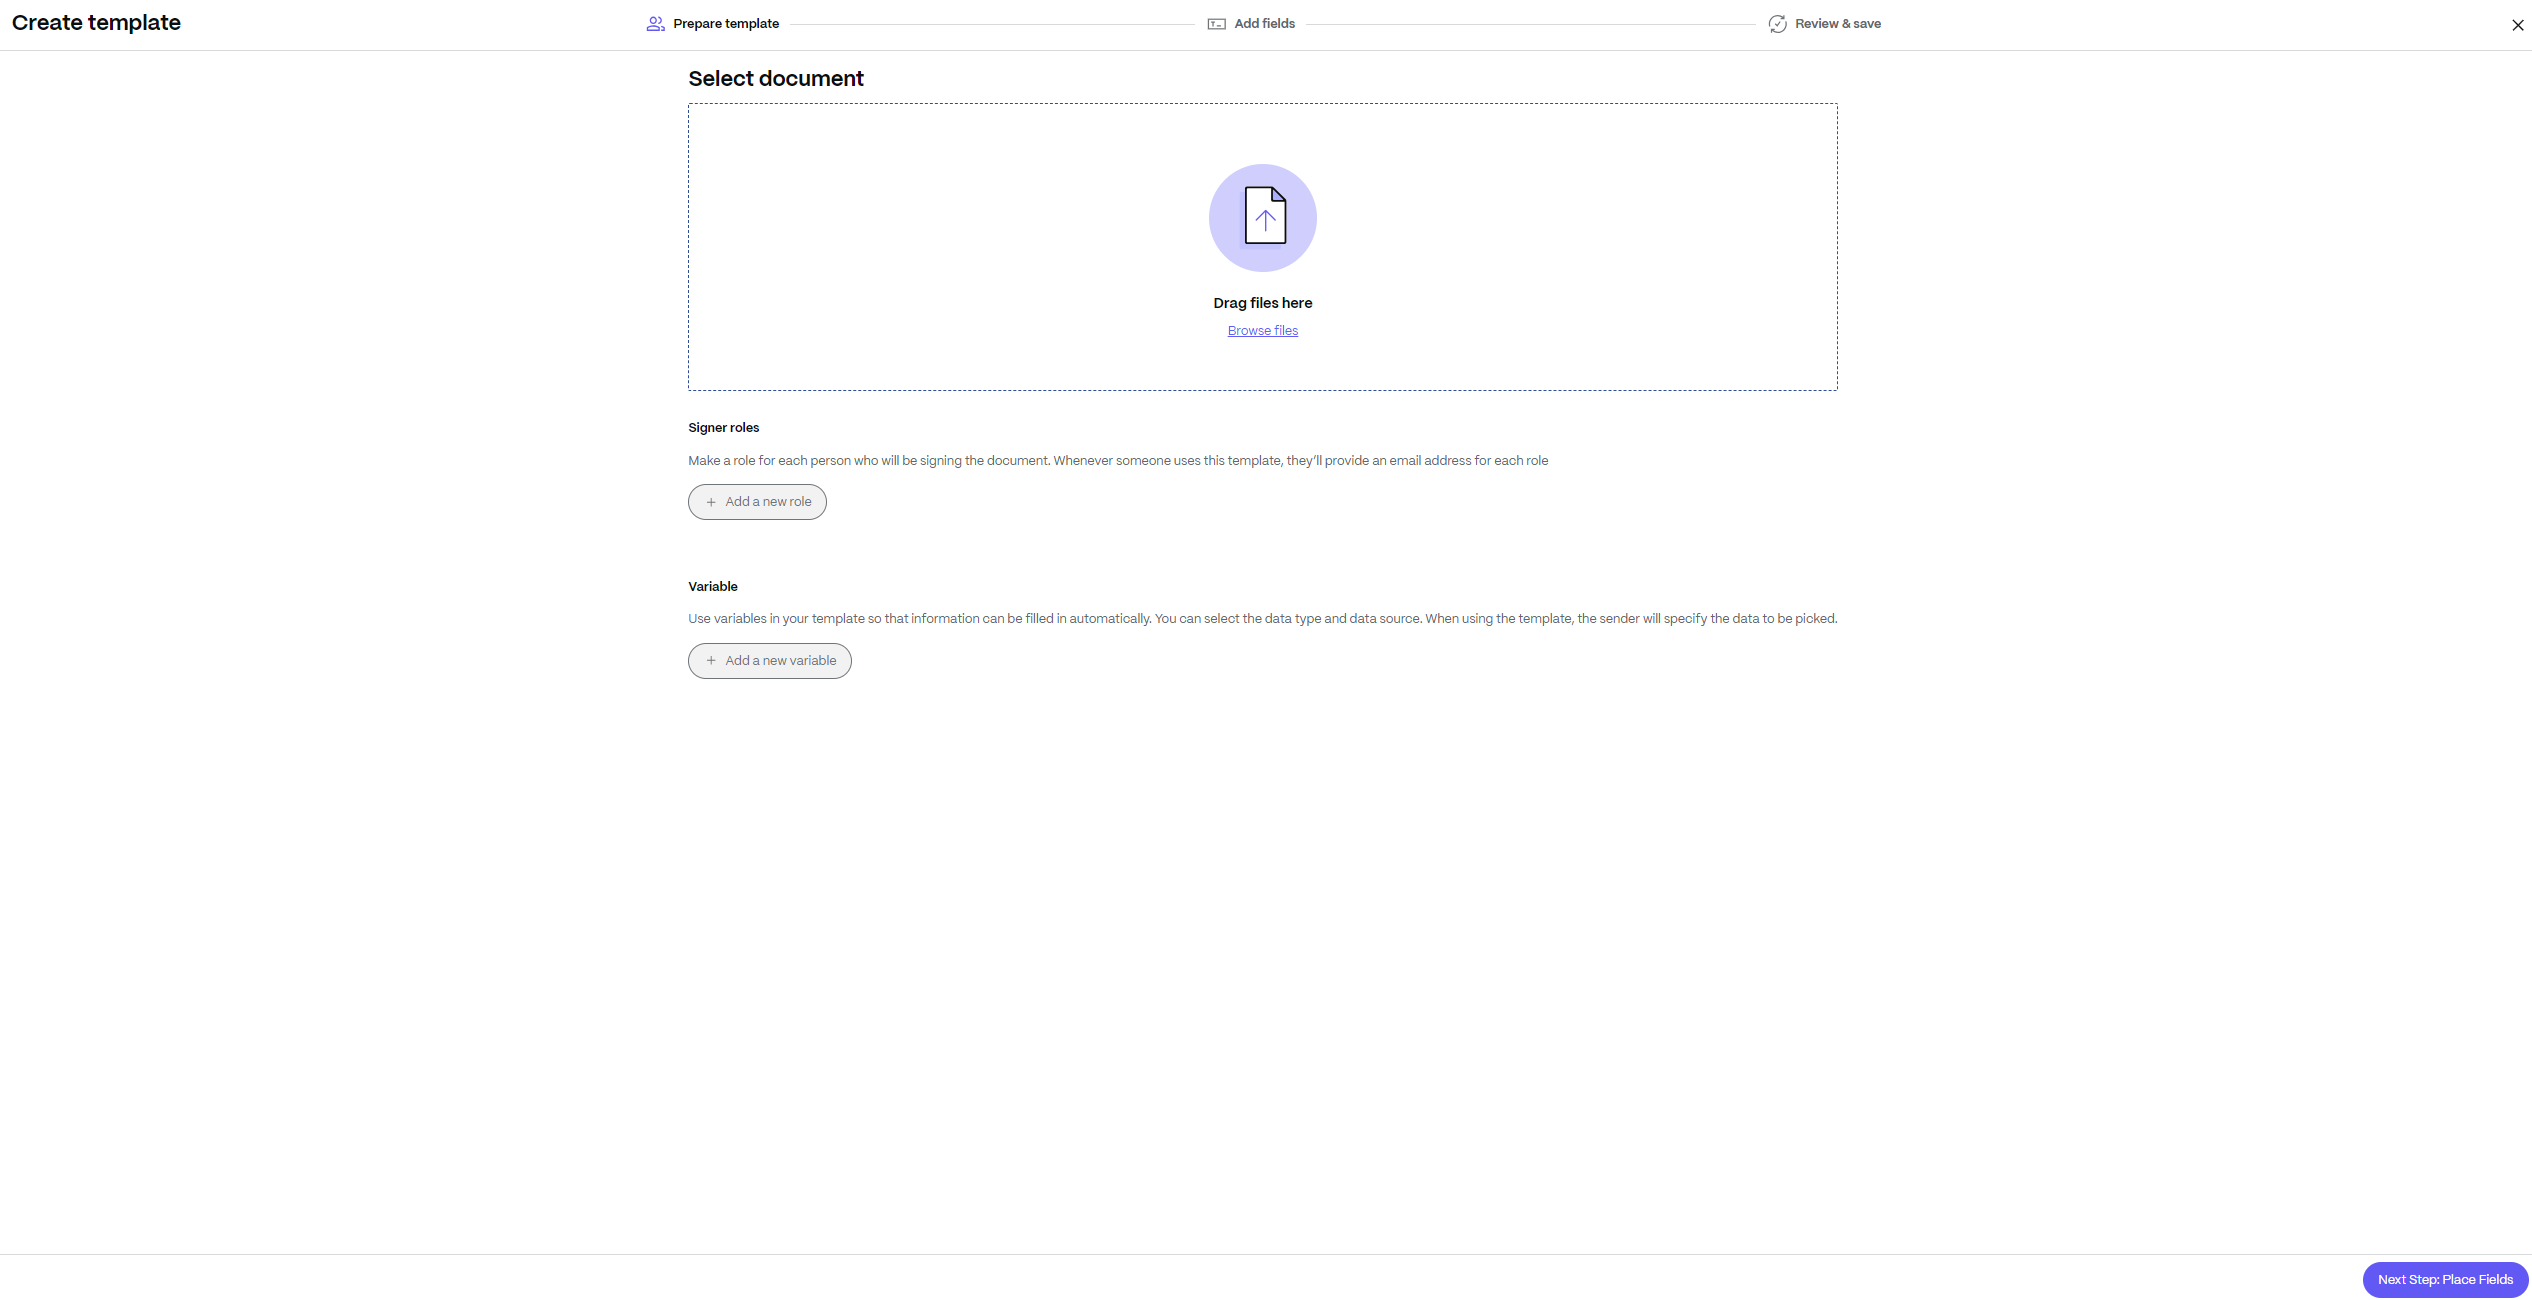
Select Create > Document template. The Create Template screen displays.
-
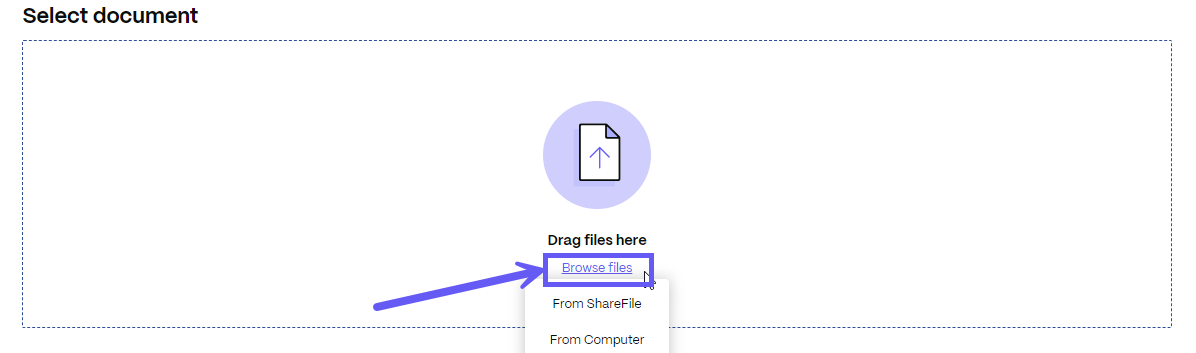
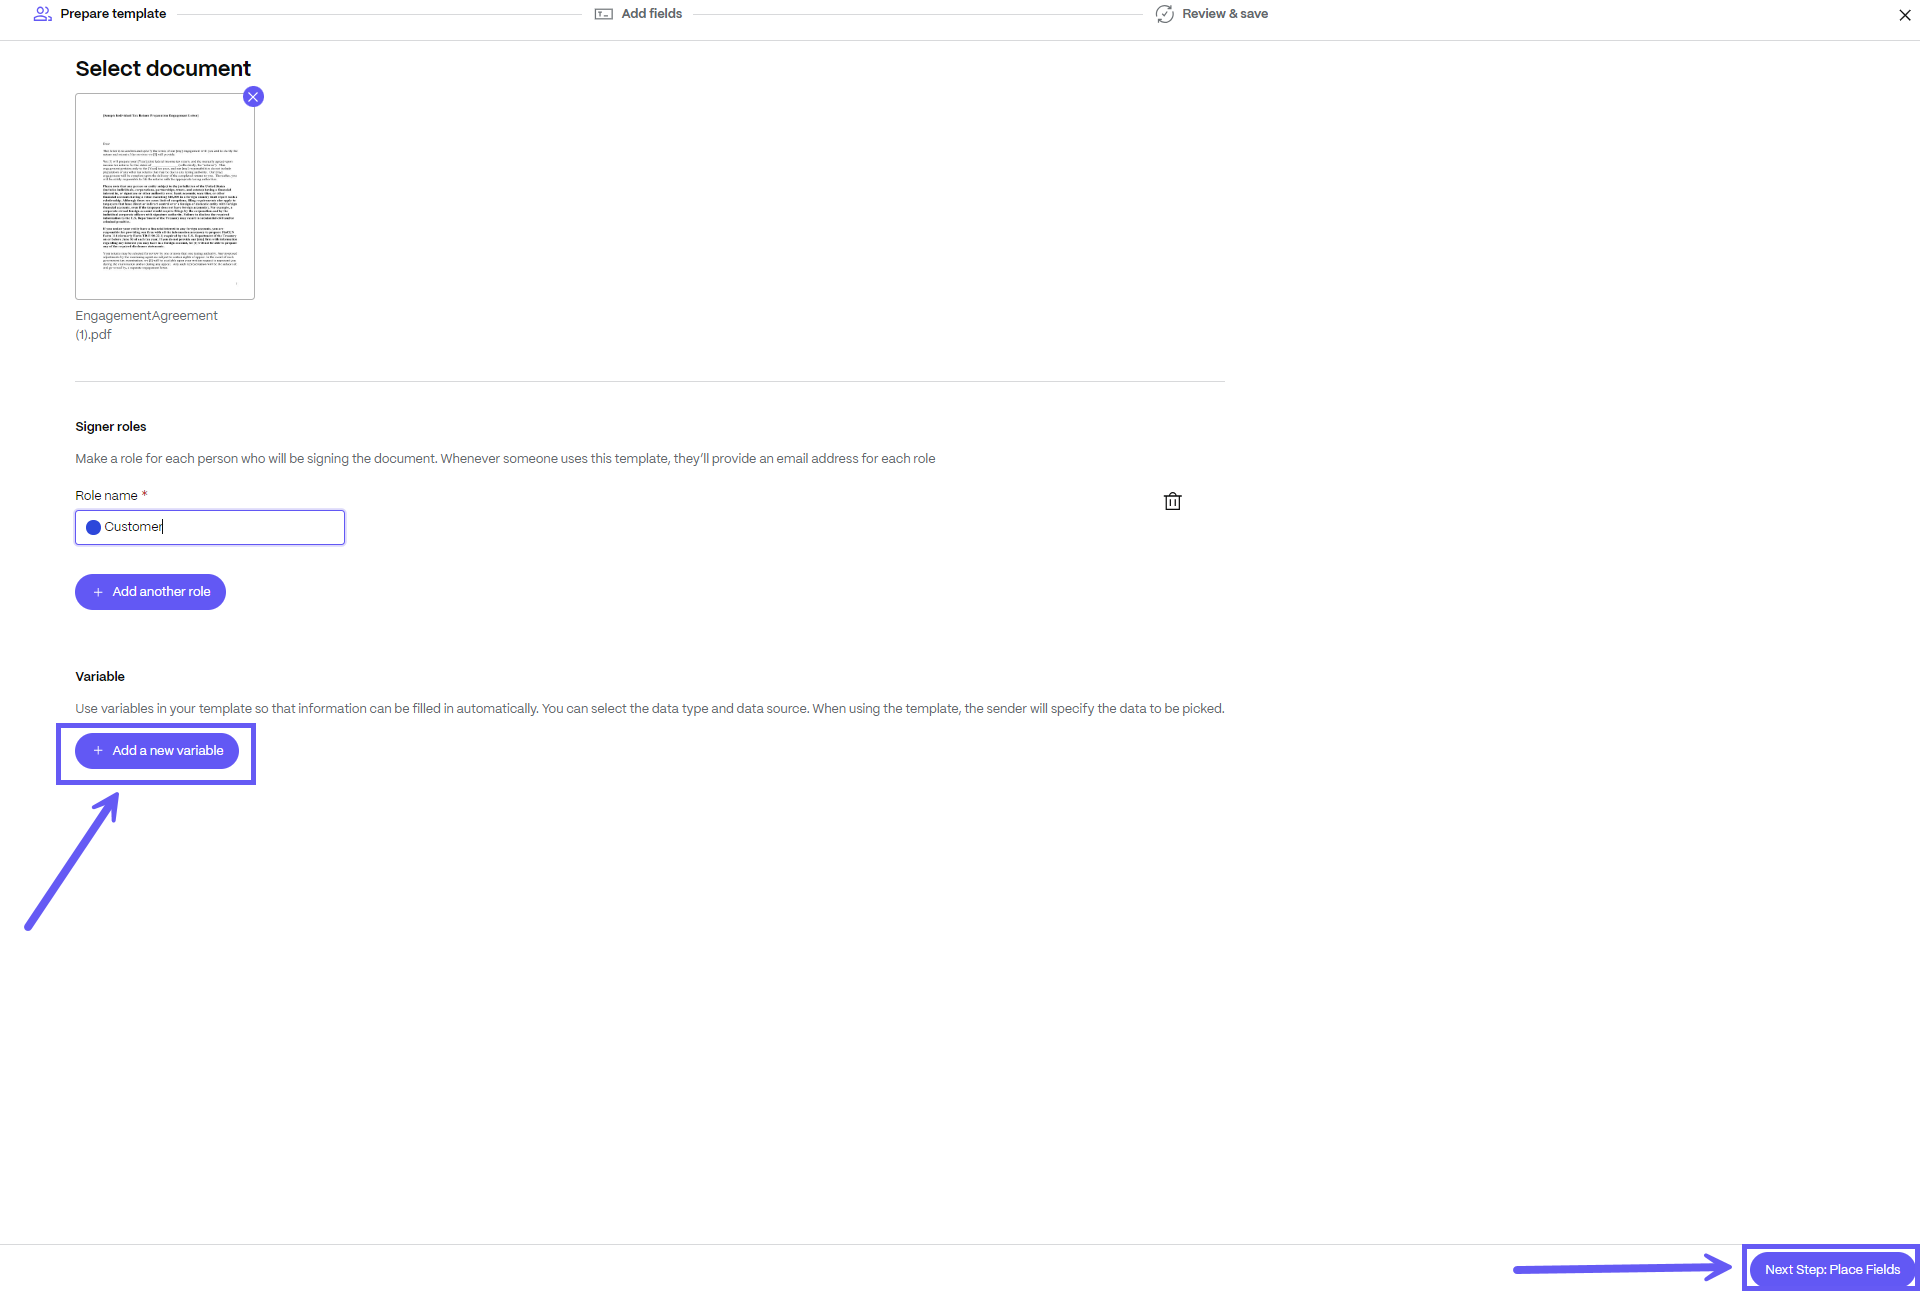
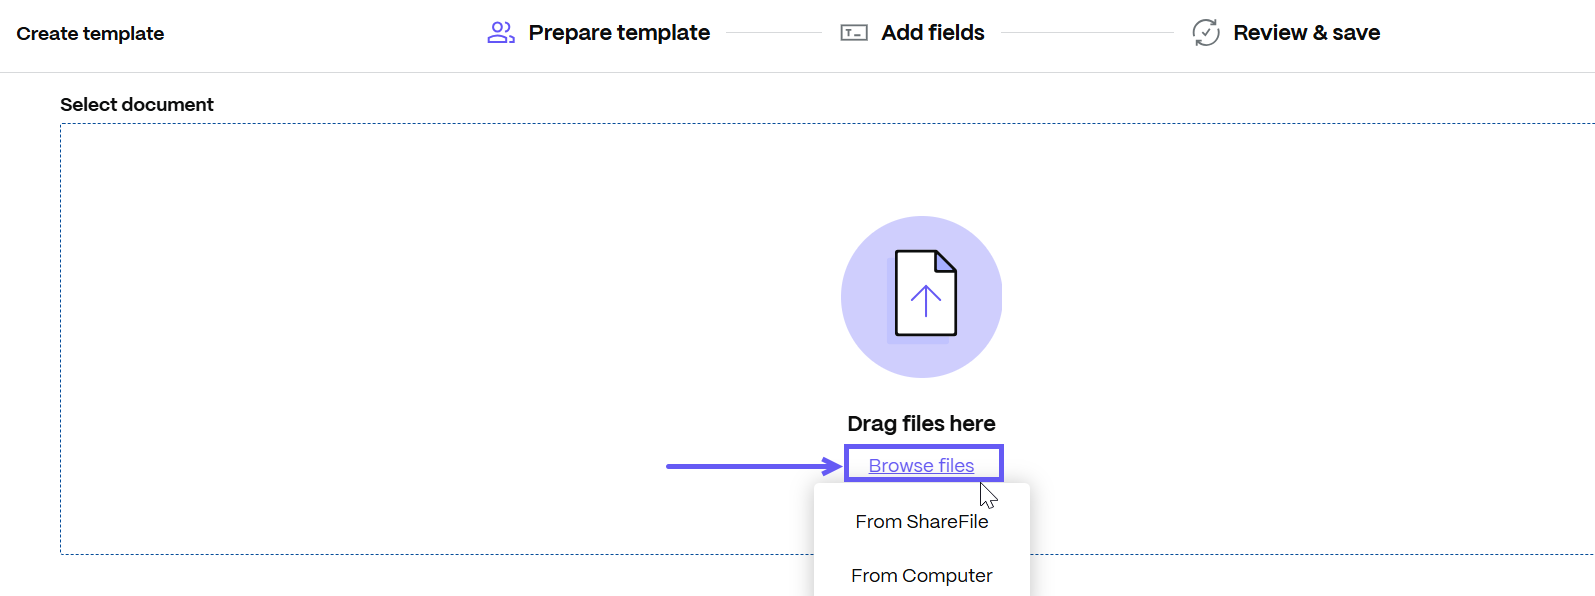
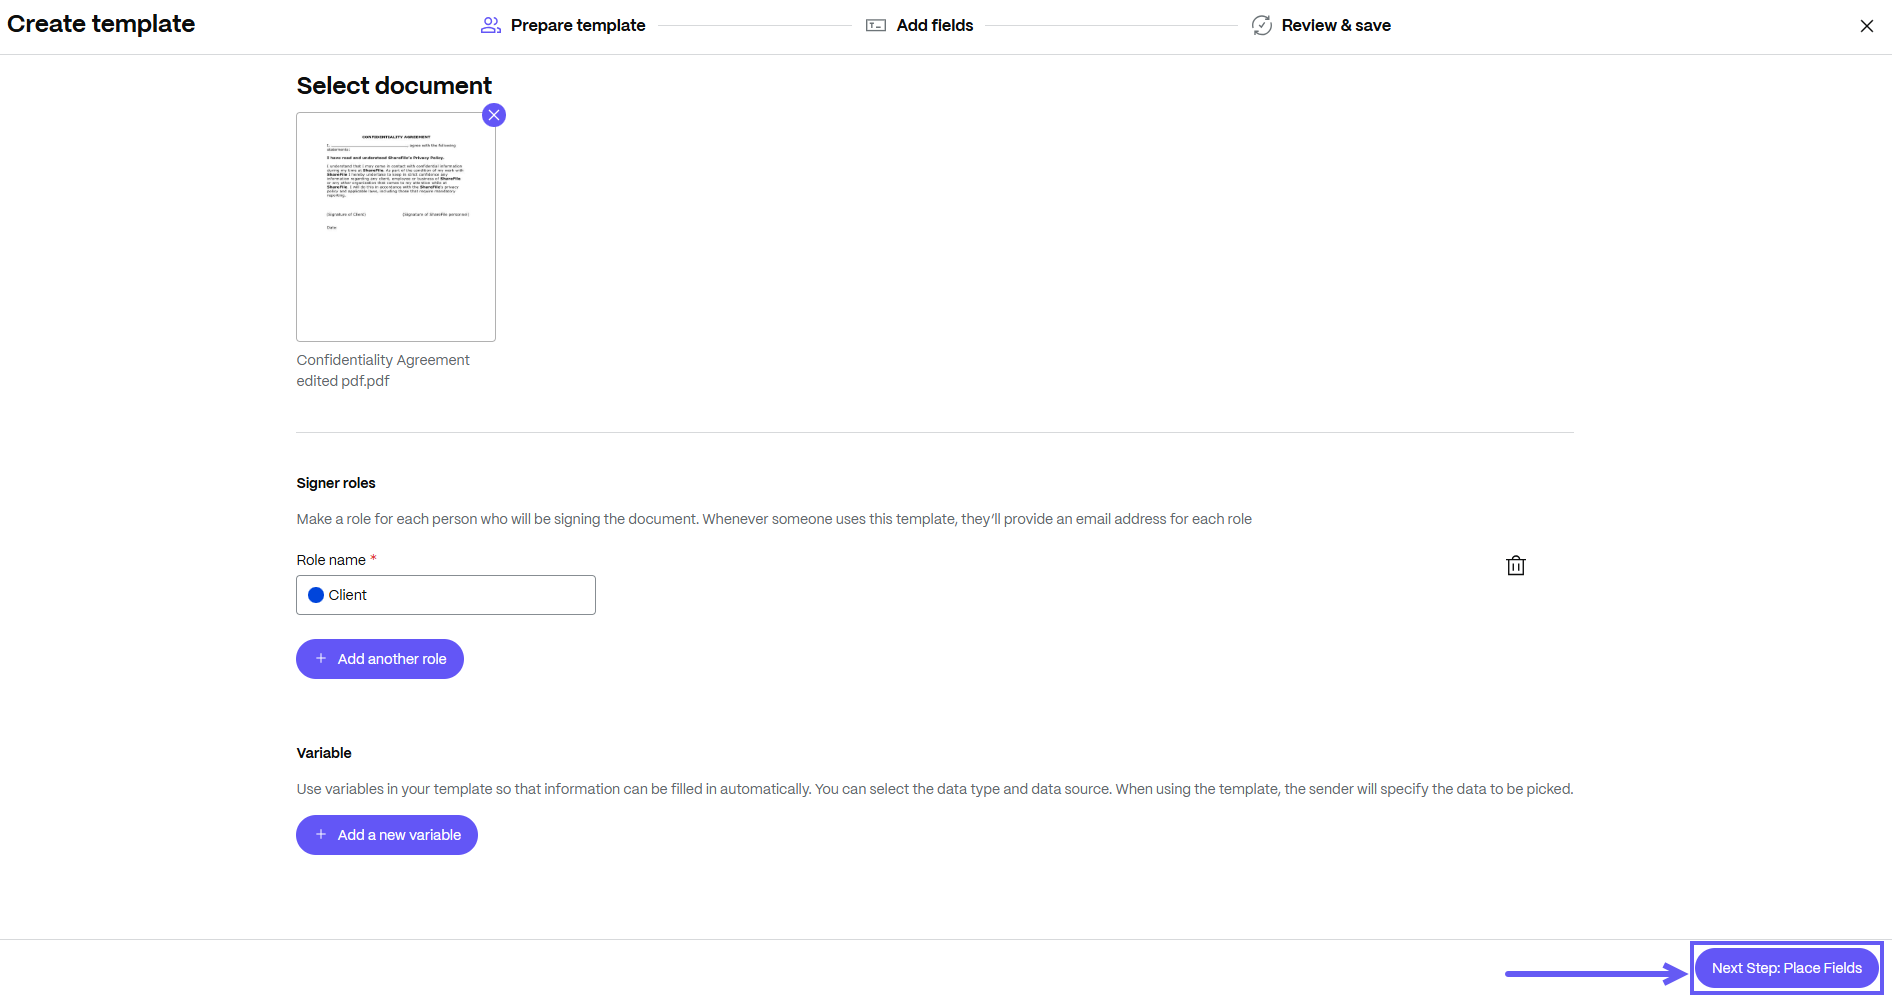
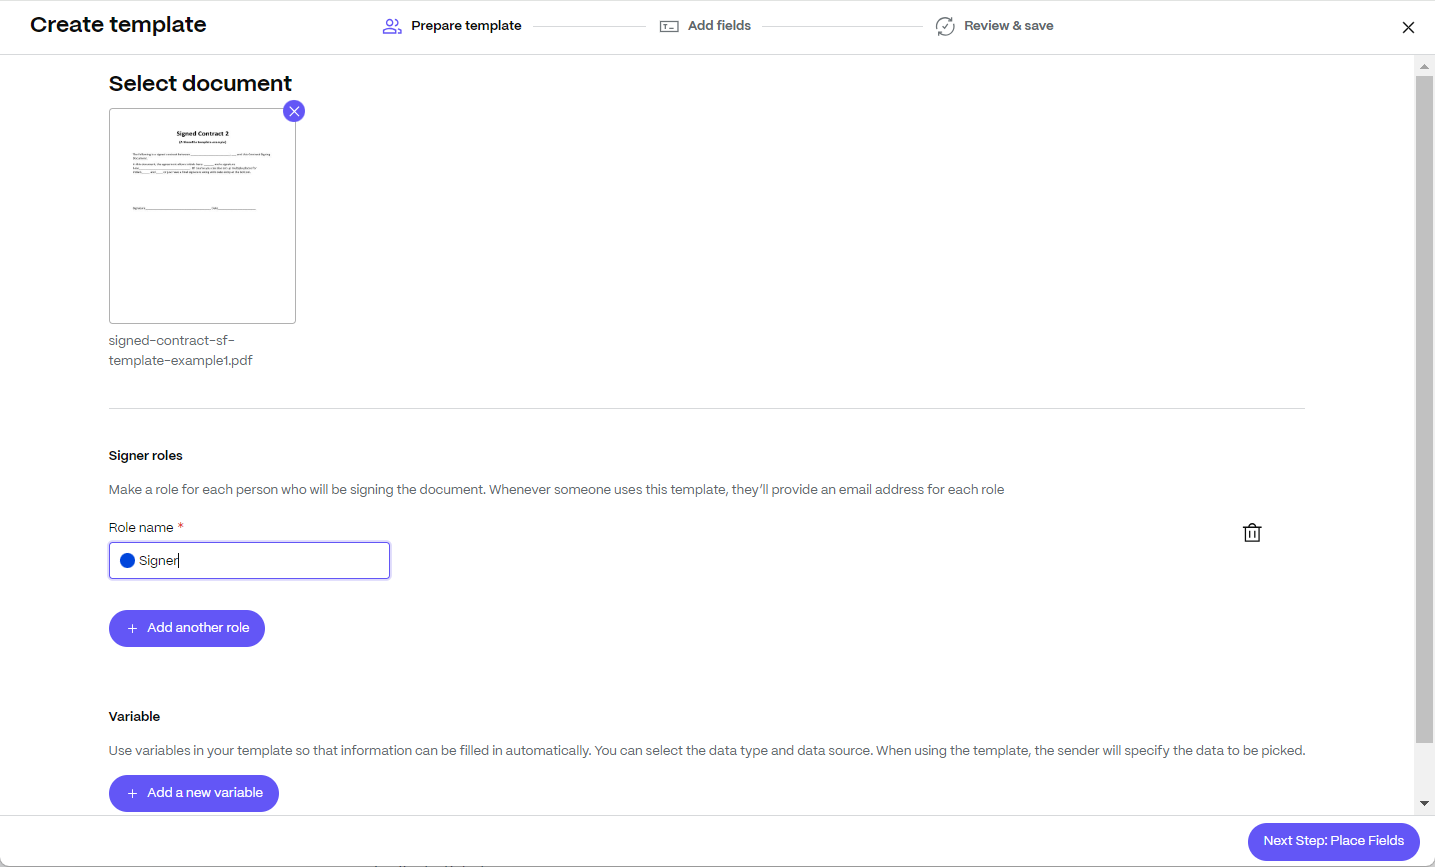
Select a PDF or .docx file from either your computer or from your ShareFile account using the Browse files link to create a PDF template.
-
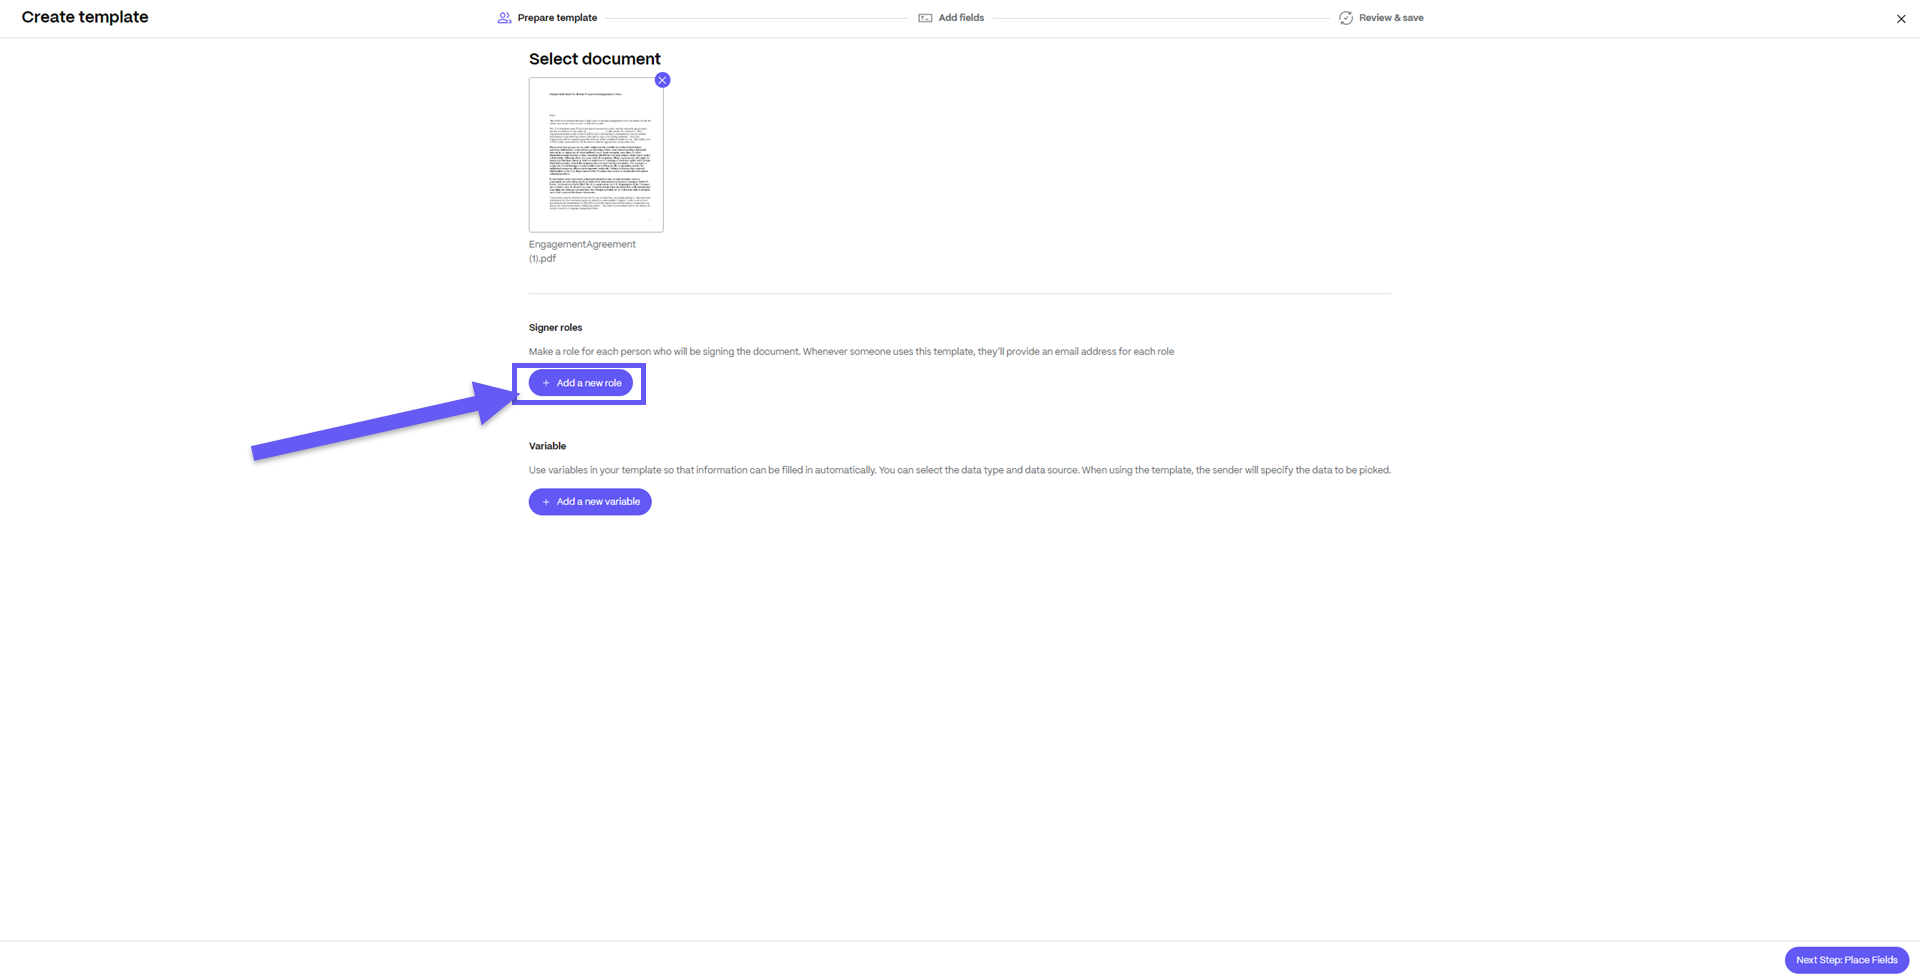
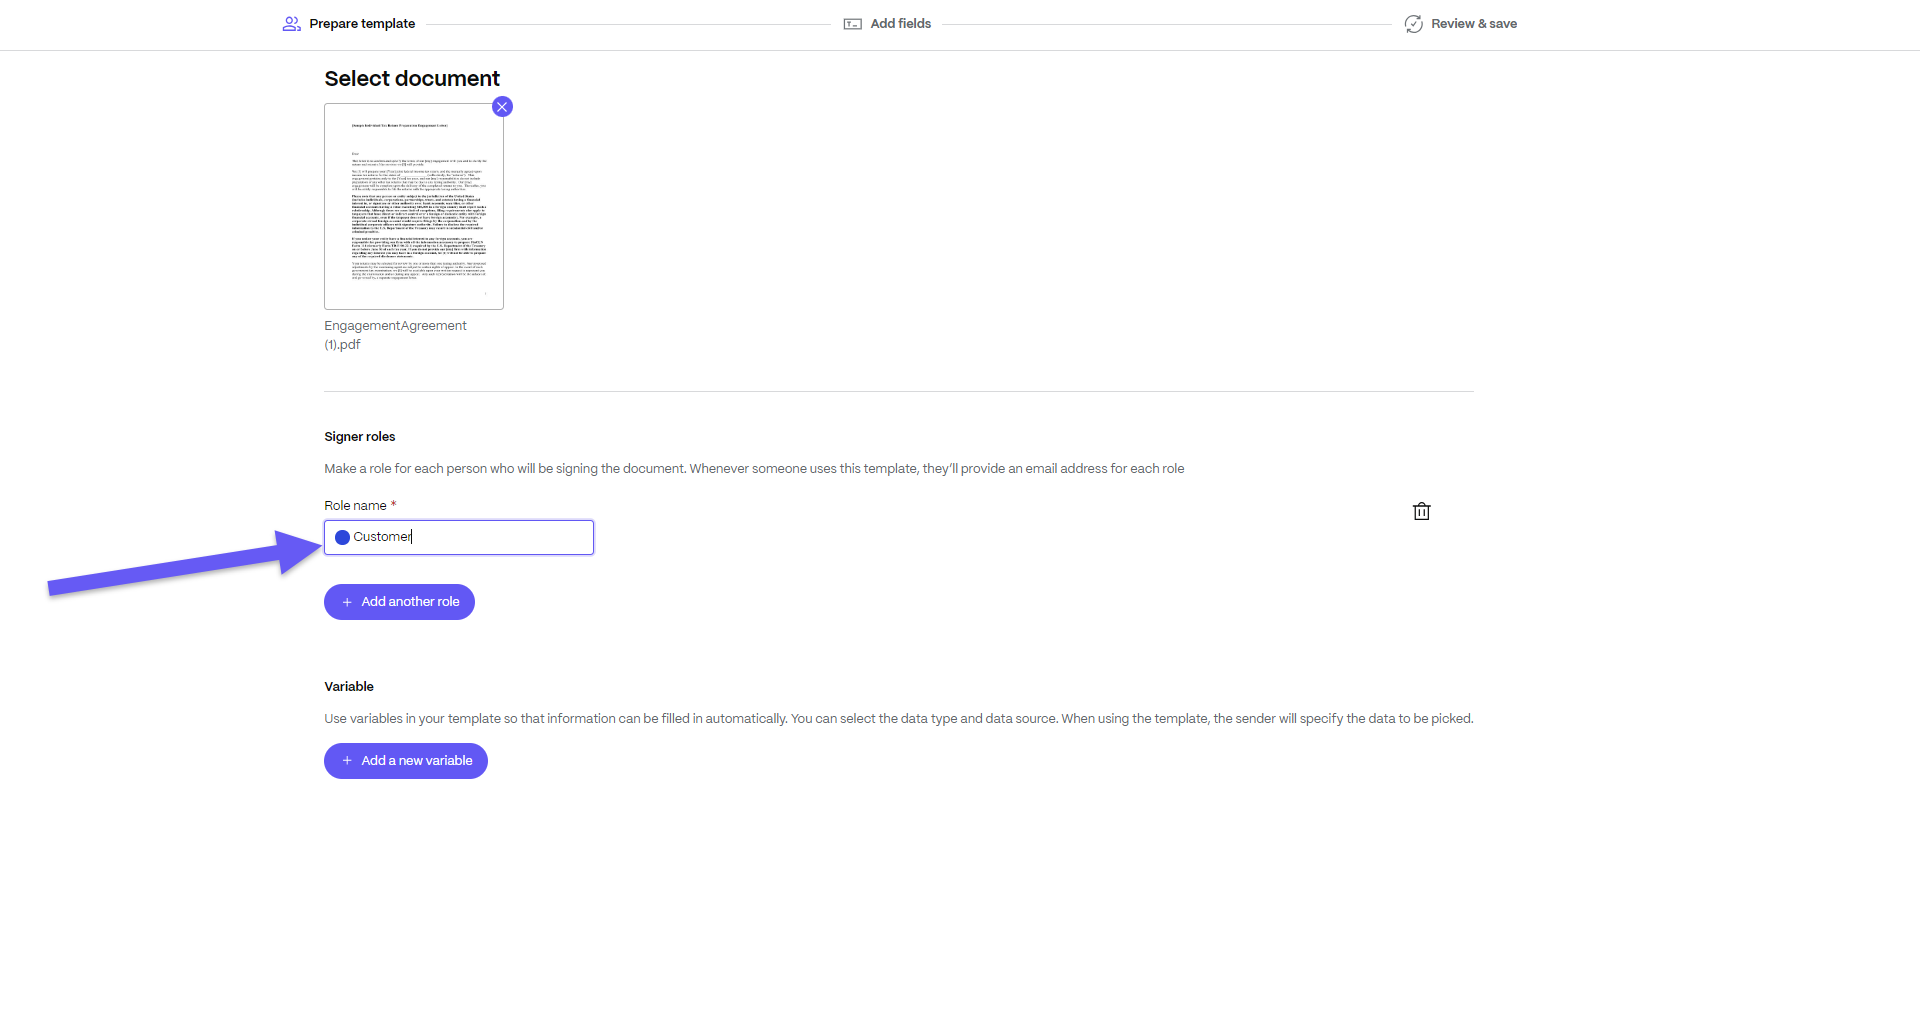
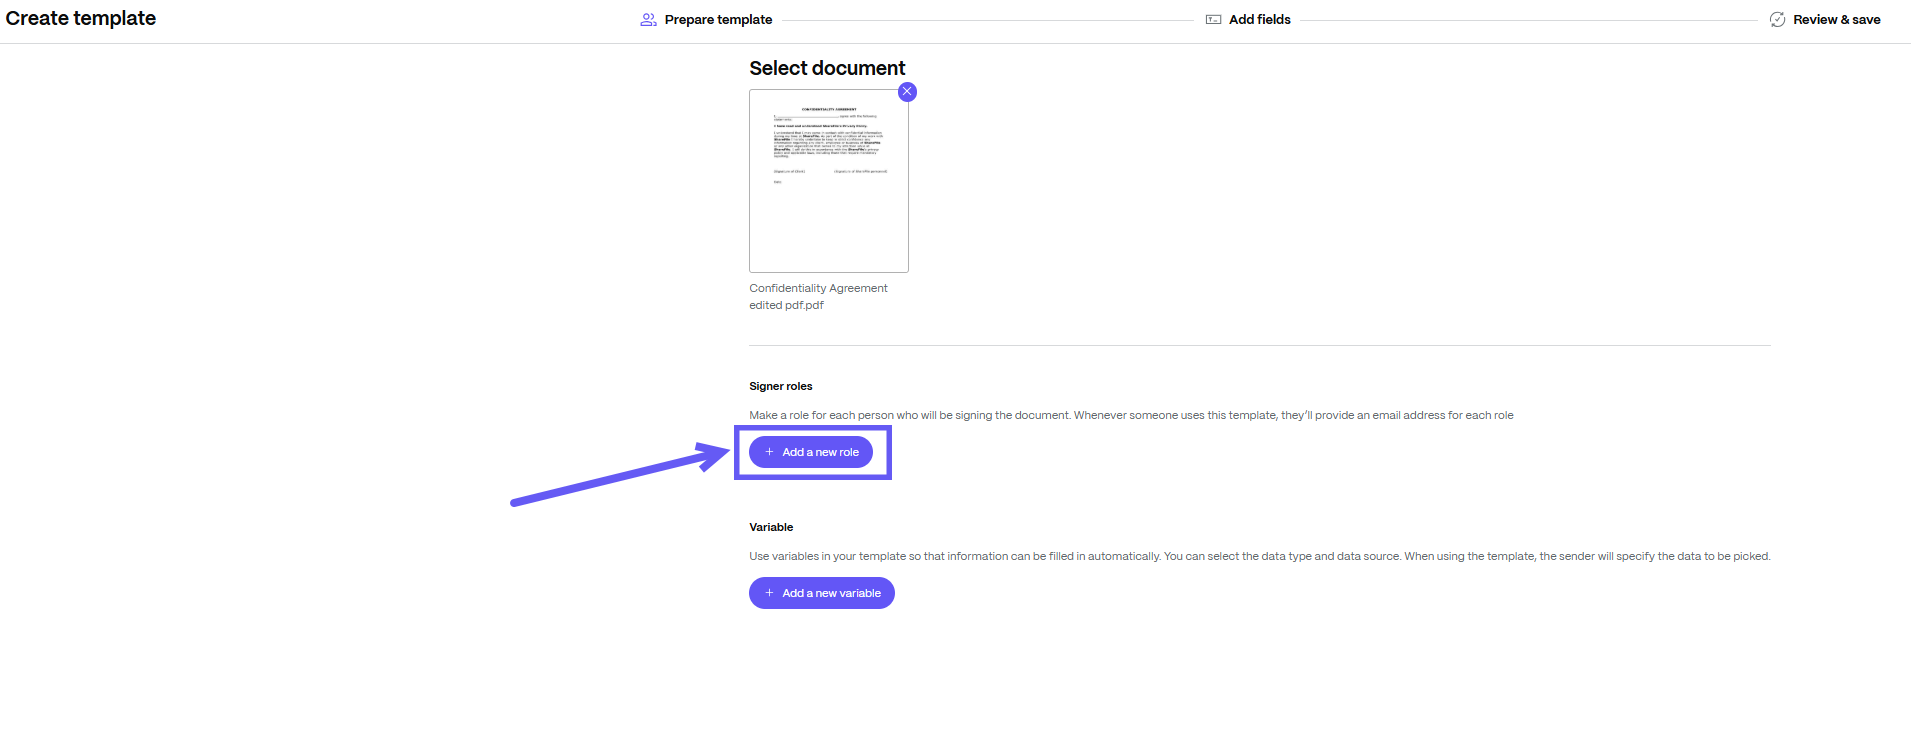
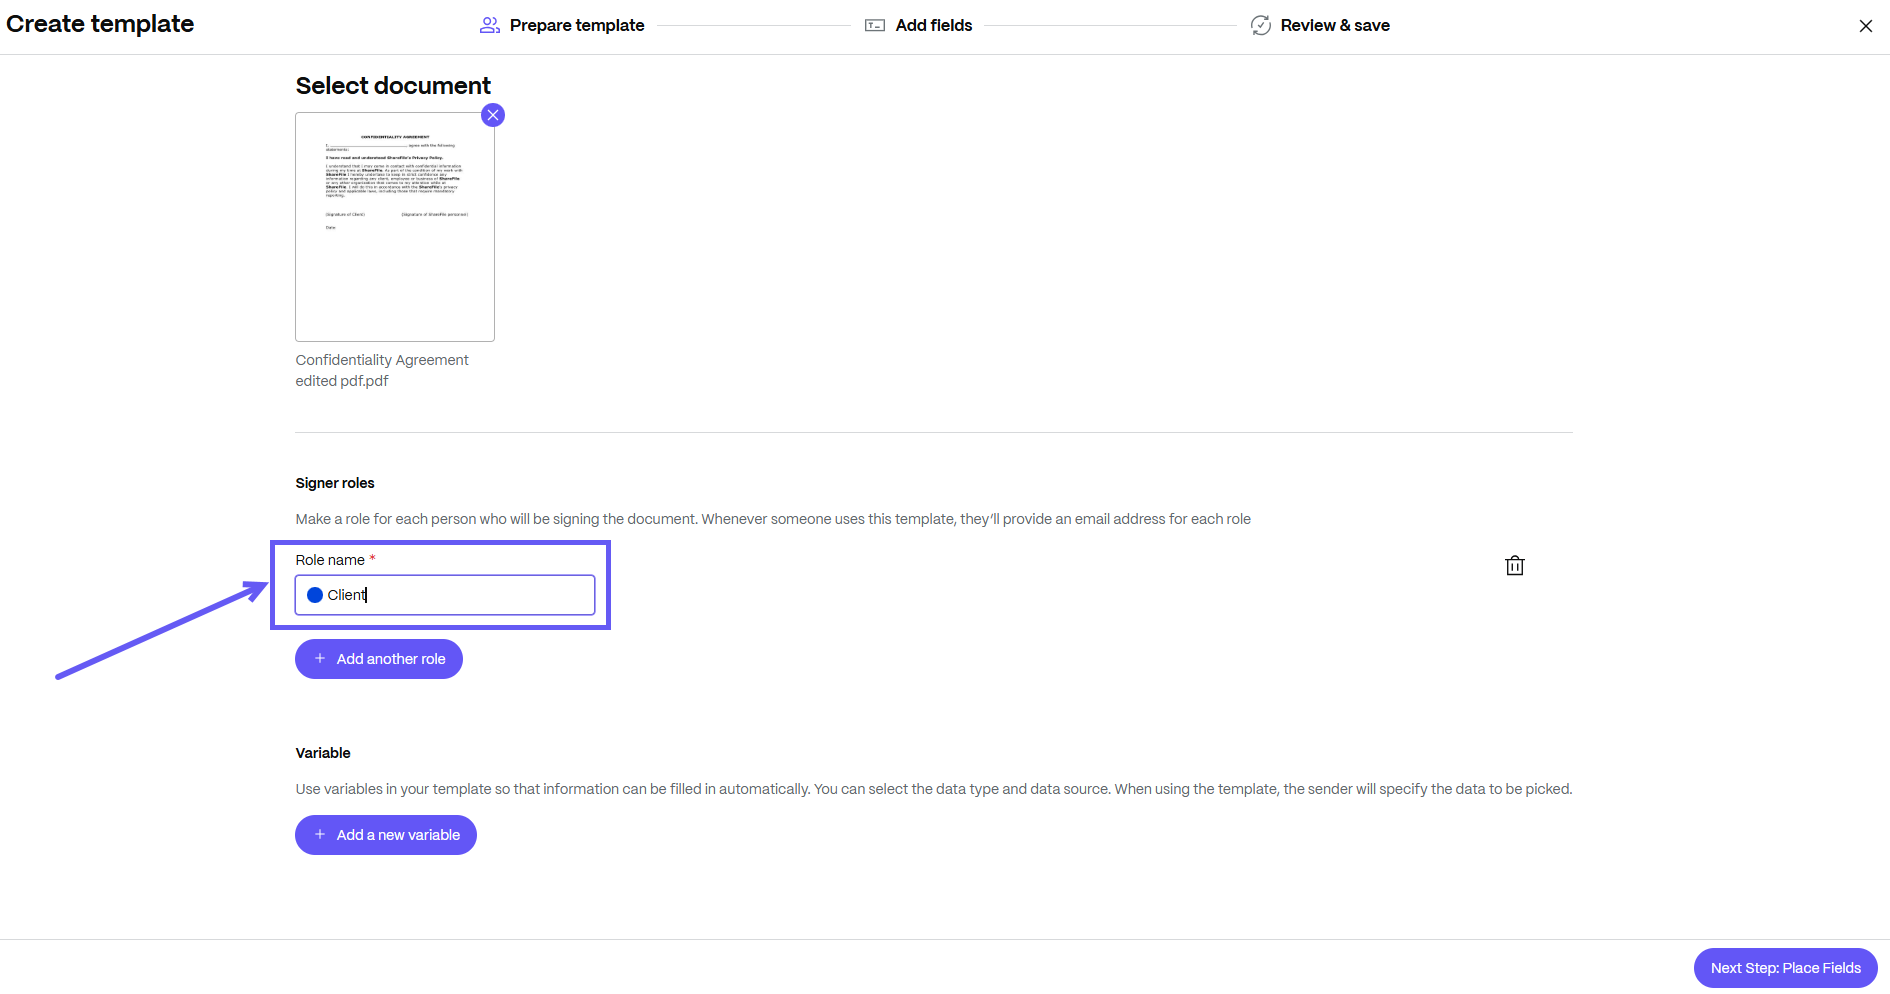
Under Signer roles, select Add a new role. Each role represents a stakeholder or a party involved in the document signature process. You can add multiple roles to a document template. For more information on Roles, see Document template components.
-
If you have more than one role, you can set the signing order using the toggle. Roles can be dragged up and down to set the signing order.
-
Select Next Step: Place Fields. The Place Fields screen displays.

-
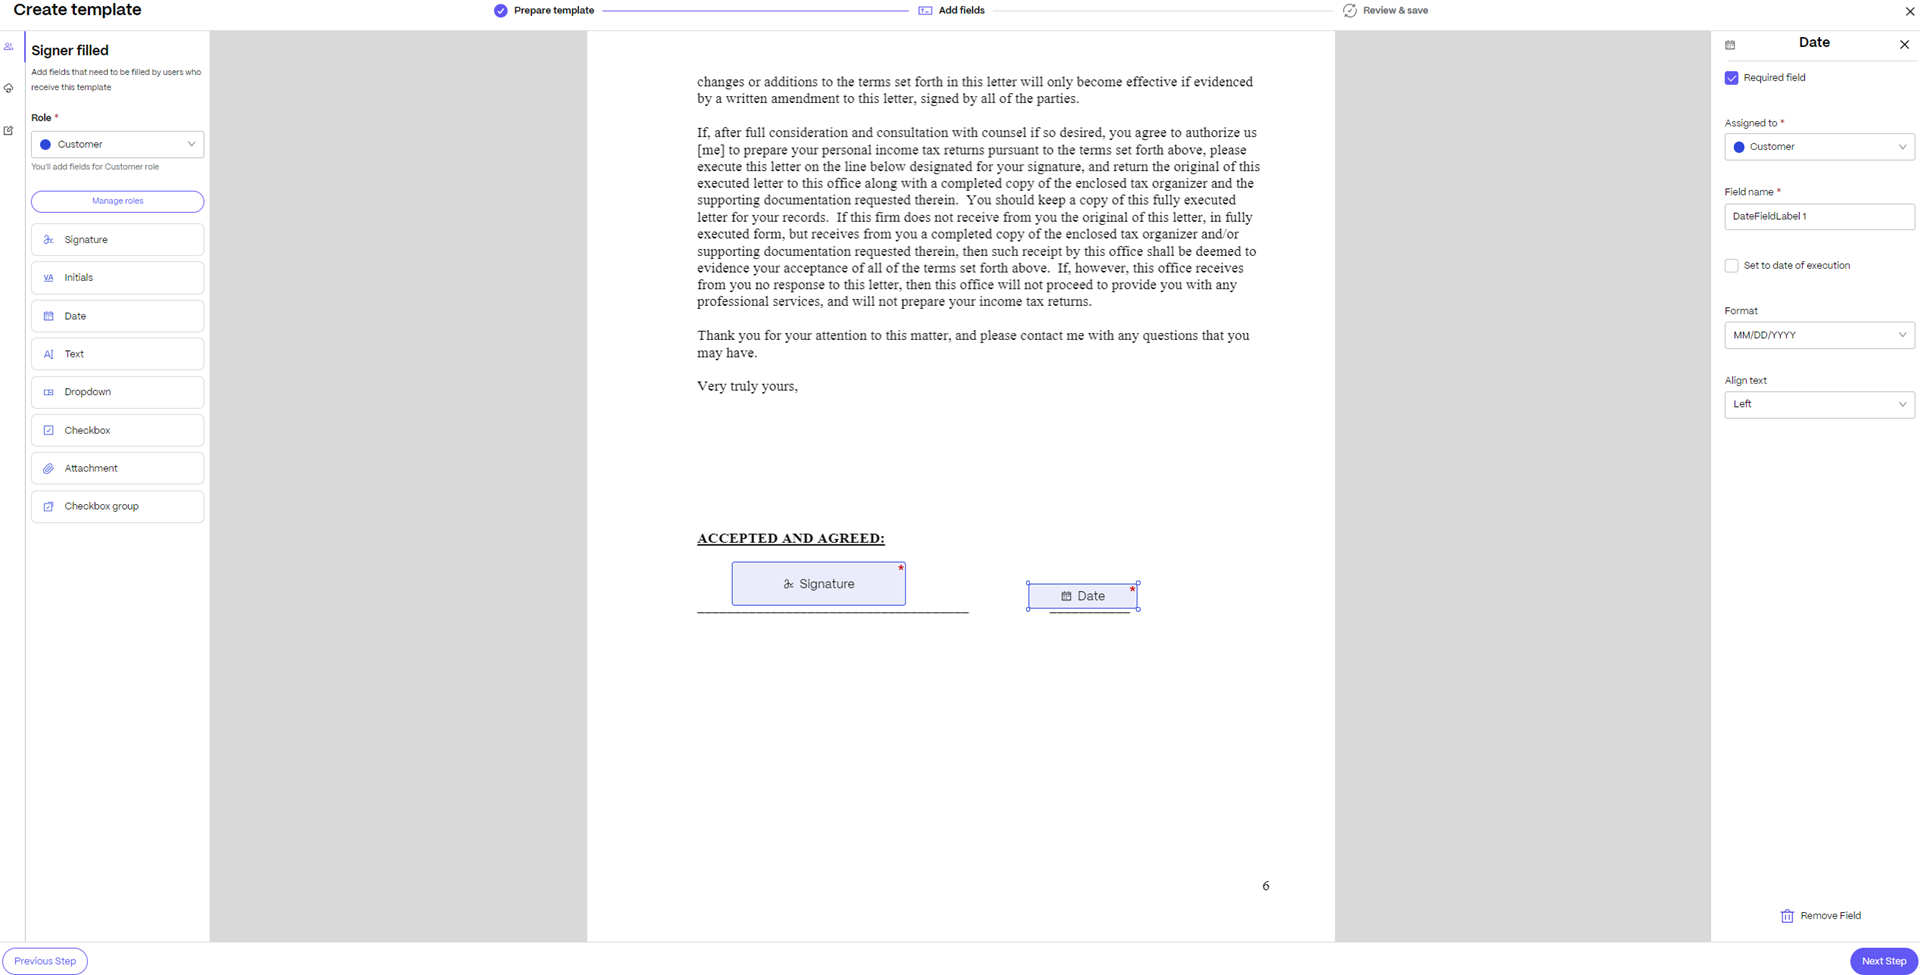
Drag and drop the fields to add them to the document template. You can click on a field to change the settings for that field like marking a field as mandatory.
Note:
When adding or placing fields, make sure you choose the right role for the field using the drop down menu. All the fields associated with a role will be assigned to the signer associated with that role.
-
Select Next Step. The Review and Save screen displays.
-
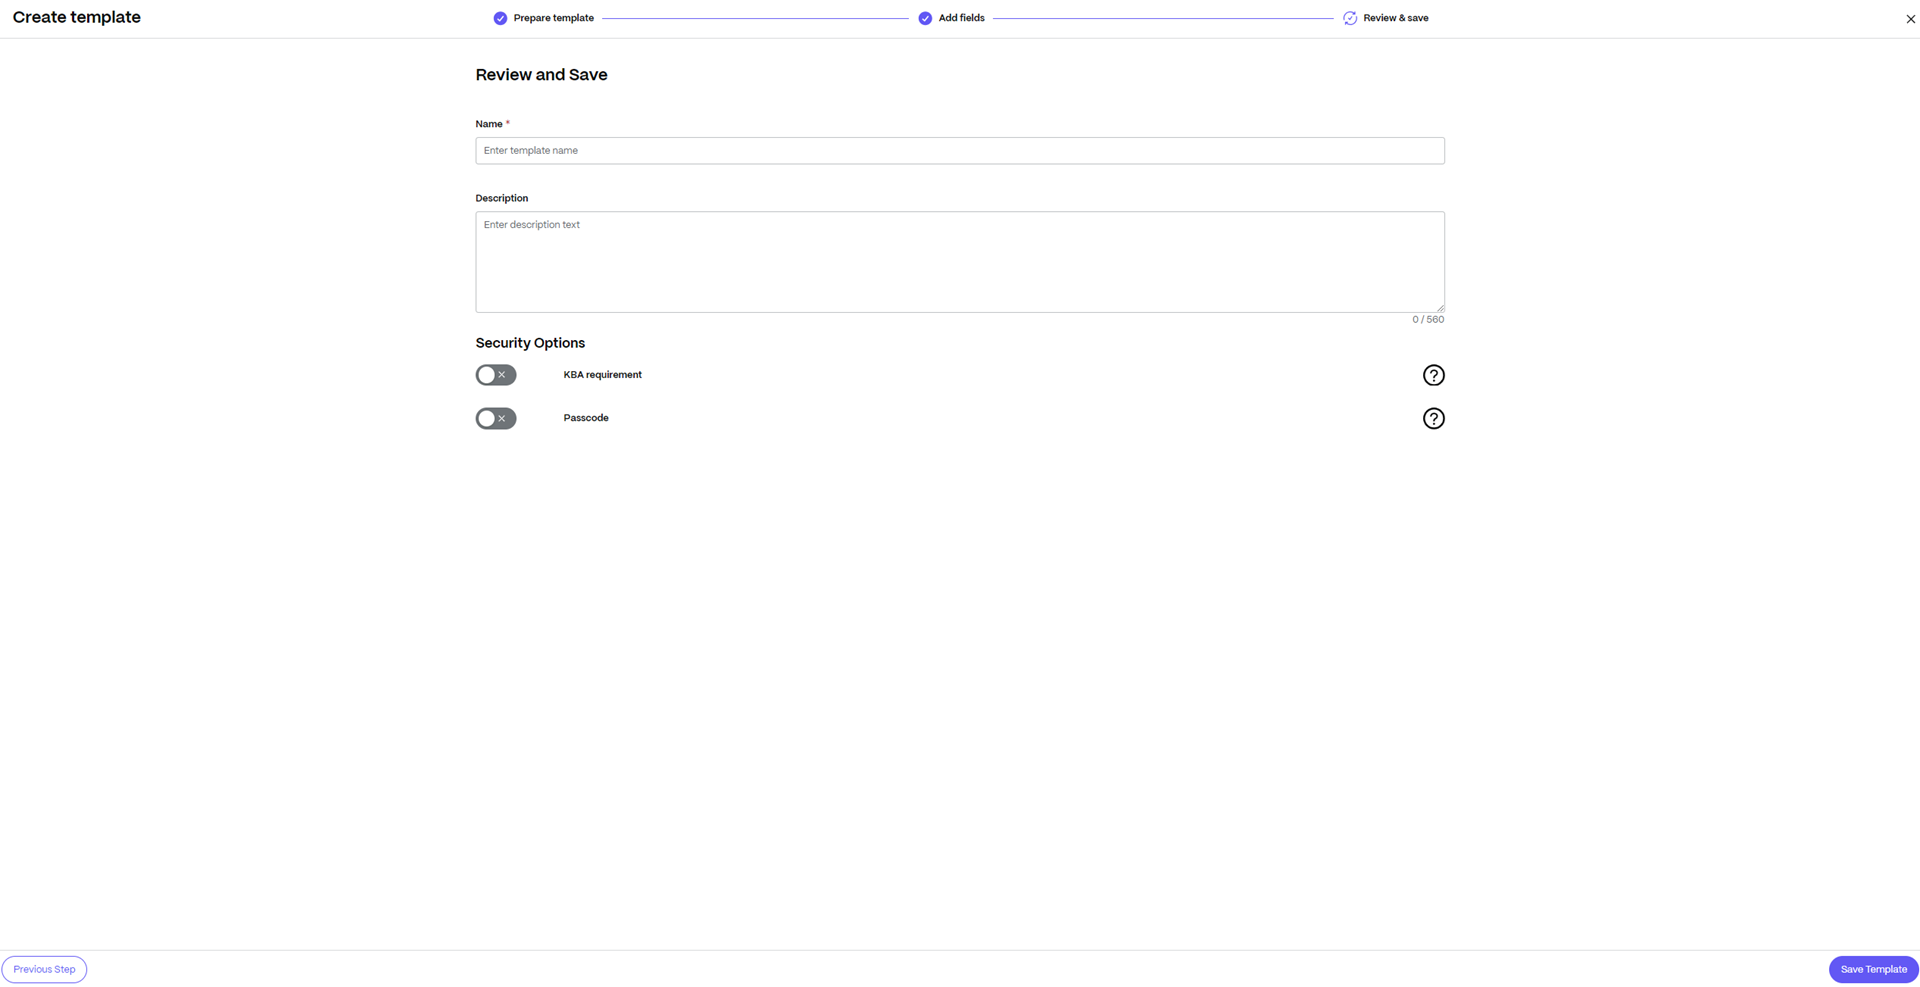
Enter the name and description for your new document template.


-
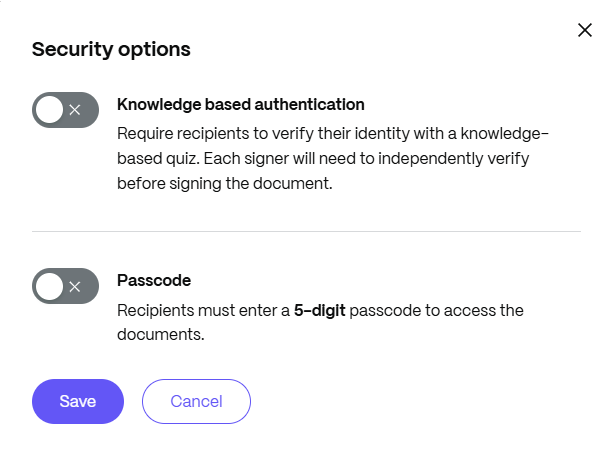
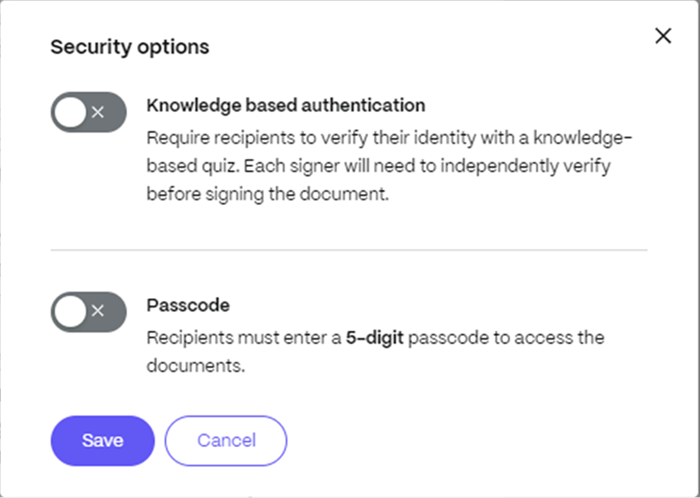
You can set additional Security Options such as KBA and passcode.
-
KBA requirement - requires signers to verify their identity with a knowledge-based quiz. Each signer must independently verify before signing the document.
-
Passcode - requires recipients to enter a 5-digit passcode to access documents.

-
-
Select Save Template.
The new document template is displayed on the Templates page.
Send a PDF document template for signature
There are three different ways in which you can send a document template for signature in ShareFile
From the Dashboard
You can now select a template to send a document for signature in ShareFile
-
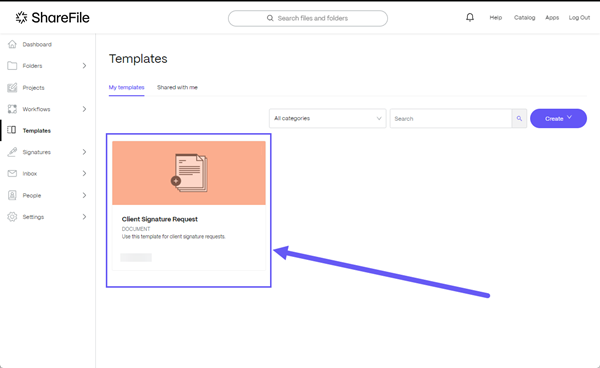
In ShareFile, navigate to Templates.
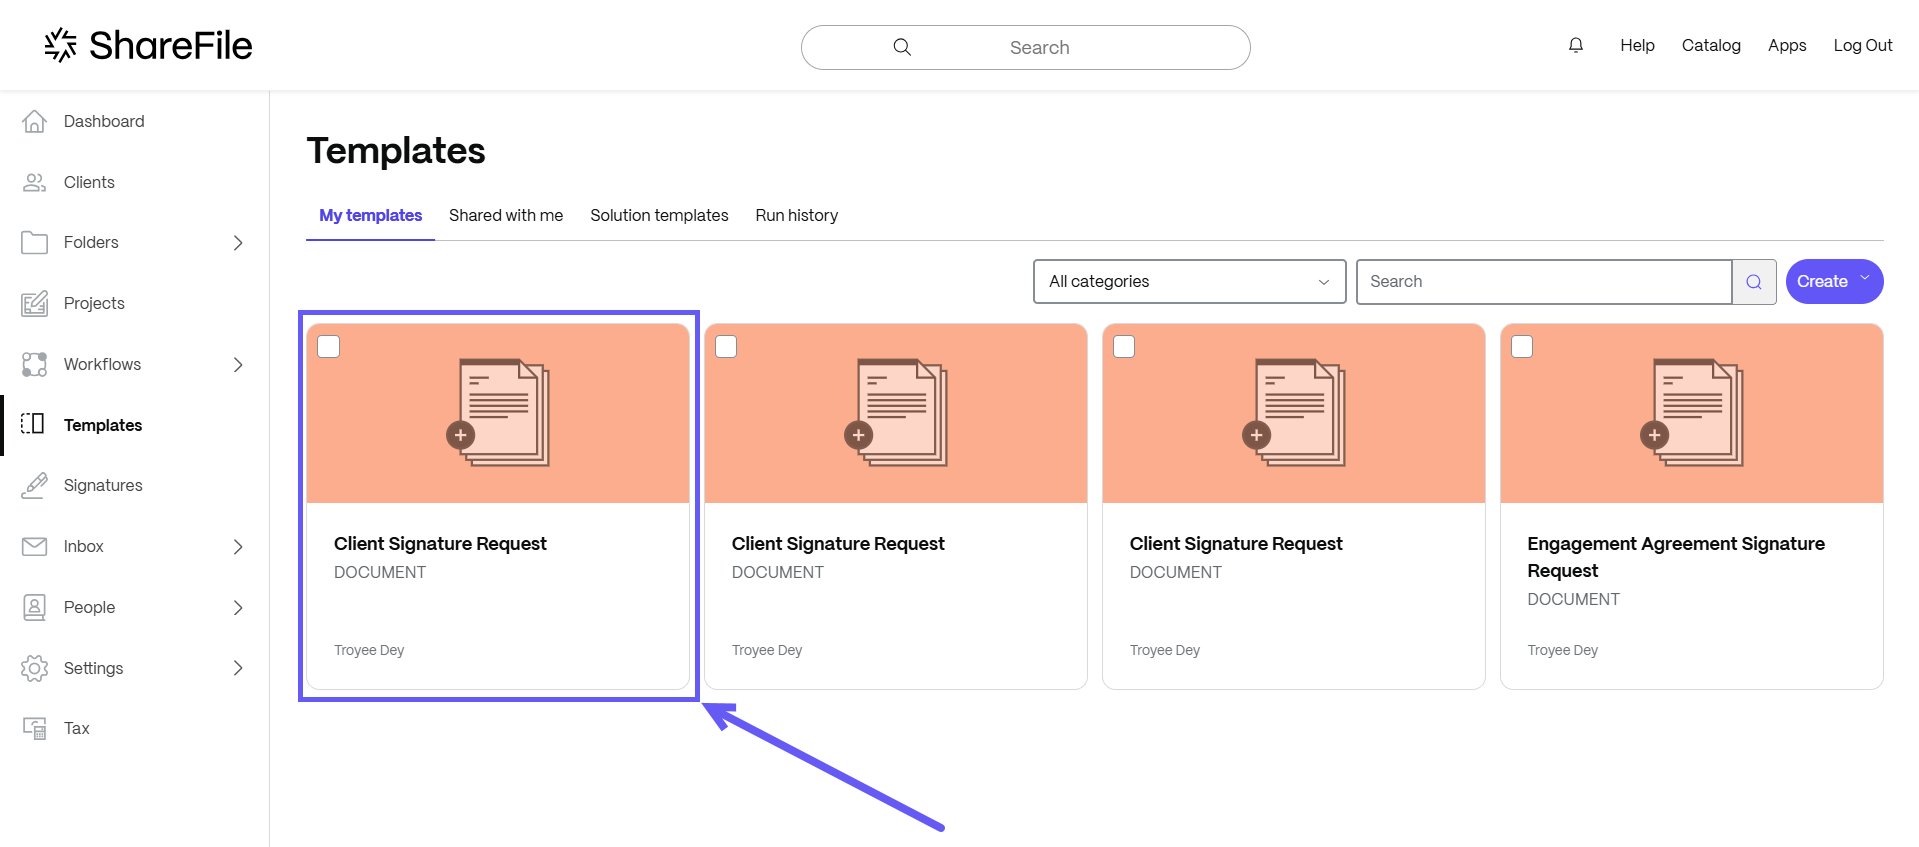
-
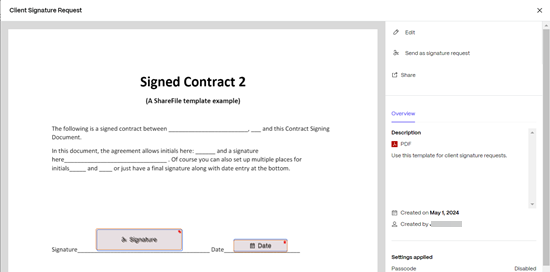
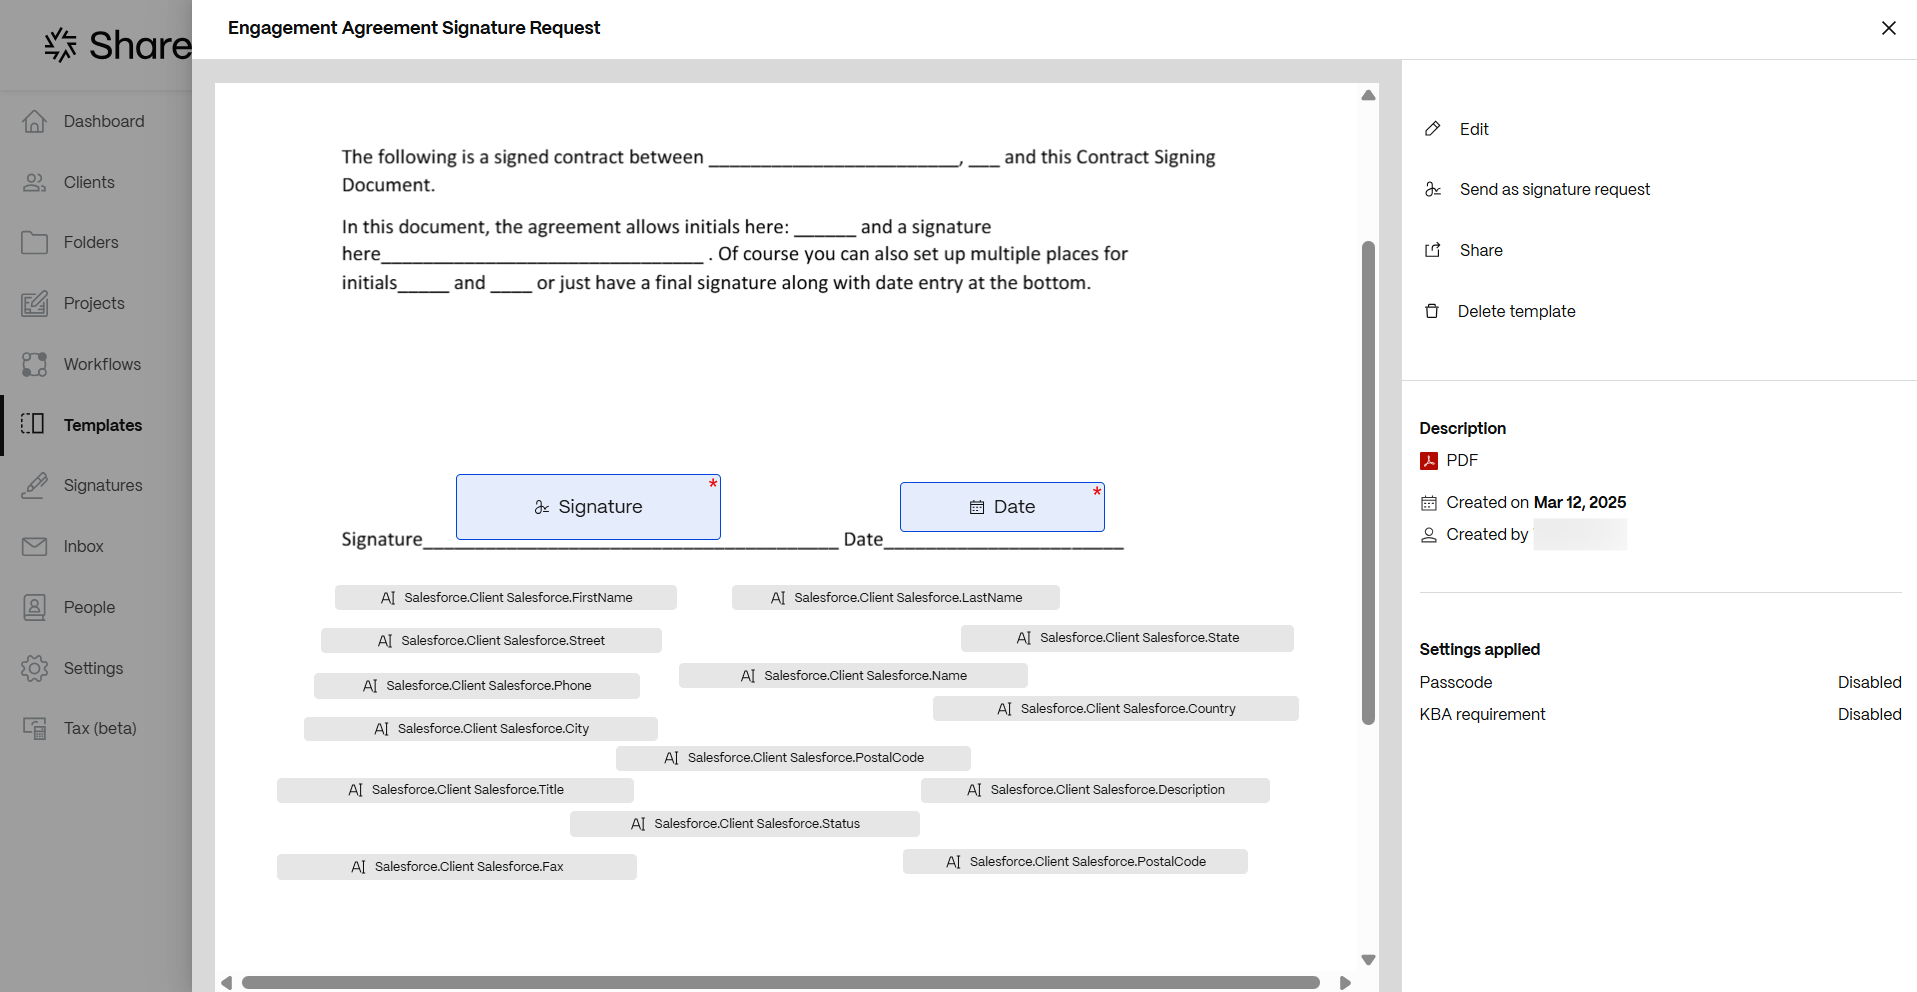
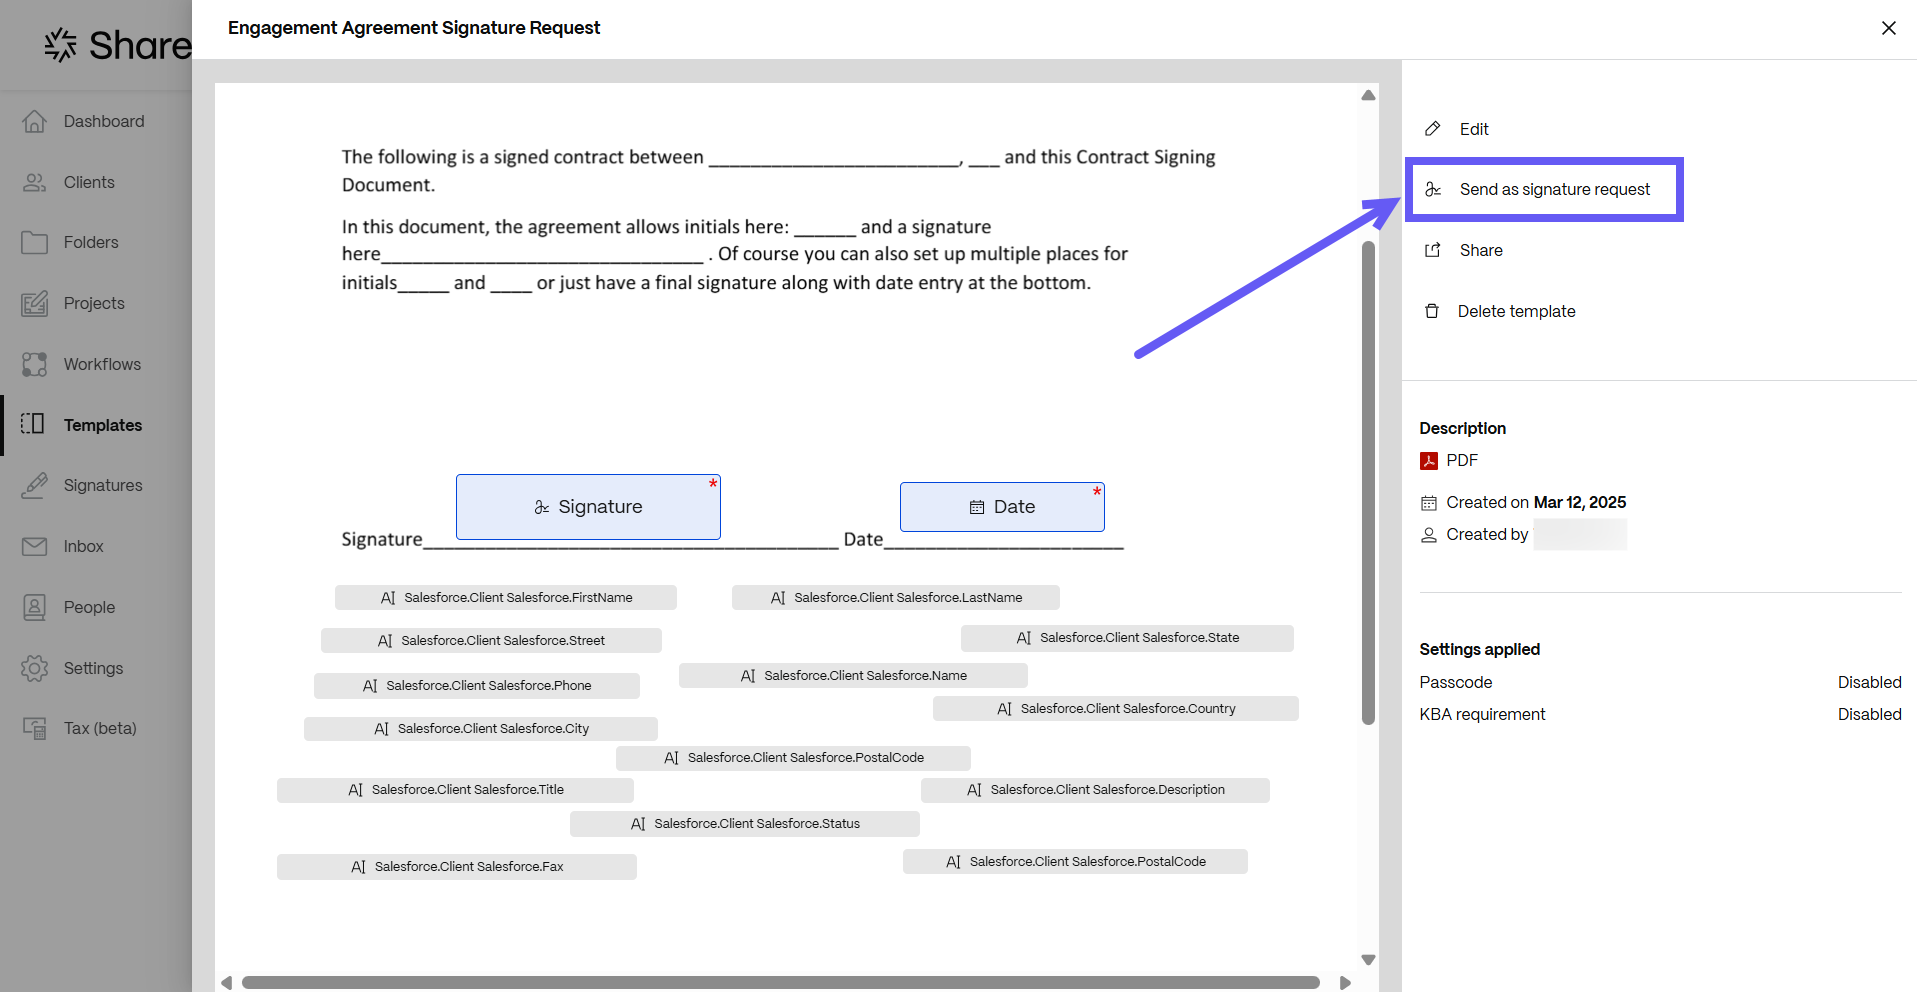
Select the document template that you want to send for signature. When you click on it, the details page opens.
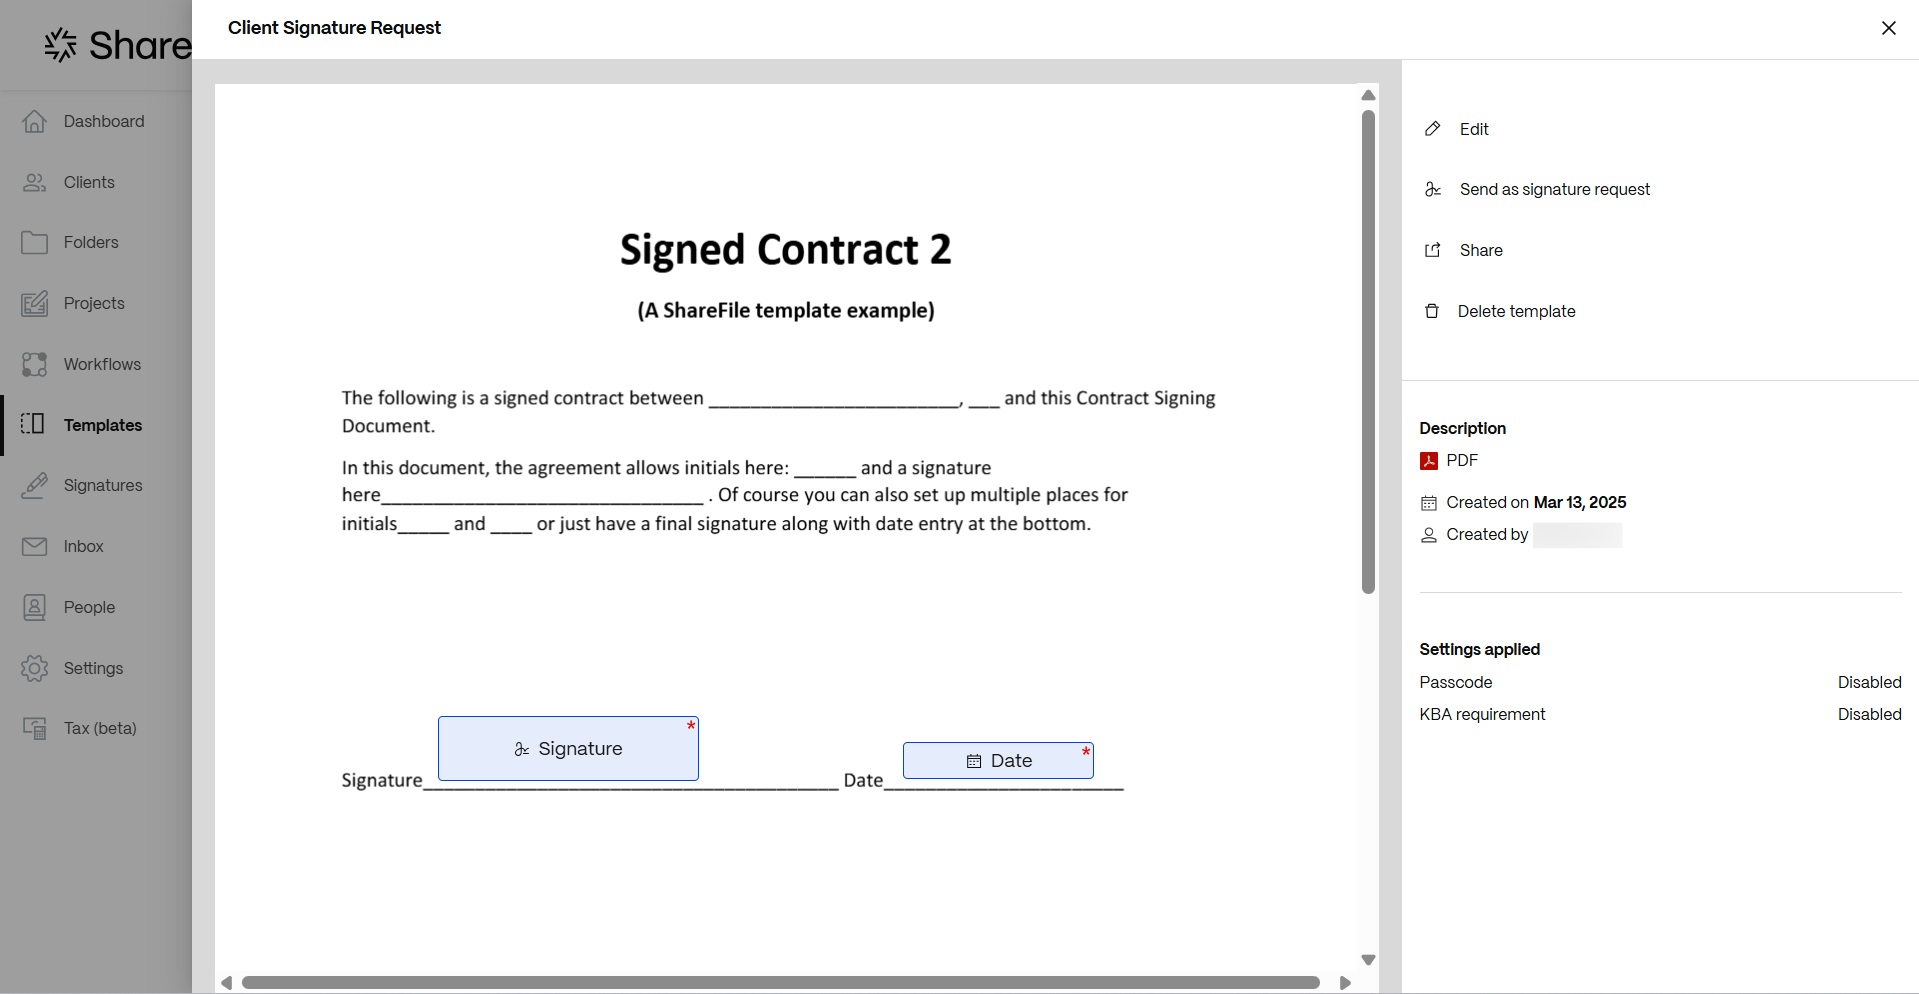
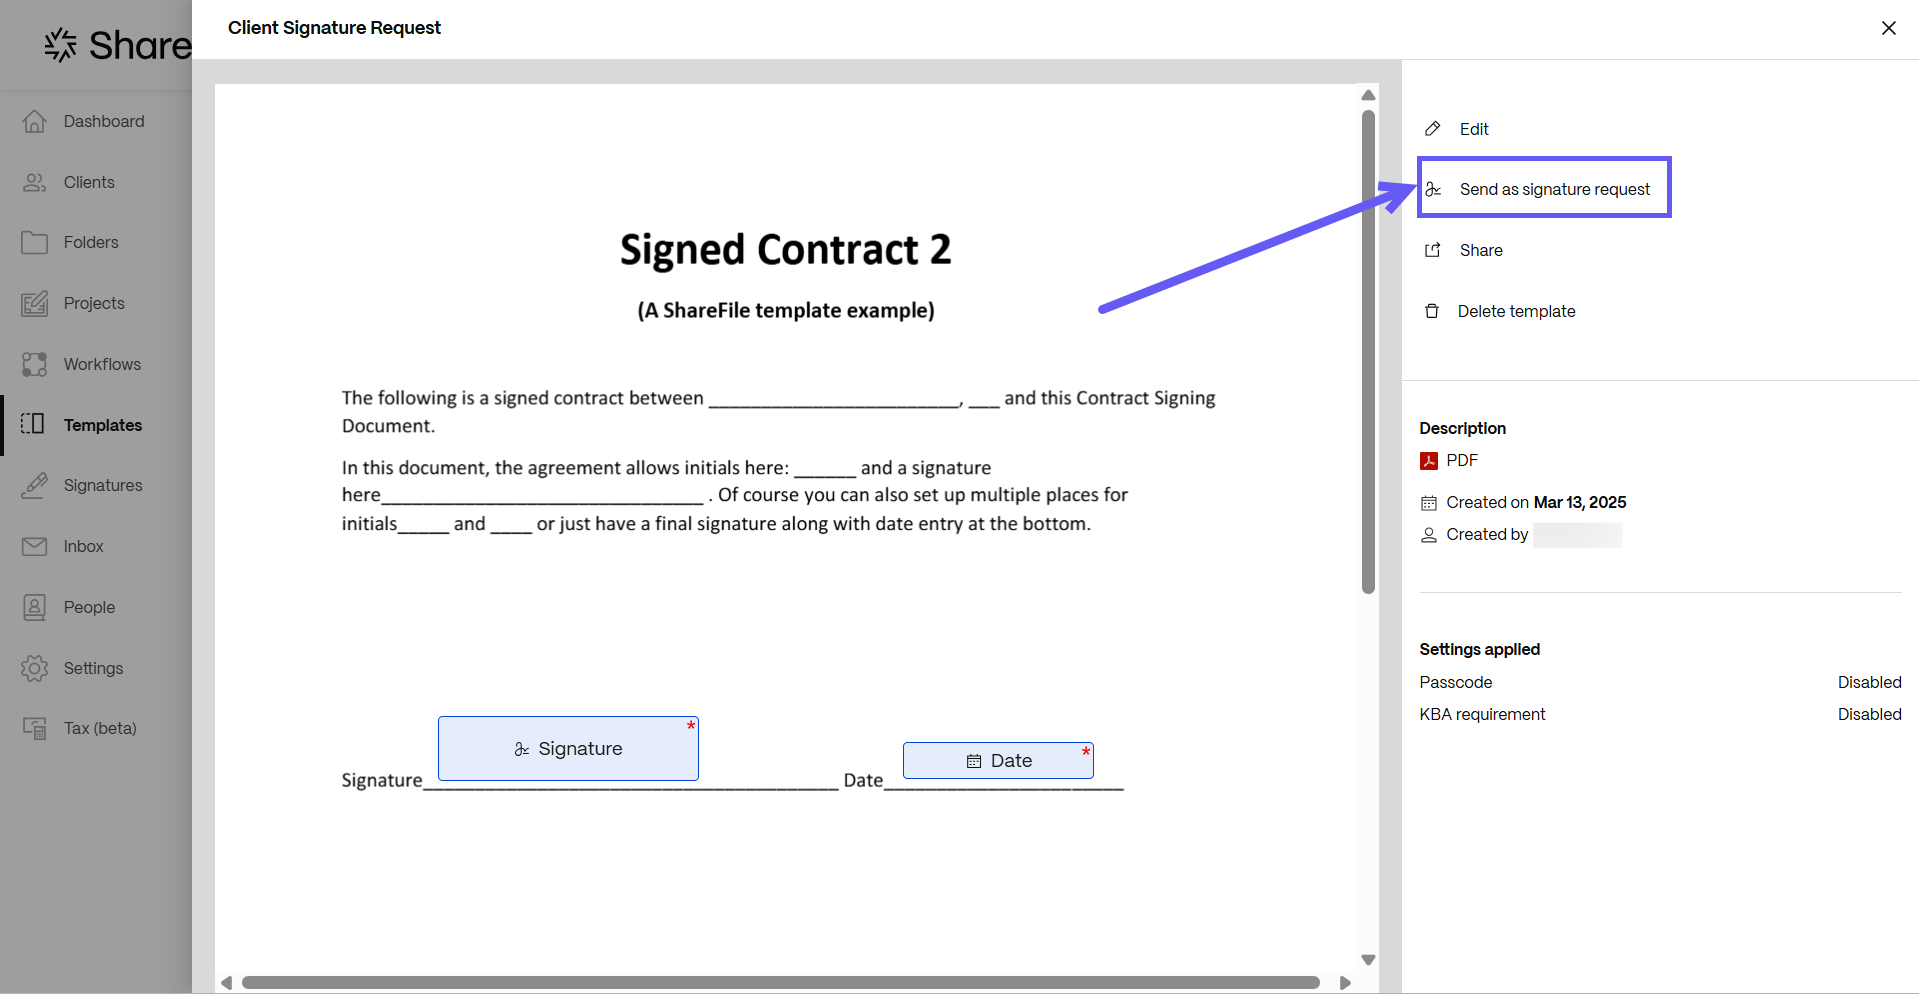
-
On the details page, select Send as signature request.
-
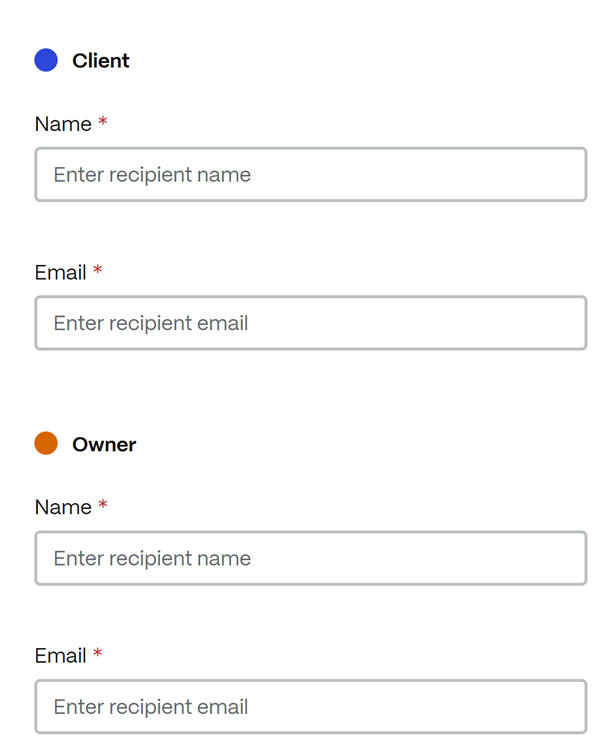
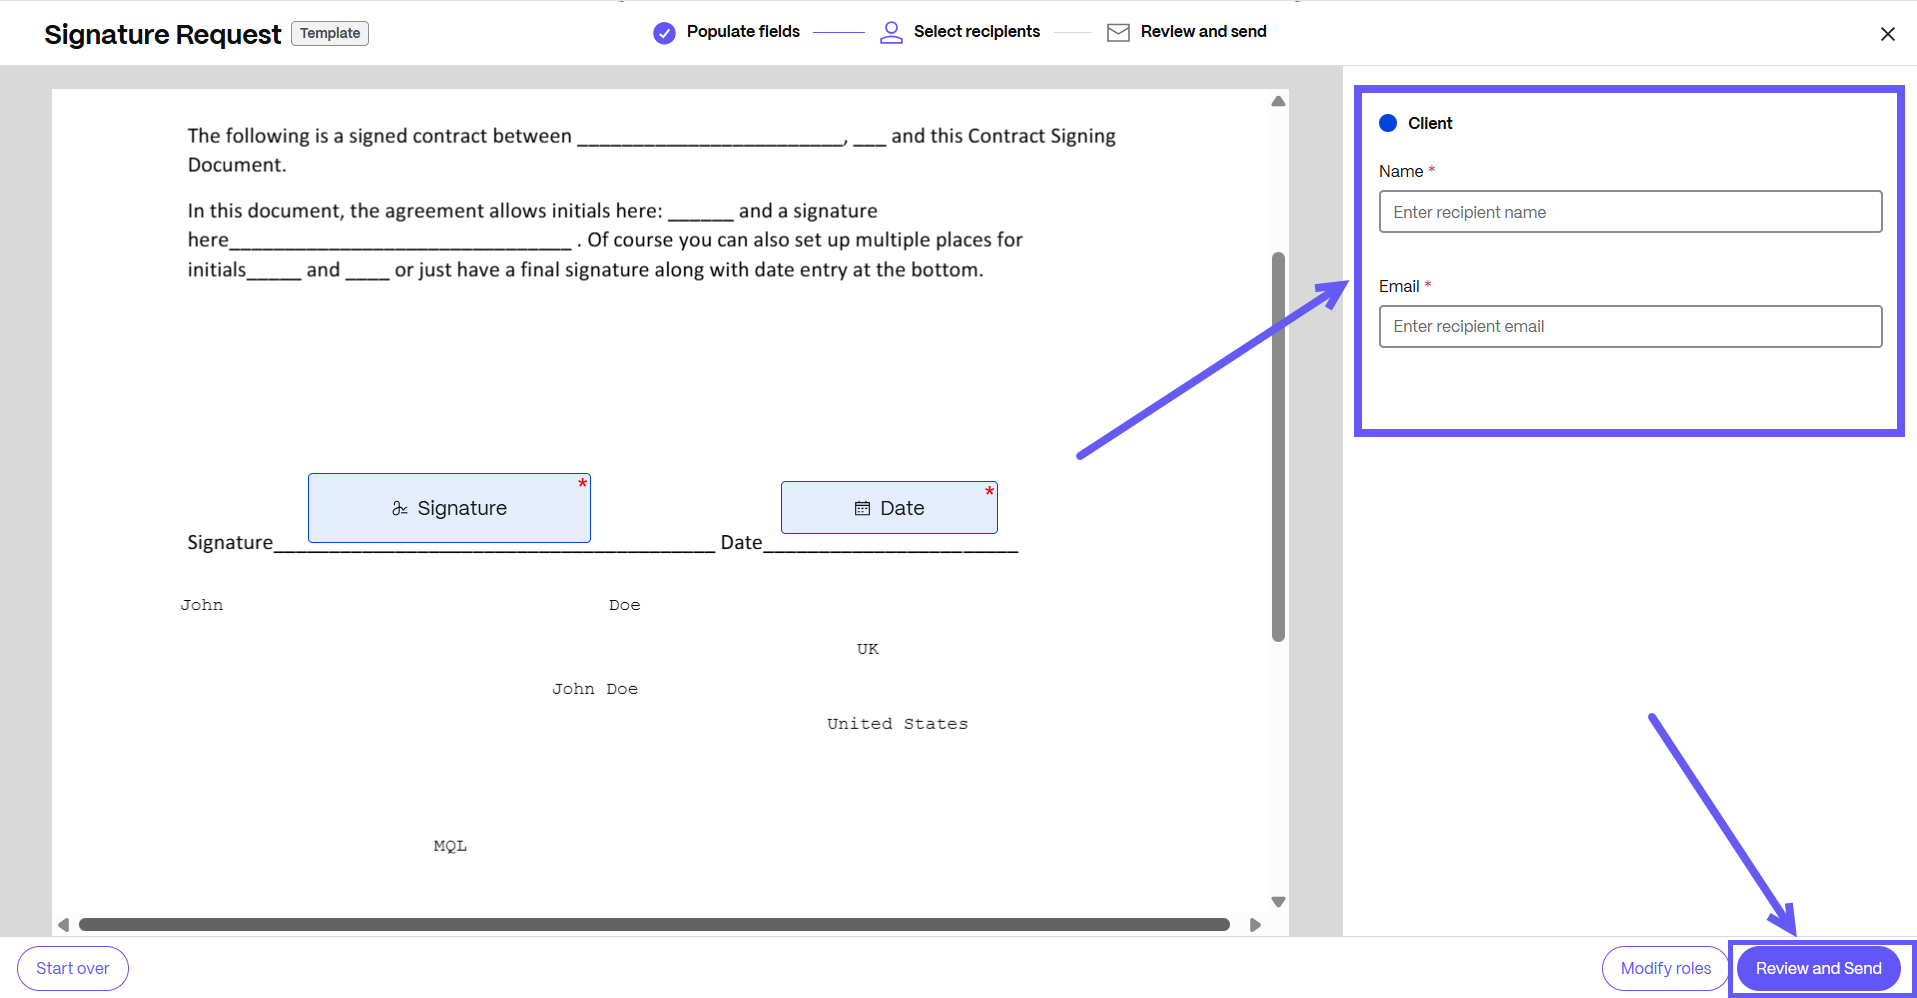
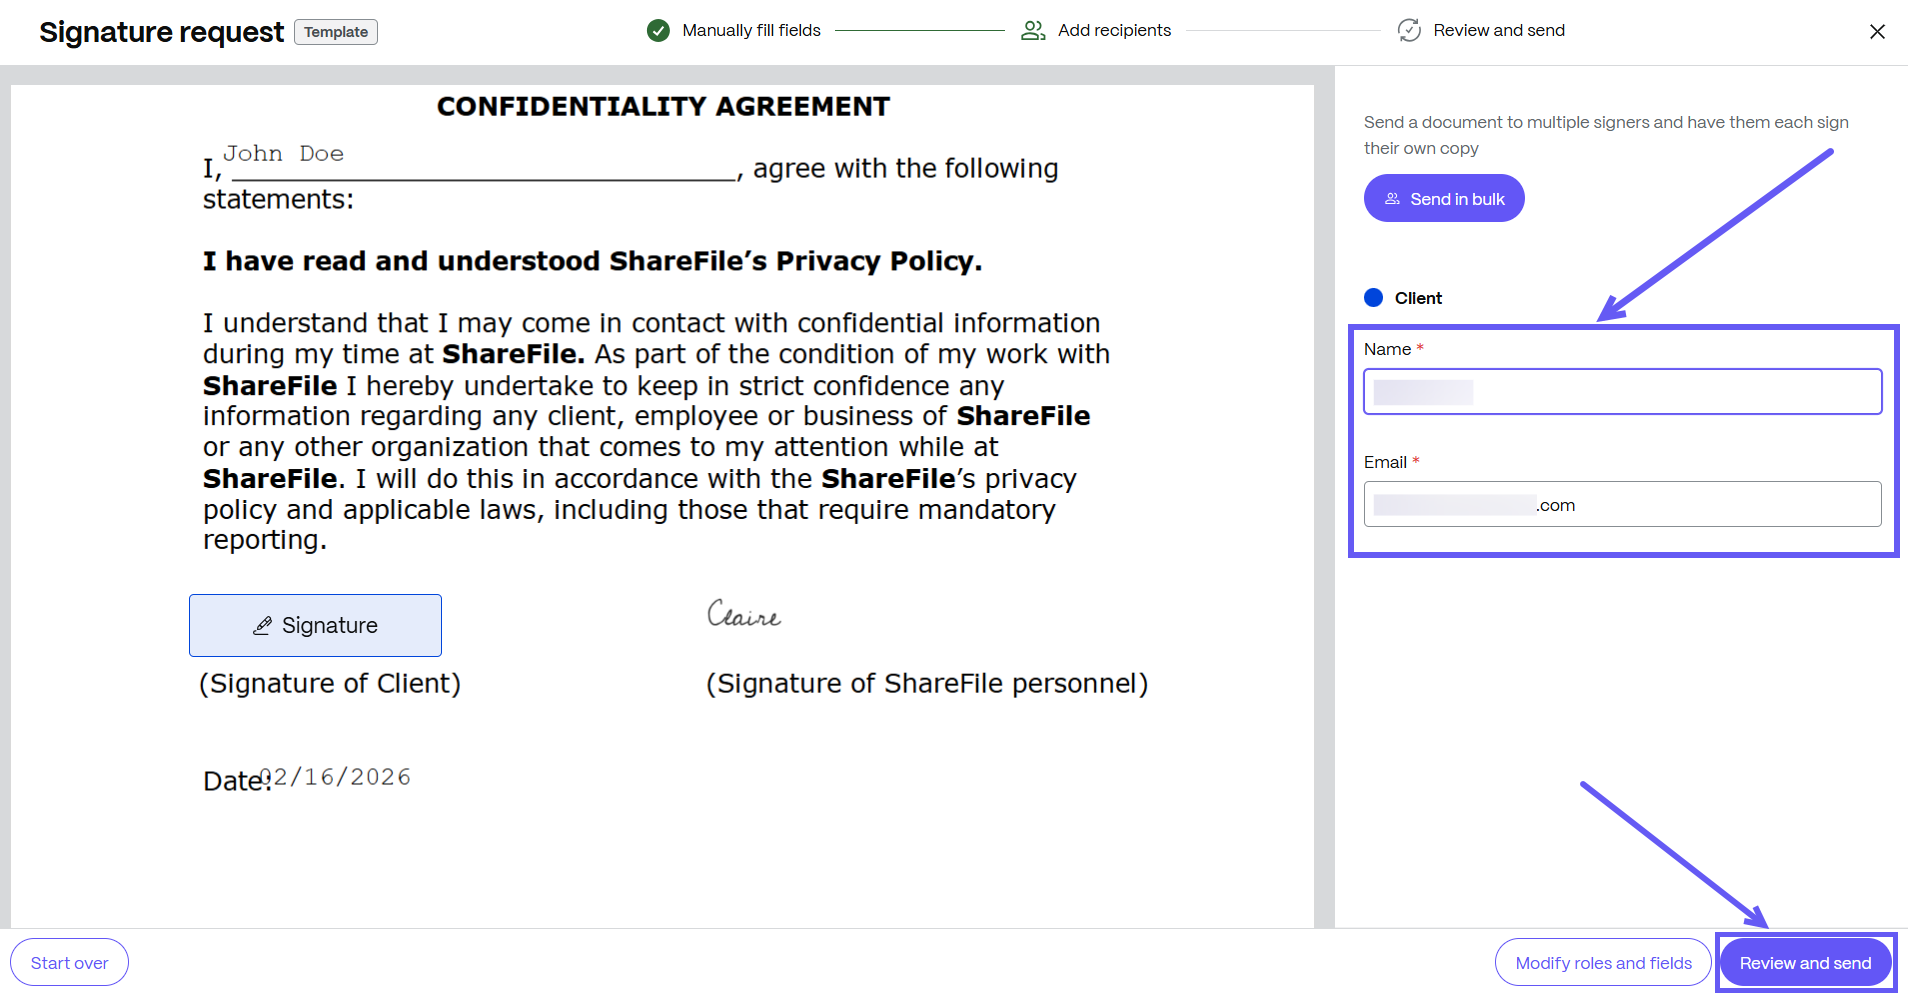
Enter the name and email for each recipient. Select Review and Send.
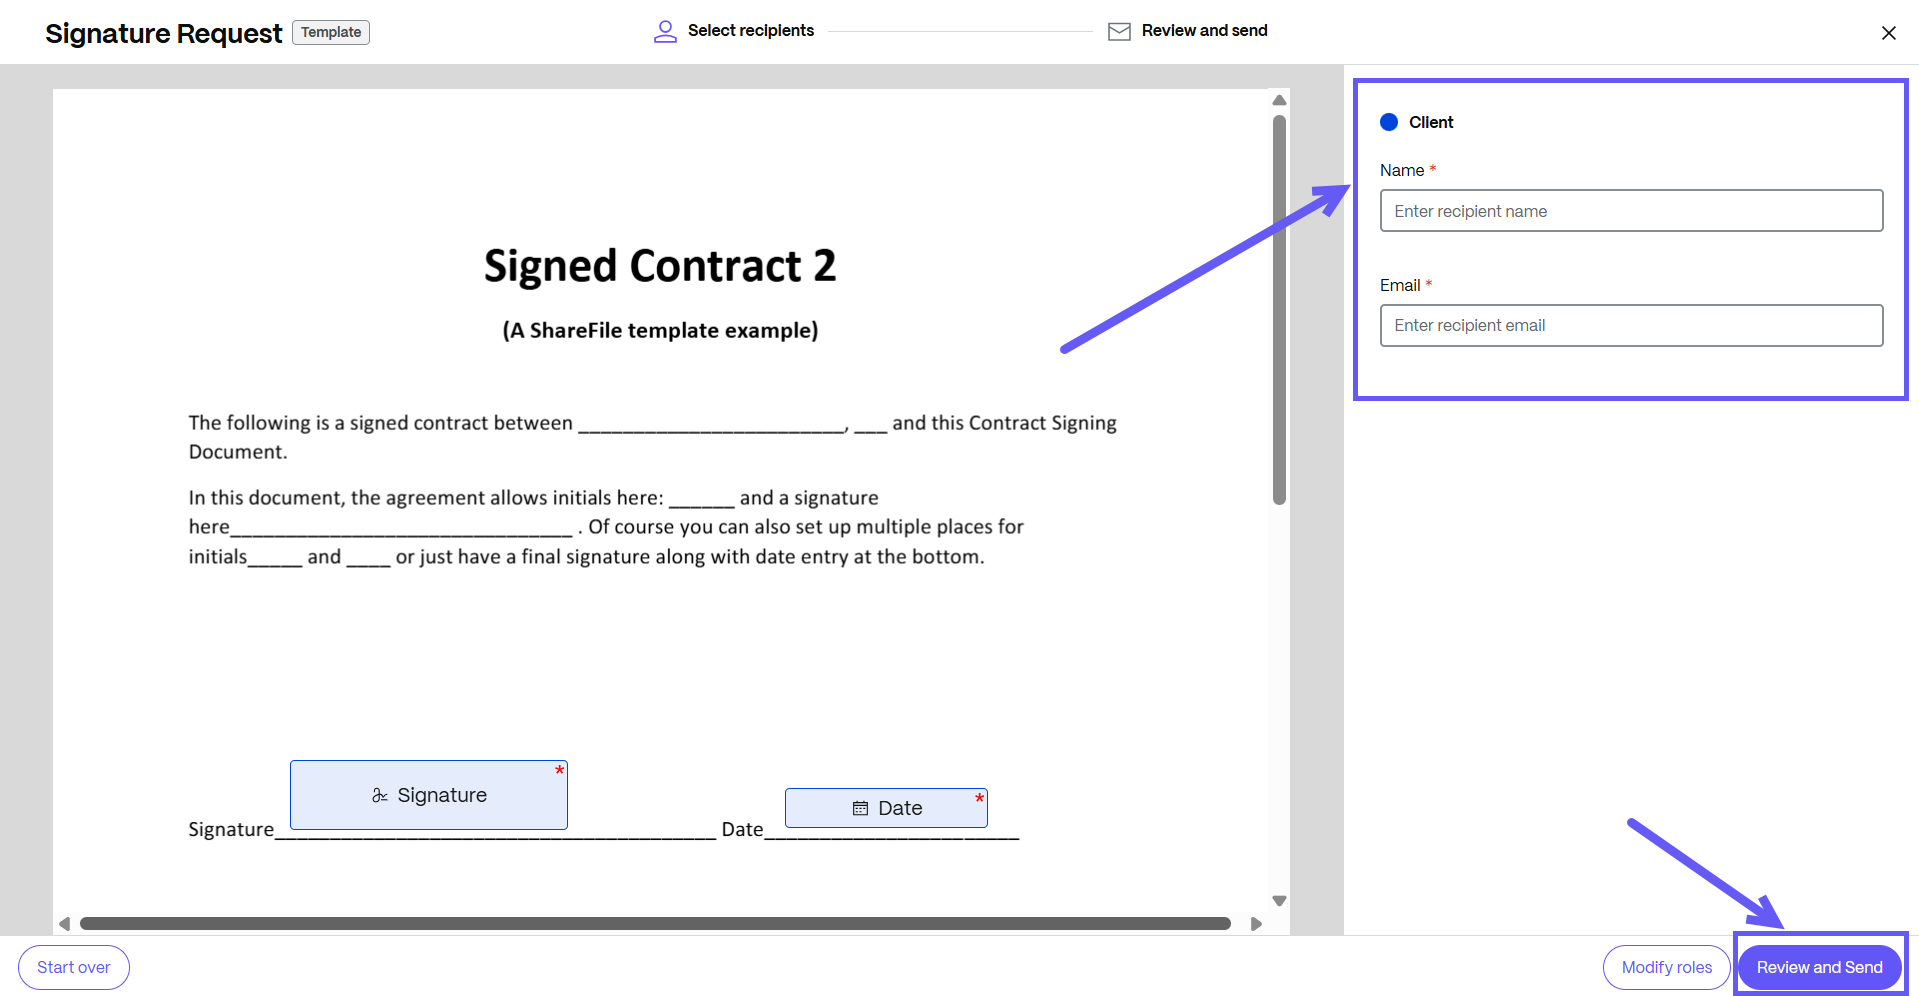
-
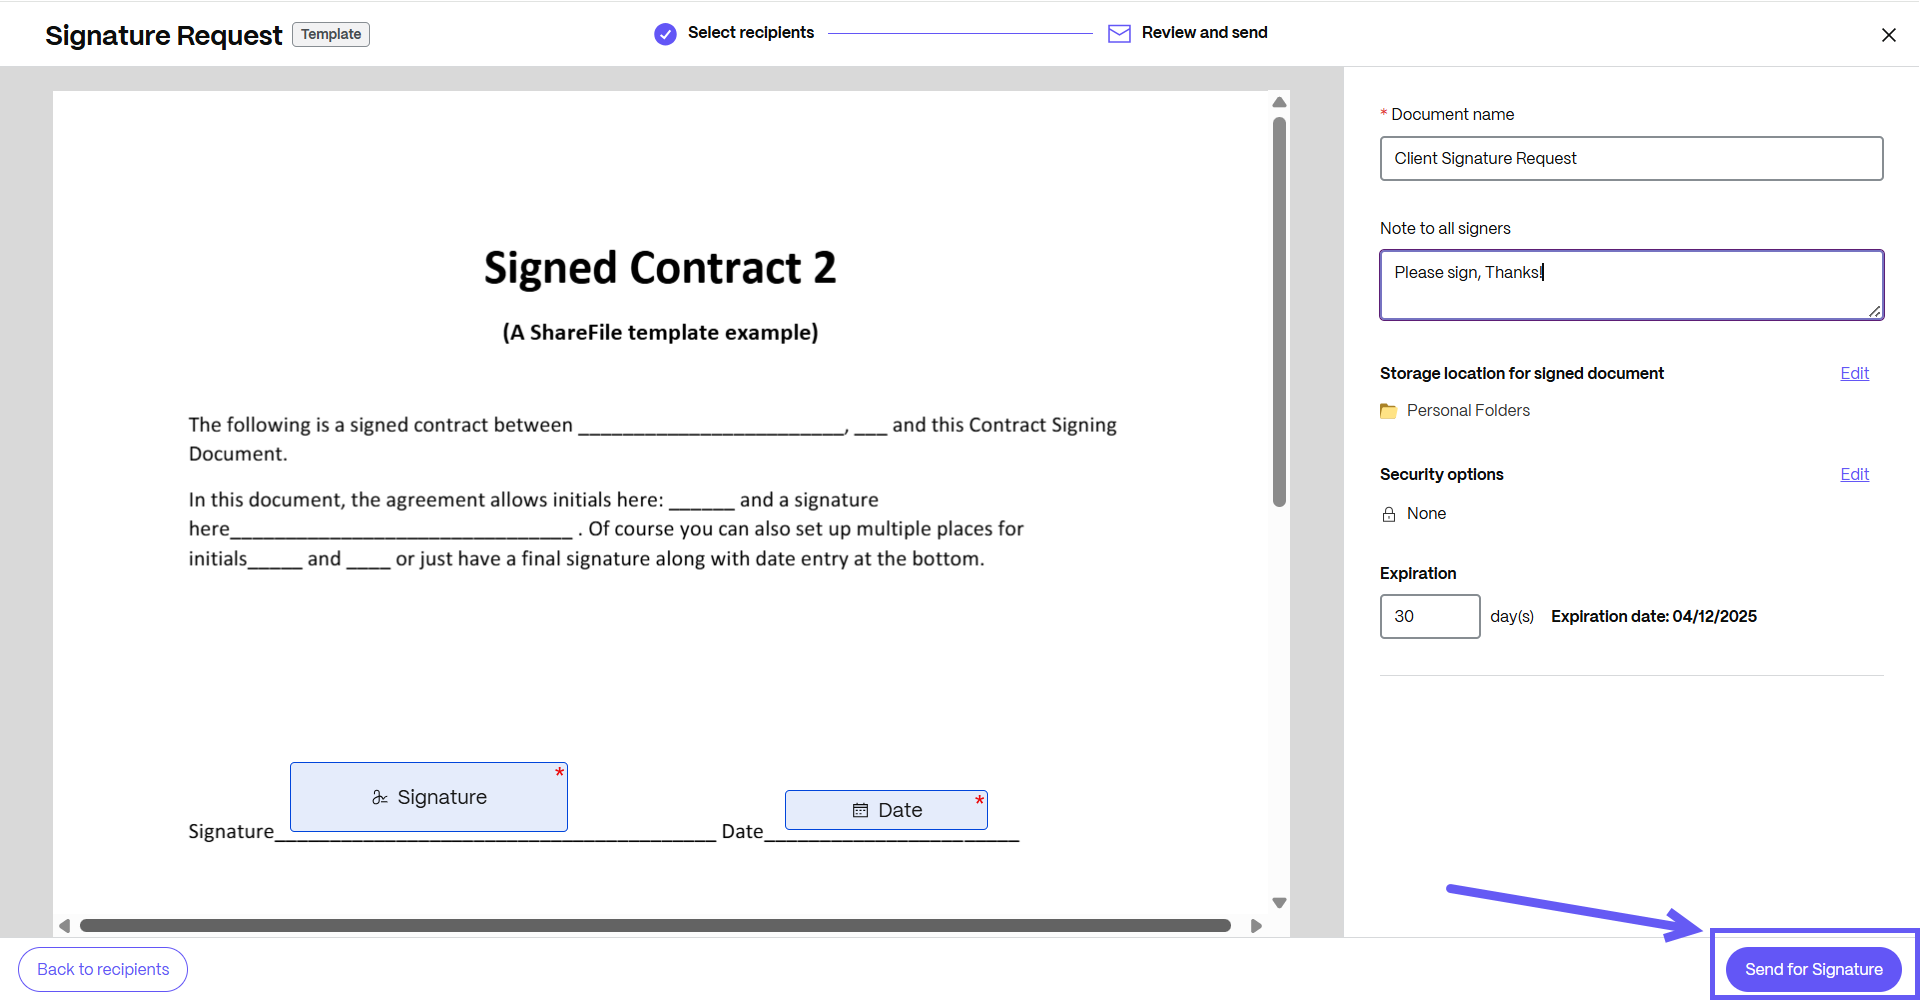
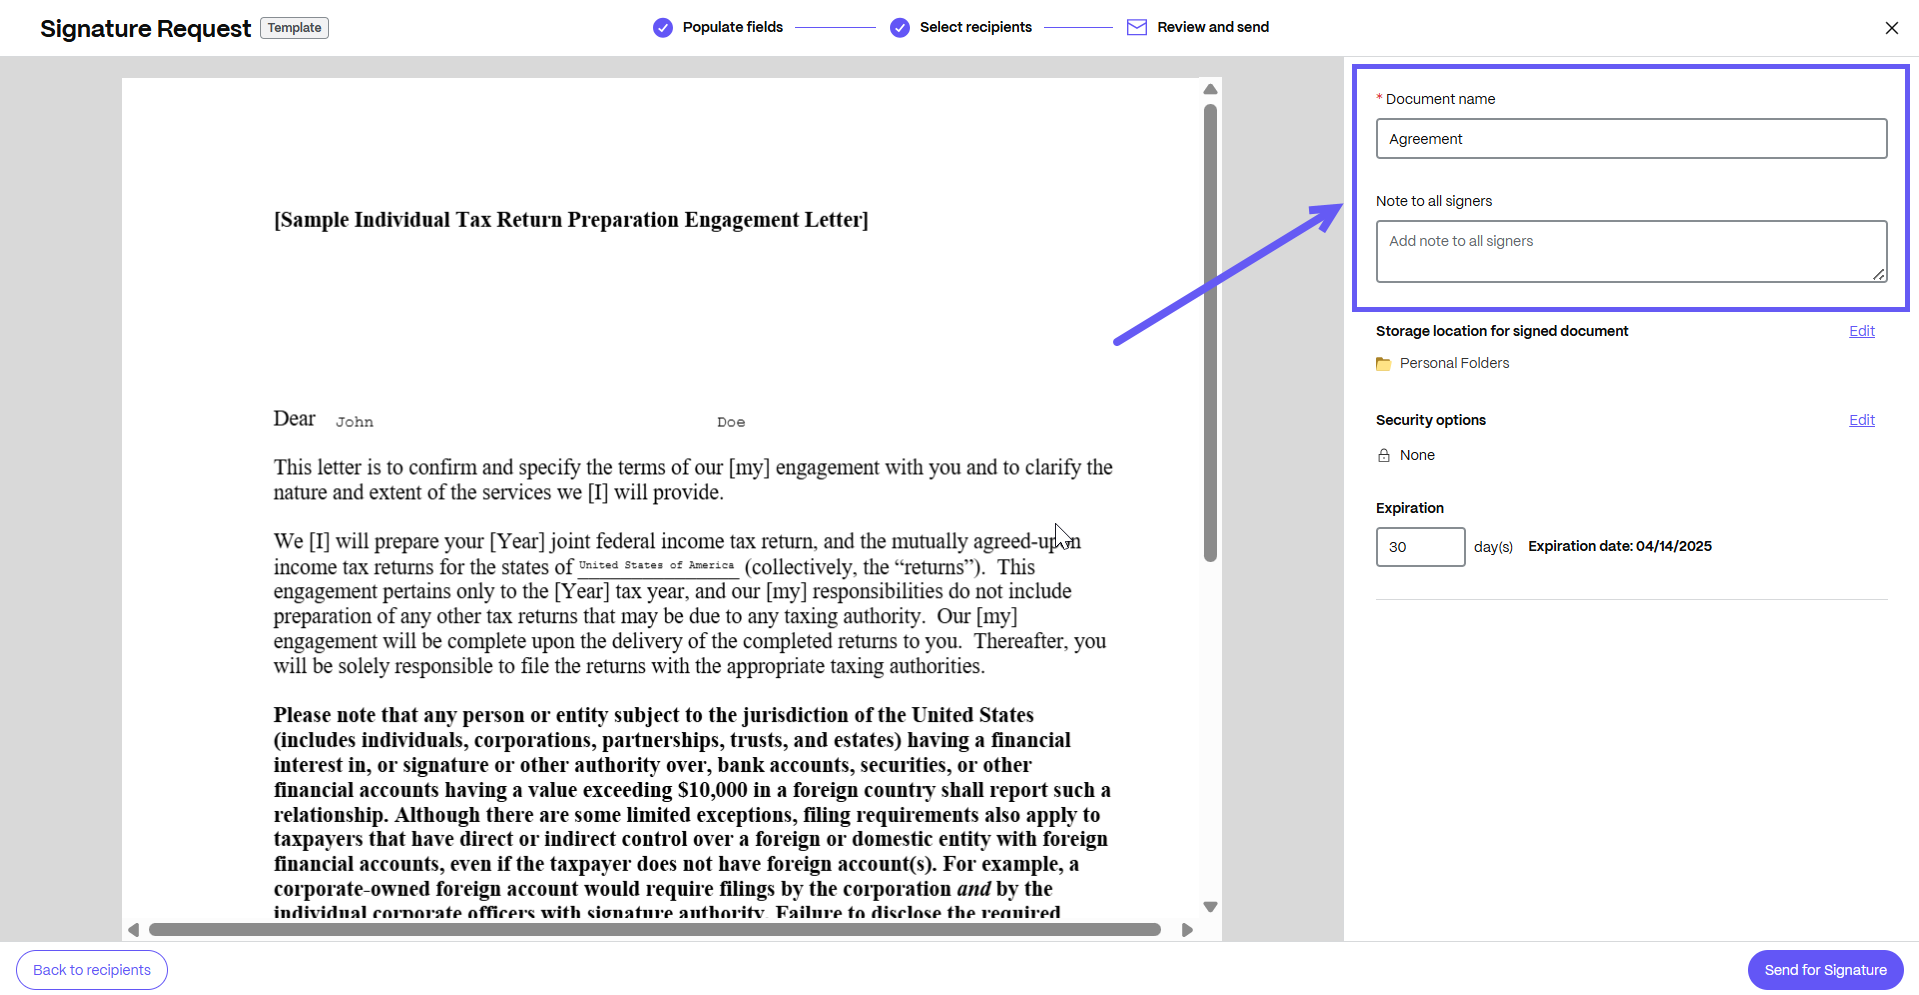
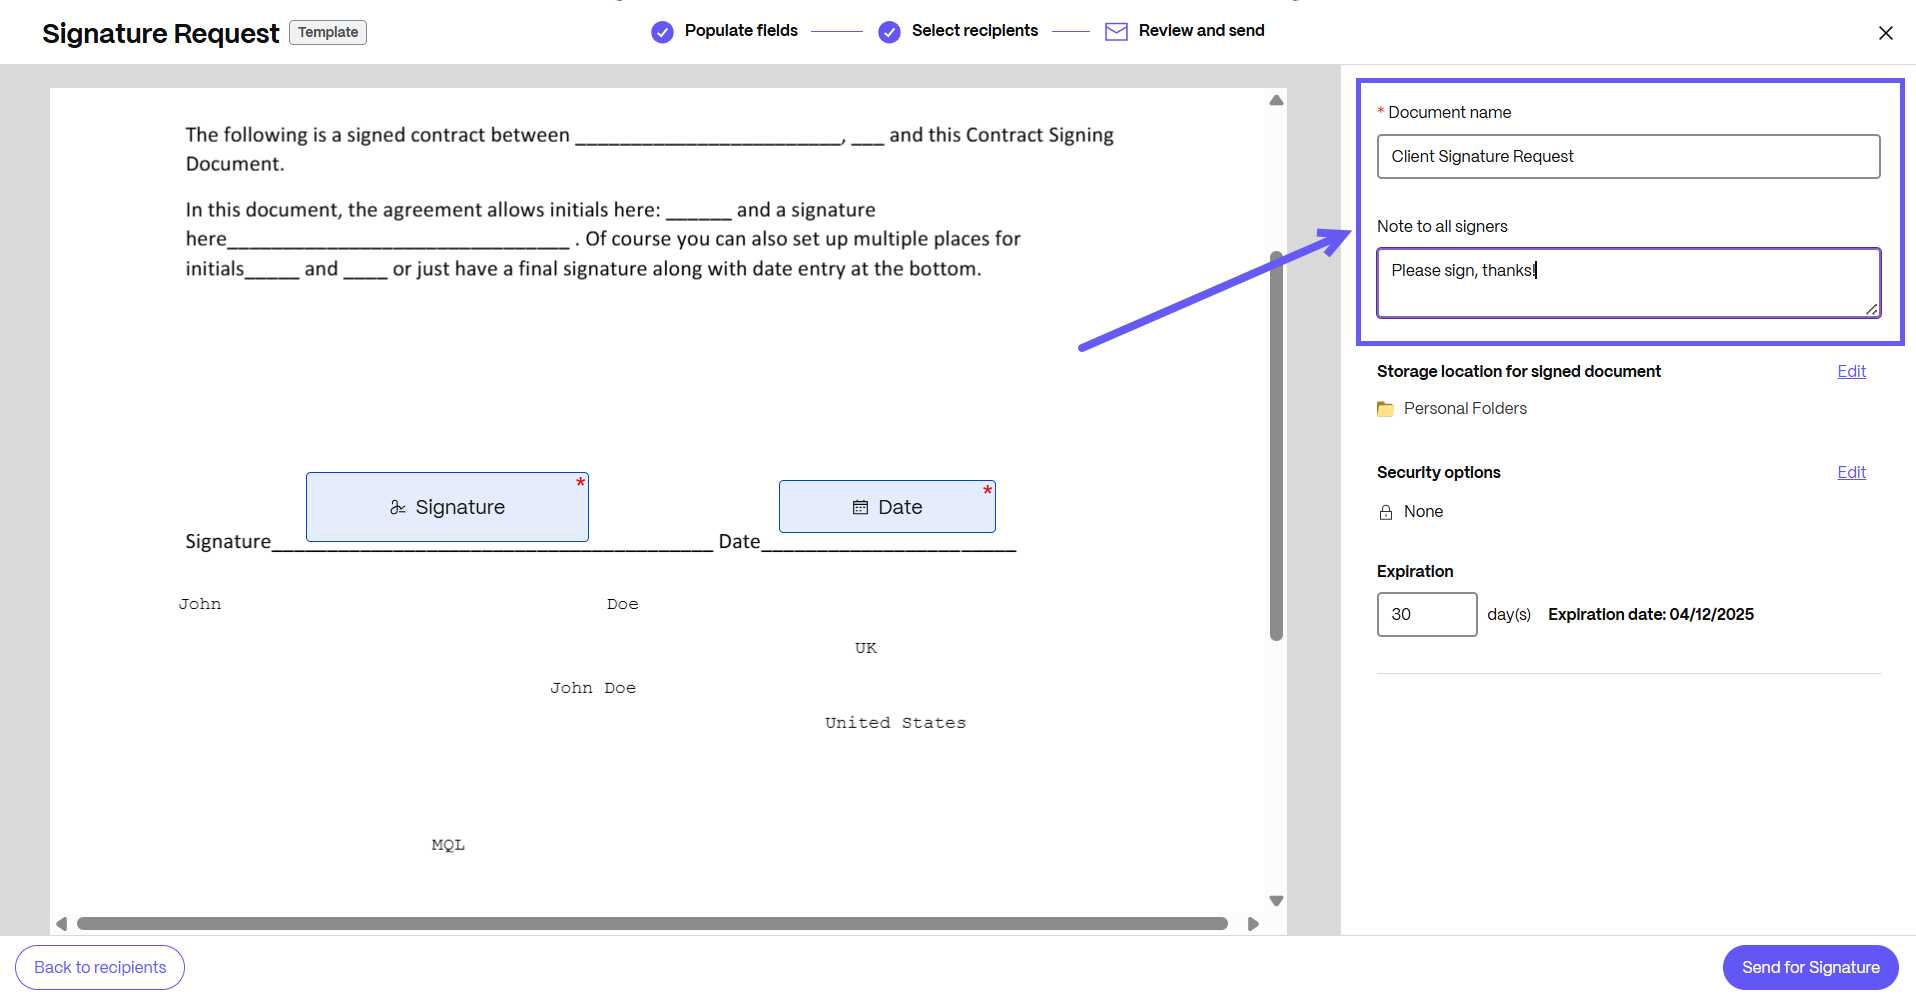
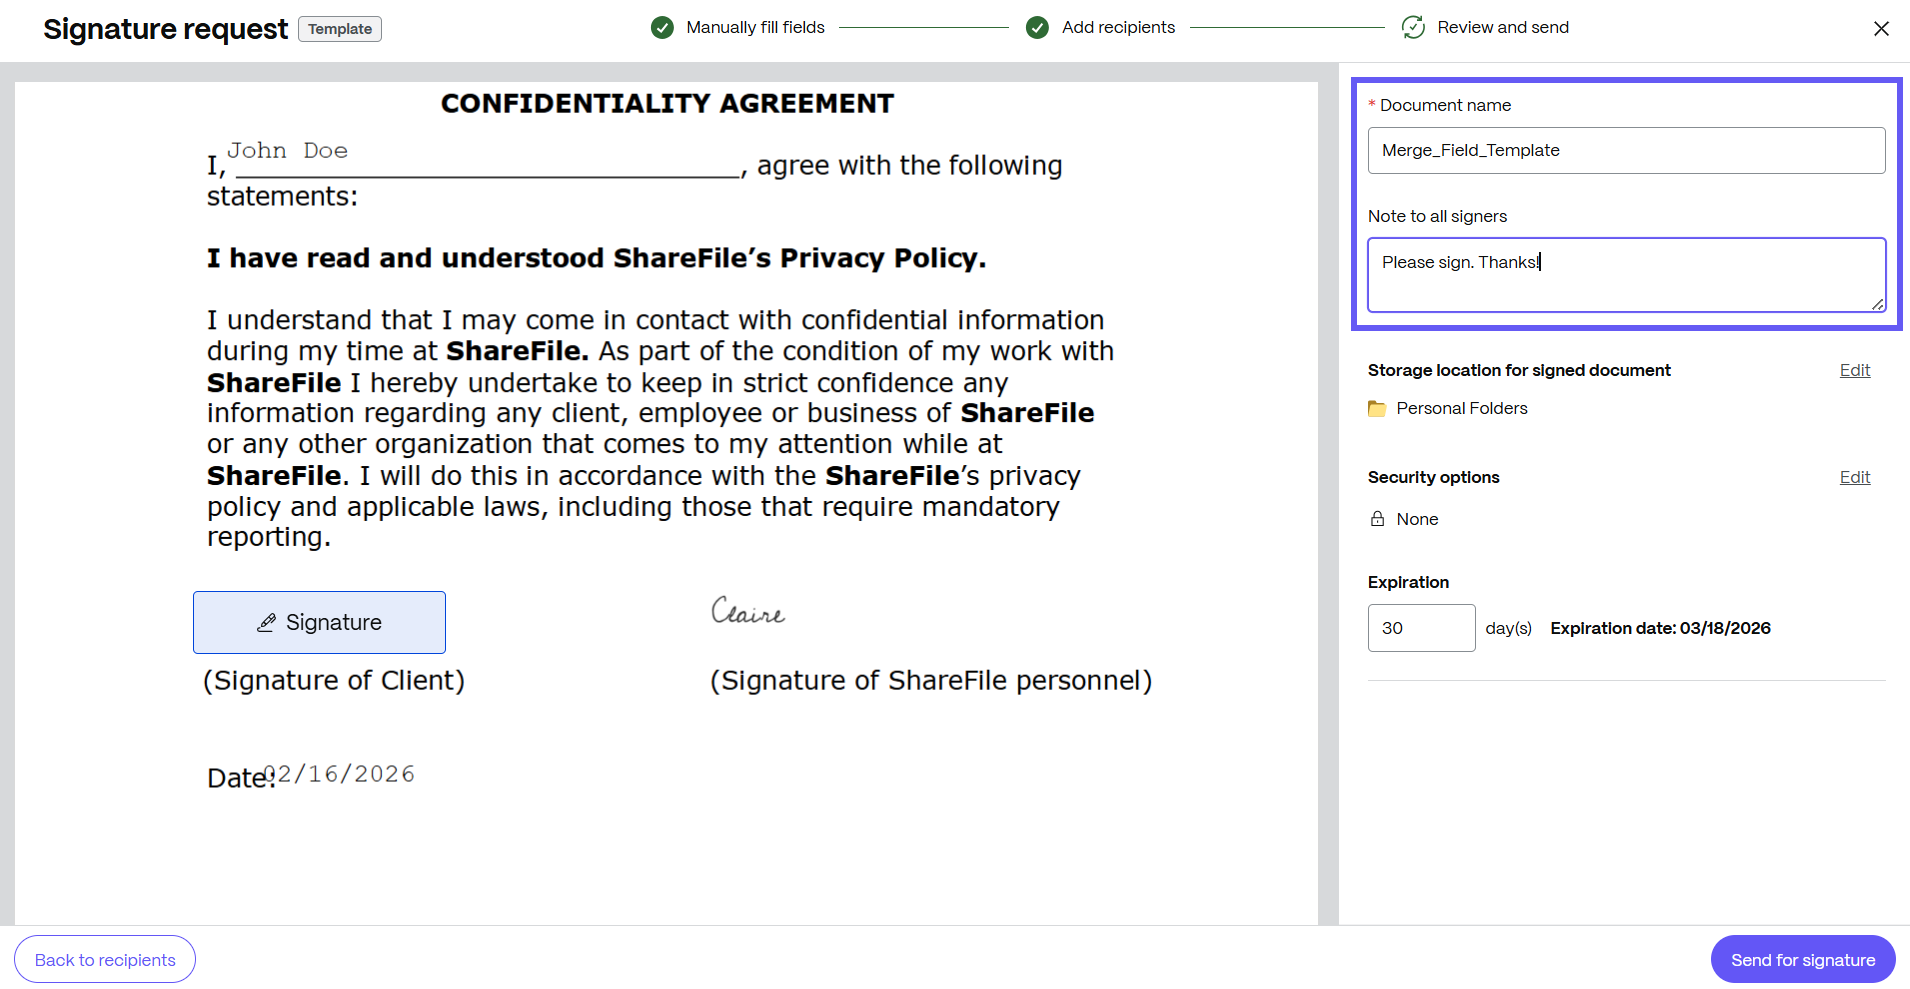
You can edit the document name and add a note that is sent to all signers.
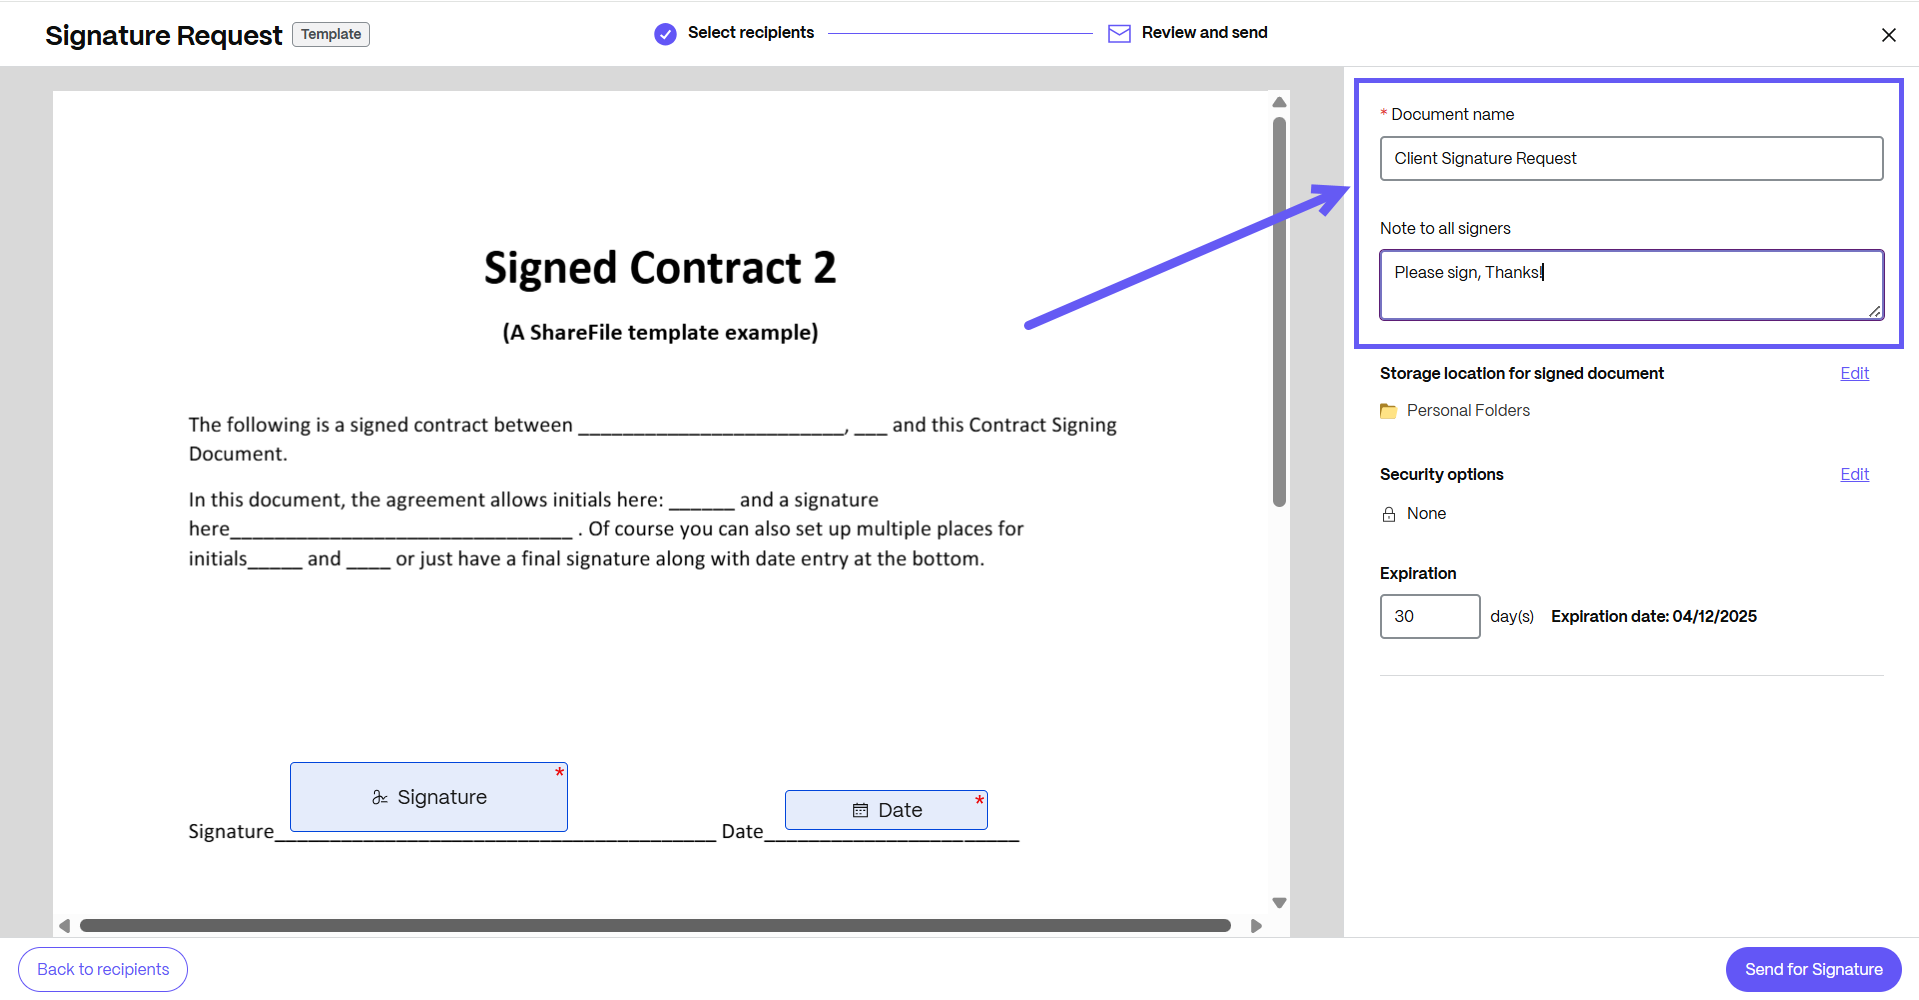
-
You can change the location for storing the signed document.

- Knowledge based authentication - requires signers to verify their identity with a knowledge-based quiz. Each signer must independently verify before signing the document.
- Passcode - requires recipients to enter a 5-digit passcode to access documents.

-
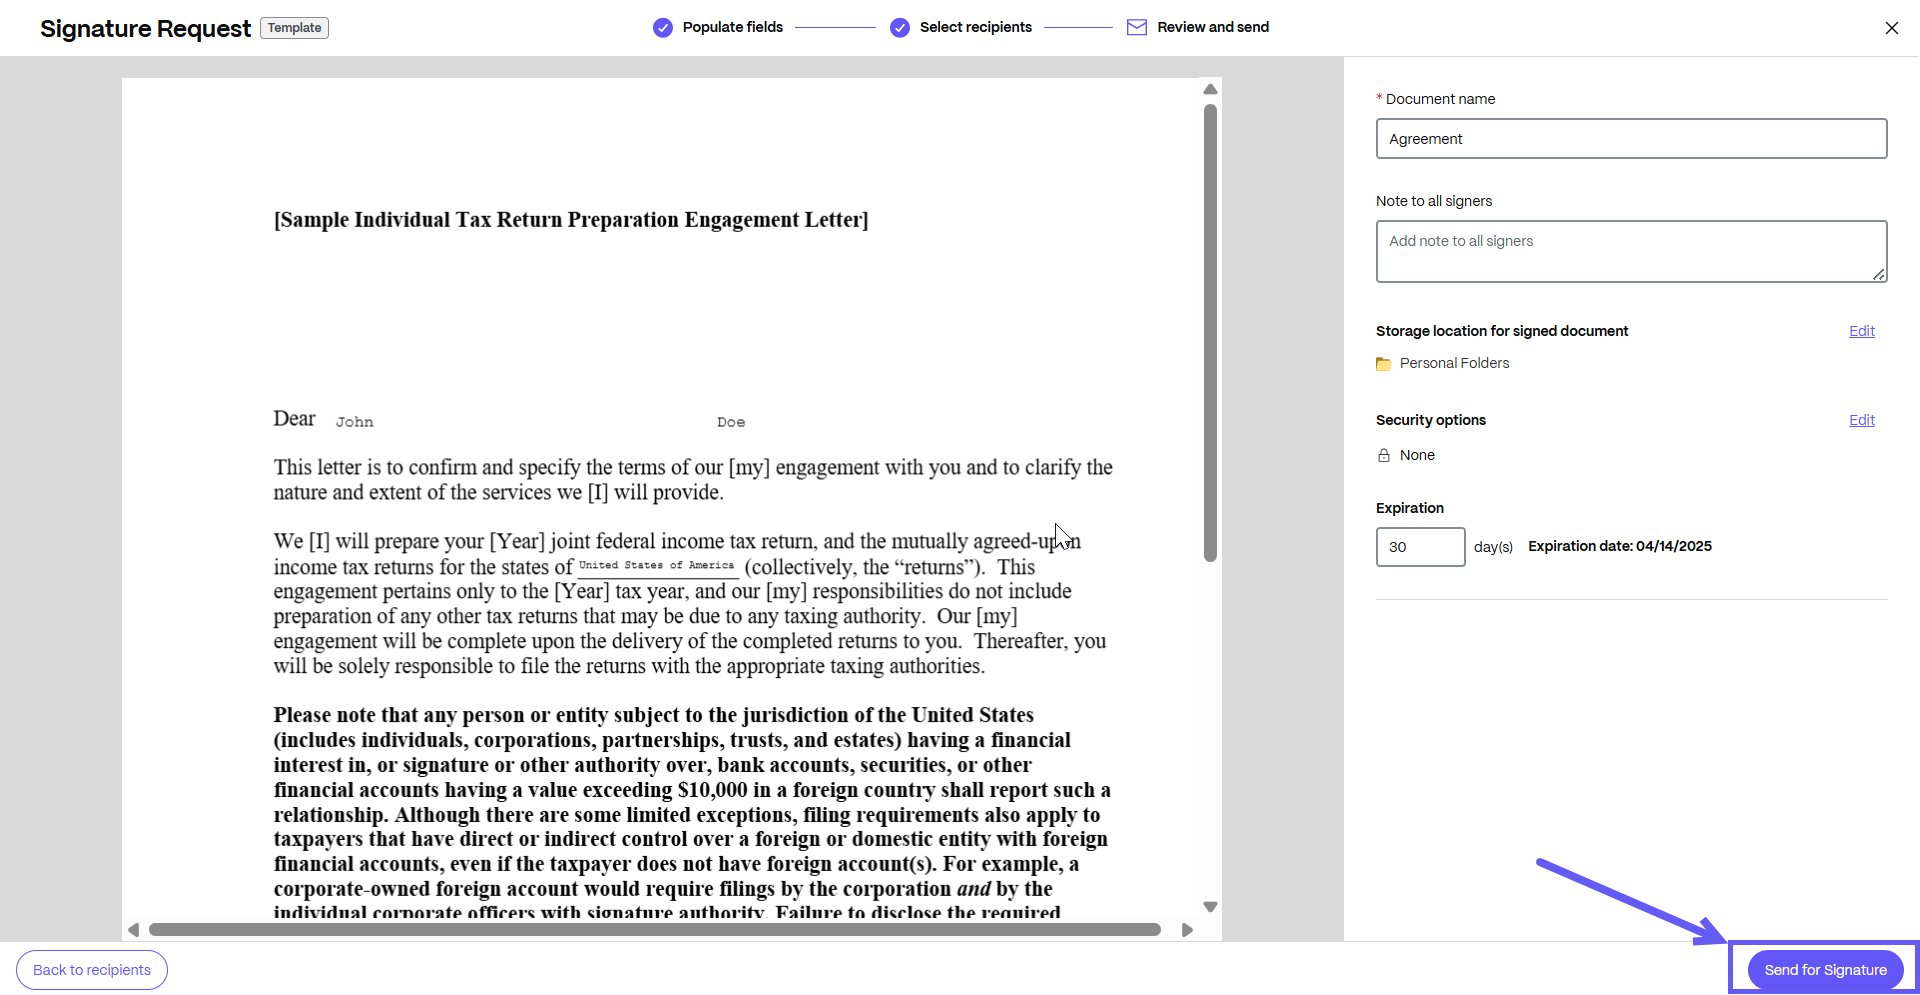
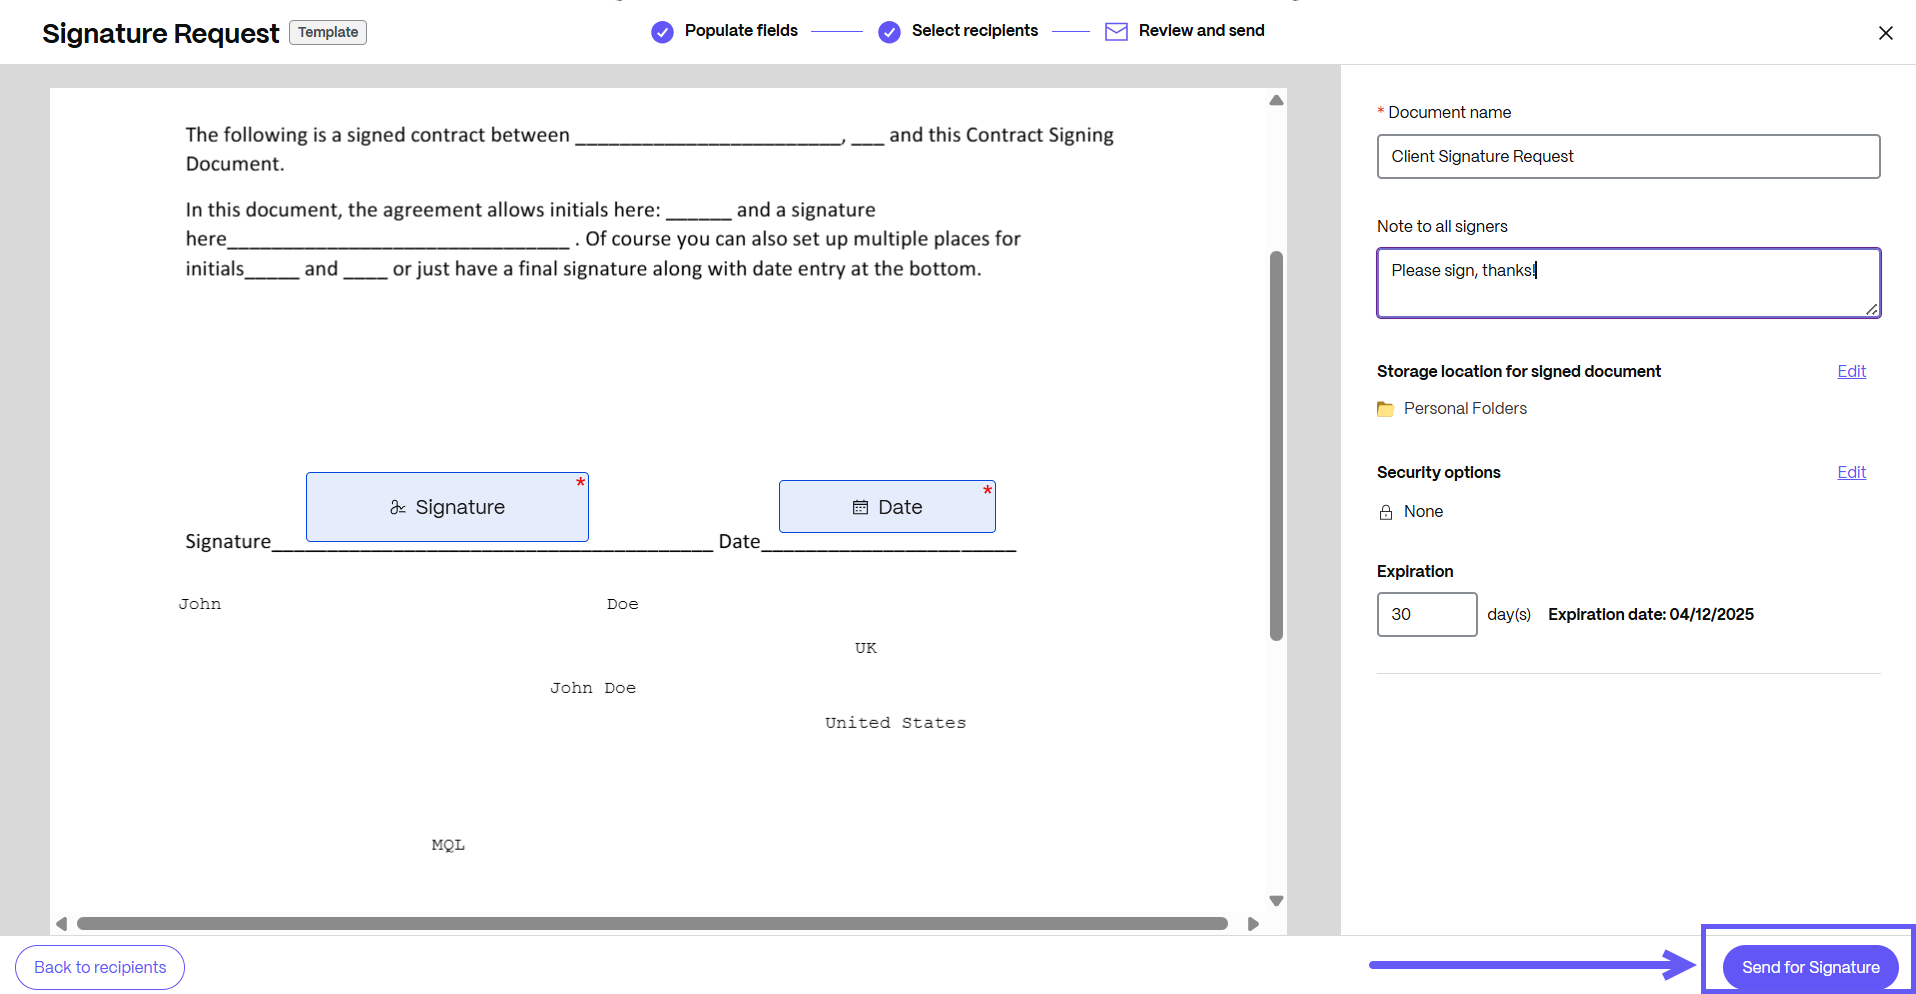
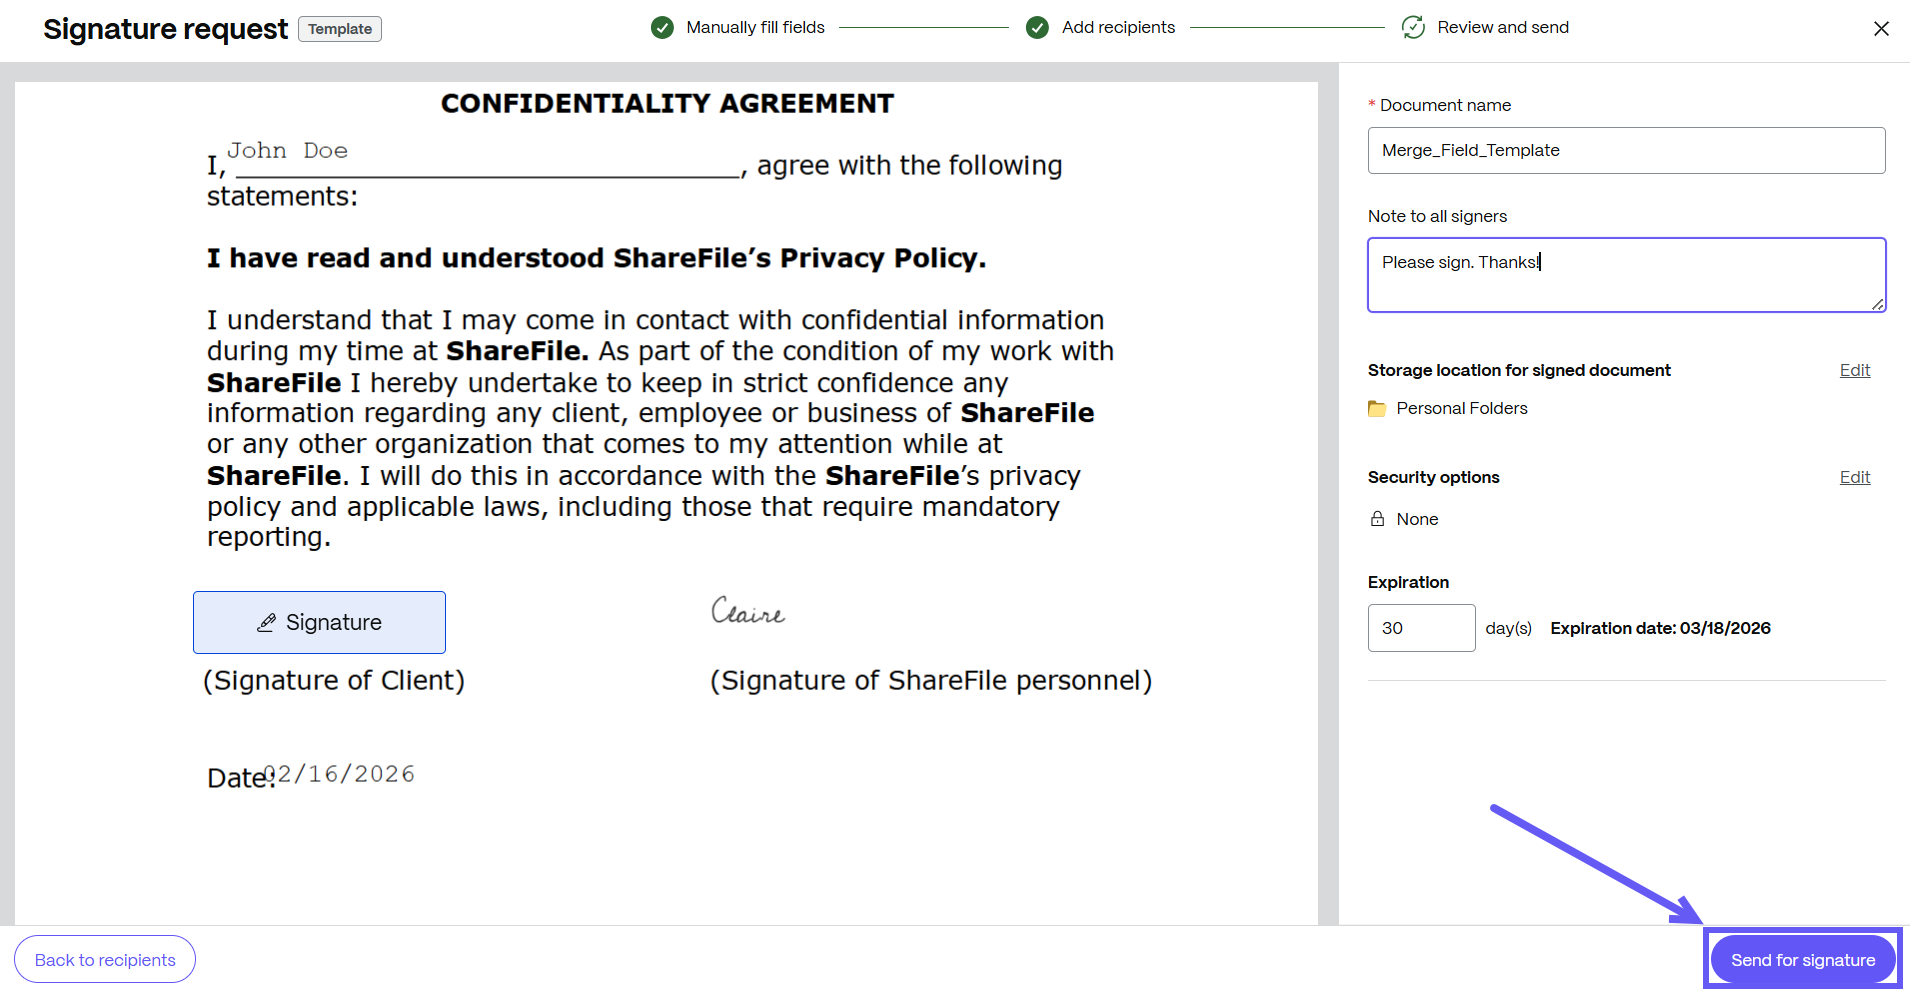
Your document is now ready to be sent for signature. Select Send for Signature.
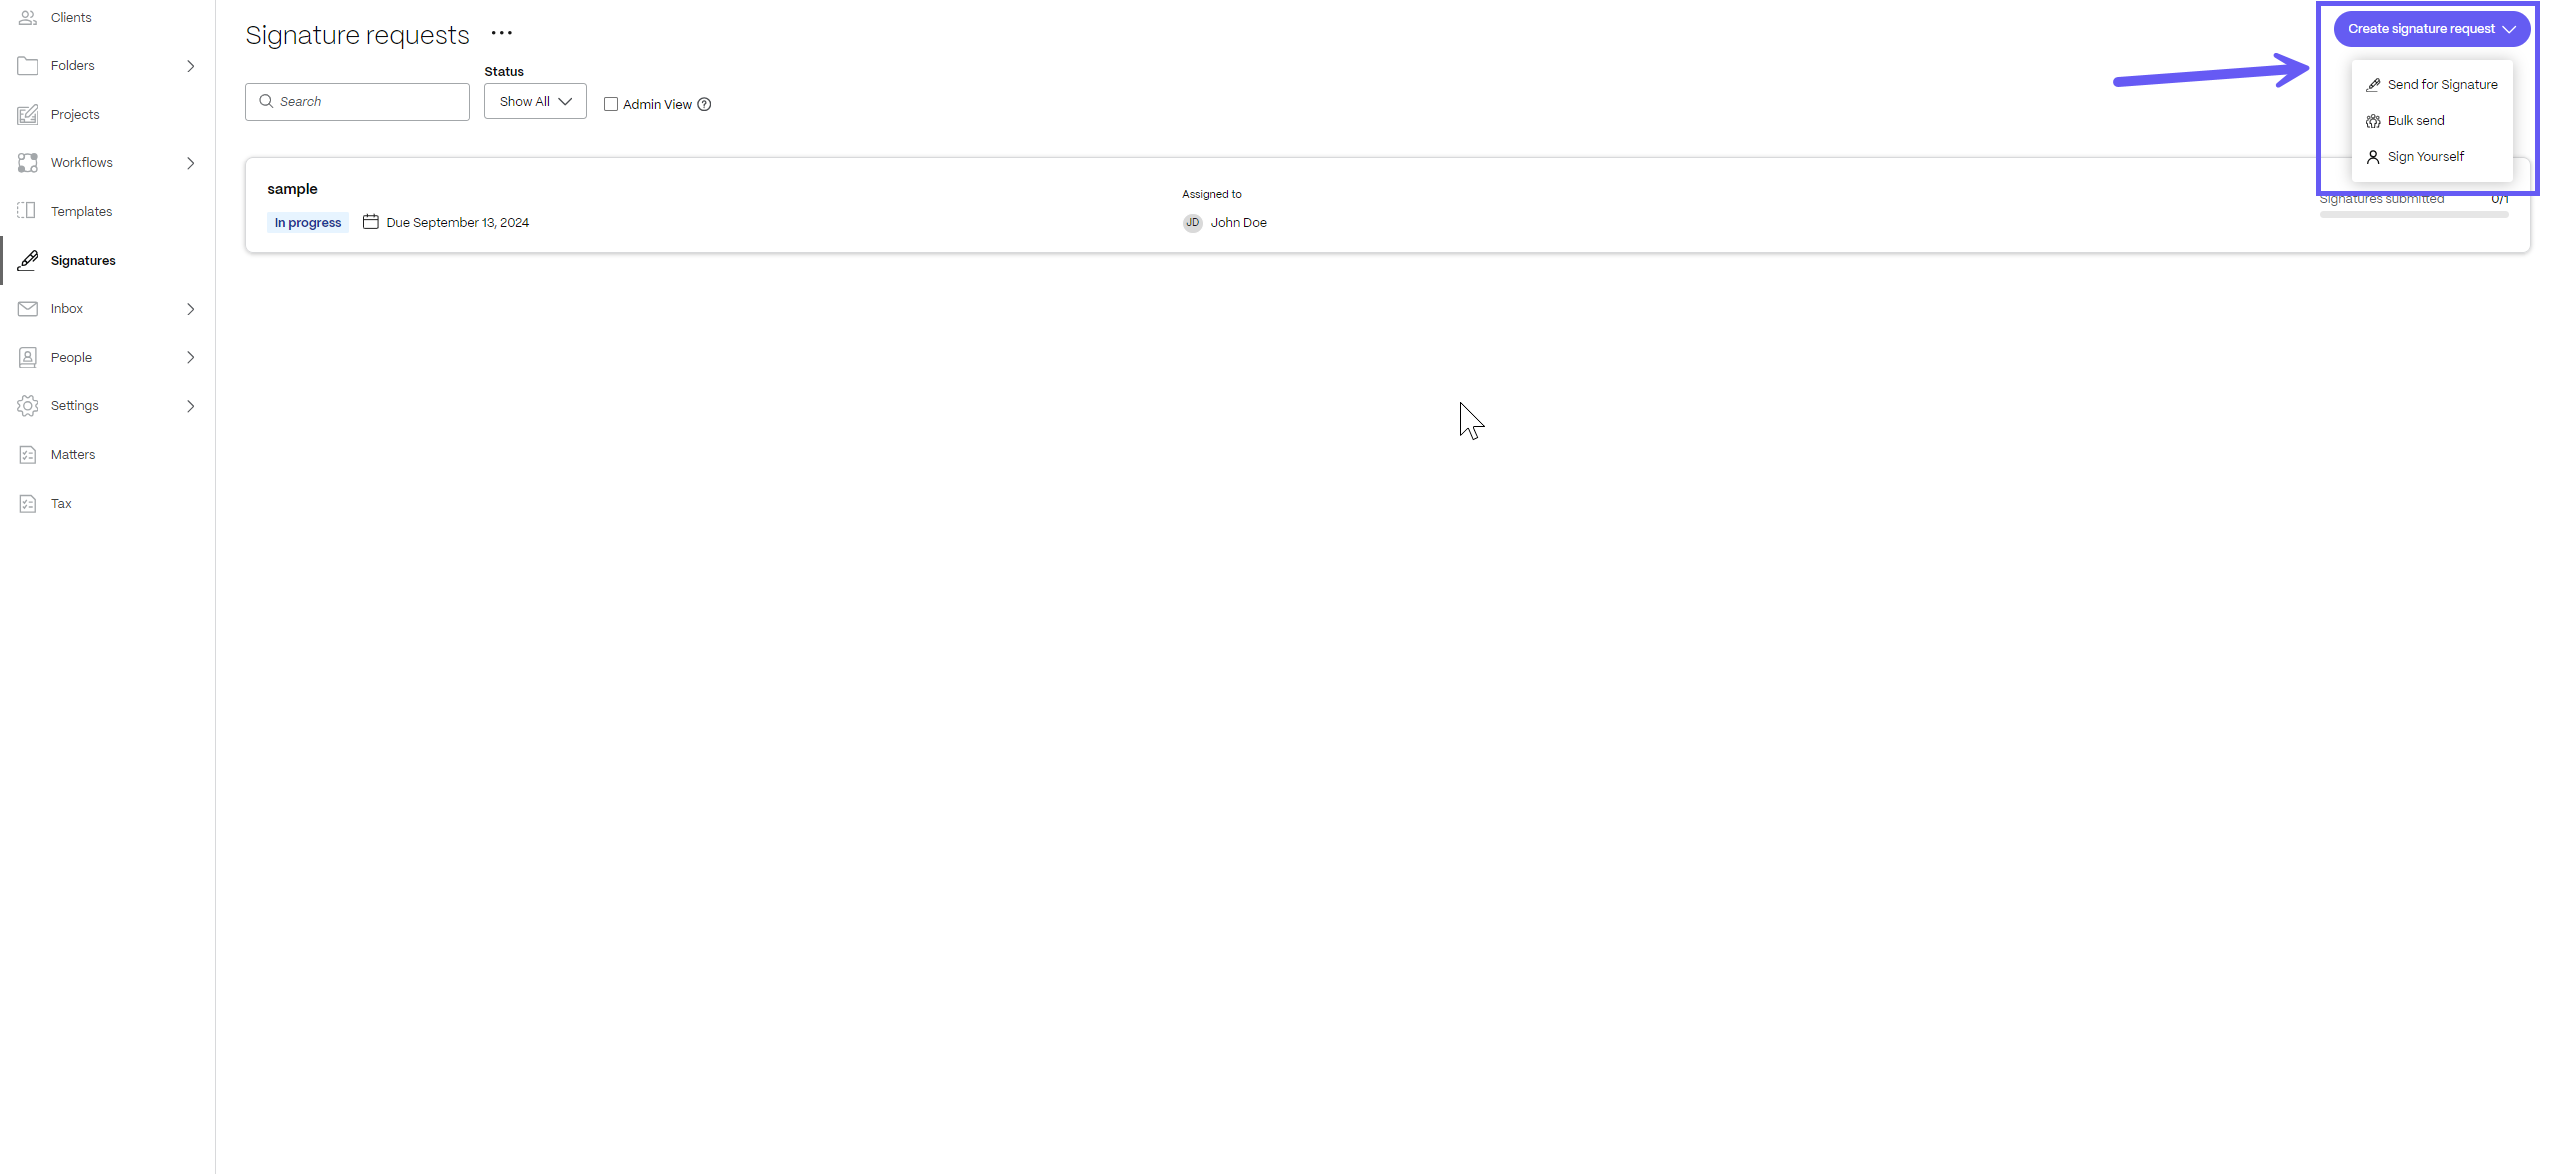
From the Signatures menu in the left navigation panel on Home Page
You can also send a document template for signature requests in ShareFile from the Signatures tab on the left pane of the SF Dashboard as shown below:
On the top right of the screen, select Create signature request > Send for Signature to go to the signature request screen.
From the Details Page of a PDF Document Template
-
In ShareFile, navigate to Templates.
-
Select the document template that you want to send for signature. When you click on it, the details page opens.
-
On the details page, select Send as signature request.

-
Enter the name and email for each recipient. Select Next step.
-
You can edit the document name and add a note that is sent to all signers.

-
You can change the location for storing the signed document.

-
Knowledge based authentication - requires signers to verify their identity with a knowledge-based quiz. Each signer must independently verify before signing the document.
-
Passcode - requires recipients to enter a 5-digit passcode to access documents.

-
-
Your document is now ready to be sent for signature. Select Send signature request.

Automatically fill or paste data from ShareFile and third party applications in documents
In your daily work, you might be creating repetitive documents. Repetitive documents are documents that are either the same or have very small variations.
For example, an engagement letter that is used to onboard a new client has to be personalized for every client. The client information will change with every onboarding but the general terms of engagement may remain the same.
Document templates can be used to pull in information from ShareFile or other applications like Salesforce and automatically paste it in a document. Users can customize documents without having to manually copy paste data into a document. Not only can this save time but prevent unintended copy-paste errors.
In the above example, the client information can be pulled from ShareFile’s Client user data or Salesforce Leads data and automatically be pasted into the engagement letter which you can send out for signature in less than 15 seconds!
Document templates can be configured to pull in values from the following sources:
| Source | Type |
|---|---|
| ShareFile | Client users, Employee users |
| Salesforce | Leads, Account, Opportunity, Quote, Contact |
Note:
If you don’t have an integration installed, you can navigate to Apps > Third Party Integrations to install a new integration.
Steps to create a template that can automatically fill or paste data from different applications
-
In ShareFile, navigate to Templates.
-
Select Create > Document template. The Create Template screen displays.
-
Under Signer roles, select Add a new role. Each role represents a stakeholder or a party involved in the document signature process. You can add multiple roles to a document template. For more information on Roles see Document template components.
-
If you have more than one role, you can set the signing order using the toggle. Roles can be dragged up and down to set the signing order.
-
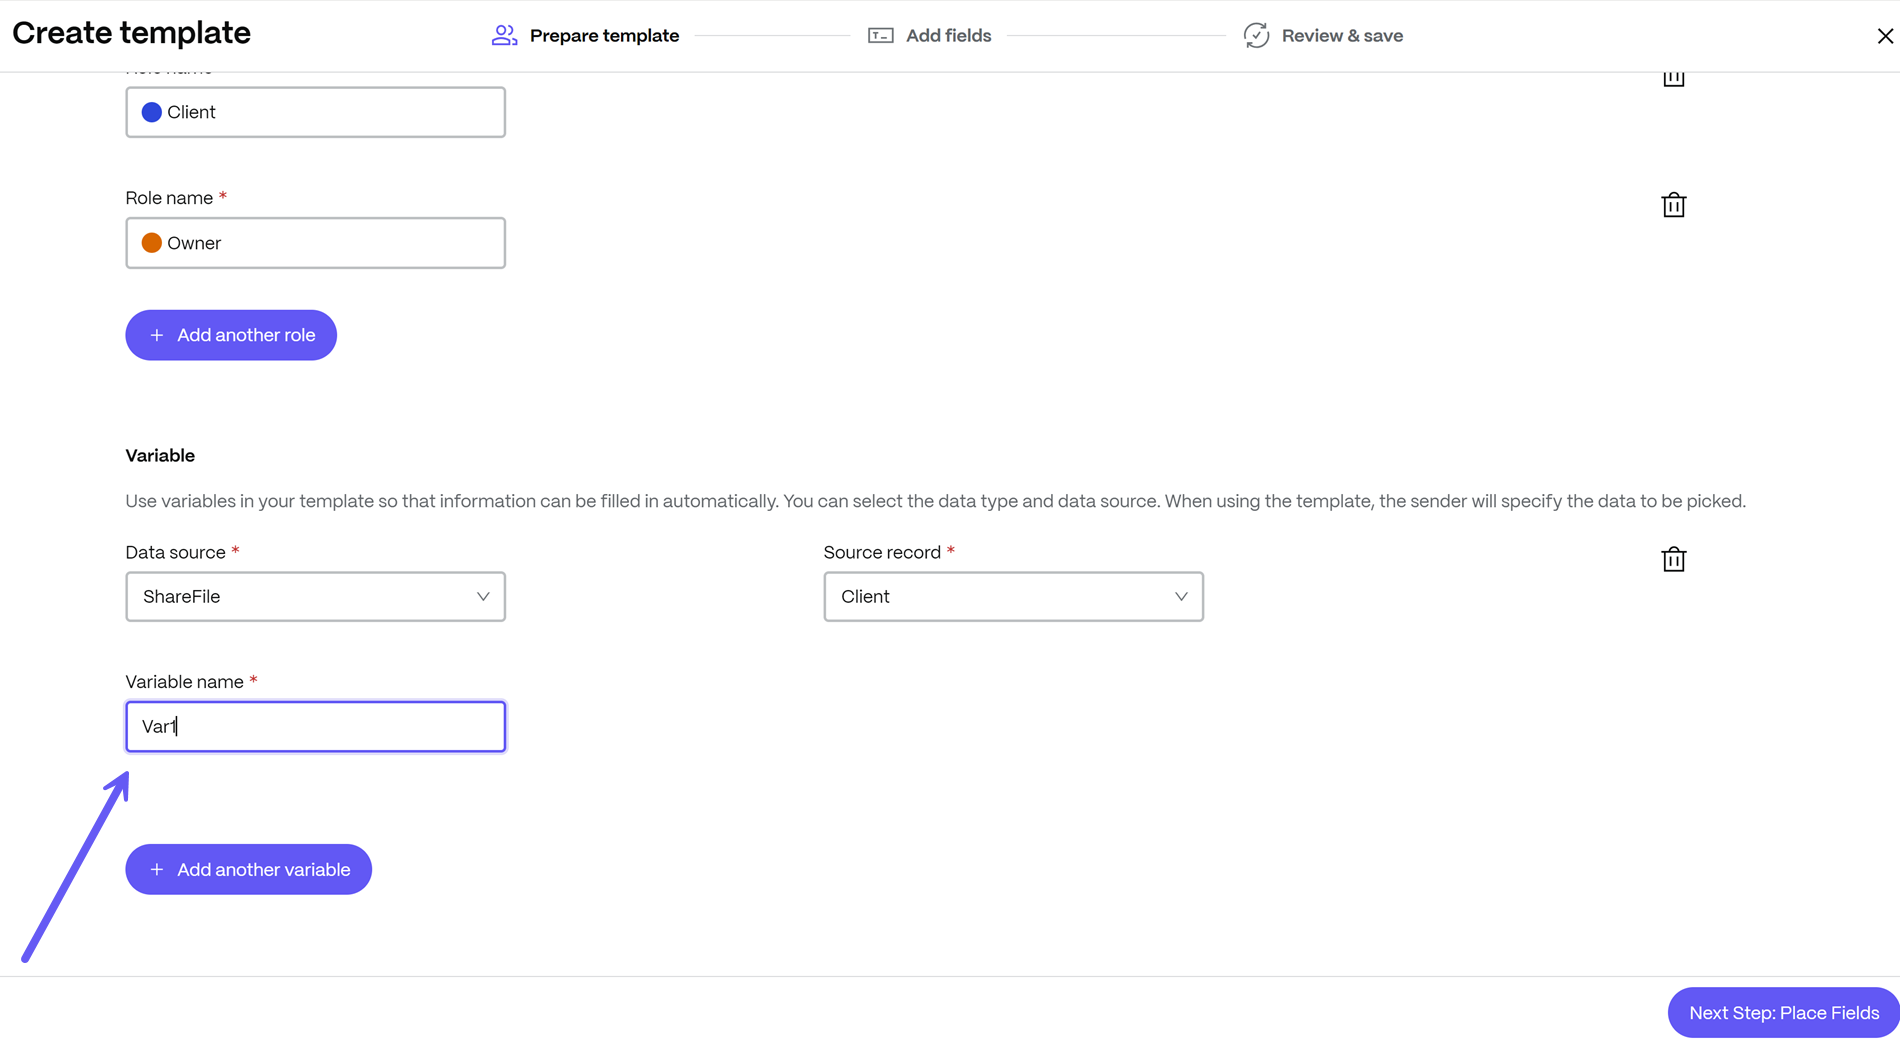
Under Variables select Add a new variable. Variables are used to specify the source and type of data that needs to be automatically filled in the document. For more information on Variables, refer Document template components.
-
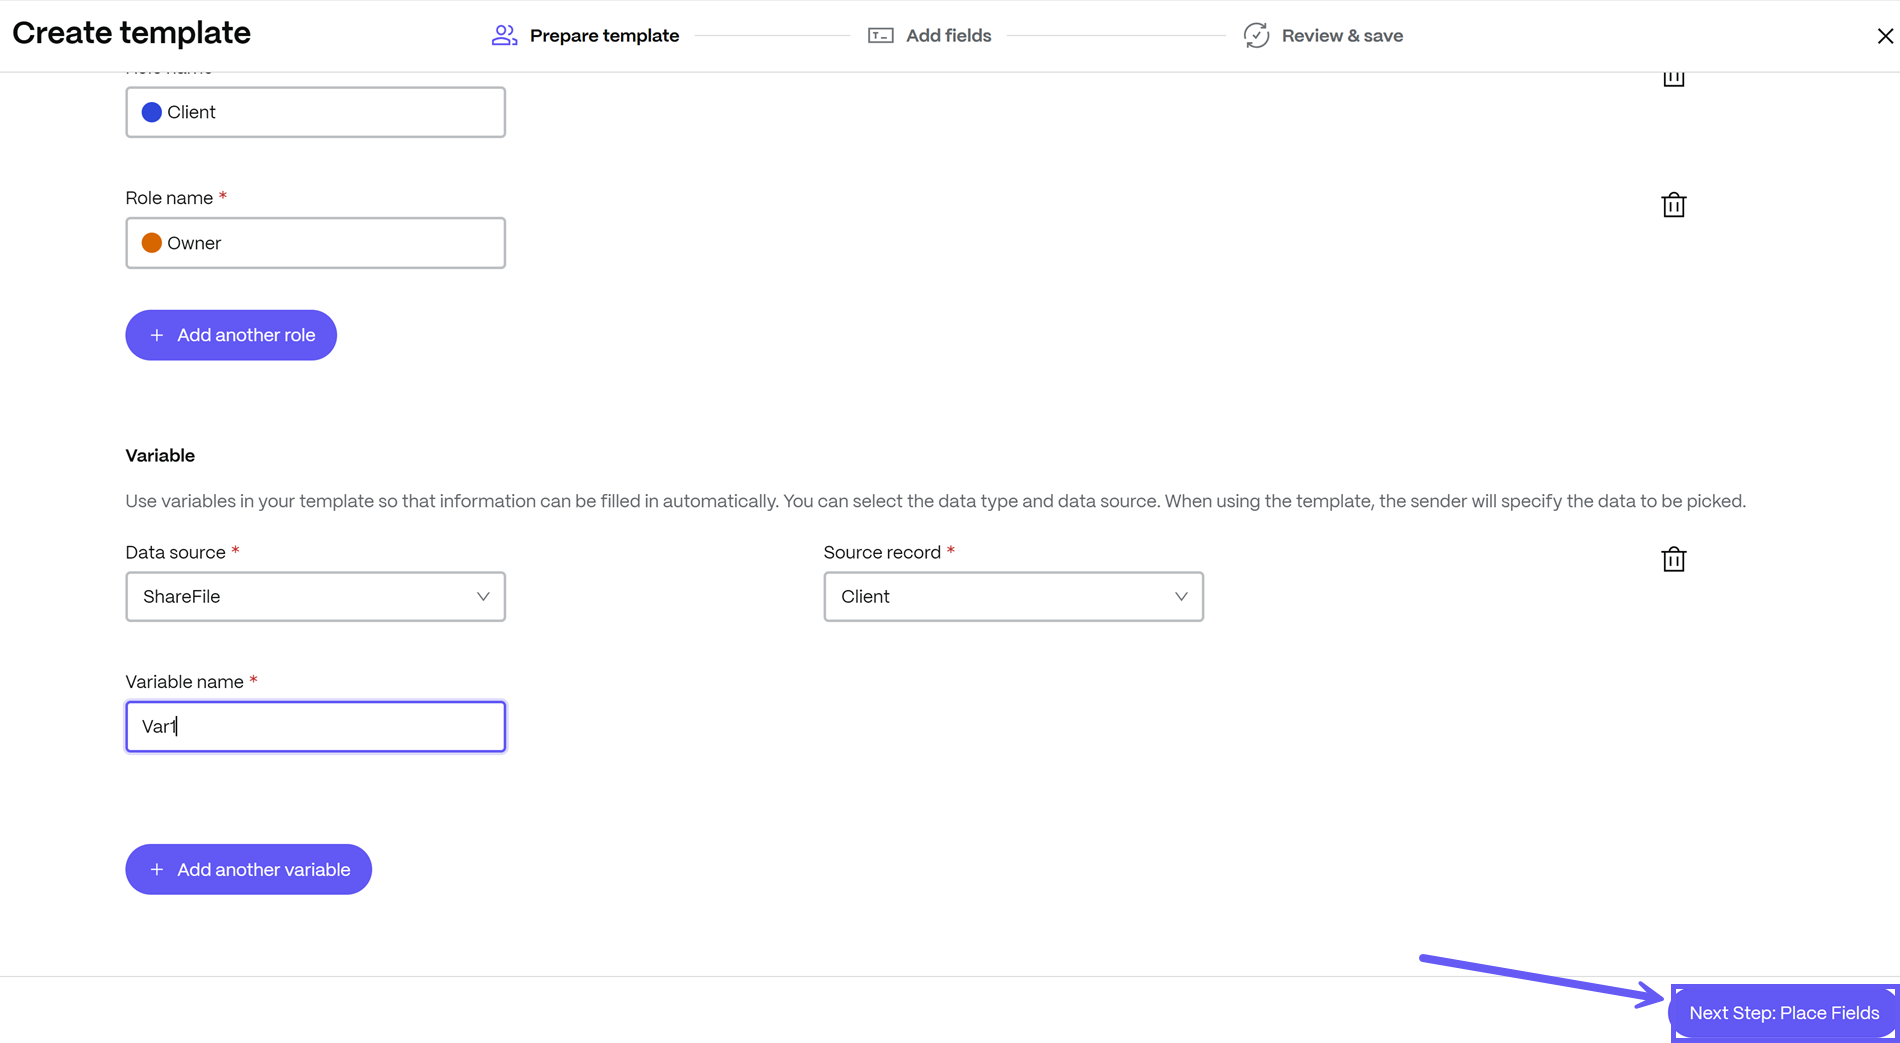
For each variable, select a Data Source and Data type from the dropdown menu. The list of supported data sources and types can be found under the section Automatically fill or paste data from ShareFile and third party applications in documents.
-
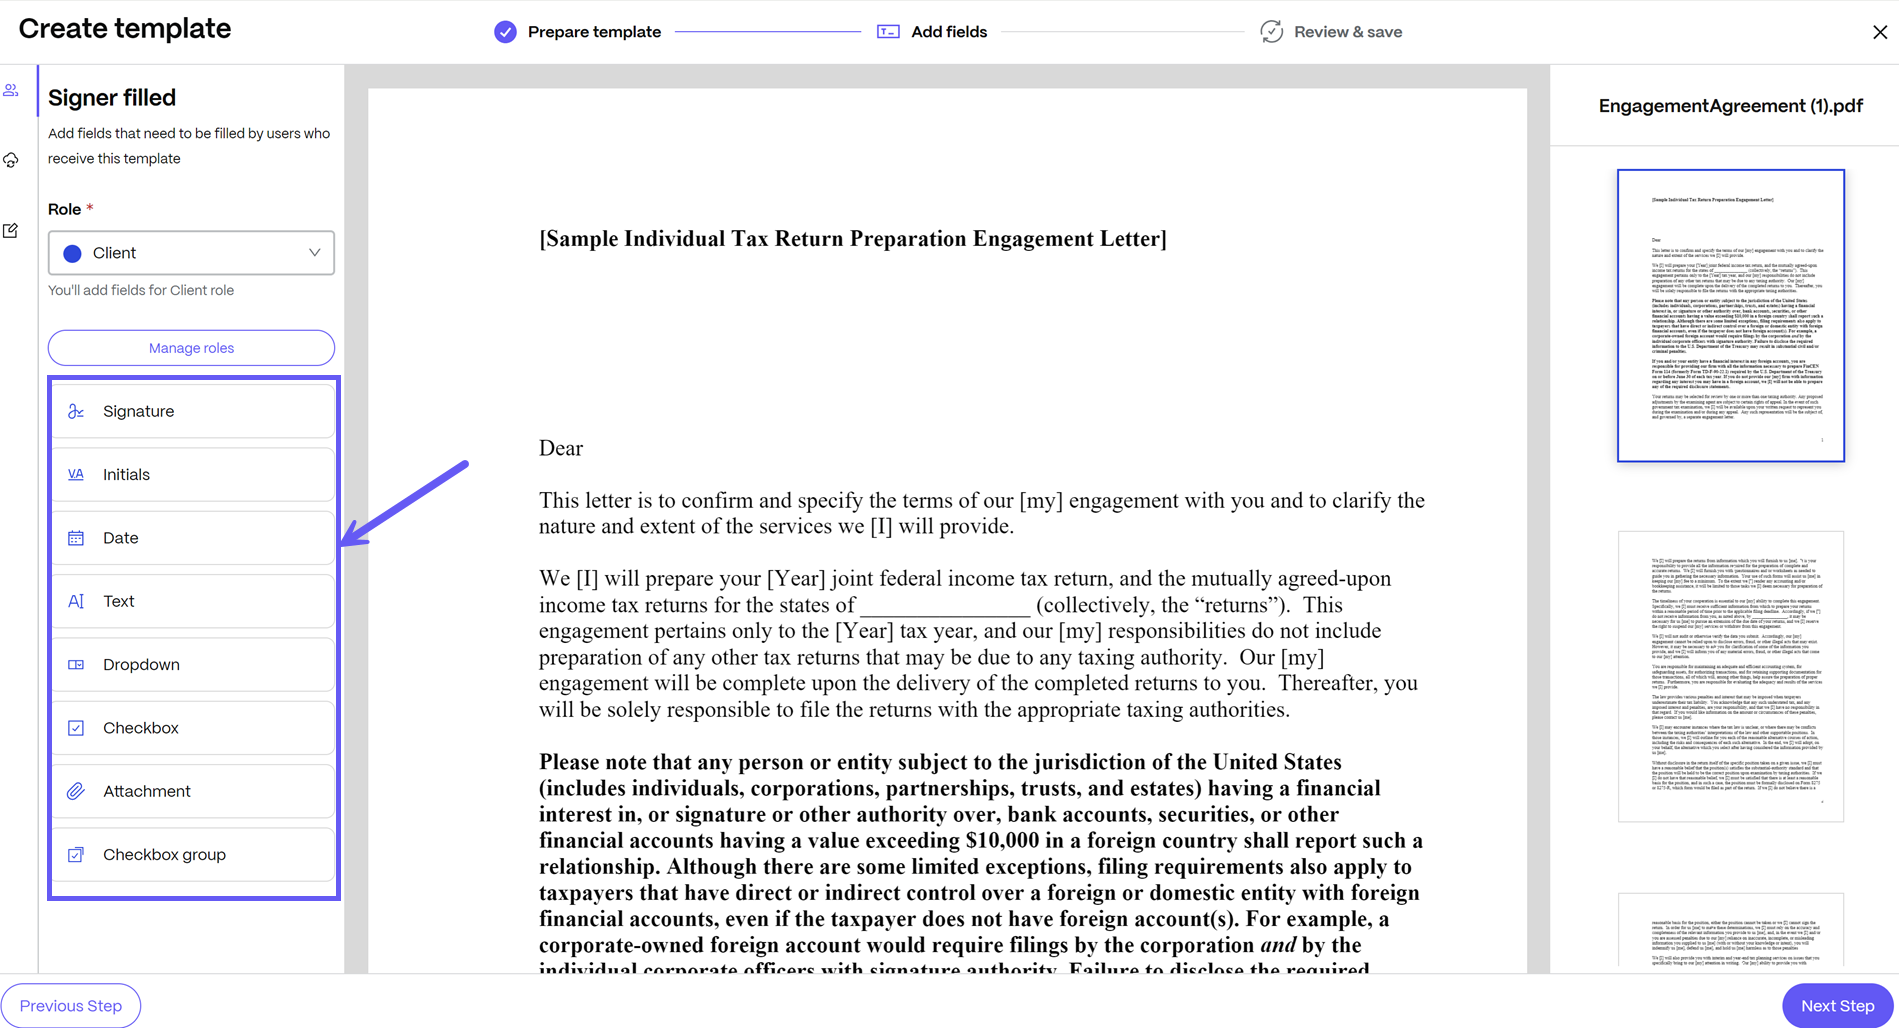
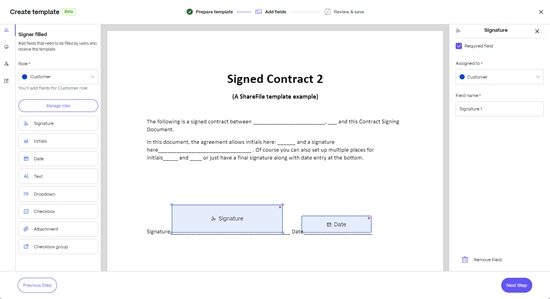
Select Next Step: Place Fields. The Place Fields screen displays with the Signer filled tab selected in the left navigation pane.
-
Under the Signer filled tab, you can drag and drop the fields to add them to the document template. You can click on a field to change the settings for that field like marking a field as mandatory.
Note:
When adding or placing fields, make sure you choose the right role for the field using the drop down menu. All the fields associated with a role will be assigned to the signer associated with that role.
-
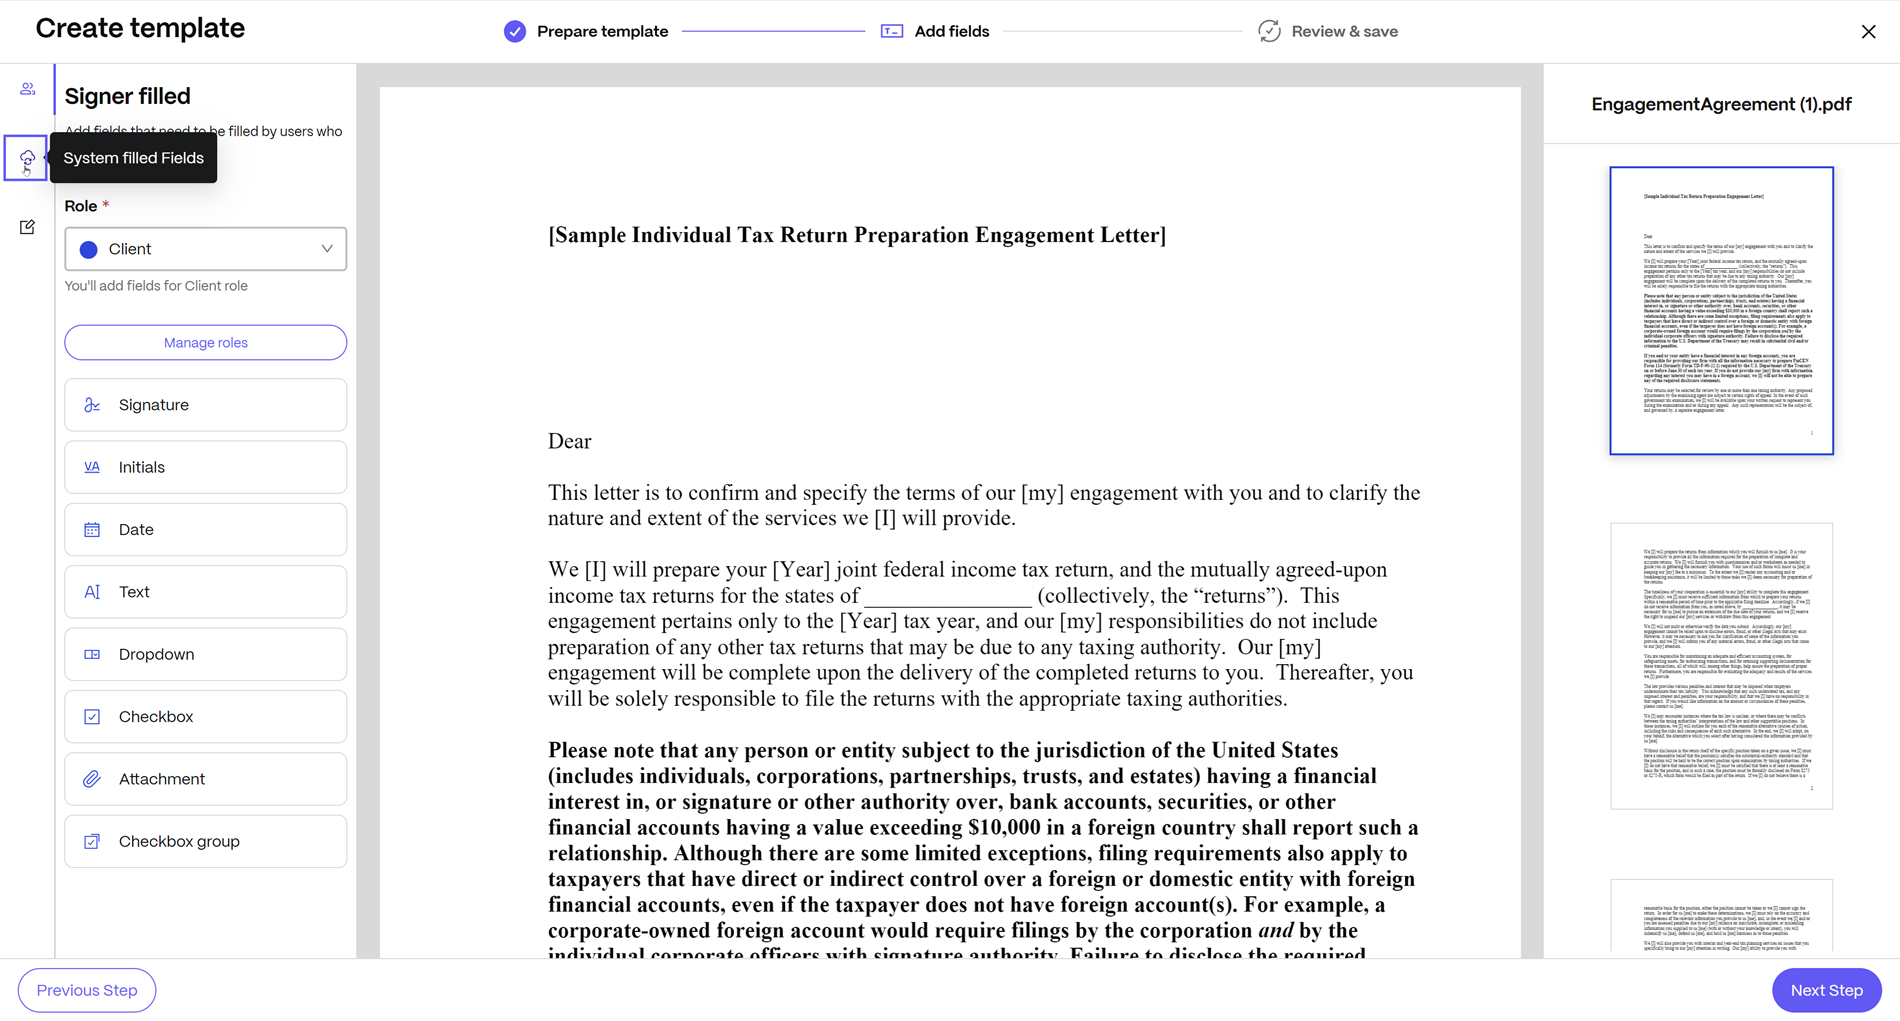
From the left navigation pane, select the System filled tab.
-
Under the System filled tab, you can select the variable from the dropdown list to view all the fields that are available for that variable. You can drag and drop the fields to add them to the document template. These fields will be automatically filled with data when you’re sending a template for signature.
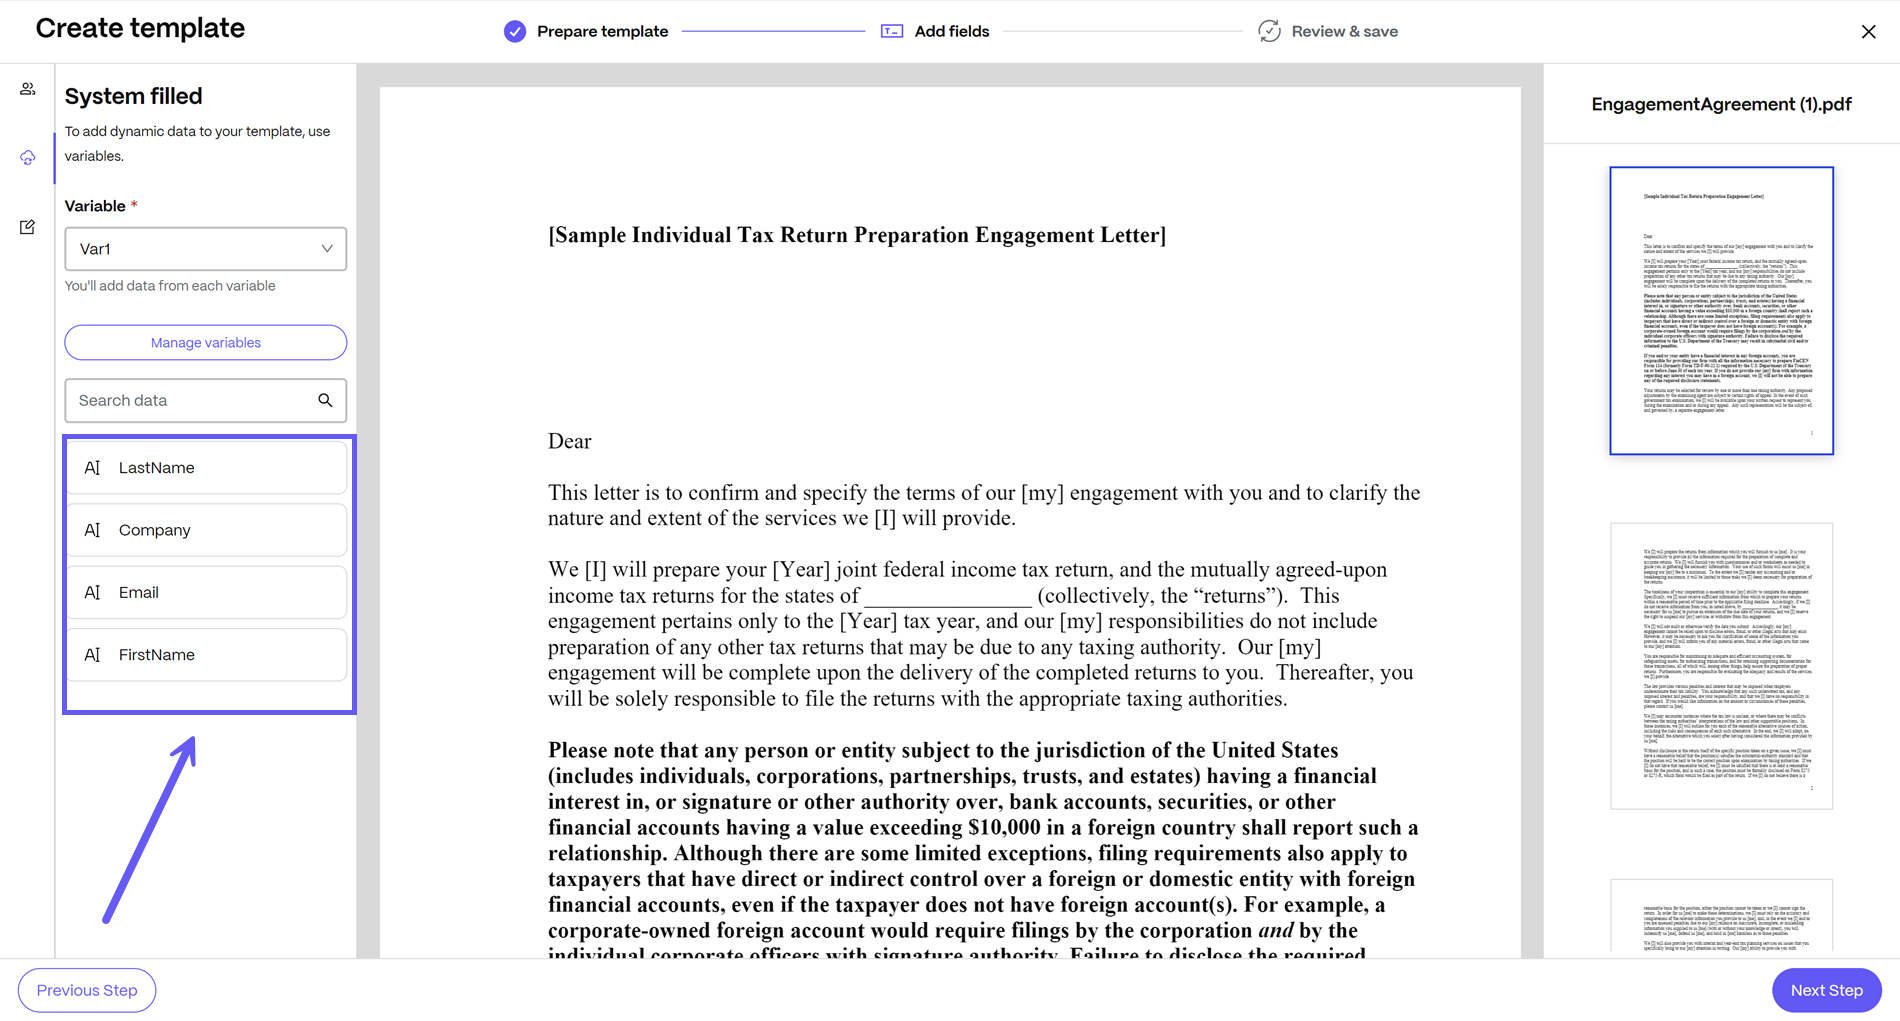
Note:
You can use the search bar to quickly search for the desired field.
-
Select Next Step: Review & save.
-
Enter the name and description for your new document template.
-
You can set additional Security Options such as KBA and passcode.
-
KBA requirement - requires signers to verify their identity with a knowledge-based quiz. Each signer must independently verify before signing the document.
-
Passcode - requires recipients to enter a 5-digit passcode to access documents.
-
-
Select Save Template.
The new document template is displayed on the Templates page.
Steps to send a template that can automatically fill or paste data from different applications
-
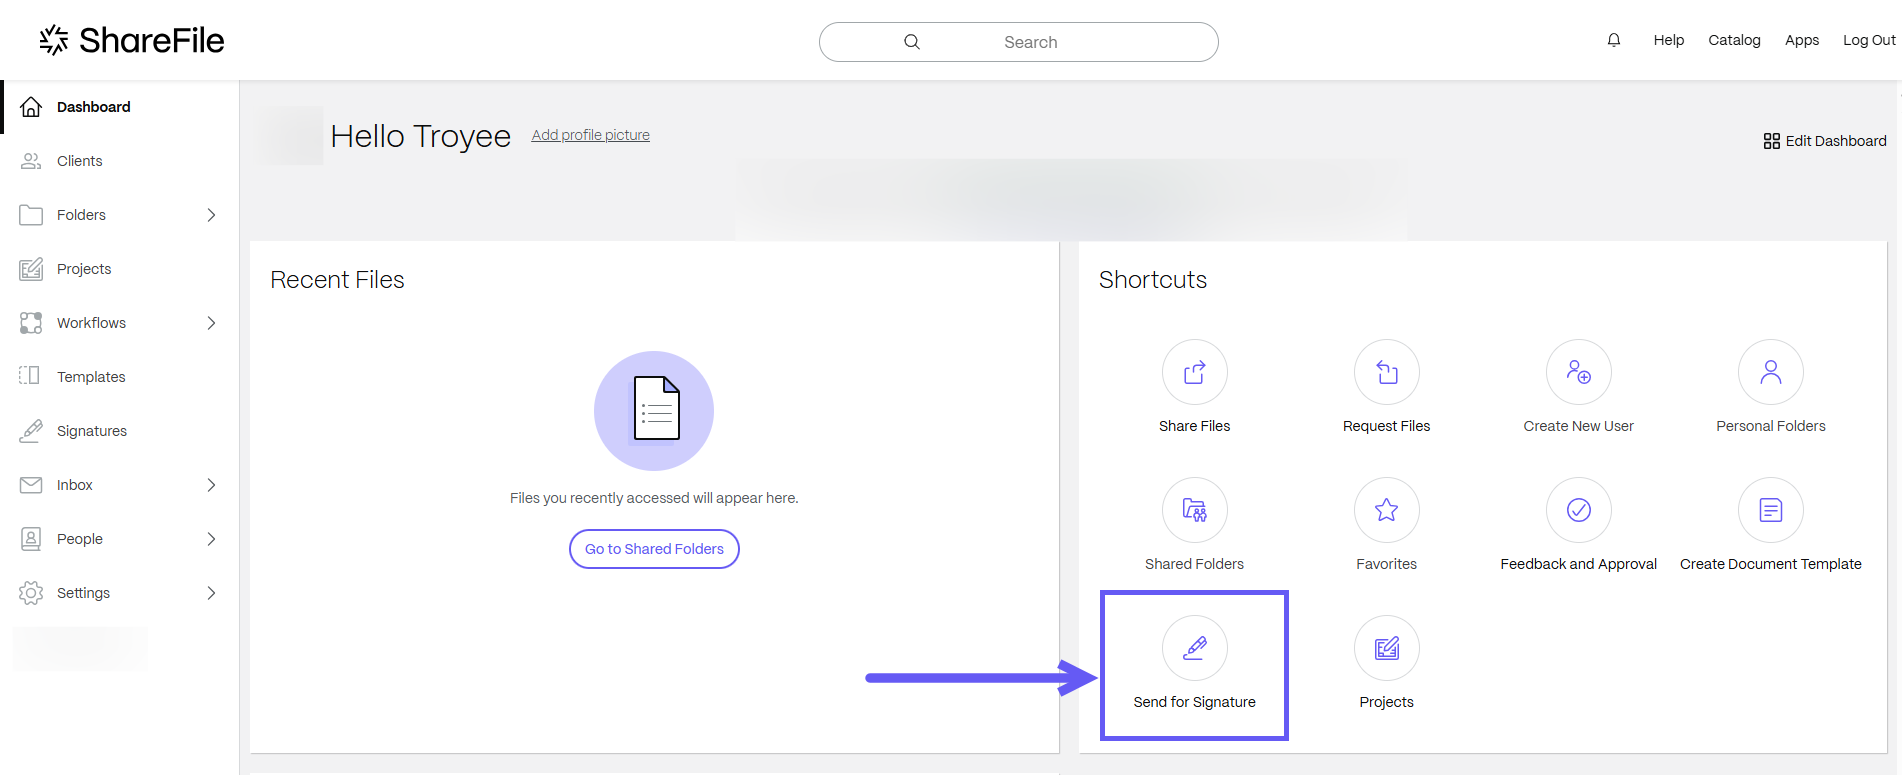
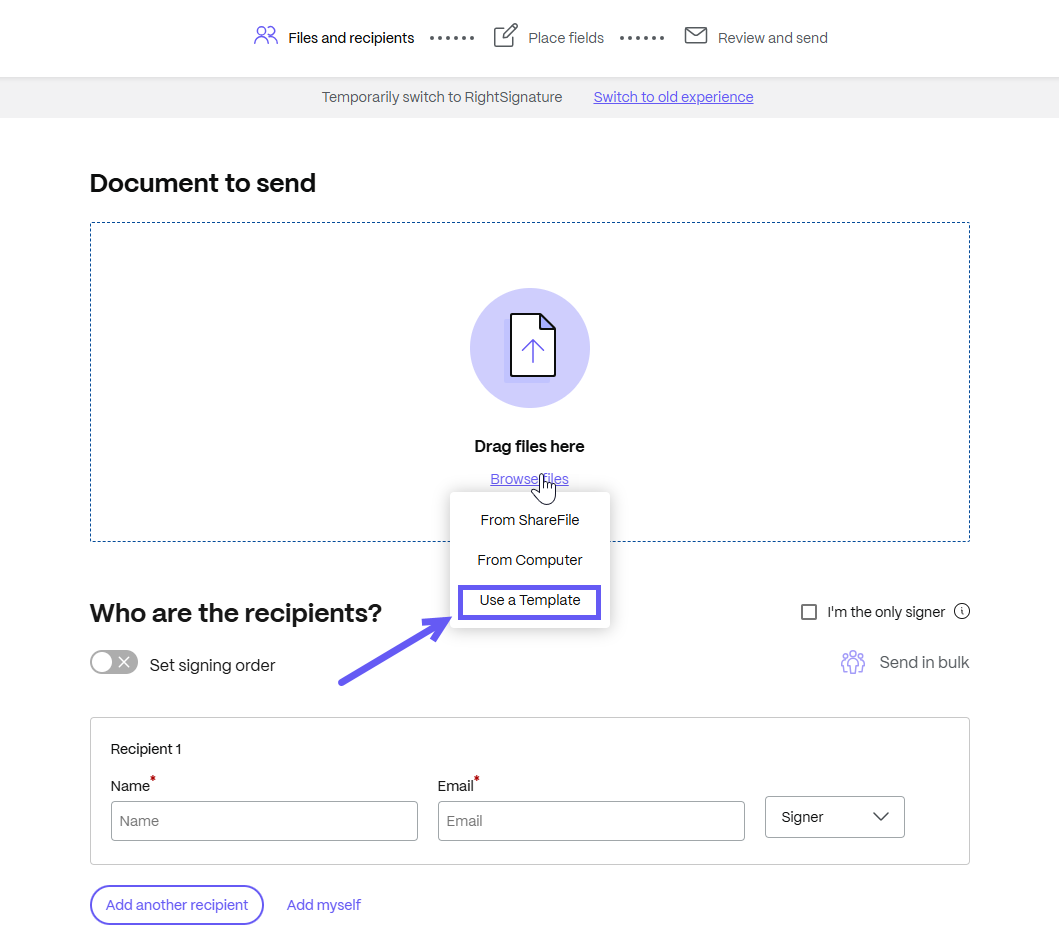
Login to your ShareFile account and from the dashboard, select the Send for Signature tab and the Signature request window opens.
-
Under the Documents to send section at the top of the window, select the browse files option and from the drop-down menu, click on the Use a Template option.
-
The Select a template window is displayed. You can choose a document template that you created in ShareFile.
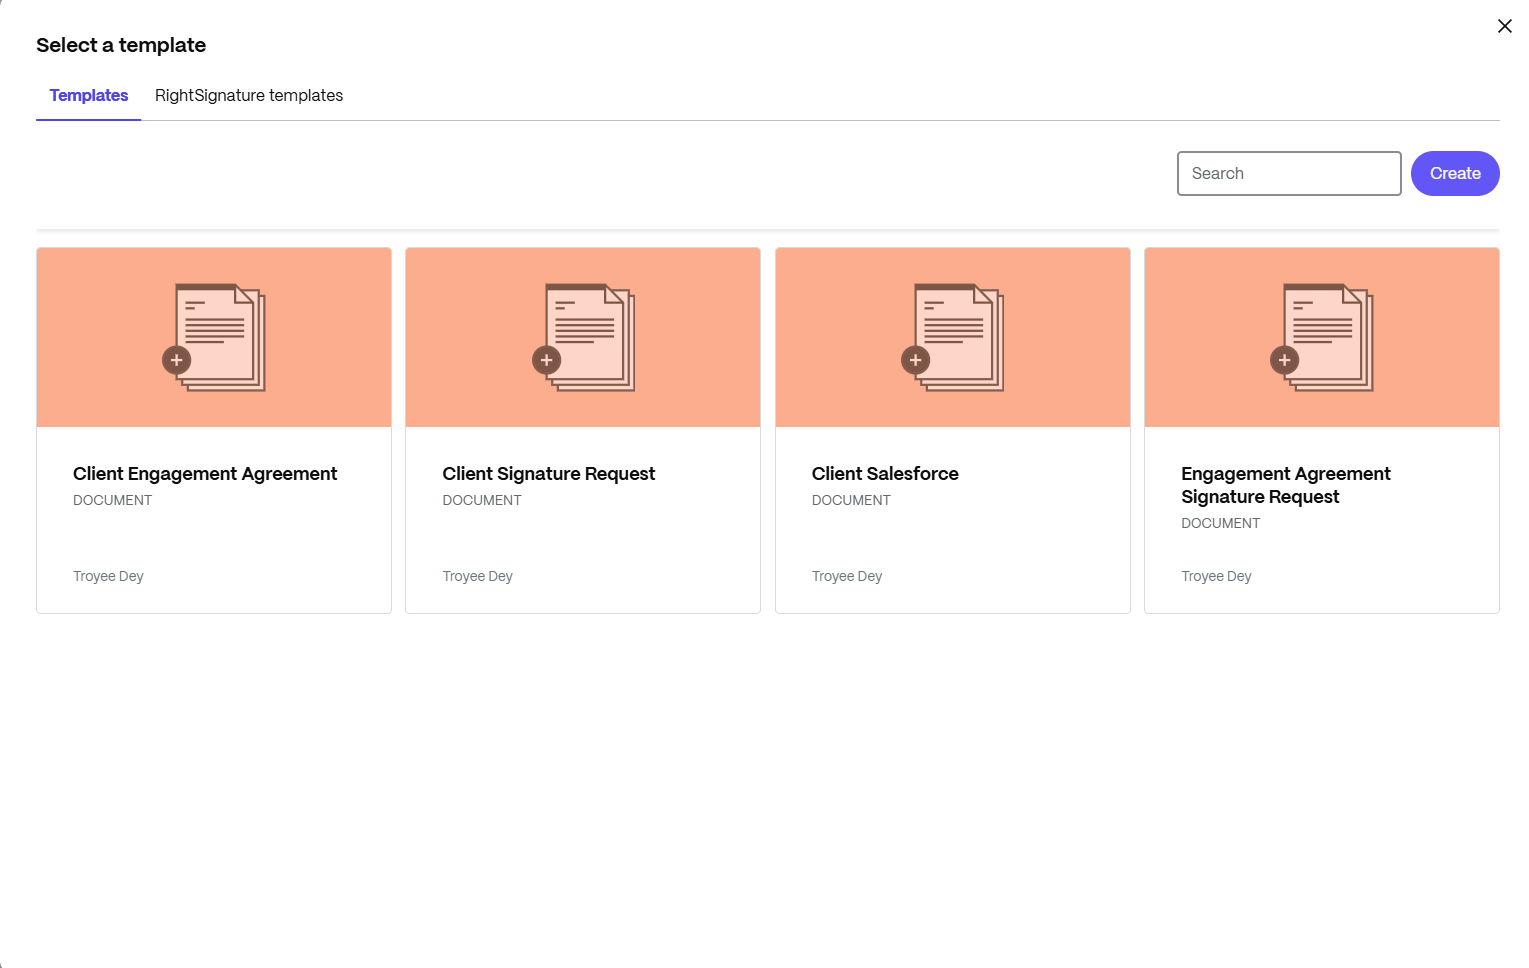
Note:
Variables are supported only for New Document template created in ShareFile.
-
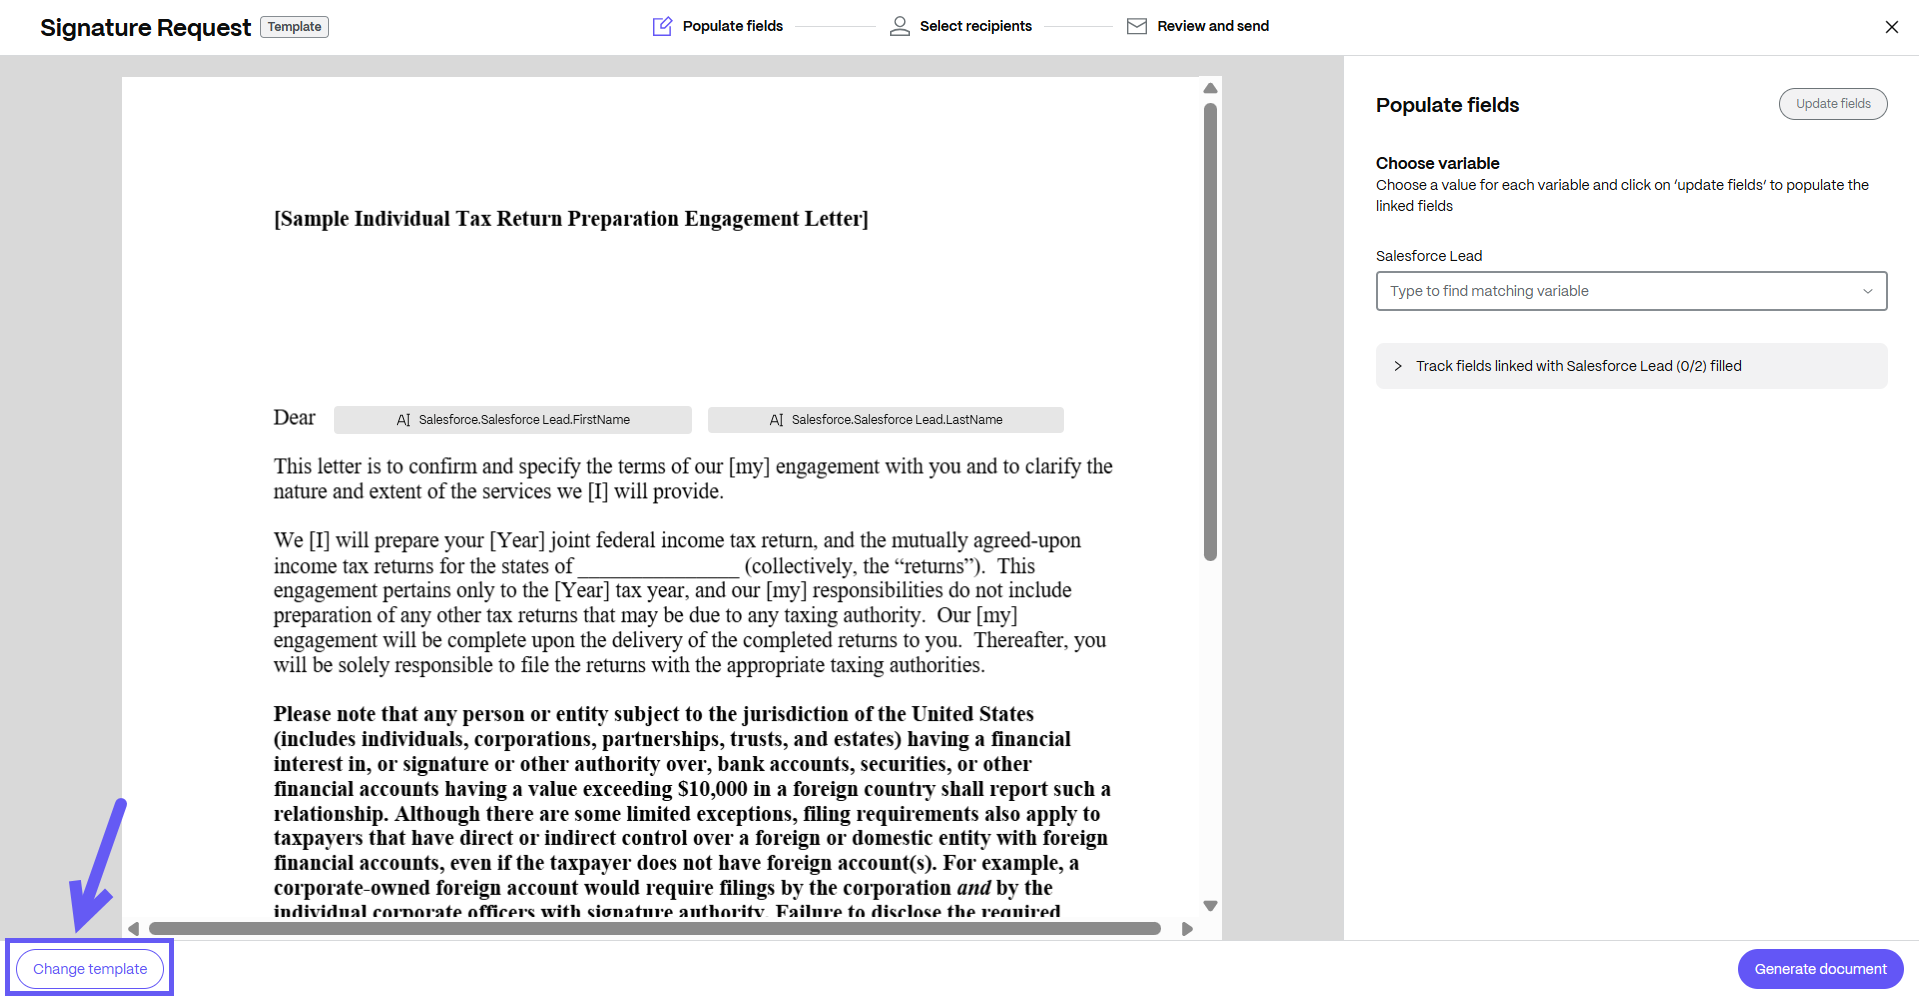
The Signature Request window opens and a document is created based on the template you have chosen. You can choose a different template by selecting the Change template button at the bottom of the screen as shown below.
-
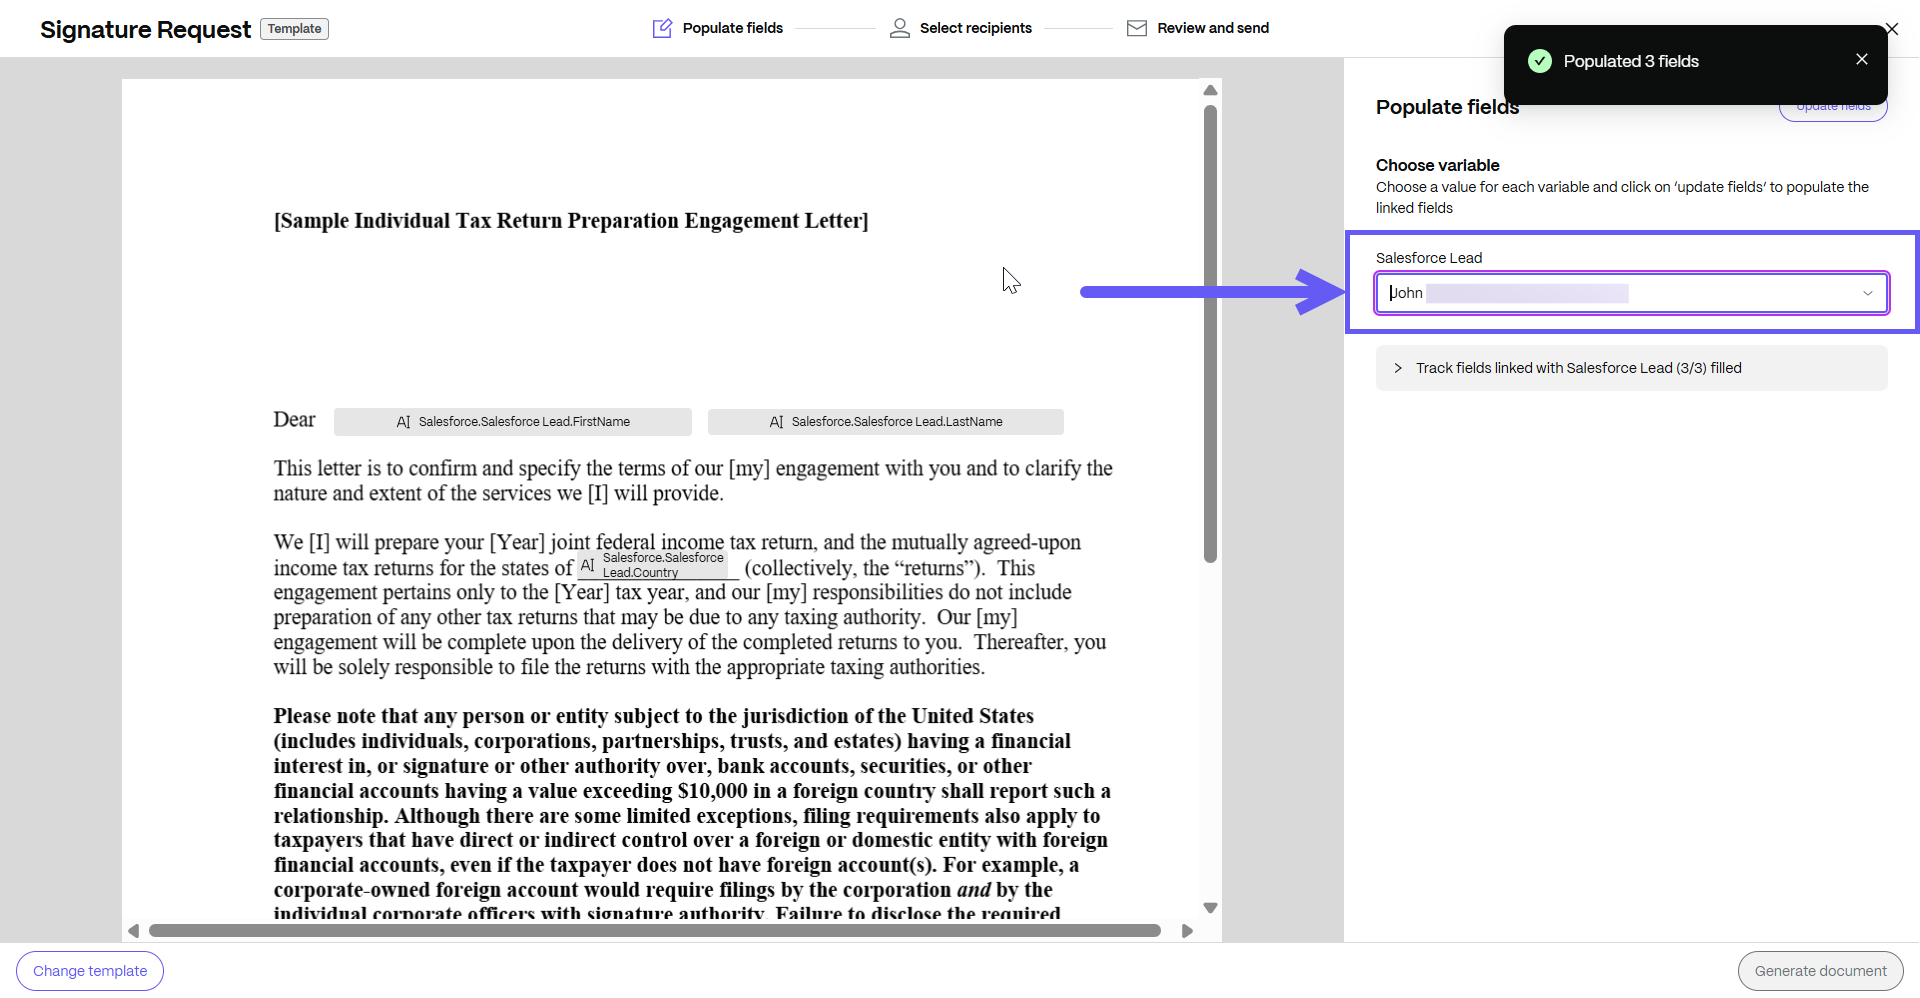
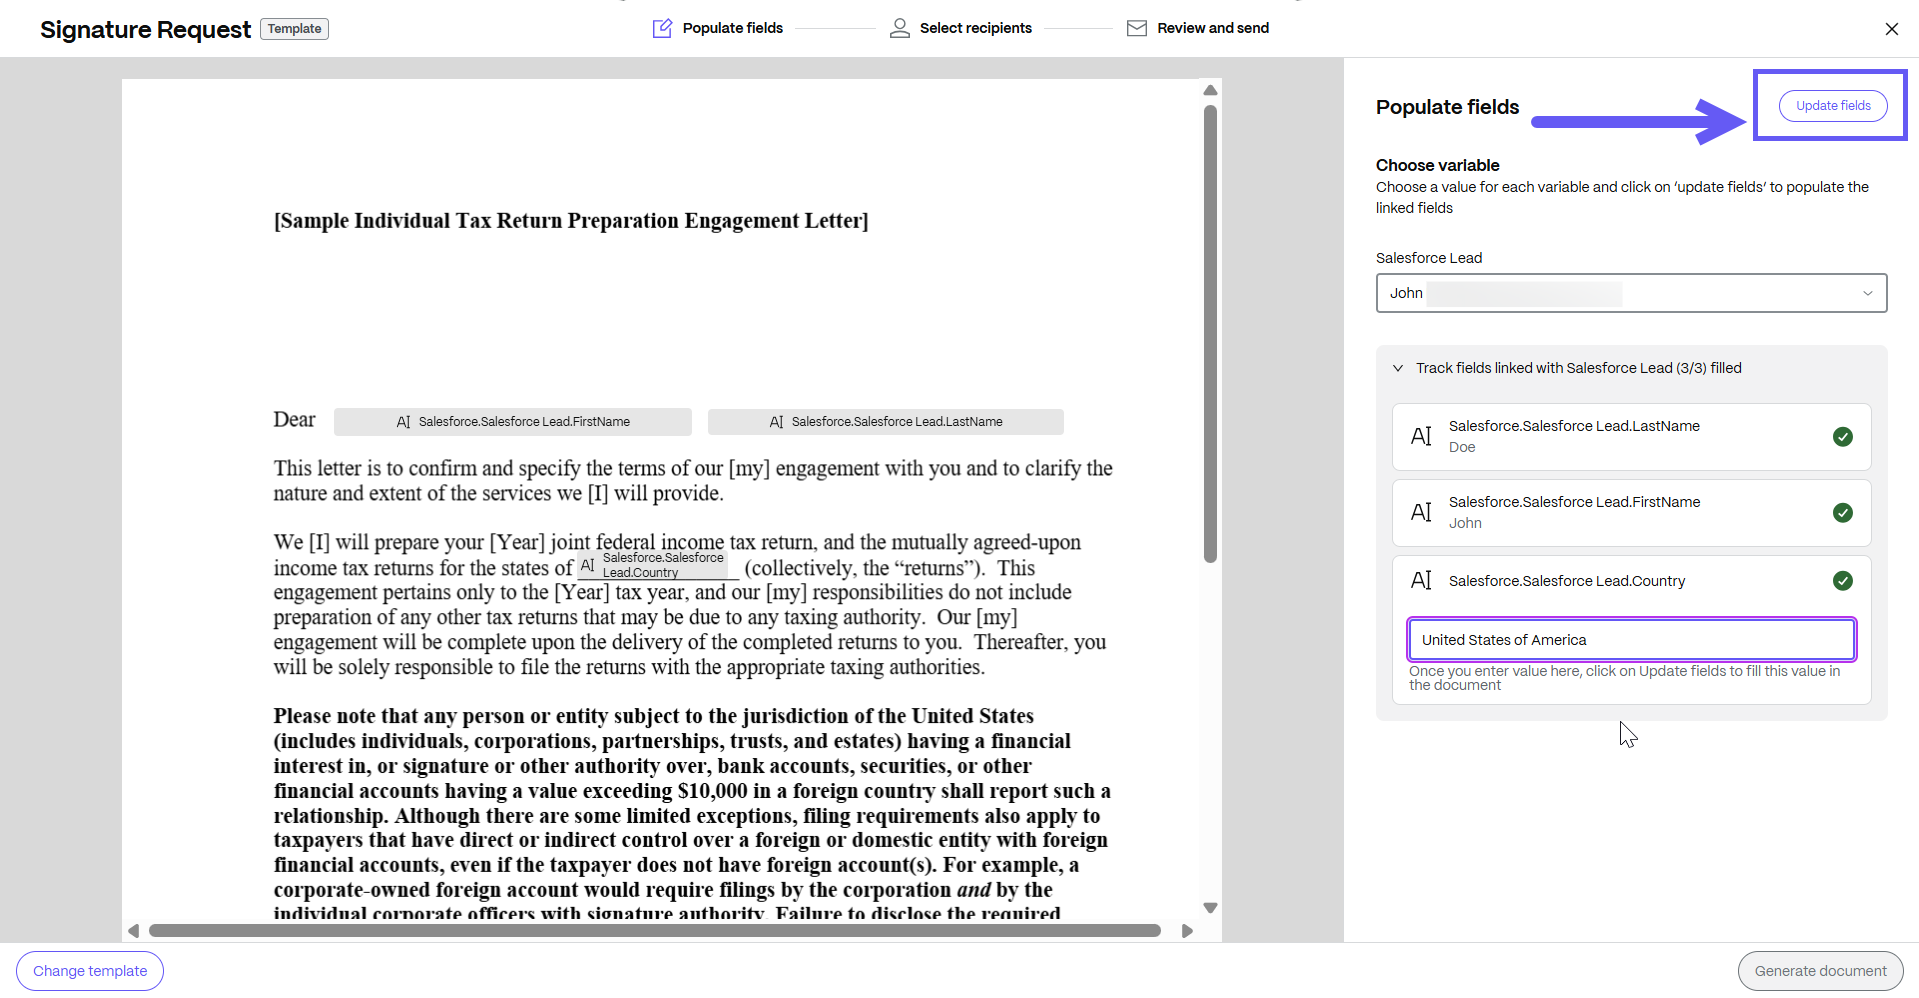
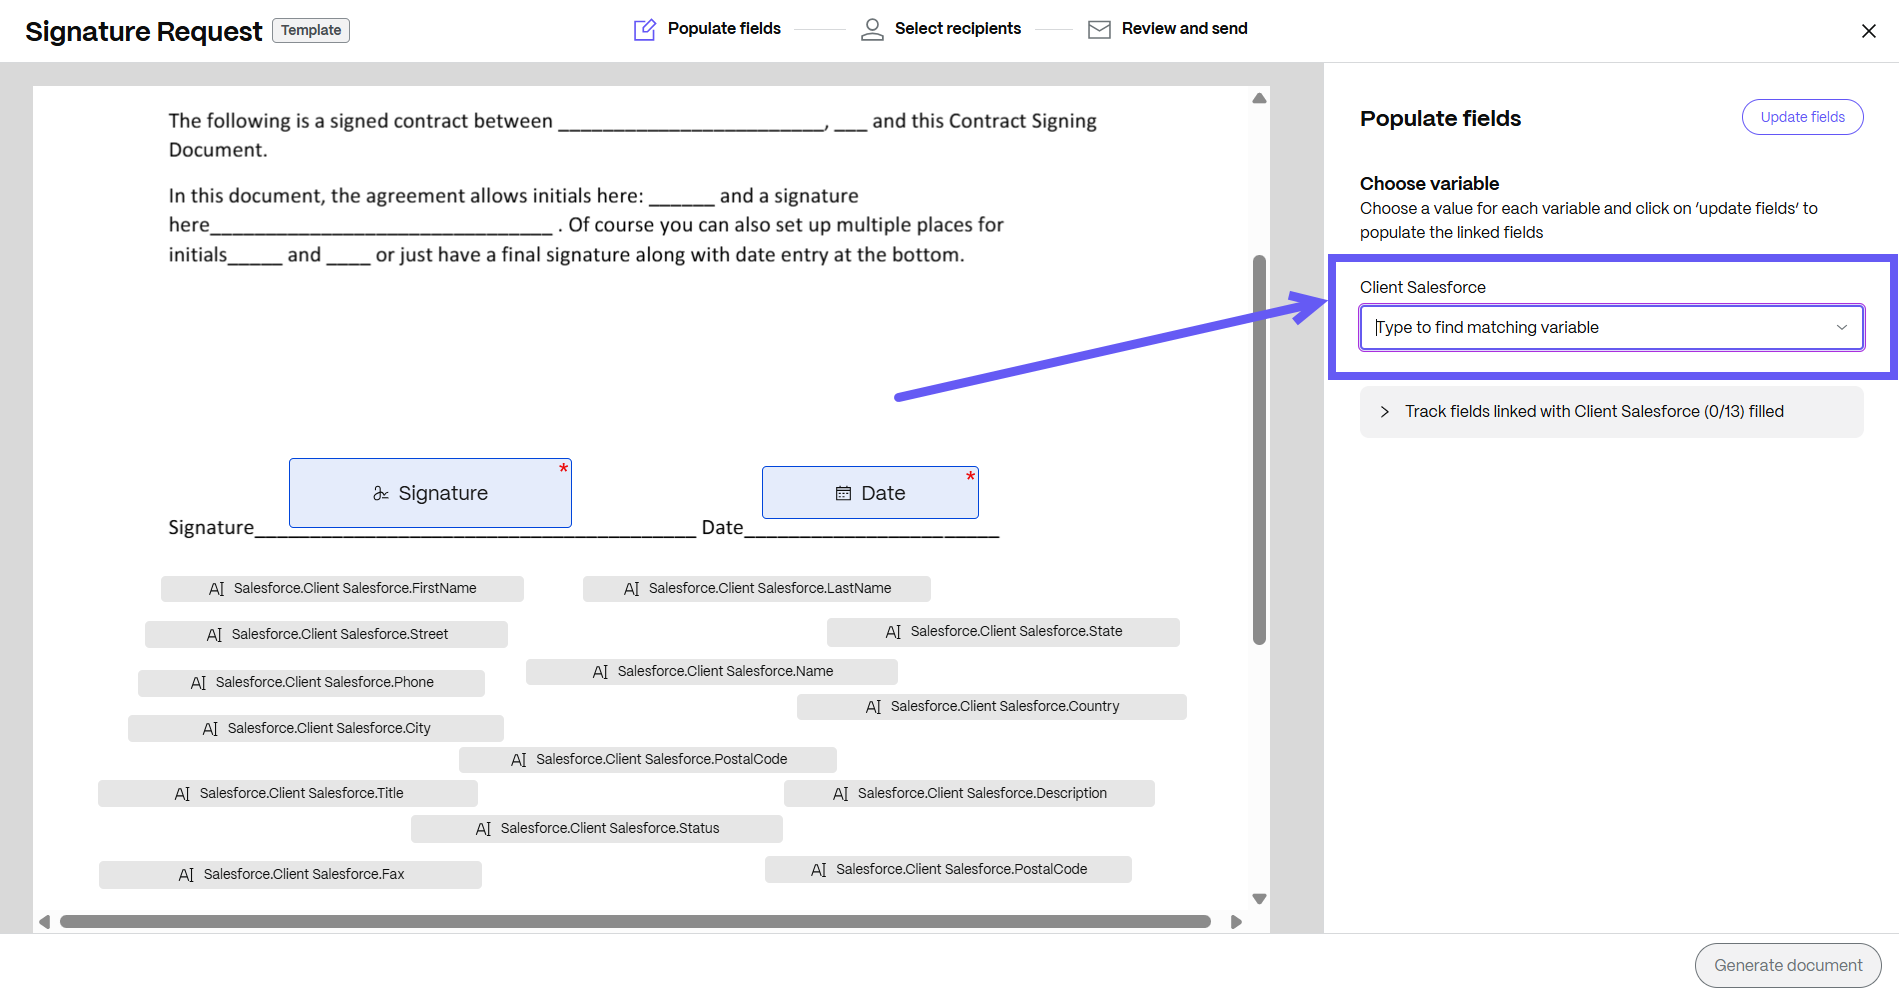
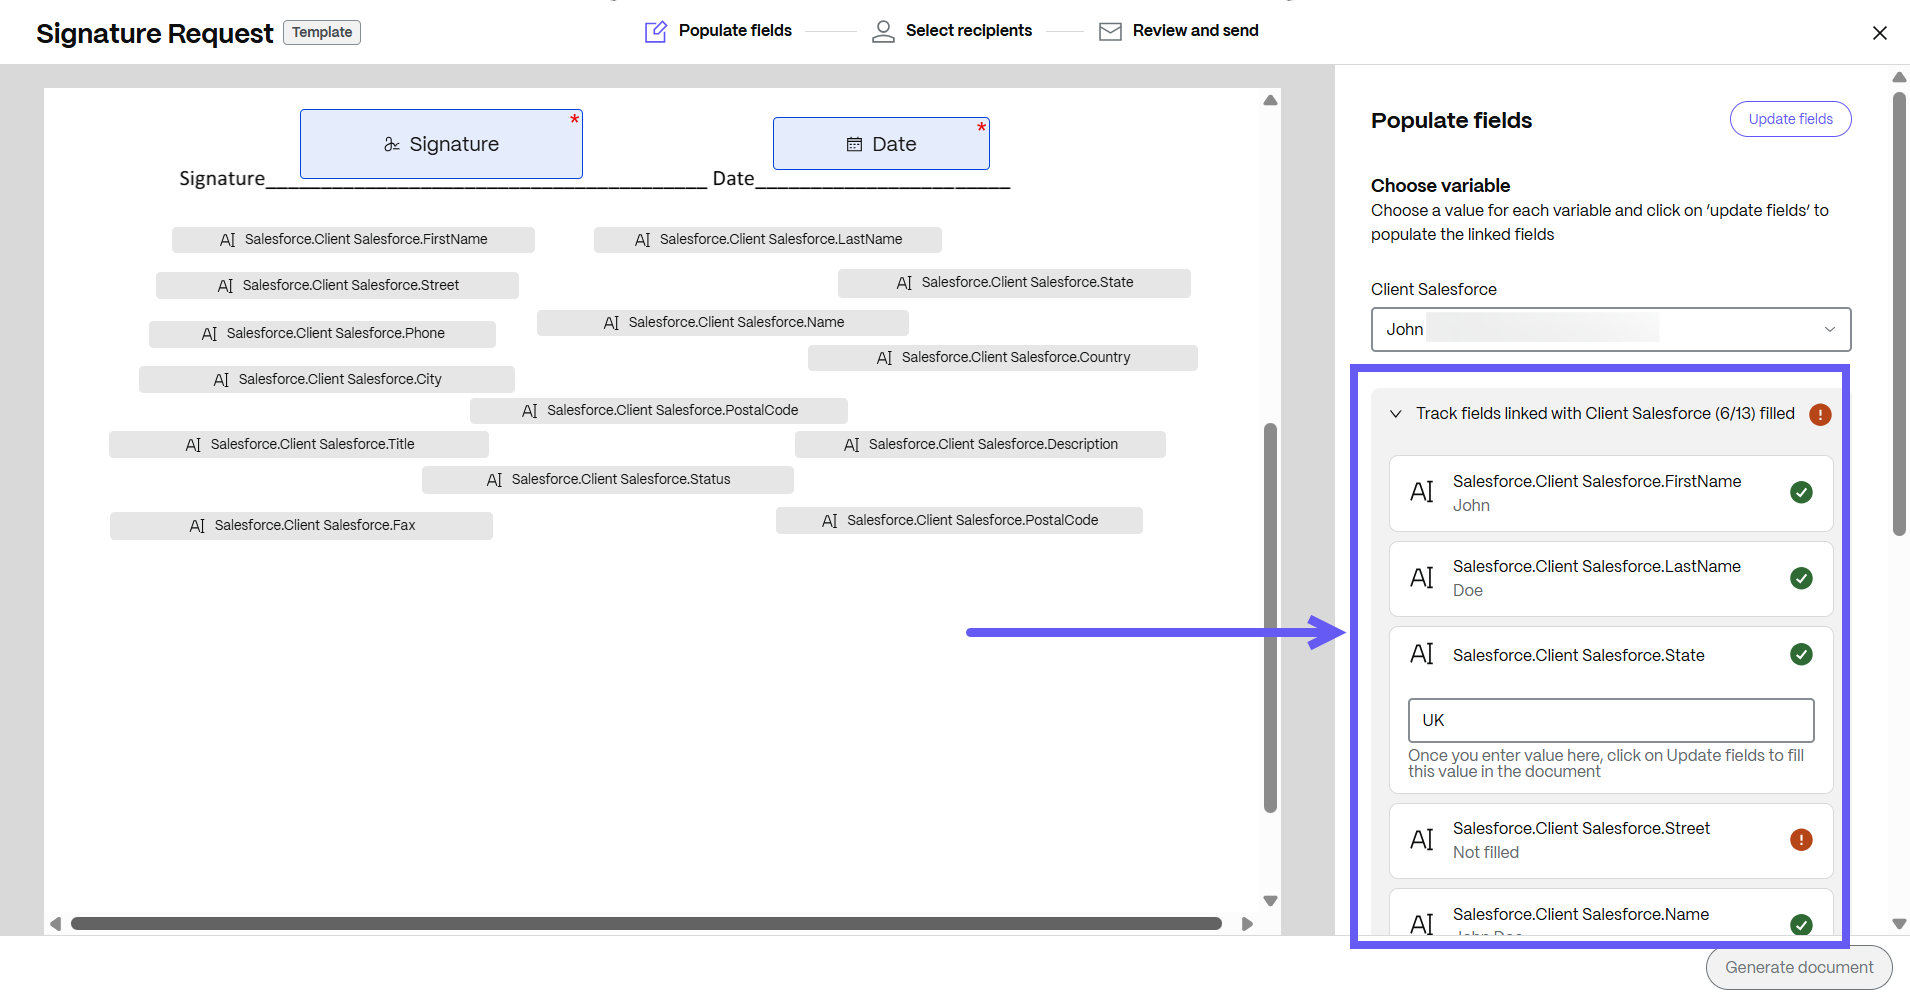
Enter the value for each variable, then click on Update fields so that all the fields associated with that variable can be automatically filled. After selecting the variable, the Populate message displays.
-
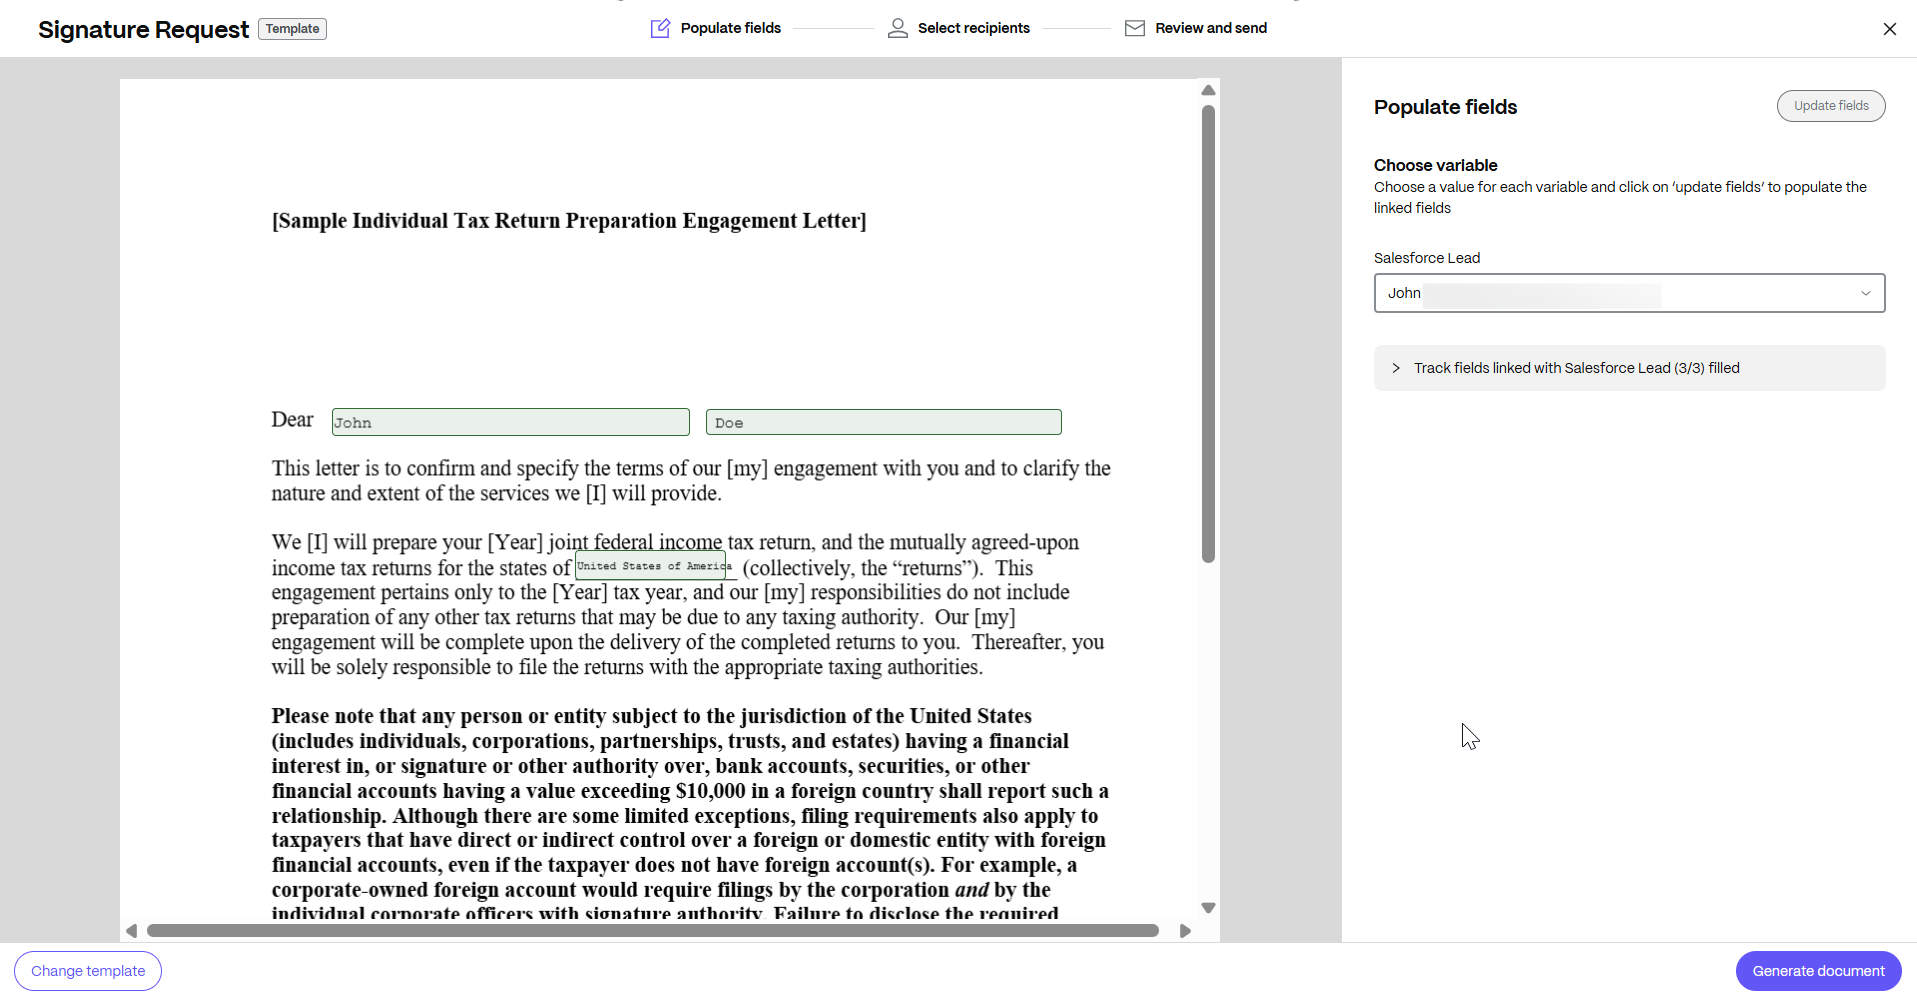
Click on Track fields to view all the fields that are auto filled. If any edits are required or if any information is missing, user can manually edit the fields before updating the document as shown below.

-
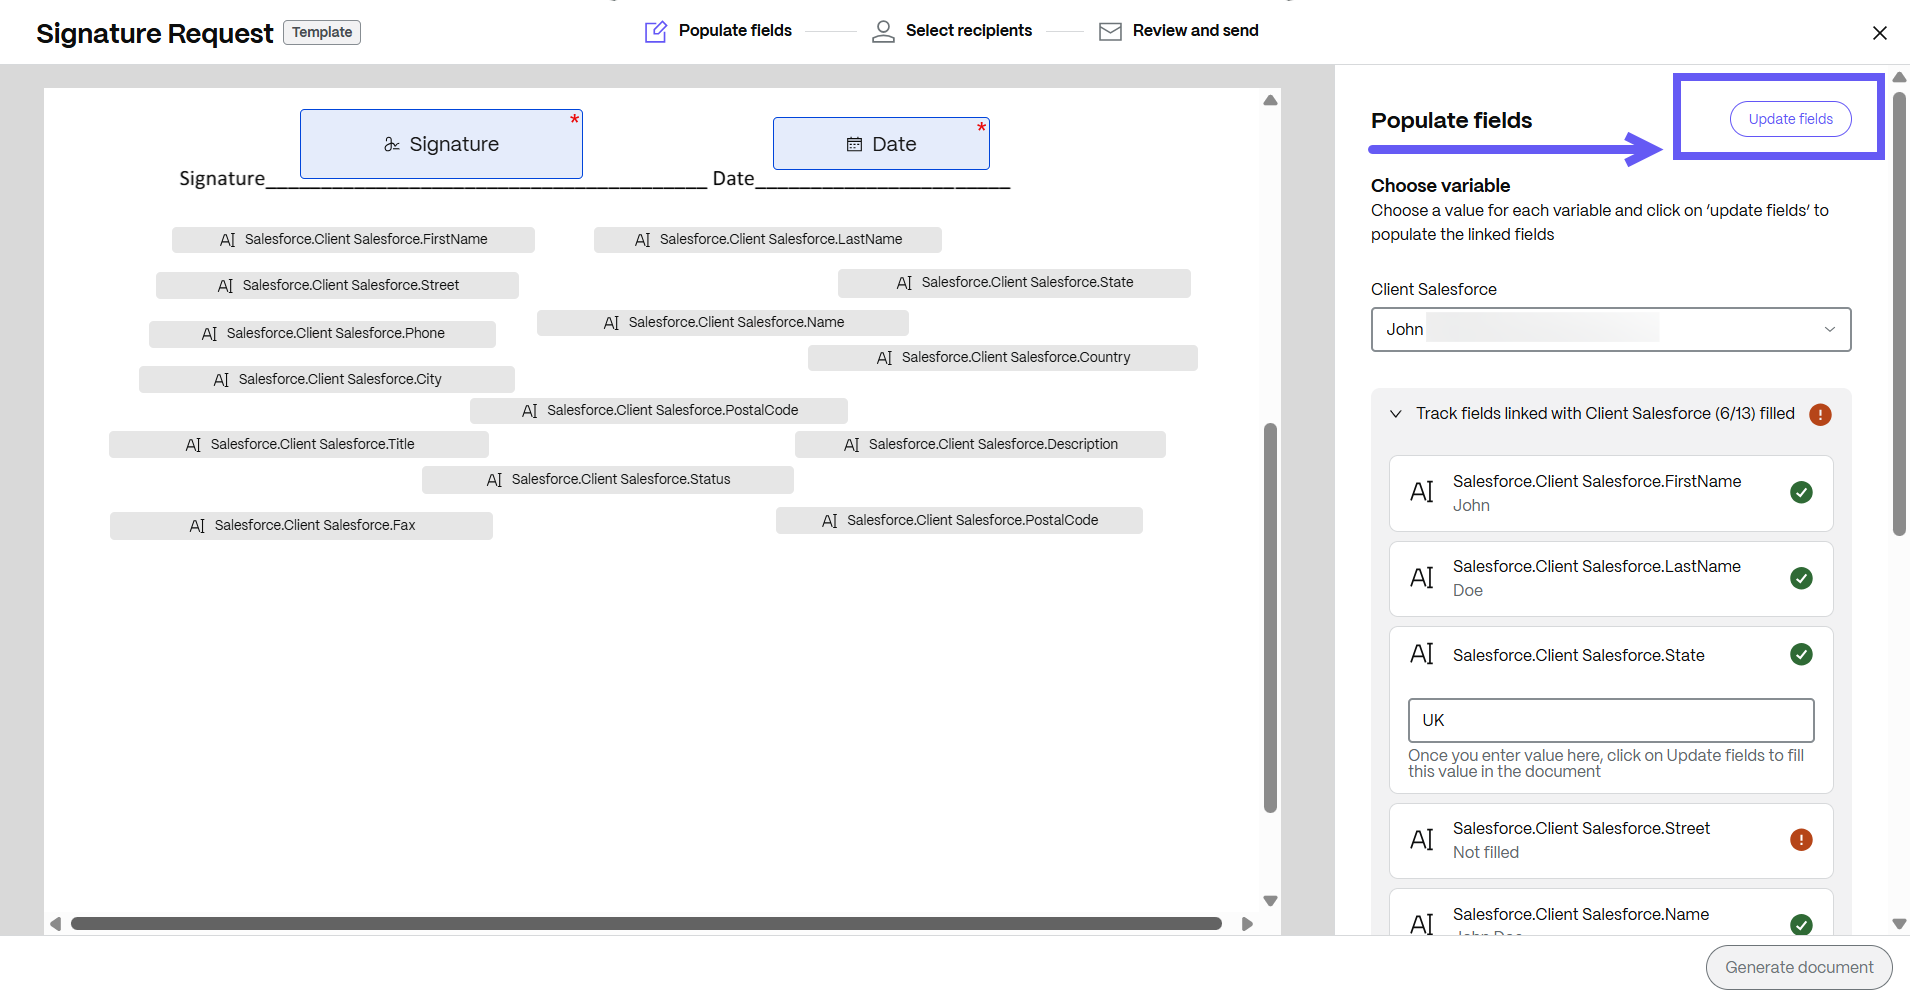
After entering the new values, click on Update fields.
-
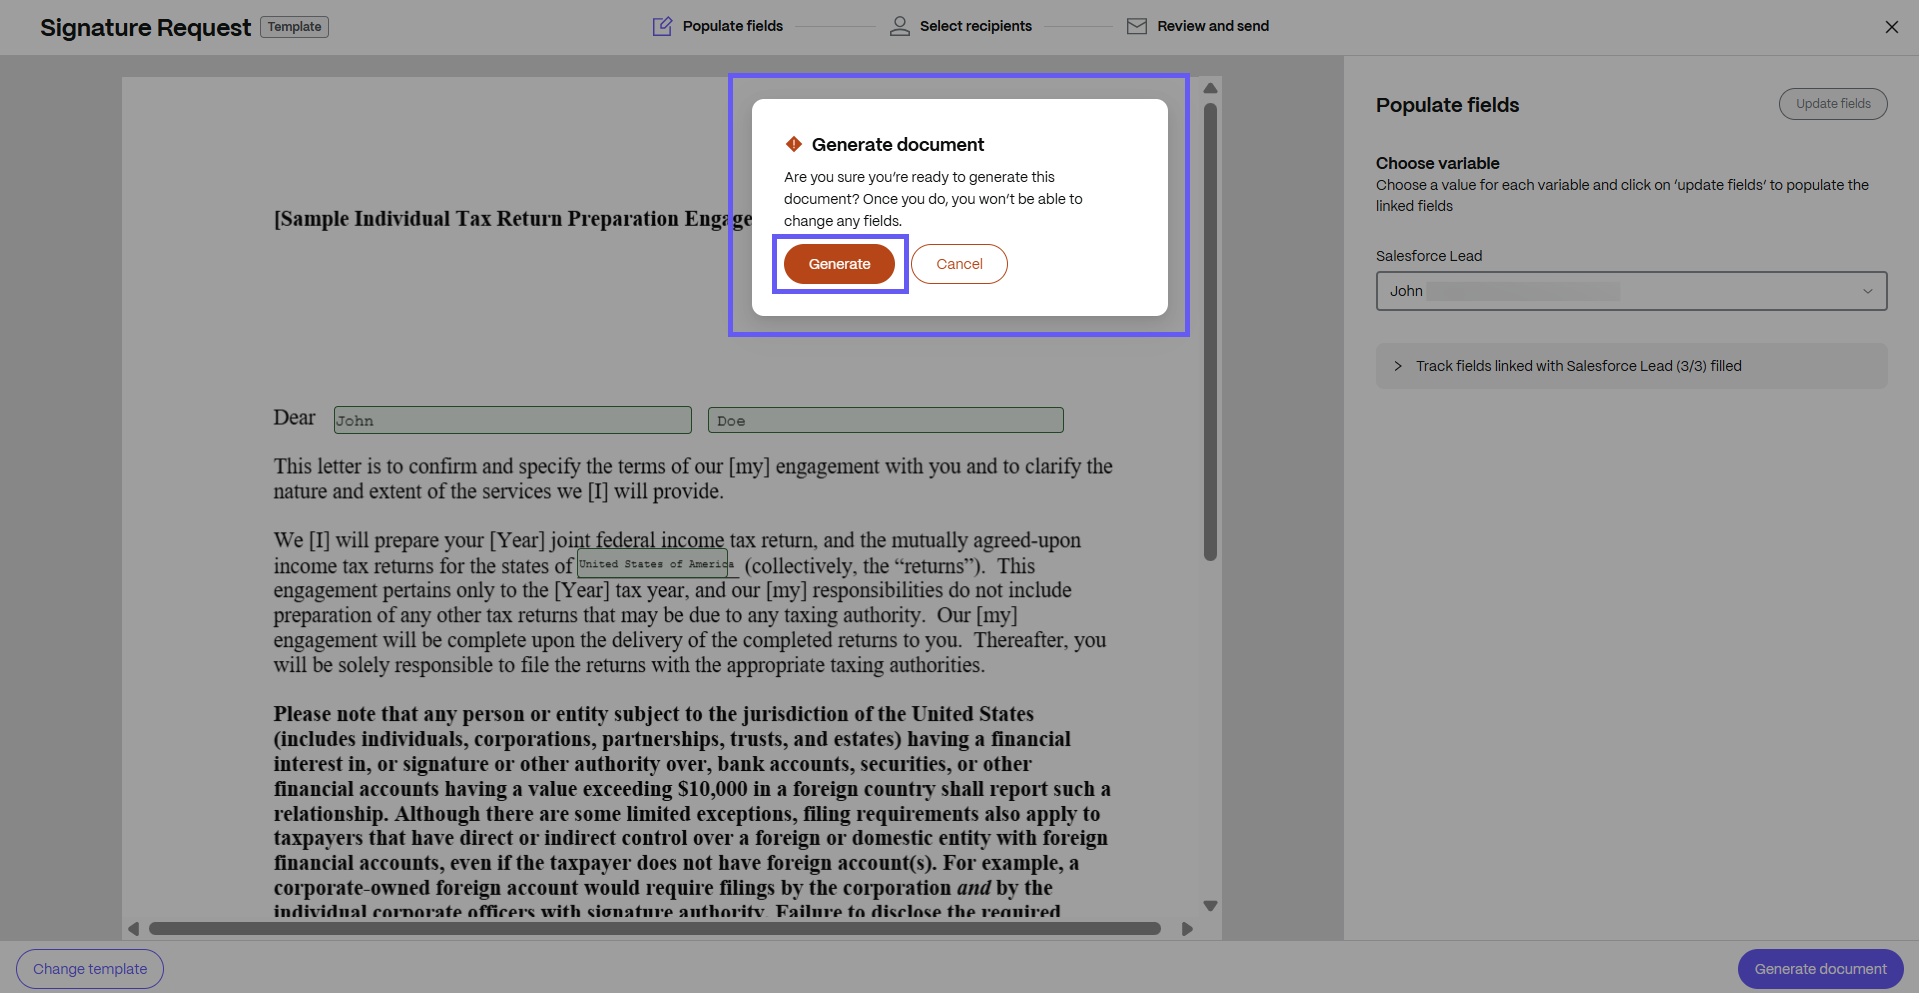
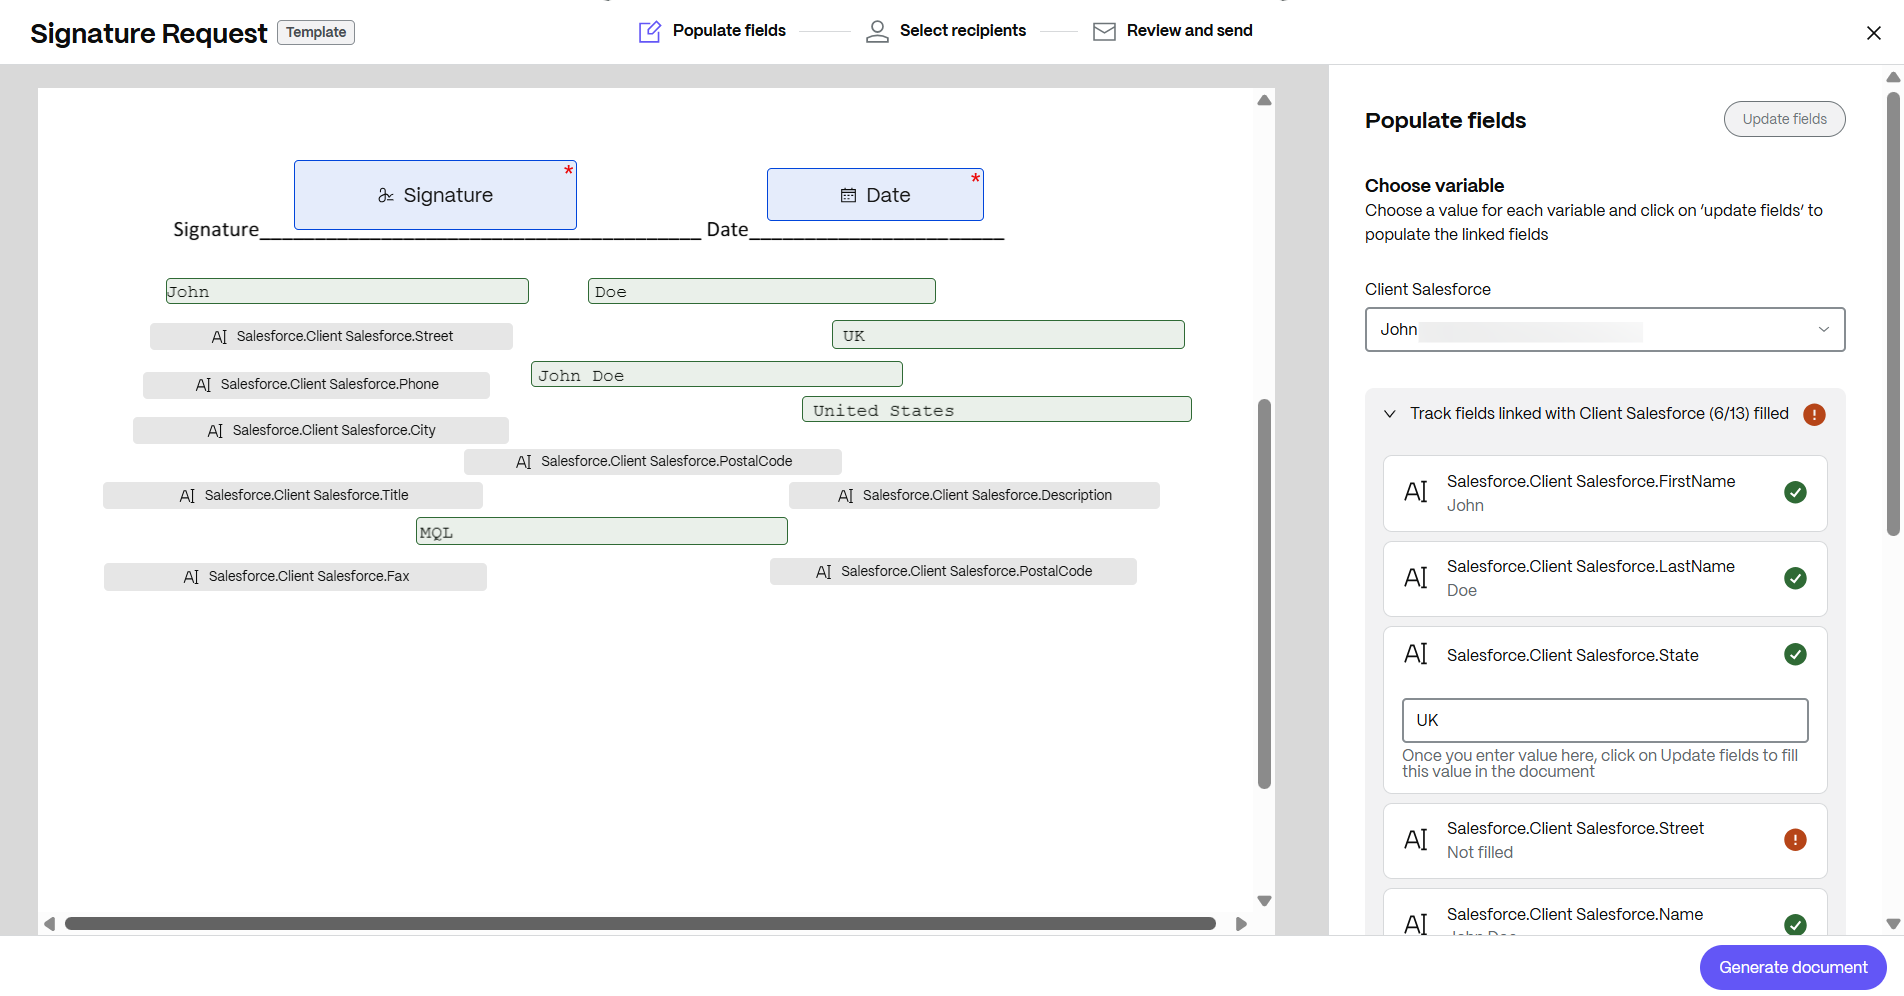
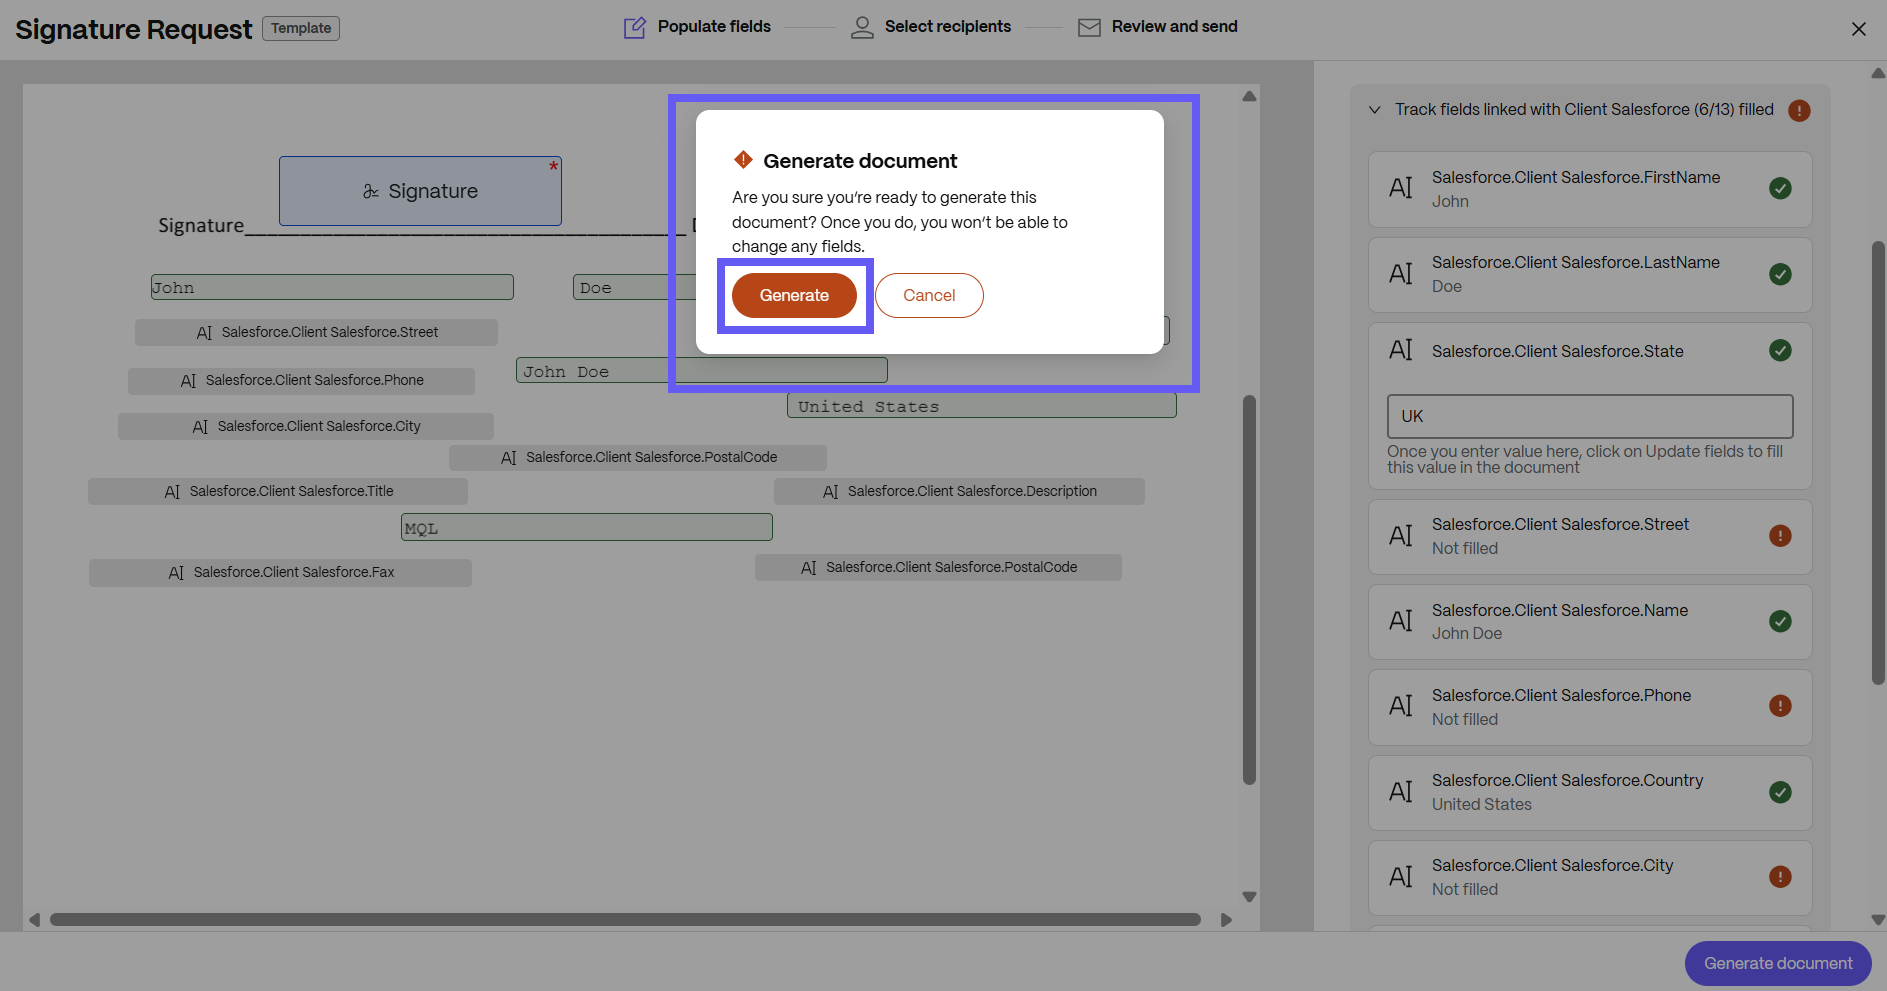
After all the fields populated, select Generate document. Click Generate, and once selected, you cannot edit any fields.
-
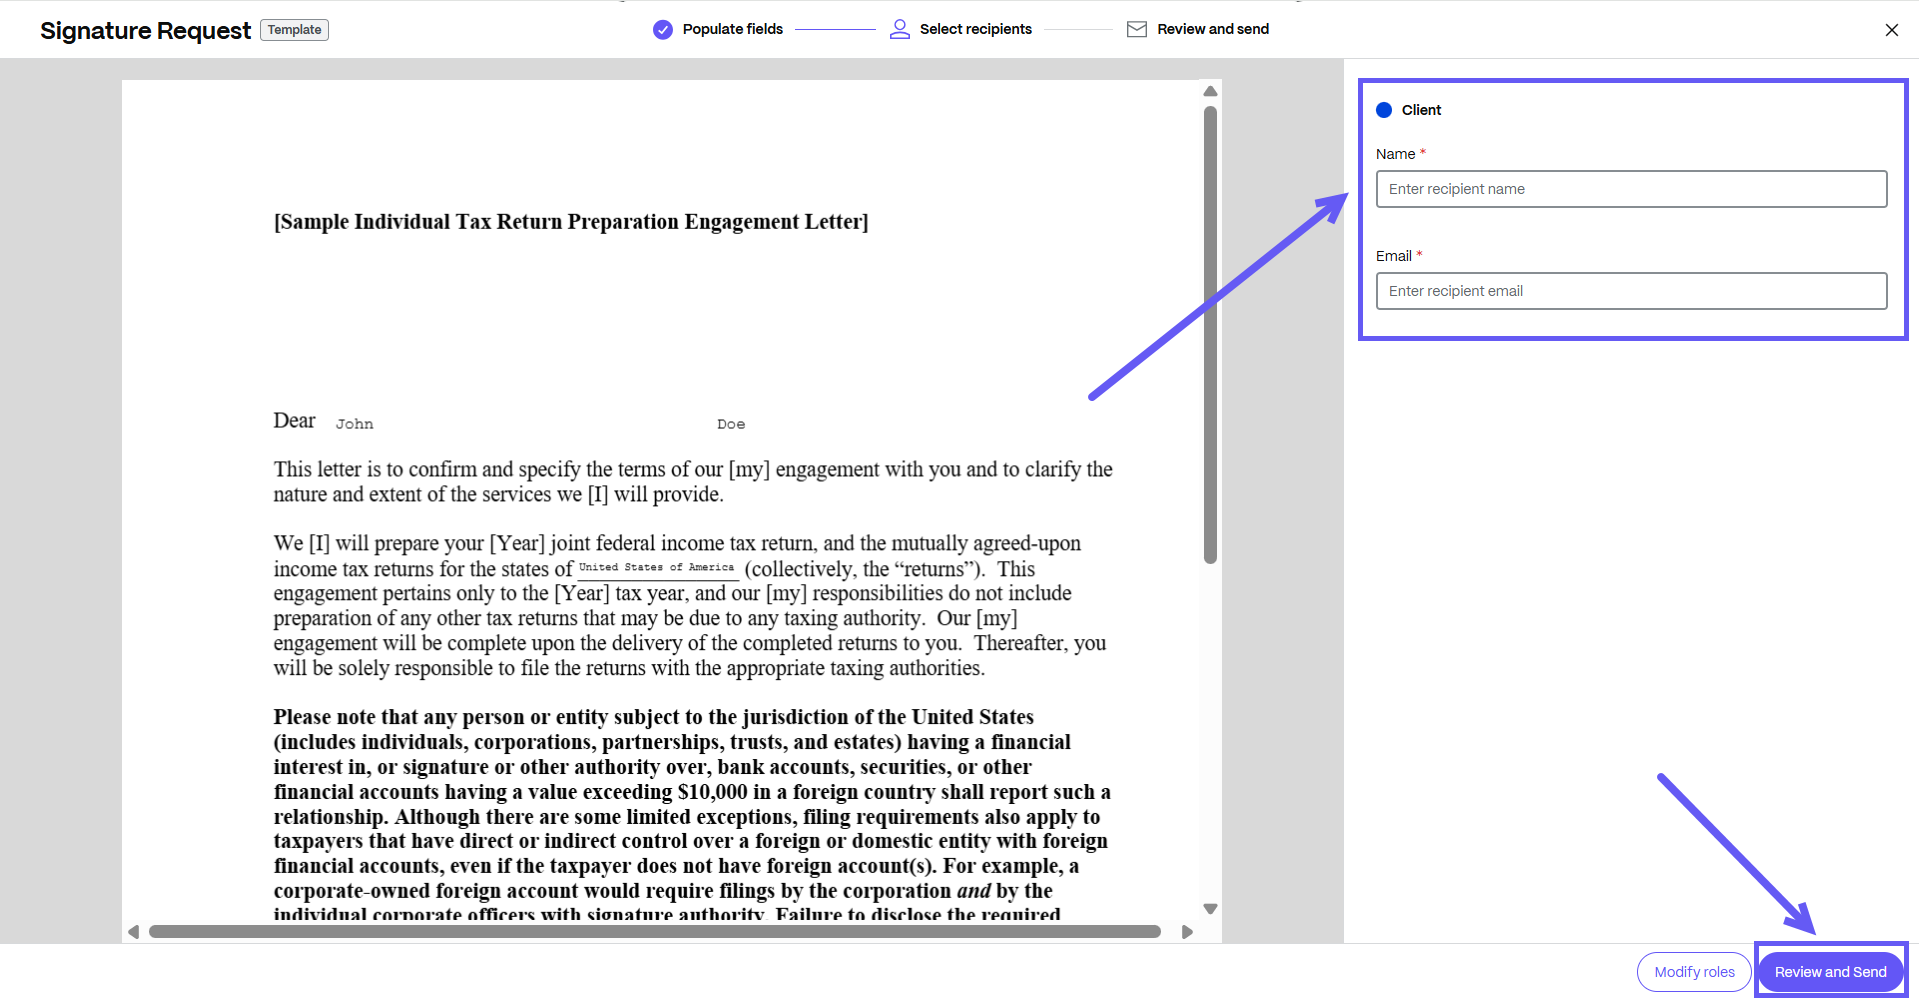
Enter the name and email for each recipient. Select Review and Send.
-
If you want to make any last-minute changes to the roles for the document that has been created, you can choose the Modify roles.
Note:
Any changes you make using this flow will not change the document template. These changes will only be applied to the document that has been created for signature in this signature request.
-
You can edit the document name and add a note that is sent to all signers. You can change the location for storing the signed document. You can also update the security options for the document.
-
Knowledge based authentication - requires signers to verify their identity with a knowledge-based quiz. Each signer must independently verify before signing the document.
-
Passcode - requires recipients to enter a 5-digit passcode to access documents.
-
-
Your document is now ready to be sent for signature. Select Send for Signature.
-
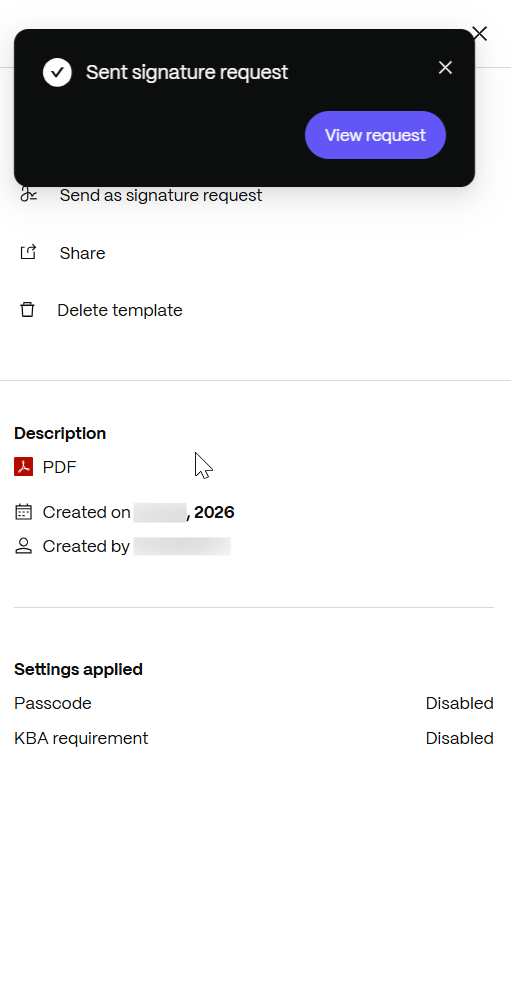
The signature request is sent, and the notification Sent signature request displays as shown below.
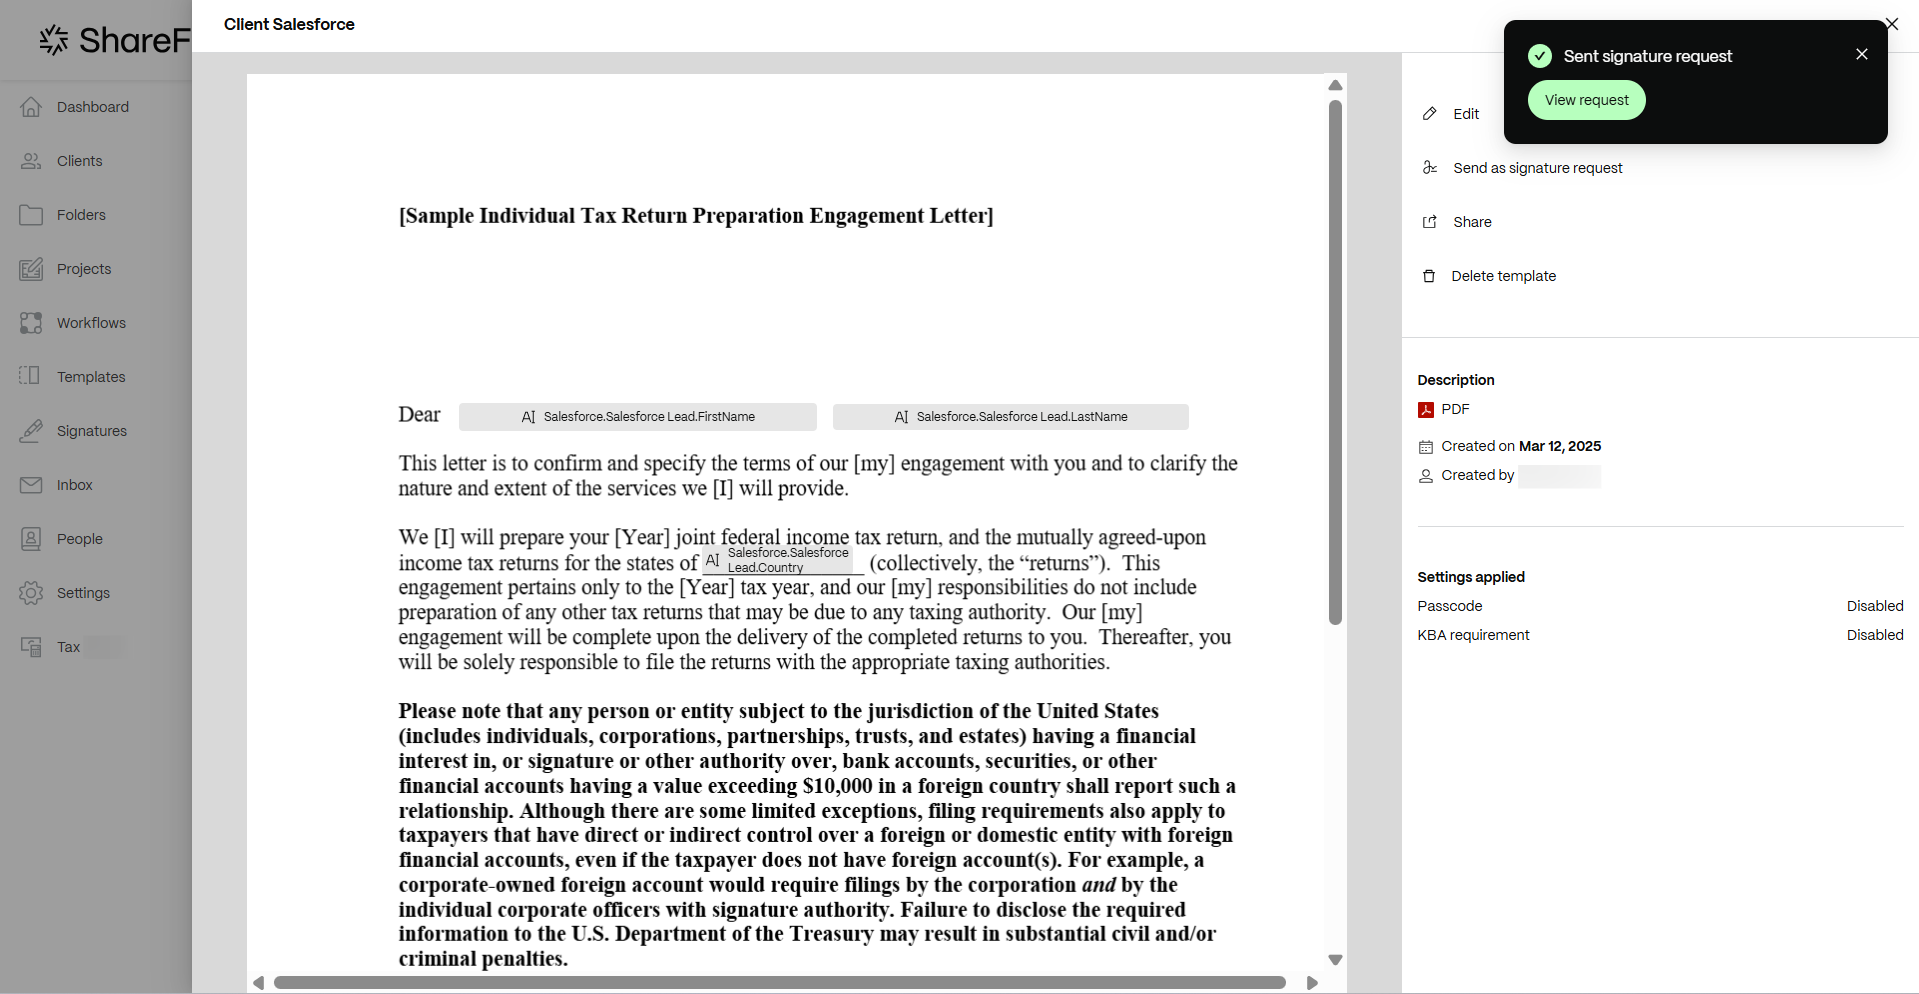
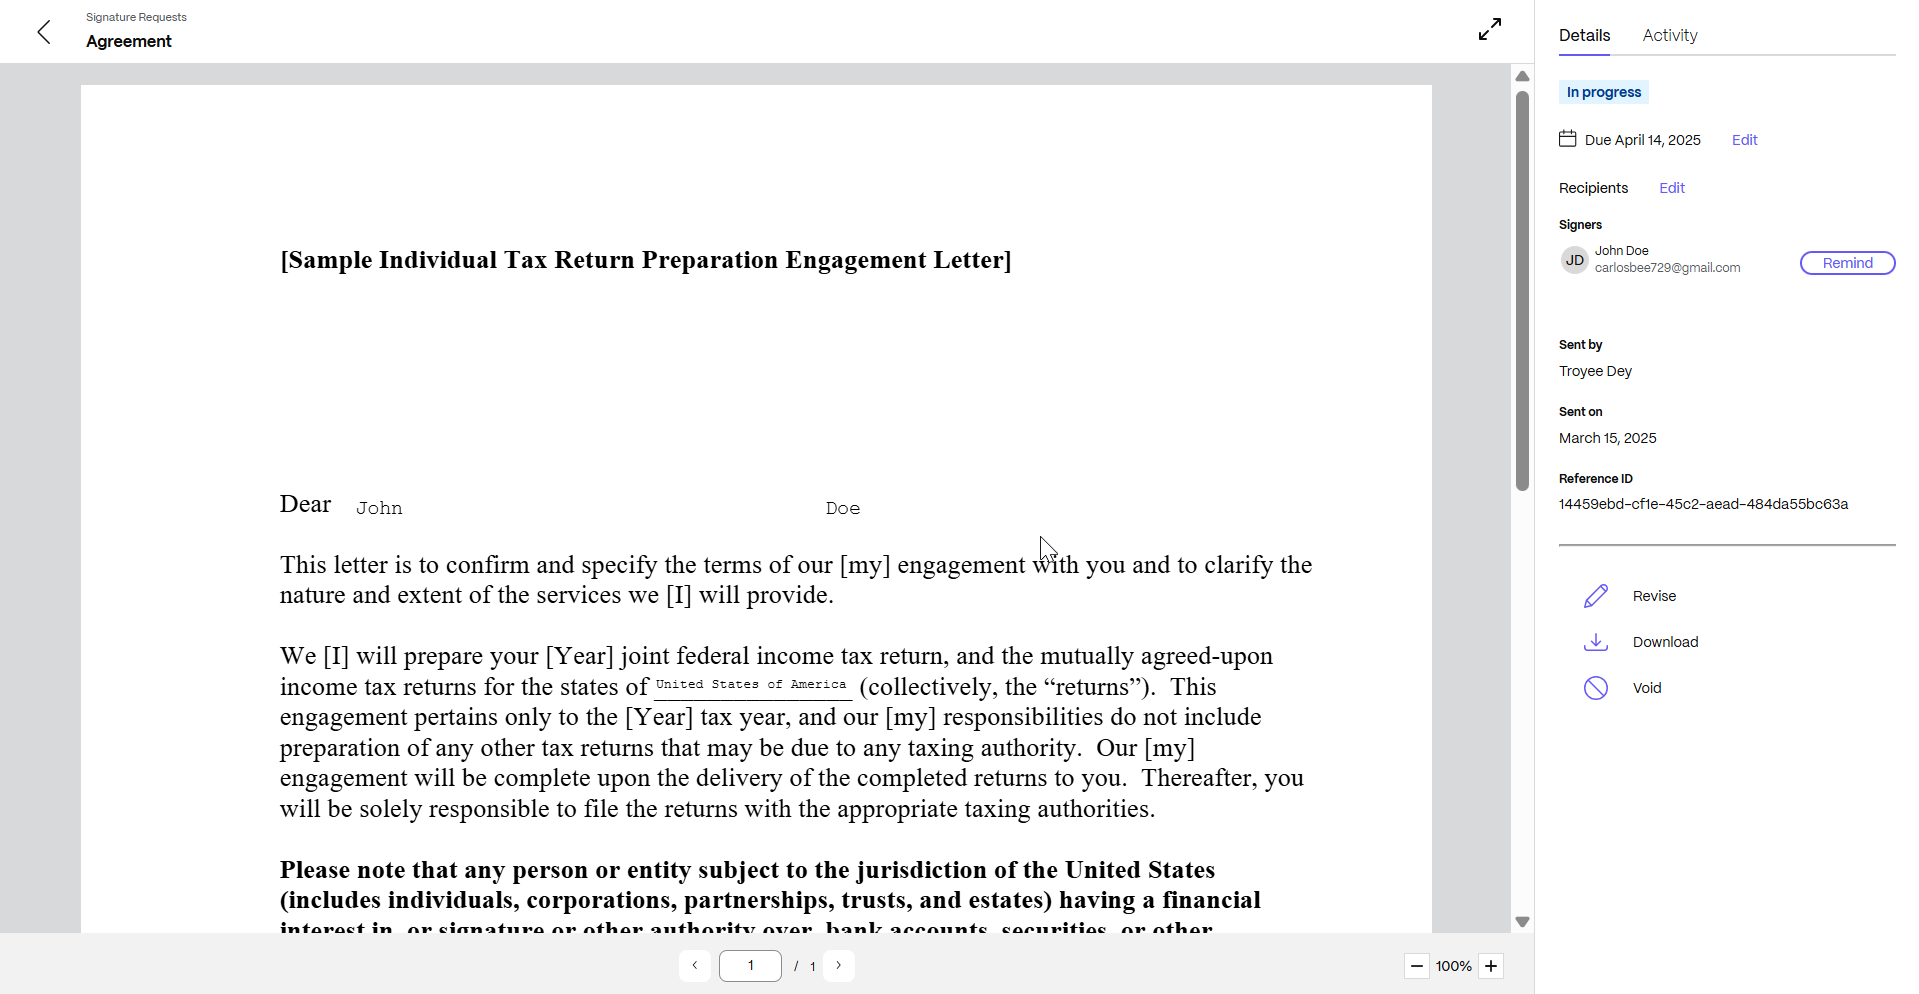
Note:
You can view the details of the signature request that has been sent by clicking on View. On the right pane, you can view the details and activity of the signature request that you sent. You can send reminders to the signers or revise, download, or cancel the request.
Handling missing data from variables
- In ShareFile, navigate to Templates.
-
Select the document template with all the fields, that you want to send for signature. When you click on it, the details page opens.
-
On the details page, select Send as signature request.
-
Enter the value for each variable so that most of the fields associated with that variable can be automatically filled. However, there is a possibility that all fields are not going to be auto filled.
-
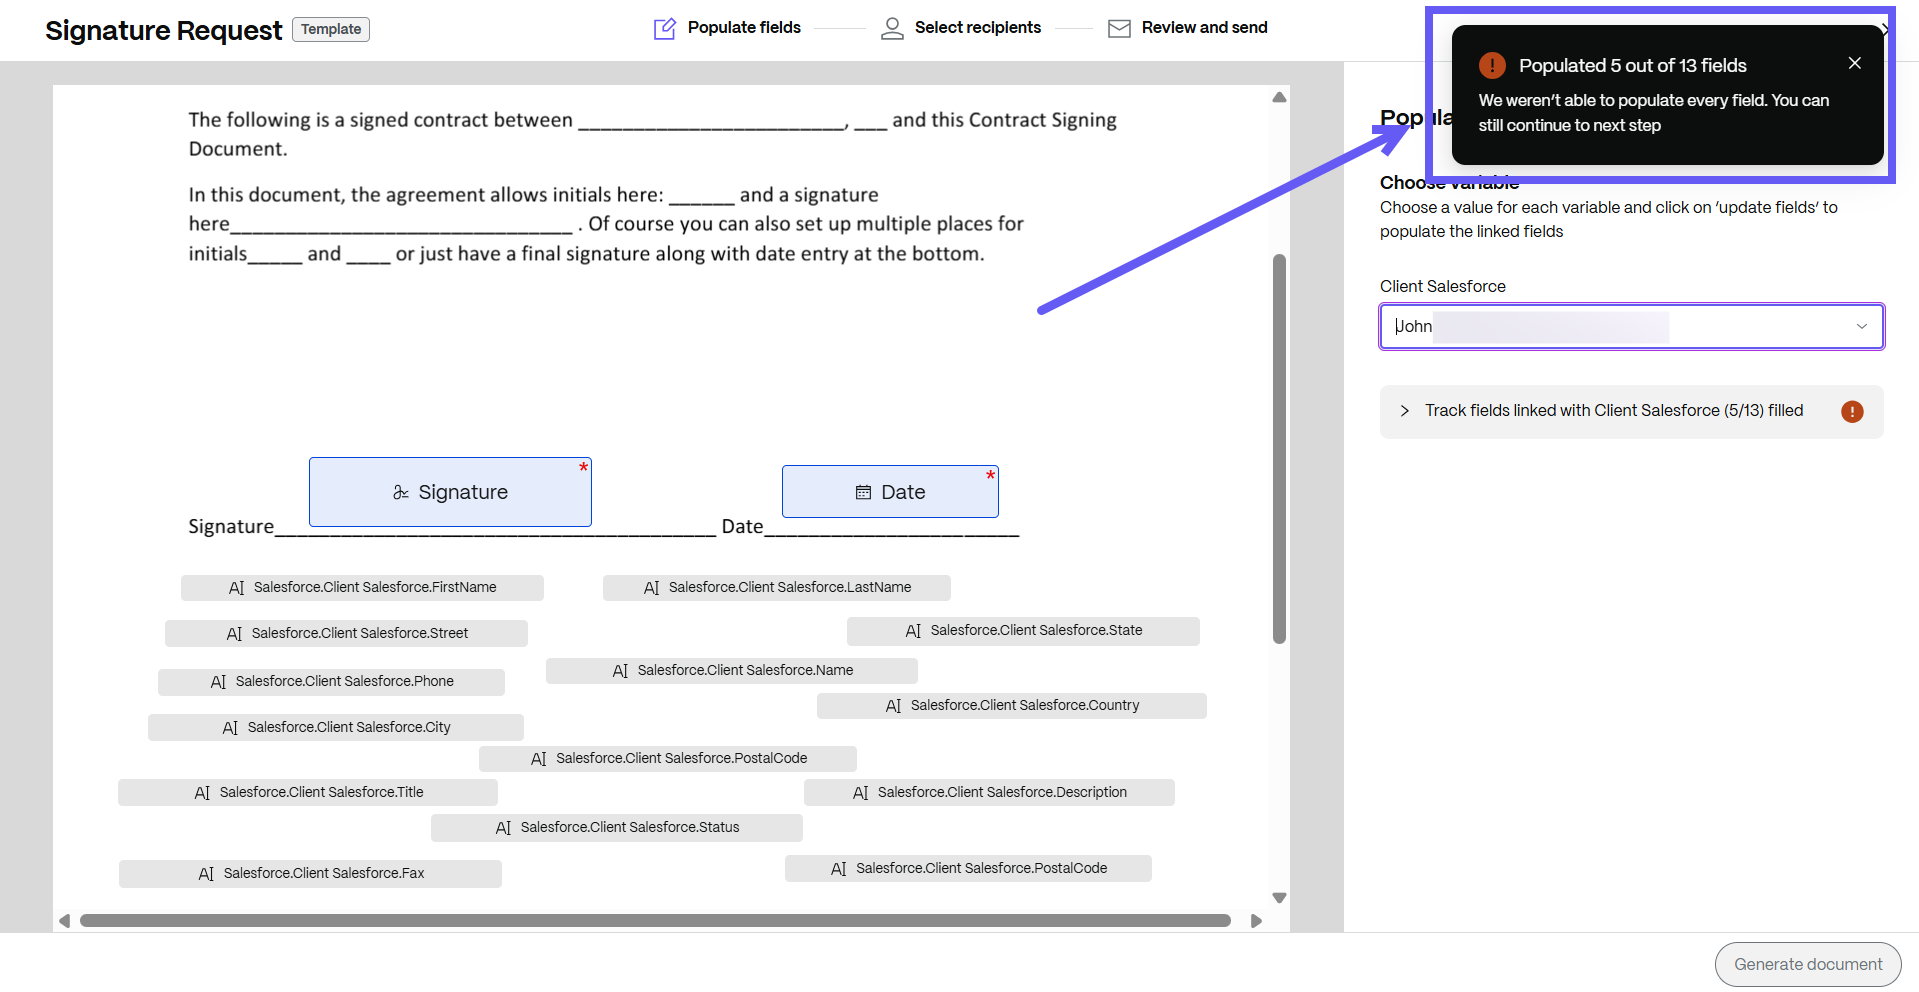
After selecting the variables, click on Update fields and the Populate message displays on the right side of the page.
-
Select Track fields to manually edit missing information before updating the document that you want to send for signature.
-
After editing the missing information, click on Update fields. You can also proceed with the available data if all the information is not required.
-
After updating the fields, select Generate document and the Generate document message displays. Click Generate, and once selected, you cannot edit any fields.
-
Enter the name and email for each recipient. Select Review and Send.
-
You can edit the document name and add a note that is sent to all signers.
-
You can change the location for storing the signed document.
-
Knowledge based authentication - requires signers to verify their identity with a knowledge-based quiz. Each signer must independently verify before signing the document.
-
Passcode - requires recipients to enter a 5-digit passcode to access documents.
-
-
Your document is now ready to be sent for signature. Select Send for Signature.
Manually enter data in document templates with Sender Filled fields
Sender Filled Fields allow users to manually enter variable data in document templates before sending them for signature. This feature is useful when required information is not available from integrated systems such as CRM.
Note:
Sender Filled Fields are supported on the following ShareFile Premium, VDR, and Industry Advantage plans.
The Sender Filled feature is available to any user with permission to create templates and send them for Signature.
Use Sender Filled Fields in document template
-
Create a Template
a. In ShareFile, navigate to Templates > Create.
b. On the Create document template page, select PDF template.
Note:
The feature is currently not supported for editable Word templates.
c. After selecting, you can upload a document either from ShareFile using Browse files, or you can upload a document from your local device.
d. Select Add a new role to create a new signer role.
e. Select Next Step: Place Fields. The Place Fields screen displays.
f. Navigate to Sender filled Fields.
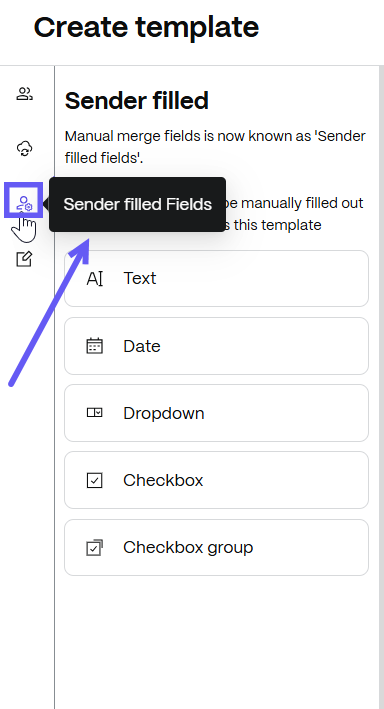
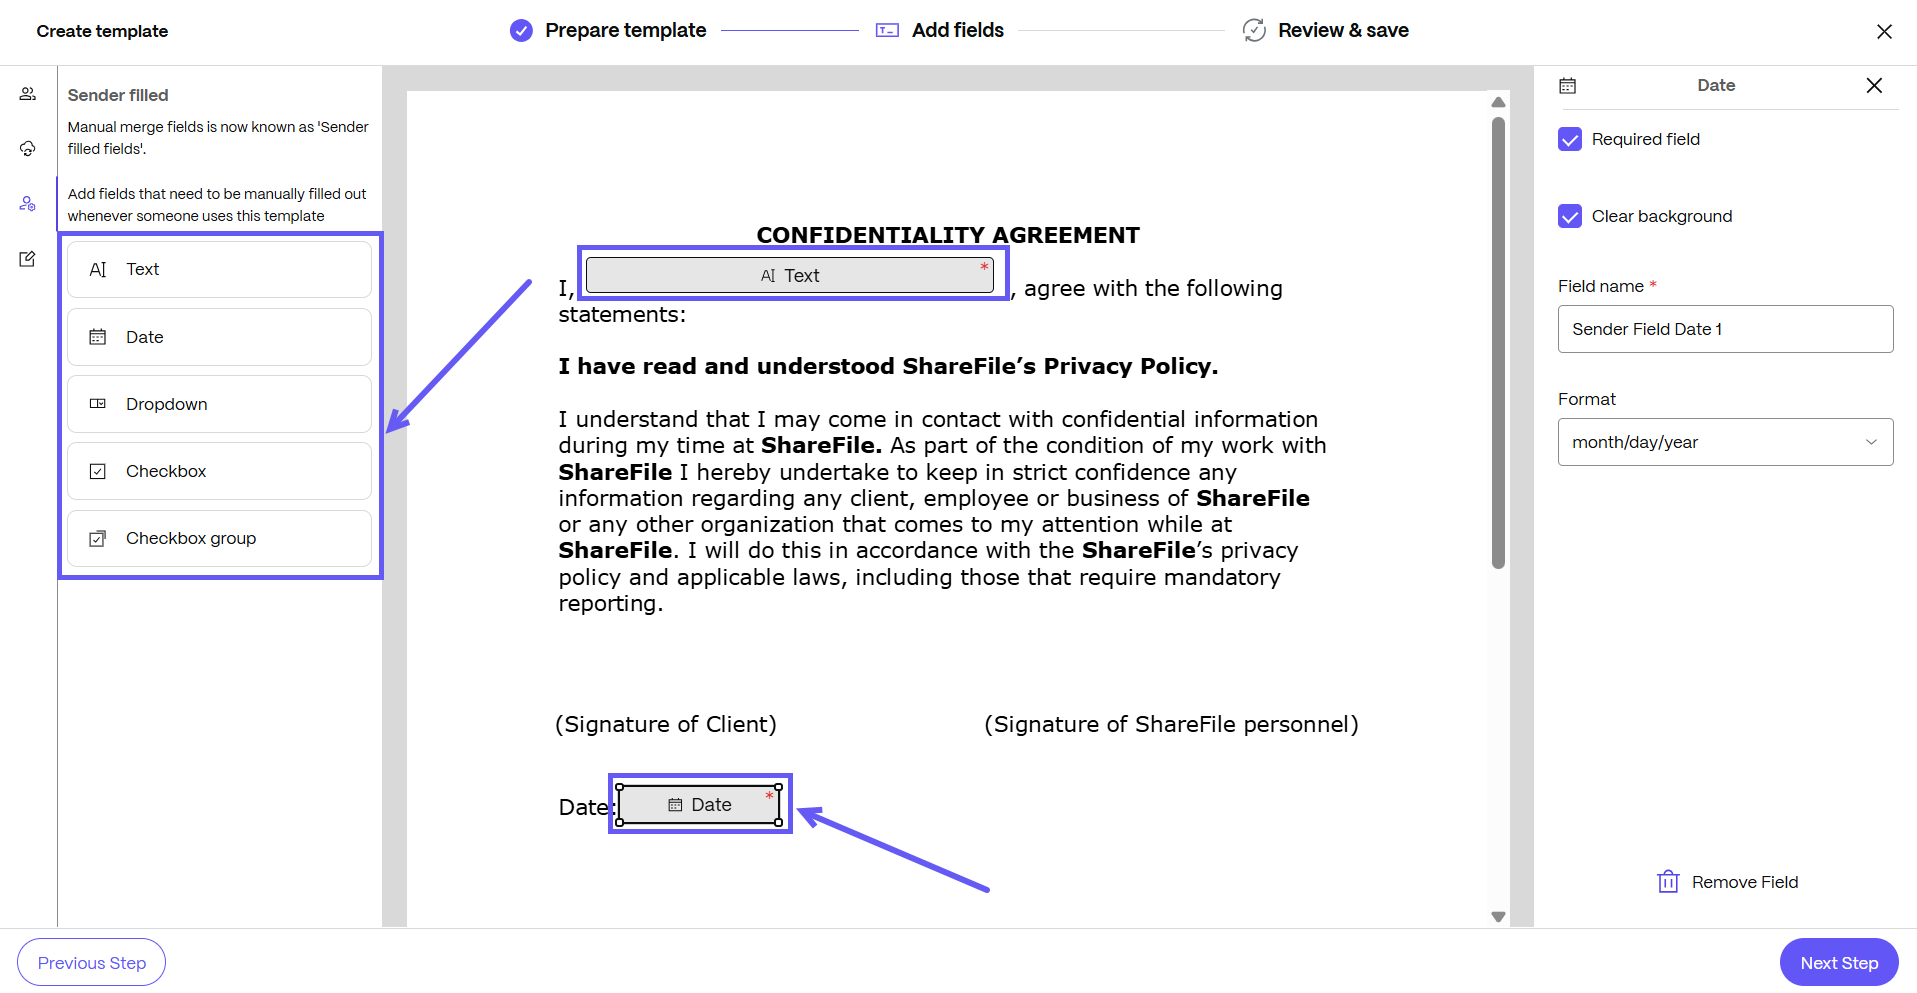
g. Drag and drop the required fields onto the document template, such as:
- Text
- Date
- Drop - down
- Checkbox
-
Checkbox Groups
h. Navigate to Signer Filled Field and add the required signature fields for the client.
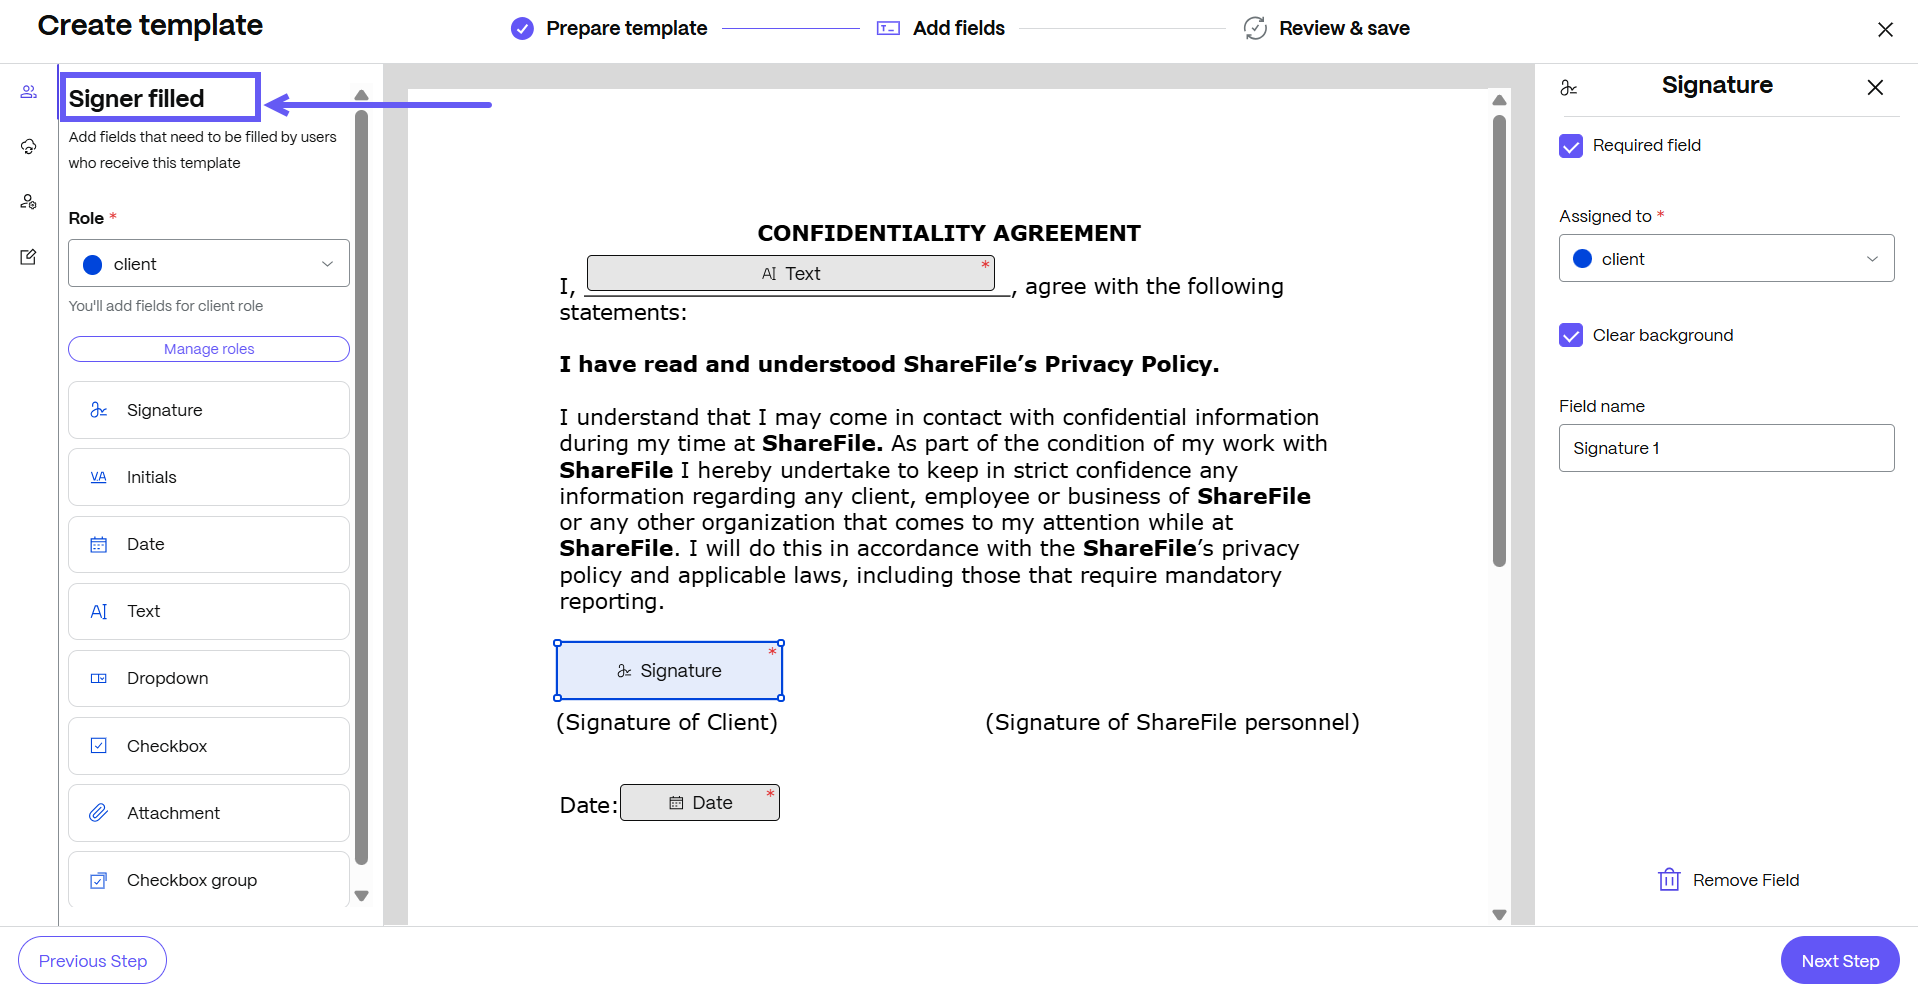
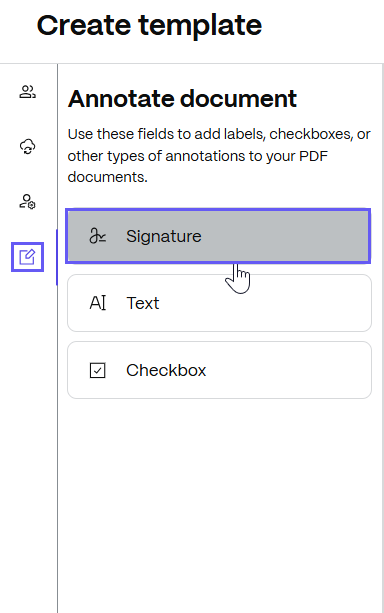
i. Select Annotate document and select Signature to annotate the sender’s signature on the template.
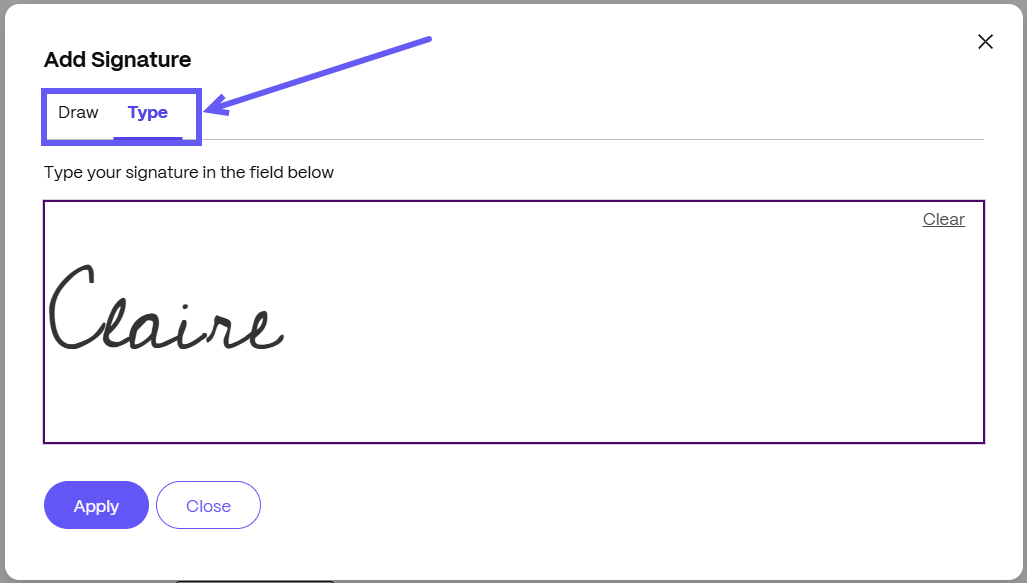
j. On the Add Signature page, you have the option to draw or type the signature.
k. Select Next Step.

l. The Review and Save screen displays. Enter the name and description for your new document template.
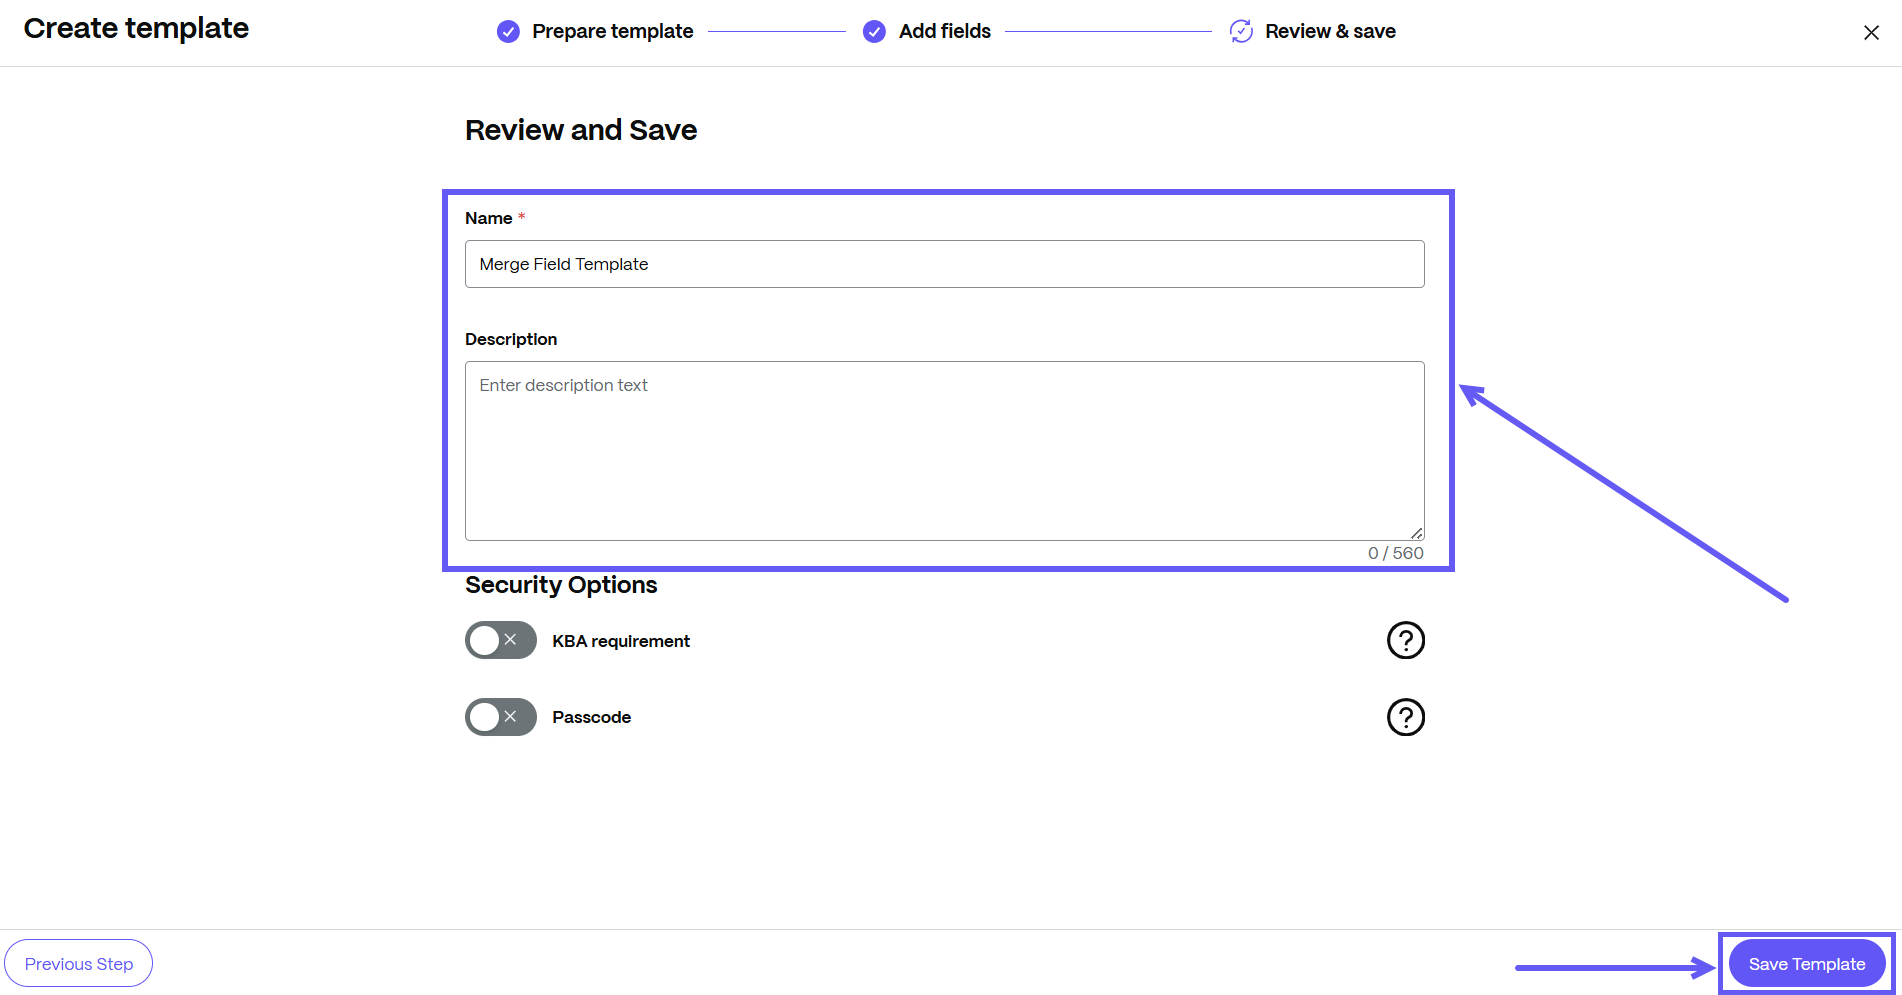
m. You can set additional Security Options such as KBA and passcode.
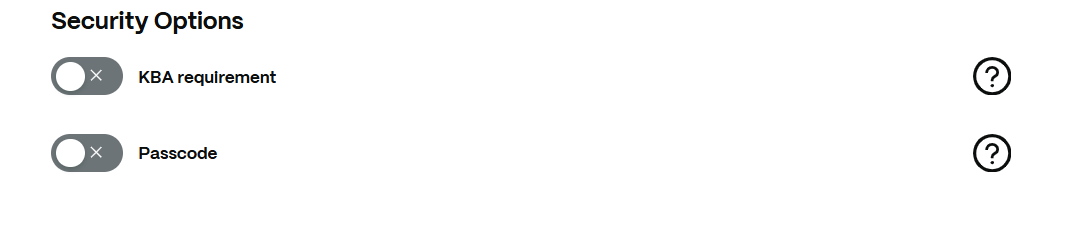
- KBA requirement - requires signers to verify their identity with a knowledge-based quiz. Each signer must independently verify before signing the document.
-
Passcode - requires recipients to enter a 5-digit passcode to access documents.
n. Select Save Template.
-
Send a template for Signature
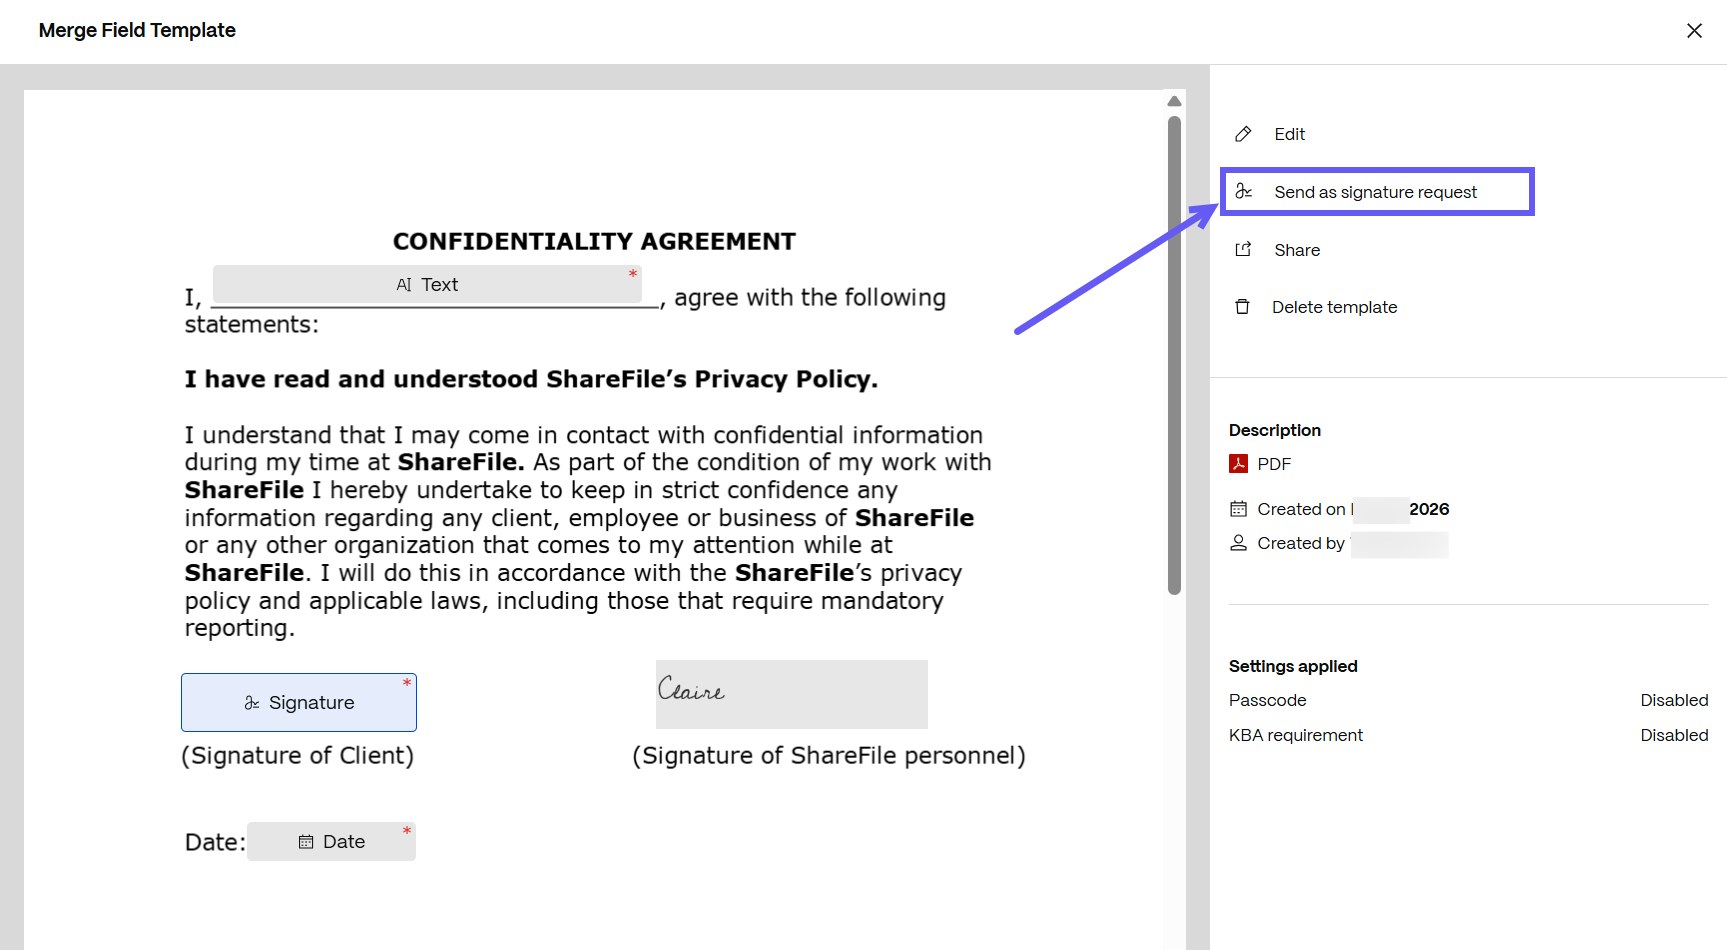
a. Open the document template that you want to send for signature.
b. Select Send a signature request.
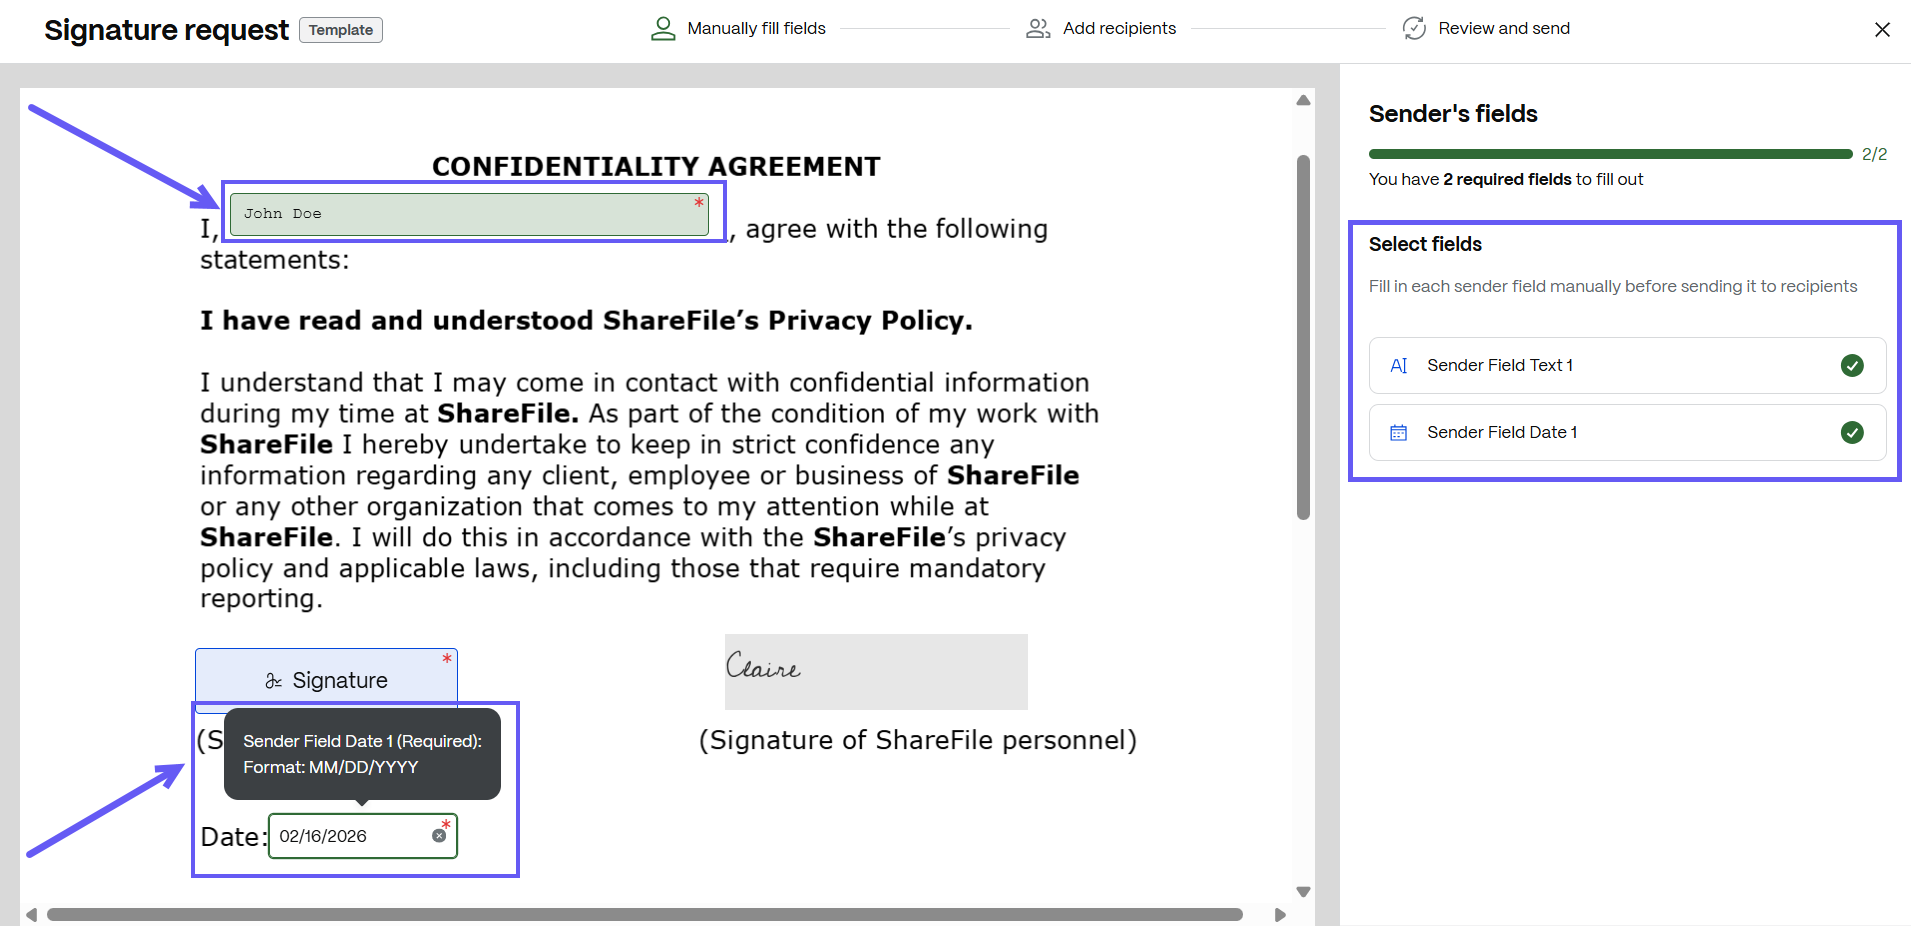
c. On the details page, you can manually enter the required information in the sender fields.
- Enter the Client’s name.
- Select a date from the date picker.
-
You can use the Sender’s fields section to track the completion of required fields.
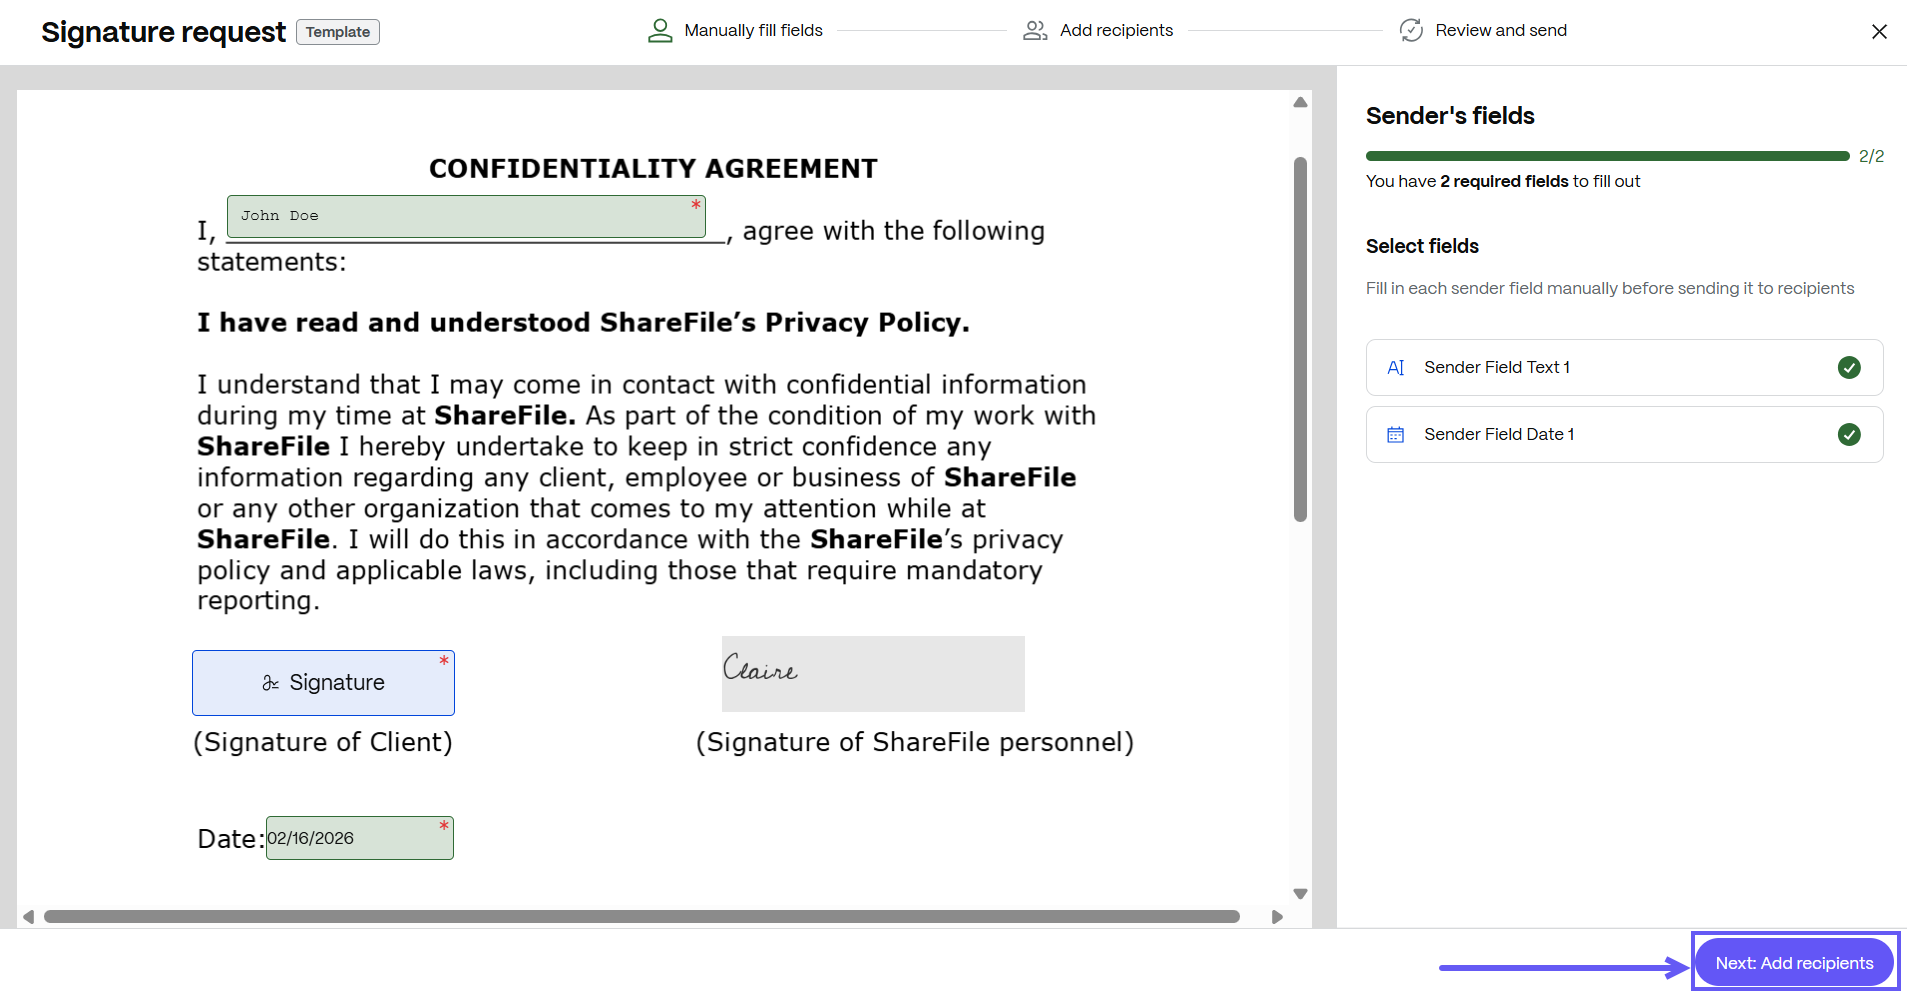
d. After entering the required fields, select Next: Add recipients.
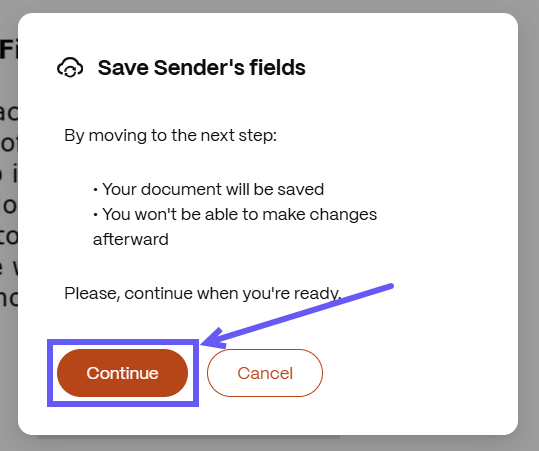
e. Click Continue. After you move to the next step, Sender filled fields are embedded and cannot be edited.
f. Enter the name and email for each recipient. Select Review and send.
Note:
Add a client name to a single recipient, or use Send in bulk to distribute it to up to 300 people. For information about sending a single template for bulk signature requests, see Bulk Send - Document Templates.
g. You can edit the document name and add a note that is sent to all signers.
h. You can change the location for storing the signed document.
- Knowledge based authentication - requires signers to verify their identity with a knowledge-based quiz. Each signer must independently verify before signing the document.
-
Passcode - requires recipients to enter a 5-digit passcode to access documents.
i. Your document is now ready to be sent for signature. Select Send for Signature.
j. The signature request is sent, and the notification Sent signature request displays as shown below.
Edit a document template
Use the following steps to edit a template.
-
In ShareFile, navigate to Templates.
-
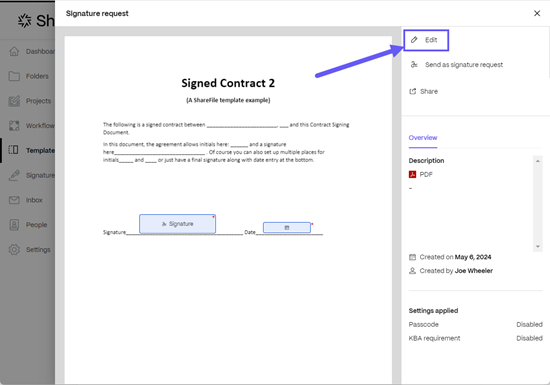
From the Templates page, select the document template that you’d like to edit.
-
Select Edit.
-
You can change the file that is being used by the document template along with the roles and the variables.
Note:
Editing the template will not change the documents that have already been created.
-
Select Next Step: Place Fields.
You can add or remove fields or click on a field to change the settings for that field.
Note:
When adding or placing fields, make sure you choose the right role for the field using the drop down menu. All the fields associated with a role will be assigned to the signer associated with that role.
-
Select Next Step. The Review and Save screen displays.
You can update the name and description of the template here along with the security options.
-
Select Save Template. The updated template will be displayed on the Templates page.
Share a document template with other people in your organization
-
In ShareFile, navigate to Templates.
-
From the Templates page, select the document template that you’d like to share.
-
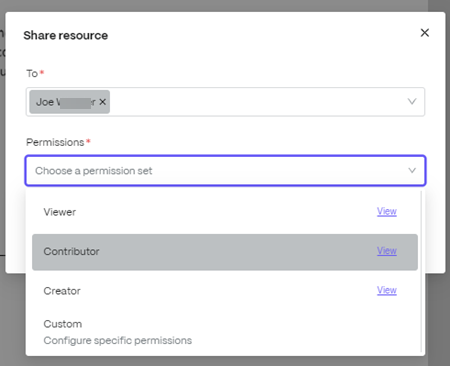
Select Share. The Share resource screen displays.
-
Type in the name of the recipient in the To field.
-
Under Permissions select the role that you want to assign to the recipient. To view the permissions associated with each role select View.
Role Permissions Purpose Viewer Recipient can view template and the underlying file Ideal for recipients that will be using this template for their document workflows. They will not be able to edit or modify the template. Contributor The recipient can view and modify the template and can view, modify and delete the underlying file. Ideal for recipients that will be making changes to the template or the underlying file. The changes that are made by the recipient will be reflected for all users who are using the template. Creator he recipient will have the same permissions as the template creator Ideal for delegating the ownership of the template to another employee. For example, if an employee is leaving the organization, a template can be shared with another employee for long-term maintenance. Custom Recipient will have custom permissions based on your selection Ideal for cases where default roles don’t serve the need. Granular permissions can be set for the recipient. -
Select Share.
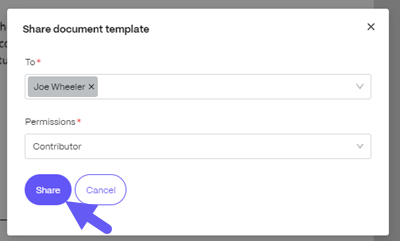
The recipient can view this template in their template library under the Shared with me tab.
Manage Document Templates
You can now customize your document template and add, delete, or modify your template attributes. Select Templates Library to learn more.
In this article
- Steps to create a PDF document template
- Send a PDF document template for signature
- Automatically fill or paste data from ShareFile and third party applications in documents
- Steps to create a template that can automatically fill or paste data from different applications
- Steps to send a template that can automatically fill or paste data from different applications
- Handling missing data from variables
- Manually enter data in document templates with Sender Filled fields
- Edit a document template
- Share a document template with other people in your organization
- Manage Document Templates