This content has been machine translated dynamically.
Dieser Inhalt ist eine maschinelle Übersetzung, die dynamisch erstellt wurde. (Haftungsausschluss)
Cet article a été traduit automatiquement de manière dynamique. (Clause de non responsabilité)
Este artículo lo ha traducido una máquina de forma dinámica. (Aviso legal)
此内容已经过机器动态翻译。 放弃
このコンテンツは動的に機械翻訳されています。免責事項
이 콘텐츠는 동적으로 기계 번역되었습니다. 책임 부인
Este texto foi traduzido automaticamente. (Aviso legal)
Questo contenuto è stato tradotto dinamicamente con traduzione automatica.(Esclusione di responsabilità))
This article has been machine translated.
Dieser Artikel wurde maschinell übersetzt. (Haftungsausschluss)
Ce article a été traduit automatiquement. (Clause de non responsabilité)
Este artículo ha sido traducido automáticamente. (Aviso legal)
この記事は機械翻訳されています.免責事項
이 기사는 기계 번역되었습니다.책임 부인
Este artigo foi traduzido automaticamente.(Aviso legal)
这篇文章已经过机器翻译.放弃
Questo articolo è stato tradotto automaticamente.(Esclusione di responsabilità))
Translation failed!
Edit Company Branding
Employee users with the Edit Account Appearance permission set can edit the appearance of the ShareFile login page for your account.
To update the company branding, navigate to Account settings > Account and Reporting > Edit Company Branding.
You can:
- Edit the account name
- Edit the account appearance
- Edit subdomains
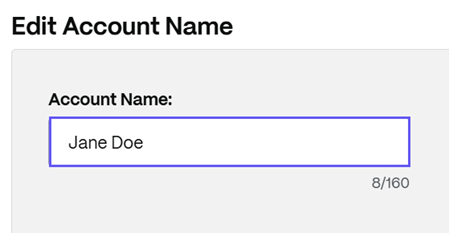
Edit Account Name
Your account’s account or company name allows ShareFile support staff to identify your account. It is also the name that appears on any billing-related correspondences. Typically, your account name is the same as the name of your business.
Edit Account Appearance
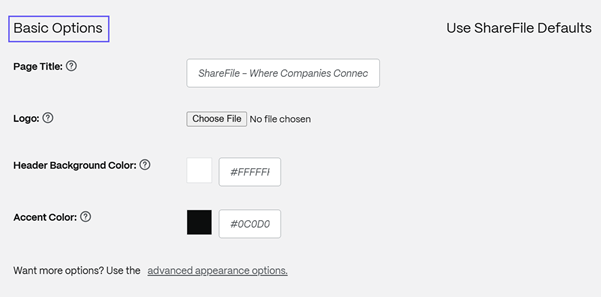
Basic Options
With the Basic Options you can perform the following actions:
- Change the Page Title that appears at the top of the window.
- Upload your company logo - Use this logo option to have a separate logo from the account header logo. The logo must be no taller than 80px and no wider than 400px. Valid file extentions are .jpg, .jpeg, .bmp, .gif, .ico and .png.
- Change the Header Background Color
- Change the Accent Color.
Note:
Changing the Header Background Color impacts the ShareFile Client Portal.
Advanced appearance options
With the advanced appearance options, users that have the Edit Account Appearance permission assigned can edit:
- Browser Options - allows you to edit the page title, and favicon in the account appearance.
- Header Options - allows you to edit the logo and background image in the account appearance.
- Page Options - allows you to set the accent bar color at the top of the tabs and in the content boxes.
- Login Page Options - Allows you to upload a logo, select a logo background color, a background color and upload a background image.
- Email Options - Allows you to upload a logo, provide a header description and provide a footer description.
Notes:
- The logo image must be no taller than 80px and no wider than 400px
- The background image can be any size, but only display the first 80 vertical pixels and will tile/repeat horizontally and vertically.
- The default background color is white but any HTML color code can be used. If both a color and an image are entered, the image displays, and not the color.
Edit Subdomains
Each ShareFile account has its own unique URL that is generally in the format of https://yourcompanyname.sharefile.com. The section of this URL with yourcompanyname in it is called the subdomain, and it will always be followed with .sharefile.com or a plan-specific variant. The creator of the ShareFile account picks the subdomain during the account setup process, and a single account can have up to three different subdomains tied to it.
To find your company’s unique subdomain, log in to your ShareFile account and locate the address in your browser’s URL bar. The part before .sharefile.com is your subdomain.

With your ShareFile account, you are allowed up to three subdomains. All of these subdomains share the same custom branding for your company account.
The following requirements are necessary to create subdomains:
- Contain only letters, numbers, and hyphens.
- Does not start with a hyphen.
- Is at least 2 characters long.
To change your subdomain:
- Go to Account settings > Account and Reporting > Edit Company Branding > Edit Subdomains
- Once you have added the subdomains, select Save at the bottom of the page.
Your primary subdomain is listed beside the red asterisk and will be the subdomain you are directed to when logging in from
ShareFile does not recommend completely deleting your subdomain, as doing so will make the subdomain available for use by another ShareFile account.
To change your subdomain, you can designate a new Primary Subdomain with the following steps:
- Create a new Alternate Subdomain.
- Sign out.
- Sign in with the Alternate Subdomain created in Step 1.
- Click Account settings > Company Account Info, then scroll to the Edit Subdomains section.
- Place your Alternate Subdomain into the Primary field.
- Don’t forget to add your previous Primary Subdomain as an Alternate Subdomain, so that it cannot be taken by a new ShareFile account.
- Click Save.
Share
Share
In this article
This Preview product documentation is Citrix Confidential.
You agree to hold this documentation confidential pursuant to the terms of your Citrix Beta/Tech Preview Agreement.
The development, release and timing of any features or functionality described in the Preview documentation remains at our sole discretion and are subject to change without notice or consultation.
The documentation is for informational purposes only and is not a commitment, promise or legal obligation to deliver any material, code or functionality and should not be relied upon in making Citrix product purchase decisions.
If you do not agree, select I DO NOT AGREE to exit.