This content has been machine translated dynamically.
Dieser Inhalt ist eine maschinelle Übersetzung, die dynamisch erstellt wurde. (Haftungsausschluss)
Cet article a été traduit automatiquement de manière dynamique. (Clause de non responsabilité)
Este artículo lo ha traducido una máquina de forma dinámica. (Aviso legal)
此内容已经过机器动态翻译。 放弃
このコンテンツは動的に機械翻訳されています。免責事項
이 콘텐츠는 동적으로 기계 번역되었습니다. 책임 부인
Este texto foi traduzido automaticamente. (Aviso legal)
Questo contenuto è stato tradotto dinamicamente con traduzione automatica.(Esclusione di responsabilità))
This article has been machine translated.
Dieser Artikel wurde maschinell übersetzt. (Haftungsausschluss)
Ce article a été traduit automatiquement. (Clause de non responsabilité)
Este artículo ha sido traducido automáticamente. (Aviso legal)
この記事は機械翻訳されています.免責事項
이 기사는 기계 번역되었습니다.책임 부인
Este artigo foi traduzido automaticamente.(Aviso legal)
这篇文章已经过机器翻译.放弃
Questo articolo è stato tradotto automaticamente.(Esclusione di responsabilità))
Translation failed!
Sign in options
Change password
To change your ShareFile password:
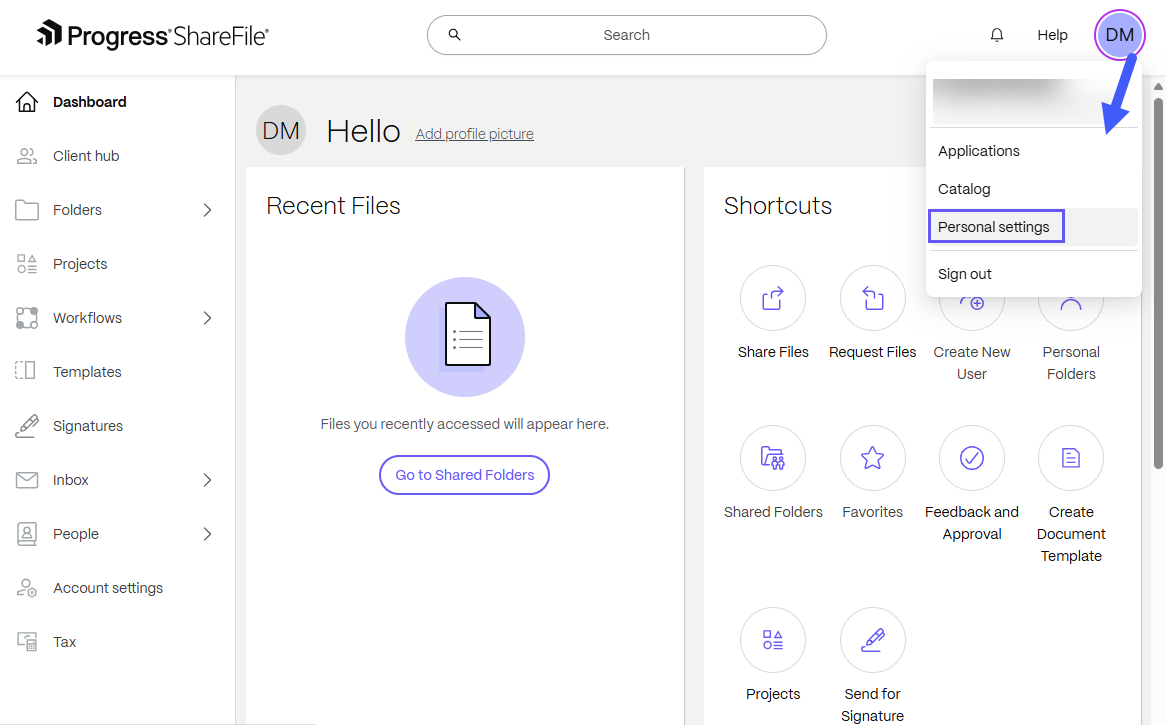
- From your ShareFile dashboard, click the user avatar in the upper right corner.
-
Select Personal settings from the dropdown options.
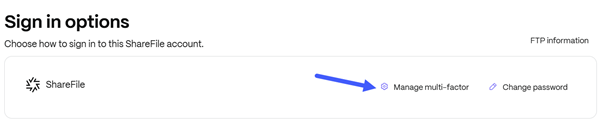
- Go to Sign in options.
-
Select Change Password next to the ShareFile sign in option:

- From the Change password screen:
- Enter your Current password.
- Enter a New password according to the password requirements.
- Confirm new password.
-
Check the box to choose if you want to sign out of all other open sessions.
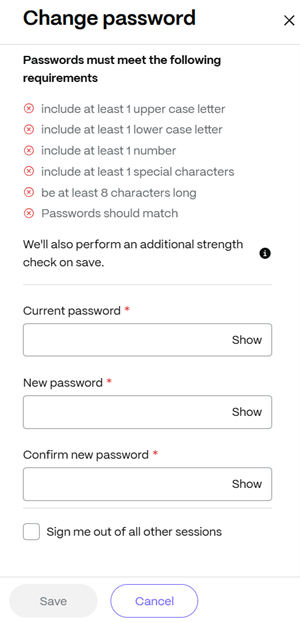
- Click Save.
Forgot password
If you have forgotten your password and cannot sign in, see Assisting users with password reset.
Manage Multi-factor authentication
Multi-factor authentication uses an authenticator app or your phone to provide an extra layer of security for your username and password. It is available to both Client and Employee users, but only if enabled by an account administrator.
To manage multi-factor authentication:
- From your ShareFile dashboard, click the user avatar in the upper right corner.
-
Select Personal settings from the dropdown options.
- Go to Sign in options.
-
Select Manage multi-factor:
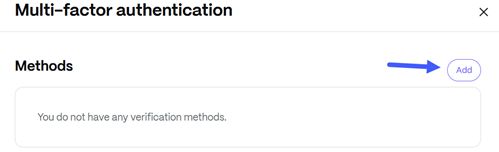
The Multi-factor authentication configuration window displays.
- From the Multi-factor authentication window, you can:
- Add multi-factor verification methods. You can use an authenticator app or a phone number to sign in to your ShareFile account.
- Generate application specific passwords for apps that don’t support multi-factor authentication.
- Generate backup codes which can be used if you lose access to other verification methods.
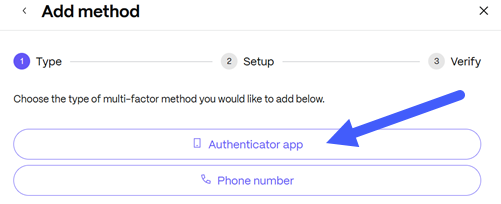
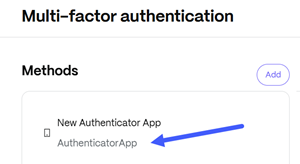
Add an Authenticator App
- From the Multi-factor authentication window, go to Methods.
-
Select Add.
-
Select the Authenticator app method.
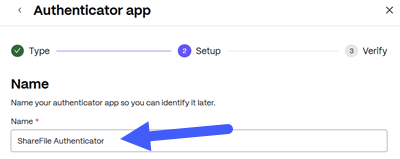
-
Give a Name to the authenticator app.
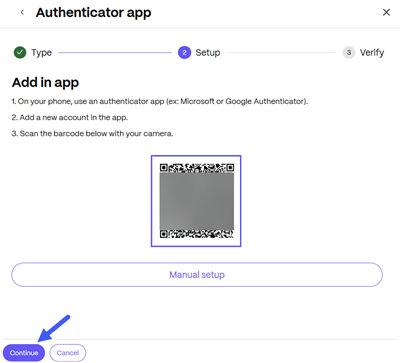
-
Add an app using your phone.
- Search your app store for an authenticator app (for example Microsoft or Google Authenticator).
- Download and install the app.
- Add a new account in the app.
-
Select the option to scan a barcode and use your phone’s camera to scan the barcode from your screen. Click Continue.
-
Enter the 6-digit verification code from the authenticator app. Click Continue.
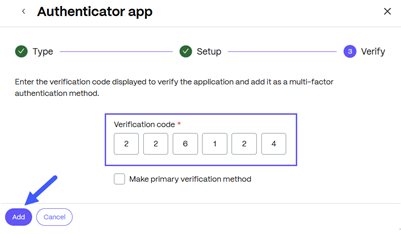
Check the box if you want to make this to be your primary verification method.
-
Once verified, the authenticator app multi-factor authentication method is added to your account.
-
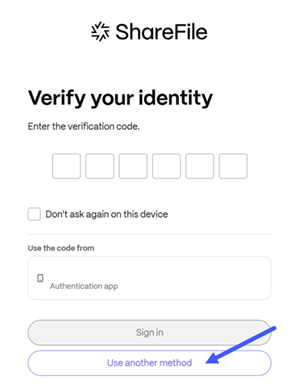
During login, you will be required to enter the verification code from your authenticator app to verify your identity.

- Enter the 6 digit code and click Sign in. Choose Use another method to return to other choices multi-factor choices.
Add a Phone Number
Whenever you login from an untrusted computer or device, we will send you a verification code to your saved phone numbers.
- From the Multi-factor authentication window, go to Methods.
-
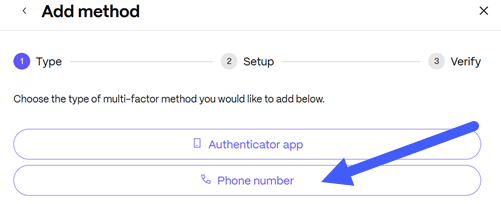
Select Add.
-
Select the Phone Number method.
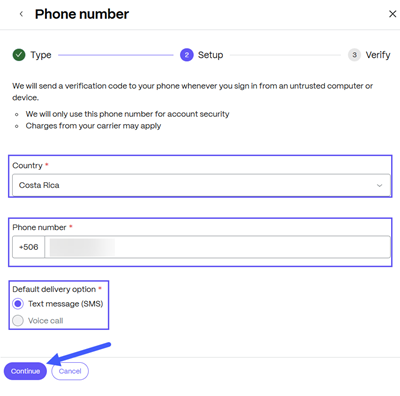
- Select your Country.
- Enter your Phone Number.
-
Select a default delivery option. Choose from Text message (SMS) or Voice call. Click Continue.
-
A verification code is sent to your phone number. To validate and add the phone number as multi-factor authentication method, enter the code received. and click Add.

Check the box if you want to make this to be your primary verification method.
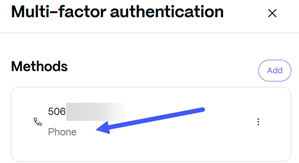
-
The phone number multi-factor authentication method is added to your account.
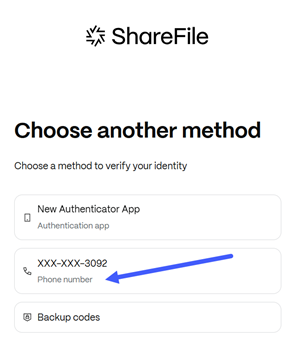
- During login, you will see an additional option to verify your identity. Click Use another method.
-
Select Phone number.
- Enter the verification code received.
- Click Sign In
- Choose Use another method to return to other choices to receive a verification code.
Limitations for VoIP Phone Services:
ShareFile is unable to support or guarantee that SMS messages and Voice Verify calls can be delivered to Google Voice and other numbers using VoIP (Voice over IP). The providers ShareFile uses for these services cannot ensure delivery to non-mobile numbers. This is a typical industry-wide practice to maintain secure and dependable authentication flows.
Generate application passwords
App specific passwords are used in applications that do not support multi-factor authentication. They are used in place of your normal ShareFile password.
You will need to create a separate password for authentication. Examples of these applications include: Storage Zone Controller, FTP, UMT, and any custom API script.
To generate an application specific password:
-
Enable multi-factor authentication in your Personal settings. If multi-factor authentication is disabled, you cannot add app passwords.
-
From your ShareFile dashboard, click the user avatar in the upper right corner.
-
Select Personal settings from the dropdown options.
-
Go to Sign in options and select Manage multi-factor.
-
On the Multi-factor authentication window, go to App passwords.
-
Select Generate.
-
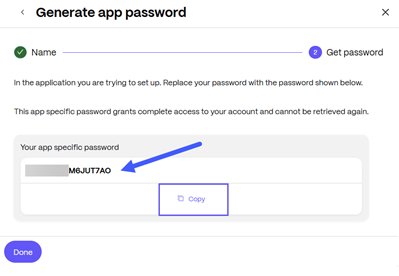
Give a Name to the application password and click Generate.
The app specific password is generated. Copy the password and replace your password with the one provided in the application that you set up, and click Done.
Generate backup codes
Backup security codes can be used if you lose access to your other verification methods. Once generated, codes should be stored in a secure location.
To generate backup codes:
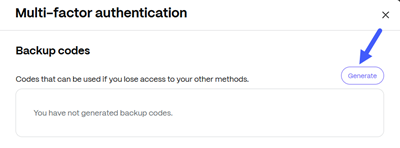
- From the Multi-factor authentication window, go to Backup codes.
-
Select Generate.
-
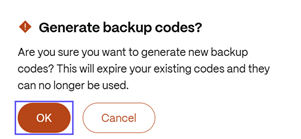
Click OK to confirm you want to generate codes. If you have generated backup codes before, please note generating a new set of codes will invalidate the previously generated set.
-
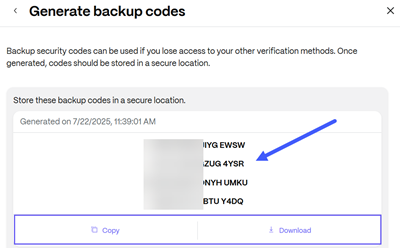
The codes are generated. Copy or download the codes and save them in a secure location.
-
During login, you will see an additional option to verify your identity. Click Use another method.
-
Select Backup codes.

-
Enter a generated Backup Code.
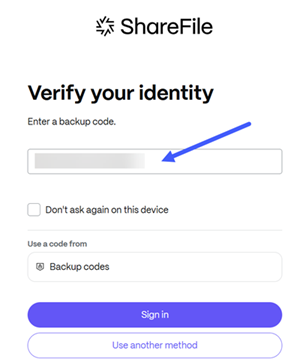
- Click Sign In
- Choose Use another method to return to other choices to receive a verification code.
FTP information
ShareFile is compatible with FTP clients such as WS-FTP and FileZilla.
To access FTP settings:
-
Select Personal settings from the dropdown options.
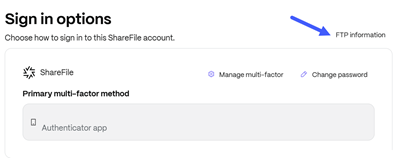
- Go to Sign in options.
-
Select FTP Information.
- Use the settings below to connect your account using an FTP client:
-
Security: - Implicit SSL/TLS (Port 990) Required. For security, ShareFile only supports secure FTPS transfers, which are sent over SSL/TLS, and not SFTP transfers, which are sent over SSH.
Note:
When using an FTP client with Implicit SSL/TLS on port 990, the client must send the following commands for establishing the secure connection: PBSZ 0 — to indicate that no additional protection buffer is required. PROT P — to request that the data channel is protected (encrypted)..
- FTP Server: - Enter yoursubdomain.sharefileftp.com (If your account is mycompany.sharefile.com enter mycompany for the subdomain).
- User name: - Enter yoursubdomain/youremailaddress
- Password: - Enter your ShareFile password or your FTPS application specific password
-
FTPS Support
ShareFile supports FTPS transfers. SFTP is not currently supported.
Notes:
- ShareFile acts as an FTP server and not as an FTP client. ShareFile does not automatically integrate with other FTP sites and servers directly.
- If you have Multi-Factor authentication, please generate an application specific password to connect to FTP using your login information.
Port Requirements
- You can connect to ShareFile using an implicit SSL/TLS connection (port 990).
- When an FTP client connects to ShareFile, they will be using an outbound port in the range of 32768-57344. To enhance security, the connection randomly switches port numbers within this large range.
- For information on ShareFile IPs, see Domain inclusion list.
- Finding the IP of my server - You can find the IP of your account’s assigned FTP server using the “ping yoursubdomain.sharefileftp.com” command in the Windows Command Line menu. You can find your FTP server name within your ShareFile account under Personal settings > Advanced Connections.
Limitations
- A user can have 8 simultaneous connections. Attempting any more connections will result in an error. If you cannot close connections, you may do so by closing your FTP client.
- Move and Copy functions are not supported. Changes made in this manner will not be reflected in the ShareFile web app.
- ShareFile does not support the Rename function when moving files.
- This feature does not support company credentials.
- This feature is not currently available for data on customer-managed StorageZones.
- This feature is not compatible with VDR accounts using the view-only feature.
Note:
As of May 19th 2025, connections to our FTP service require TLS 1.2 or higher. Please ensure your FTP client supports this protocol version to maintain compatibility. Clients using older versions may experience connection issues.
–
Note:
Throttling limits:
For all plan tracks except VDR and Enterprise, throttling begins after 2,000 operations, with a 2.5-second delay per command, and increases to a 5-second delay after 4,000 operations.
For VDR and Enterprise plan track, these limits are higher: throttling starts after 8,000 operations, with the same delay pattern applied at higher thresholds (5-second delay after 16,000 operations).
Configuration examples
The following recommended setups have been verified by ShareFile Support.
Note:
Use of these clients with settings not listed here may not be fully supported.
FileZilla for Windows and Mac
- Select File.
- Select Site Manager. A new window will pop up.
- Select New Site and set it up as follows:
- Name the connection. e.g. ‘ShareFile’
- Host - Server address.
- Server Type - For FTP, select Regular FTP. For FTPS, select Require implicit FTP over TLS.
- Login Type - ‘Normal’
- User - Enter username in format subdomain/email address.
- Enter Password - ShareFile account password.
- Click on the Transfer Settings tab.
- Select Passive Mode.
- Select Connect.
WS_FTP
- Select File.
- Select Connect.
- Select Connection Wizard.
- Name the connection - e.g. ‘ShareFile’
- Connection Type –> Regular FTP: Select ‘FTP’ from drop down. Secure FTP: Select ‘FTP/Implicit SSL’ from drop down
- Enter Server Address
- Enter user name
- Format of ‘subdomain’/’email address’
- Enter Password
- ShareFile account password
- Select on the Advanced button.
- Select the Advanced tab on the left.
- Ensure the check box for Use Passive mode for data connections is selected.
- Select OK to finish.
Cute FTP
- Select the File drop-down menu
- Select New > Regular FTP: Select ‘FTP’ from drop down. Secure FTP: Select ‘FTP/Implicit SSL’ from drop down
A new window will pop up
- Label - A connection name, e.g. ‘ShareFile’
- Host name - Server address
- Enter user name - Use format of subdomain/email address
- Enter password - ShareFile account password
- Select Login method - Normal
- Select Type.
- Under the Data connections type select: Use PASV
- Select the Connect button.
Smart FTP
- Select File.
- Select New Remote Browser.
- Protocol - Regular FTP: Select ‘FTP’ from drop down. Secure FTP: Select FTP over SSL Implicit.
- Host - Server address
- Enter user name - Format of ‘subdomain’/’email address’
- Enter Password - ShareFile account password
- Name the connection - e.g. ‘ShareFile’
- Click on the **Properties button
- Highlight the Connection tab.
- Under Data Connection and Mode, select Passive Mode
- Select OK.
Share
Share
This Preview product documentation is Citrix Confidential.
You agree to hold this documentation confidential pursuant to the terms of your Citrix Beta/Tech Preview Agreement.
The development, release and timing of any features or functionality described in the Preview documentation remains at our sole discretion and are subject to change without notice or consultation.
The documentation is for informational purposes only and is not a commitment, promise or legal obligation to deliver any material, code or functionality and should not be relied upon in making Citrix product purchase decisions.
If you do not agree, select I DO NOT AGREE to exit.