This content has been machine translated dynamically.
Dieser Inhalt ist eine maschinelle Übersetzung, die dynamisch erstellt wurde. (Haftungsausschluss)
Cet article a été traduit automatiquement de manière dynamique. (Clause de non responsabilité)
Este artículo lo ha traducido una máquina de forma dinámica. (Aviso legal)
此内容已经过机器动态翻译。 放弃
このコンテンツは動的に機械翻訳されています。免責事項
이 콘텐츠는 동적으로 기계 번역되었습니다. 책임 부인
Este texto foi traduzido automaticamente. (Aviso legal)
Questo contenuto è stato tradotto dinamicamente con traduzione automatica.(Esclusione di responsabilità))
This article has been machine translated.
Dieser Artikel wurde maschinell übersetzt. (Haftungsausschluss)
Ce article a été traduit automatiquement. (Clause de non responsabilité)
Este artículo ha sido traducido automáticamente. (Aviso legal)
この記事は機械翻訳されています.免責事項
이 기사는 기계 번역되었습니다.책임 부인
Este artigo foi traduzido automaticamente.(Aviso legal)
这篇文章已经过机器翻译.放弃
Questo articolo è stato tradotto automaticamente.(Esclusione di responsabilità))
Translation failed!
Encrypt Email using ShareFile in Outlook Online
You can now encrypt emails using ShareFile in Outlook. This feature allows the encrypted email to be shared as a protected link with the recipient. To open the encrypted email, the recipient must sign in to the portal to access the message.
To encrypt the email in Outlook using ShareFile, perform the following steps:
- Navigate to your Outlook account.
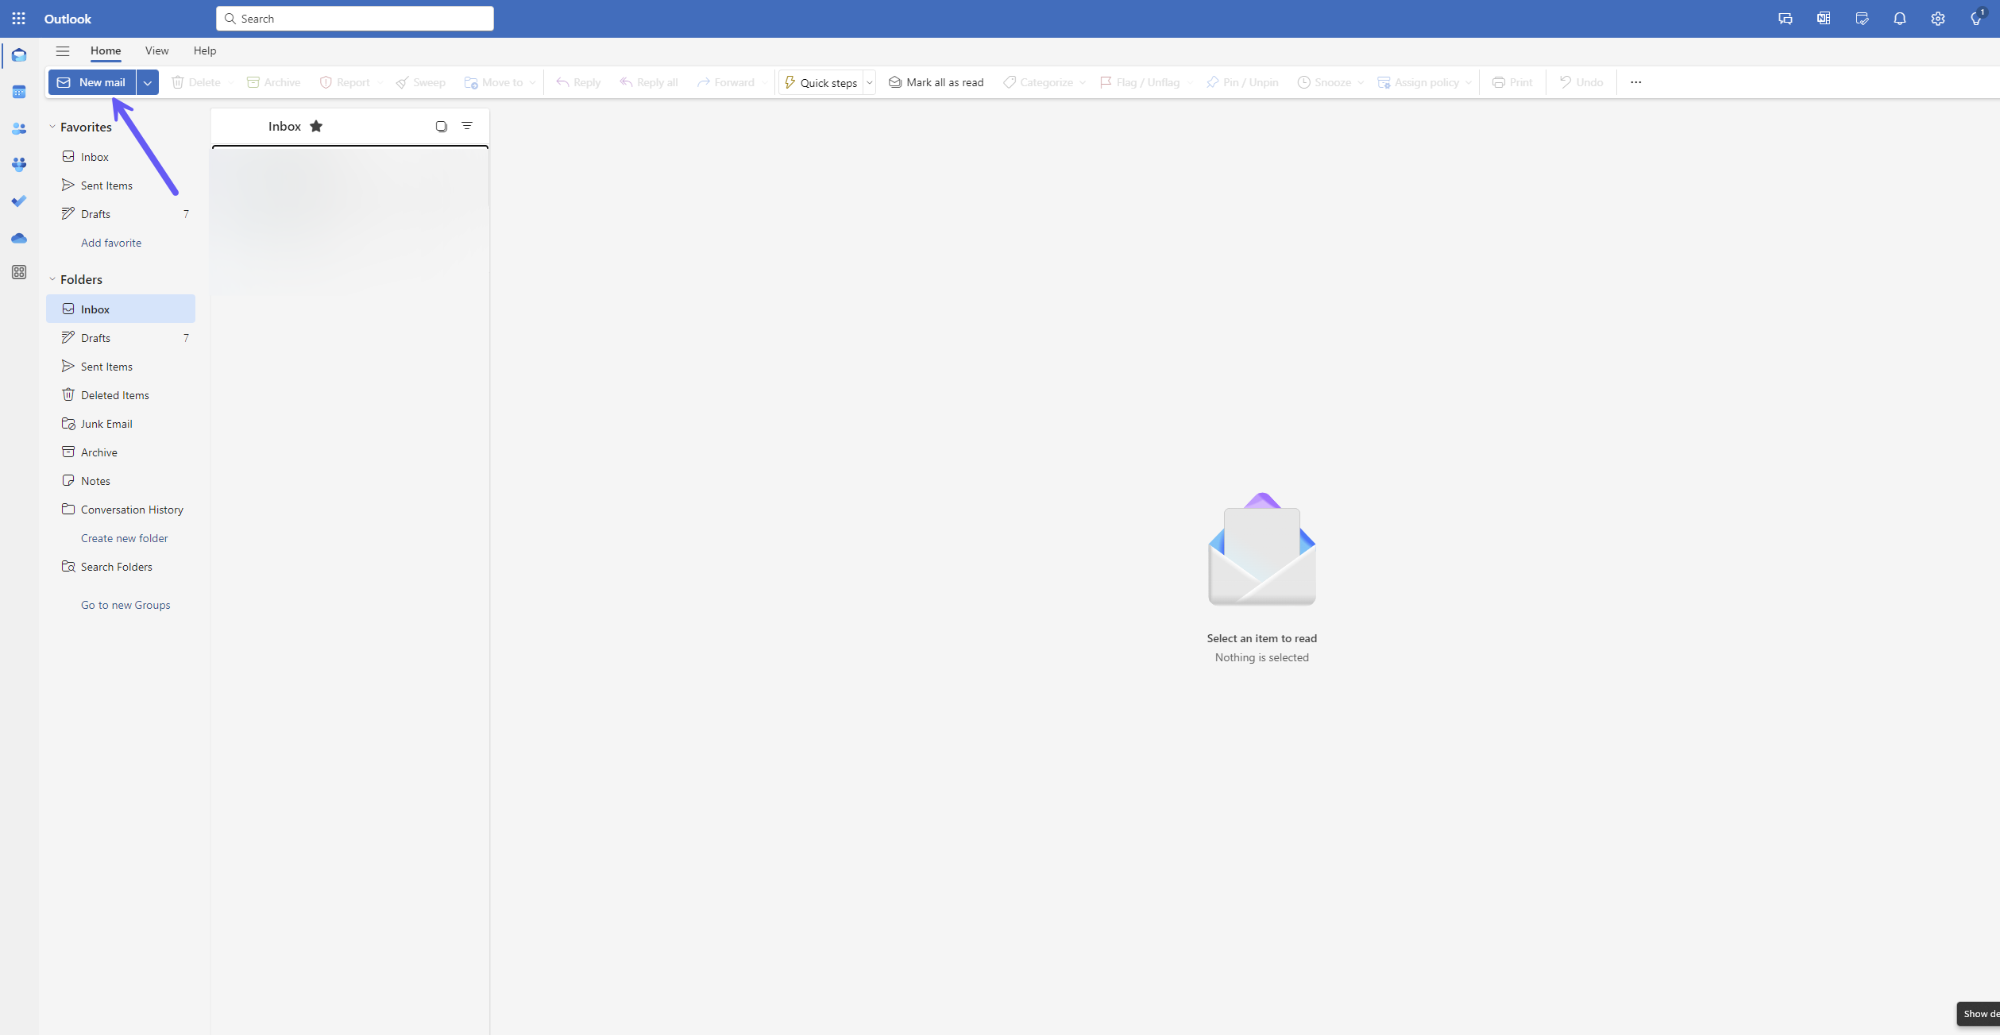
- Select the New mail to open up a new message window.
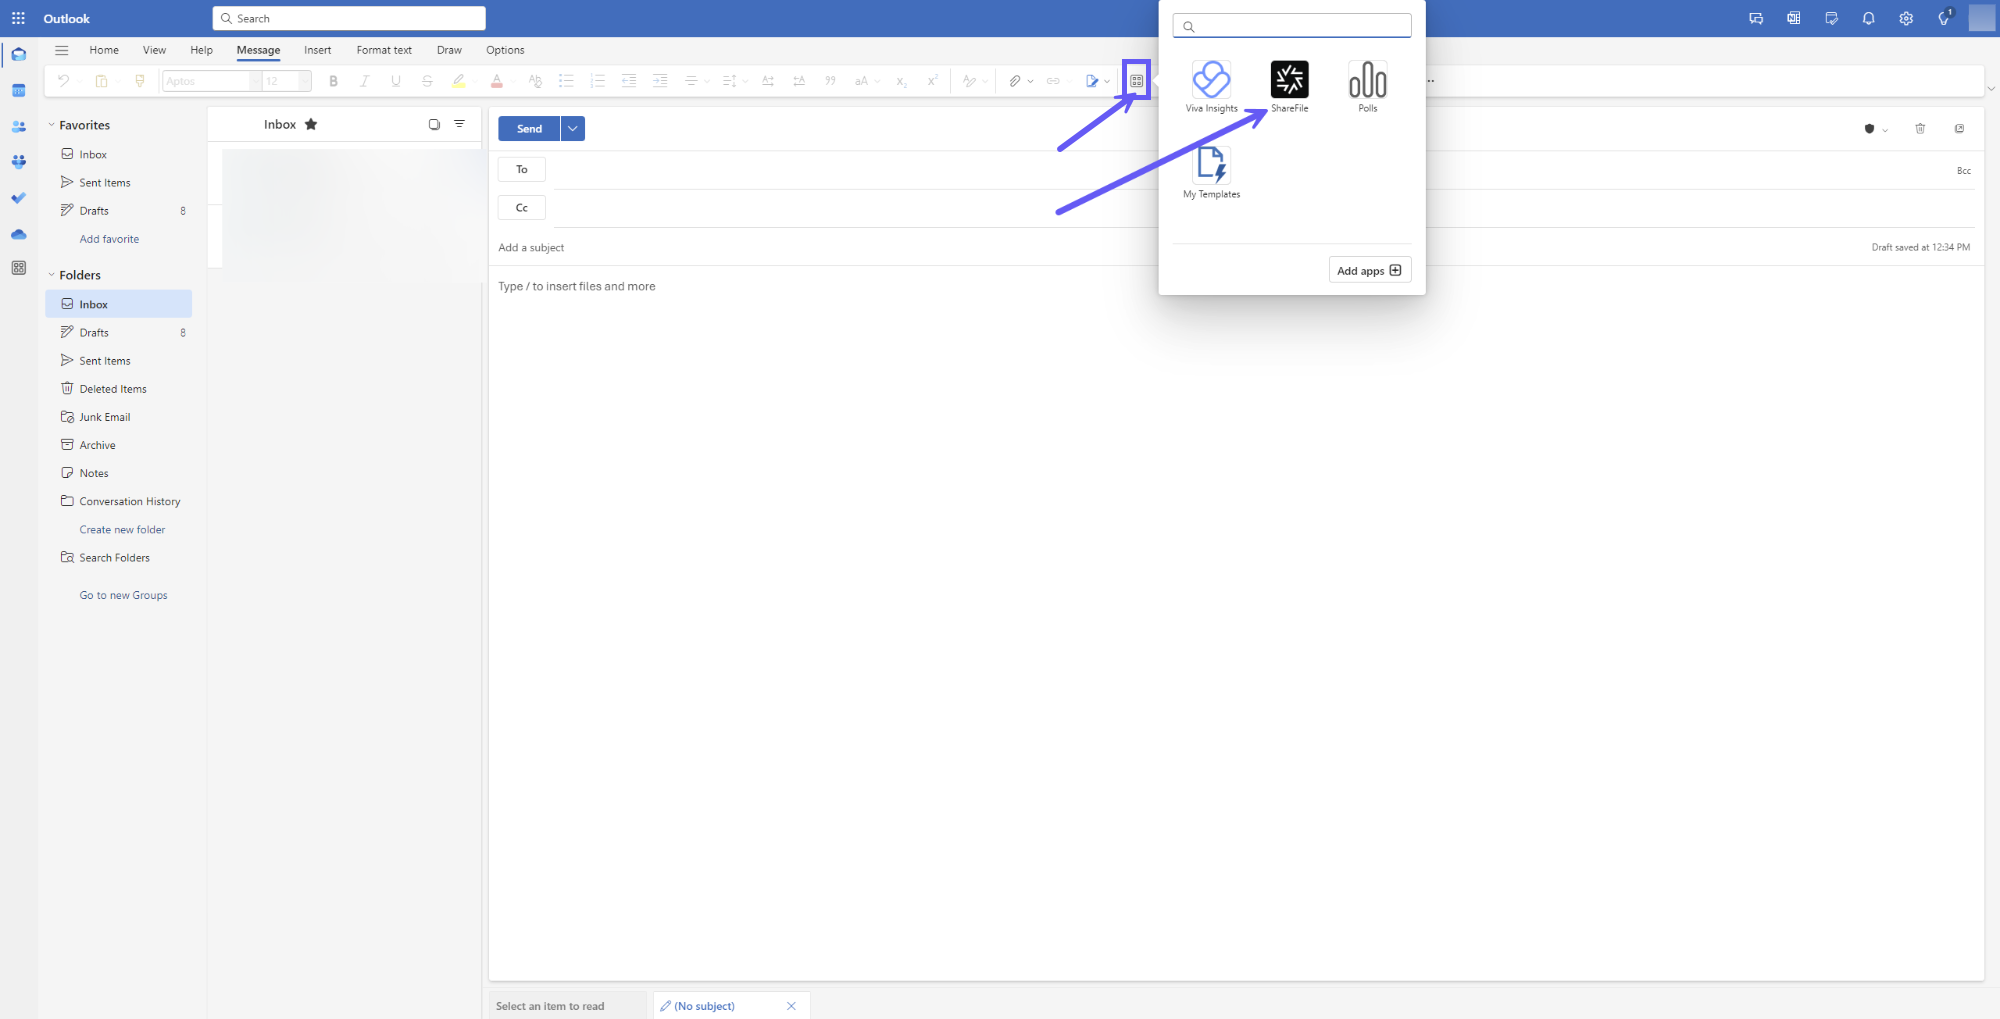
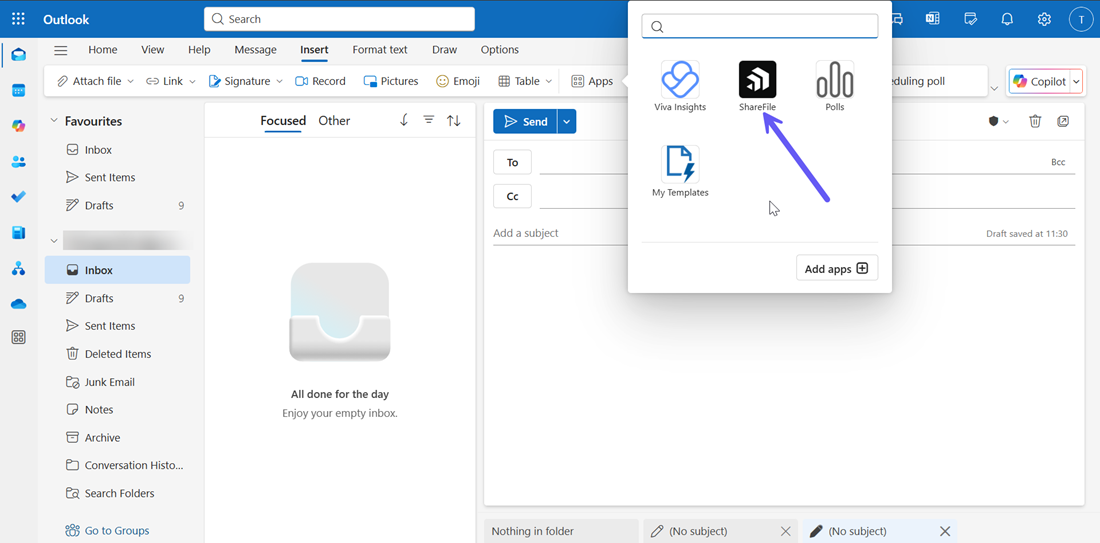
- Select the ShareFile icon in the Outlook ribbon bar.
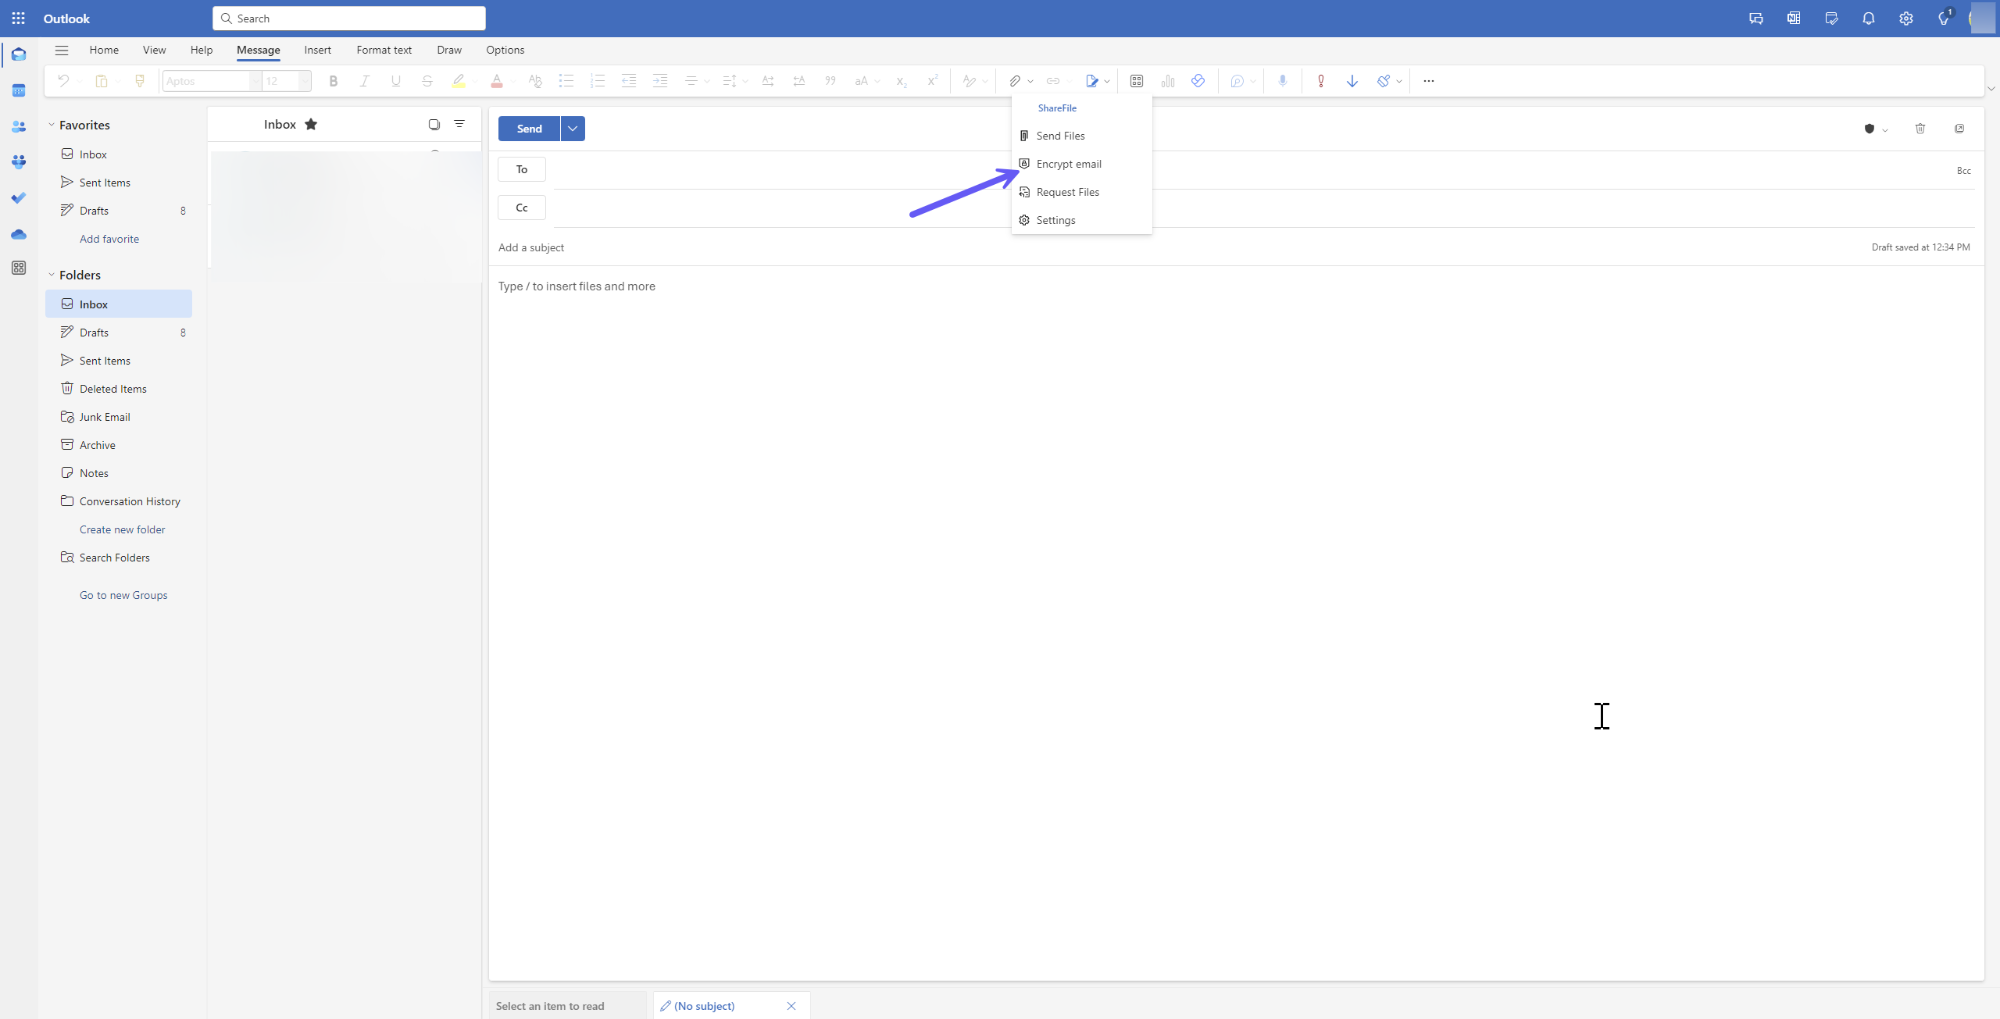
- Select Encrypt Email option from the drop-down menu.
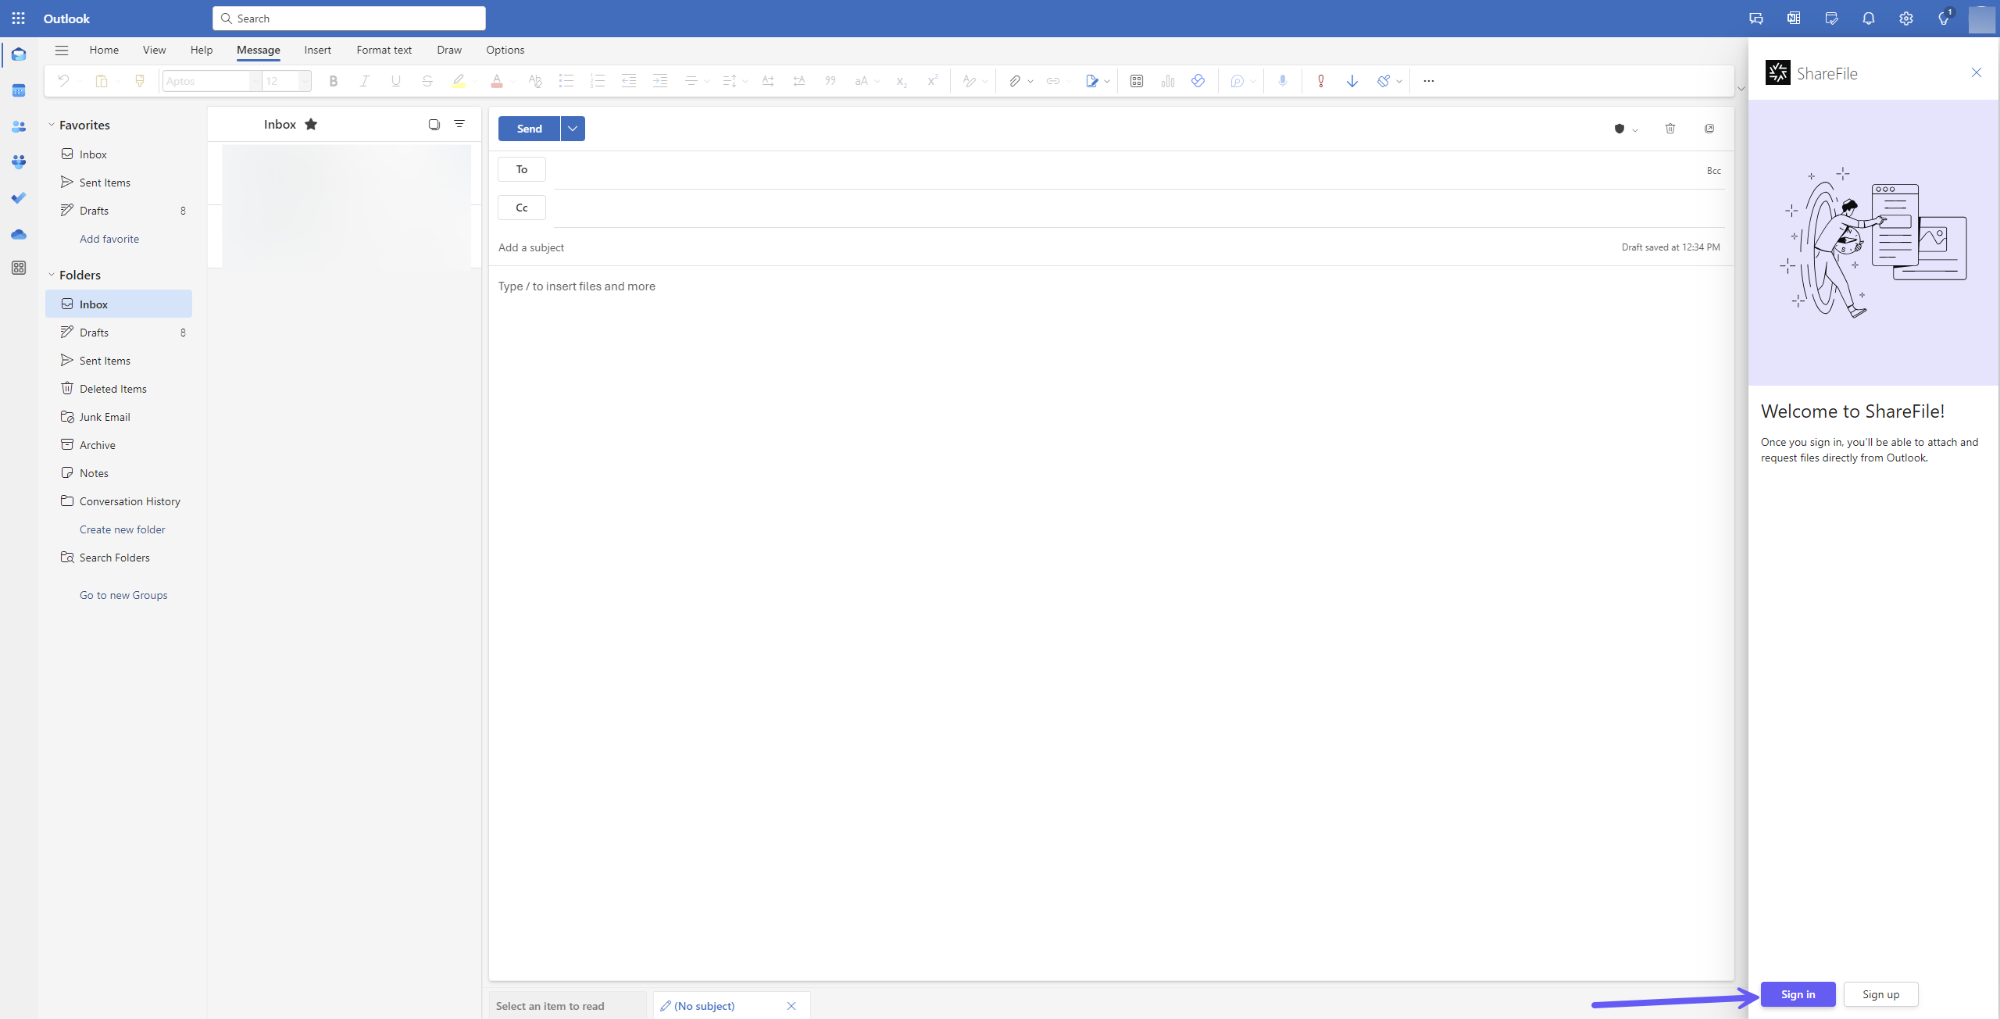
- In the right pane window, you need to sign in to your ShareFile account as shown below.
- Upon successful login, the encrypt email window pane is displayed with the Encrypt Email button.
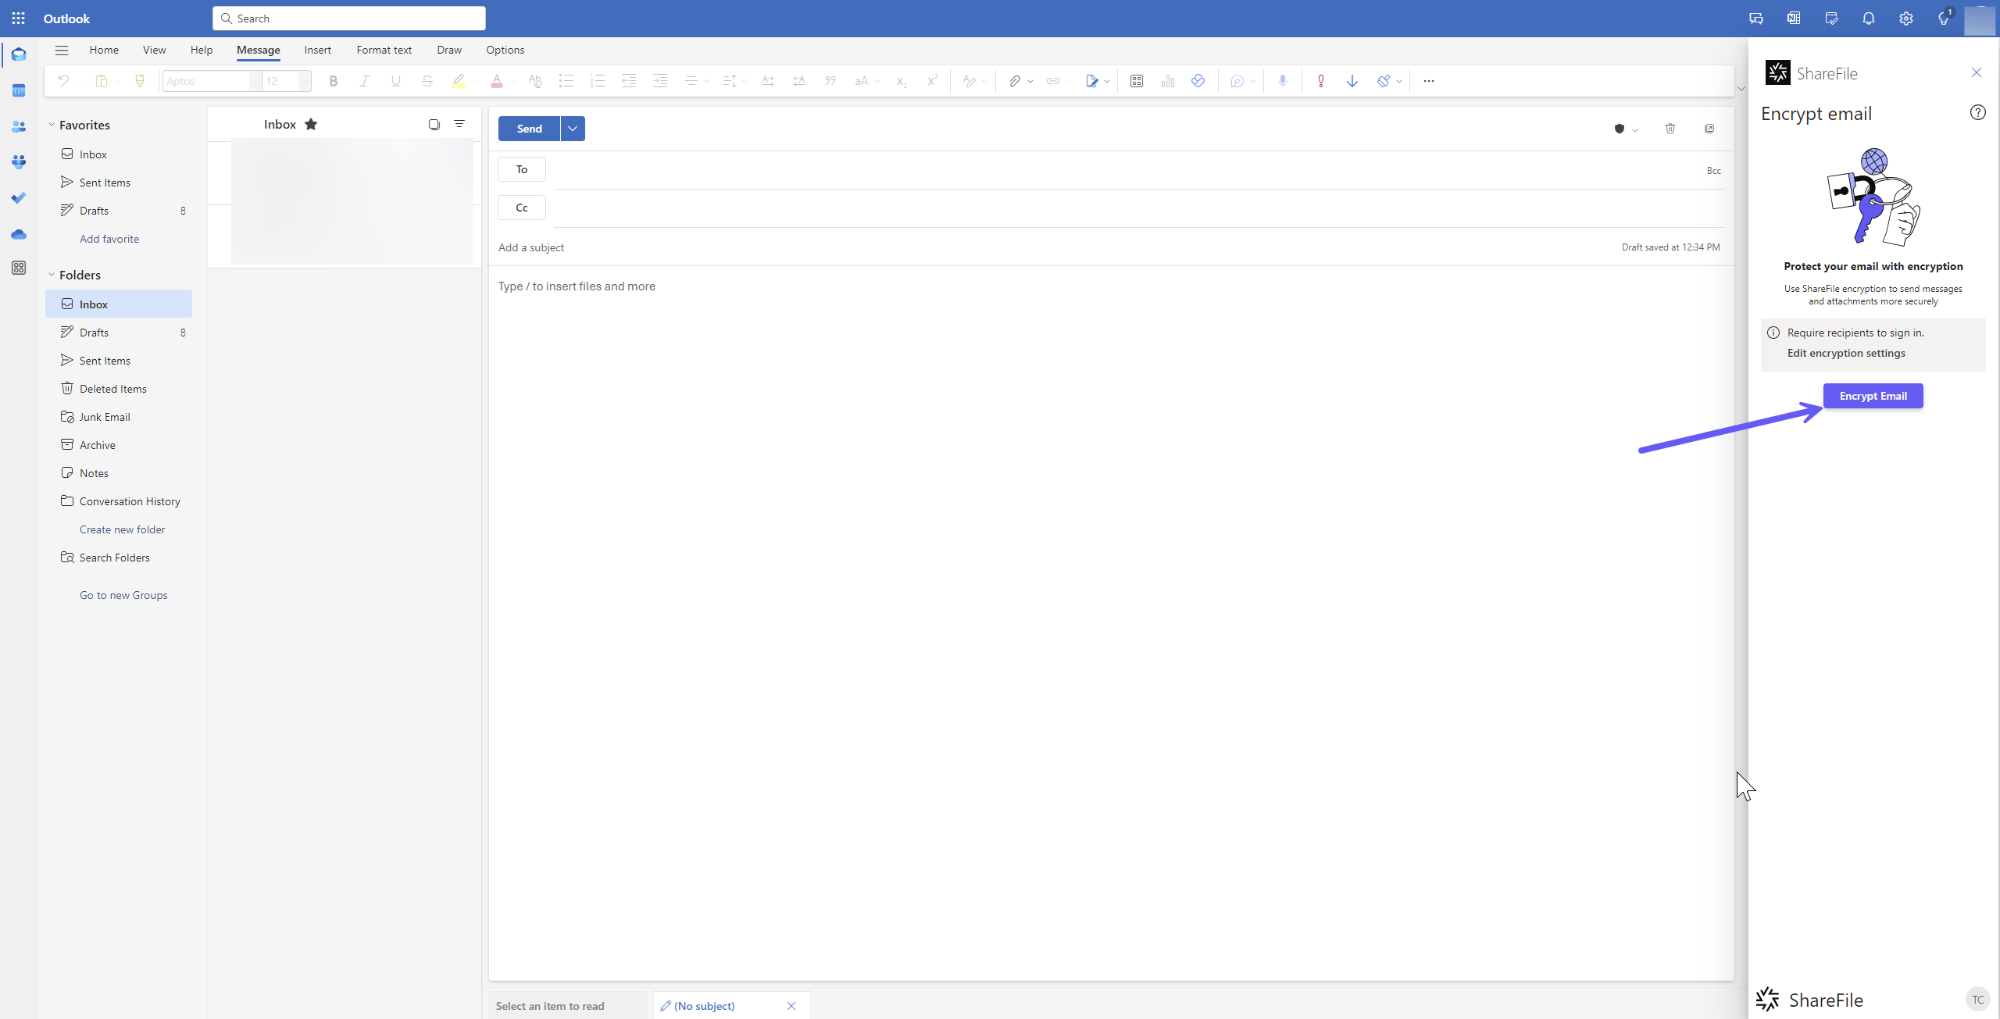
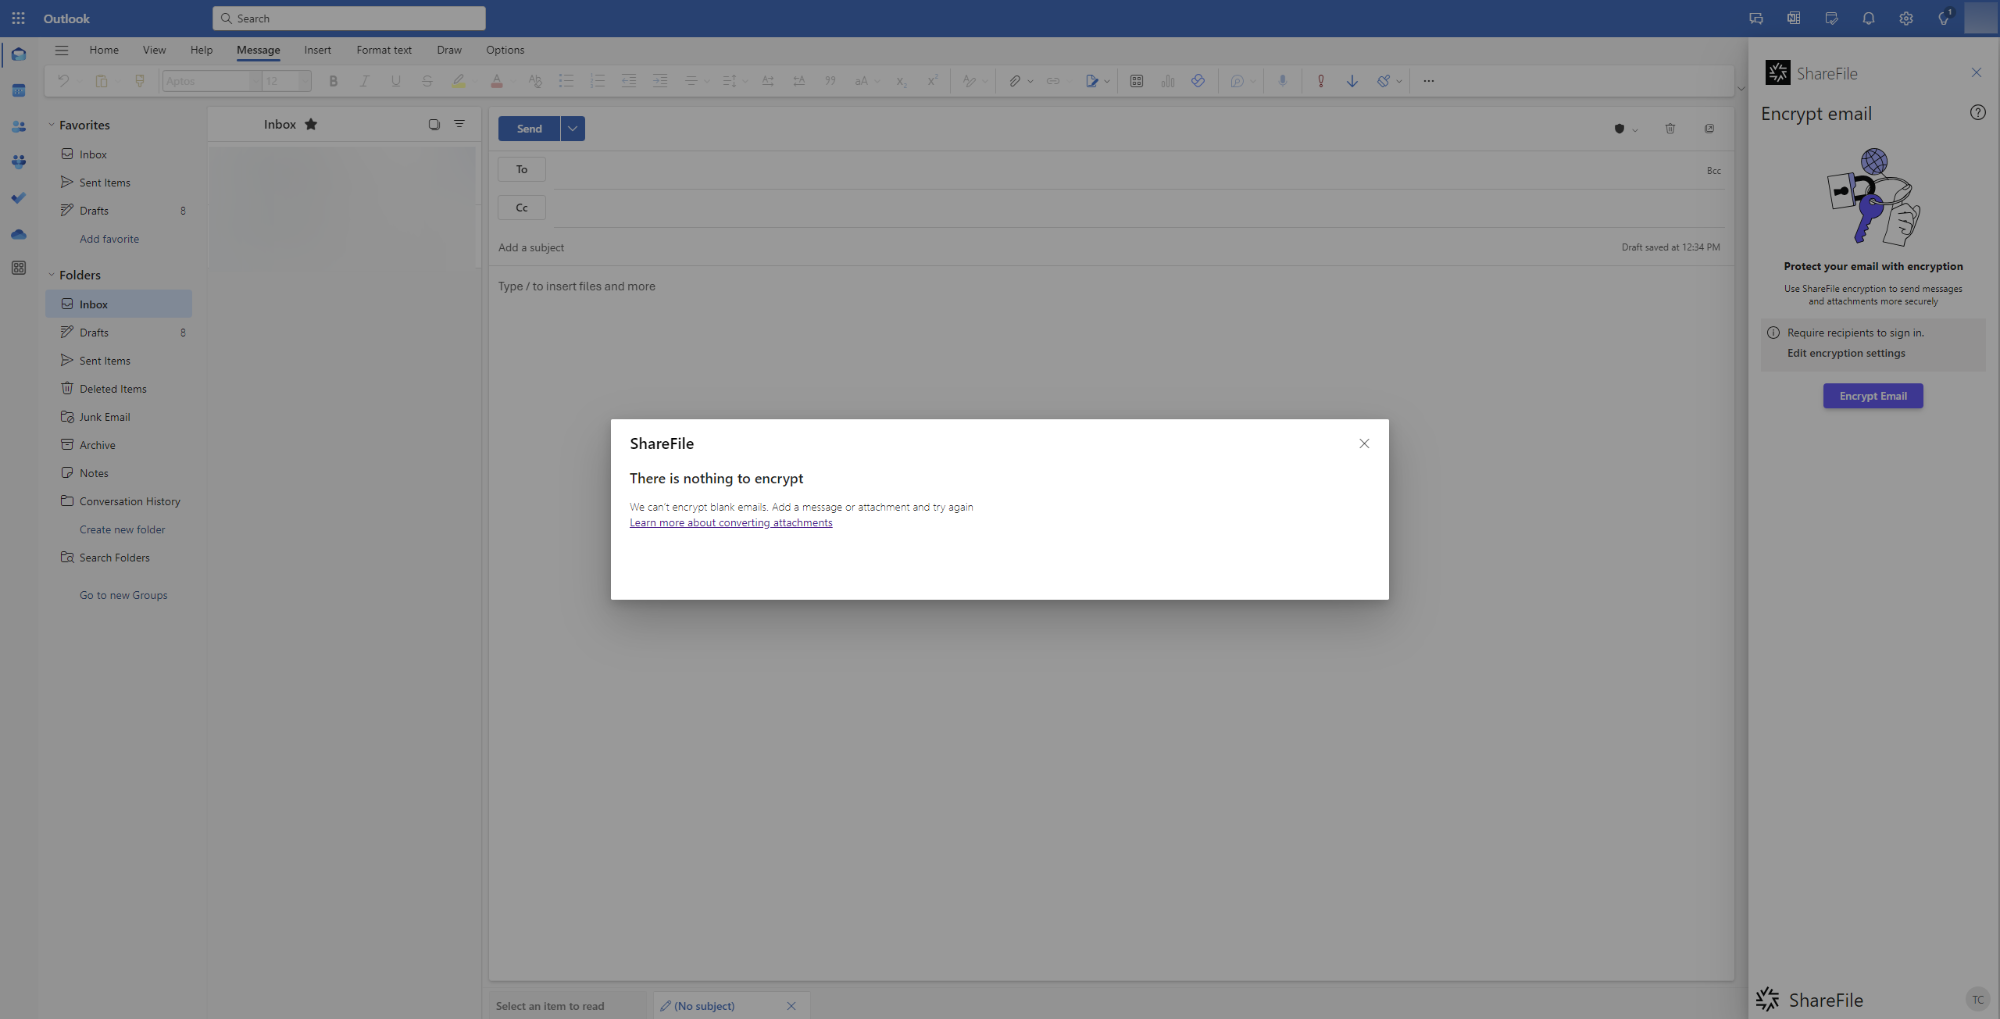
Note:
If you click on the Encrypt Email button without composing an email, you will receive an alert message stating there is no email content to encrypt.
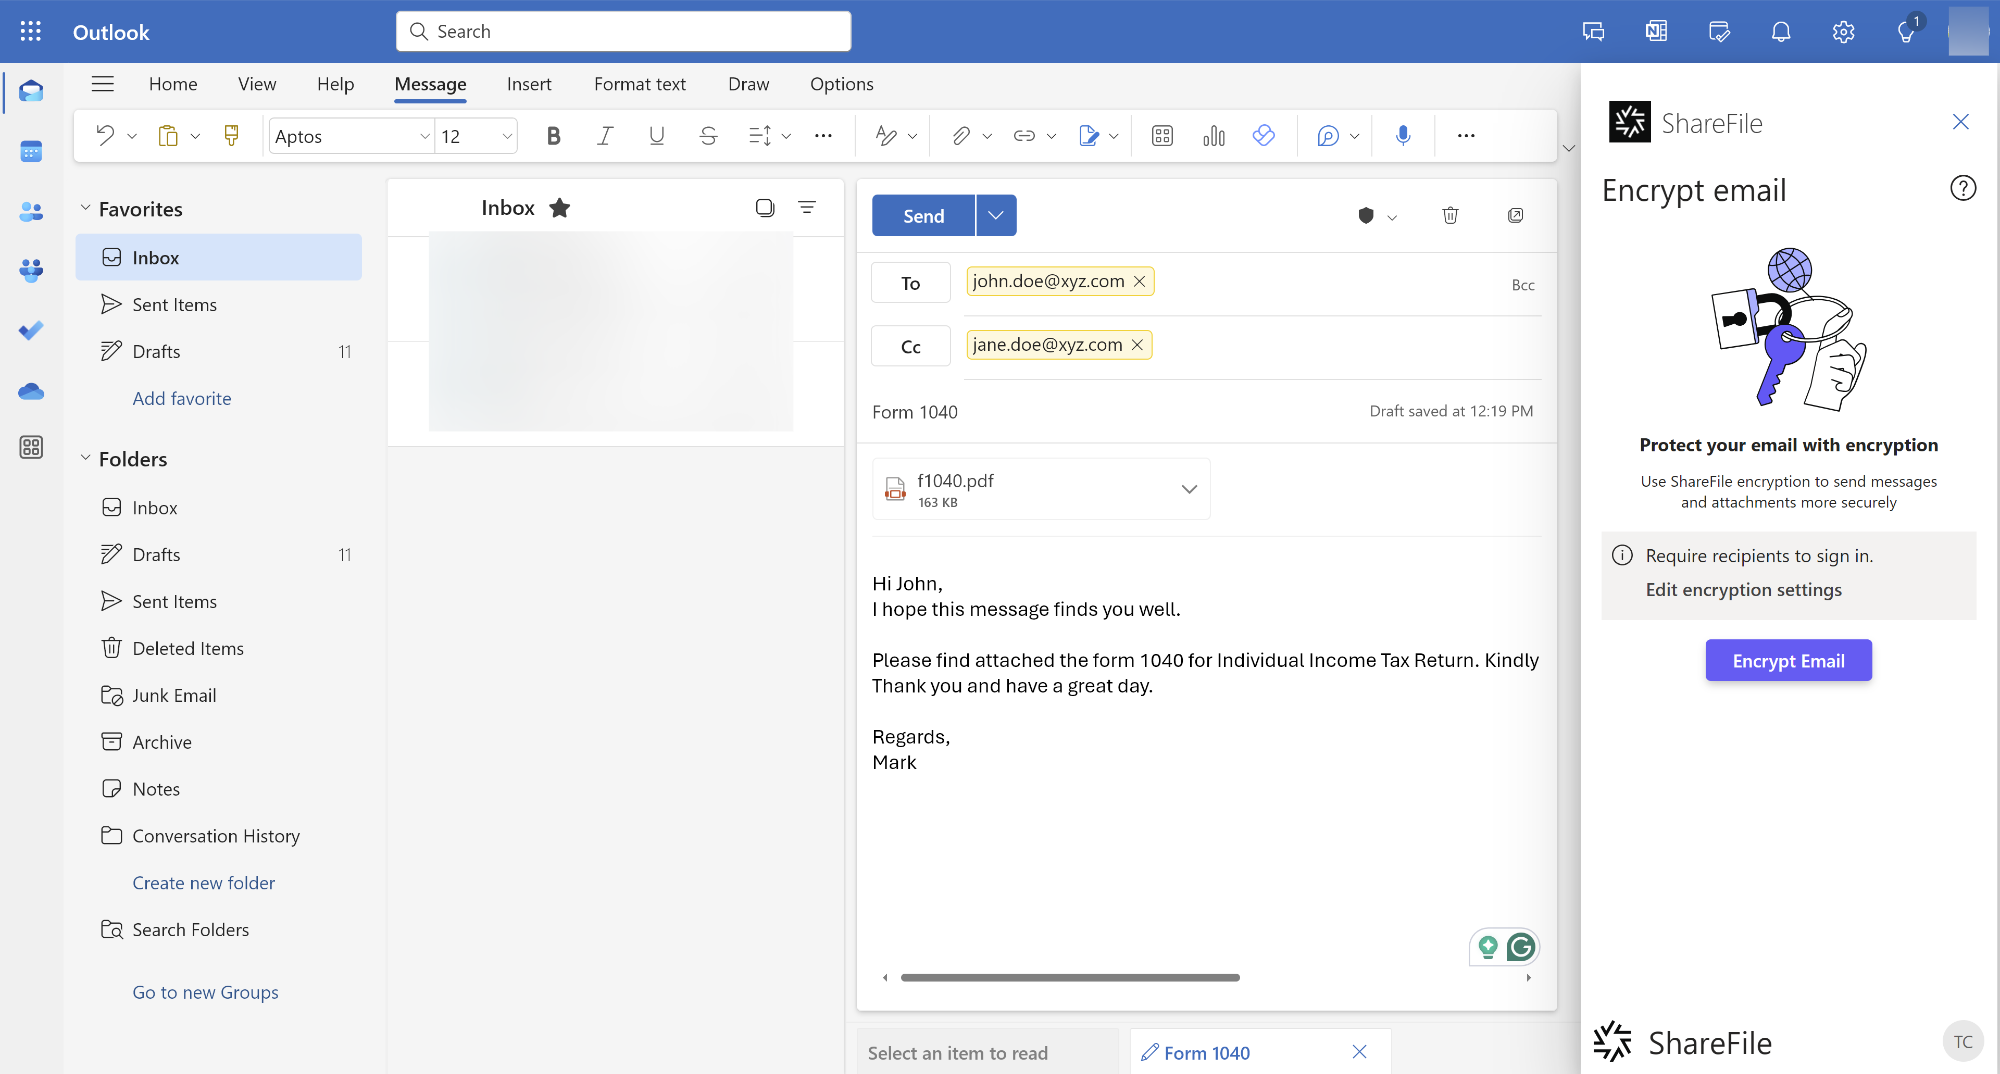
- Once you have composed the mail, next click on the Encrypt Email button.
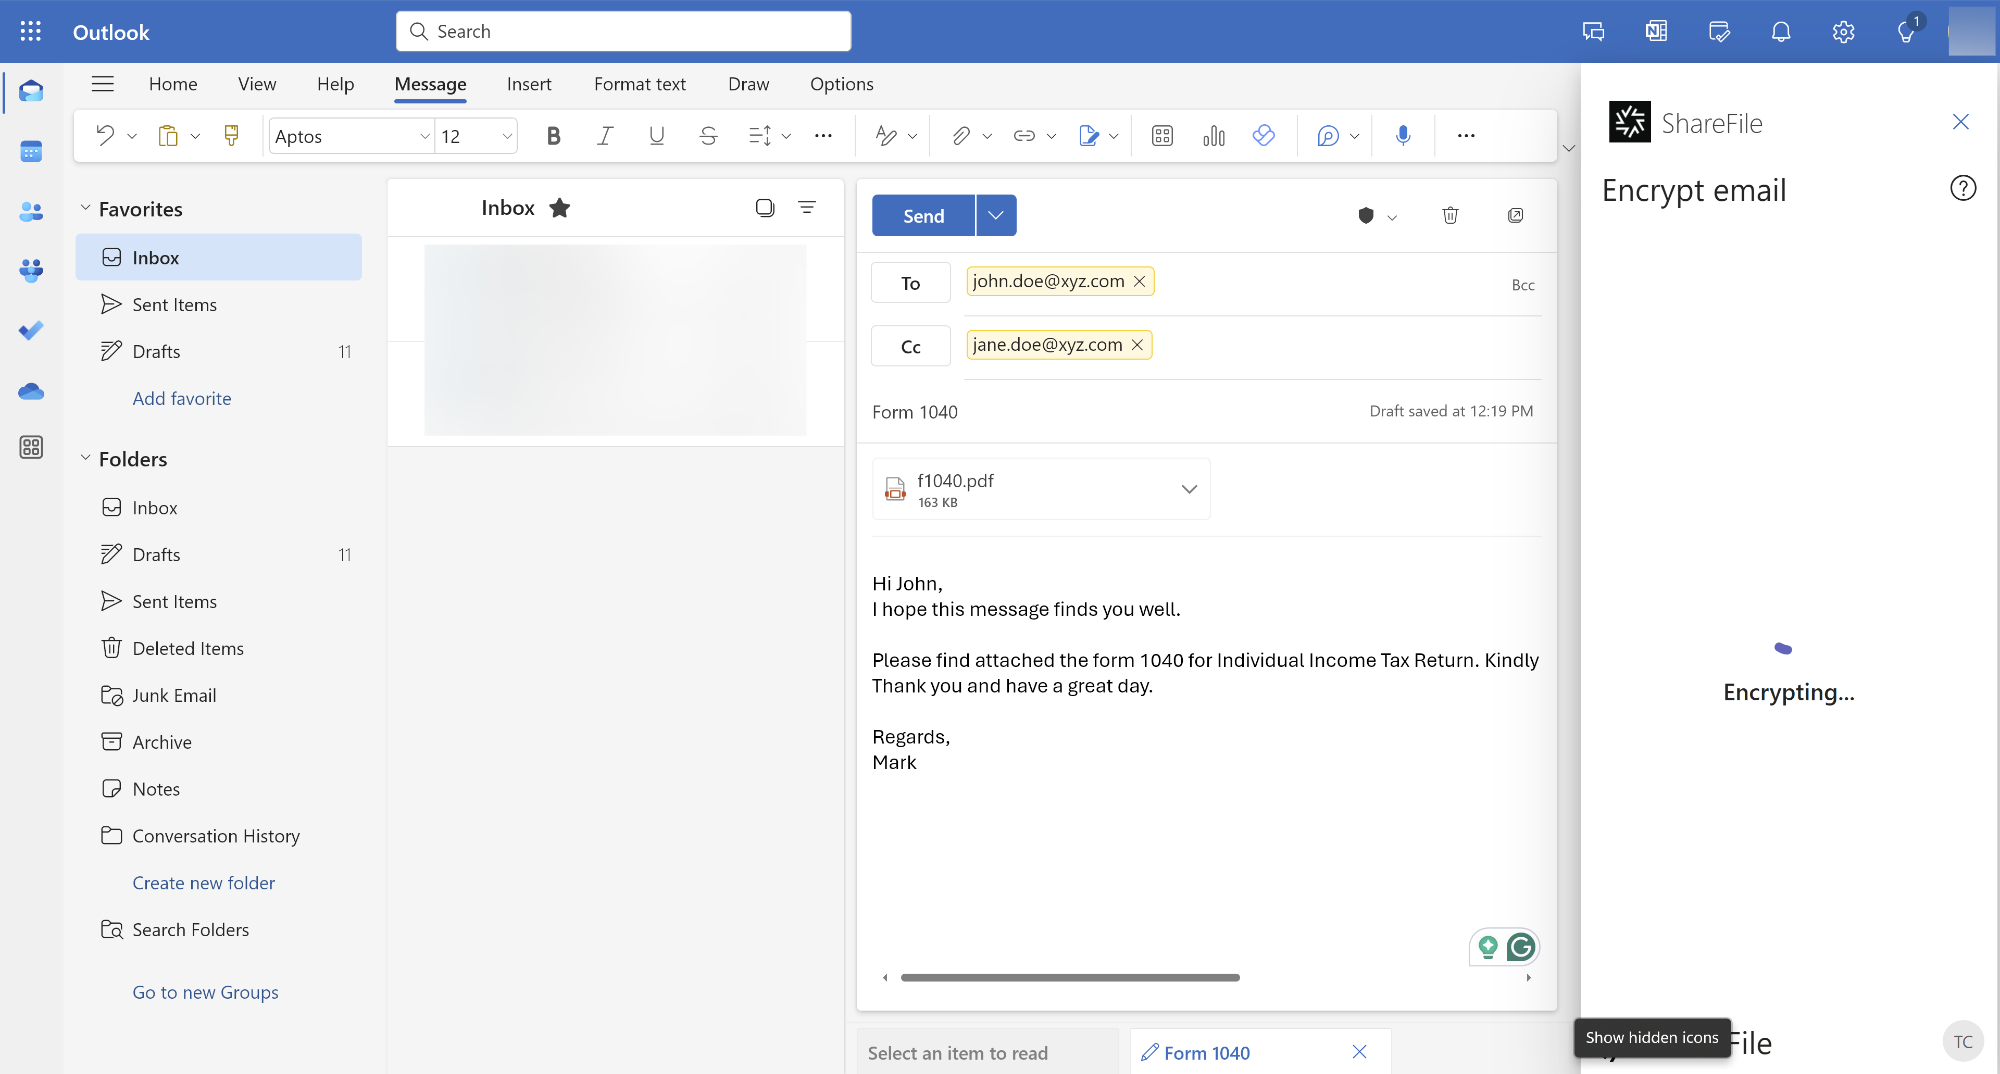
- Upon successful completion, your mail is encrypted as shown below:
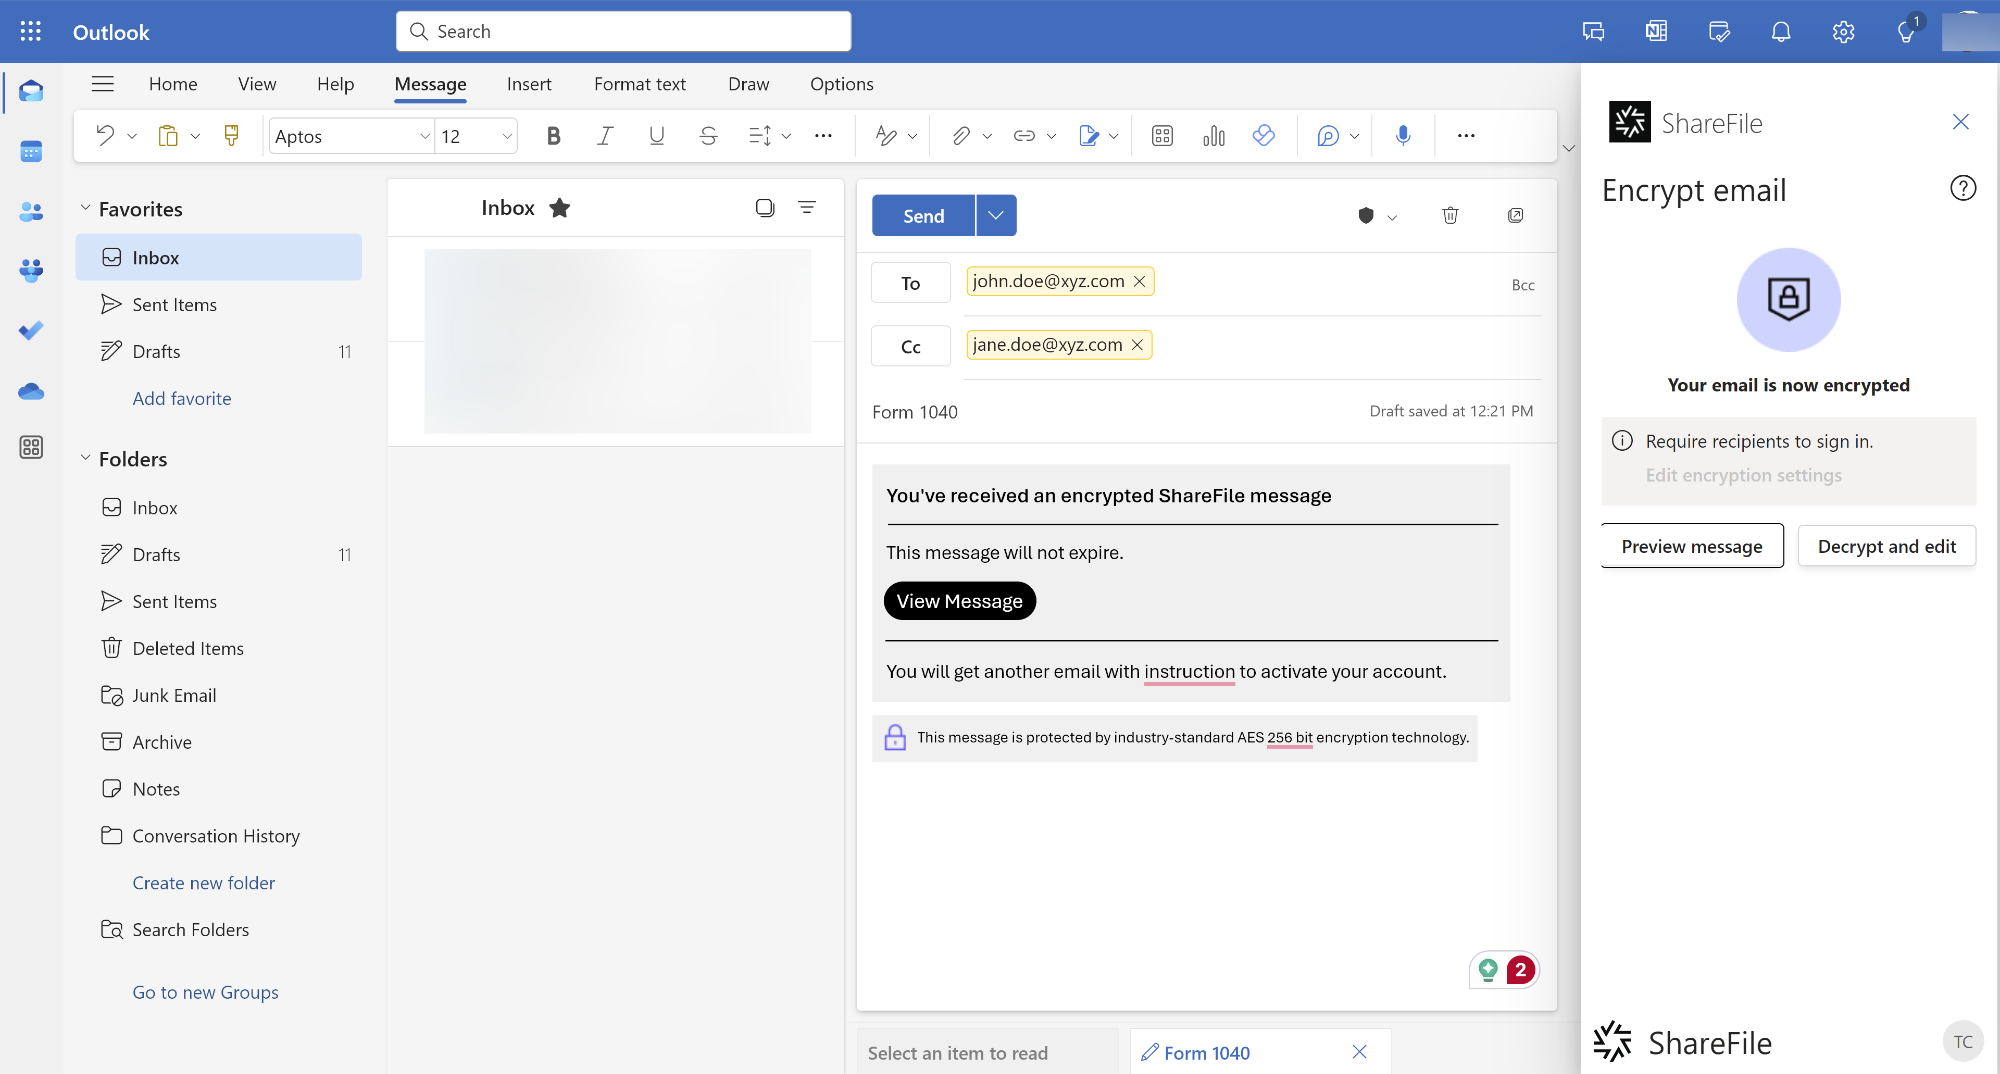
- From the ShareFile pane on the right, you can select the Preview message button to preview the encrypted message and attachments.
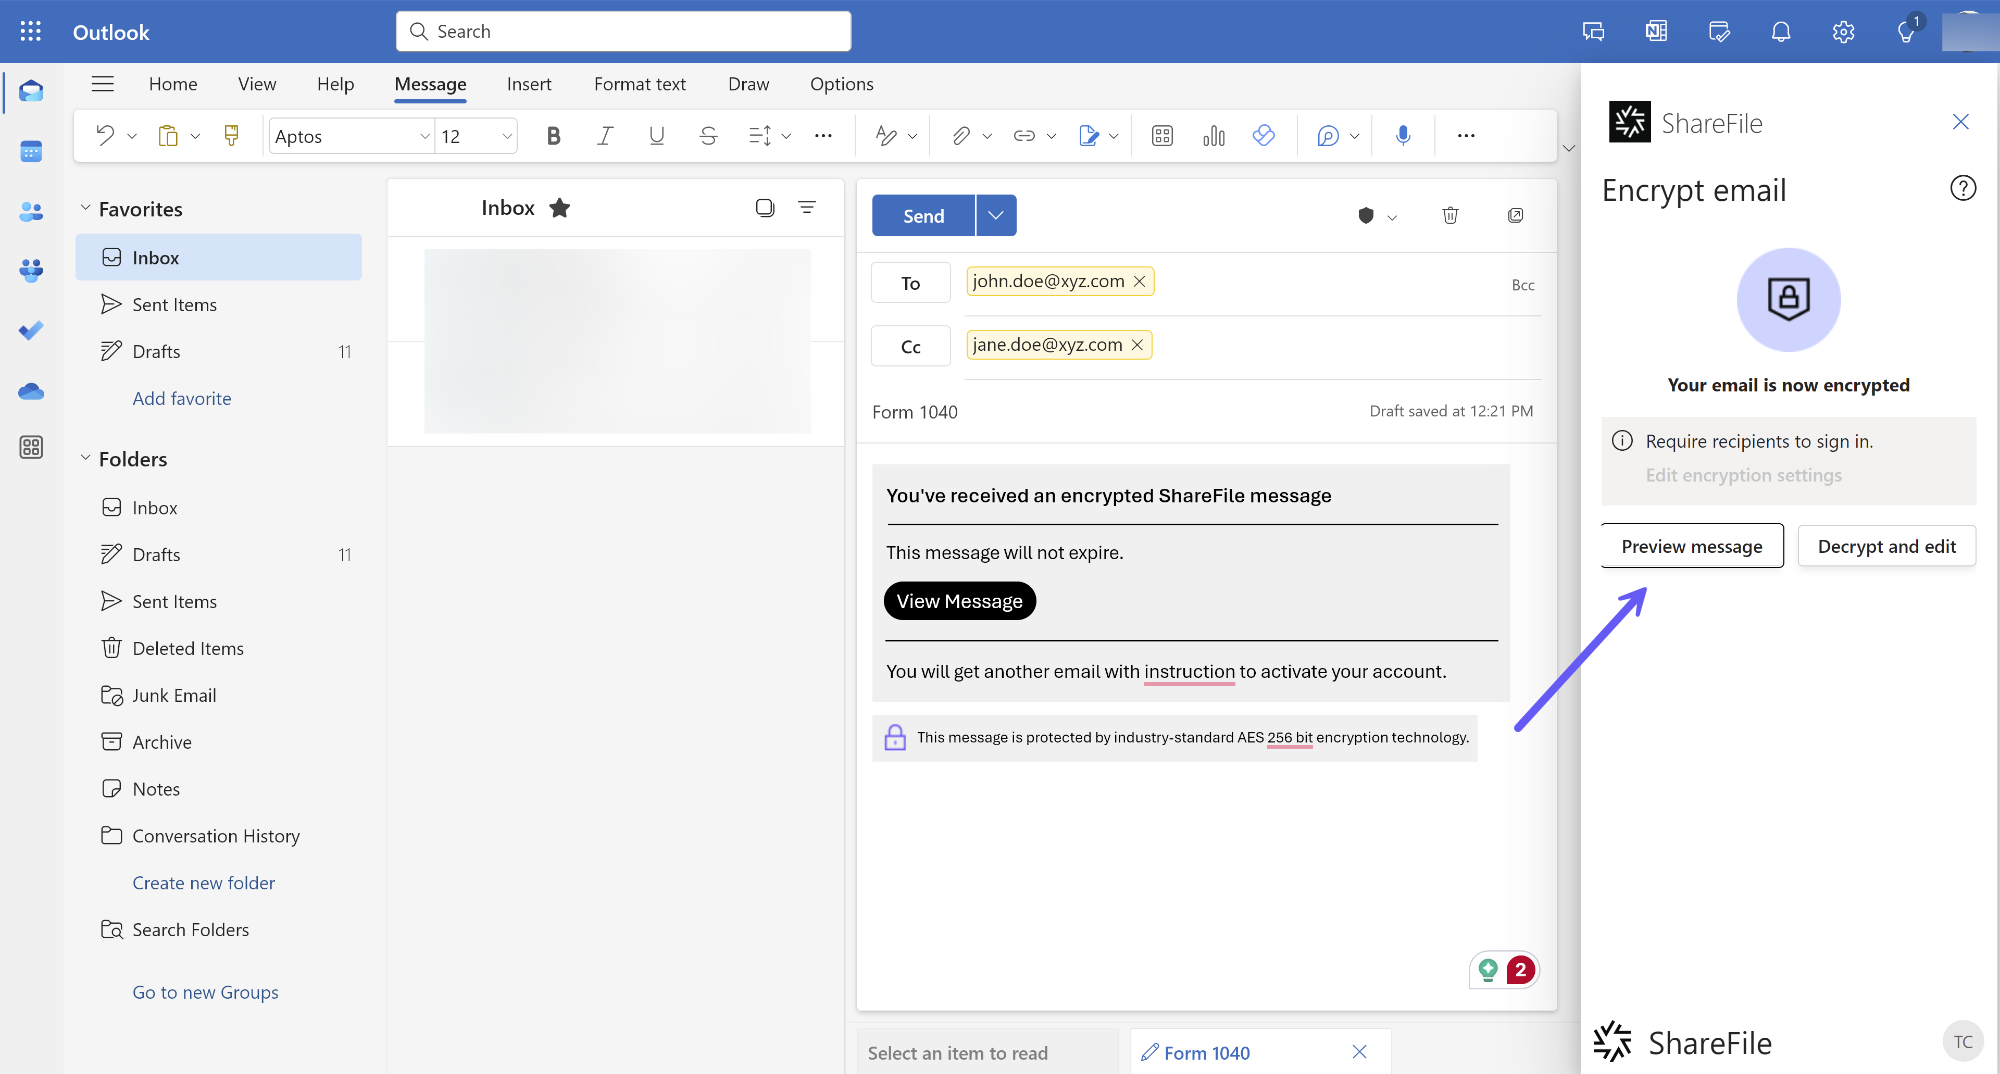 The preview window opens and the original message and any attached files are displayed.
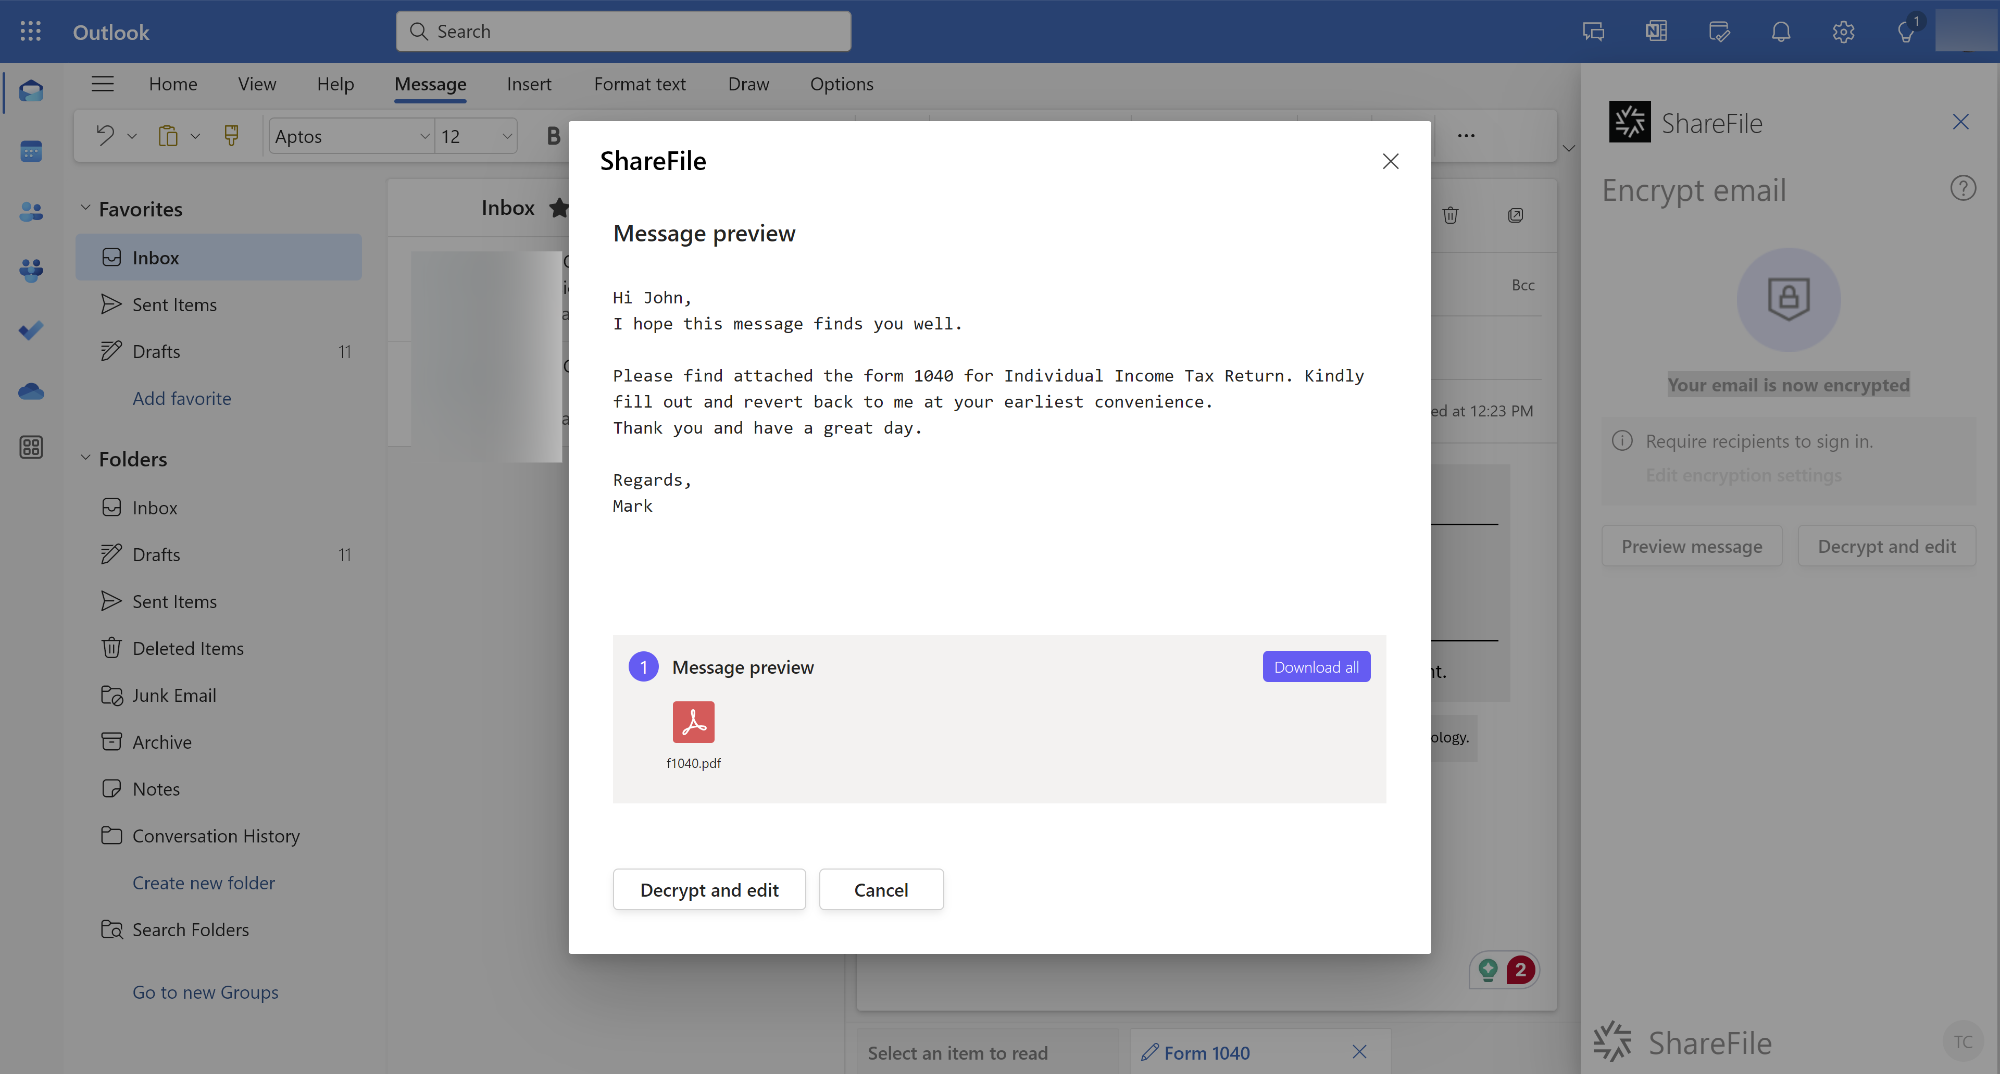
- In case you wish to make further edits, you can click on the Decrypt and edit button. This will remove the encrypted email and revert back to editing mode.
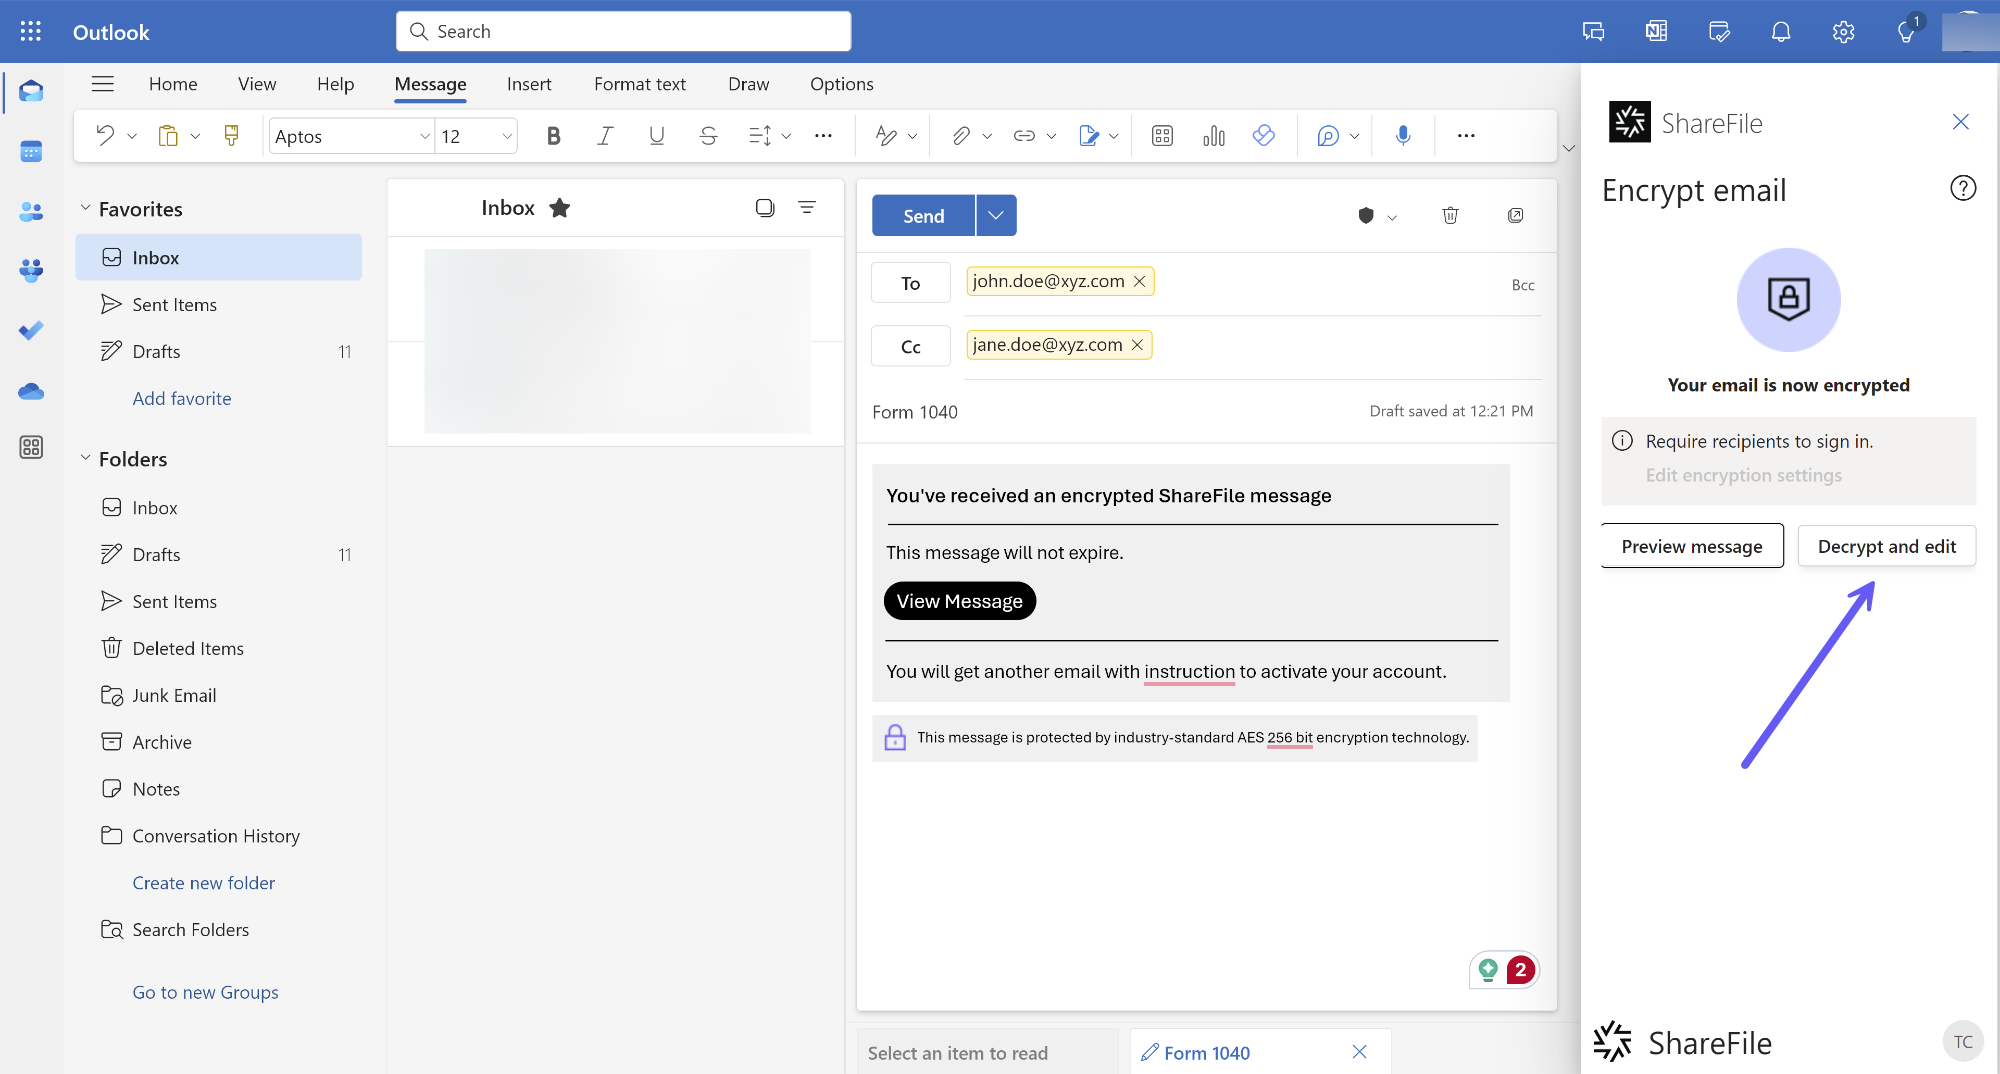
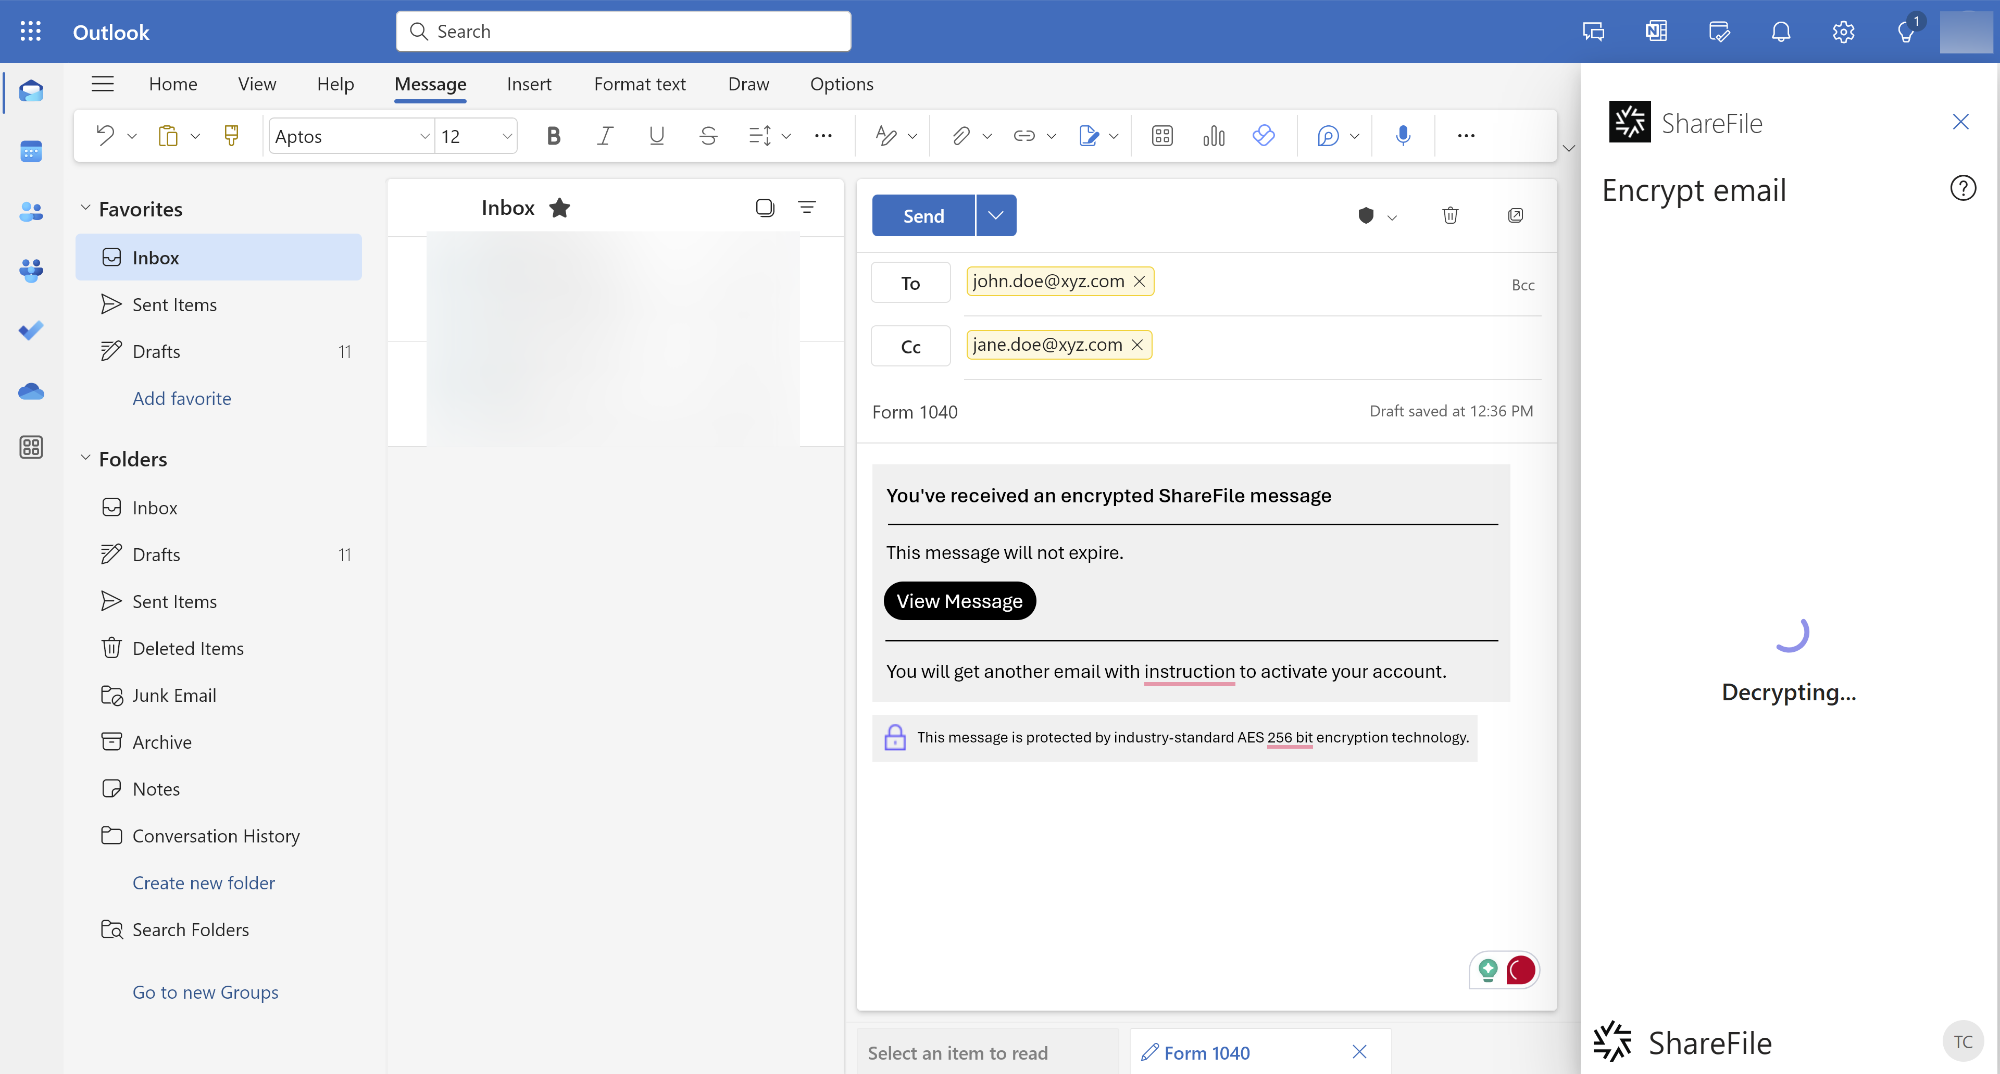
 After making edits, you can encrypt the email again by clicking on the Encrypt Email button.
 - Once the mail is ready and the encryption is complete, you can now send the encrypted email to the recipient. However, if you edit the mail after the encryption is done (For example you forgot to attach the file and add it after the mail is encrypted), then you will receive an alert message stating that you have made additions that are not encrypted.
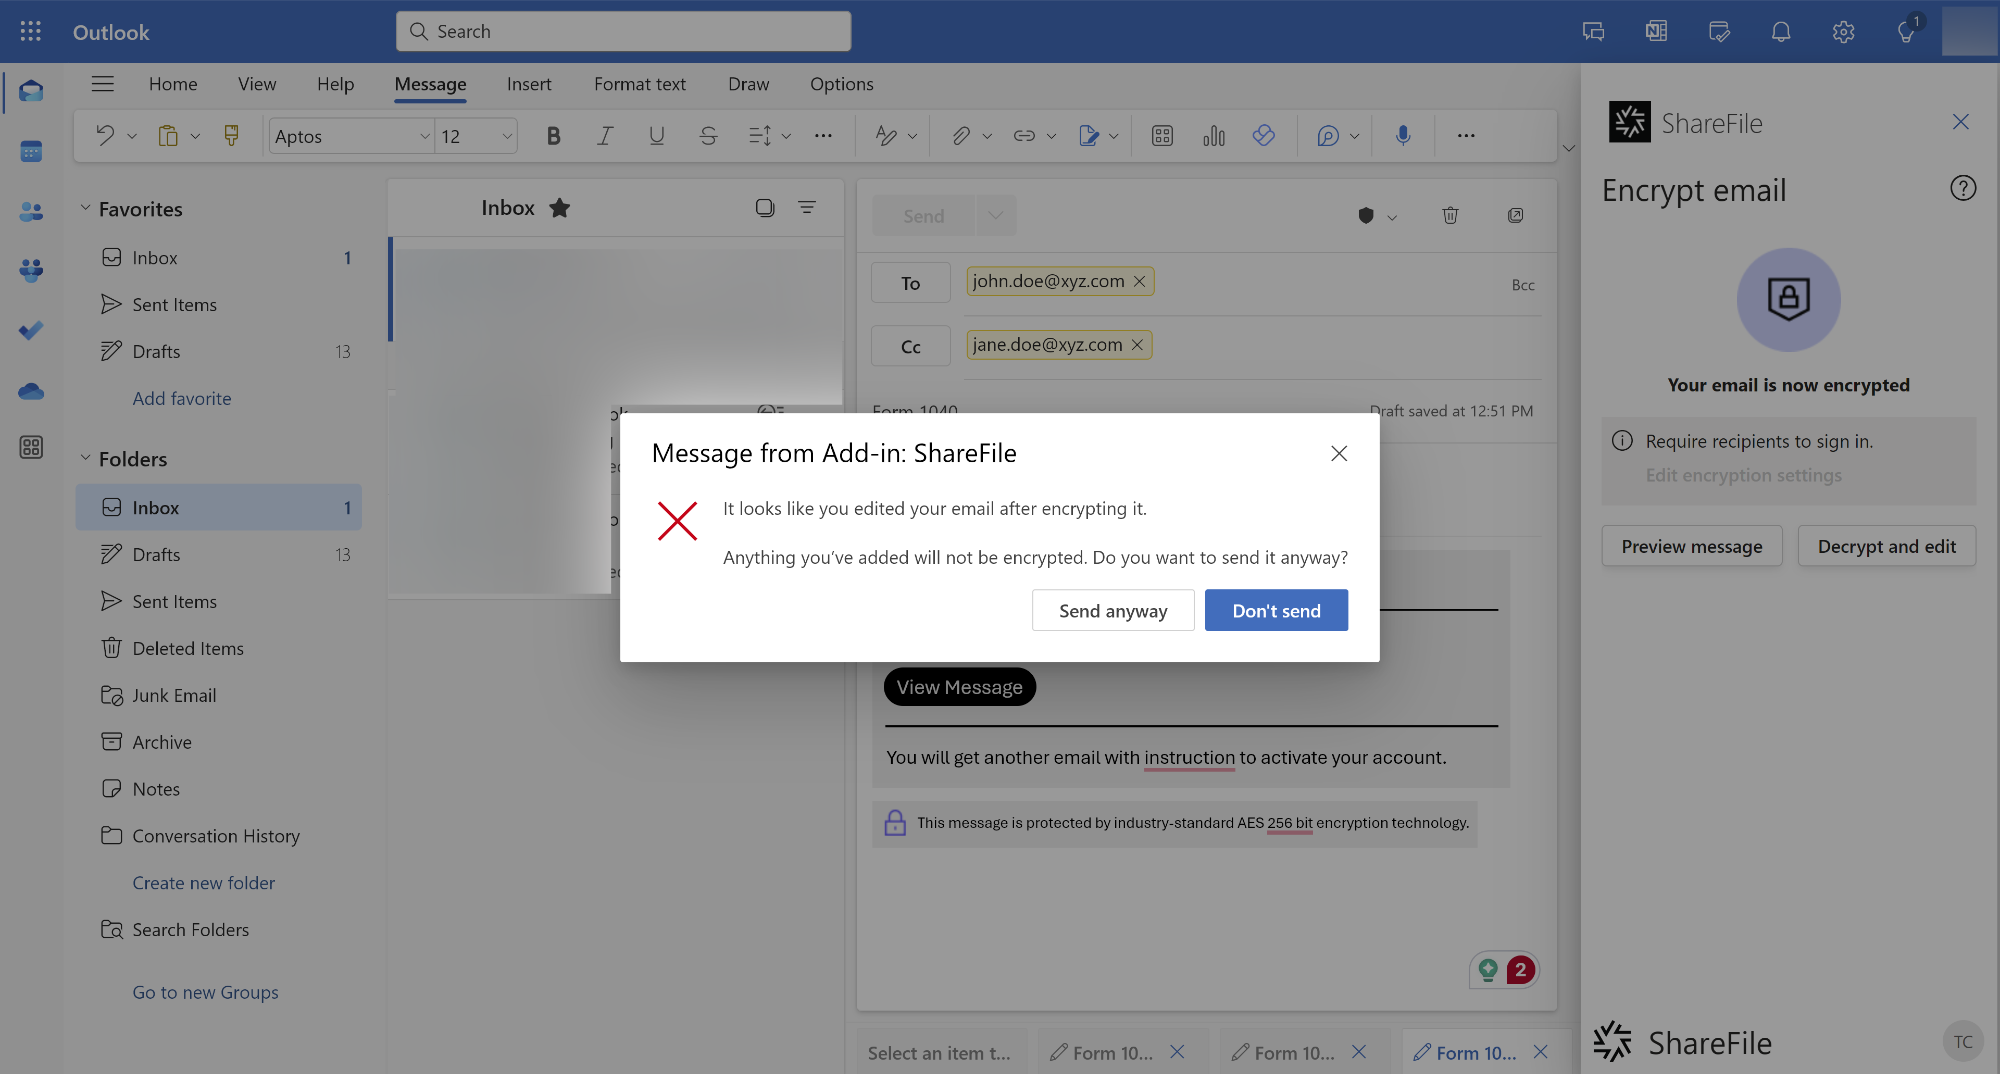 In this case you can choose to edit the mail again by clicking on the Don’t Send button and going back and encrypting the mail again. Or you can choose to send the mail without encryption by clicking on the Send anyway button. However any addition you have made will not be encrypted and the mail will be sent.
Note on Encrypted Emails and Retention Policies:
When sending files via encrypted email, the retention period applied to those files is governed by the retention policy set at the account level. This means that even if the email appears accessible, the files will be automatically deleted once the retention period expires. After that point, recipients may still see the message or link, but the associated file will no longer be available.
Sending encrypted emails to Email Recipients (Sign-In Required)
ShareFile now enables recipients to authenticate before they can access content on Outlook. For new users who do not have a ShareFile account, an activation link will be provided where they have to create a new ShareFile account in order to access sensitive content.
-
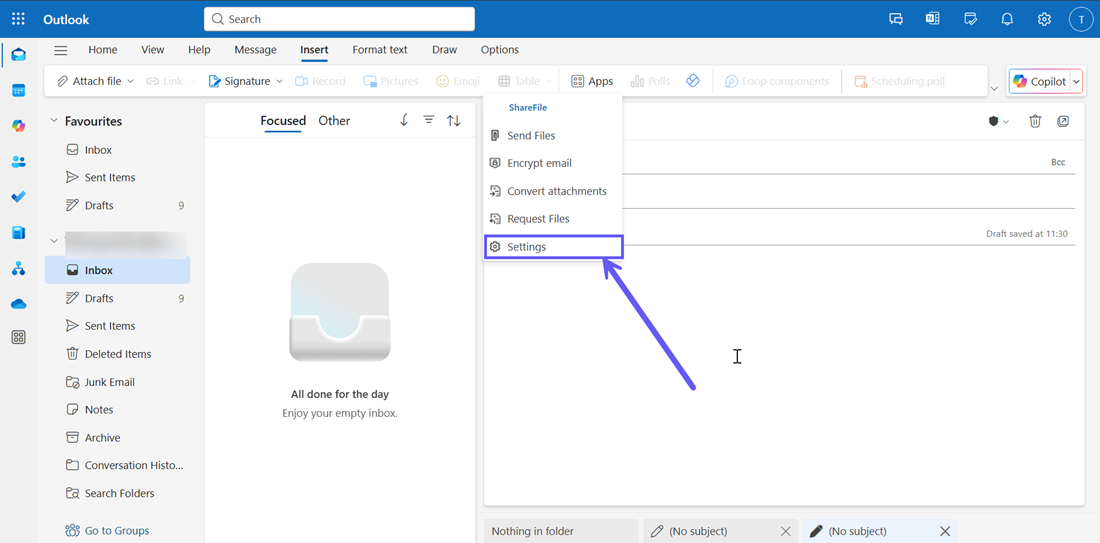
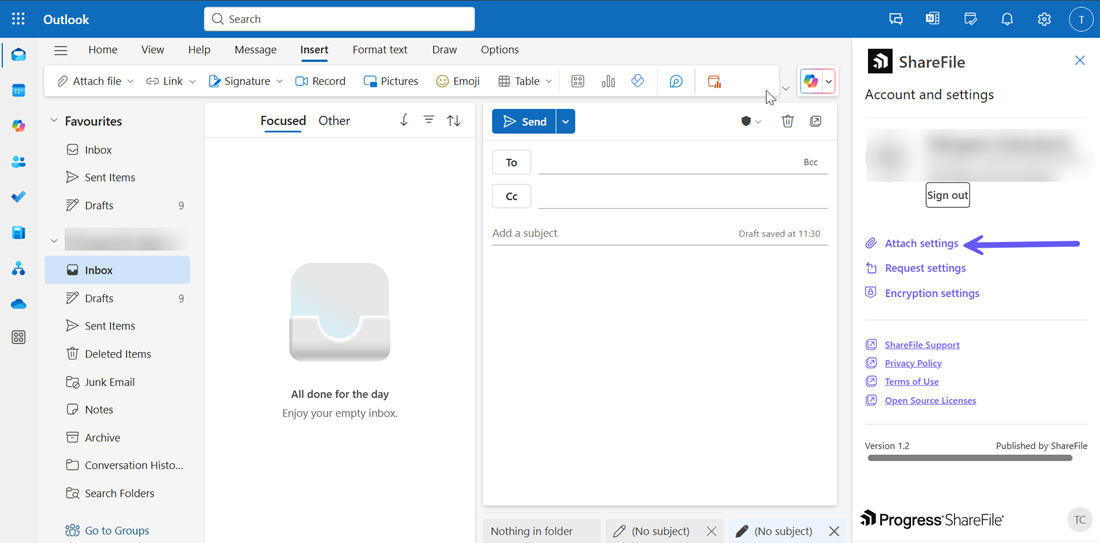
To configure email recipients for sign in, go to the ShareFile settings menu from the New Email window as shown below:
-
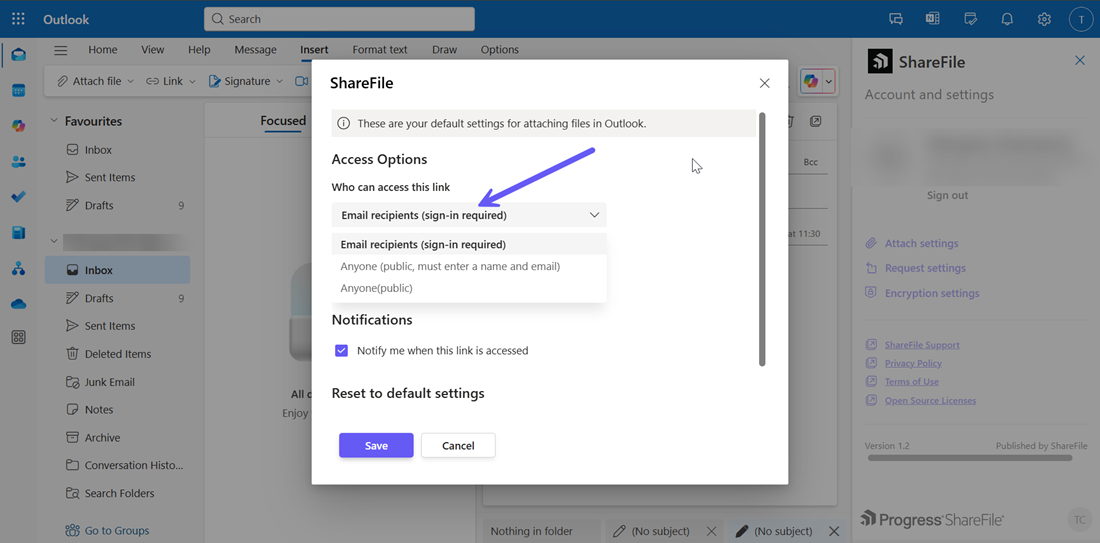
From the ShareFile settings menu, go to the Encryption settings menu. From the Access options window that opens, go to the Who can access this link section and change the dropdown option to Email recipients (sign-in required) as shown below:
-
To send encrypted emails to email recipients, follow the Steps 1-5 in the above section and log in to ShareFile.
-
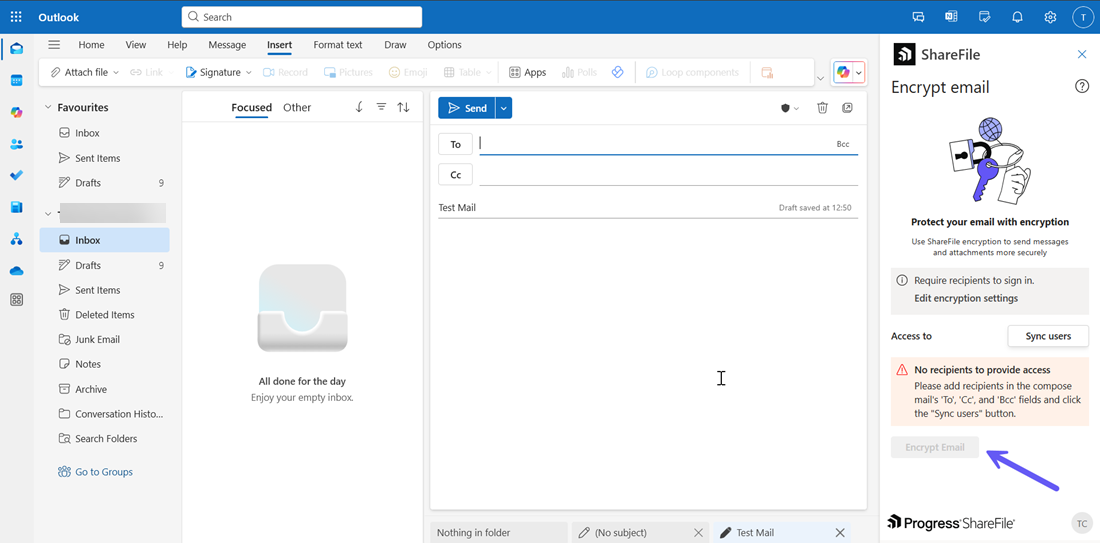
Once you have signed in to ShareFile, the Encrypt Email menu will open. If no body text is drafted in the email and no email recipients are added to the email, the Encrypt Email button is disabled by default as shown below:
-
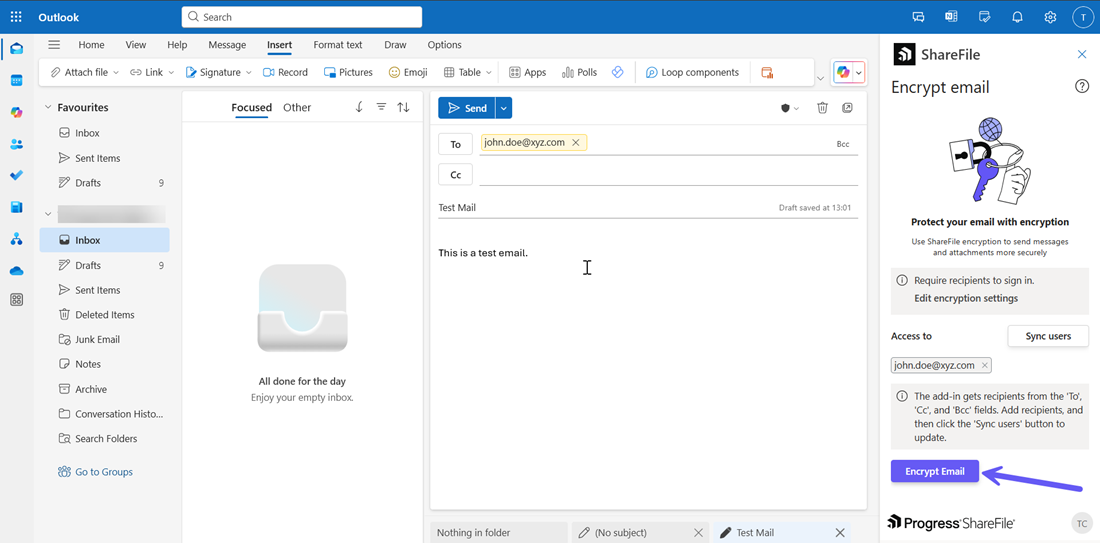
Insert the email body and add the recipients; then the Encrypt Email button is enabled. Click on the Encrypt Email button. The mail will be encrypted and will require all new users to sign-in to access the mail. If any of the email recipients do not have a ShareFile account, then an activation link for creating an account has to be sent to the new users and the Adding new users window opens as shown below.
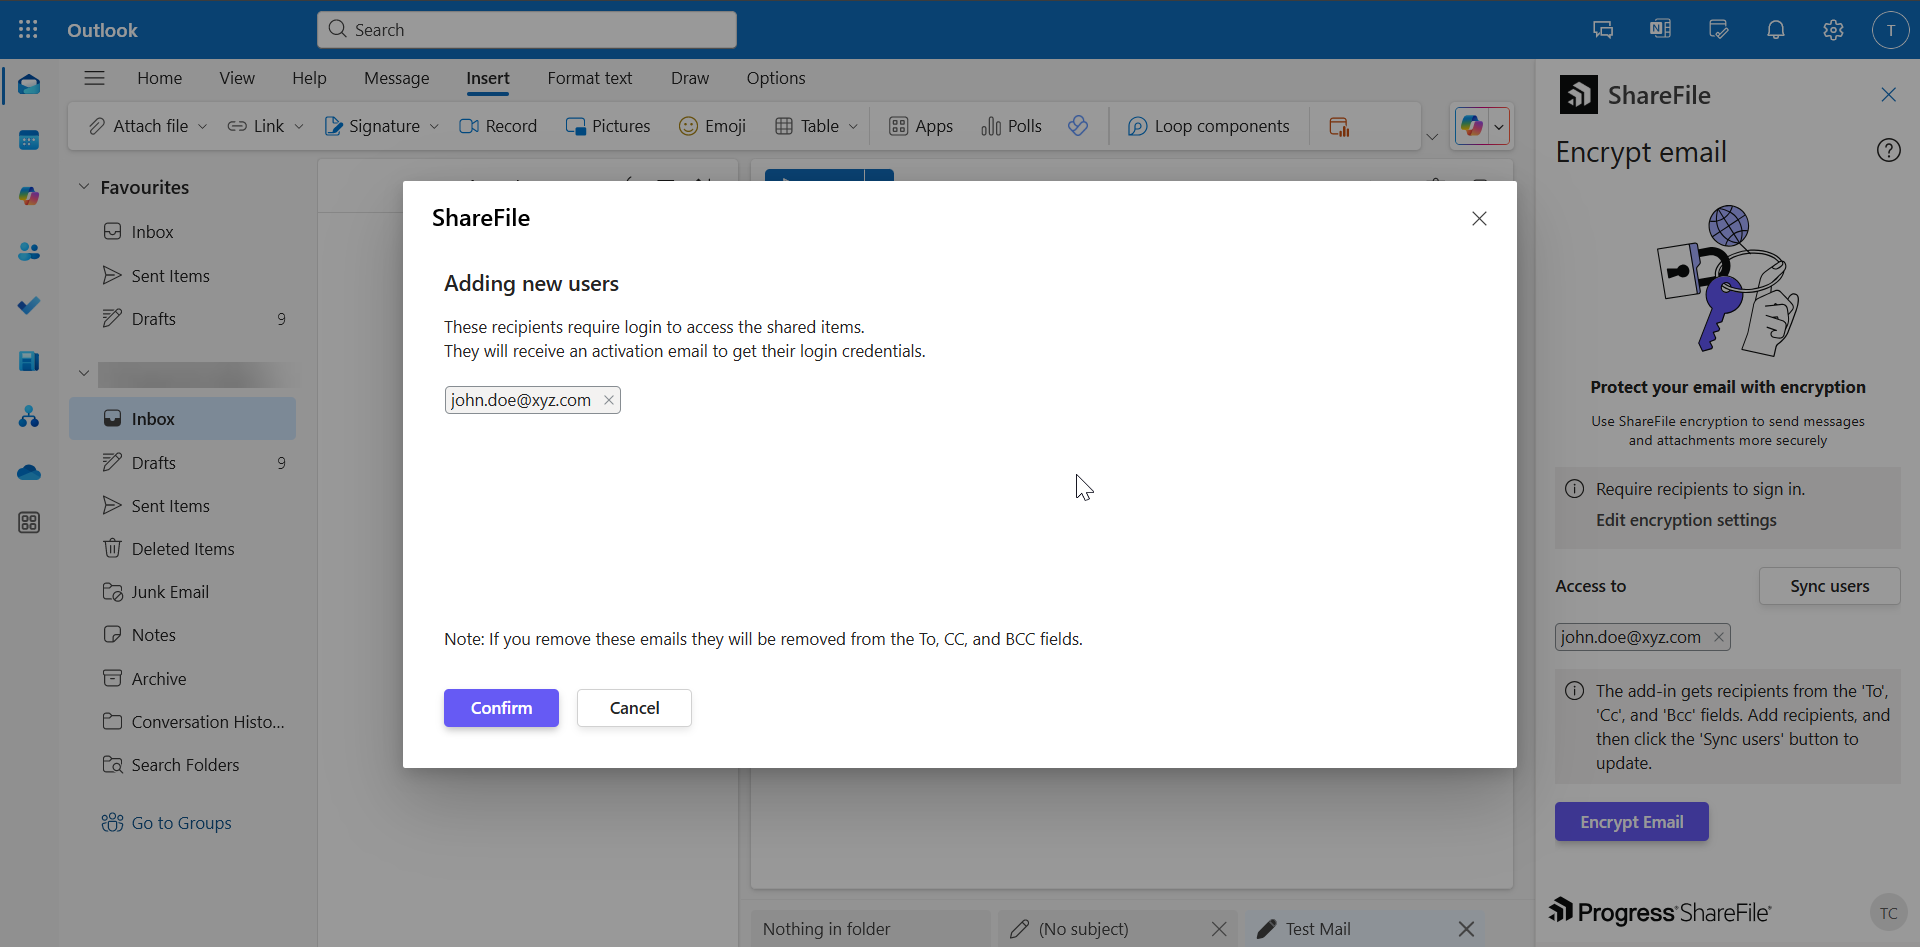
-
Click on the Confirm button and the encryption process will begin. Once complete, the encrypted email is displayed.
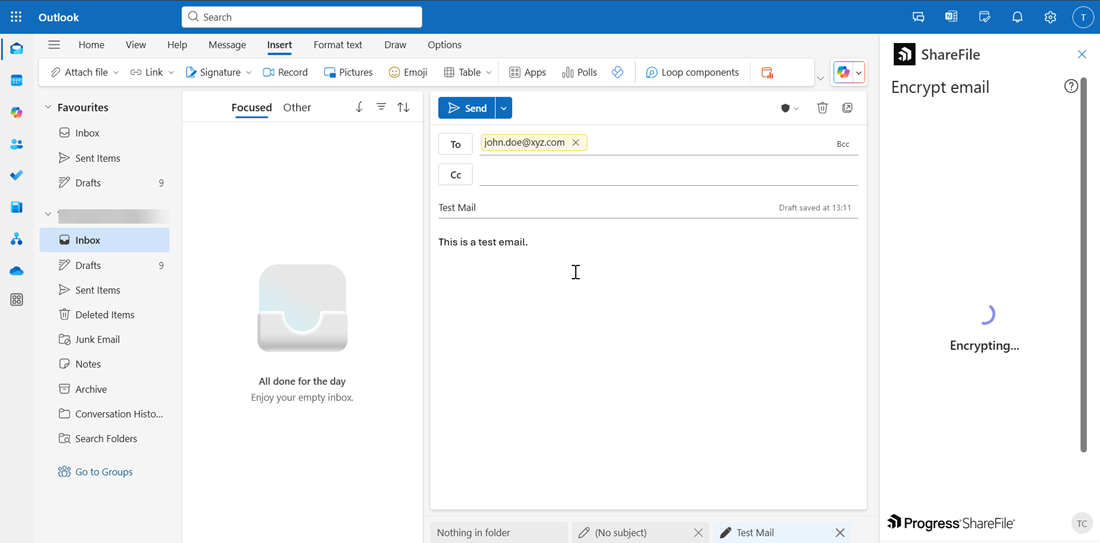
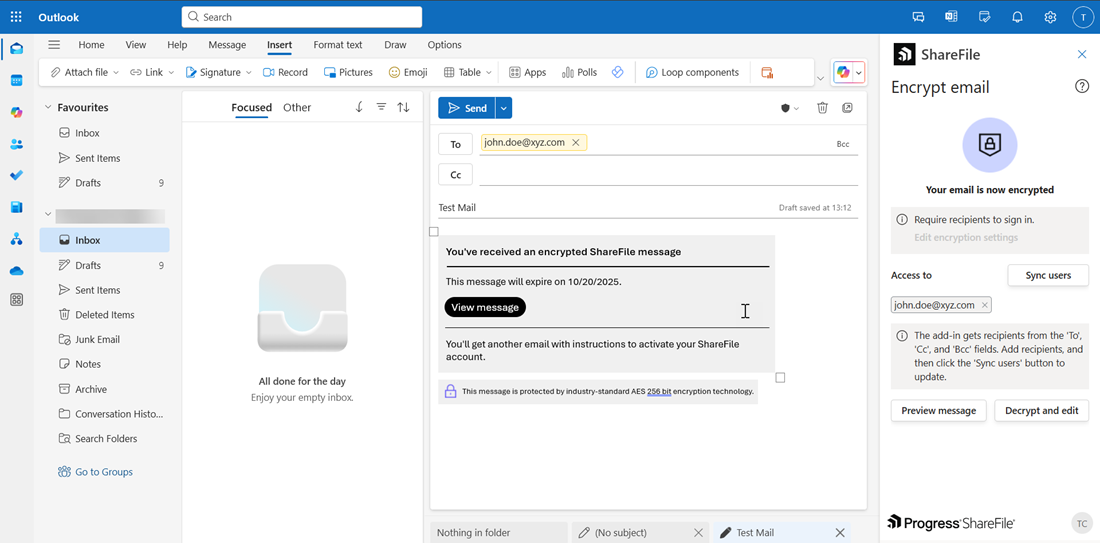
-
You can also use the Preview message button to preview the encrypted email body or use the Decrypt and edit button to go back and edit the body of the mail. This is similar to the Steps 9 and 10 of the previous section above.
-
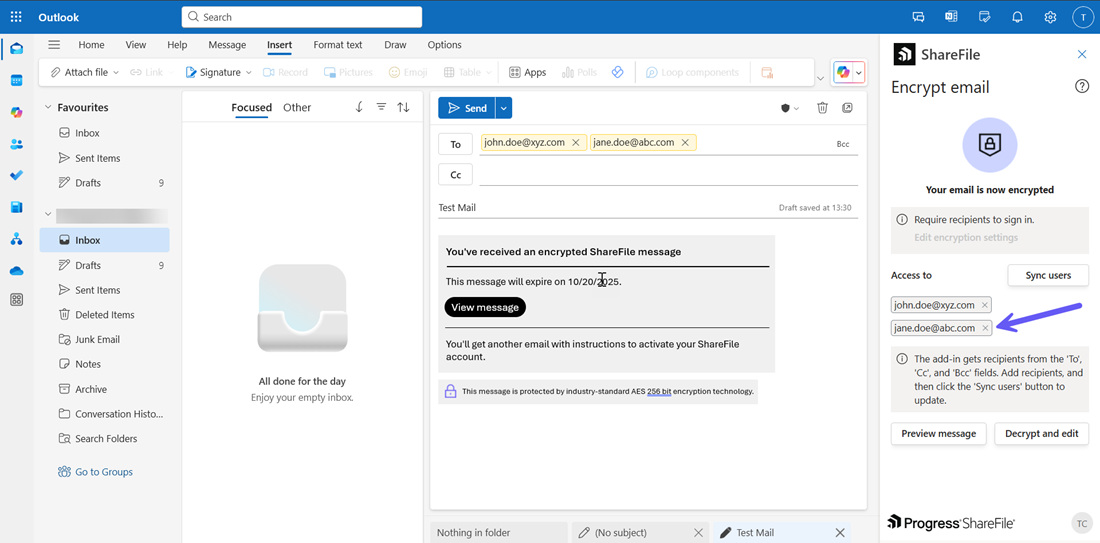
You can also add email recipients once the mail has been encrypted. Simply add a new email recipient and click on the Sync users button in the ShareFile pane as shown below:
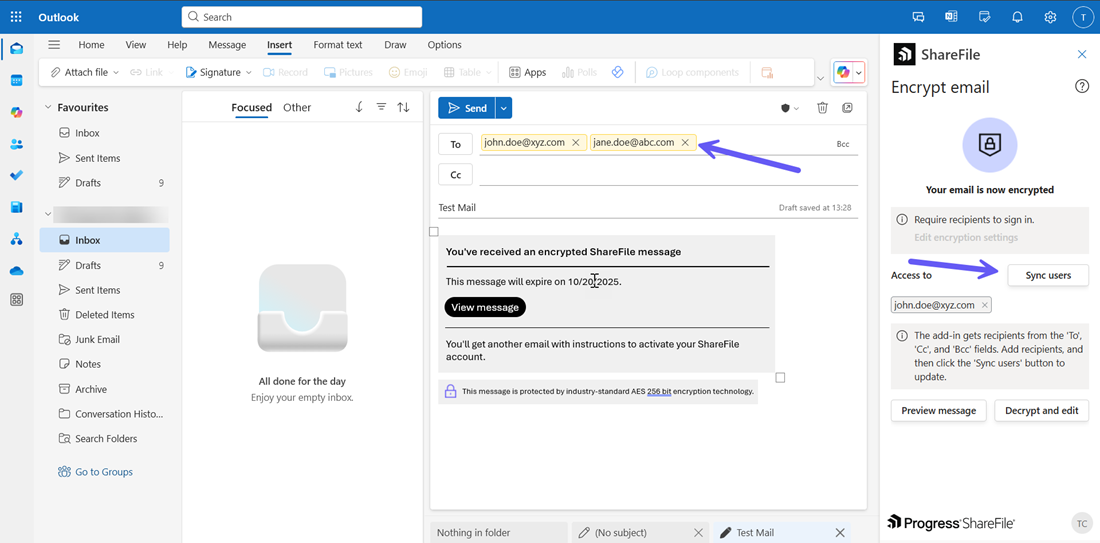
Share
Share
In this article
This Preview product documentation is Citrix Confidential.
You agree to hold this documentation confidential pursuant to the terms of your Citrix Beta/Tech Preview Agreement.
The development, release and timing of any features or functionality described in the Preview documentation remains at our sole discretion and are subject to change without notice or consultation.
The documentation is for informational purposes only and is not a commitment, promise or legal obligation to deliver any material, code or functionality and should not be relied upon in making Citrix product purchase decisions.
If you do not agree, select I DO NOT AGREE to exit.