-
-
-
-
-
-
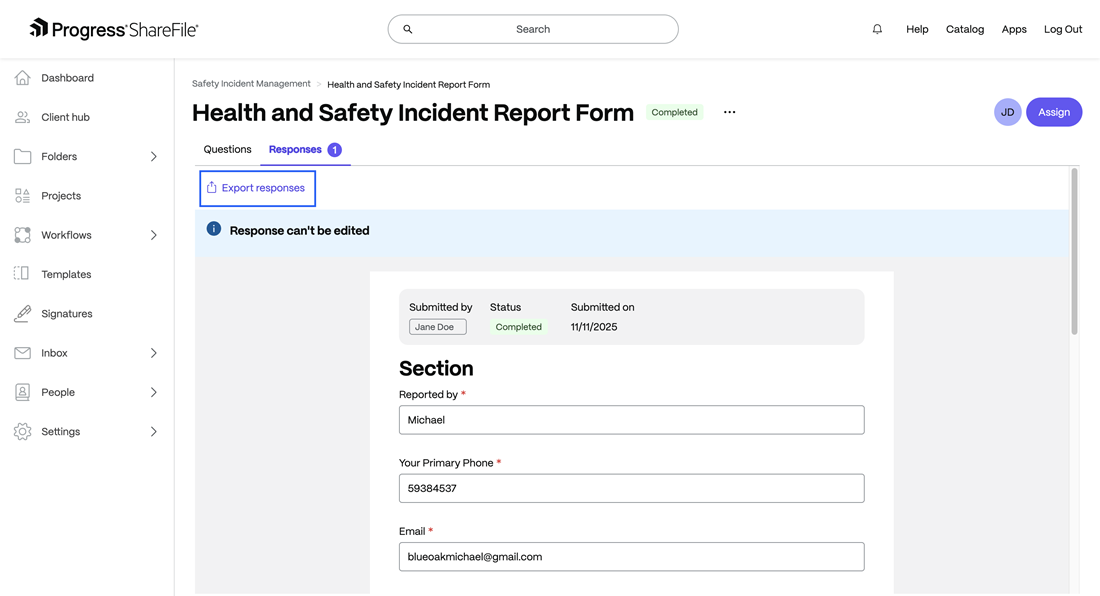
Export responses from Information Requests
-
-
-
-
This content has been machine translated dynamically.
Dieser Inhalt ist eine maschinelle Übersetzung, die dynamisch erstellt wurde. (Haftungsausschluss)
Cet article a été traduit automatiquement de manière dynamique. (Clause de non responsabilité)
Este artículo lo ha traducido una máquina de forma dinámica. (Aviso legal)
此内容已经过机器动态翻译。 放弃
このコンテンツは動的に機械翻訳されています。免責事項
이 콘텐츠는 동적으로 기계 번역되었습니다. 책임 부인
Este texto foi traduzido automaticamente. (Aviso legal)
Questo contenuto è stato tradotto dinamicamente con traduzione automatica.(Esclusione di responsabilità))
This article has been machine translated.
Dieser Artikel wurde maschinell übersetzt. (Haftungsausschluss)
Ce article a été traduit automatiquement. (Clause de non responsabilité)
Este artículo ha sido traducido automáticamente. (Aviso legal)
この記事は機械翻訳されています.免責事項
이 기사는 기계 번역되었습니다.책임 부인
Este artigo foi traduzido automaticamente.(Aviso legal)
这篇文章已经过机器翻译.放弃
Questo articolo è stato tradotto automaticamente.(Esclusione di responsabilità))
Translation failed!
Export responses from Information Requests
Article applies to:
- ShareFile Employee users
You can export all Information Request responses for offline review, analysis, or recordkeeping. Exports include metadata such as timestamps, respondent names, and all field-level answers.
To export a response from an Information Request:
- Navigate to the Information Requests tab in your project.
- Open the completed (or active) request.
- Select Export Responses -> CSV Format from the toolbar.
- Wait for the export to generate.
- Download the file to your local system.
Included in export
- Request name and ID
- Field names (in order of appearance)
- Each respondent’s entries
- Submission timestamps
Notes:
- Export is available once at least one response has been submitted.
- CSV files can be opened in Excel, Sheets, or imported into analytics tools.
- Conditional logic affects exported columns — hidden or skipped questions appear as blank cells.
- If multiple versions of the form are active, each version is exported separately.
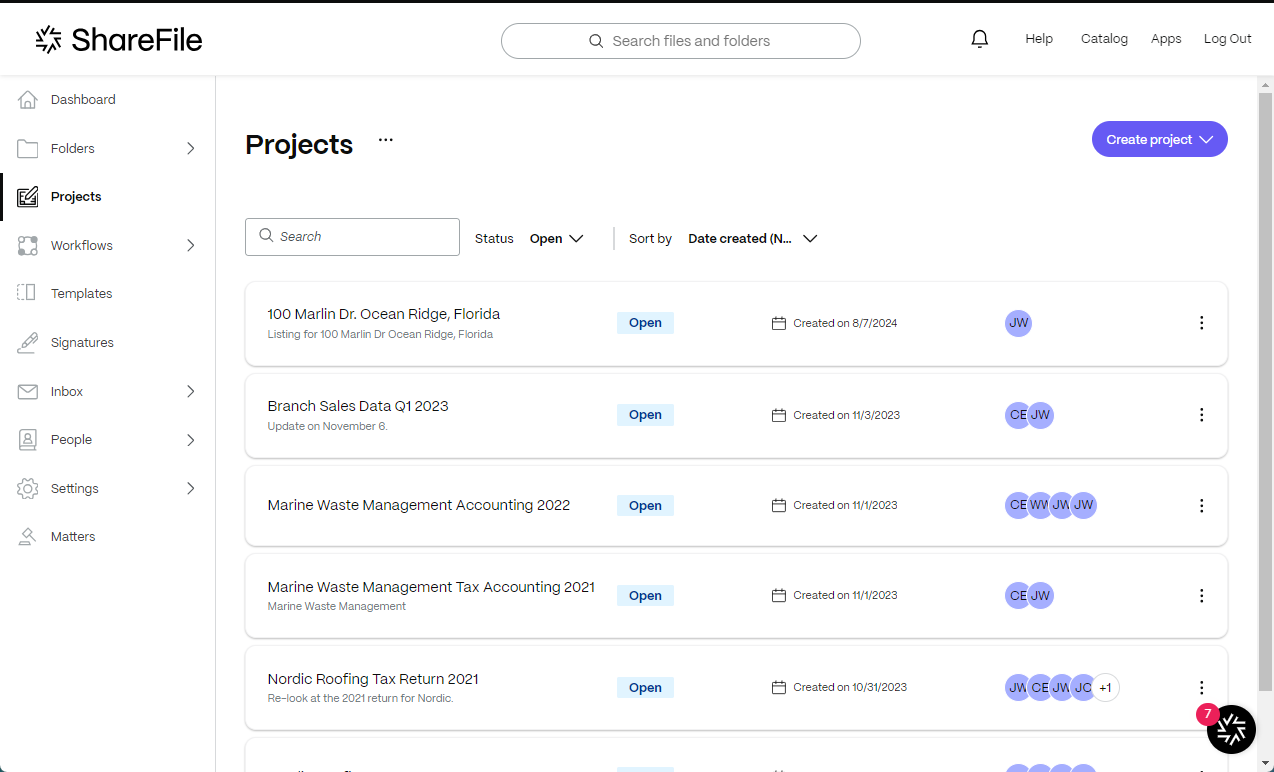
Creating and assigning information requests on the service provider side is available in the Projects folder for the specific client under the Information requests tab.
-
Navigate to Projects in your ShareFile account.
-
Select an existing project or select Create Projects. For these instructions, we selected an existing project.
-
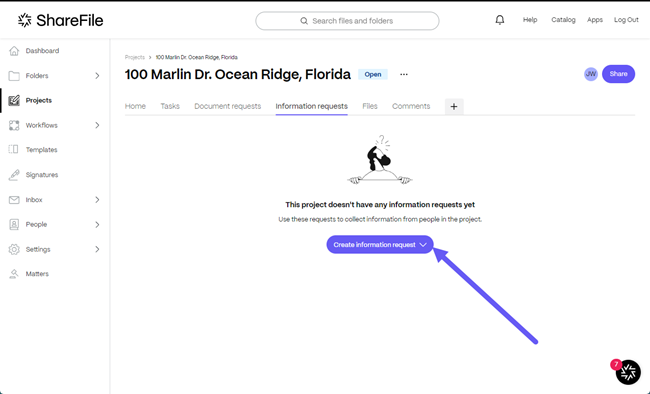
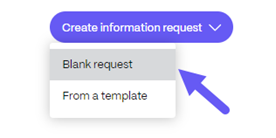
Select Create an information request then Blank request from the dropdown.
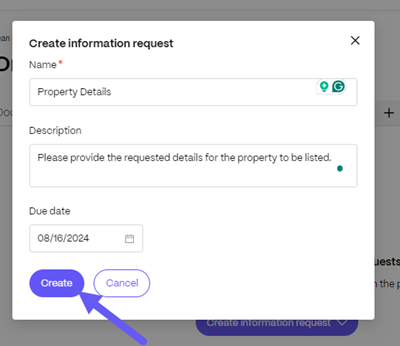
The Create Information request popup displays.
-
In the Name field, type in a name for the request.
-
In the Description field, you can provide an optional description for the request.
-
Select a Due date from the dropdown calendar.
-
Select Create.
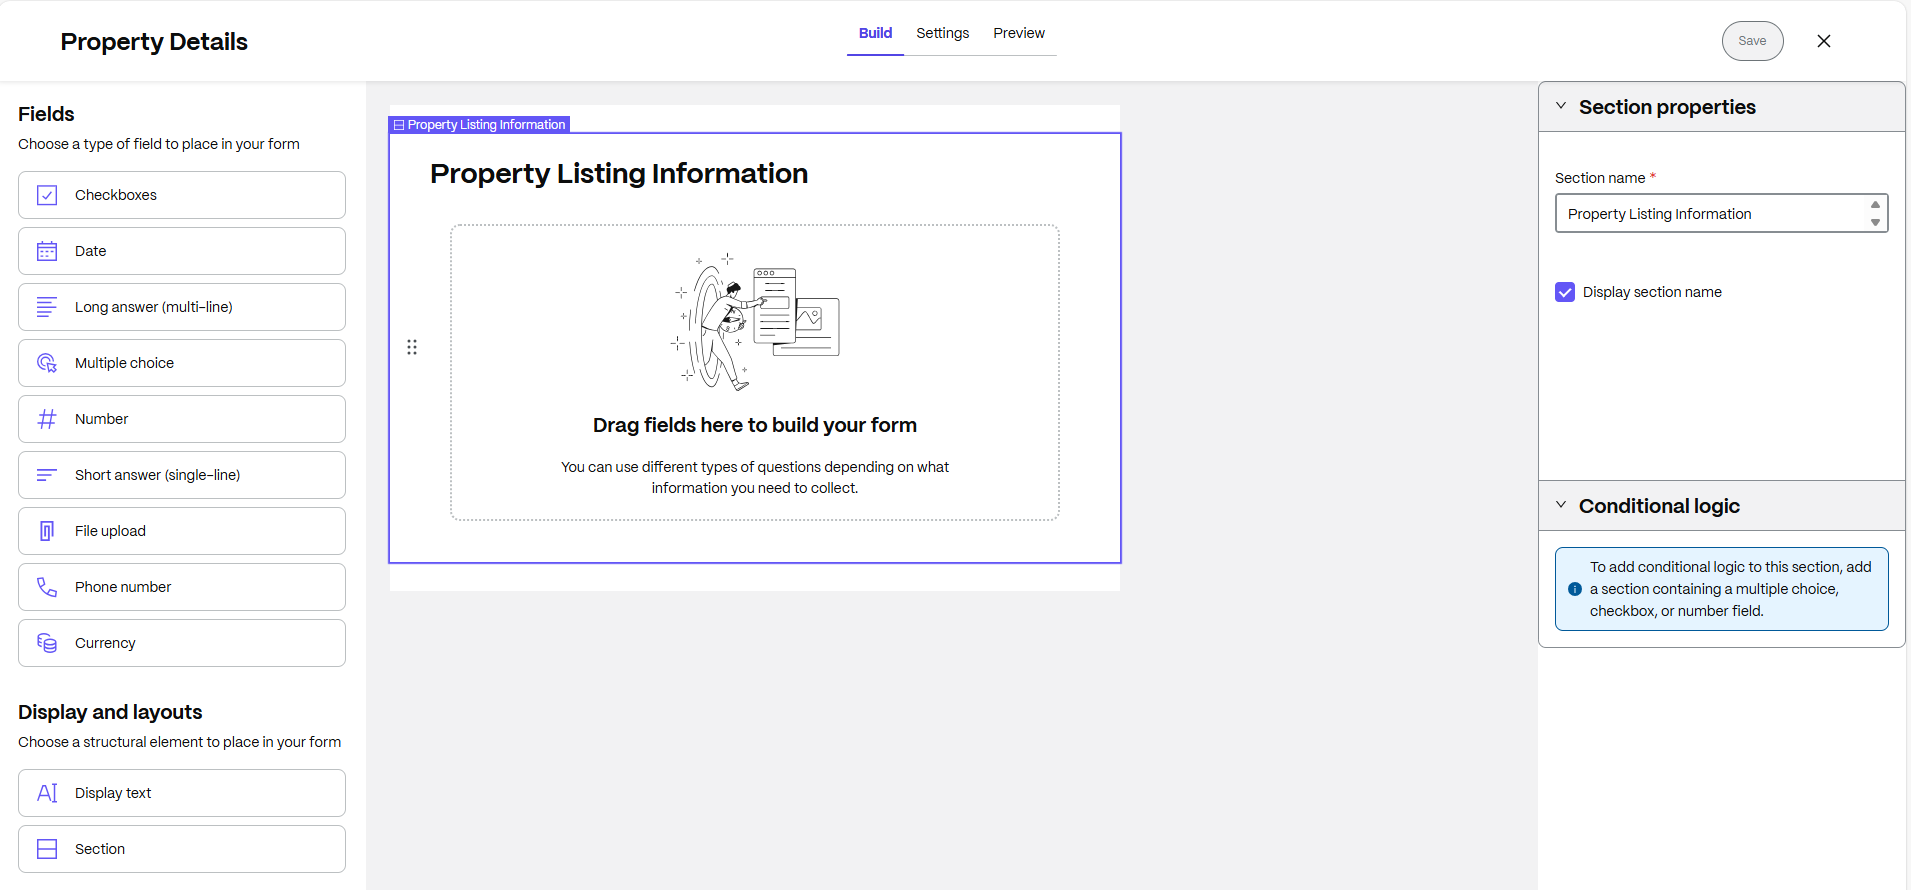
You are then redirected to the Information Request builder dashboard.
-
Select from the following fields to build out the request for specific information.
-
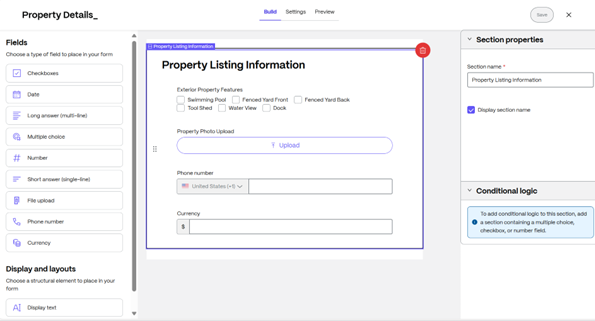
Checkboxes - Use this field type to create lists of possible items for recipients to select from. Options include:
- Question or Label for the Checkbox created.
- Required checkbox to require the recipient to complete the requested information.
- Hint text to assist in the defining of checkboxes.
- Options allow you to name each of the checkboxes for more details.
- Options Layout to choose either Horizontal or Vertical display.
-
Date - Use this to require a date for when the information request was completed.
-
Long answer (multi-line) - Use this field to allow the user to add as much information as need for the request. Options include:
- Required checkbox to require the recipient to complete the requested information.
- Question or Label for the field created.
- Hint text to assist the user in what kind of information is being requested.
-
Multiple choice - Use this field to allow the user to select between several options offered.
- Required checkbox to require the recipient to complete the requested information.
- Question or Label for the field created.
- Hint text to assist the user in what kind of information is being requested.
- Options allow you to name each of the multiple choice items.
- Options Layout to choose either Horizontal or Vertical display.
-
Number - Use this field to allow the user to add a number. For example, the number of bedrooms in a real estate listing.
- Required checkbox to require the recipient to complete the requested information.
- Question or Label for the field created.
- Hint text to assist the user in what kind of information is being requested.
-
Short answer (single-line) - Use this field to answer a single question. Options include:
- Required checkbox to require the recipient to complete the requested information.
- Question or Label for the field created.
- Hint text to assist the user in what kind of information is being requested.
-
File Upload - Use this to upload information including documents, photos, and other requested information.
-
-
Select Phone Number to provide your clients or prospective clients with an option to add their phone number or contact information.
-
Required checkbox to require the recipient to complete the requested information.
-
Question or Label for the field created.
-
Hint text to assist your client user in understanding what kind of information is being requested.
-
-
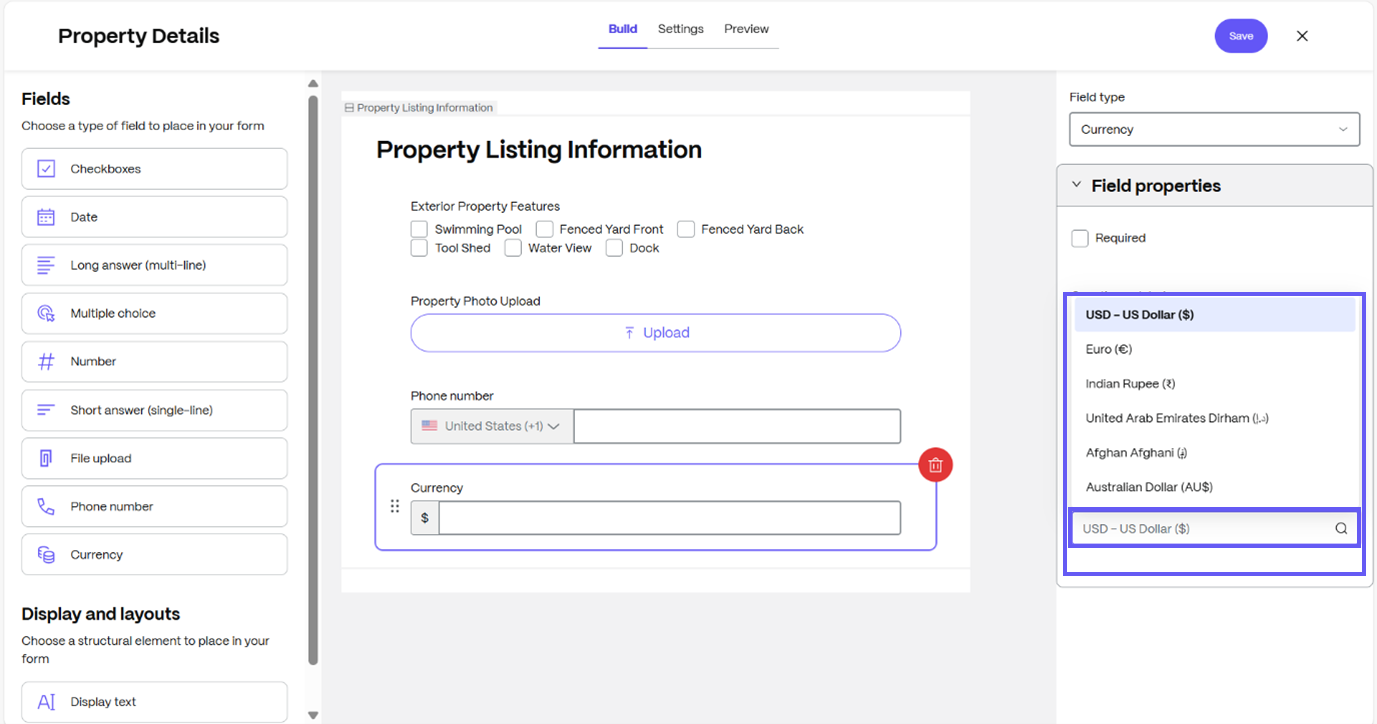
Select Currency to provide your clients or prospective clients with an option to select their respective currency.
-
Required checkbox to require the recipient to complete the requested information.
-
Question or Label for the field created.
-
Hint text to assist your client user in understanding what kind of information is being requested.
-
Currency Type Field which will allow users to select their respective currency based on their country where their business is located.
-
-
Select from Display and Layouts to select a structural element to place in your form including conditions.
-
Display text - Use this field to enter a title or provide other information to assist the recipient in providing as much detailed information as required.
- Display text enter the text to assist the recipient.
- Text size select from *Small, Medium, or Large.
-
Section - Use this to add sections to your request that can also contain conditions. For more information on creating conditional items in an Information request, see Creating a conditional request
-
-
Once you have completed the Build section, select Settings to review the field settings.

-
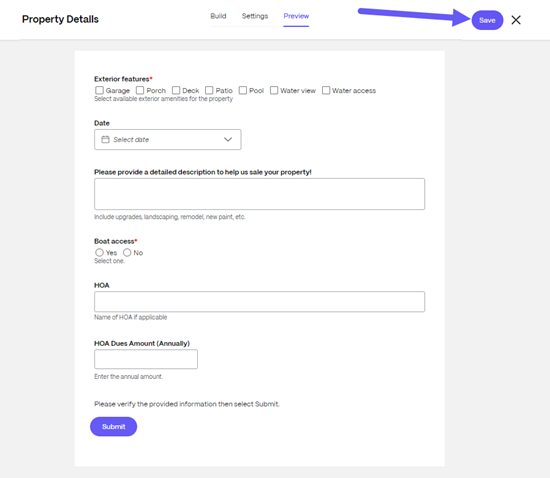
Select Preview to see how the request will look to the recipient.
-
Select Save.
-
Select X to go back to the project where the Information Request was initiated from.
Share
Share
In this article
This Preview product documentation is Citrix Confidential.
You agree to hold this documentation confidential pursuant to the terms of your Citrix Beta/Tech Preview Agreement.
The development, release and timing of any features or functionality described in the Preview documentation remains at our sole discretion and are subject to change without notice or consultation.
The documentation is for informational purposes only and is not a commitment, promise or legal obligation to deliver any material, code or functionality and should not be relied upon in making Citrix product purchase decisions.
If you do not agree, select I DO NOT AGREE to exit.