This content has been machine translated dynamically.
Dieser Inhalt ist eine maschinelle Übersetzung, die dynamisch erstellt wurde. (Haftungsausschluss)
Cet article a été traduit automatiquement de manière dynamique. (Clause de non responsabilité)
Este artículo lo ha traducido una máquina de forma dinámica. (Aviso legal)
此内容已经过机器动态翻译。 放弃
このコンテンツは動的に機械翻訳されています。免責事項
이 콘텐츠는 동적으로 기계 번역되었습니다. 책임 부인
Este texto foi traduzido automaticamente. (Aviso legal)
Questo contenuto è stato tradotto dinamicamente con traduzione automatica.(Esclusione di responsabilità))
This article has been machine translated.
Dieser Artikel wurde maschinell übersetzt. (Haftungsausschluss)
Ce article a été traduit automatiquement. (Clause de non responsabilité)
Este artículo ha sido traducido automáticamente. (Aviso legal)
この記事は機械翻訳されています.免責事項
이 기사는 기계 번역되었습니다.책임 부인
Este artigo foi traduzido automaticamente.(Aviso legal)
这篇文章已经过机器翻译.放弃
Questo articolo è stato tradotto automaticamente.(Esclusione di responsabilità))
Translation failed!
Projects 2.0: A Connected Collaboration Space
Overview
Projects is ShareFile’s built-in workspace for managing client and internal work from start to finish. It brings files, requests, tasks, data, and e-signatures into one secure, structured space, so teams can collaborate better and execute work without switching tools or losing context.
Because all work lives in one place, every document, action, and conversation stays connected to the engagement. Progress is visible, ownership is clear, and work remains secure and traceable from kickoff to completion.
Projects is designed for teams managing document-heavy, multi-stakeholder work—especially when clients are involved
Step-by-Step Guide to use Projects Space
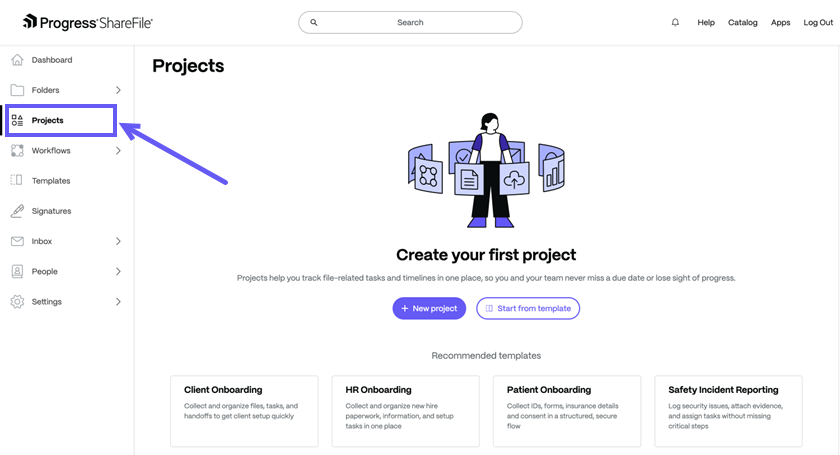
Step 1: Creating a New Project
-
Navigate to Projects > New Project.
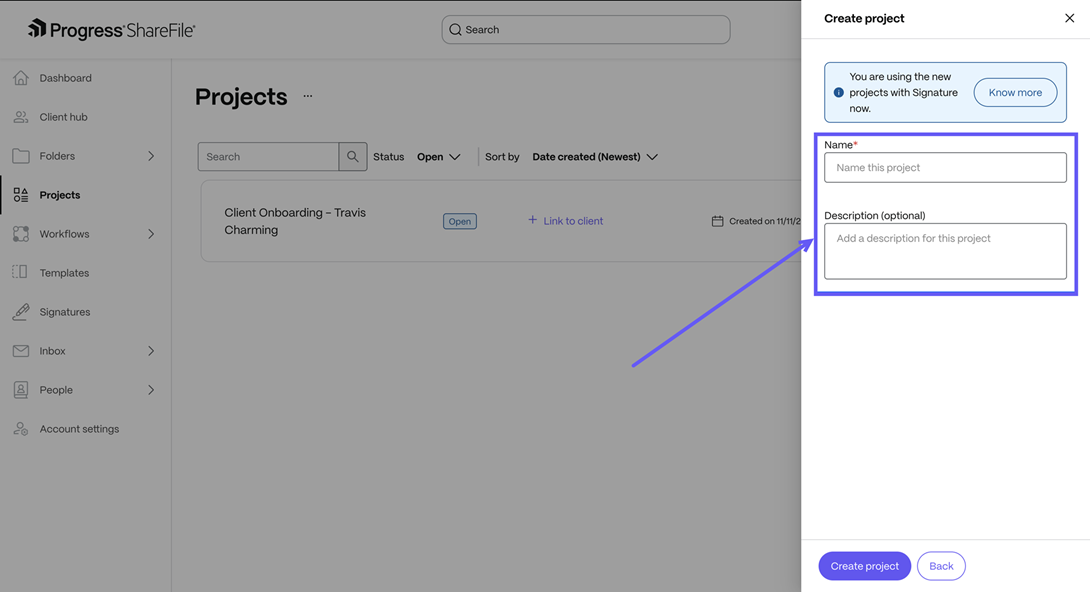
Step 2: Adding Project Details
-
Provide a Name and Description for the project.
Note
You can always delete the projects you own.
Step 3: Sharing the Project
- Internal team members can be added to collaborate on client deliverables and will see the project in their Projects dashboard.
- Clients can be added as external collaborators and will access the project and their assigned tasks through their Client Portal.
-
Access for all users is governed by the permissions you assign while sharing the project.

Step 4: Creating and Managing Todos
- Navigate to To-dos tab to start creating and assigning tasks relevant to the project.
- Create and assign a to-do using the To-dos Space when you need to assign a simple task- for example, when you want the client to complete a specific action, such as scheduling a meeting or preparing all necessary documents. Clients can respond simply by adding a comment and marking the todo as completed once done.
-
To raise an information request, document request, or signature request, navigate to the Request tab. You can create a request using templates or from scratch and assign it to a client or team member.

Step 5: Request for Document, Information or Signature
-
Navigate to the Request tab to start creating a document, information and signature request type.

- Assign any of these requests to the clients which they can view on the Client portal.
- If you need to collect information from the client, use the Information Request under the Request tab. Similarly, if you need to request a set of documents from the client, use the Document Request under the Request tab.
- All these requests can be templatized, so you only need to create an Information Request or Document Request once. You can reuse them in other projects by selecting Template, or you can template the entire project for future use.
Step 6: How to reuse your created information request and document request
- You can templatize three resources – Information request, Document request, Tables and Projects.
-
To templatize a custom information request you created, you can open the created information request then click on Three dot icon and then click on Save as template button.
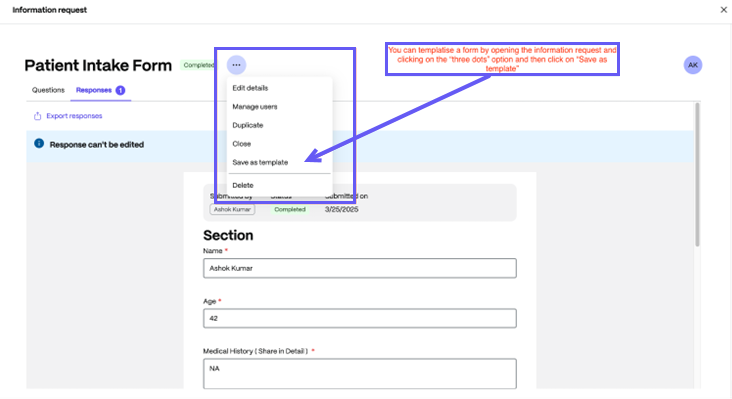
-
To templatize a custom document request you created, it first must be in open state. You can click on the Document Request created from the Request section, then click on Three dot icon > Save as template.
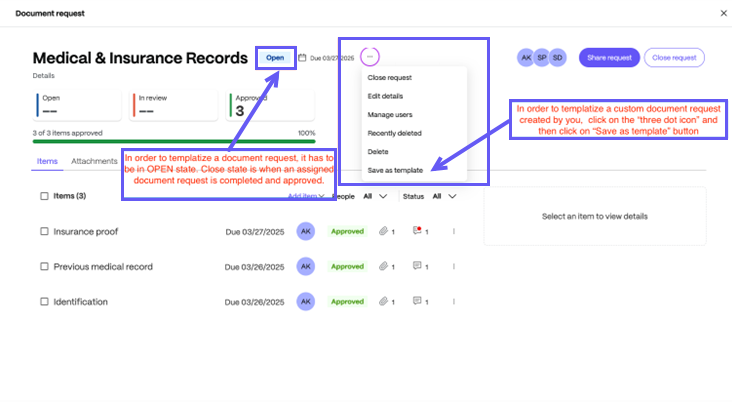
-
In case you feel that the list of Tasks, Document Request, Information Request and Table schemas can be reused repeatedly, then you can also templatize the project itself. To do so, click on Three dot icon > Save as template button.
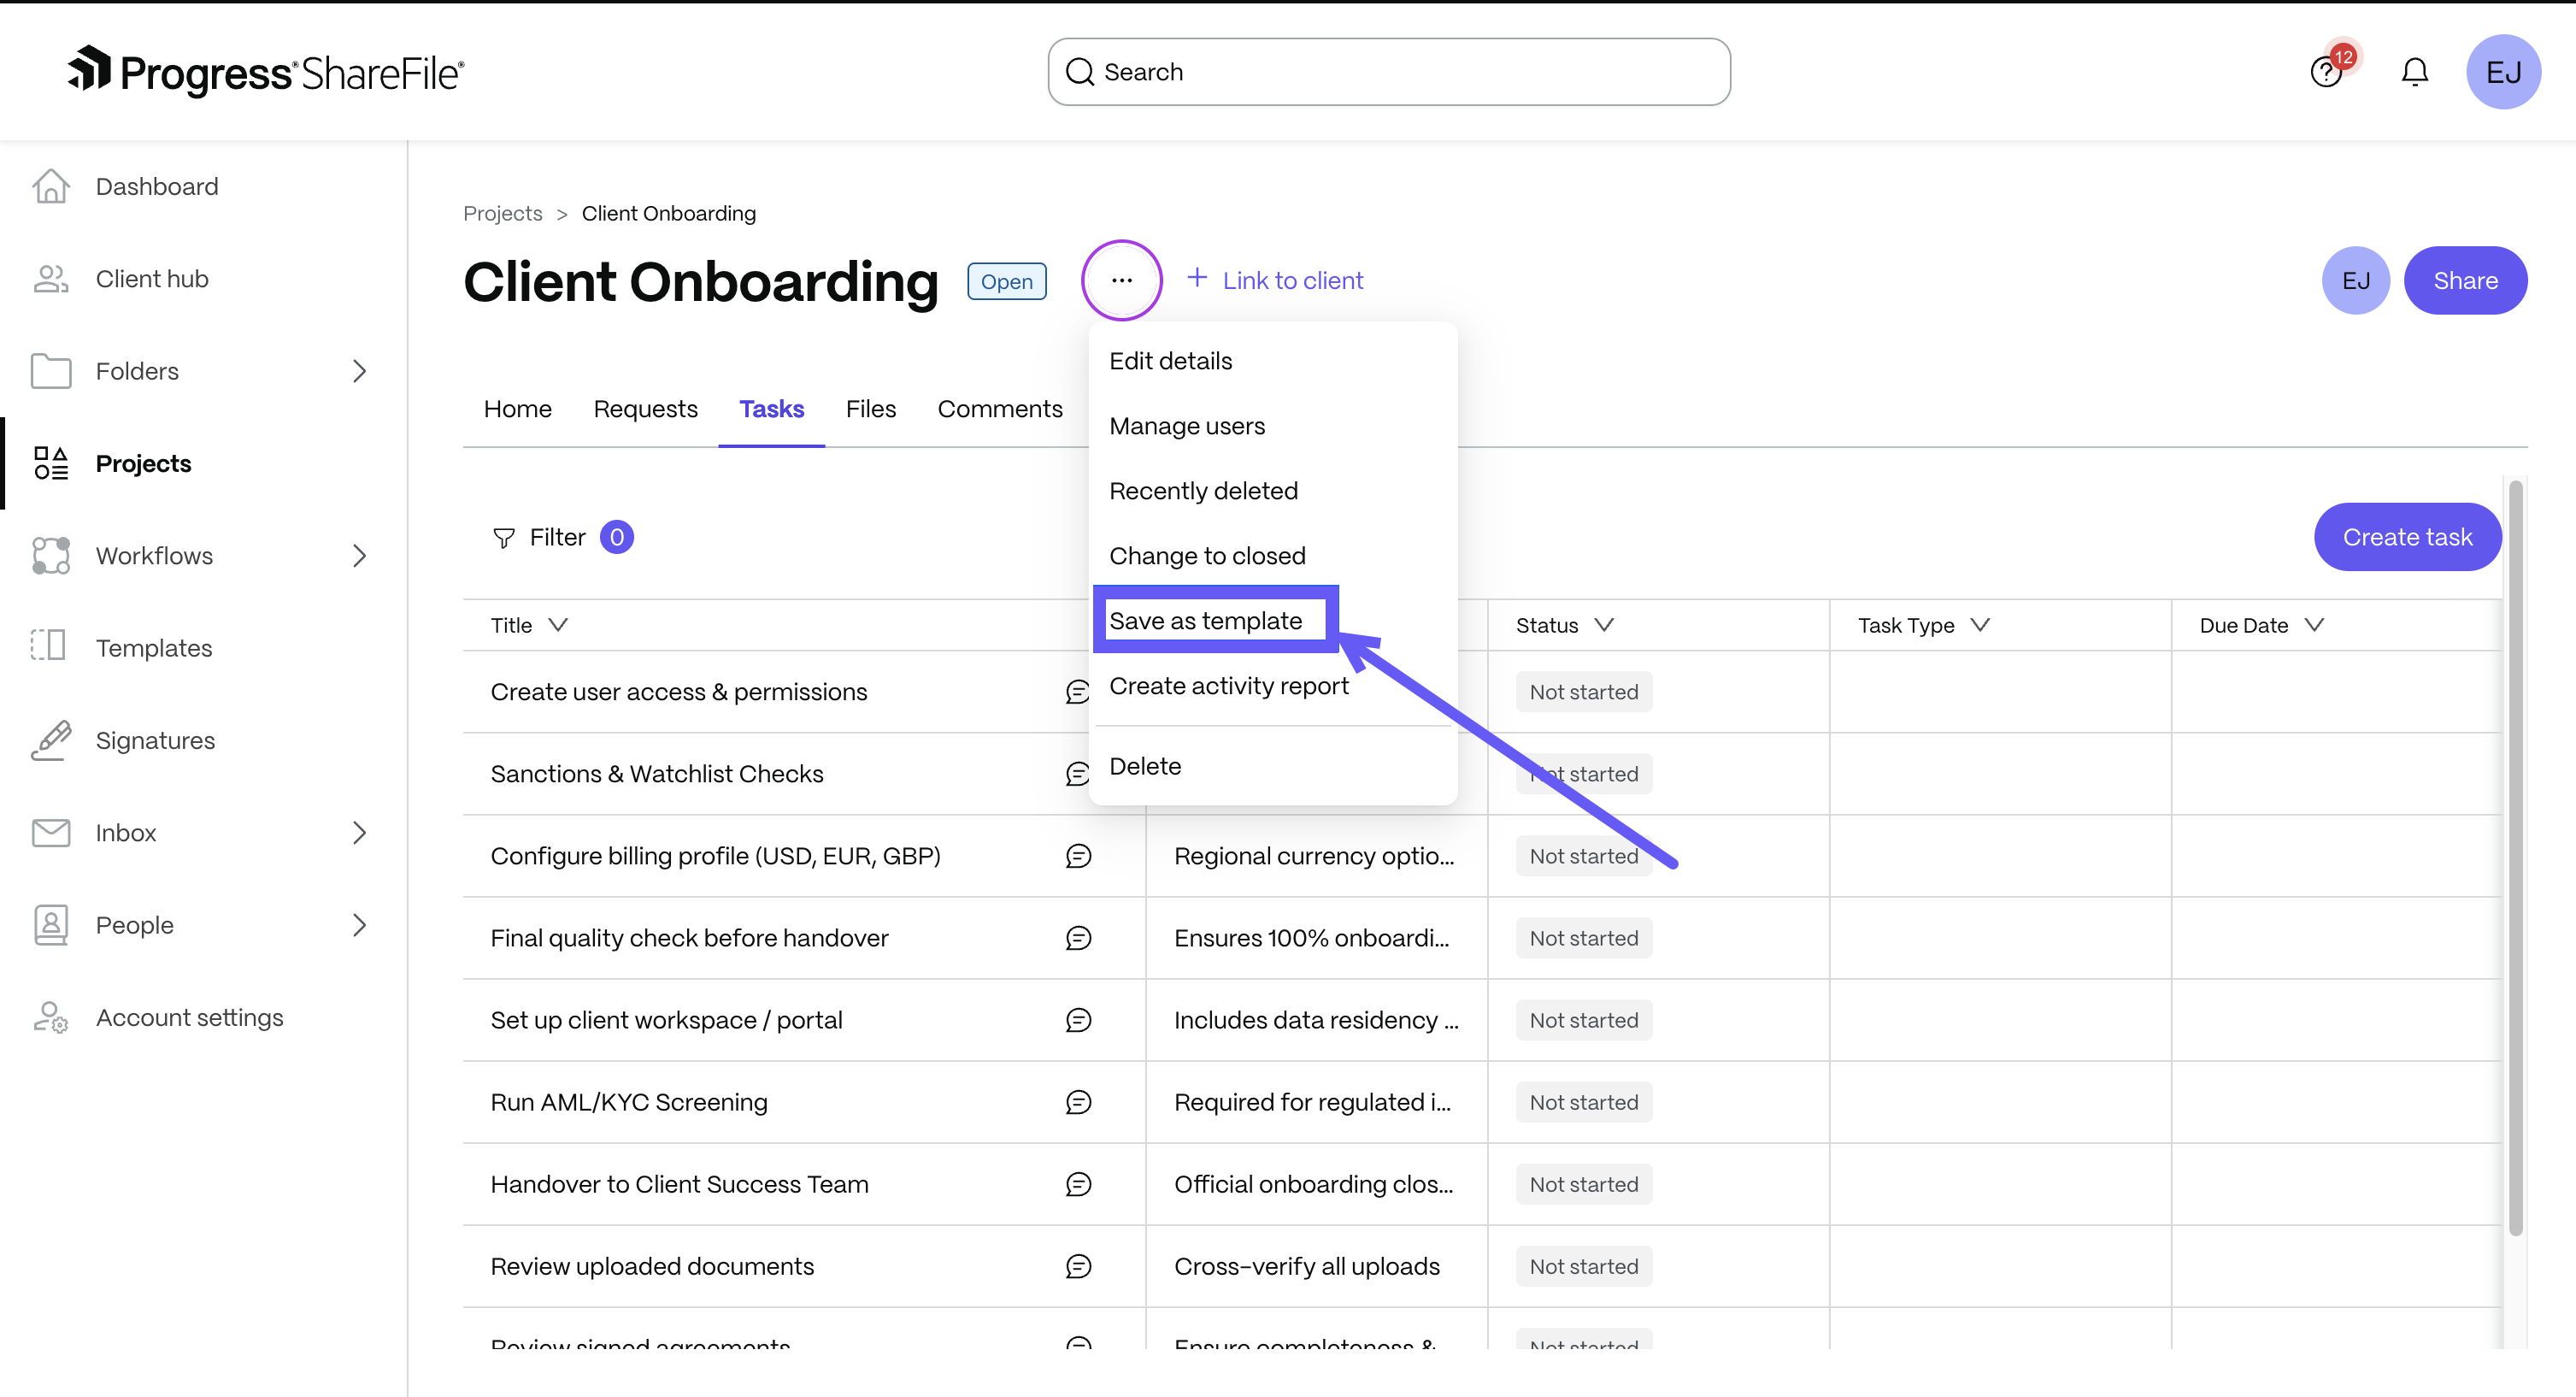
- In case you want to templatize a list of tasks for other projects, then we recommend templatizing the whole project.
Step 7: Accessing Client View
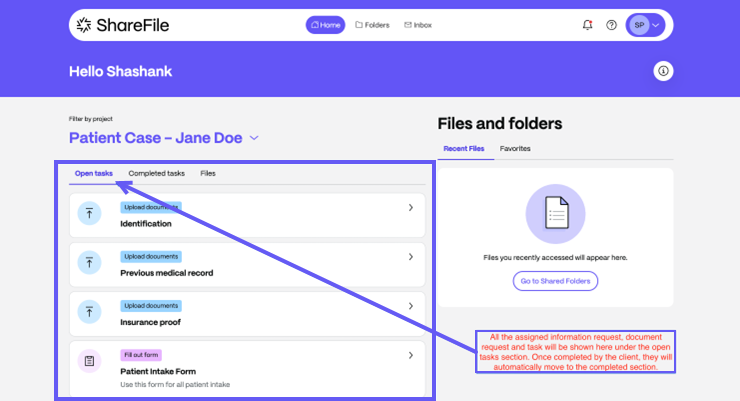
-
Clients can see all tasks and requests assigned to them in their client portal.
Step 8: Client’s View of Tasks
-
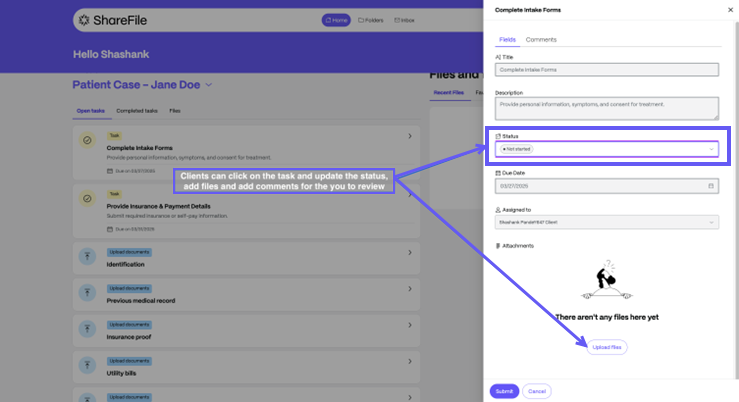
To-do assignment - When a to-do is assigned to a client, they can:
- Update the task status
- Upload files
- Add comments using the comment section
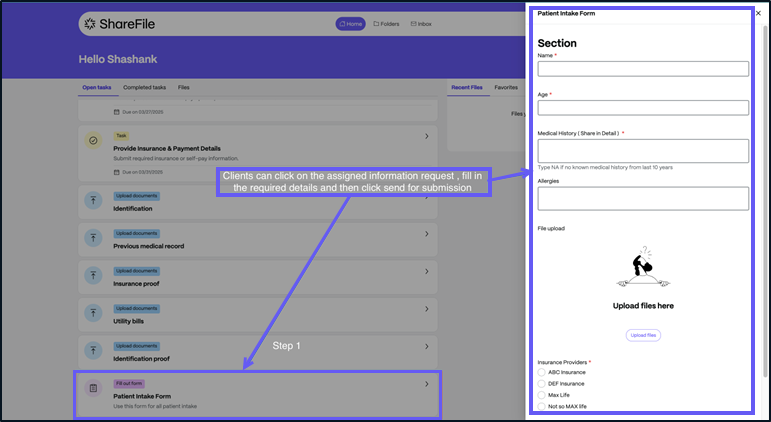
-
Information Request: When assigned an information request, the client can open the form and submit all required details.
-
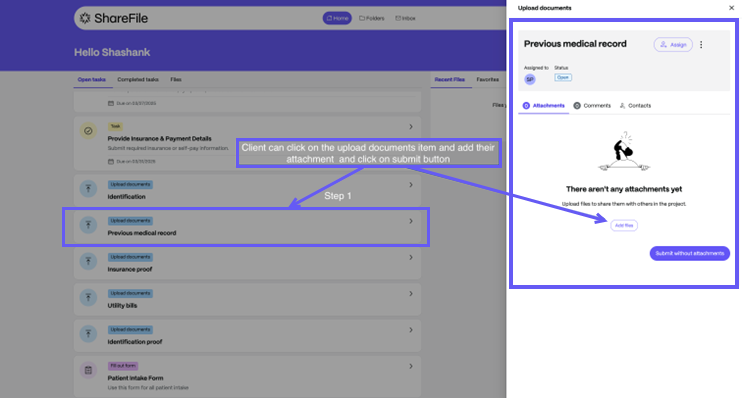
Document Request: When assigned a document request, the client can:
- Open the request and upload the required document
- Use the comment section to collaborate with the assigner
-
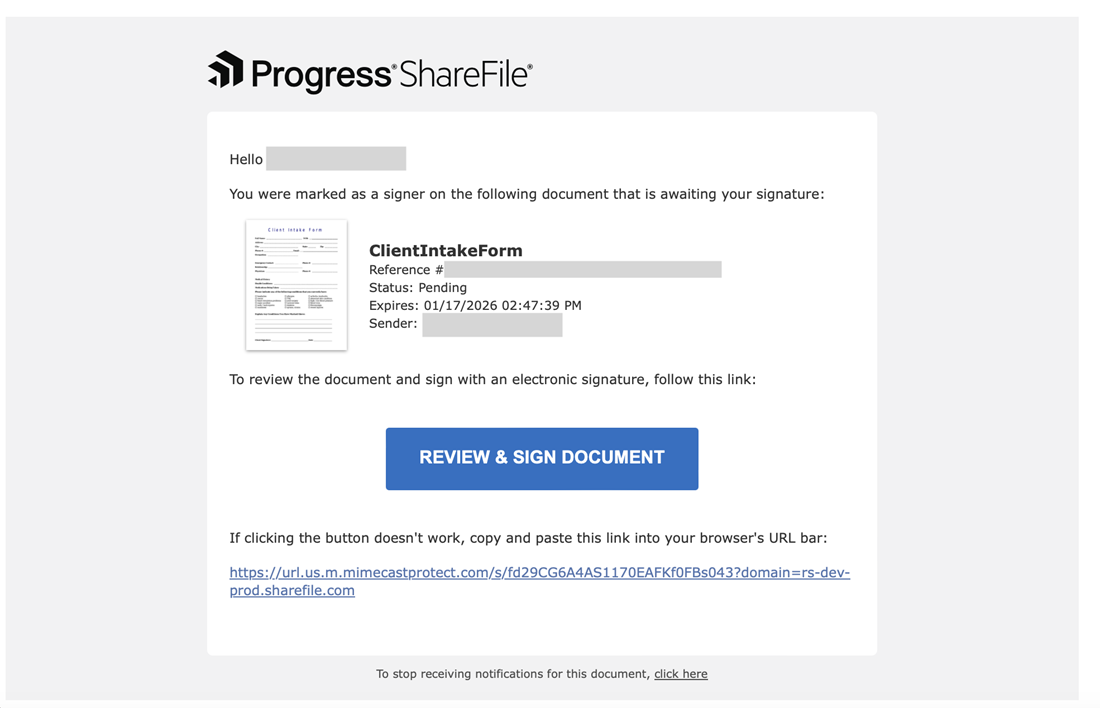
Signature Request: When assigned a signature request, the client will receive an email notification to sign the document or they can also open their Client portal and complete the assigned signature request.
Industry specific use cases
The Solution: A Game-Changer for Real Estate
Sarah adopted ShareFile’s new Enhanced Project experience Template designed for real estate transactions. The impact was immediate:
- Effortless Document Collection – Instead of chasing buyers and sellers for paperwork, Sarah used structured document requests within the template. Clients uploaded deeds, financing approvals, and contracts directly through the client portal.
- Structured Task Management – Dedicated tasks and request spaces brought structure for the stakeholders involved. Sarah no longer had to manually track if the mortgage broker had submitted approvals or if the home inspection was scheduled correctly or whether loan approval documents have been submitted or not.
- Seamless eSignature Integration – Closing deals became easier with built-in eSignature functionality. Sarah sent purchase agreements for signing, and they were automatically stored within the project upon completion.
- Real-Time Transaction Tracking – With the template’s structured tables, Sarah monitored every step of the deal—milestones, pending approvals, and commission details—without spreadsheets or manual updates.
The Solution: A Transformative Patient Workflow
Dr. Patel’s clinic implemented ShareFile’s new Enhanced Project Experience Template for healthcare, streamlining every step of the patient intake process:
- Simplified Patient Intake– Instead of handing out paper forms, the clinic used structured digital Forms to collect patient details, medical history, and insurance information before the appointment.
- Effortless Document Collection– Patients uploaded required documents—insurance proof, identification, and medical records—directly through the secure client portal, eliminating repeated requests and misplaced paperwork.
- Structured Task Assignments– The Individual tasks can be assigned to the right team members. Admin staff verified insurance, doctors reviewed medical history, and patients received reminders to complete outstanding forms.
- Seamless eSignature Integration– Consent forms were sent for electronic signatures, ensuring compliance without physical paperwork.
- Centralized Patient Data Management– The structured Tables feature allowed staff to track patient visit history, insurance claims, and lab reports in one place, reducing dependency on manual spreadsheets.
FAQs
Do I have to create a list task manually for every project that I have for different clients?
We recommend using the “Save as Template” feature in project settings. Simply set up a project with all necessary documents, information, and tasks, then convert it into a reusable template. This allows you to use the same setup any number of times efficiently.
How can I invite my team members or clients?
- To share a project, go to the Share option in your project settings.
- You can share the project with a client who is already added to your account. If the client is not yet added, add them first and then share the project.
- You can also share the project directly with any employee within your account and assign the necessary permissions.
This Preview product documentation is Citrix Confidential.
You agree to hold this documentation confidential pursuant to the terms of your Citrix Beta/Tech Preview Agreement.
The development, release and timing of any features or functionality described in the Preview documentation remains at our sole discretion and are subject to change without notice or consultation.
The documentation is for informational purposes only and is not a commitment, promise or legal obligation to deliver any material, code or functionality and should not be relied upon in making Citrix product purchase decisions.
If you do not agree, select I DO NOT AGREE to exit.