This content has been machine translated dynamically.
Dieser Inhalt ist eine maschinelle Übersetzung, die dynamisch erstellt wurde. (Haftungsausschluss)
Cet article a été traduit automatiquement de manière dynamique. (Clause de non responsabilité)
Este artículo lo ha traducido una máquina de forma dinámica. (Aviso legal)
此内容已经过机器动态翻译。 放弃
このコンテンツは動的に機械翻訳されています。免責事項
이 콘텐츠는 동적으로 기계 번역되었습니다. 책임 부인
Este texto foi traduzido automaticamente. (Aviso legal)
Questo contenuto è stato tradotto dinamicamente con traduzione automatica.(Esclusione di responsabilità))
This article has been machine translated.
Dieser Artikel wurde maschinell übersetzt. (Haftungsausschluss)
Ce article a été traduit automatiquement. (Clause de non responsabilité)
Este artículo ha sido traducido automáticamente. (Aviso legal)
この記事は機械翻訳されています.免責事項
이 기사는 기계 번역되었습니다.책임 부인
Este artigo foi traduzido automaticamente.(Aviso legal)
这篇文章已经过机器翻译.放弃
Questo articolo è stato tradotto automaticamente.(Esclusione di responsabilità))
Translation failed!
Create an Editable Word Document Template Using Desktop App
Editable Word Templates are supported only on the following ShareFile Premium, VDR and Industry Advantage plans.
NOTES:
- Enabled for HIPAA accounts.
- Disabled for FINRA accounts (by policy).
- Not available for Trial users.
-
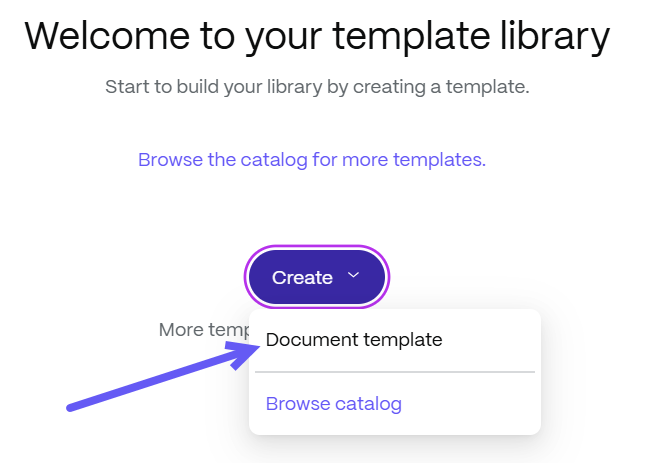
In ShareFile, navigate to Templates.

-
Select Create > Document template. The template page displays. Click on Editable Word template to create a fully editable template in Word.
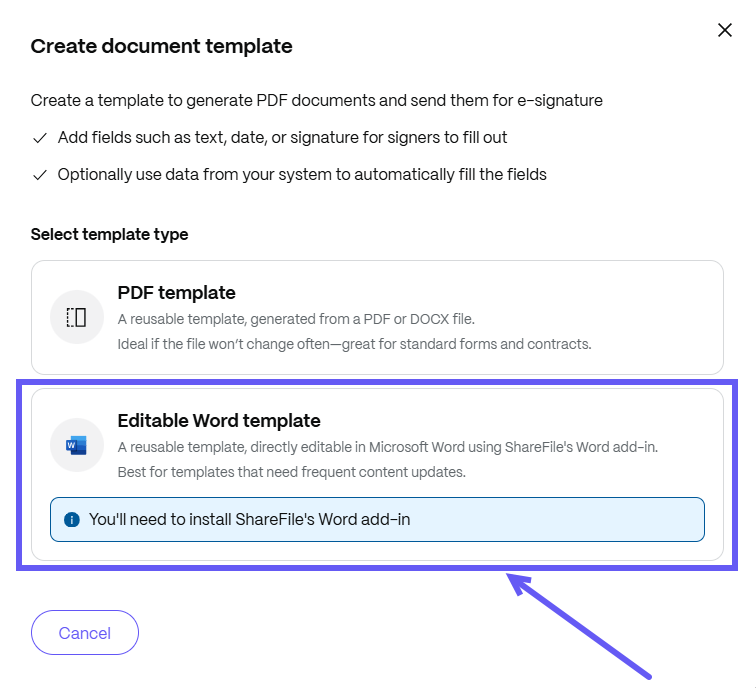
NOTE:
You need to install ShareFile’s Word add-in to edit files in Microsoft Word.
-
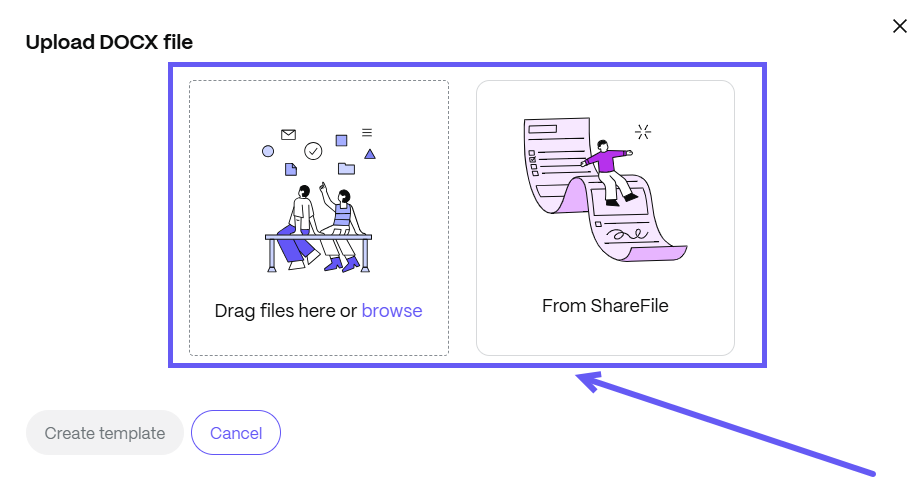
After selecting, you can upload a Word document either from your local device using Browse option, or you can select From ShareFile to upload a document.
-
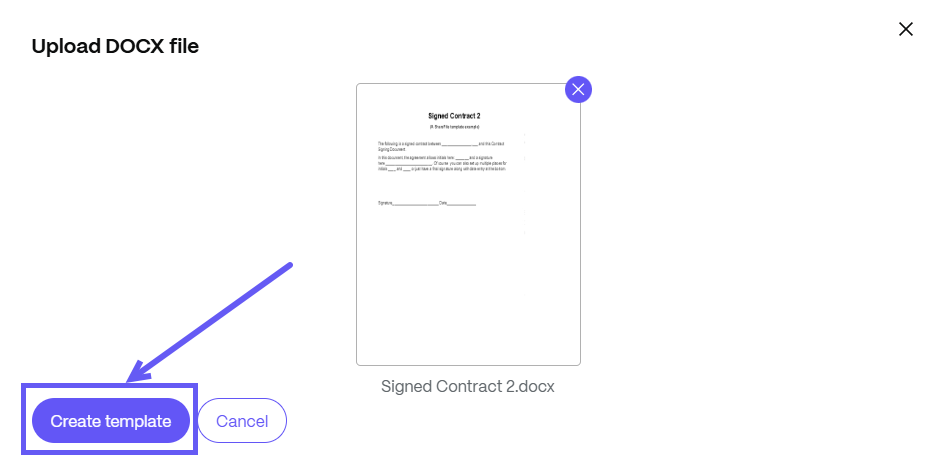
After uploading a document, select Create template.
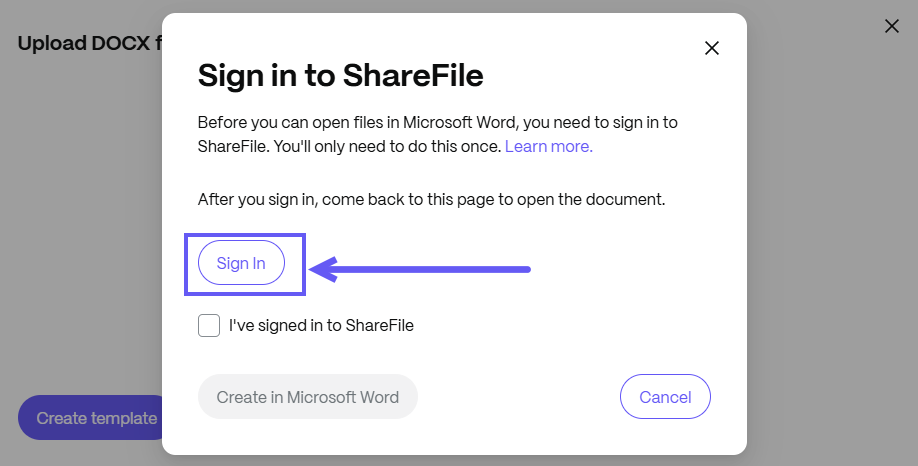
- Once created, the Sign in to ShareFile screen displays. You can Sign In to ShareFile for Word in one of the following methods:
-
From the ShareFile Dashboard
-
Select Sign In to edit a document in Microsoft Word.
-
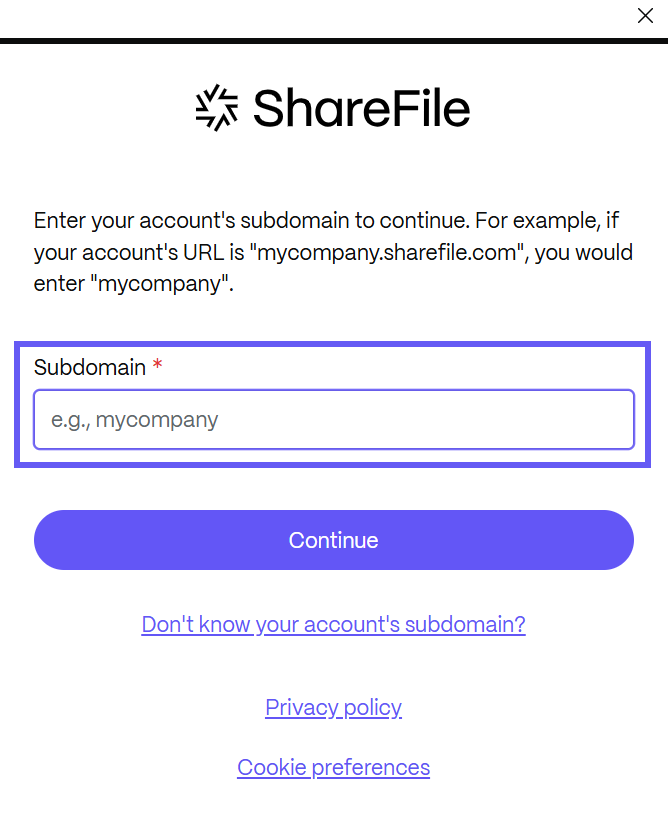
Enter your subdomain name to continue editing in the Microsoft Word Add-in.
-
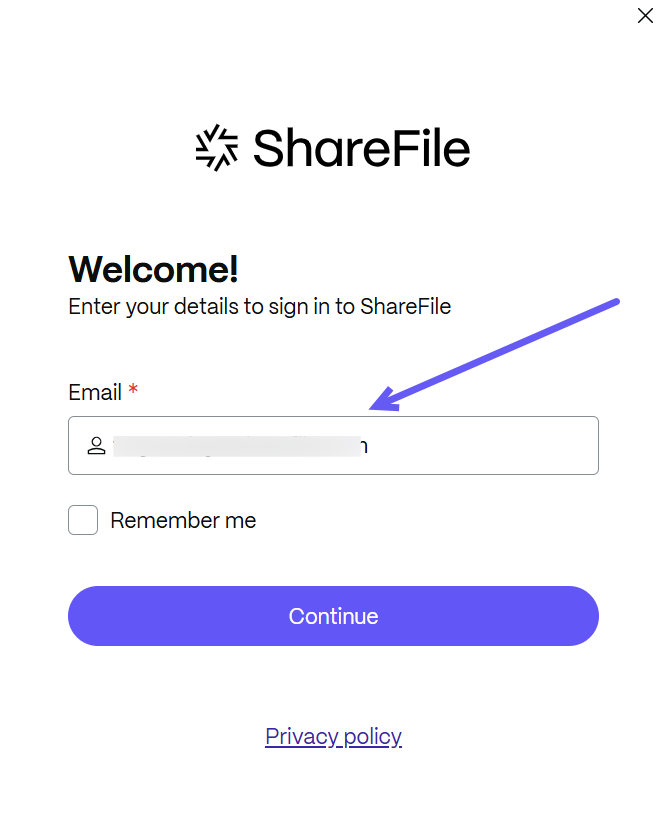
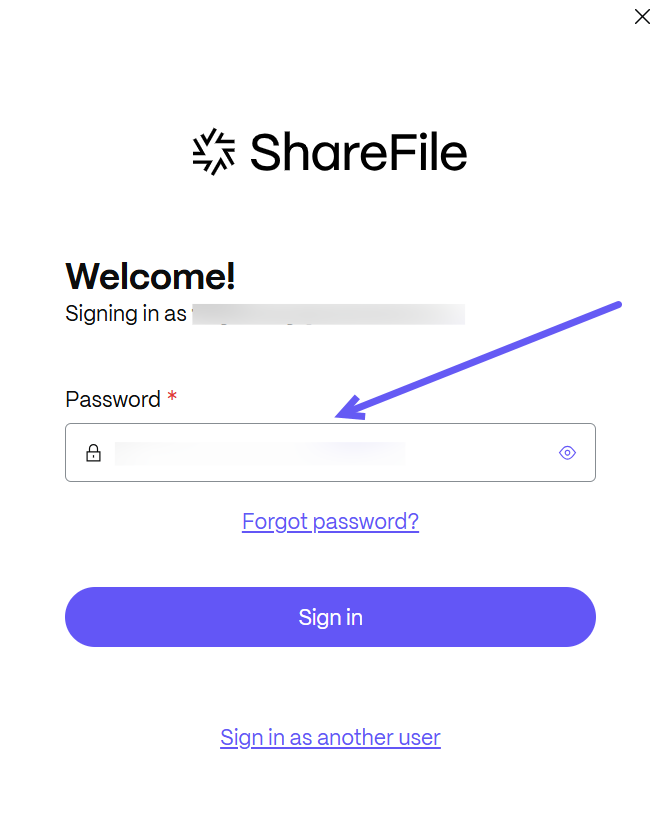
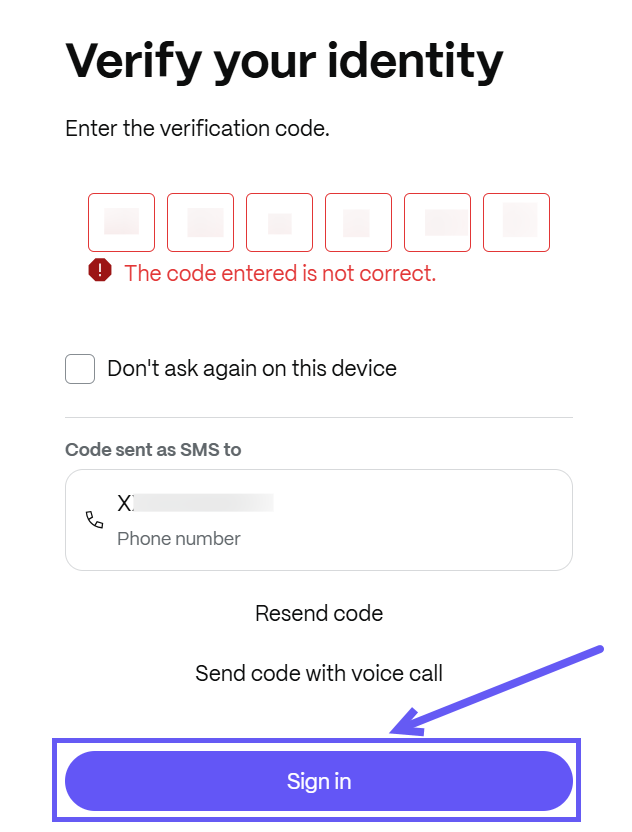
Enter your email, password, and verify your identity with the verification code. Select Sign In.
-
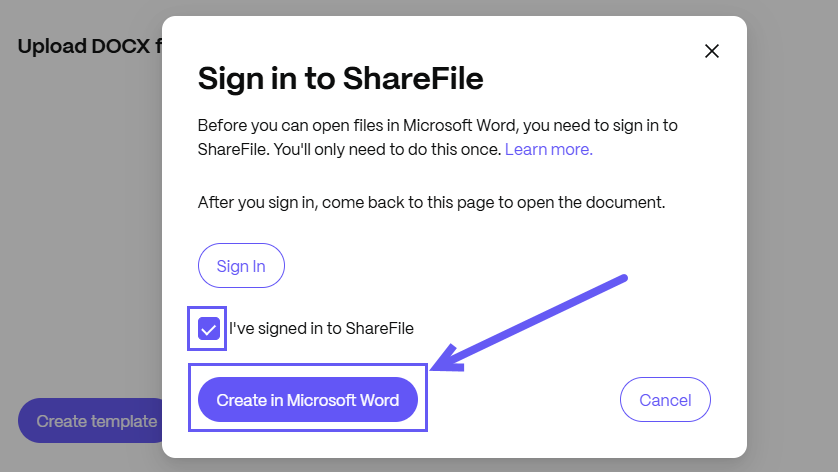
After signing in, navigate to the ShareFile dashboard, select the checkbox, and click Create in Microsoft Word.
-
-
From the Microsoft Word
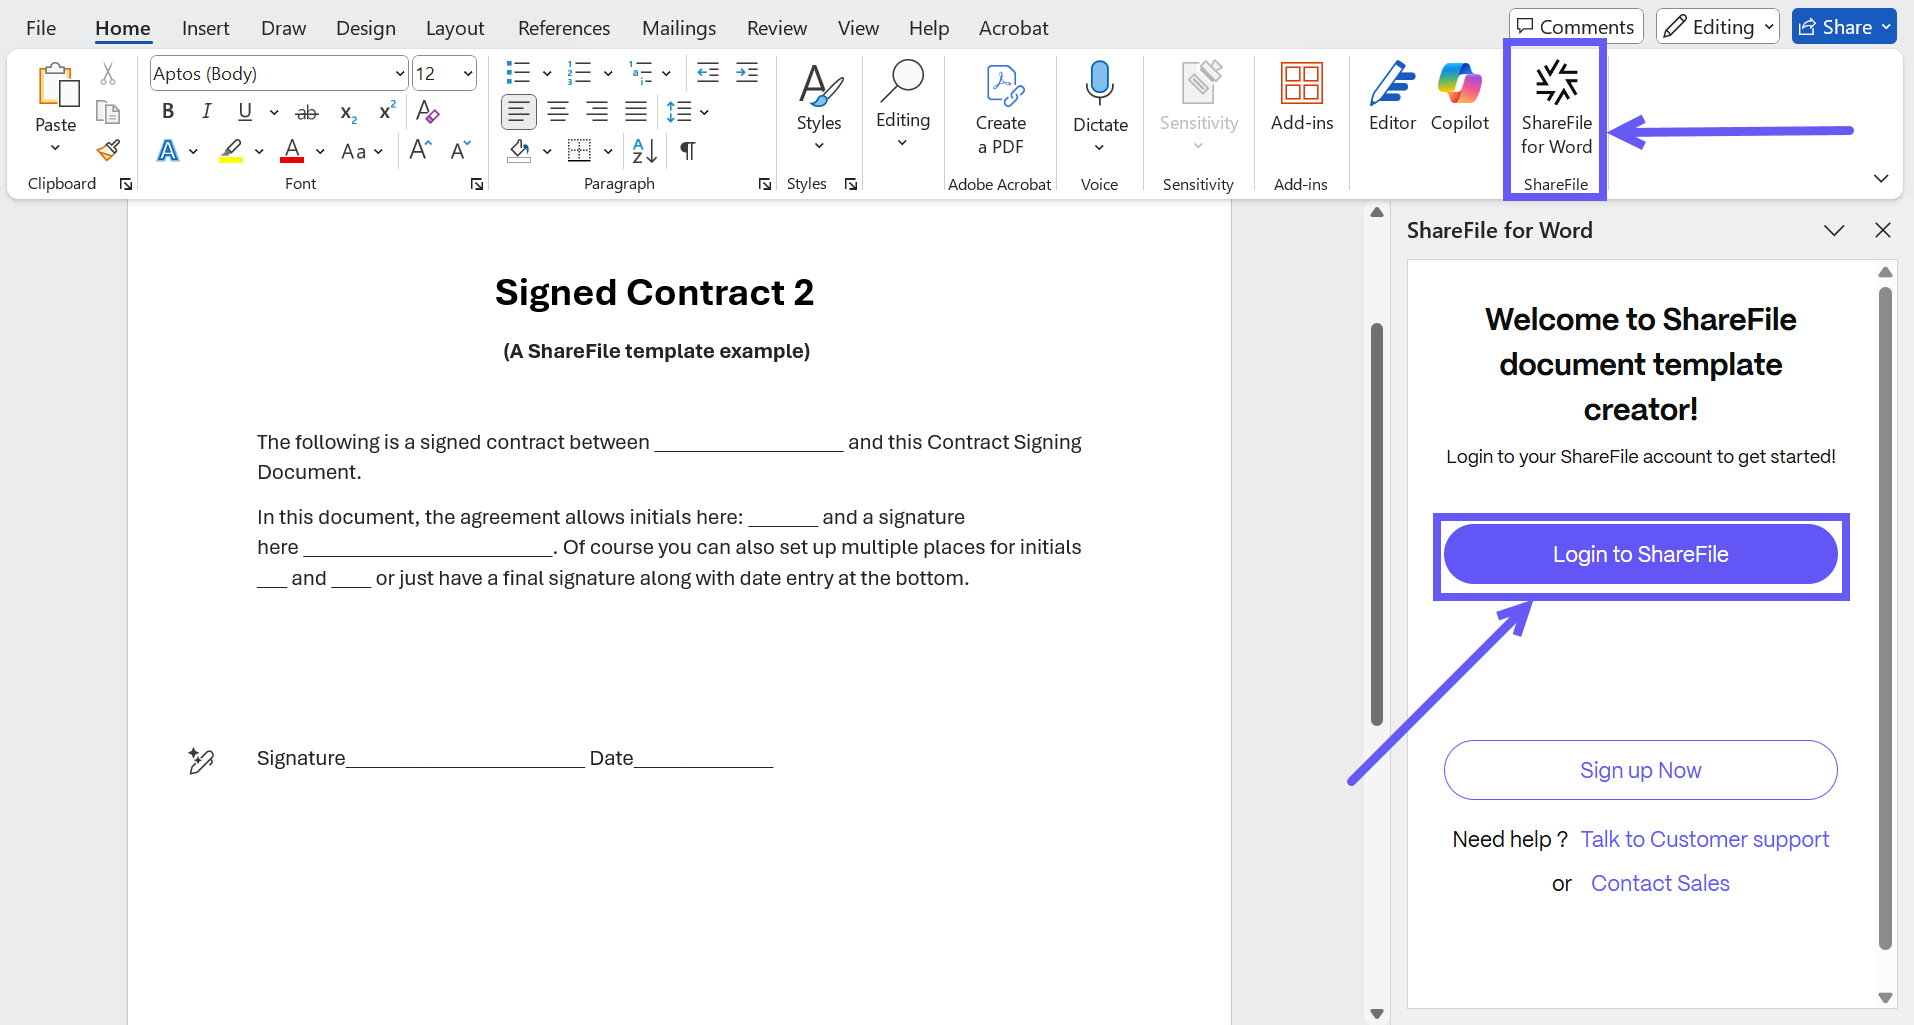
- In Microsoft Word, install the ShareFile for Word Add-in.
-
Navigate to the ShareFile tab. Select ShareFile for Word > Login to ShareFile and follow the steps as highlighted in the above section From the ShareFile Dashboard to complete the sign-in process.
-
From the ShareFile Dashboard
-
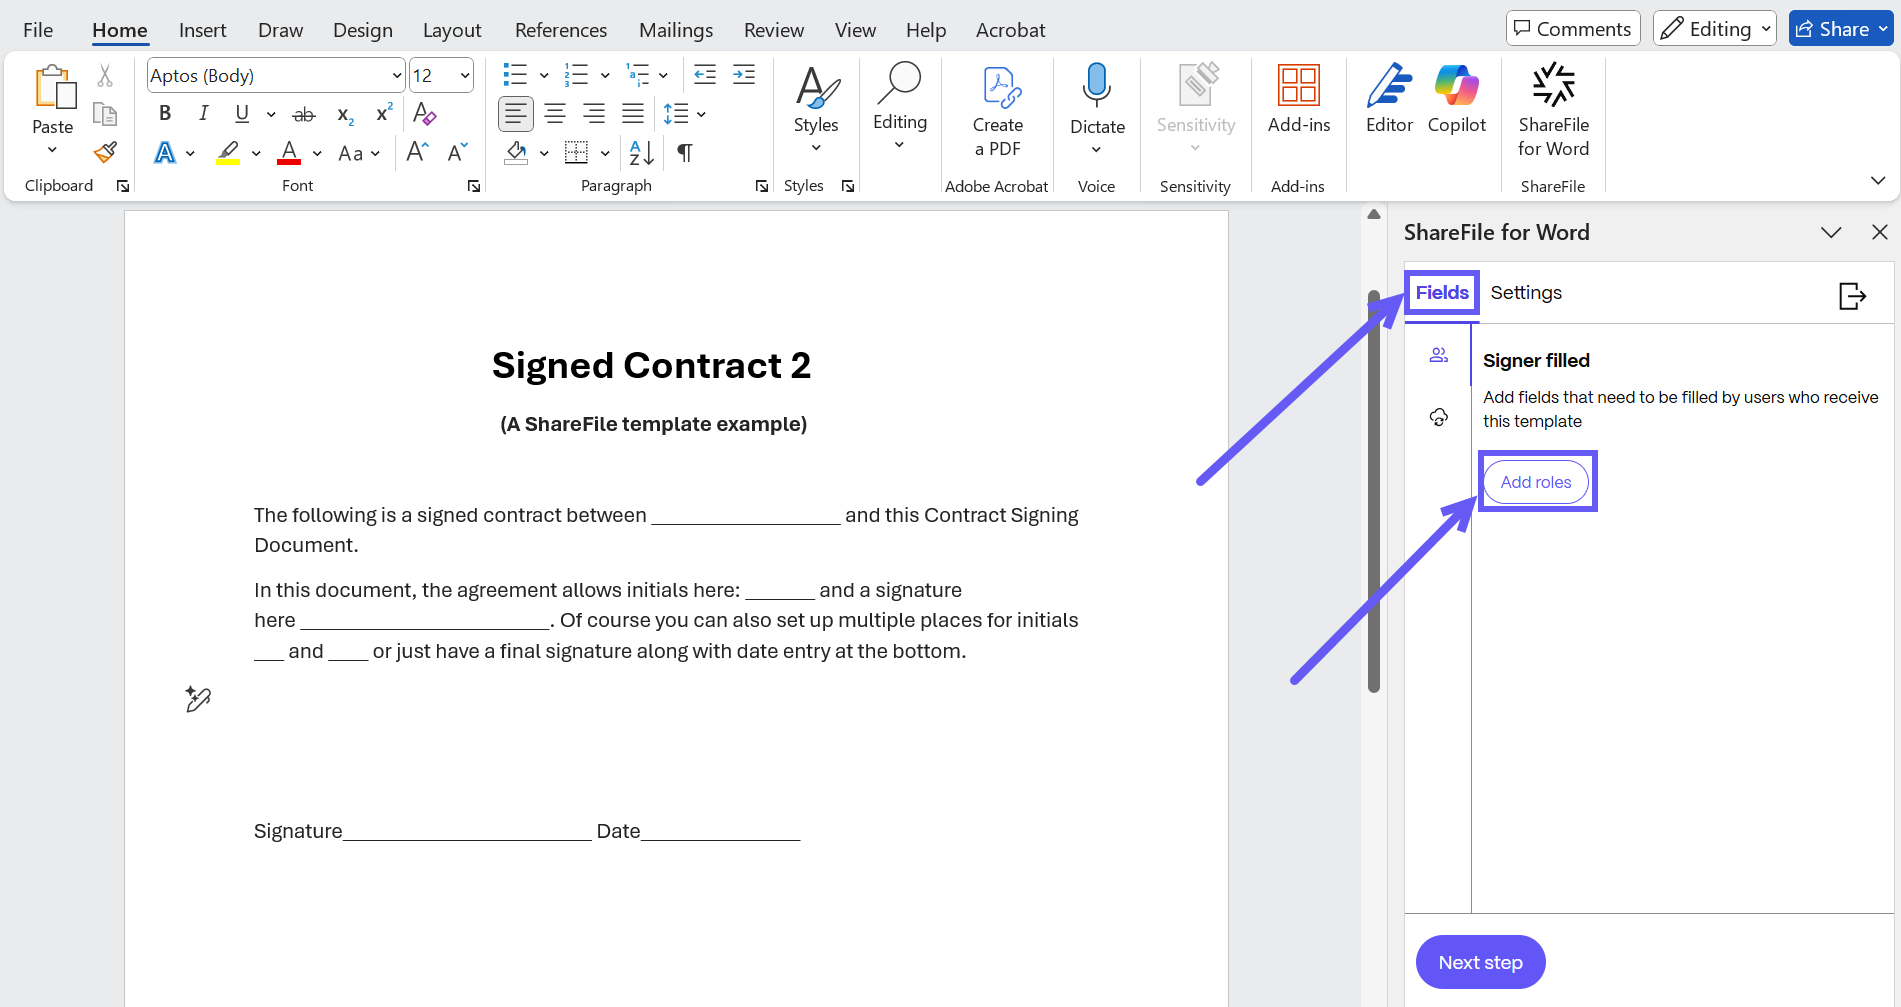
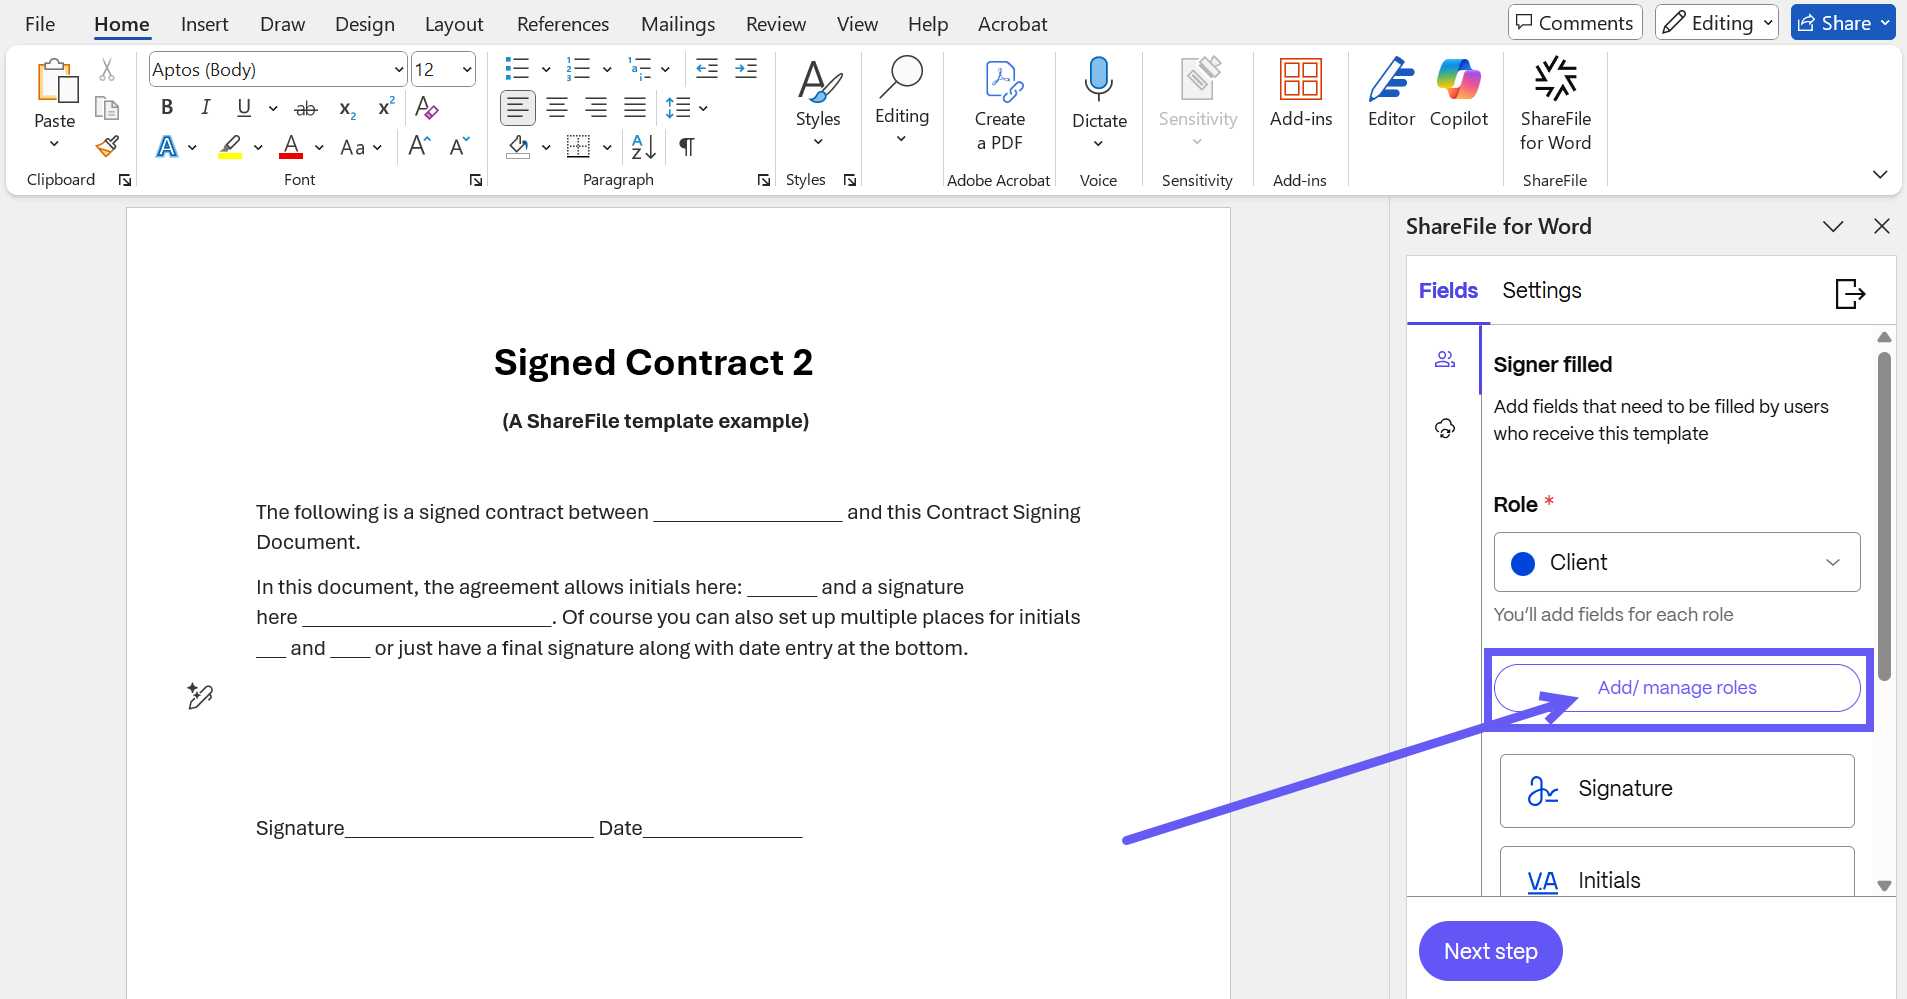
Once you logged in to ShareFile, select the Fields tab in the Add-in > Add Roles.
-
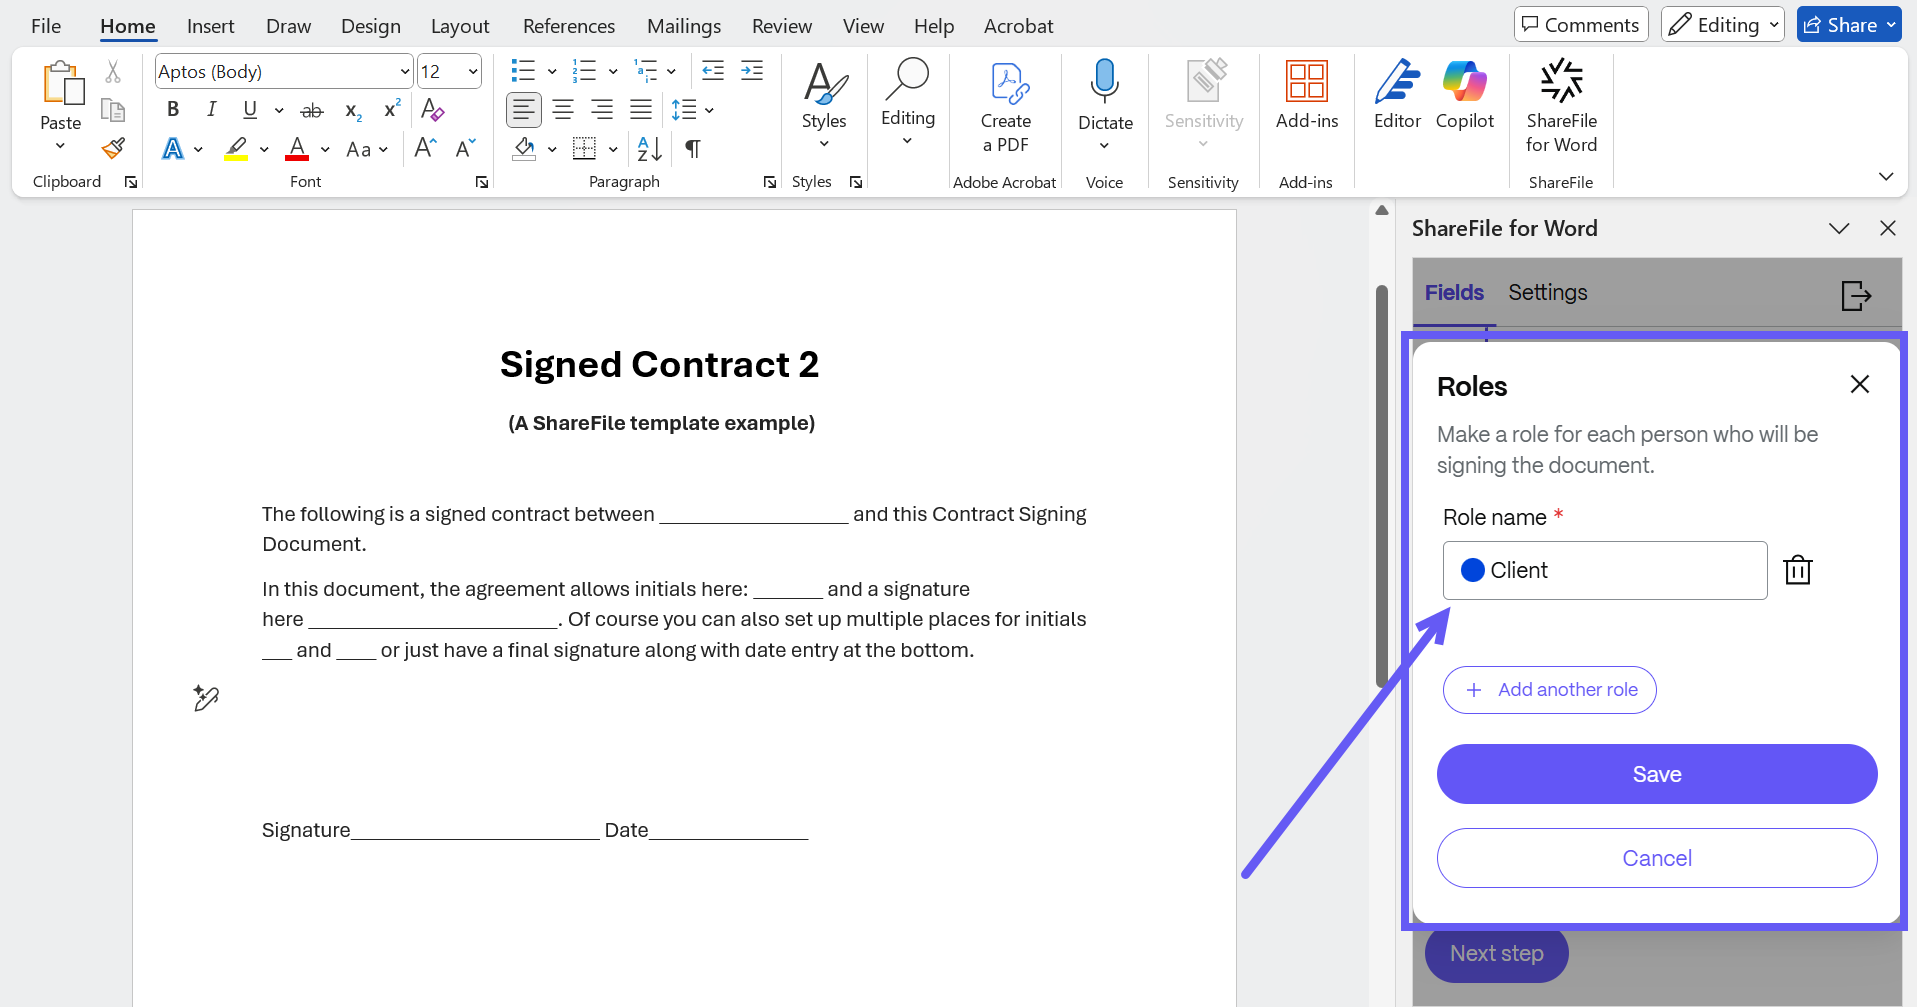
Select Add new role to create a new signer role.
-
Enter a name for the role. Each role represents a stakeholder involved in the signing process. You can add multiple roles to a single template.
-
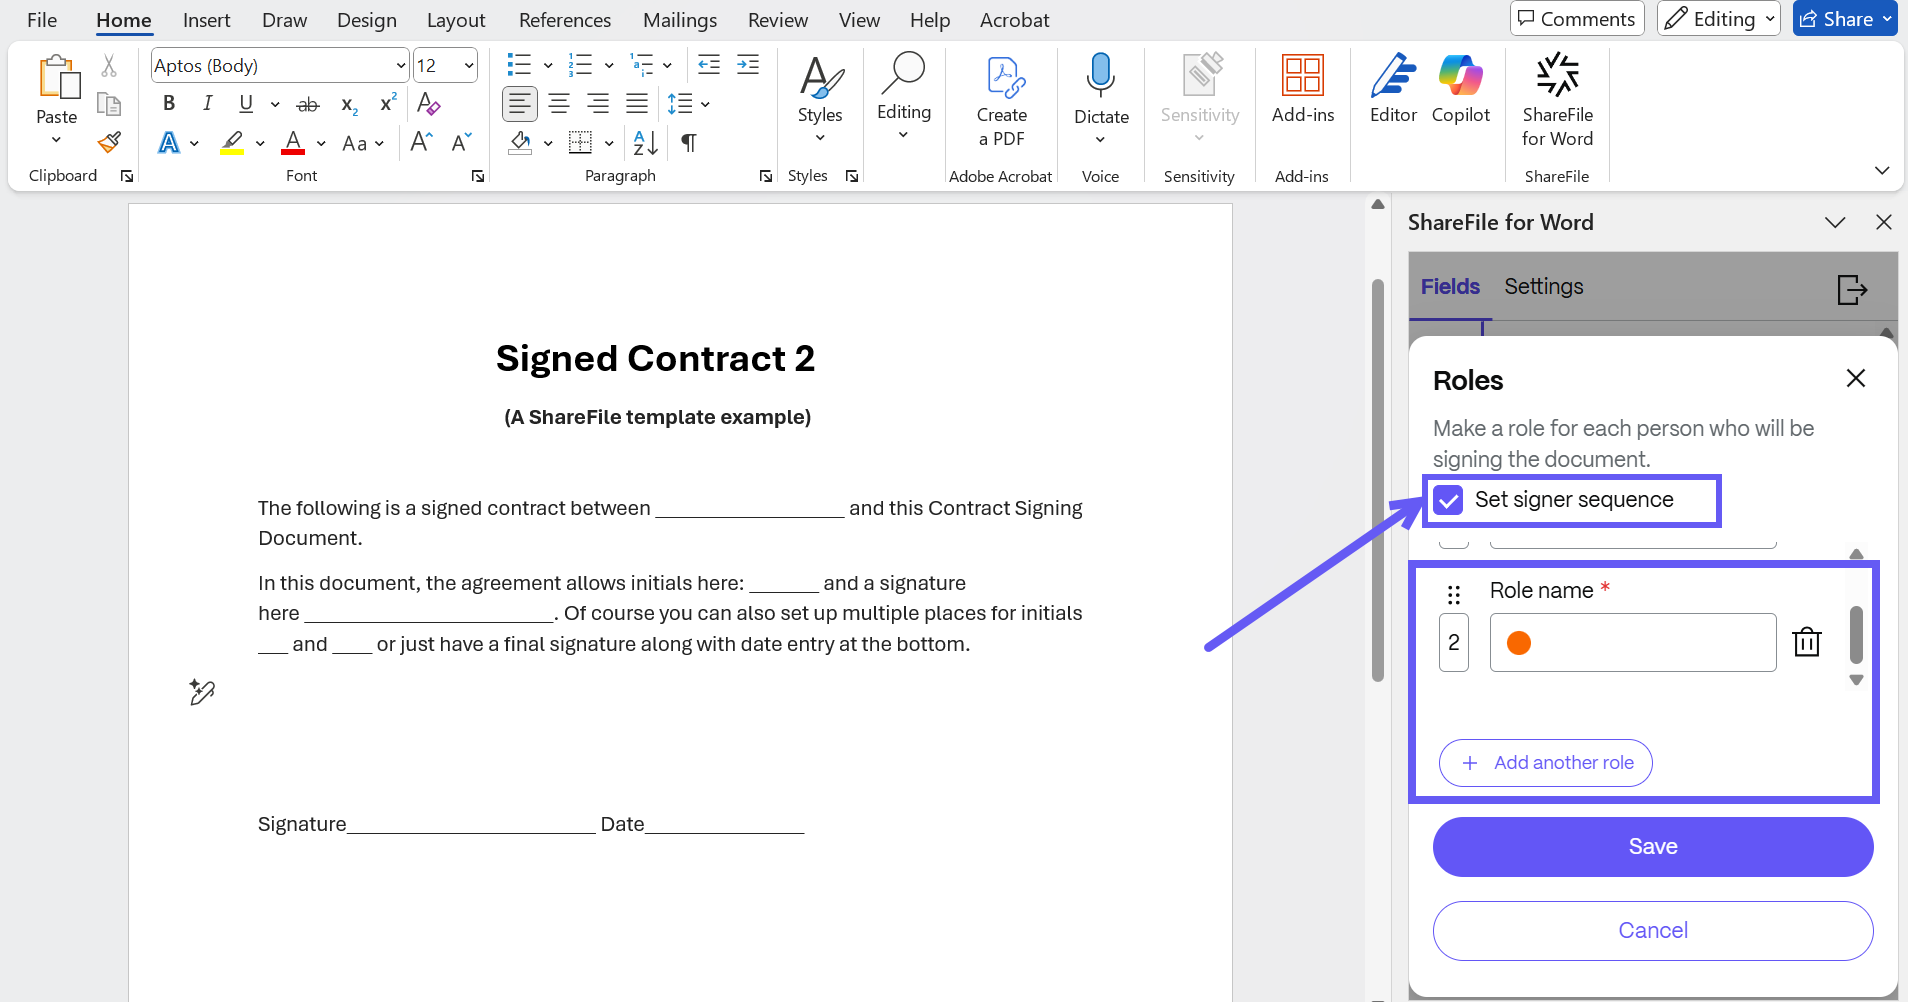
If you have added more than one role, you can define the signing order by selecting the Set signer sequence checkbox. You can also drag and drop roles to rearrange their order.
-
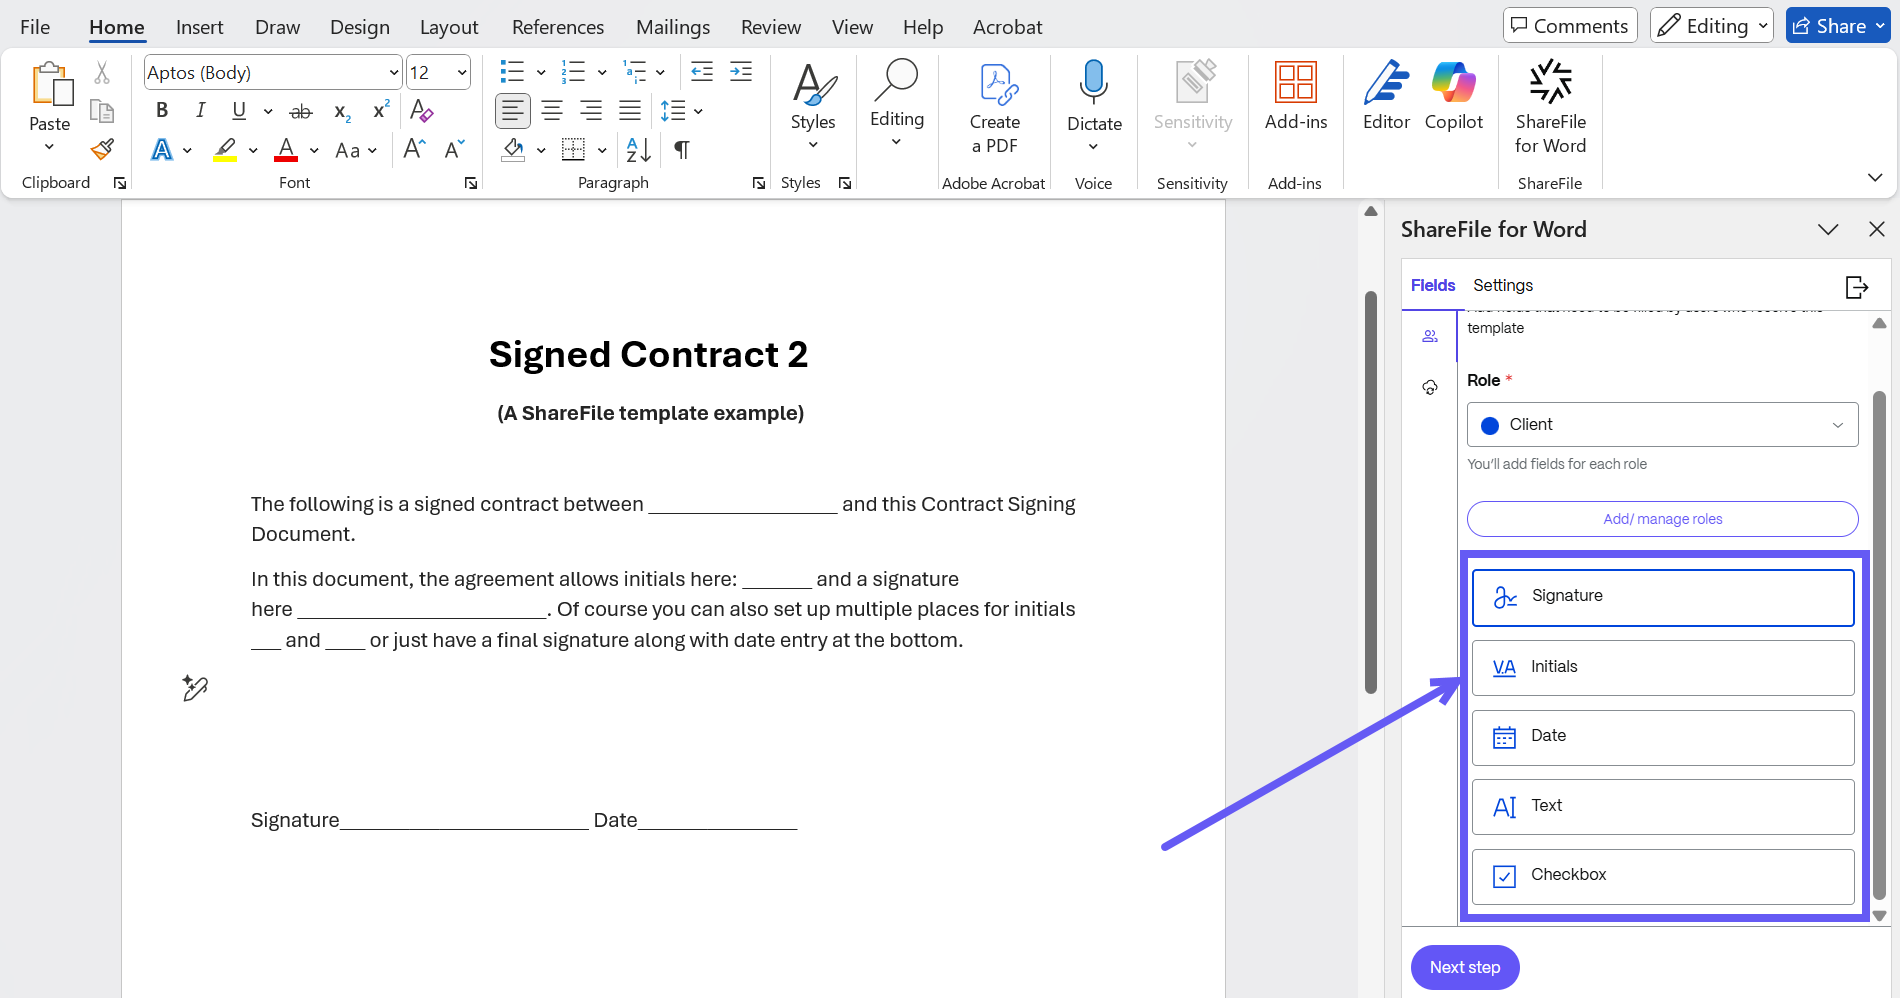
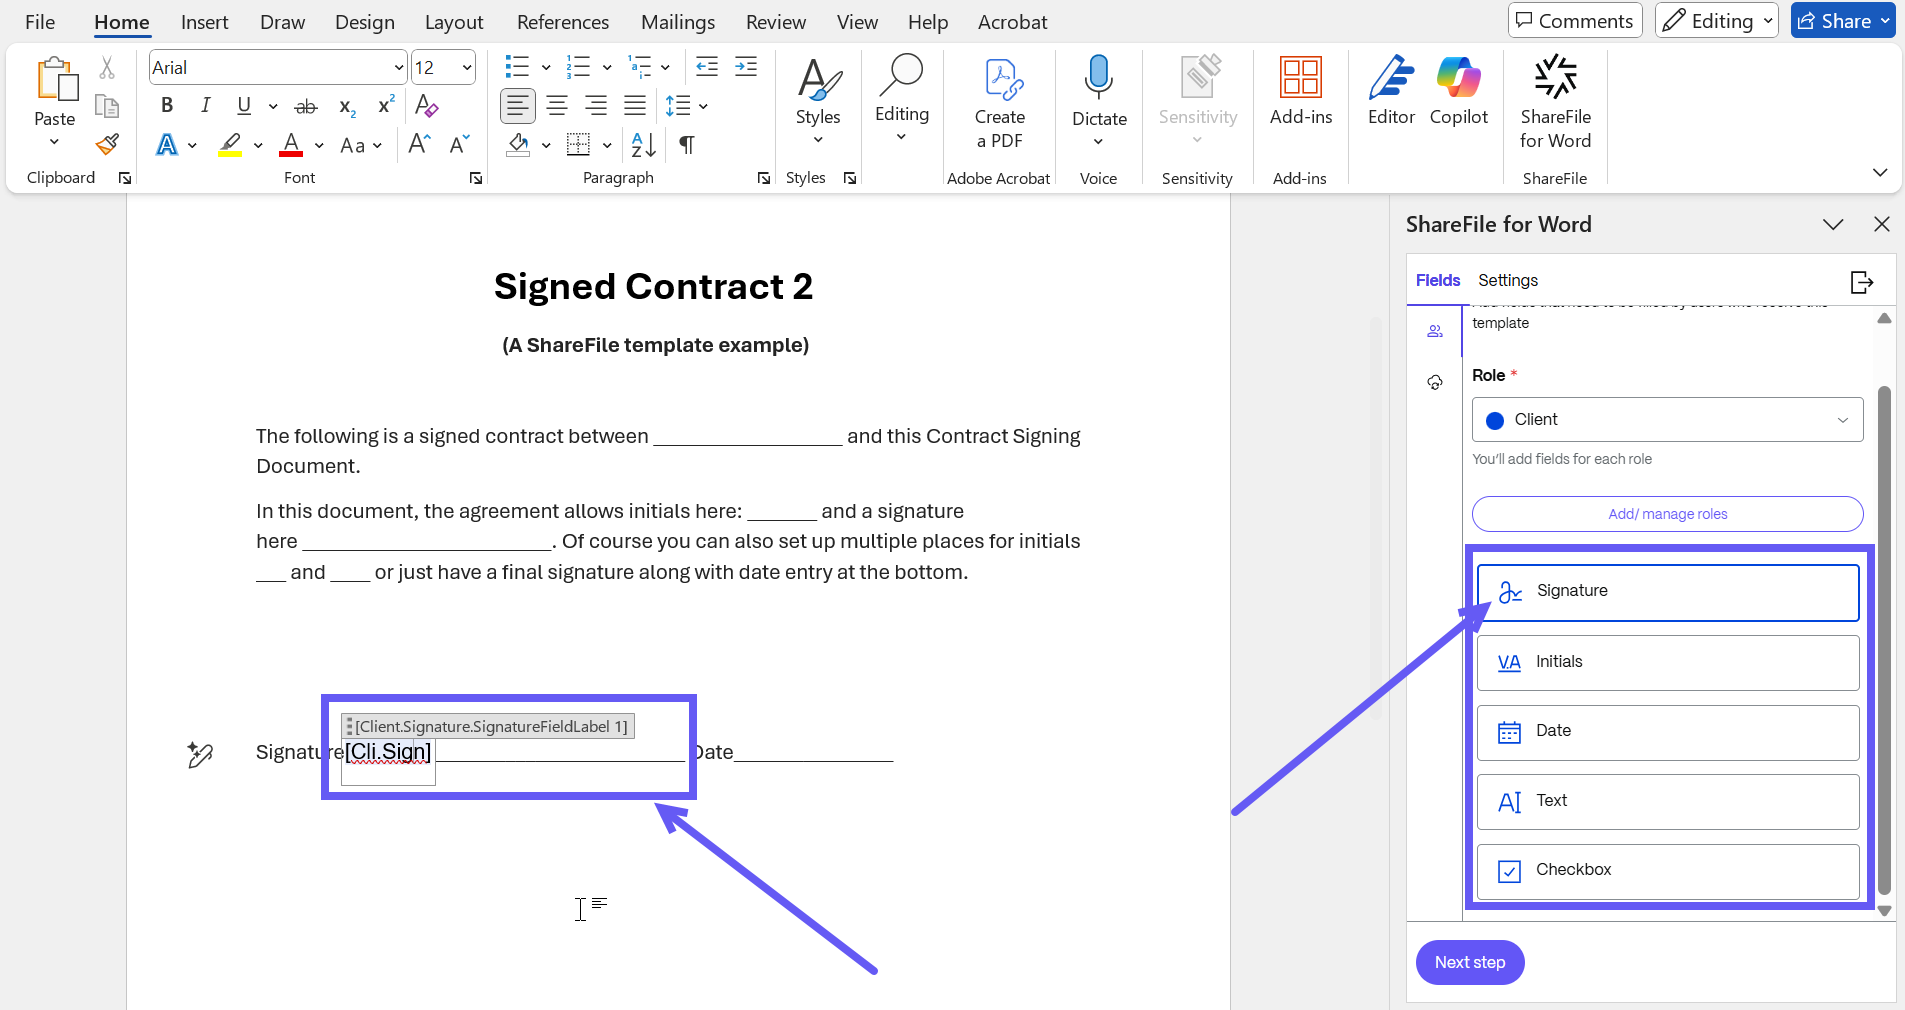
Once a role is added, the available signer fields (e.g., Signature, Text, Date) display as shown below.
-
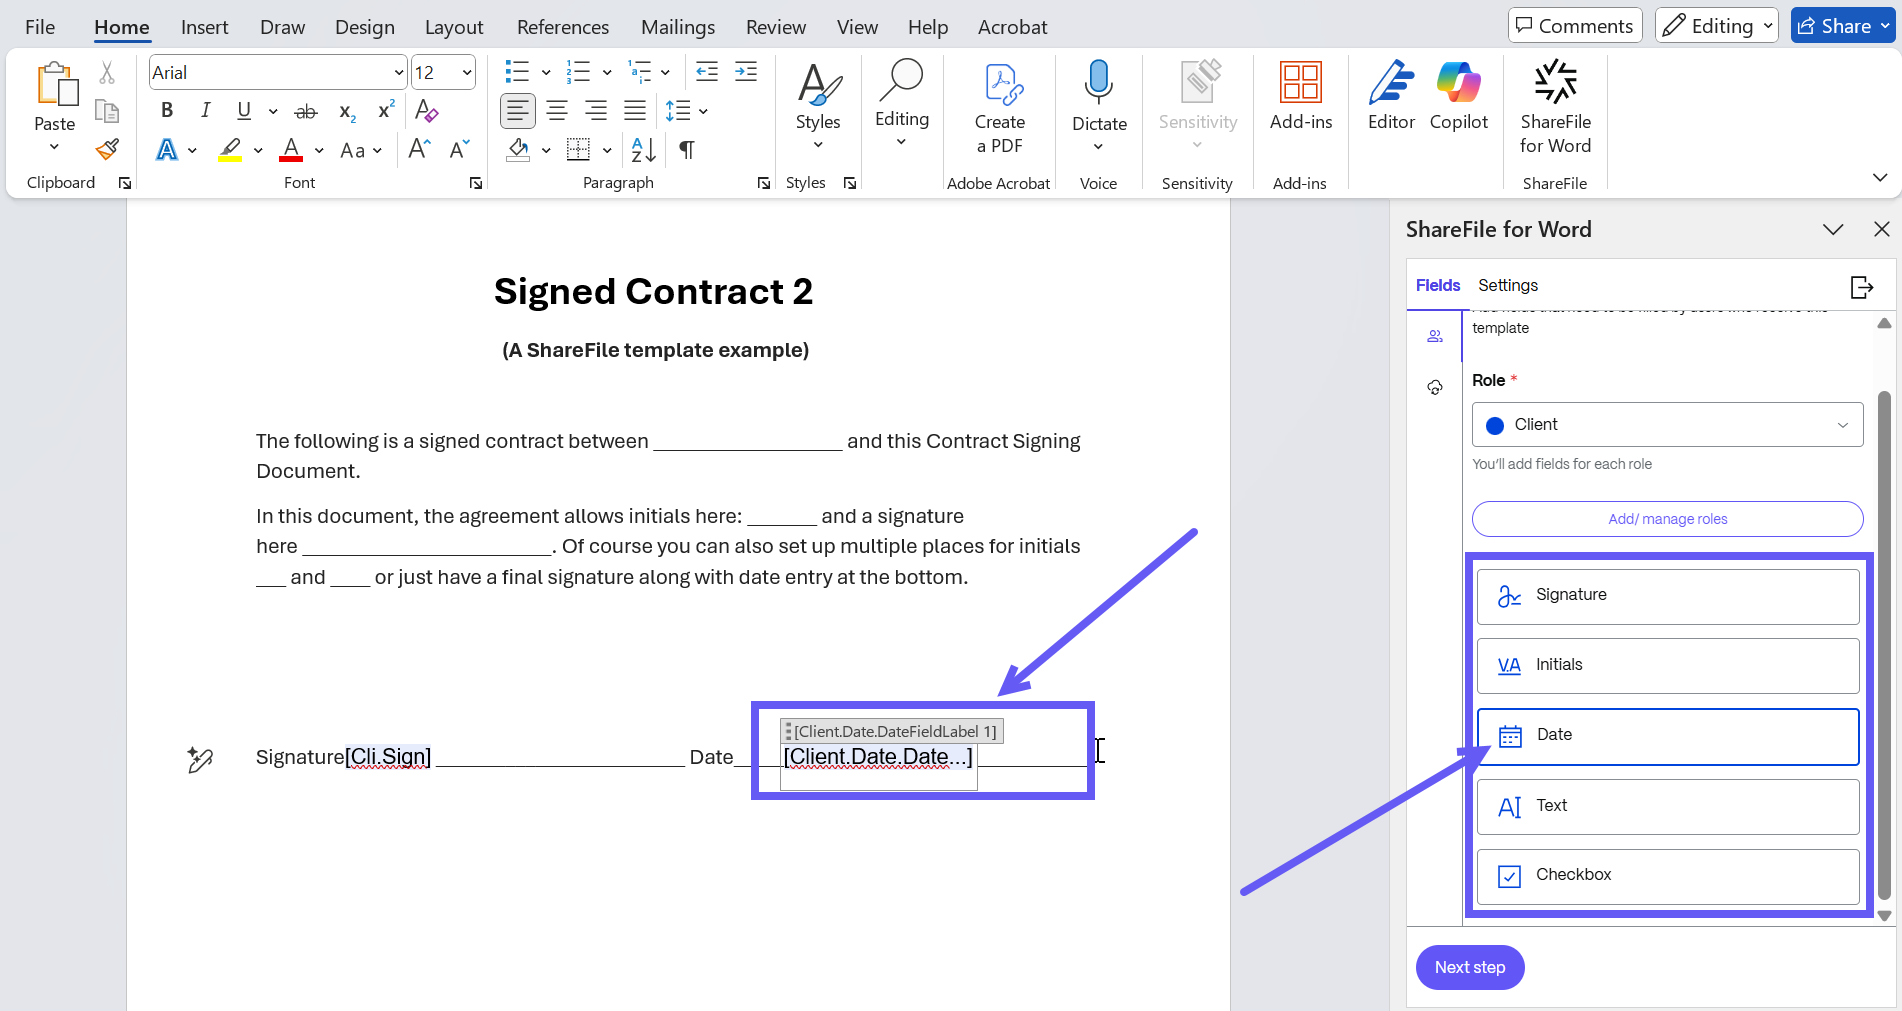
To insert a field, place your cursor in the document where you want the field to appear, then click on desired field in the Add-in.
-
Repeat the process to add all necessary fields for each role into your template.
-
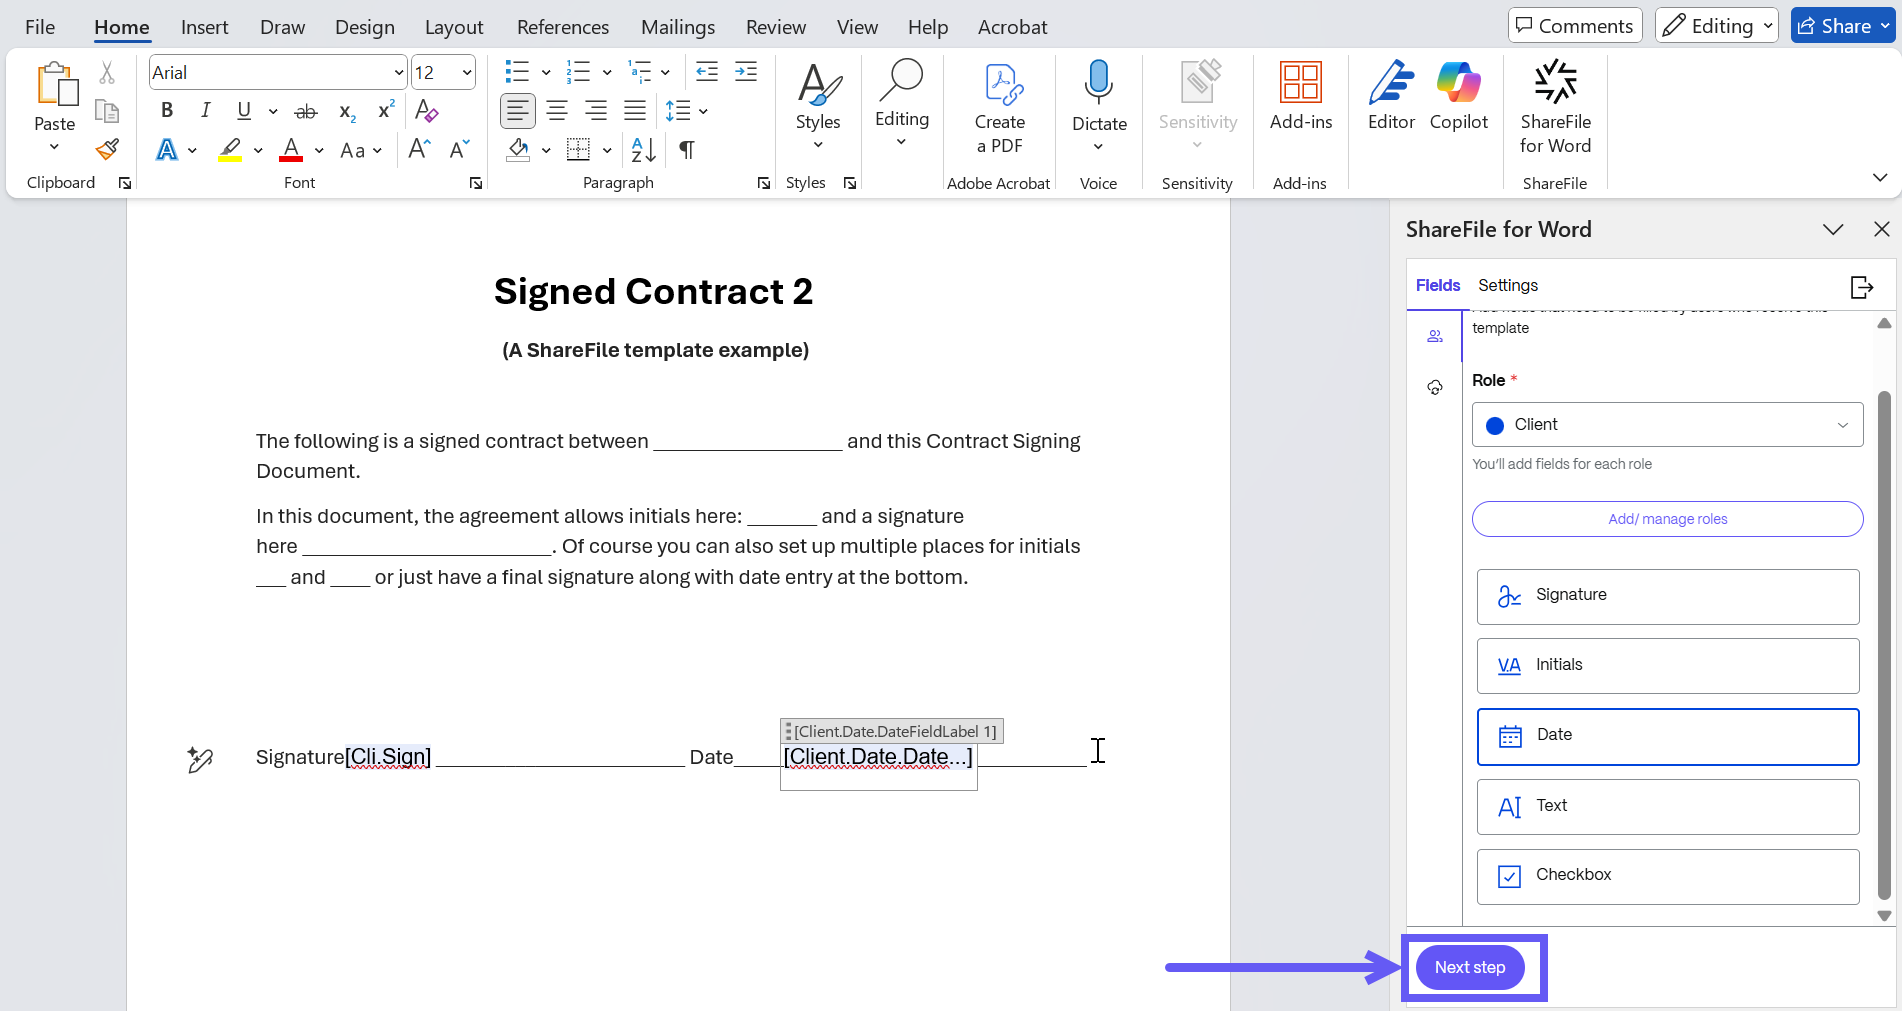
After adding all fields, click Next Step to move to the Settings tab.
-
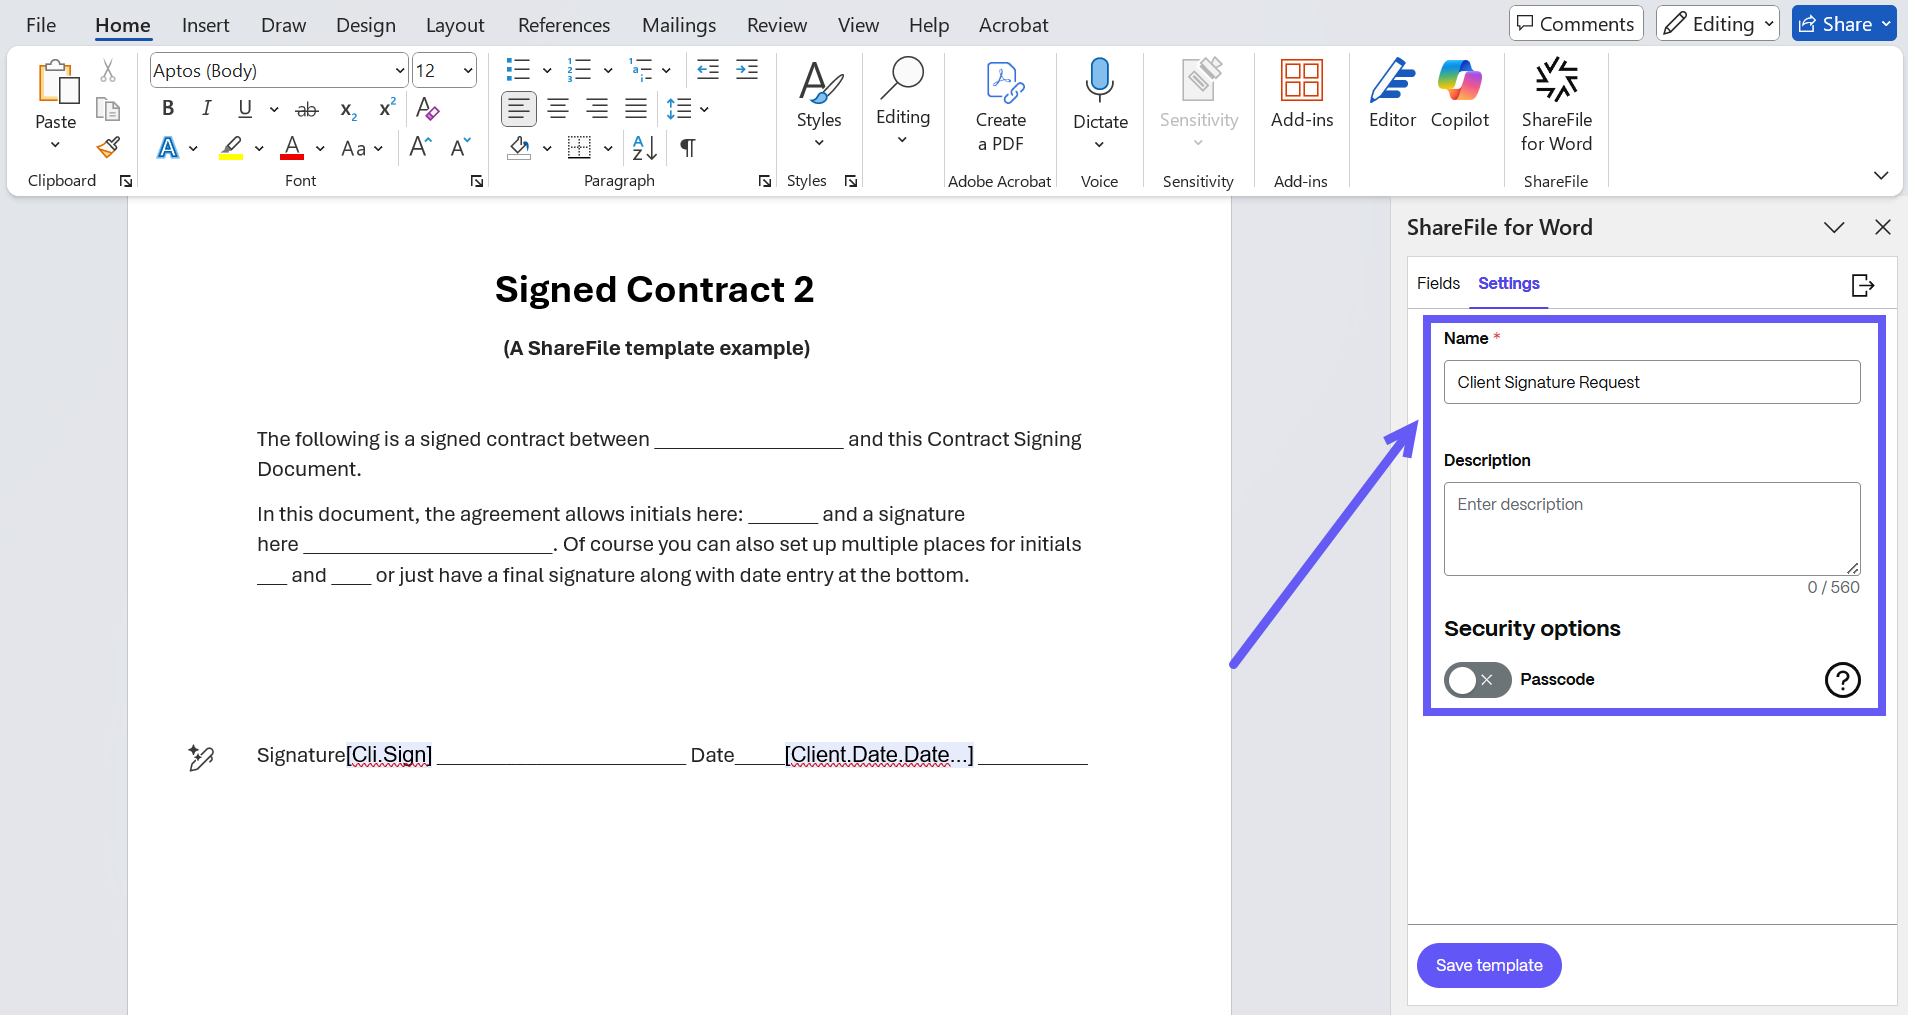
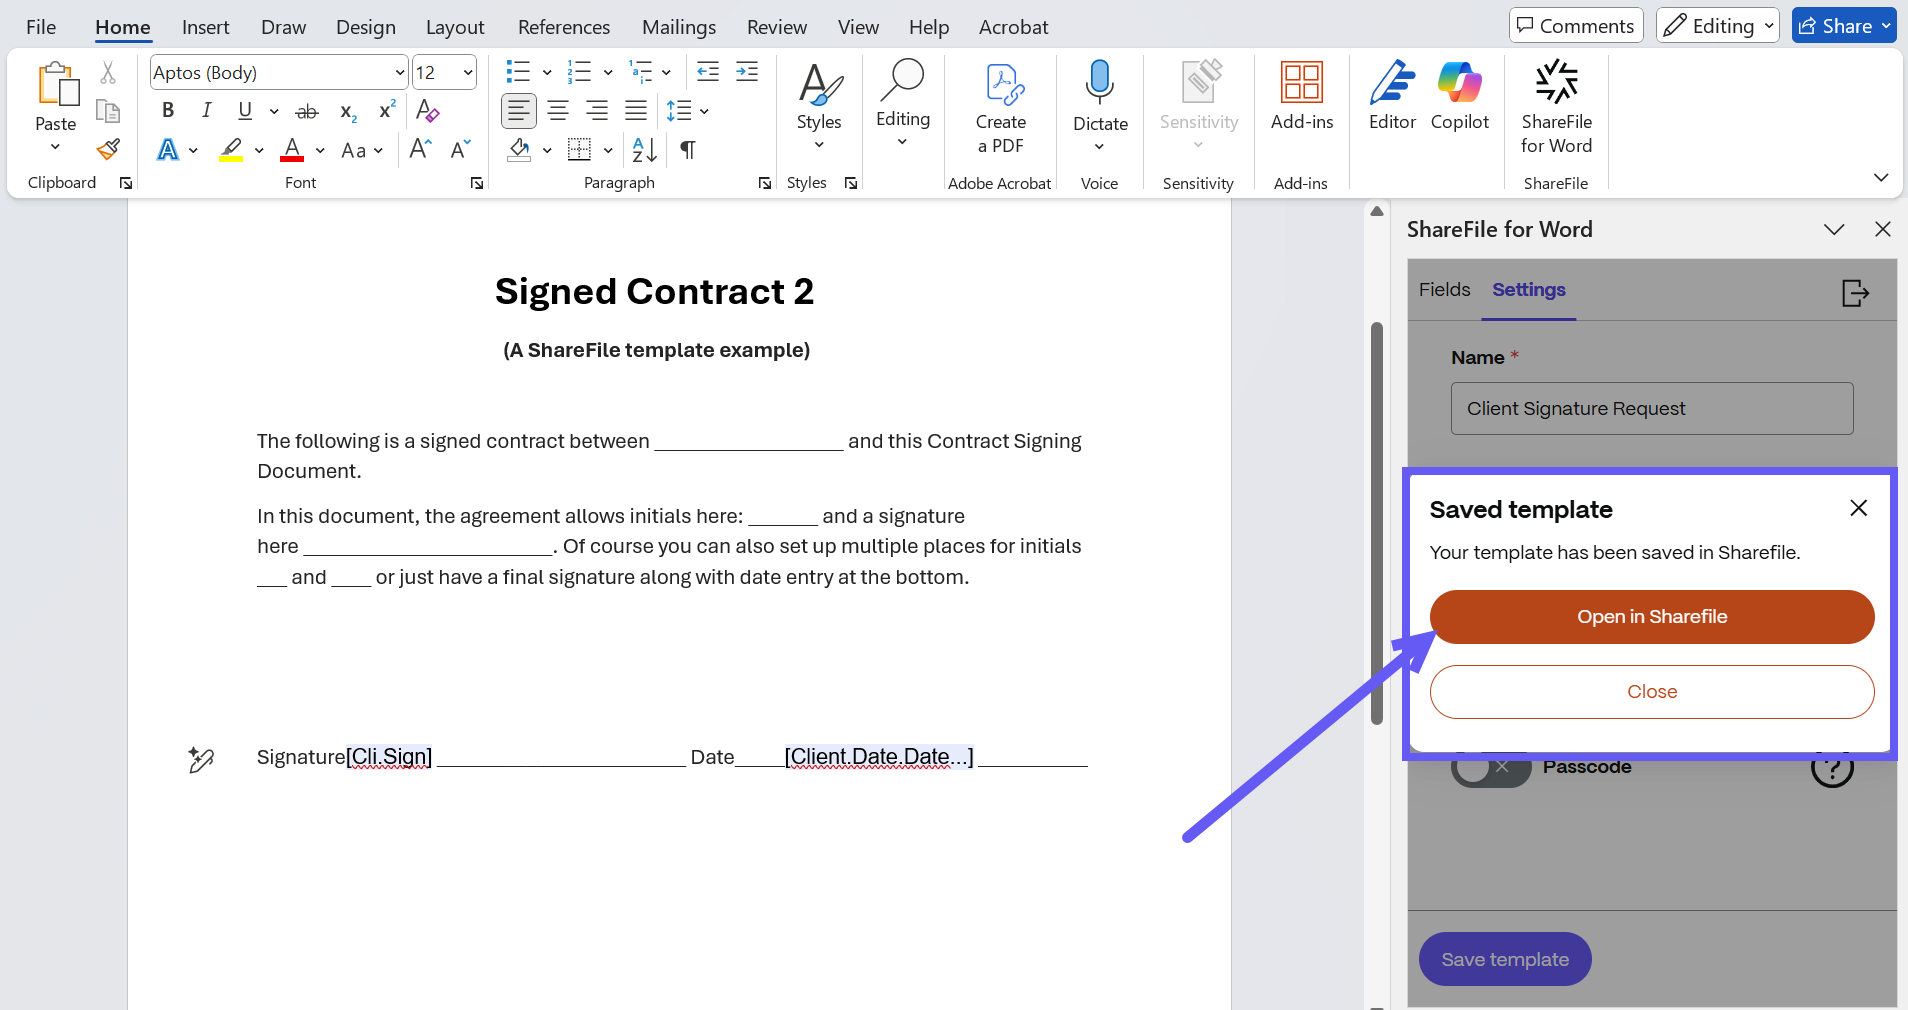
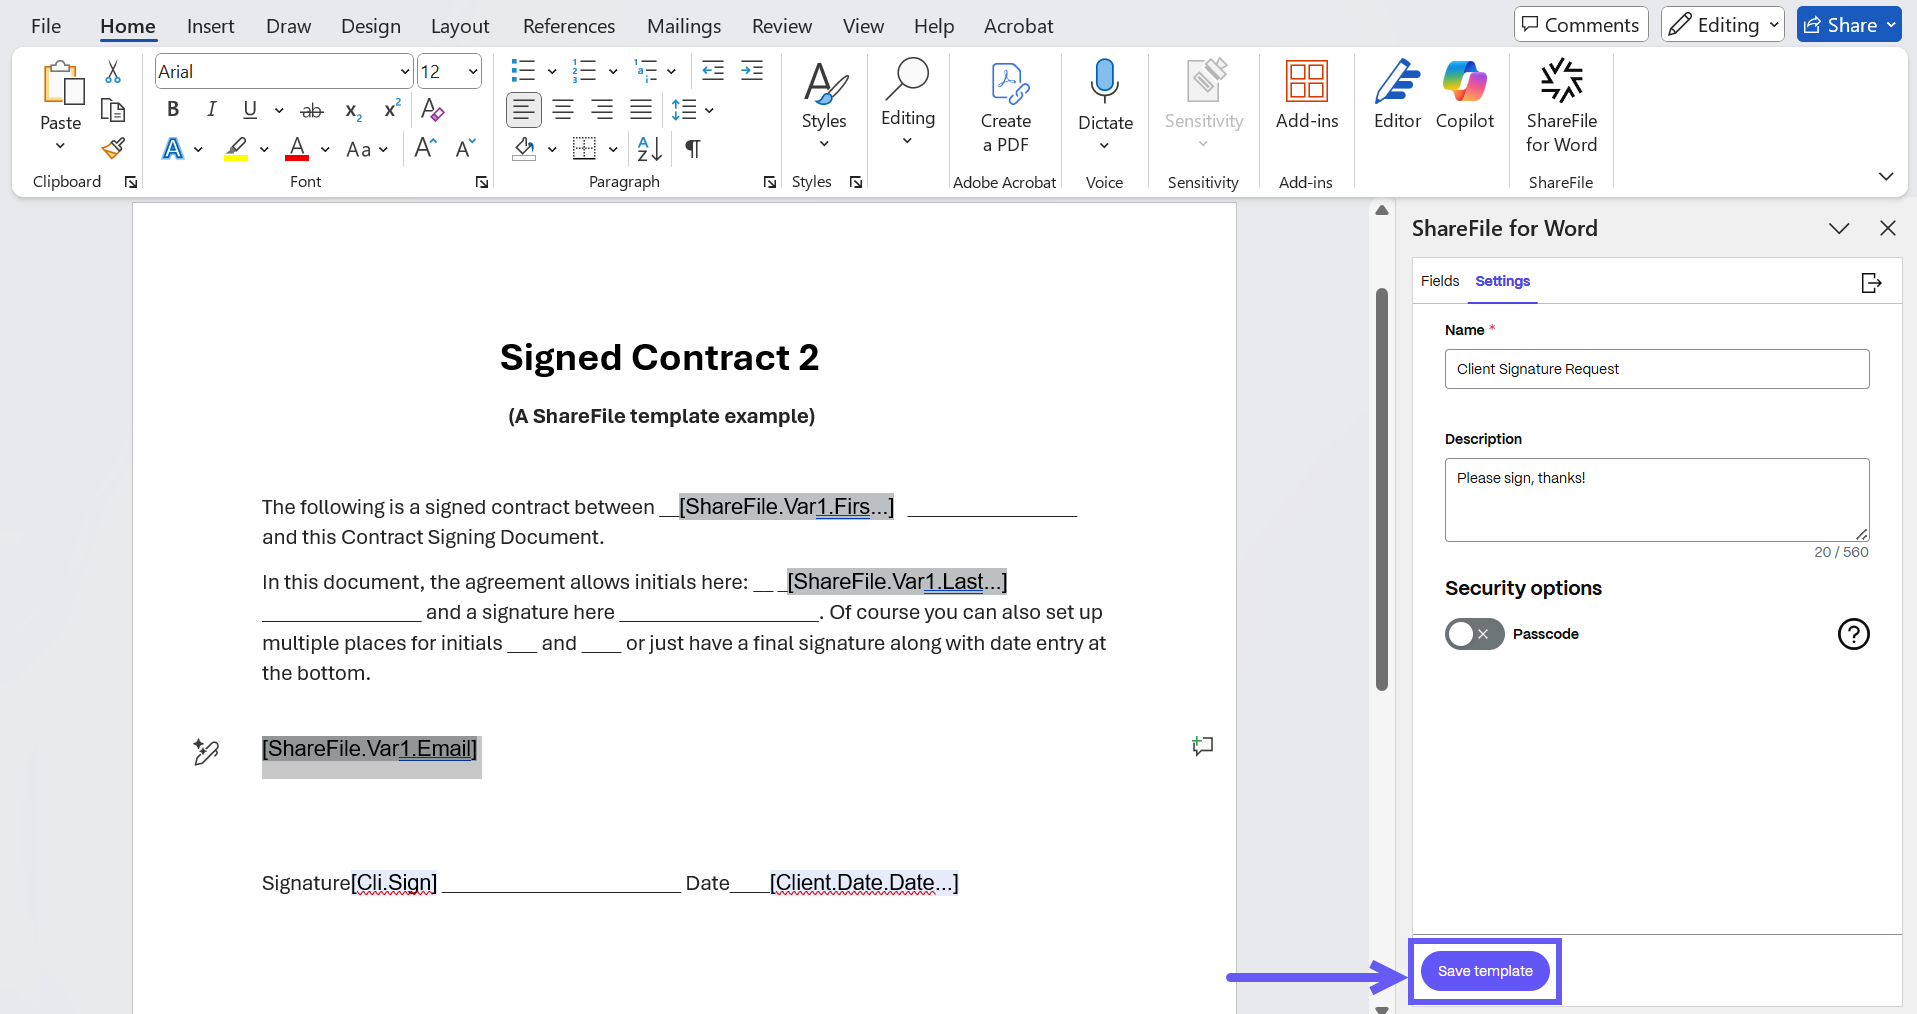
In the Settings tab, enter a name and description for your document template. You can also enable a security feature such as passcode protection.
-
Select Save Template. A new document template is created and saved in the Template listing page in ShareFile.
-
Click on Open in ShareFile to find the Newly created template in ShareFile.
Send a document template for signature
There are three different ways in which you can send a document template for signature in ShareFile
From the Dashboard
You can now select a template to send a document for signature in ShareFile
-
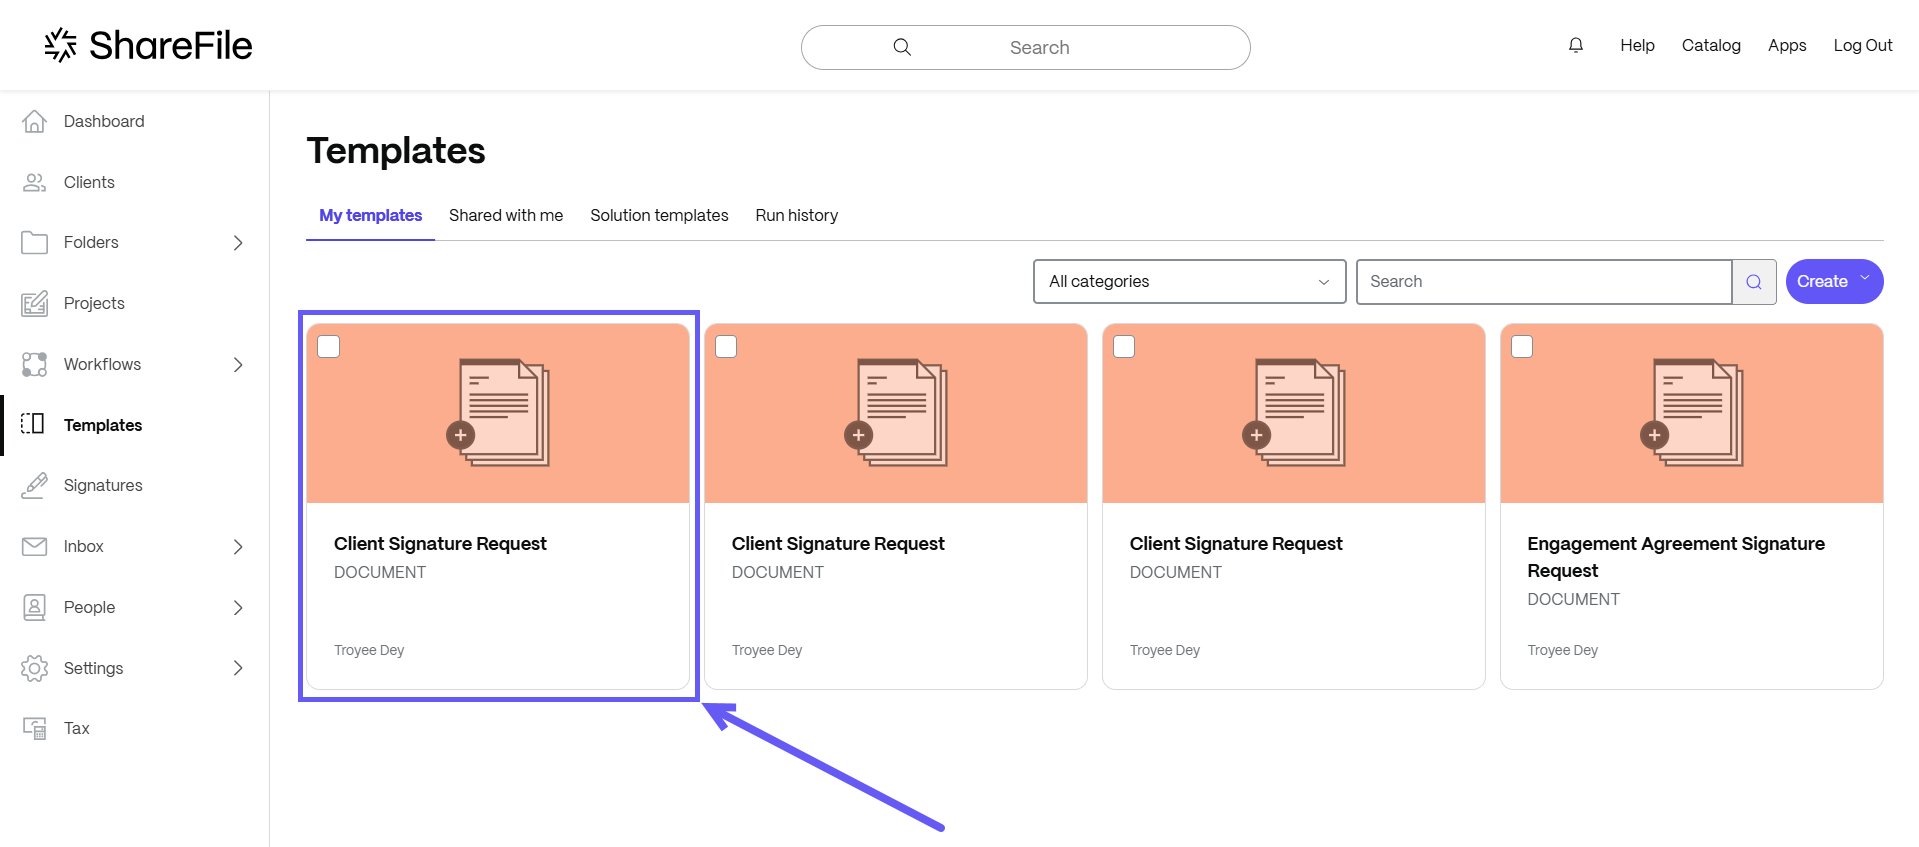
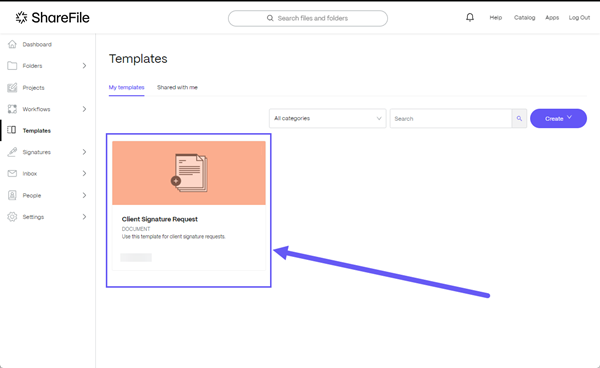
In ShareFile, navigate to Templates.
-
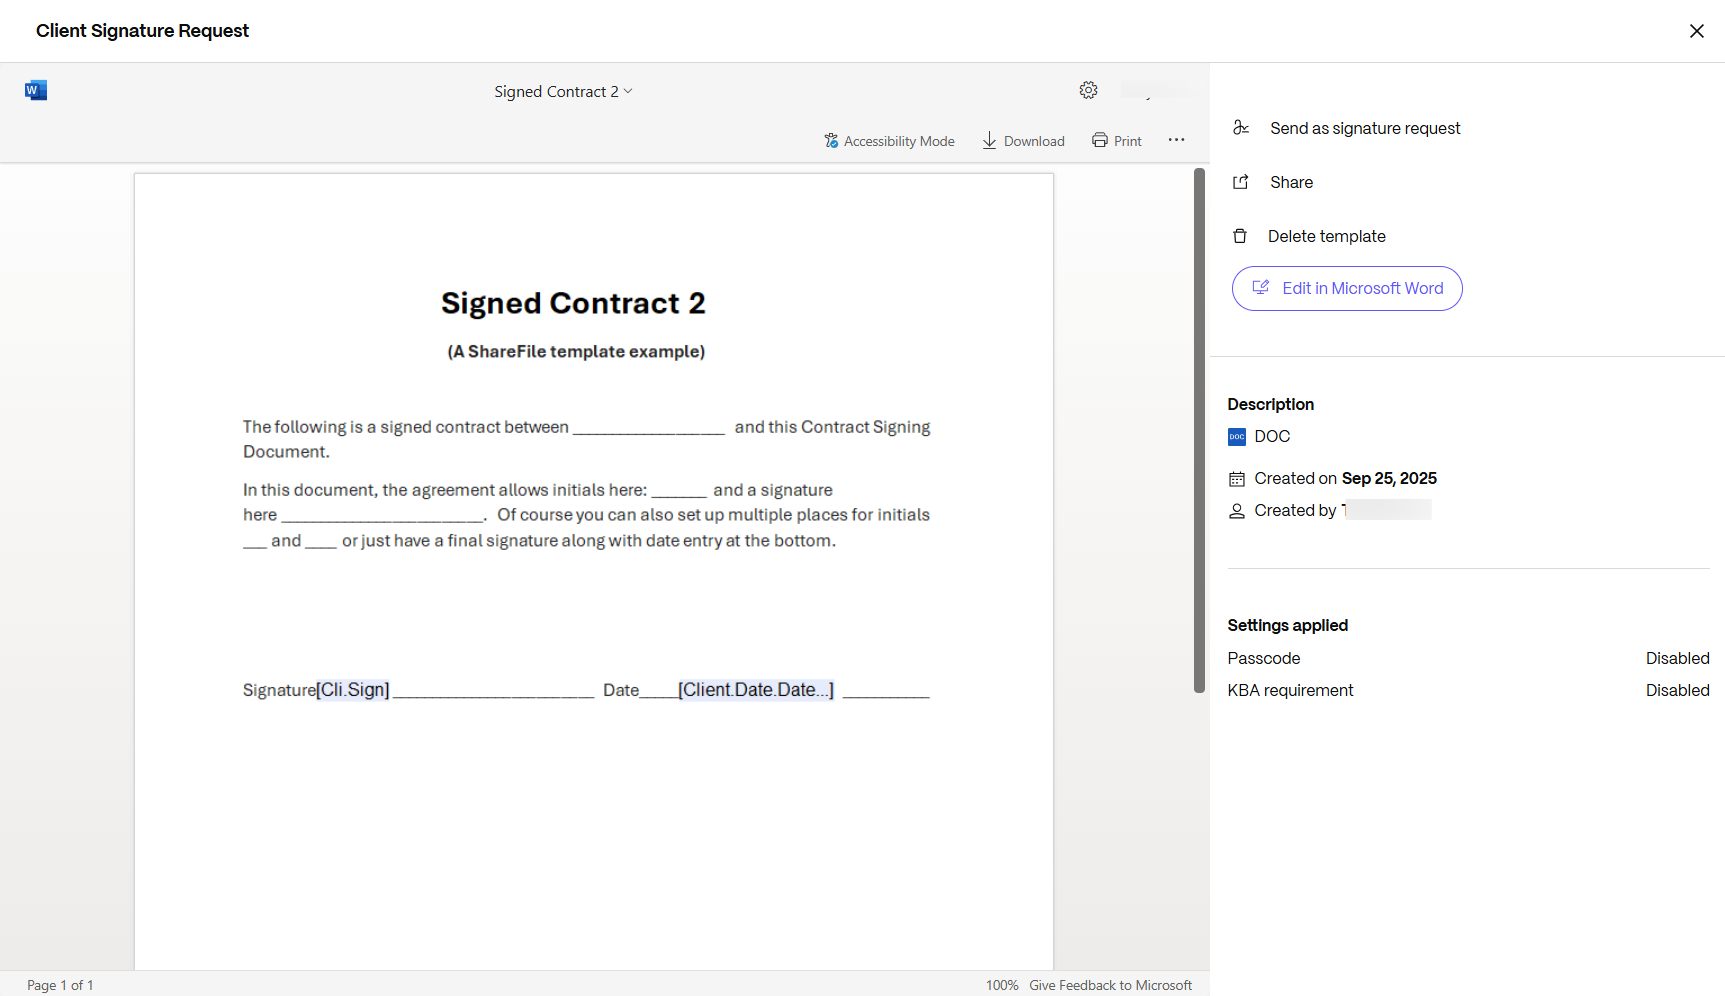
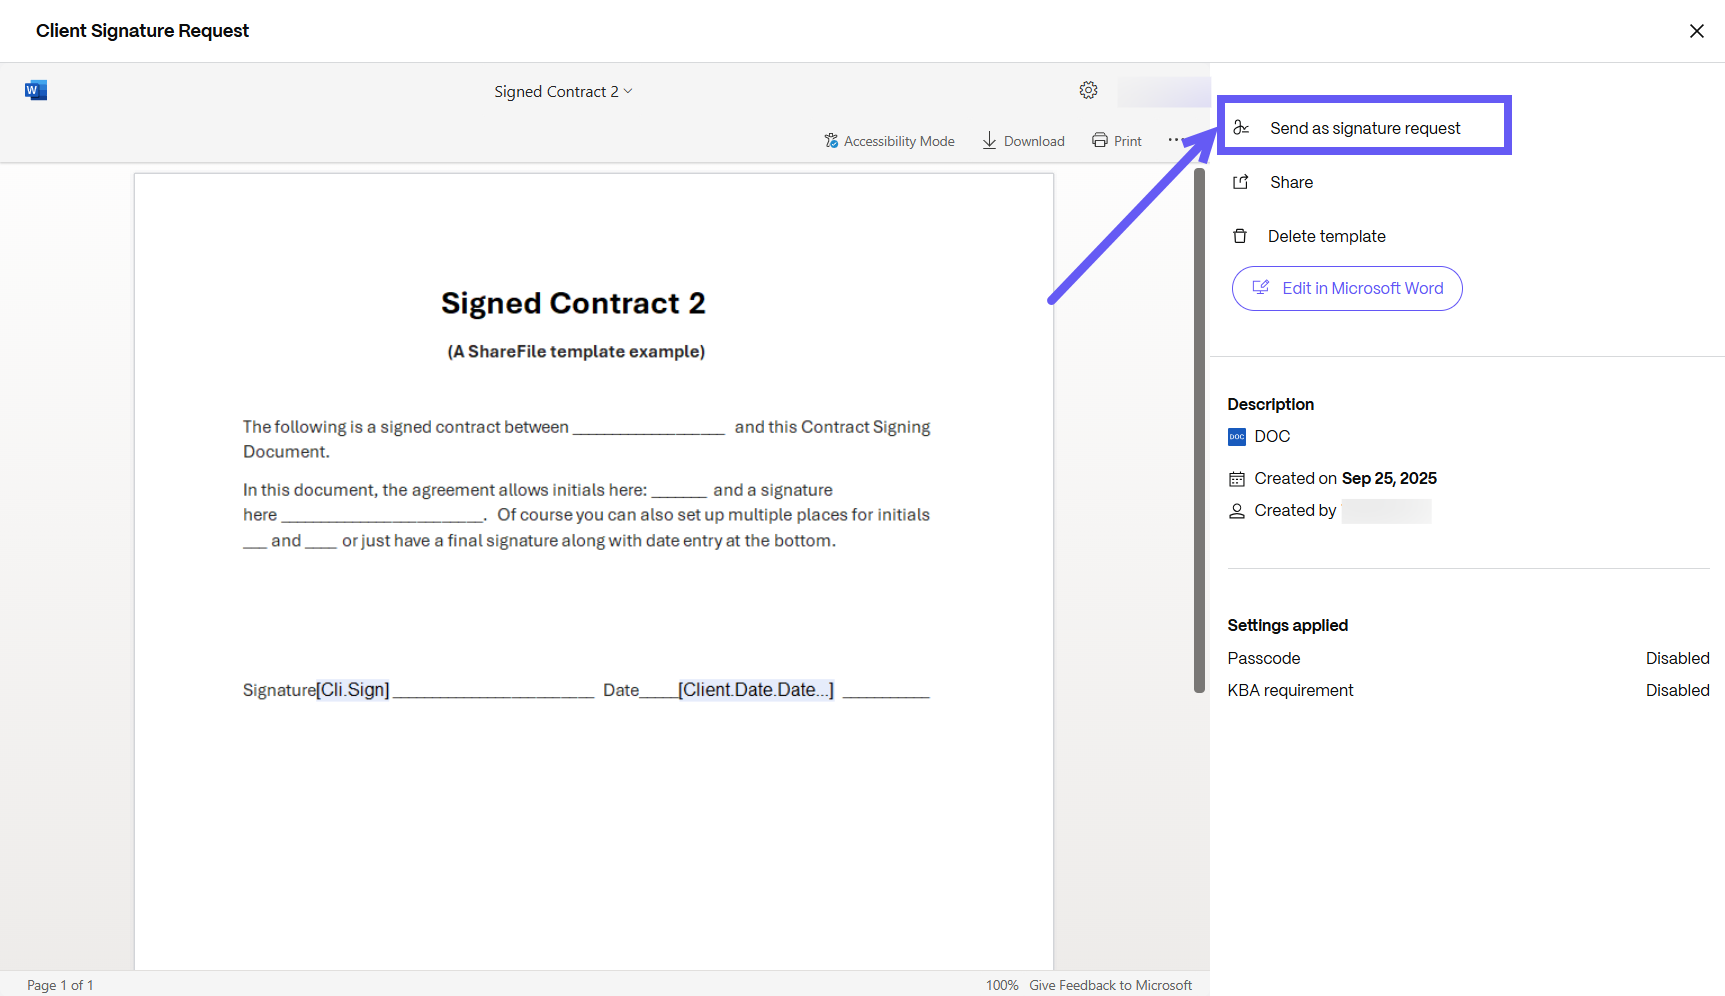
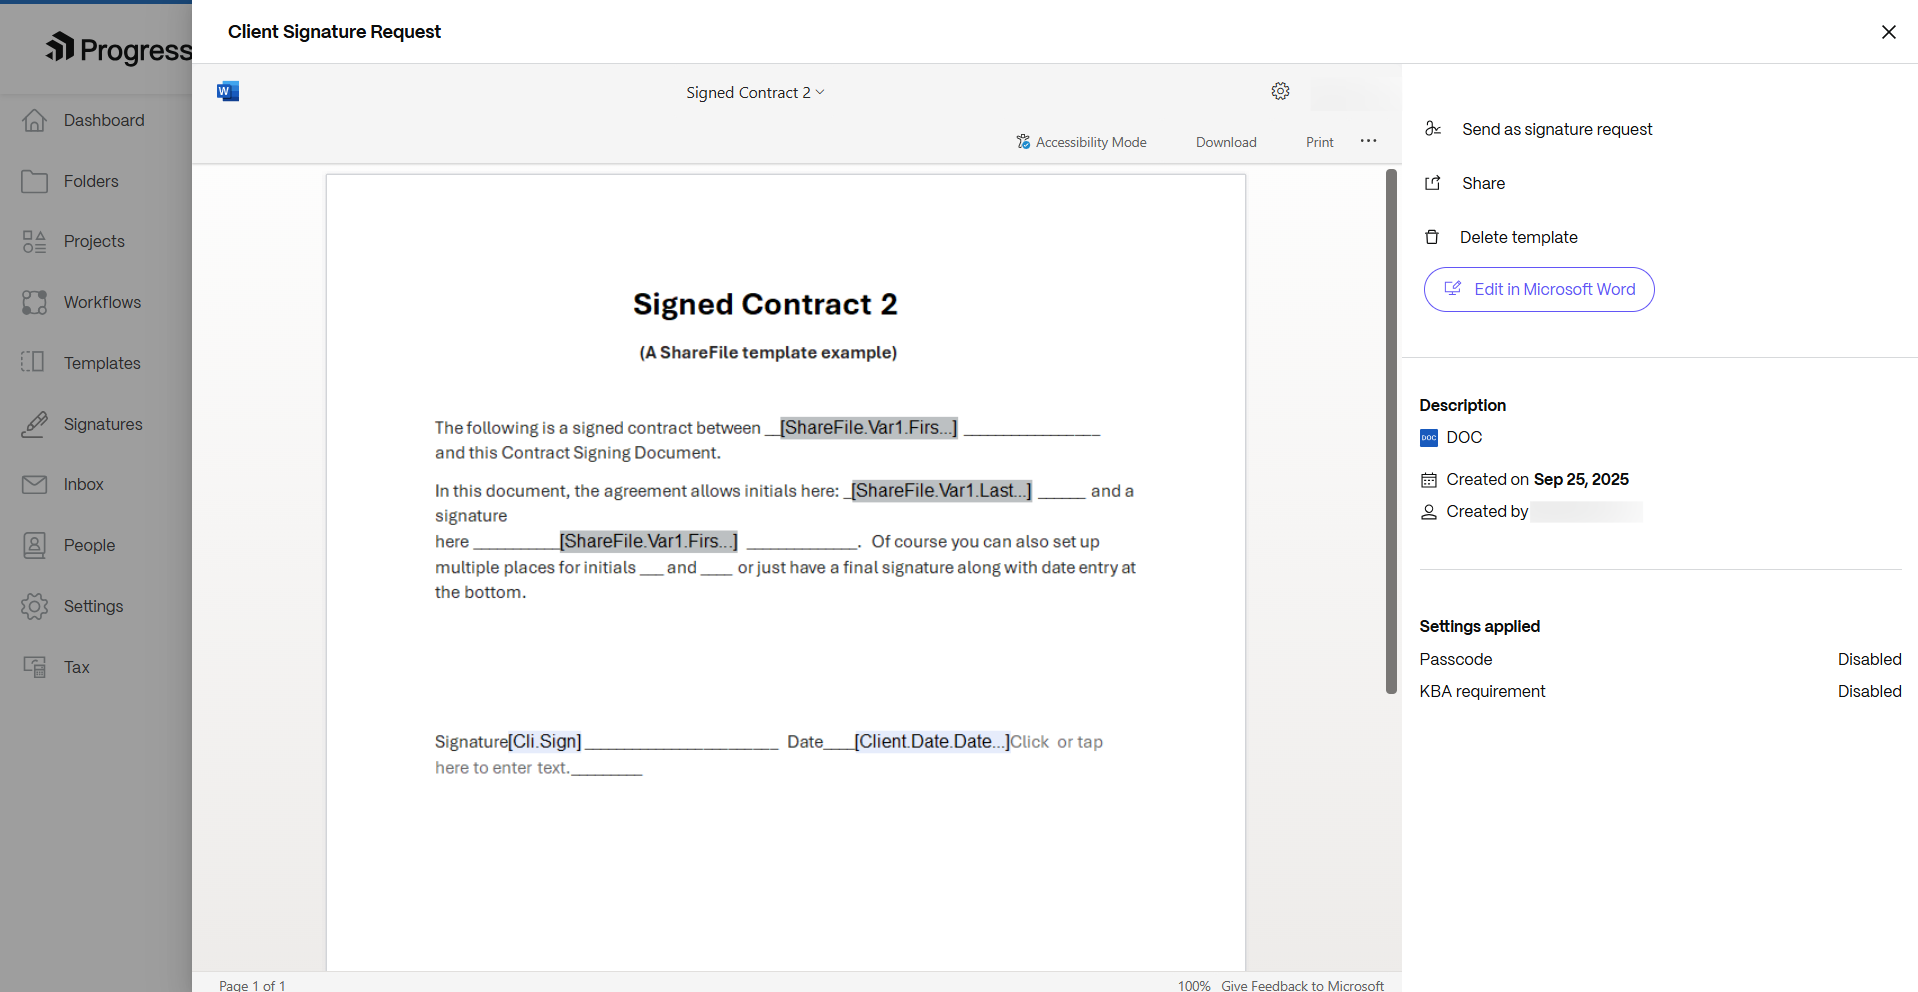
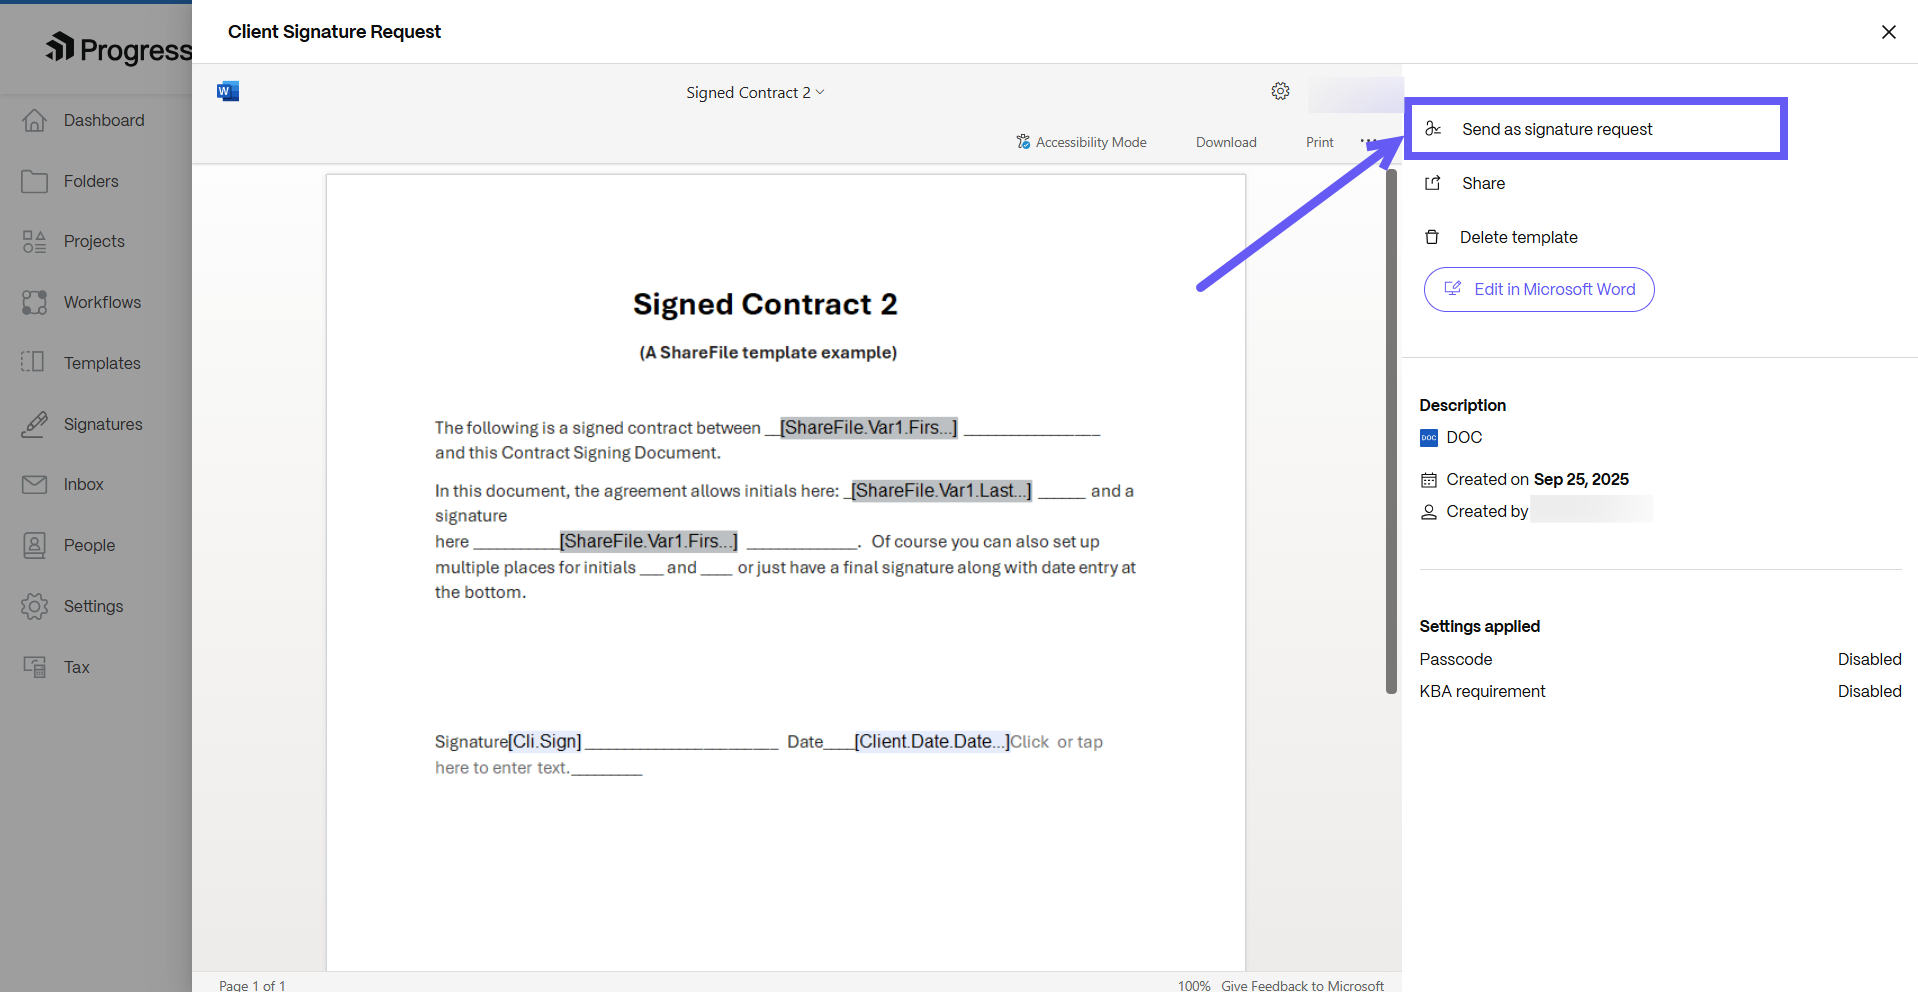
Select the document template that you want to send for signature. When you click on it, the details page opens.
-
On the details page, select Send as signature request.
-
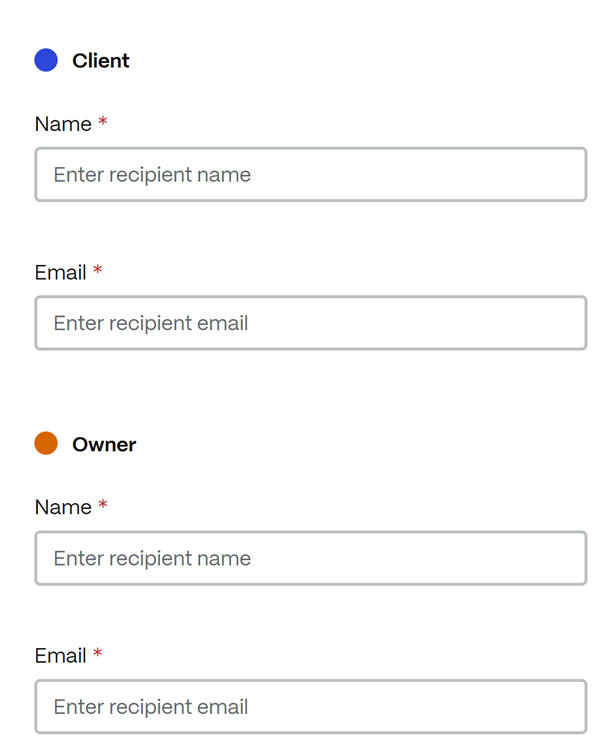
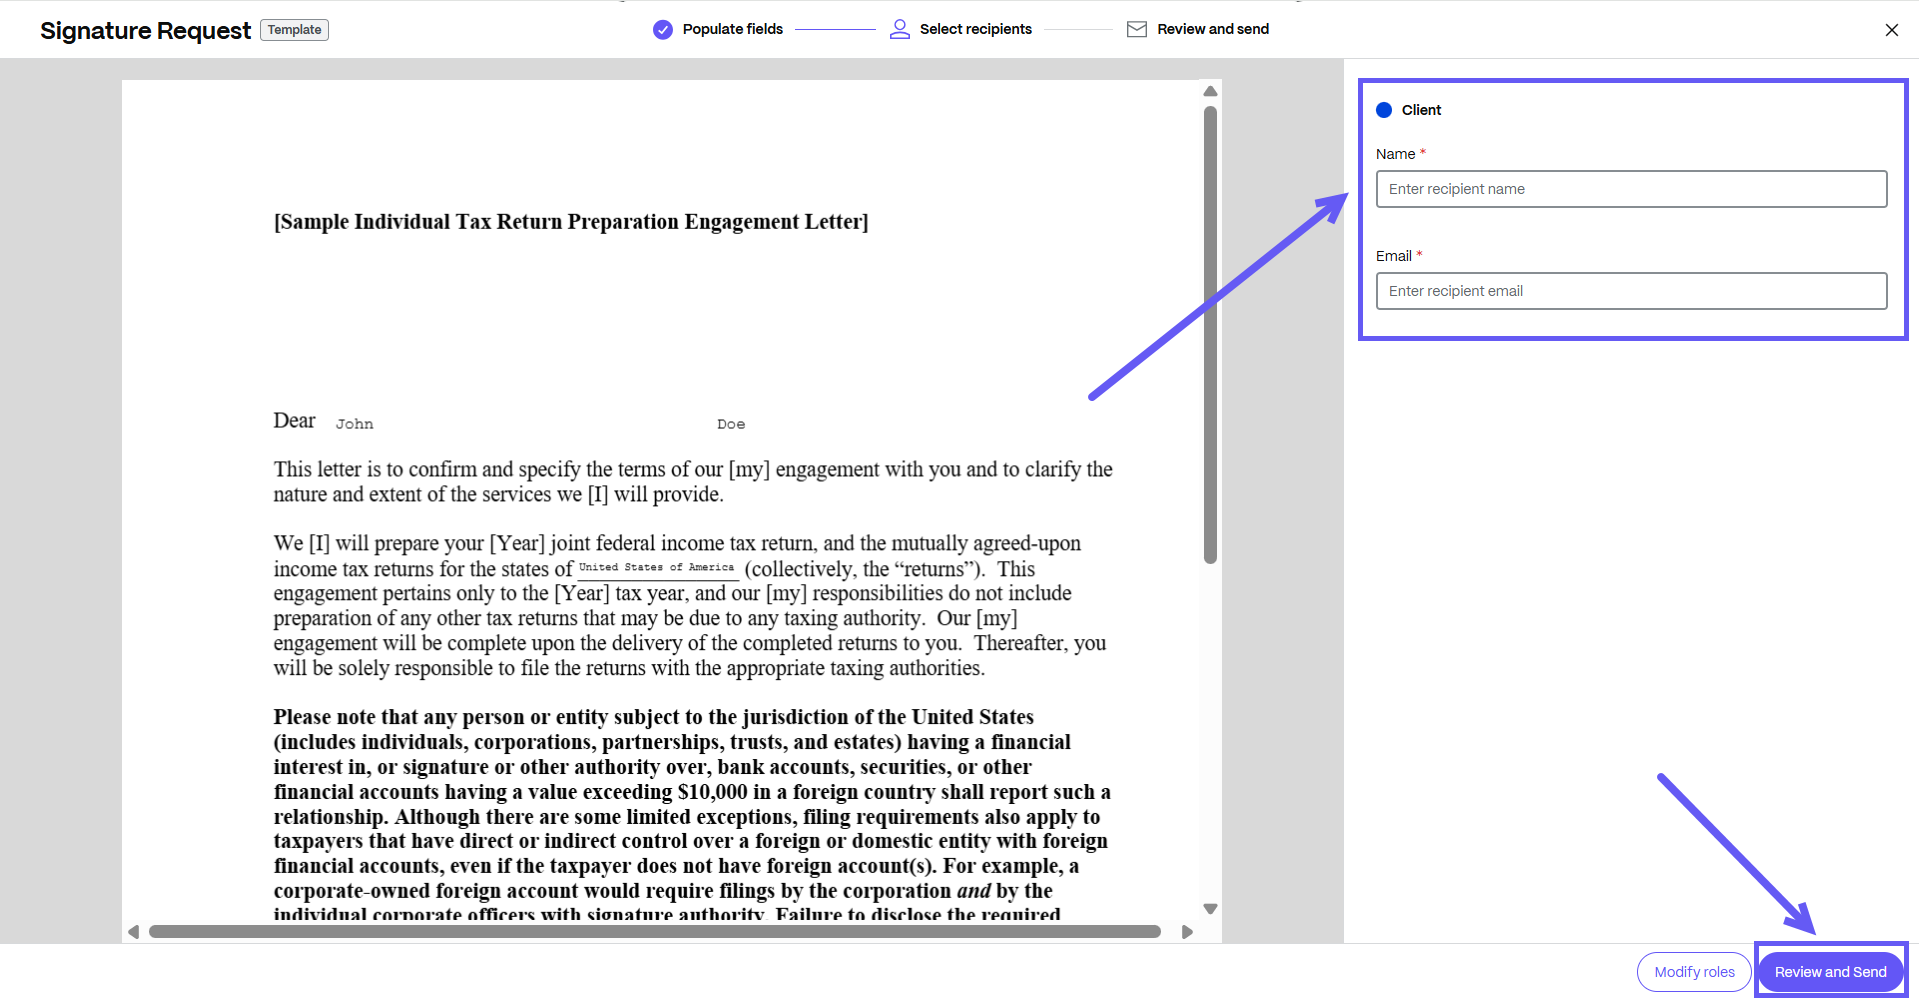
Enter the name and email for each recipient. Select Review and Send.
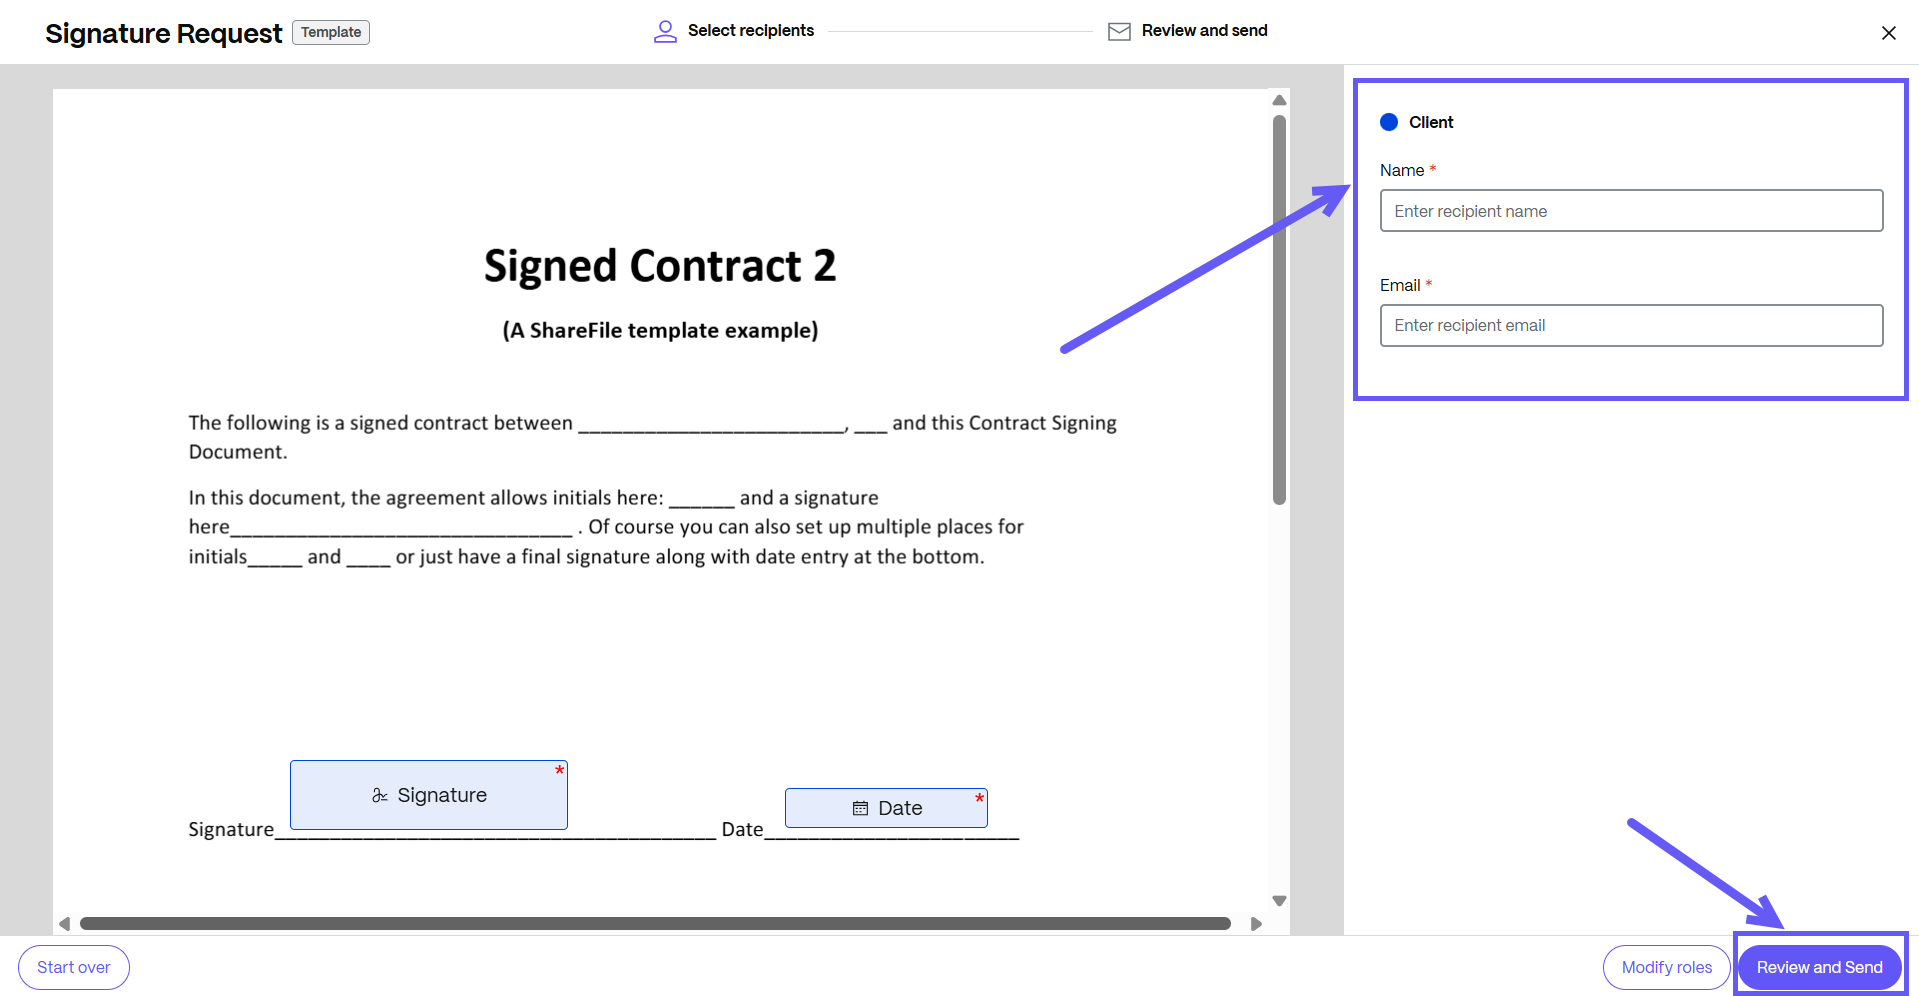
-
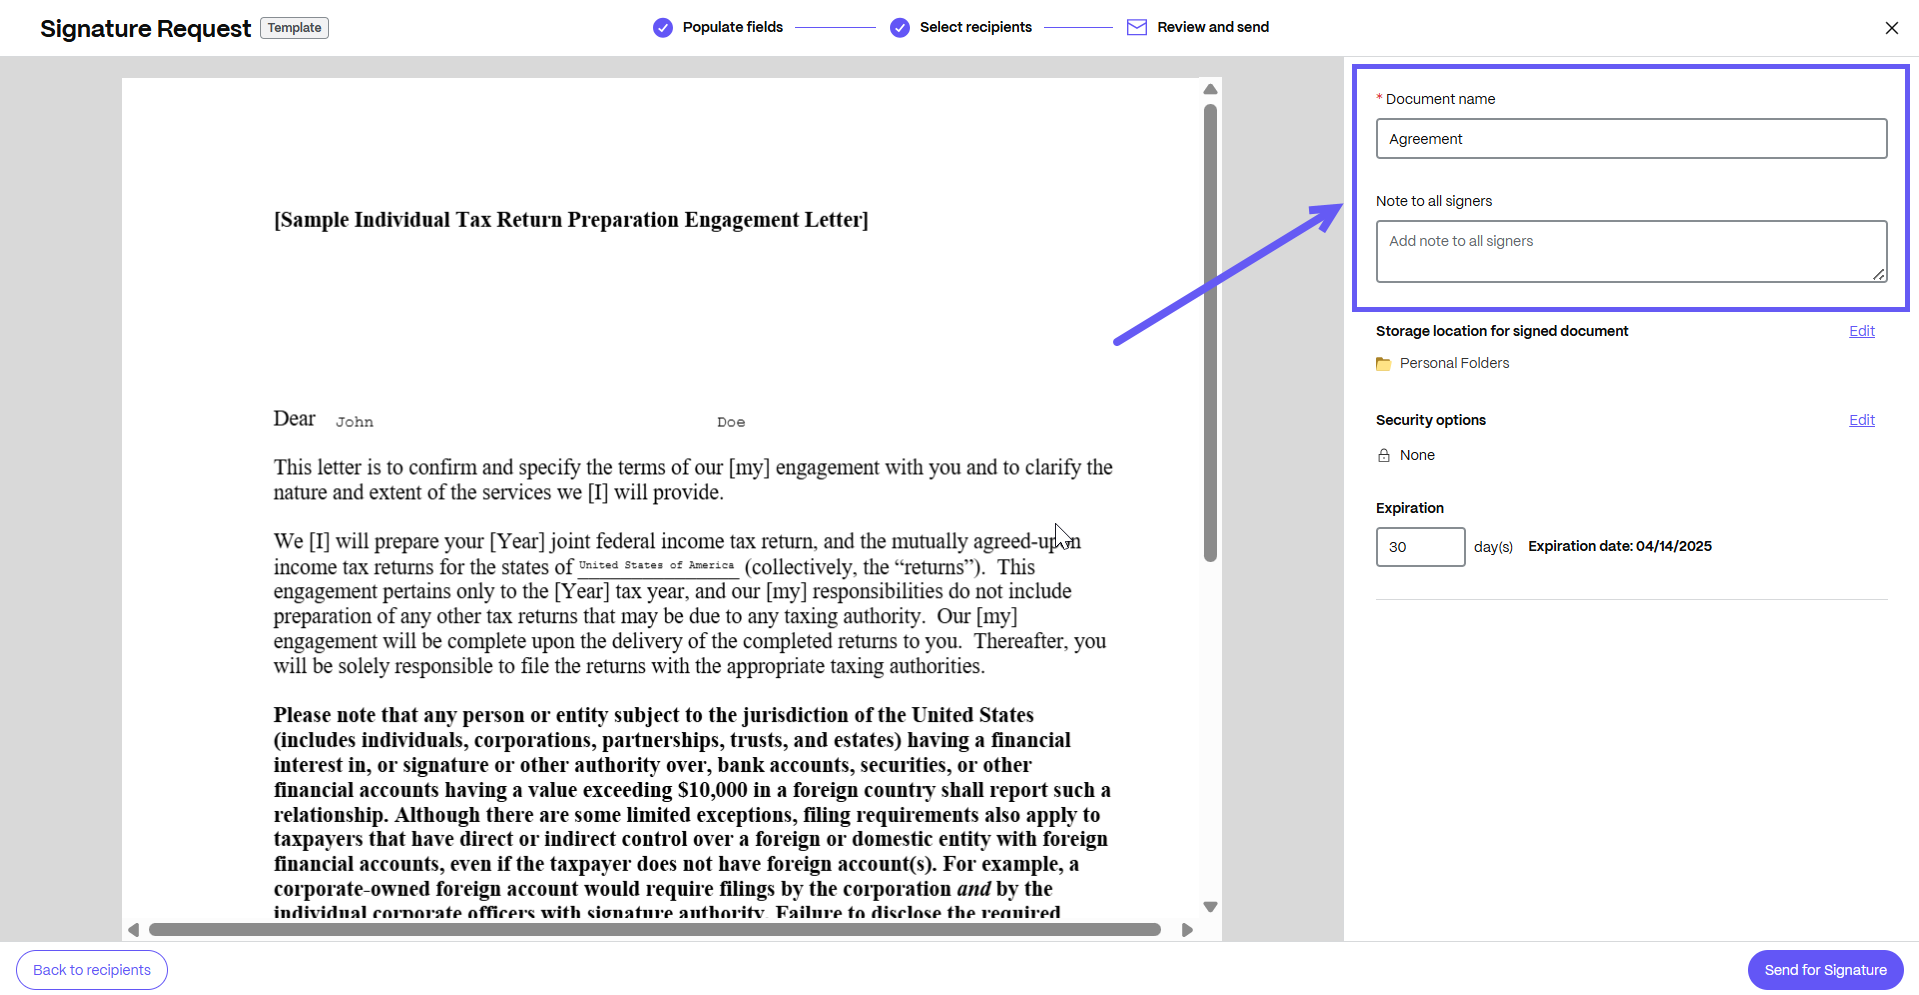
You can edit the document name and add a note that is sent to all signers.
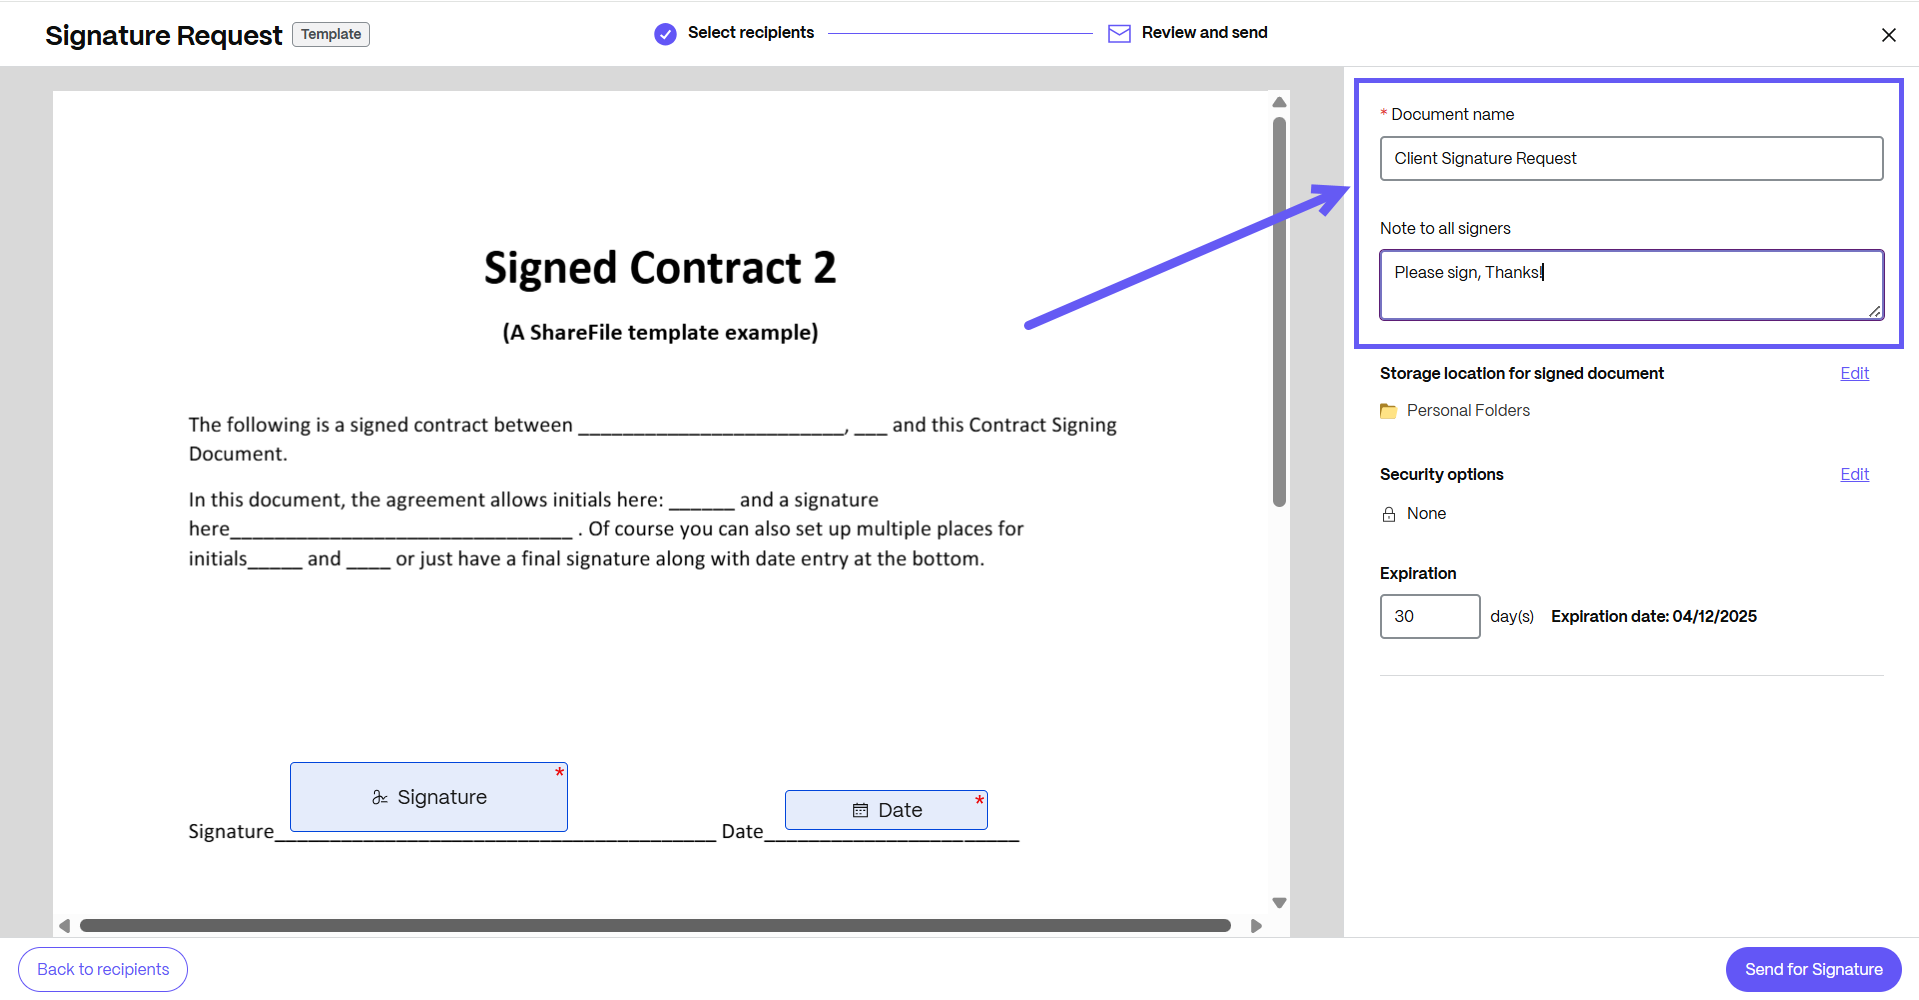
-
You can change the location for storing the signed document.

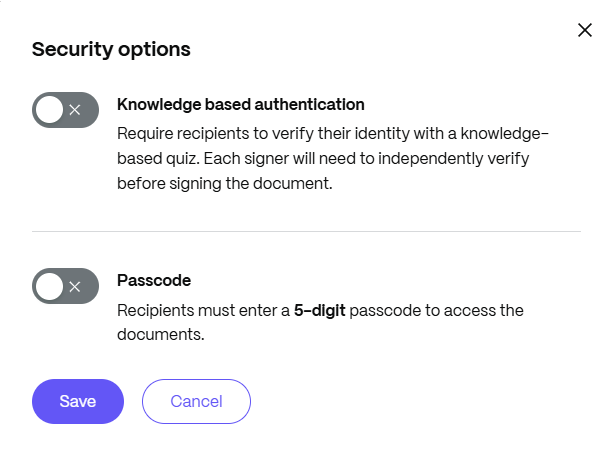
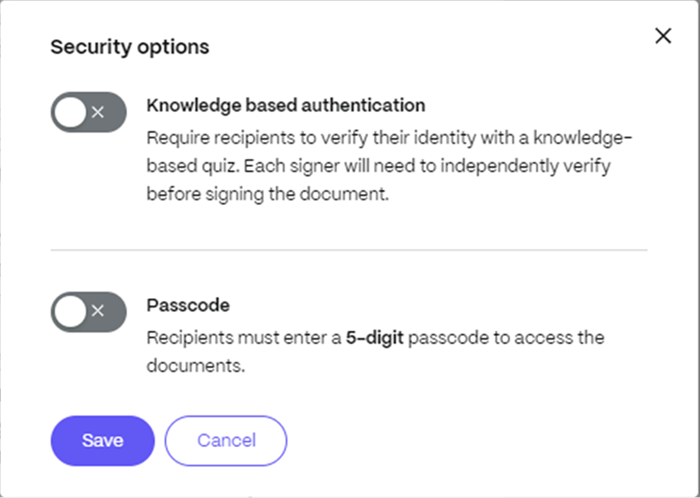
- Knowledge based authentication - requires signers to verify their identity with a knowledge-based quiz. Each signer must independently verify before signing the document.
- Passcode - requires recipients to enter a 5-digit passcode to access documents.

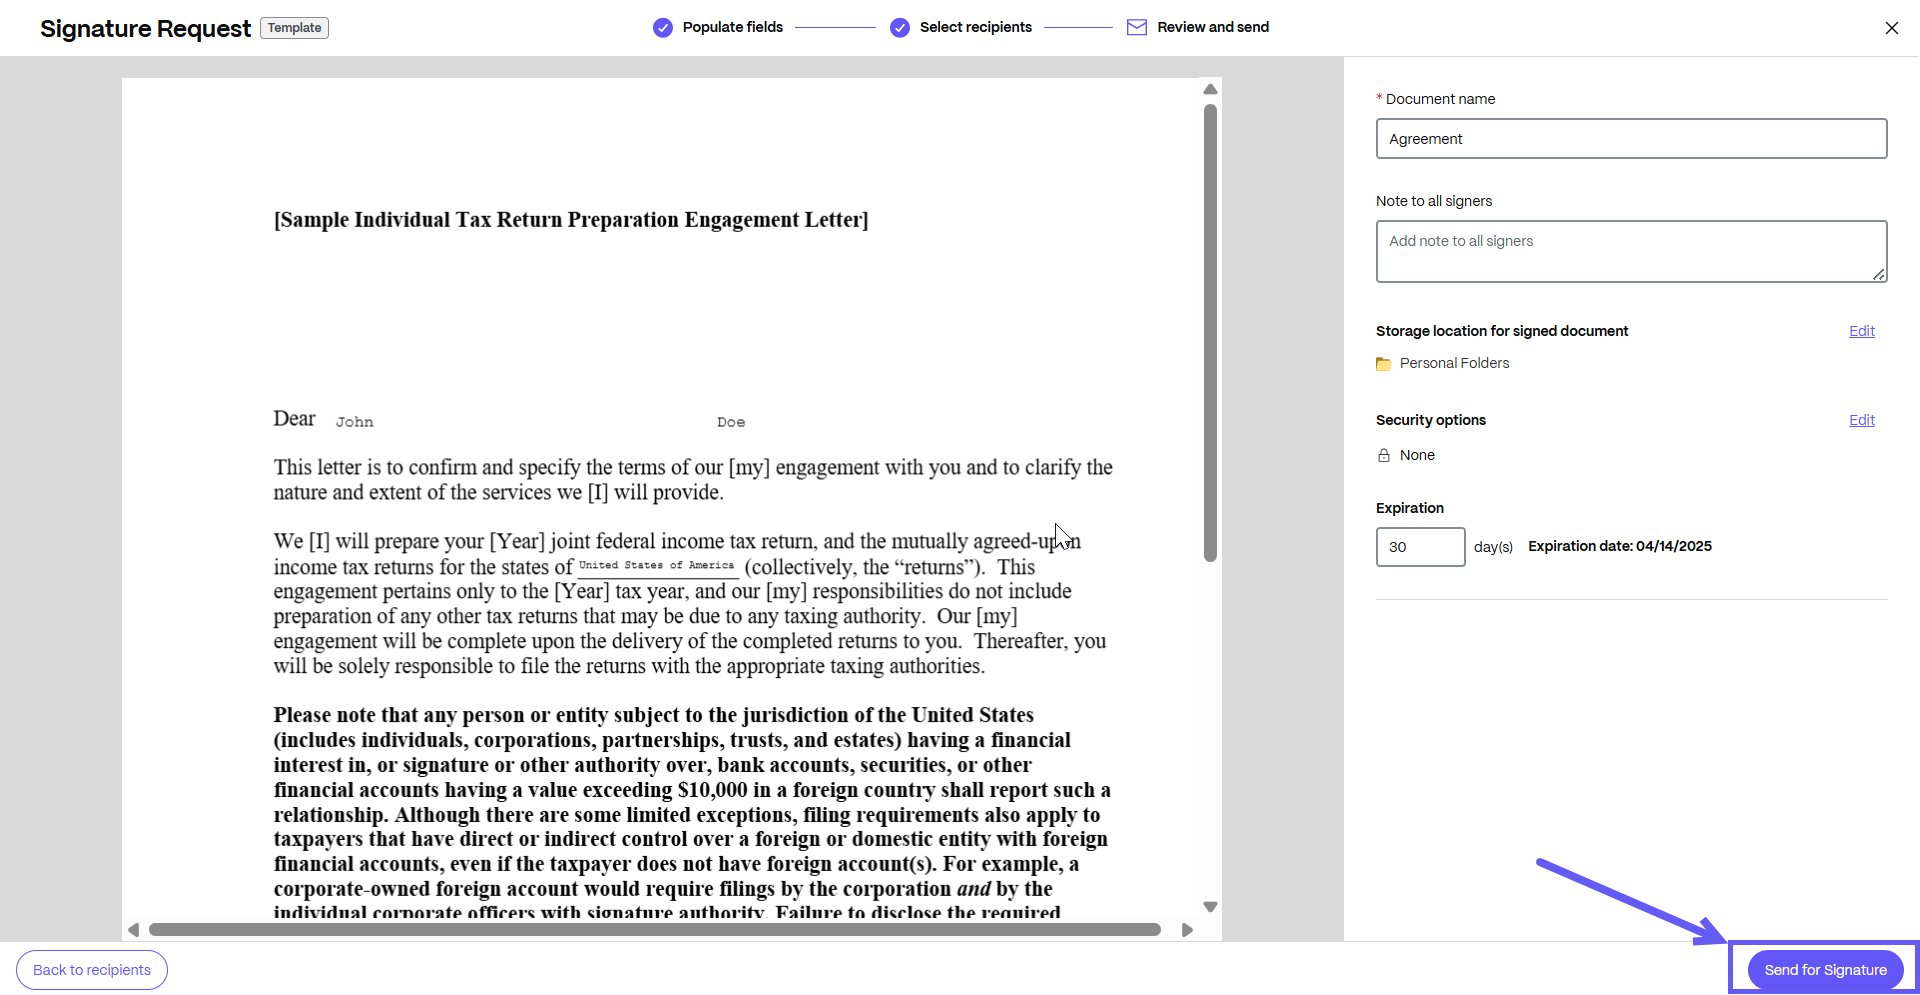
-
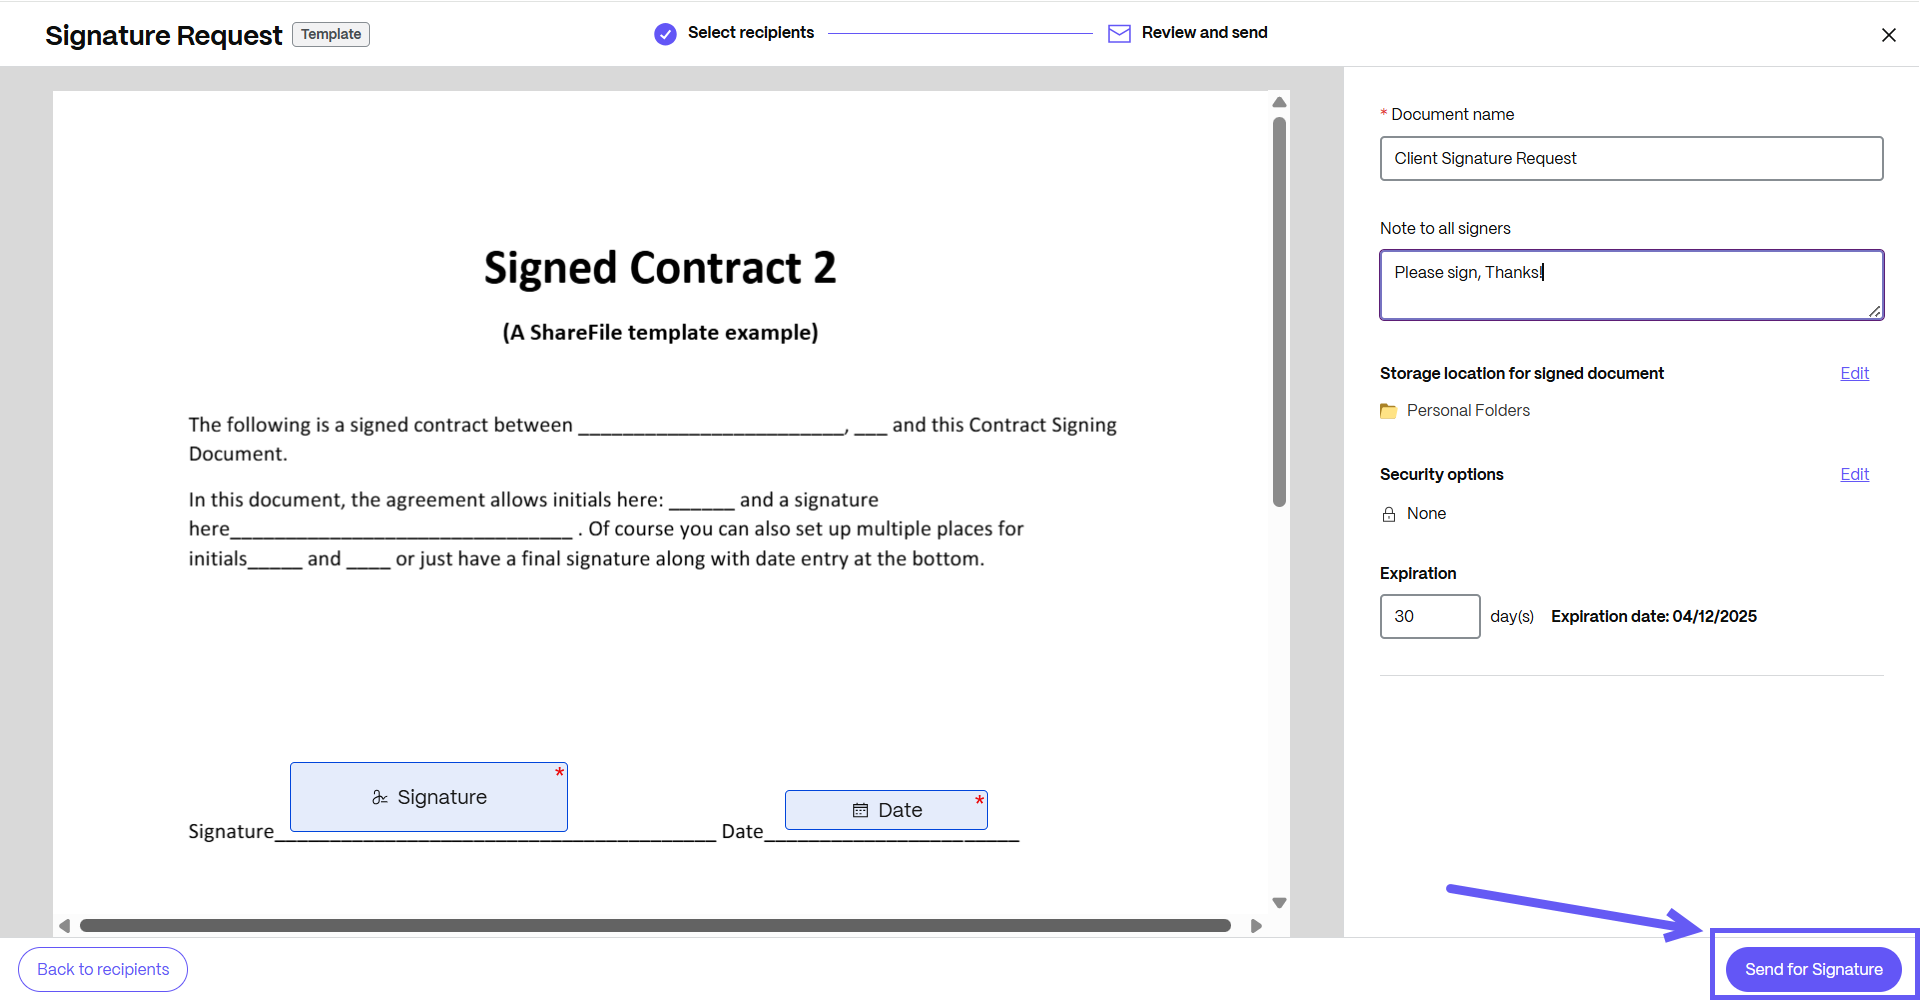
Your document is now ready to be sent for signature. Select Send for Signature.
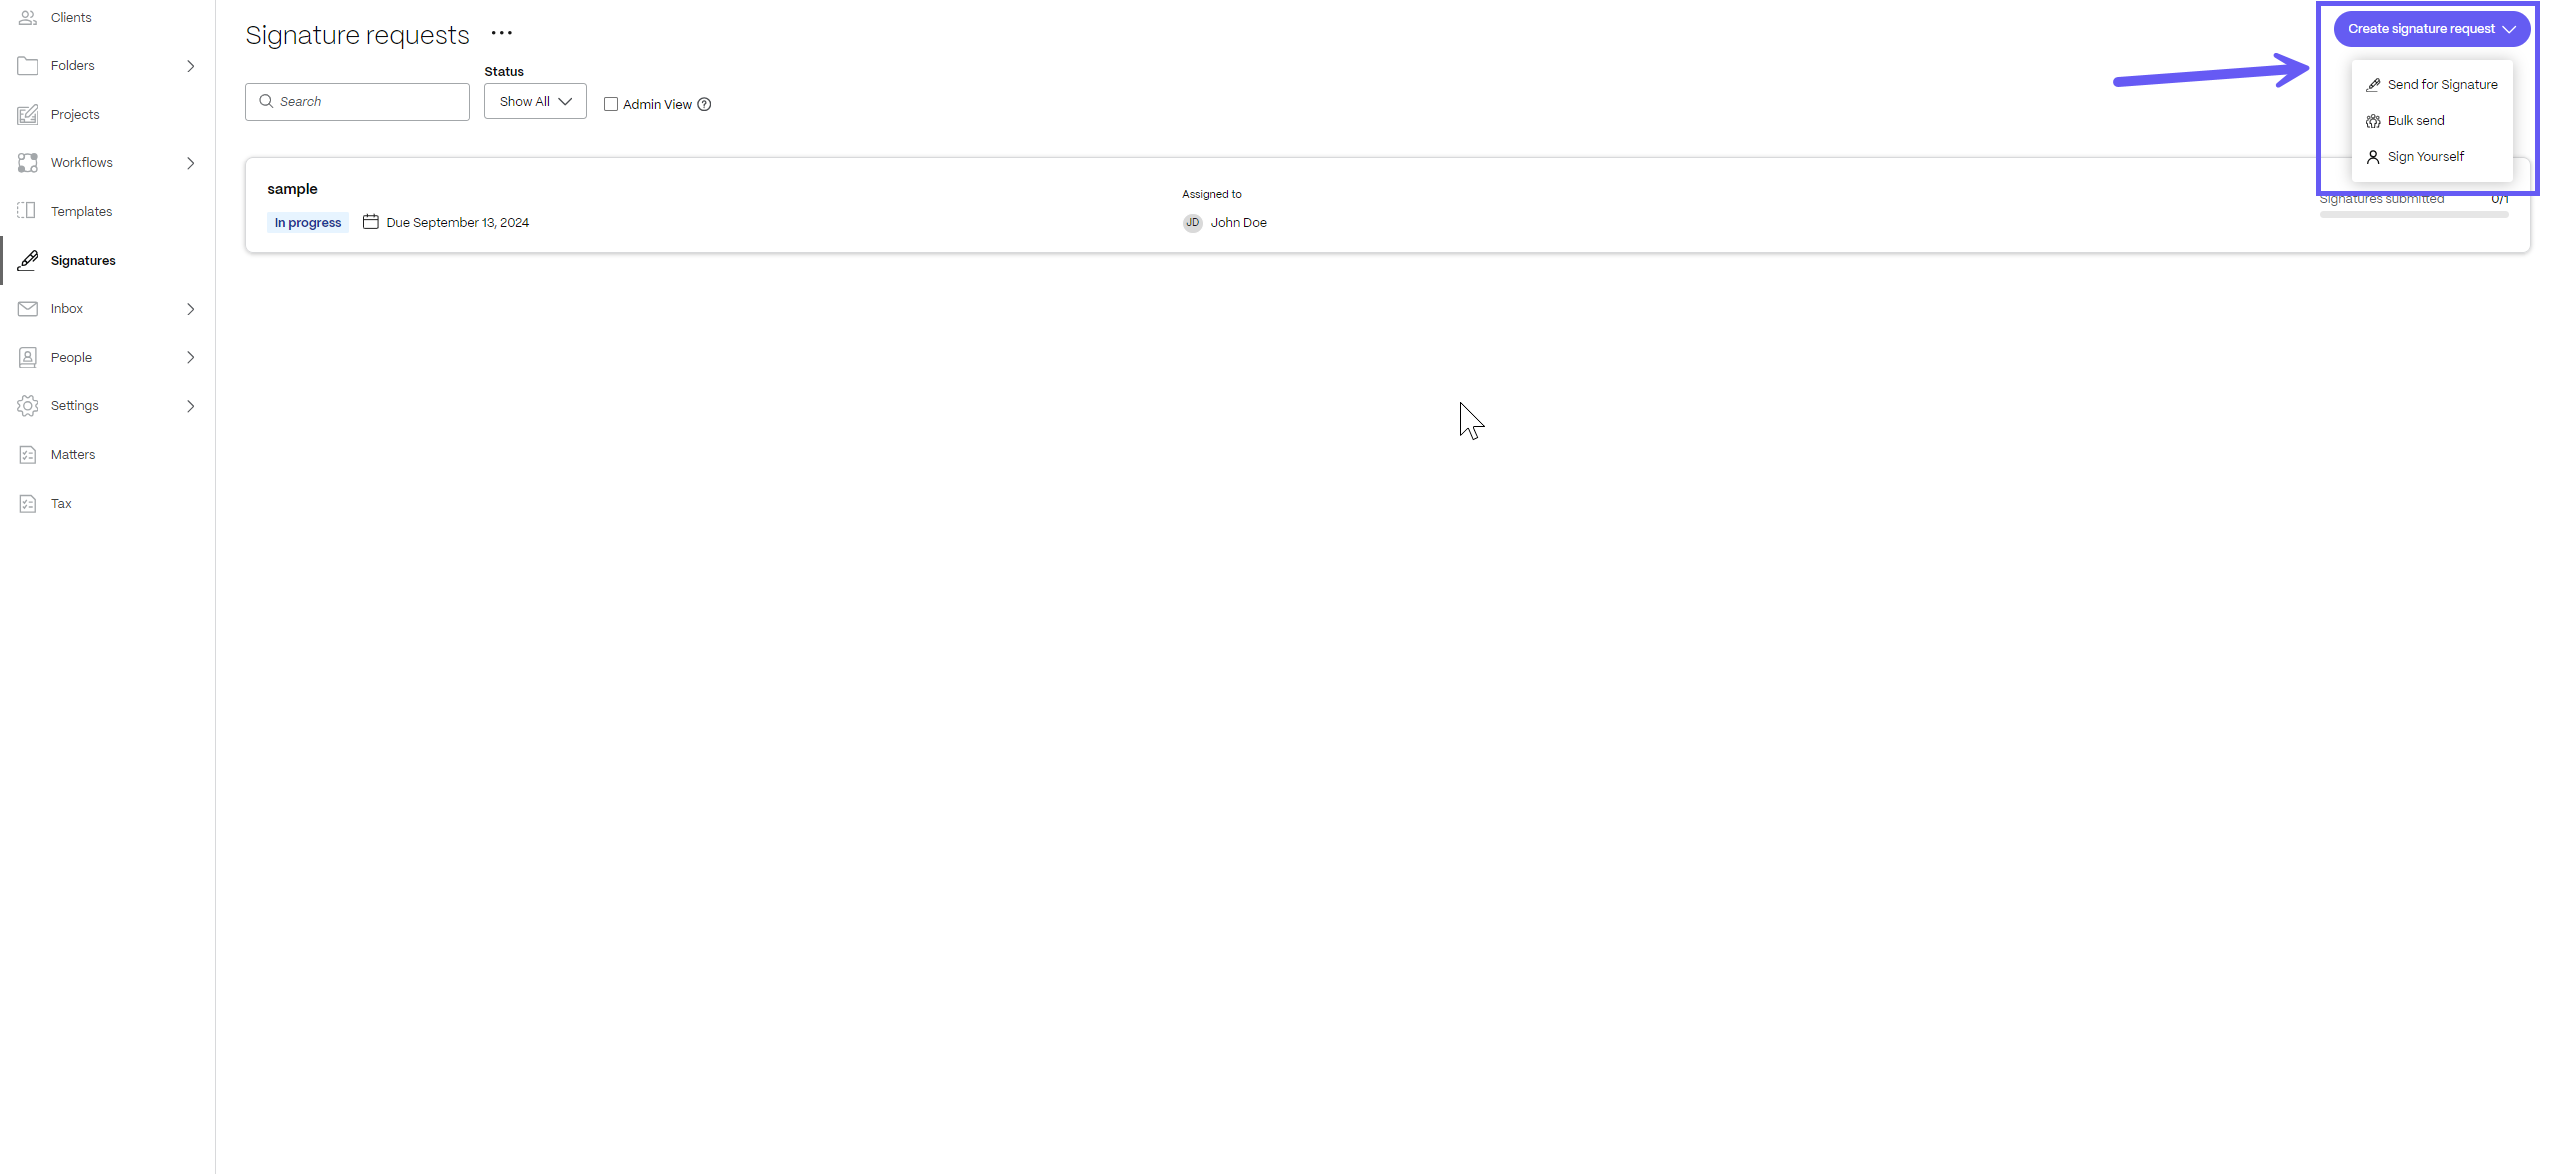
From the Signatures menu in the left navigation panel on Home Page
You can also send a document template for signature requests in ShareFile from the Signatures tab on the left pane of the SF Dashboard as shown below:
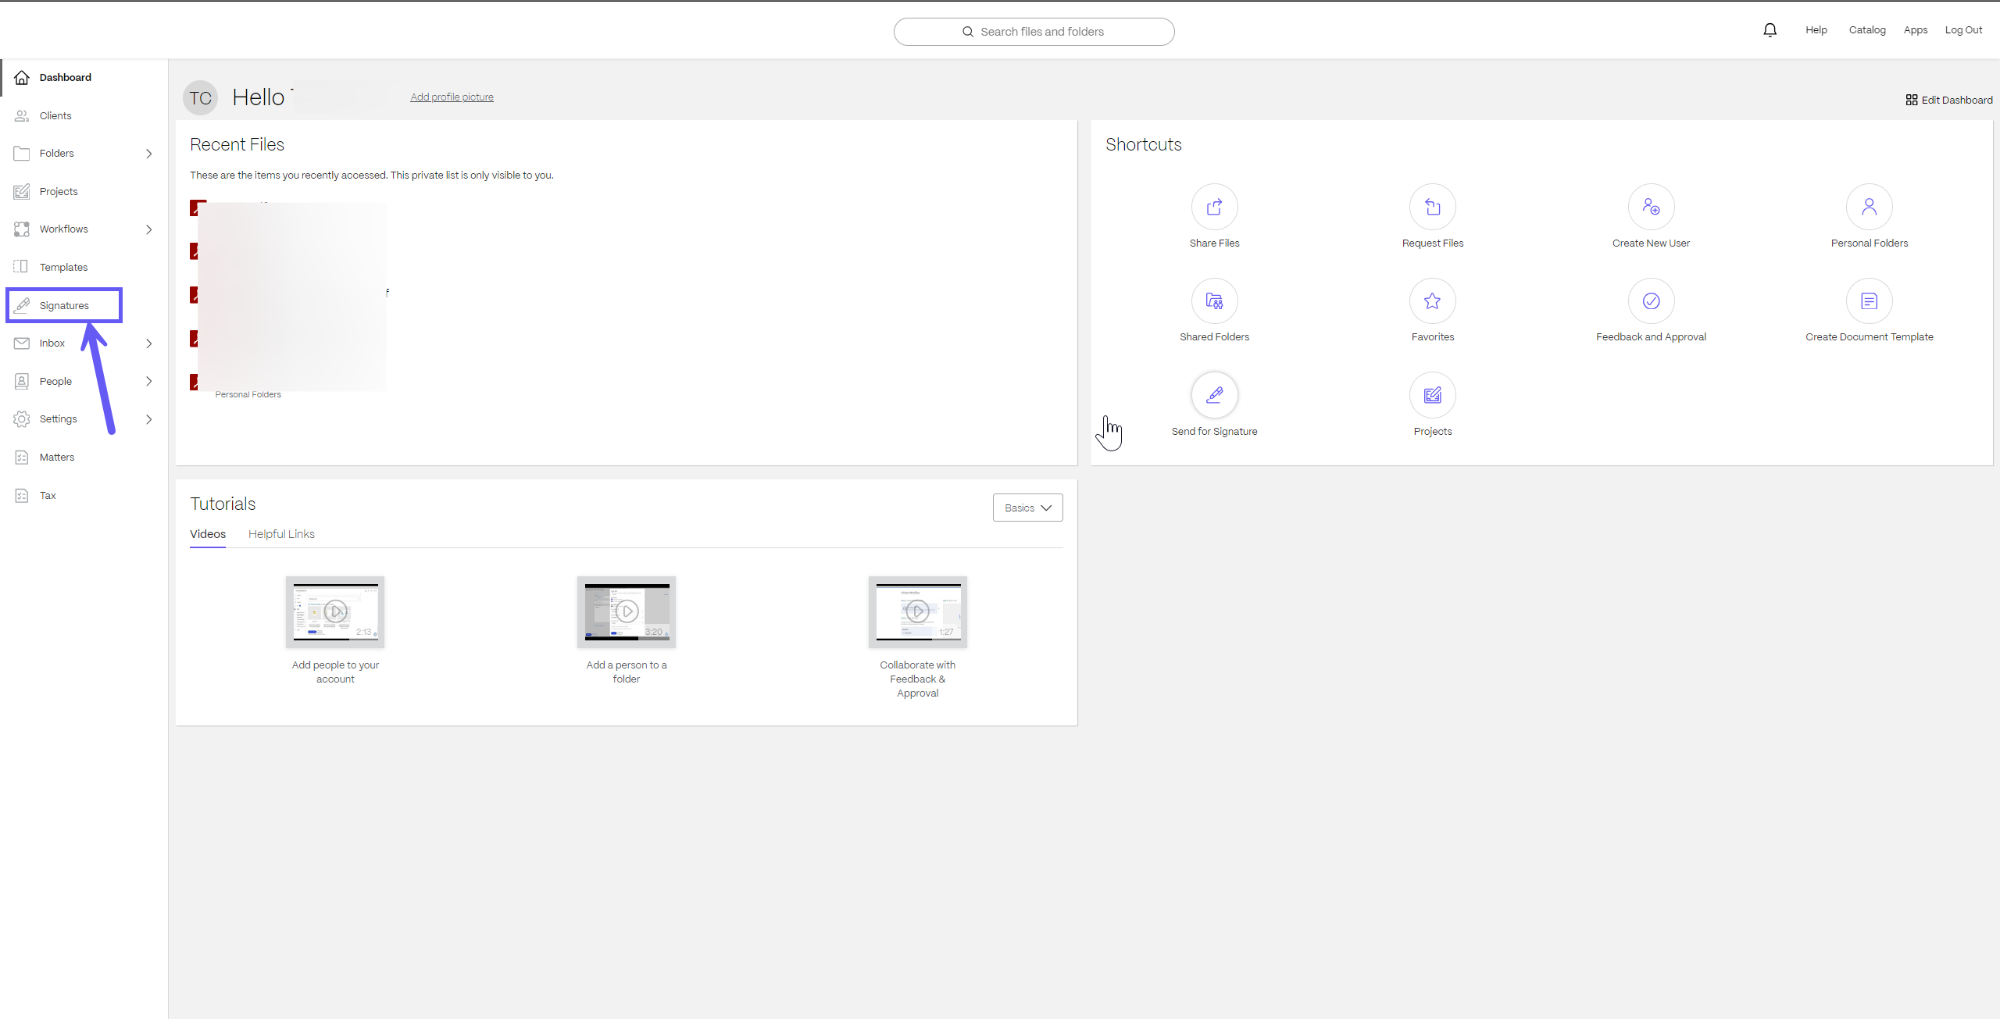
On the top right of the screen, select Create signature request > Send for Signature to go to the signature request screen.
From the Details Page of a Document Template
-
In ShareFile, navigate to Templates.
-
Select the document template that you want to send for signature. When you click on it, the details page opens.
-
On the details page, select Send as signature request.
-
Enter the name and email for each recipient. Select Next step.
-
You can edit the document name and add a note that is sent to all signers.

-
You can change the location for storing the signed document.

-
Knowledge based authentication - requires signers to verify their identity with a knowledge-based quiz. Each signer must independently verify before signing the document.
-
Passcode - requires recipients to enter a 5-digit passcode to access documents.

-
-
Your document is now ready to be sent for signature. Select Send signature request.

Automatically fill or paste data from ShareFile and third party applications in documents
In your daily work, you might be creating repetitive documents. Repetitive documents are documents that are either the same or have very small variations.
For example, an engagement letter that is used to onboard a new client has to be personalized for every client. The client information will change with every onboarding but the general terms of engagement may remain the same.
Document templates can be used to pull in information from ShareFile or other applications like Salesforce and automatically paste it in a document. Users can customize documents without having to manually copy paste data into a document. Not only can this save time but prevent unintended copy-paste errors.
In the above example, the client information can be pulled from ShareFile’s Client user data or Salesforce Leads data and automatically be pasted into the engagement letter which you can send out for signature in less than 15 seconds!
Document templates can be configured to pull in values from the following sources:
| Source | Type |
|---|---|
| ShareFile | Client users, Employee users |
| Salesforce | Leads, Account, Opportunity, Quote, Contact |
NOTE:
If you don’t have an integration installed, you can navigate to Apps > Third Party Integrations to install a new integration.
Steps to create a Doc Gen Template with variables
-
In Microsoft Word, open the ShareFile for Word Add-in. Ensure you are already logged into ShareFile.
-
Under the Fields tab in the Add-in, click on Add Roles.
-
Click Add new role to create a new signer role.
-
Enter a name for the role. Each role represents a stakeholder involved in the signing process.
-
If you have added more than one role, you can define the signing order by selecting the Set signer sequence checkbox. You can also drag and drop roles to rearrange their order.
-
Once a role is added, the available signer fields (e.g., Signature, Text, Date) display as shown below.
-
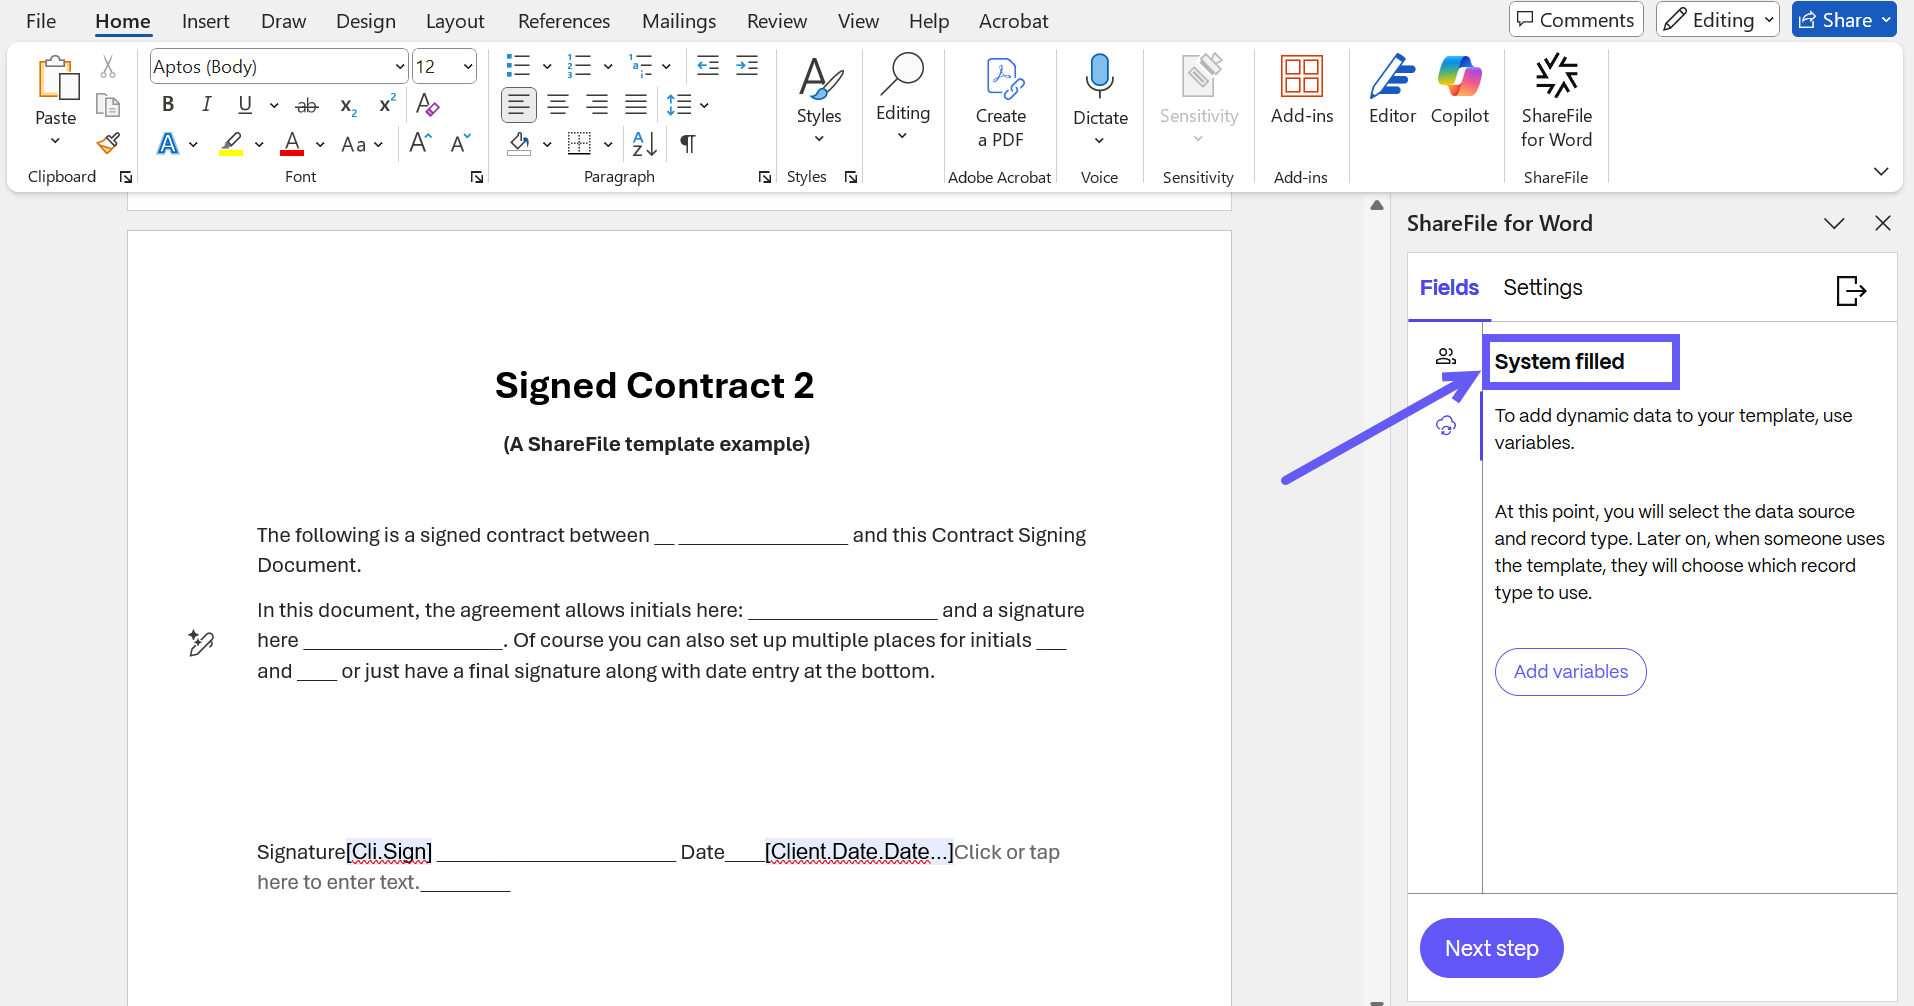
Select System fields icon to start adding variables to the document template.
-
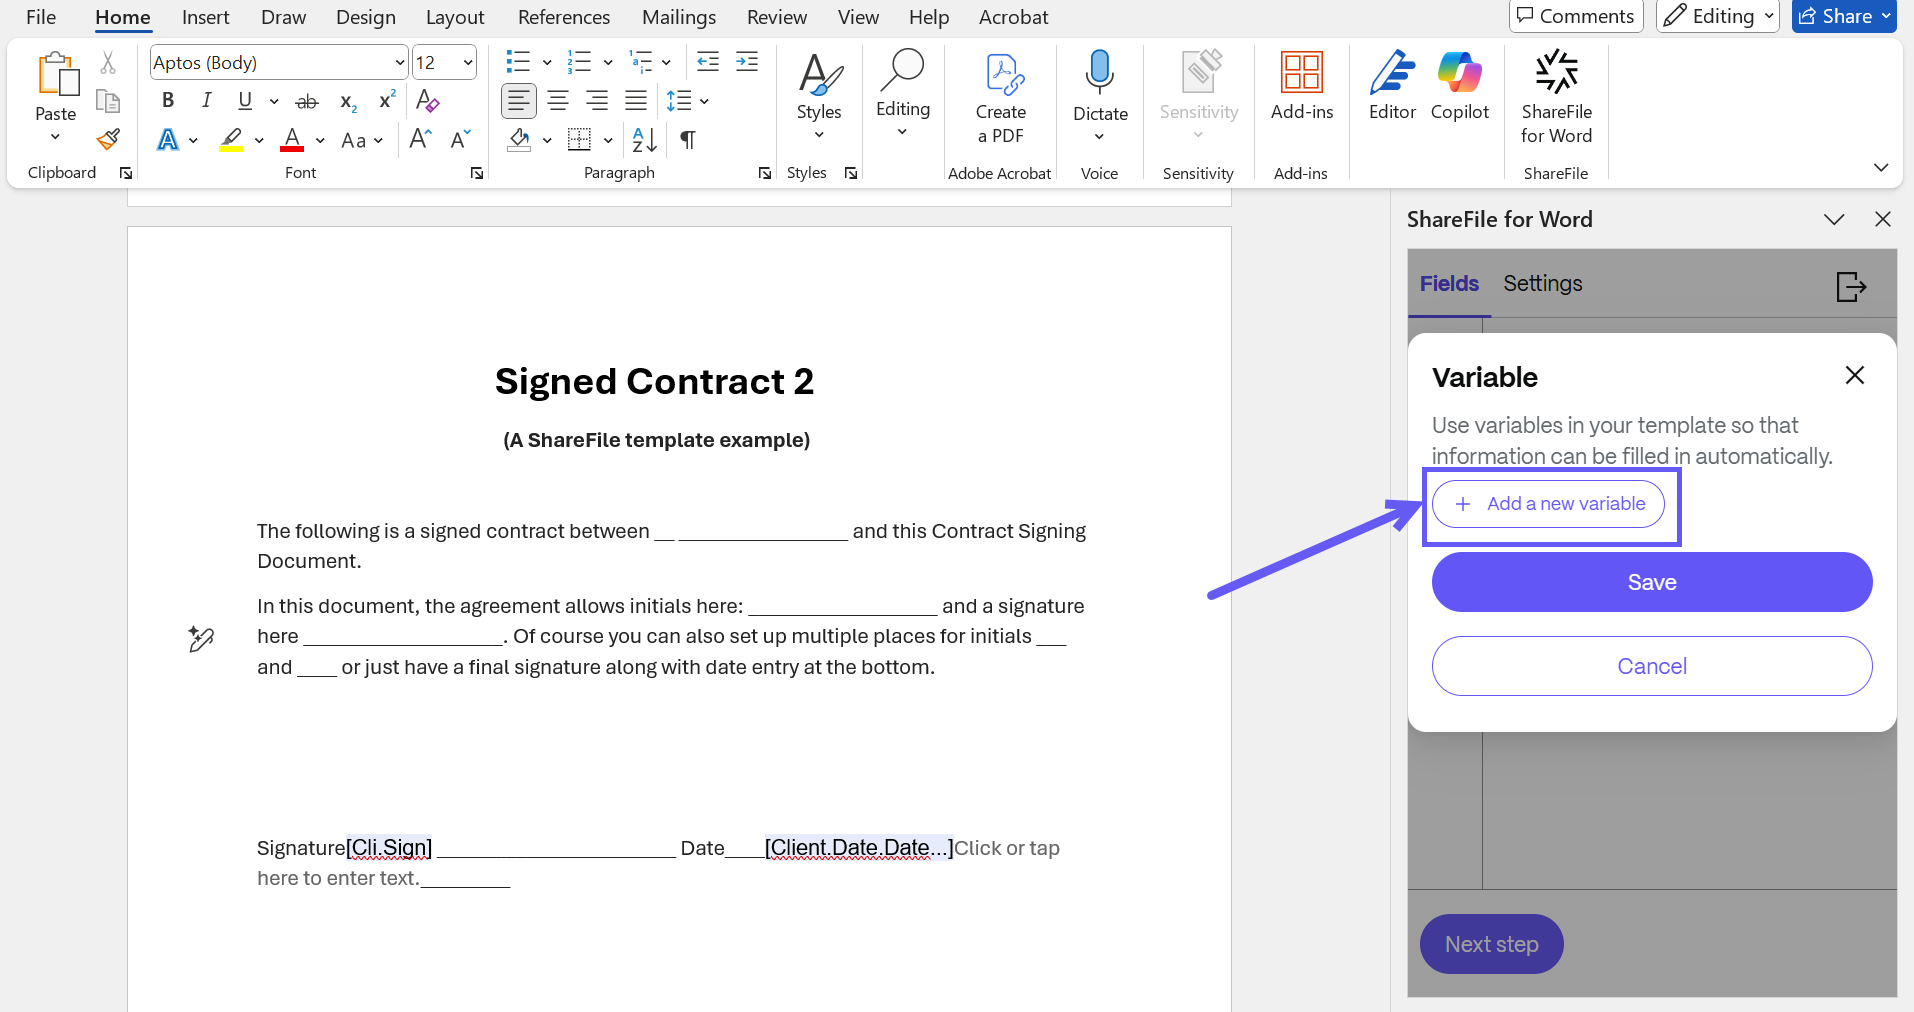
Click Add a new variable to create a new variable. Variables specify the source and type of data that must be automatically filled in the document. For more information on Variables, please refer to Document template components.
-
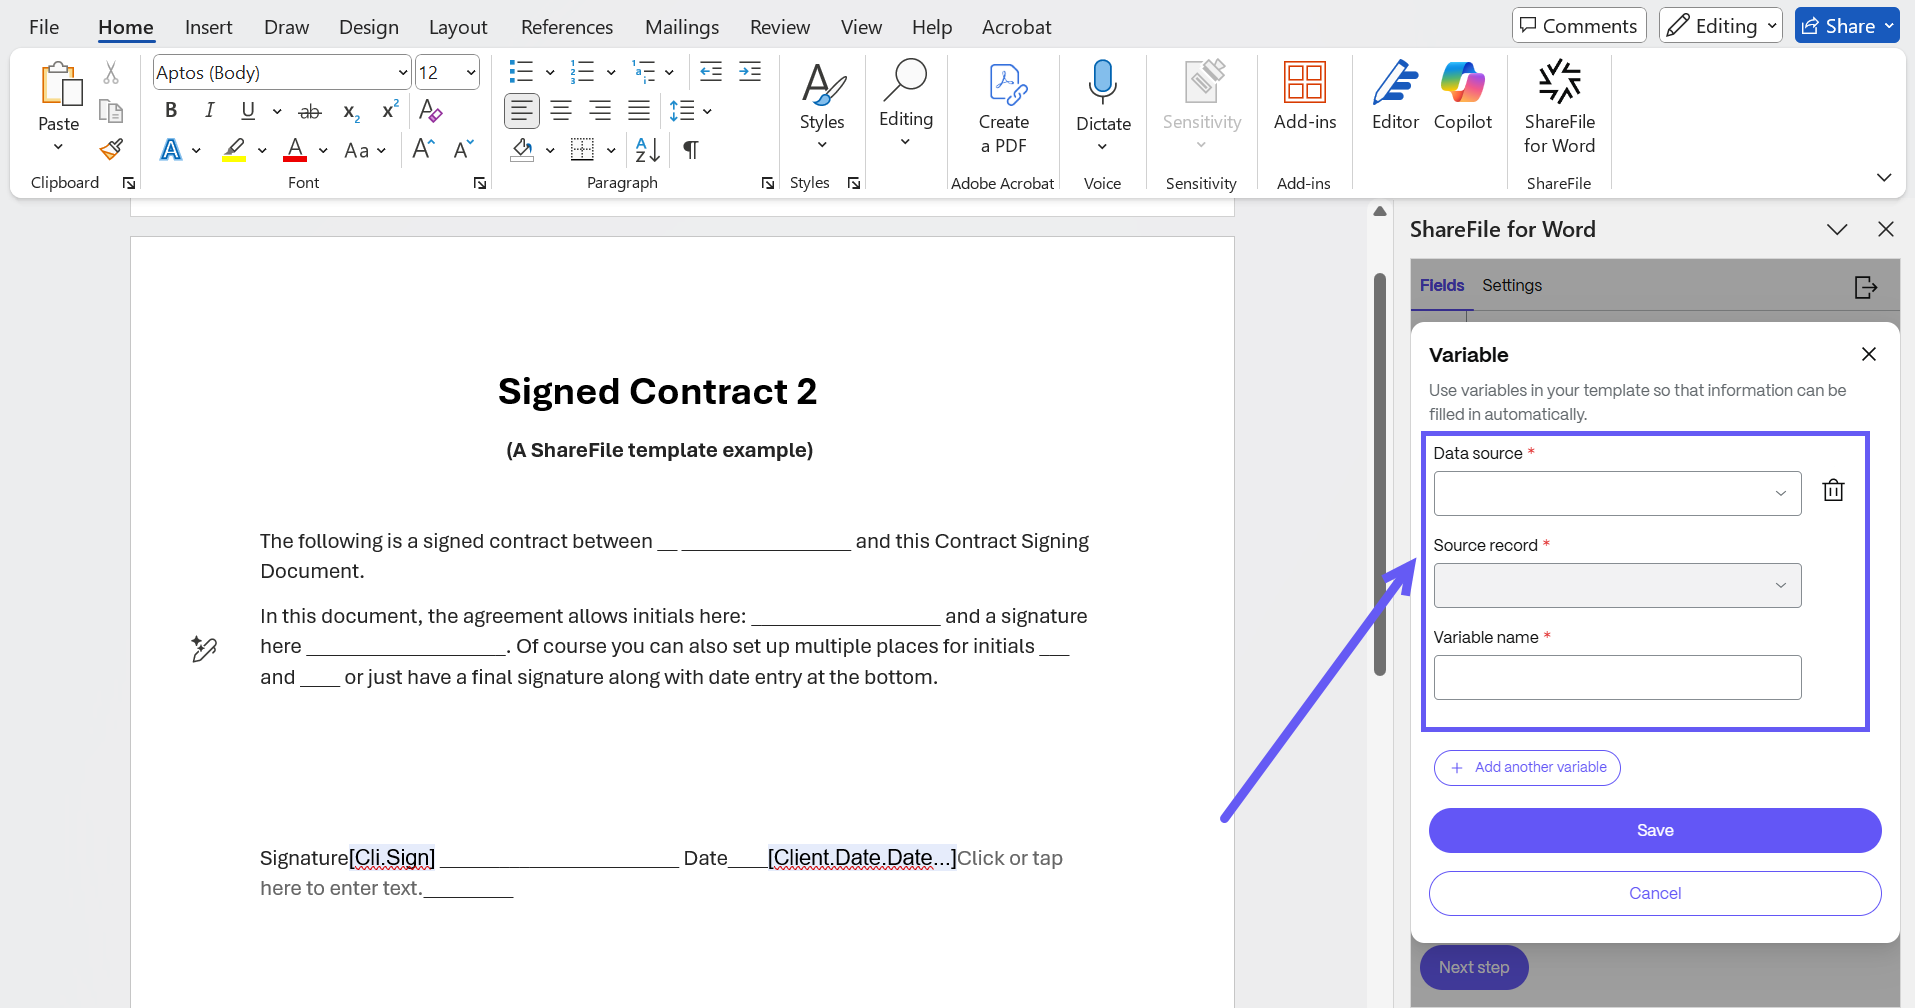
For each variable, select a Data Source and Data type from the dropdown menu. The list of supported data sources and types can be found under the section Automatically fill or paste data from ShareFile and third party applications in documents.
-
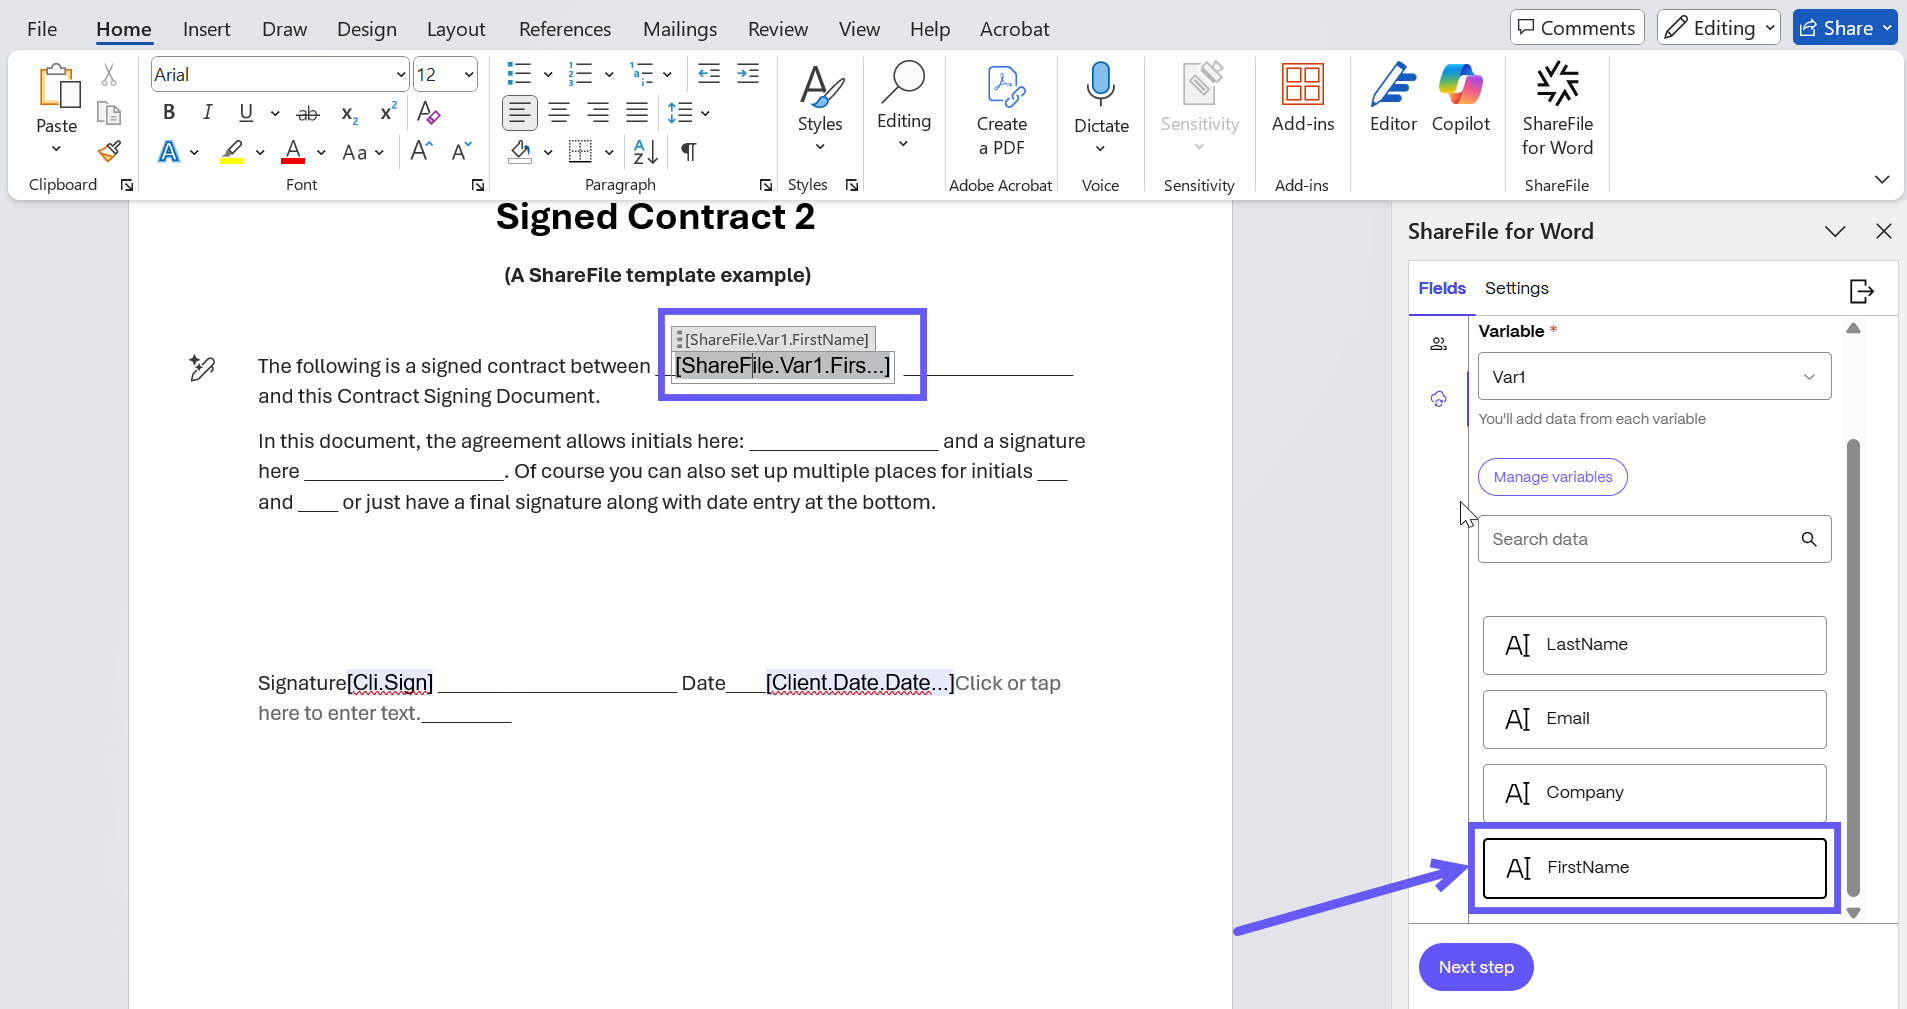
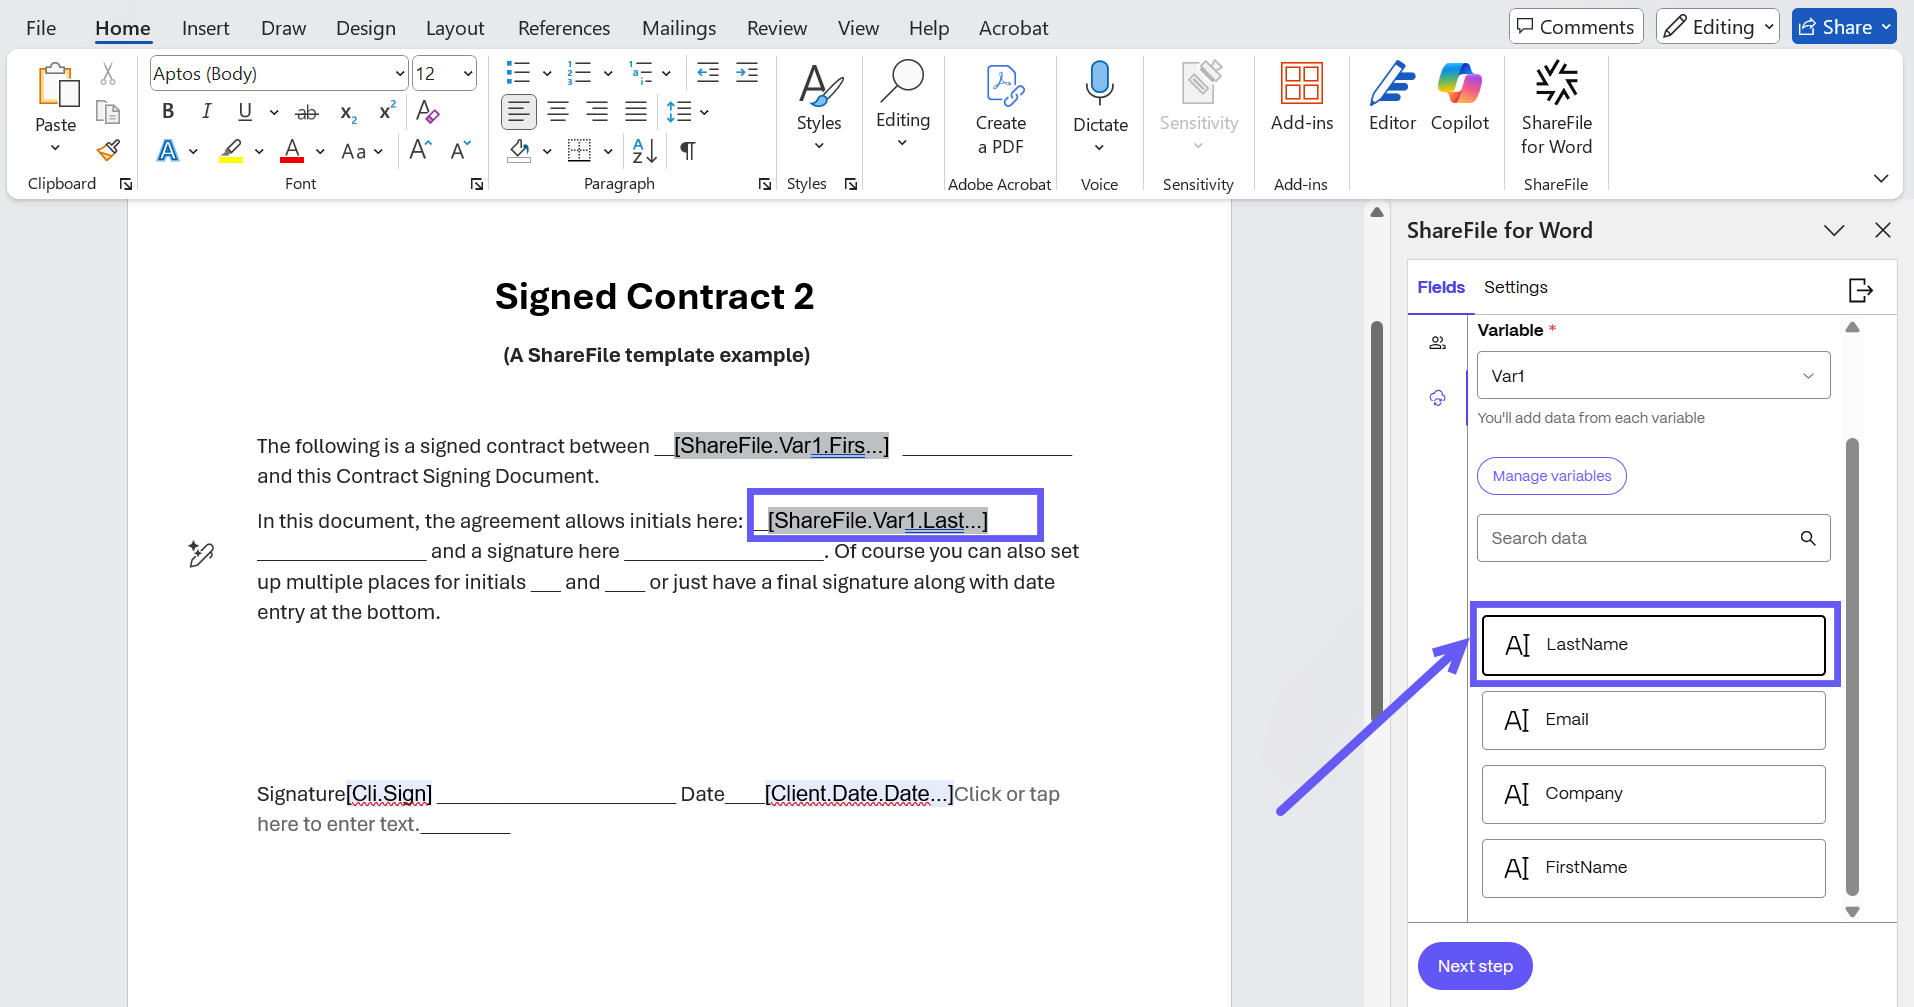
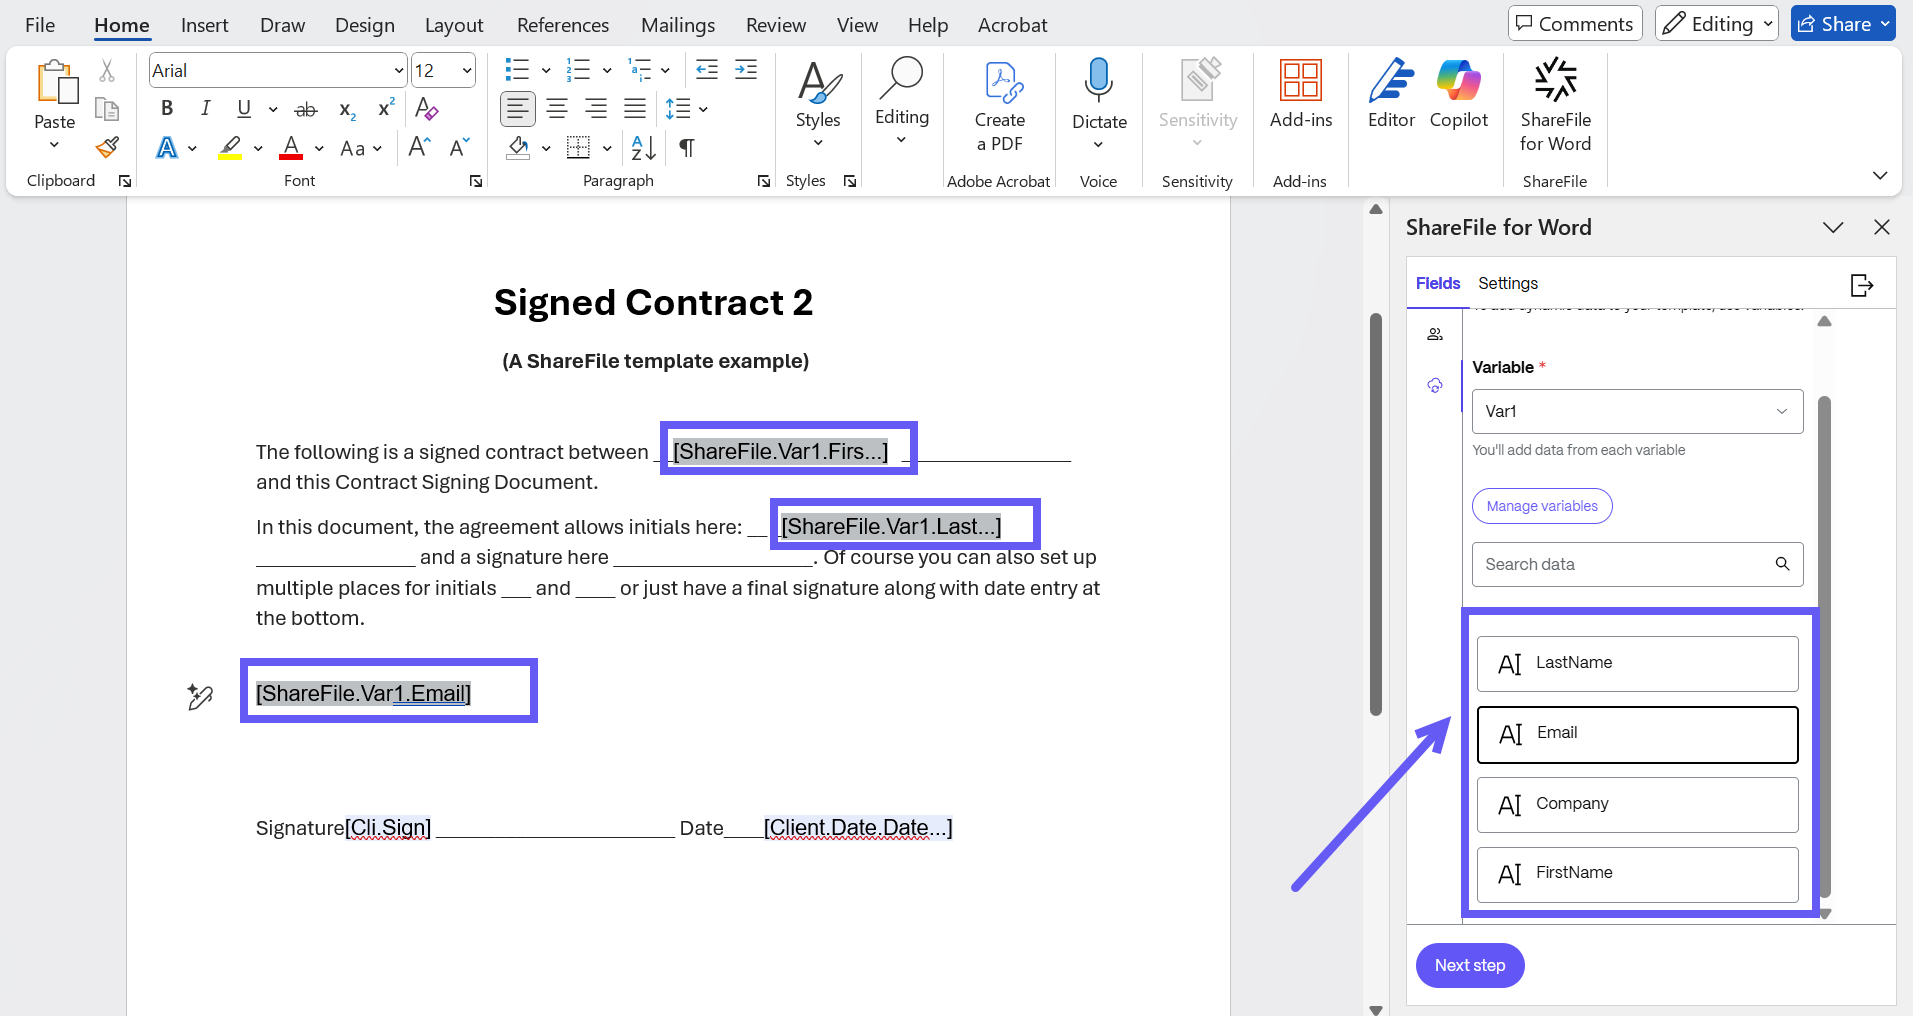
Once a variable is added, its attributes display as shown below. To add a variable field into the document template, place your cursor where you want the data to appear, then click on the relevant attribute in Add-in.
-
Repeat the process to add all necessary variable attributes into your template.
-
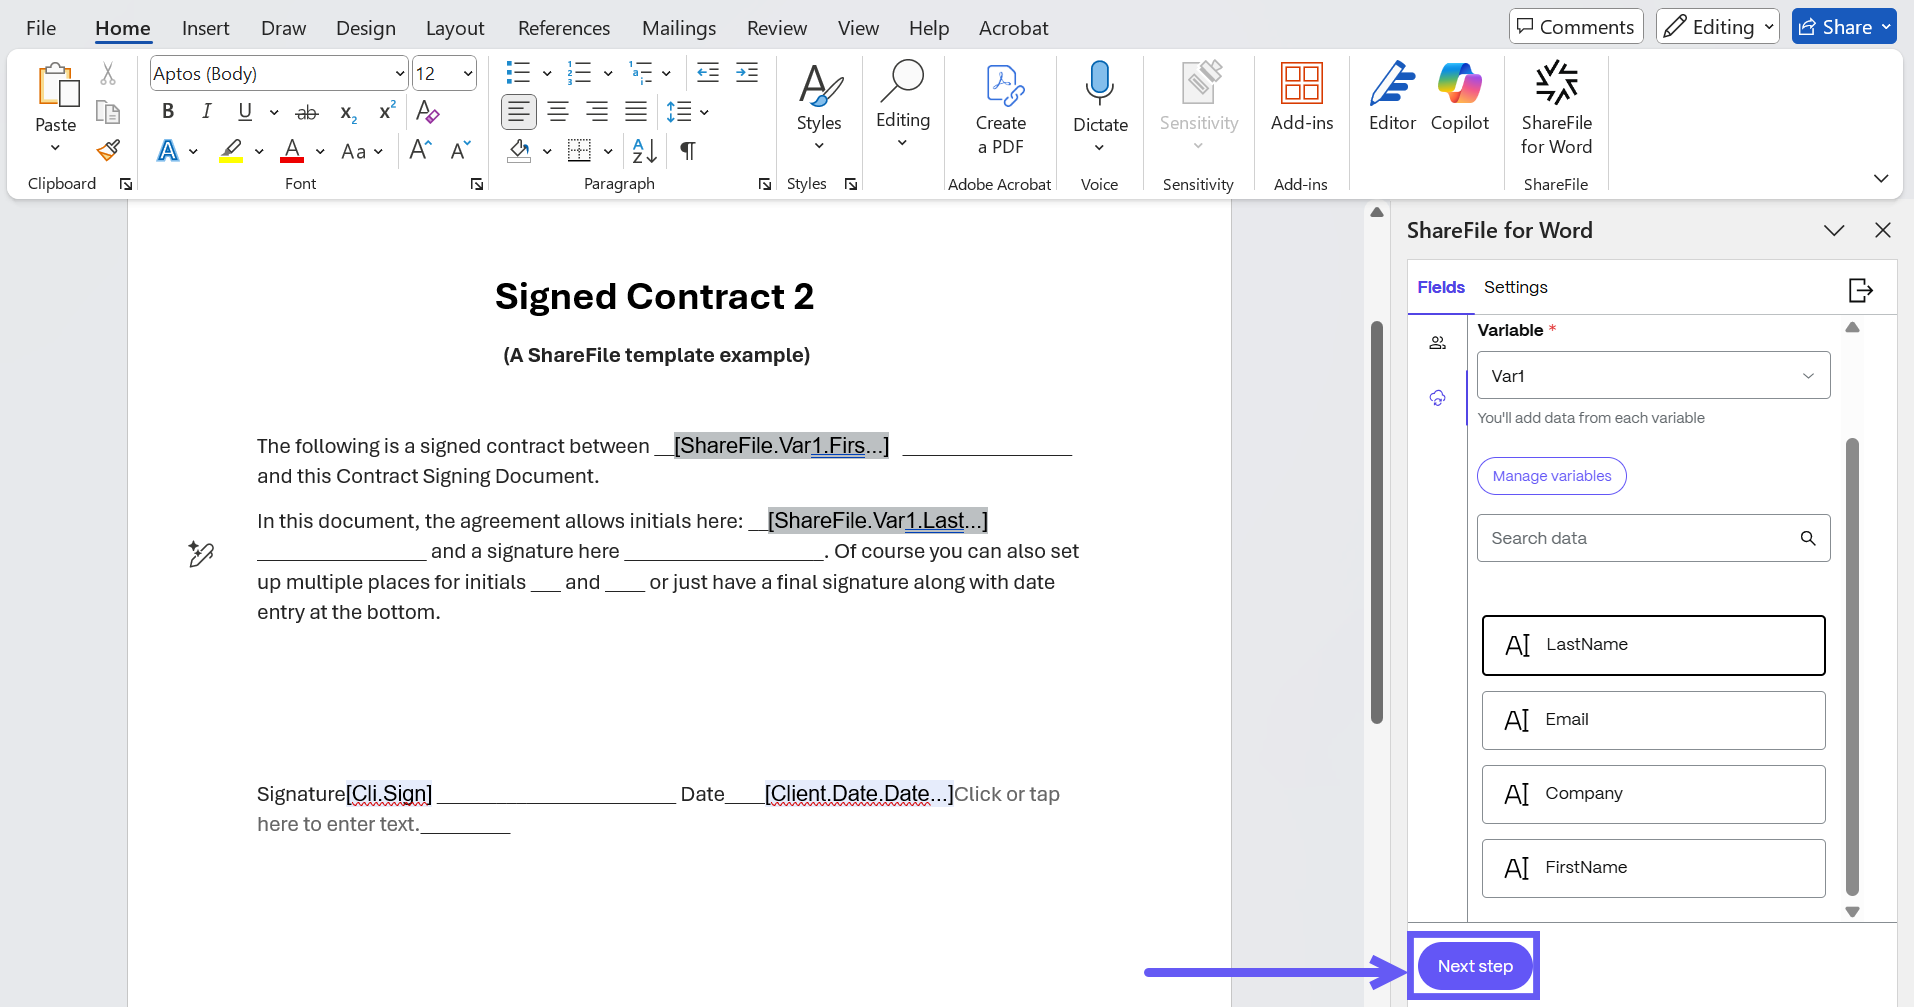
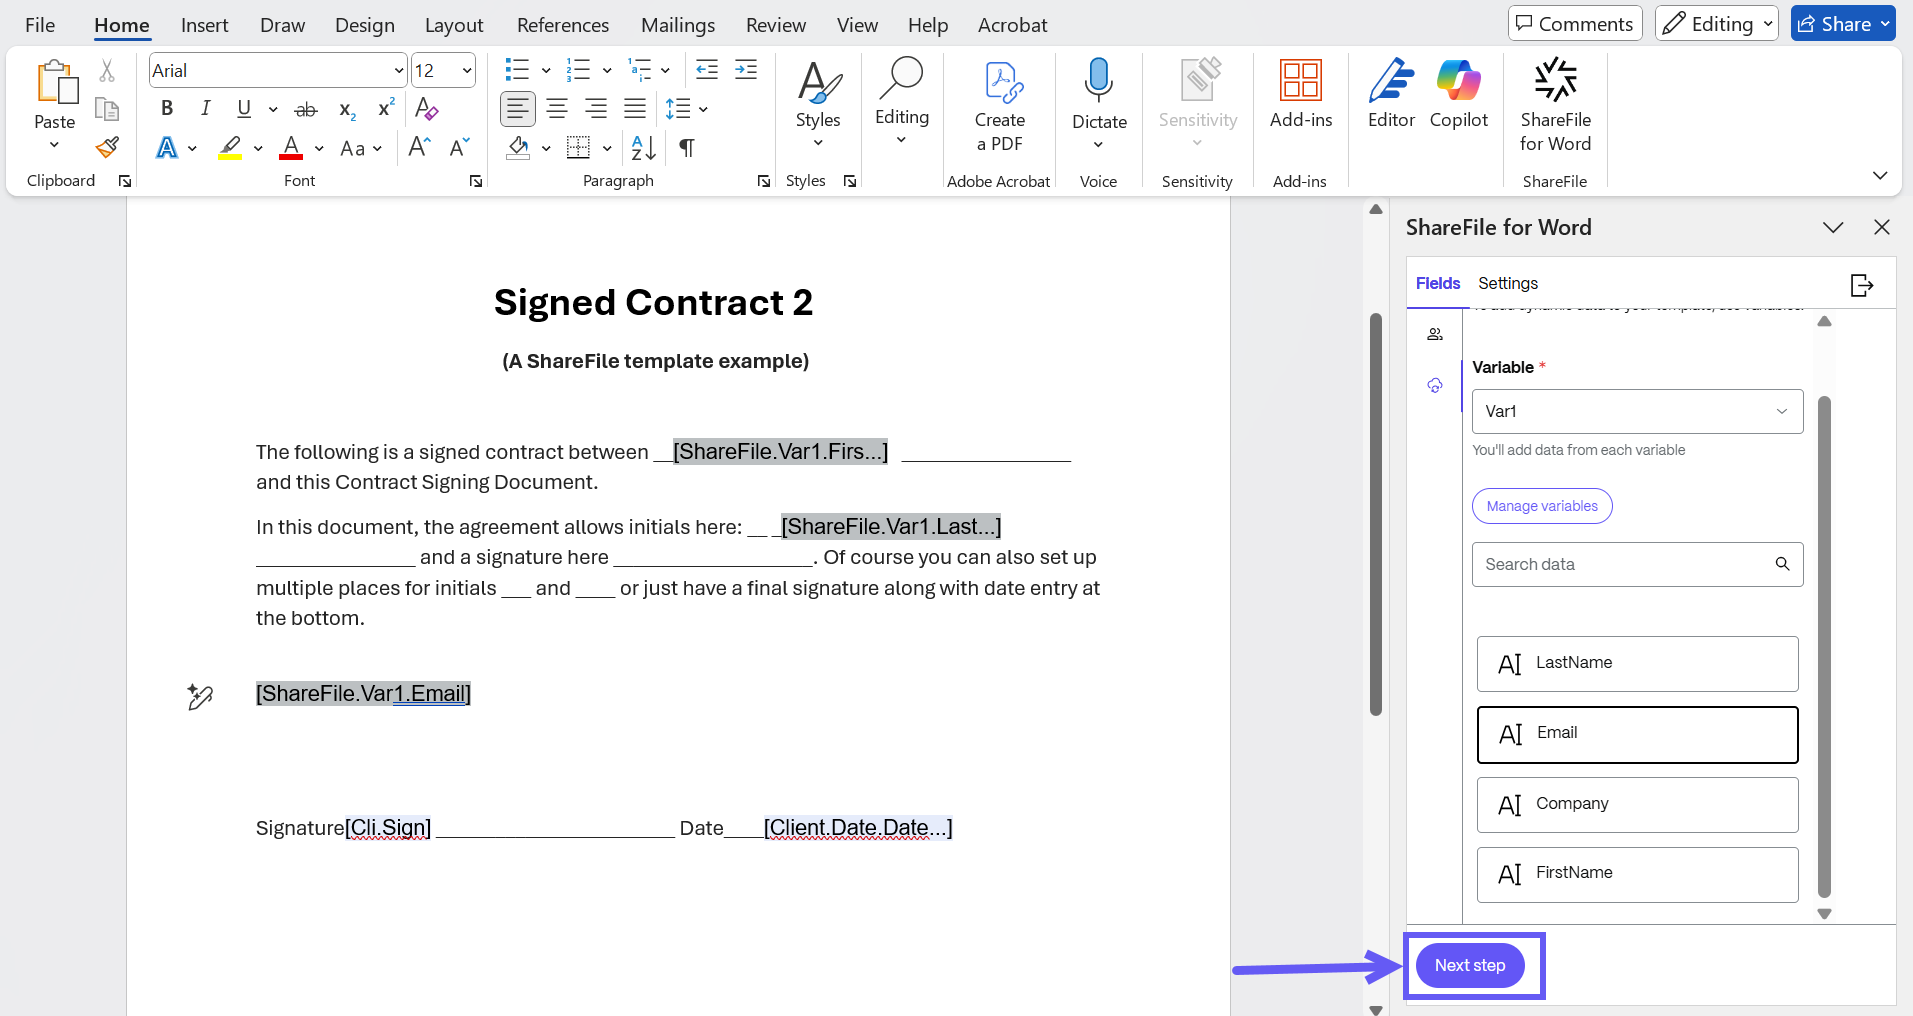
After adding all fields, click Next Step to move to the Settings tab.
-
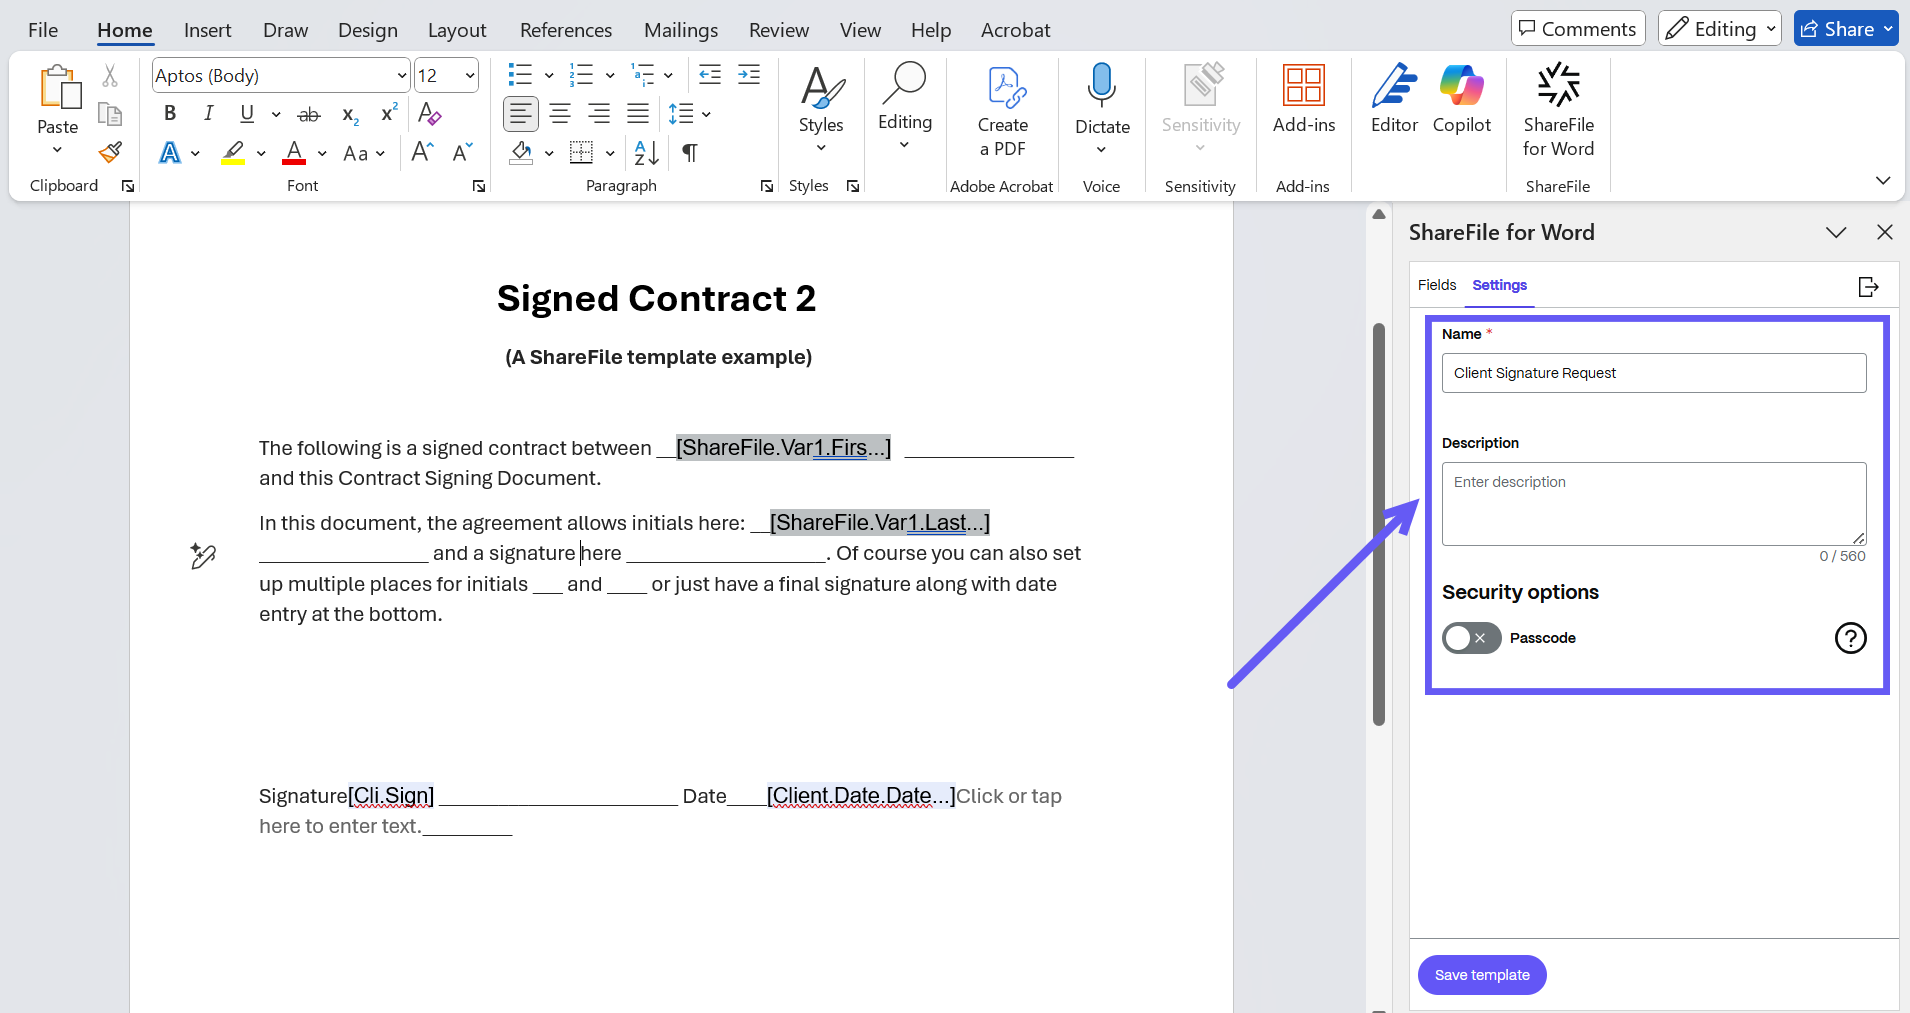
In the Settings tab, enter a name and description for your document template. You can also enable a security feature such as passcode protection.
-
Select Save Template. A new document template is created and saved in Template listing page in ShareFile.

-
You can click on Open in ShareFile to find the Newly created template in ShareFile.
Send a Docgen Template with variables for Signature
-
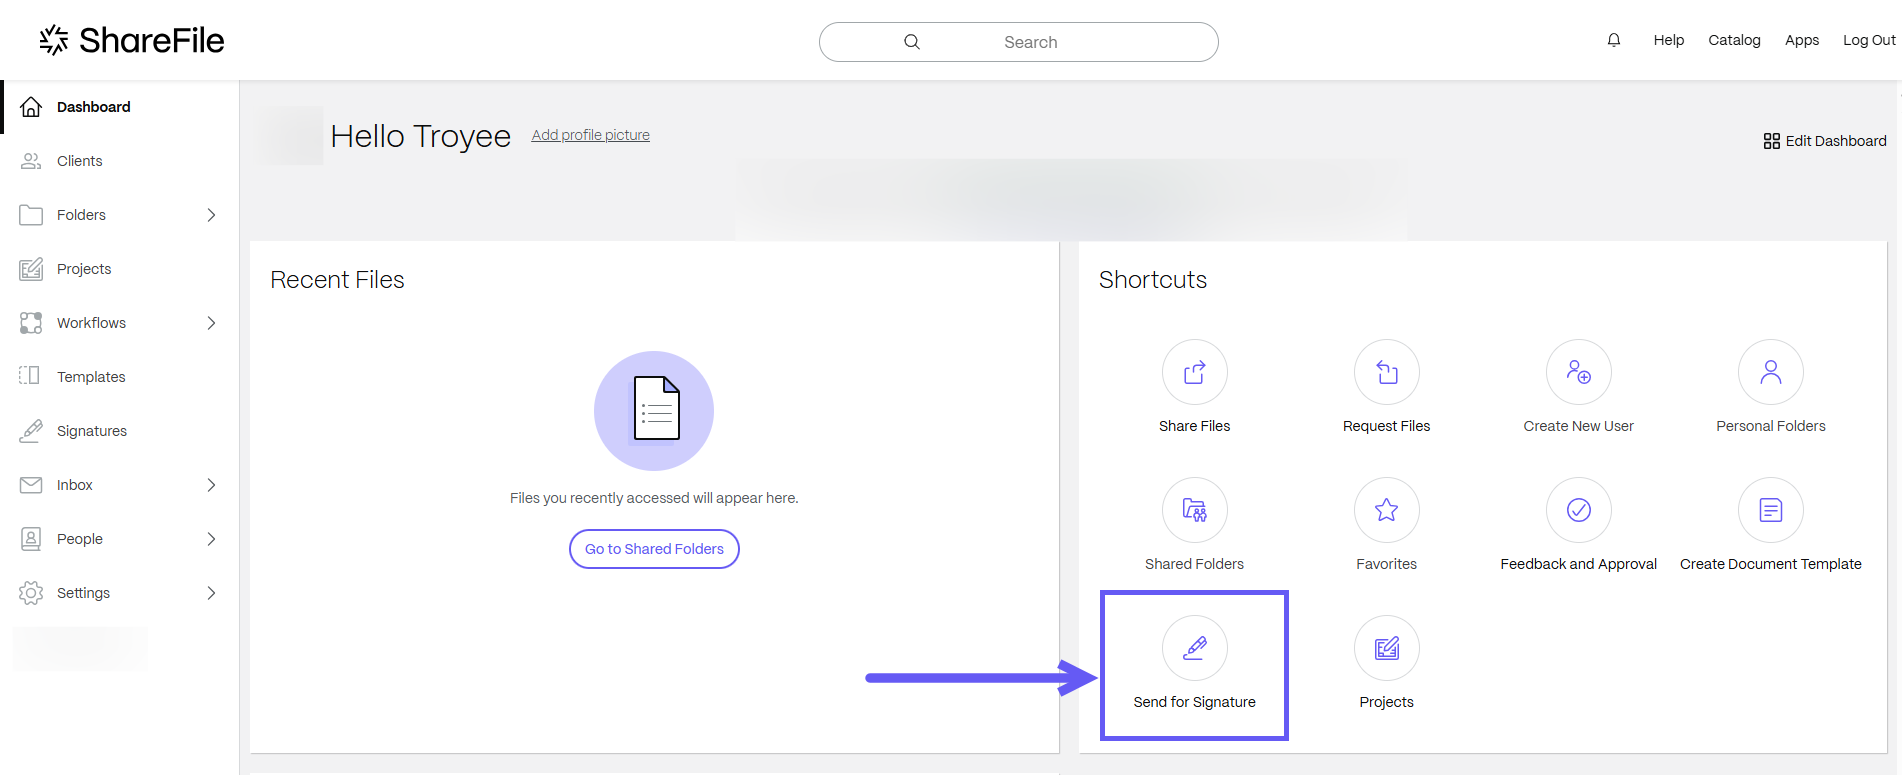
Login to your ShareFile account and from the dashboard, select the Send for Signature tab and the Signature request window opens.
-
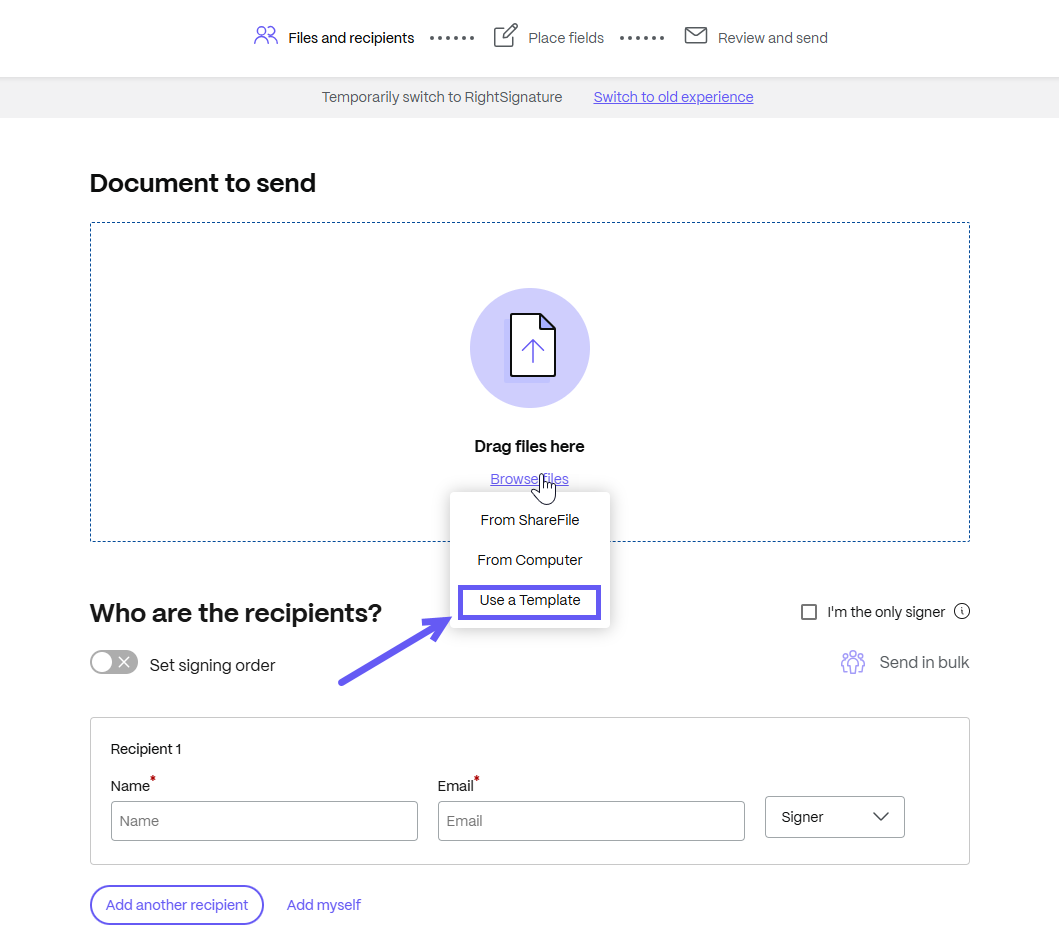
Under the Documents to send section at the top of the window, select the browse files option and from the drop-down menu, click on the Use a Template option.
-
The Select a template window is displayed. You can choose a document template that you created in ShareFile.
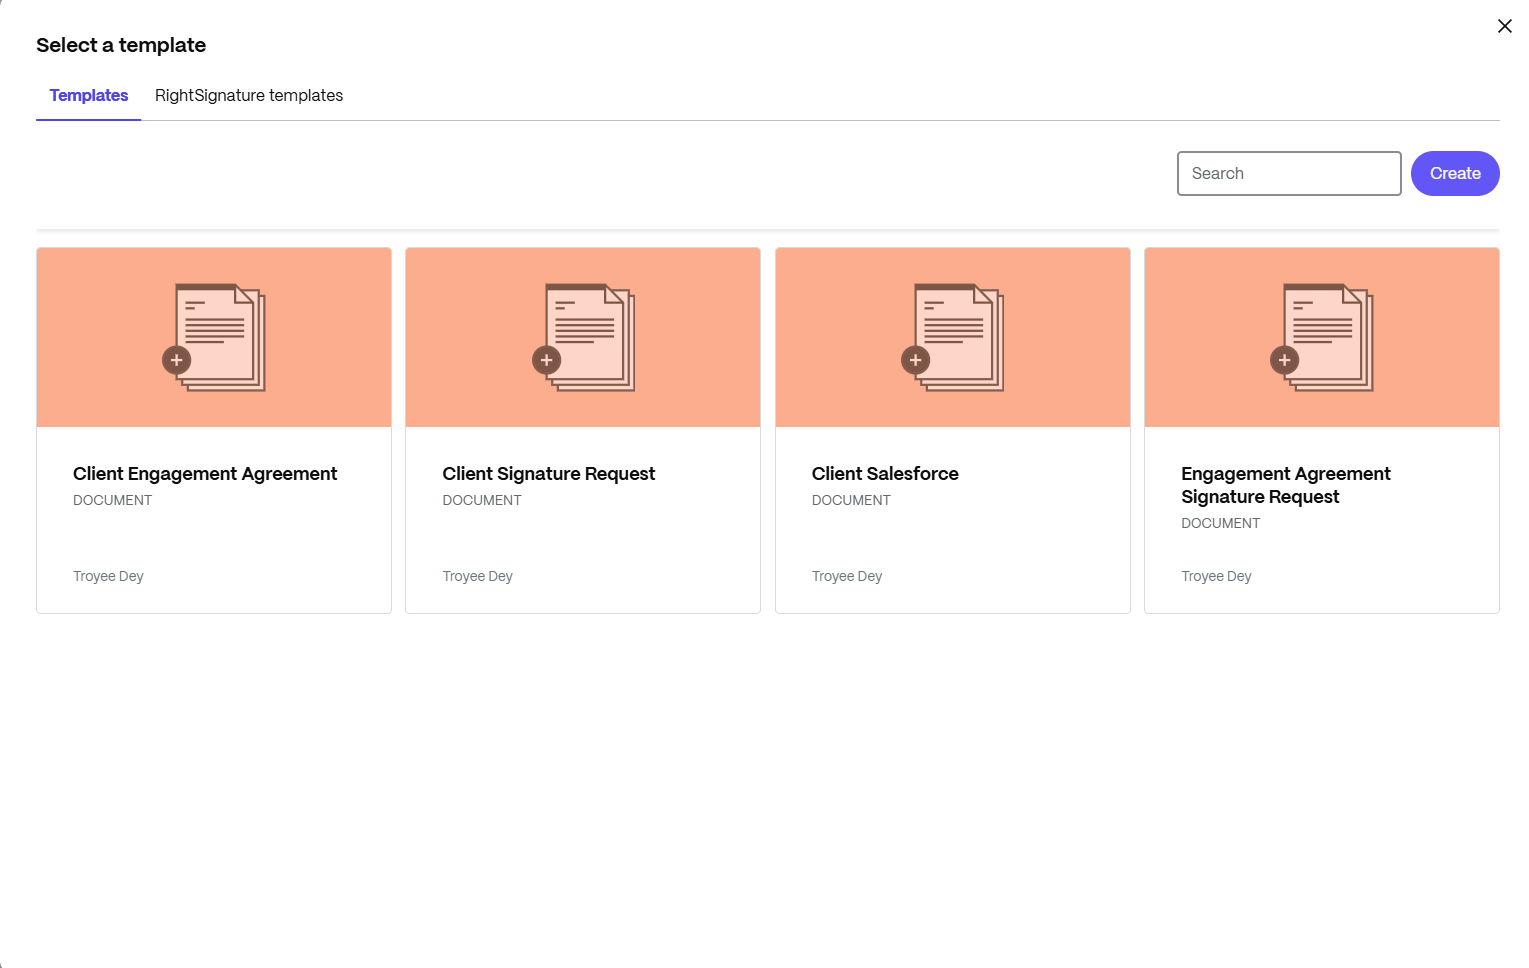
NOTE:
Variables are supported only for New Document template created in ShareFile.
-
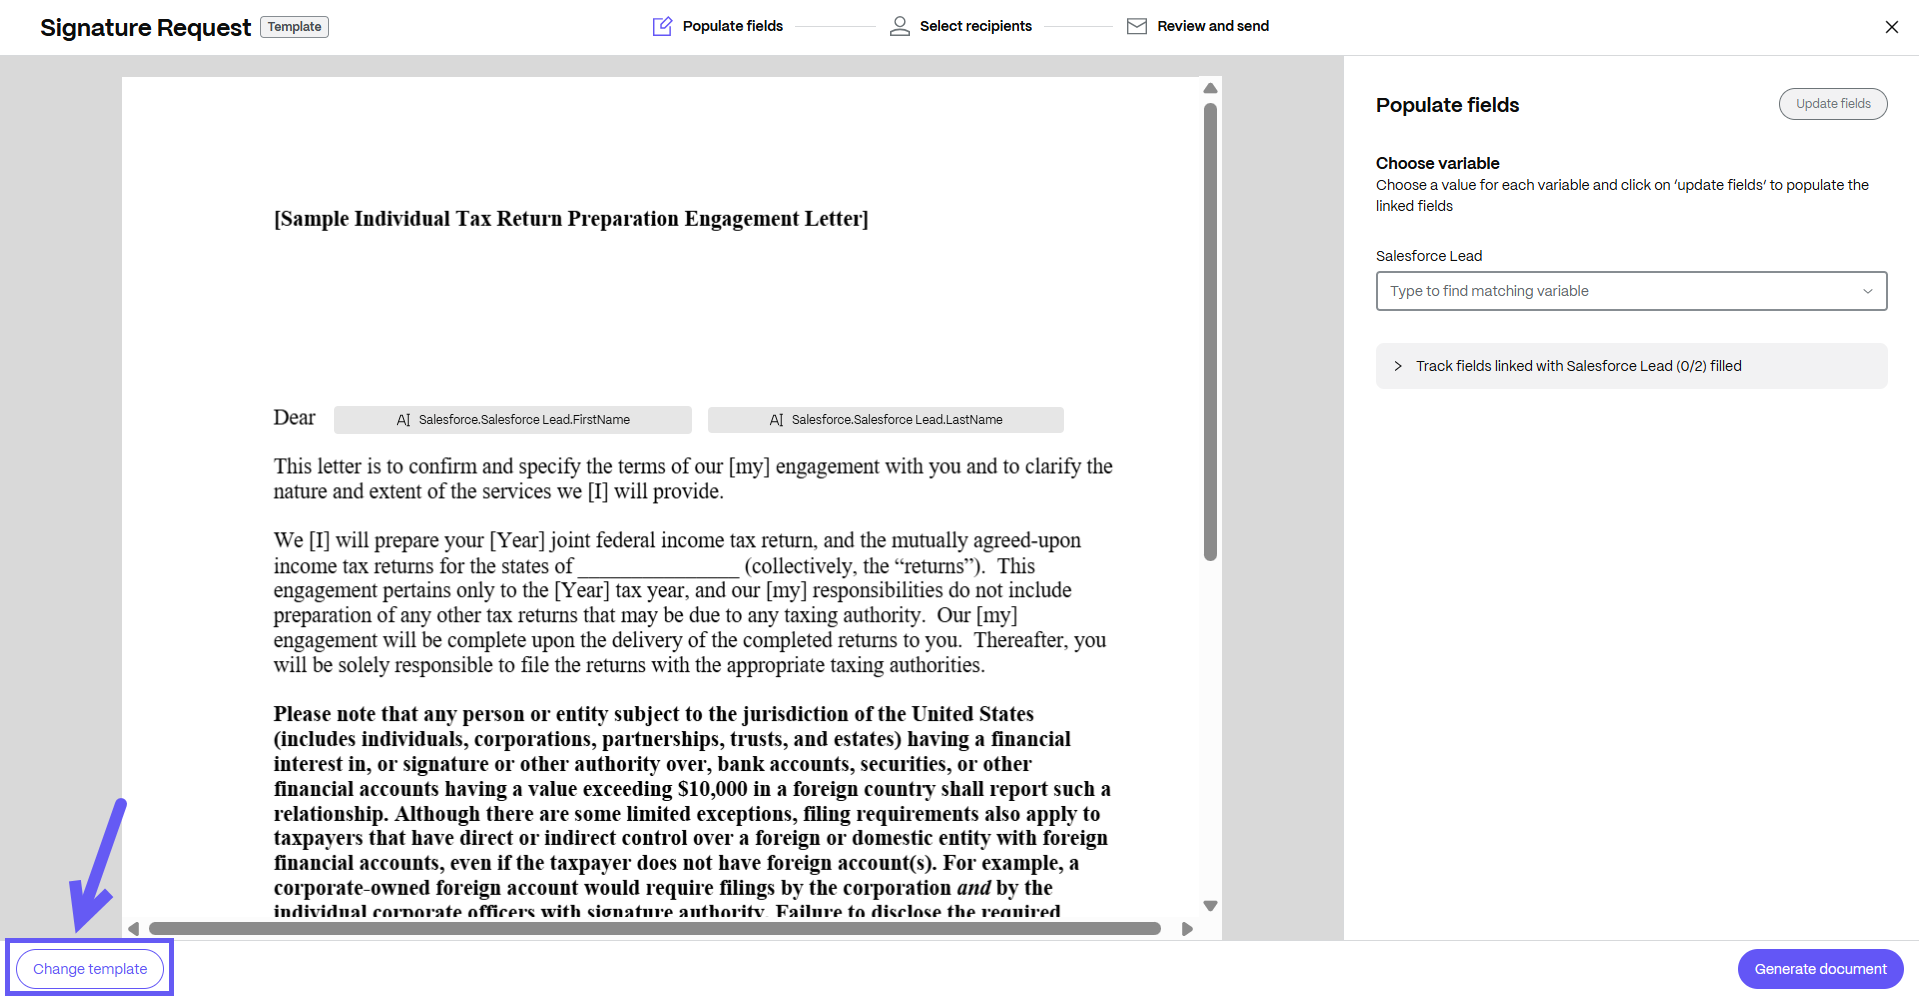
The Signature Request window opens and a document is created based on the template you have chosen. You can choose a different template by selecting the Change template button at the bottom of the screen as shown below.
-
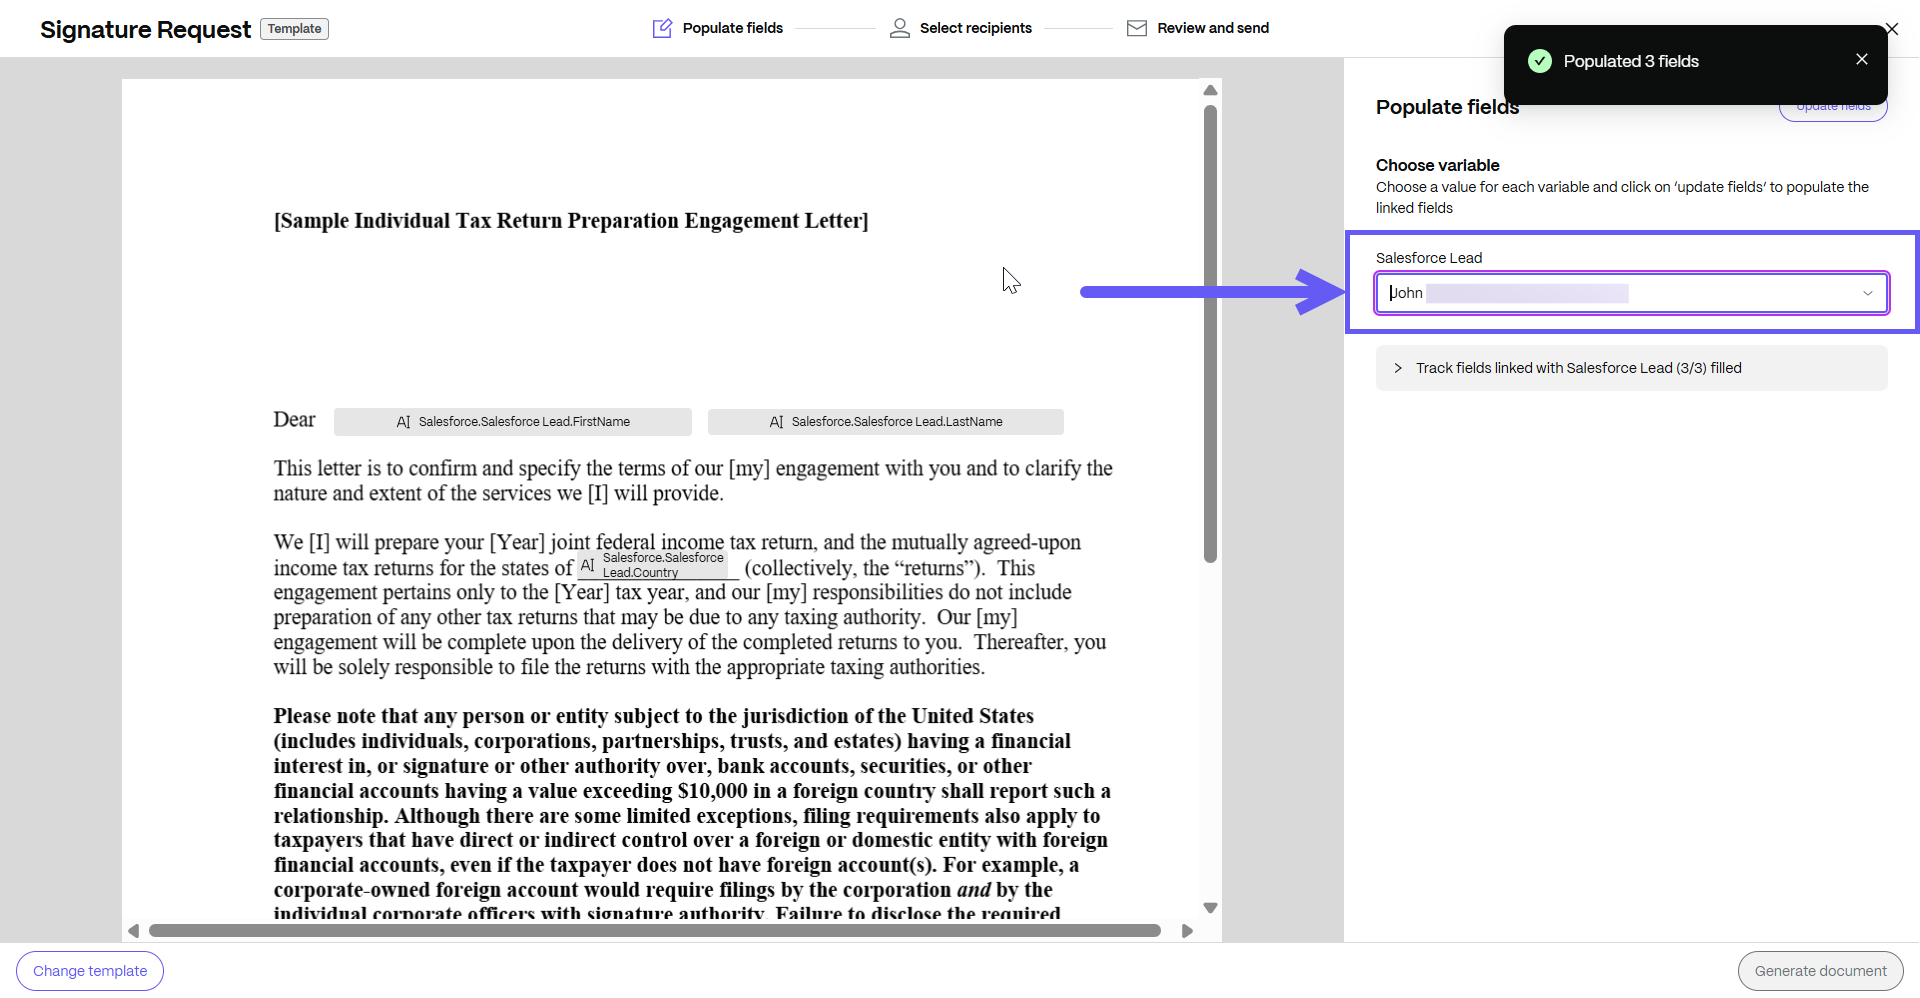
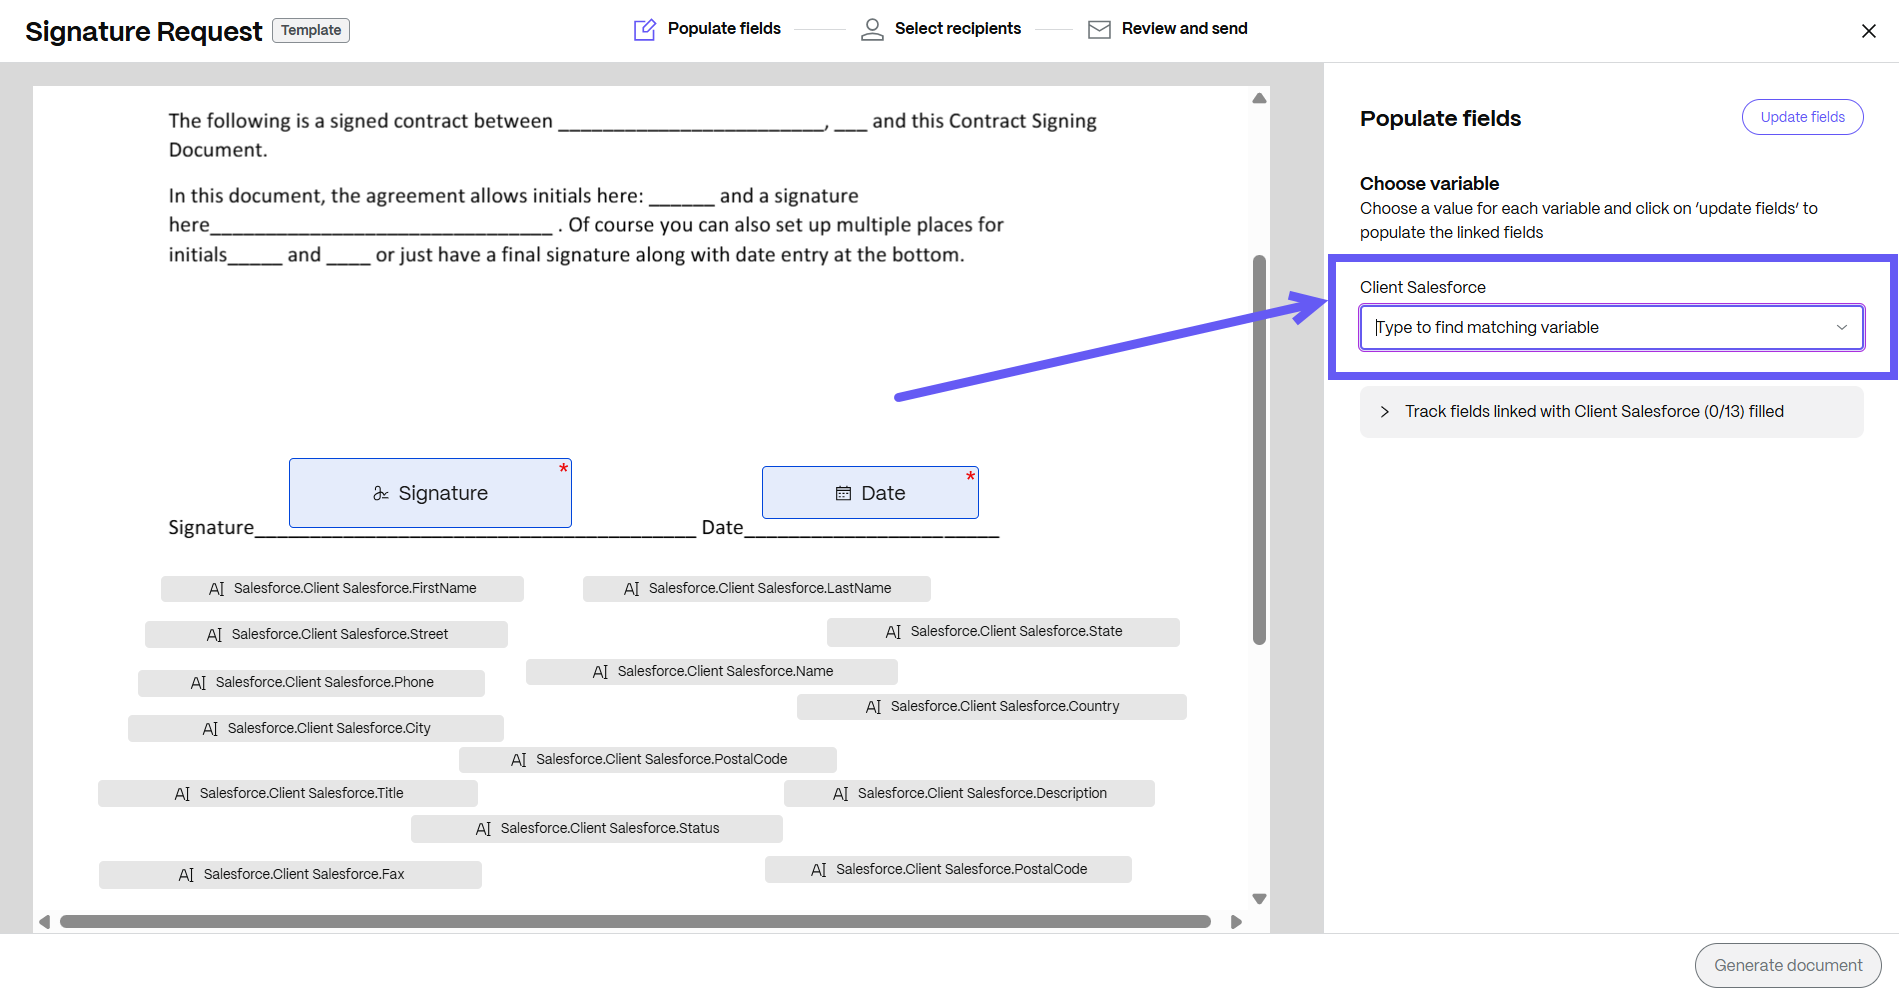
Enter the value for each variable, then click on Update fields so that all the fields associated with that variable can be automatically filled. After selecting the variable, the Populate message displays.
-
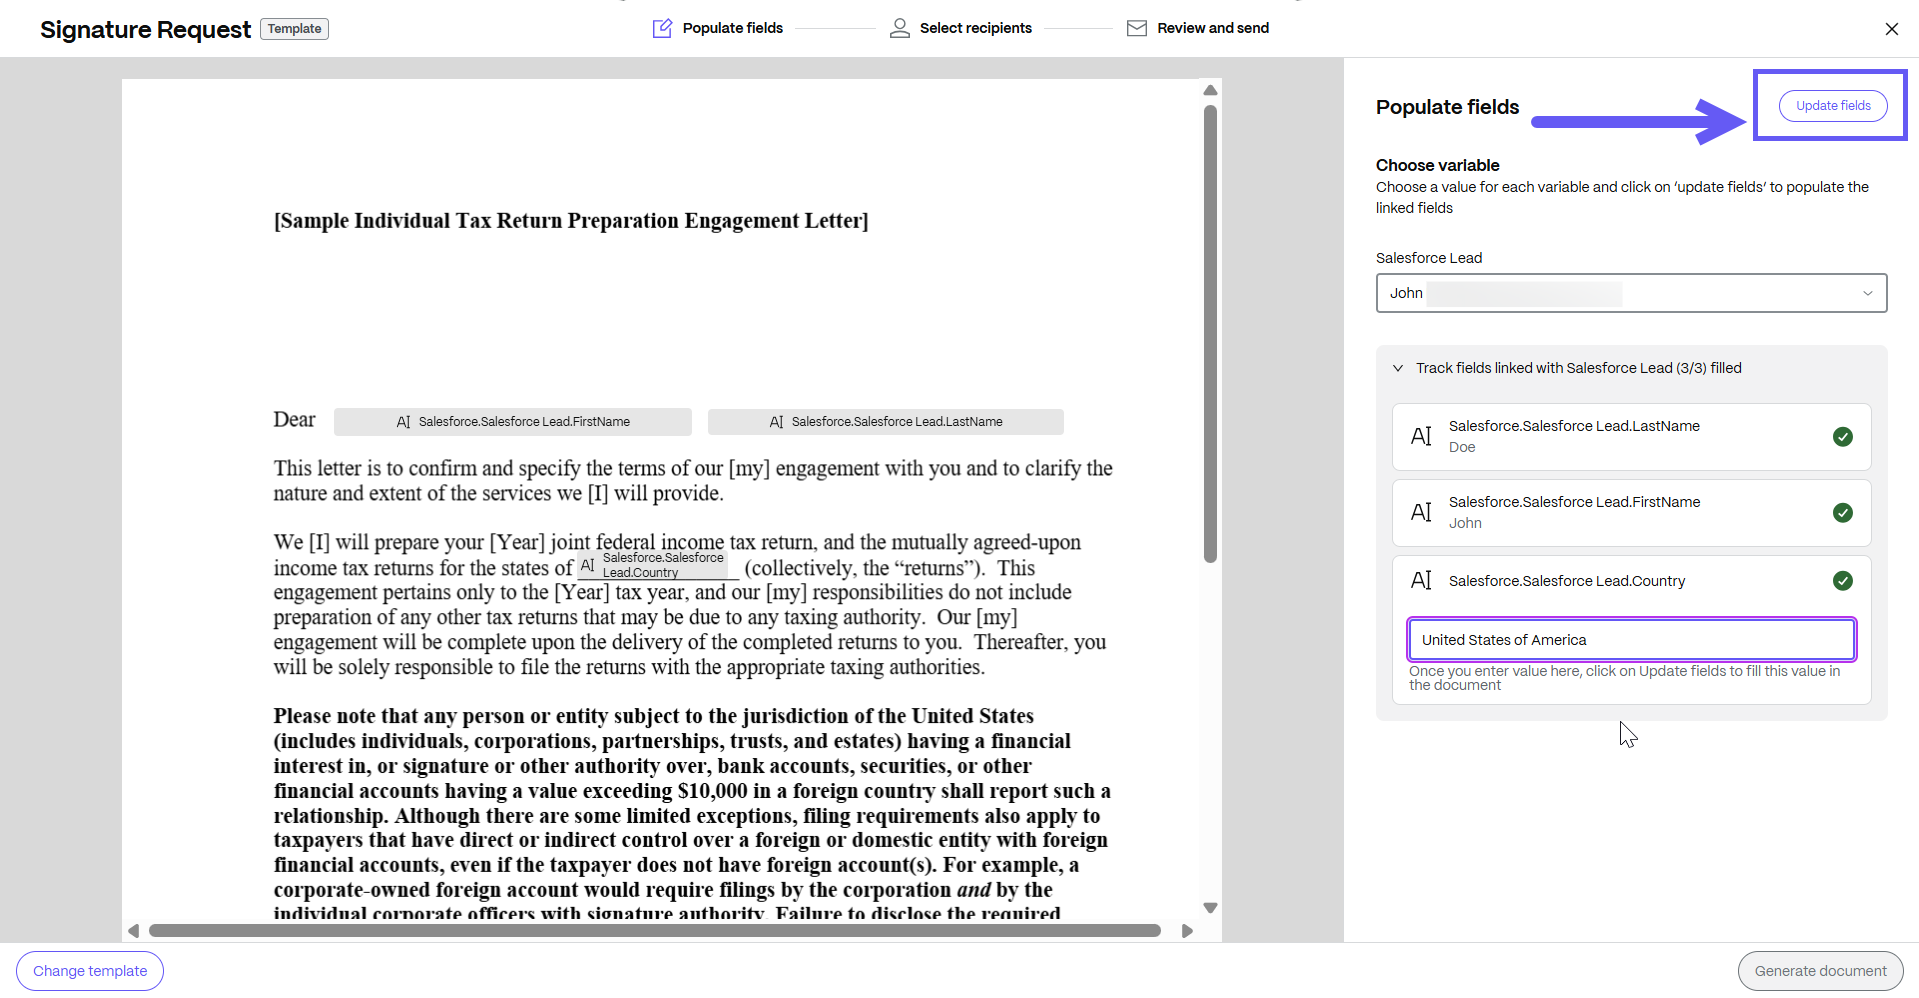
Click on Track fields to view all the fields that are auto filled. If any edits are required or if any information is missing, user can manually edit the fields before updating the document as shown below.

-
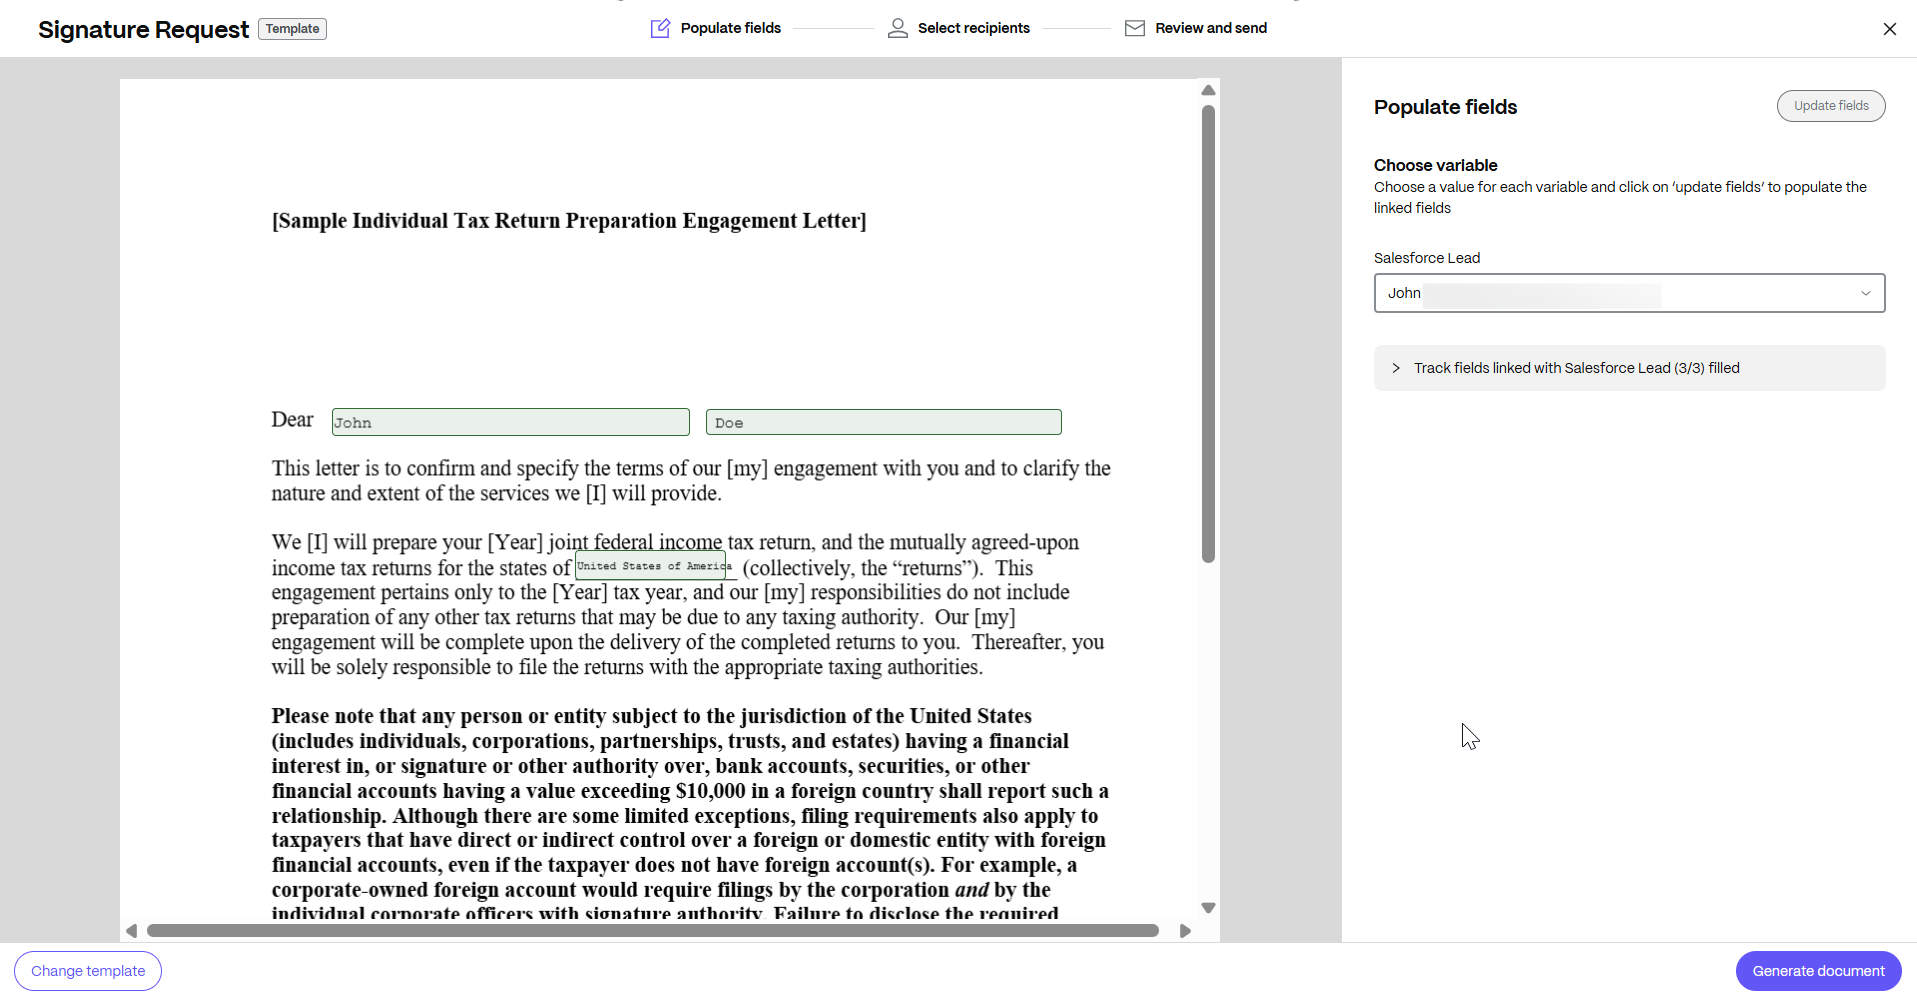
After entering the new values, click on Update fields.
-
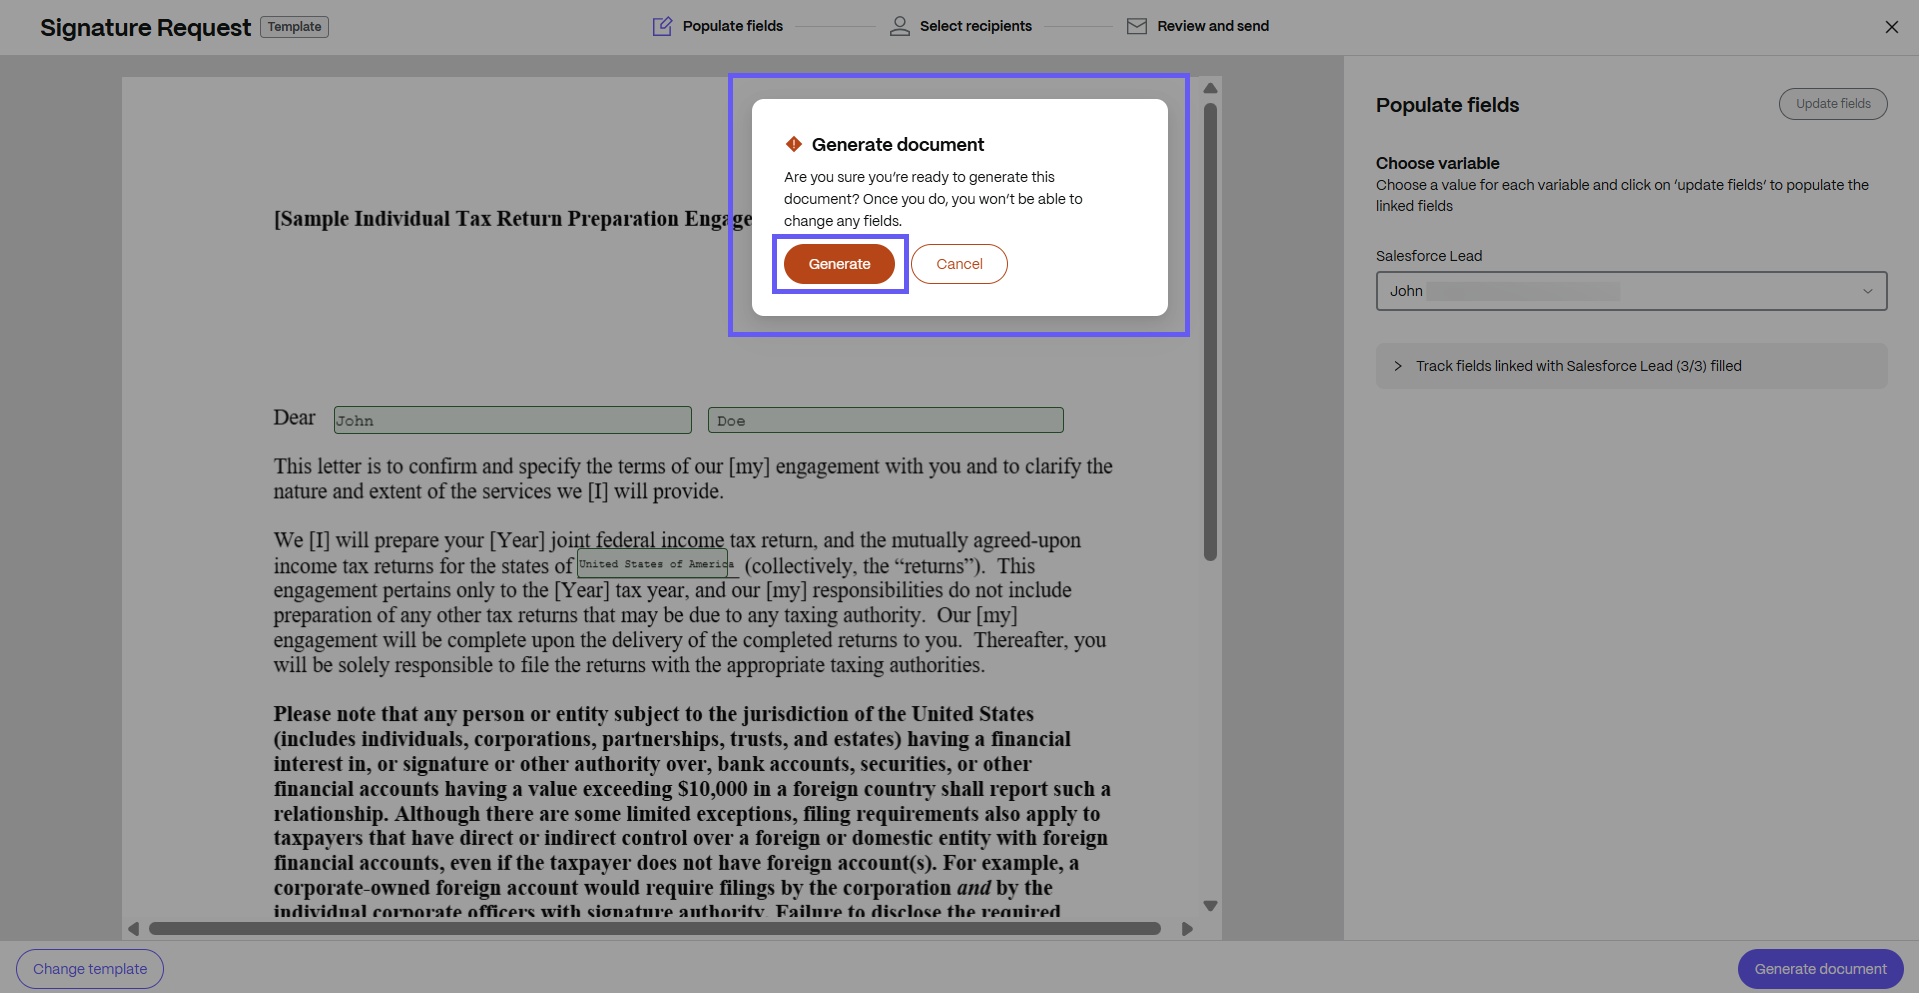
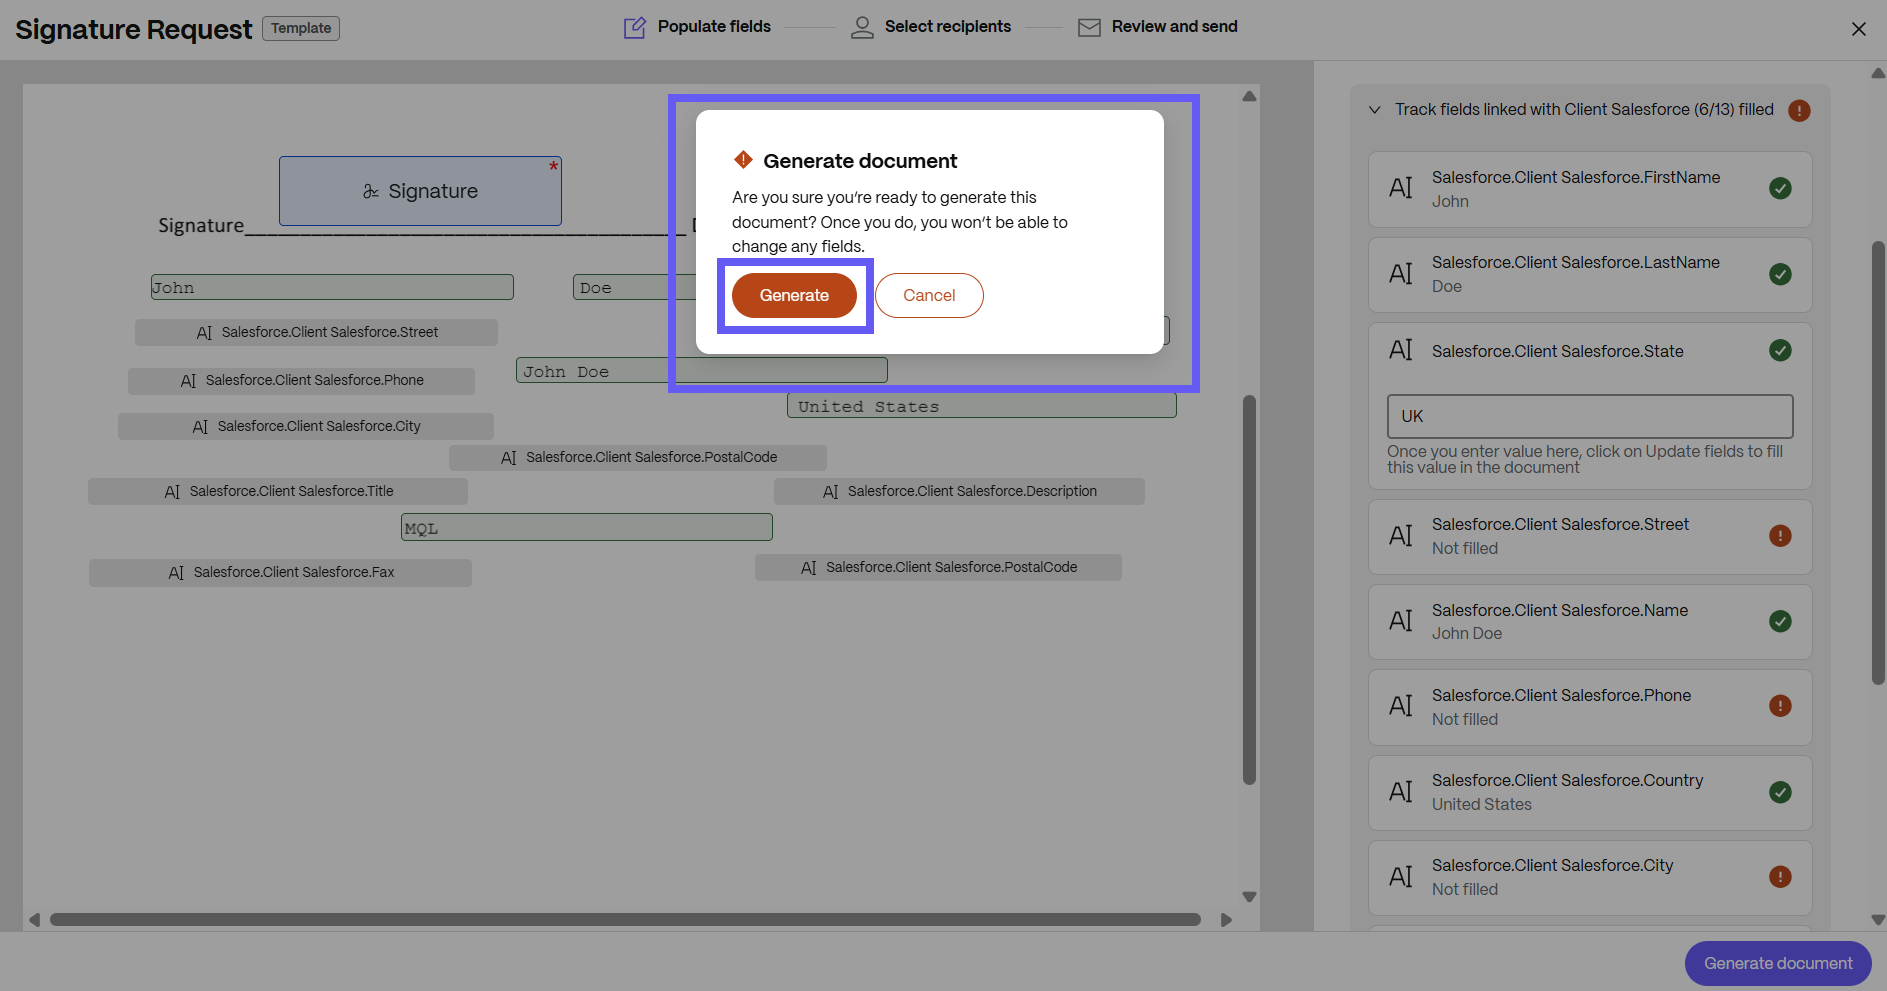
After all the fields populated, select Generate document. Click Generate, and once selected, you cannot edit any fields.
-
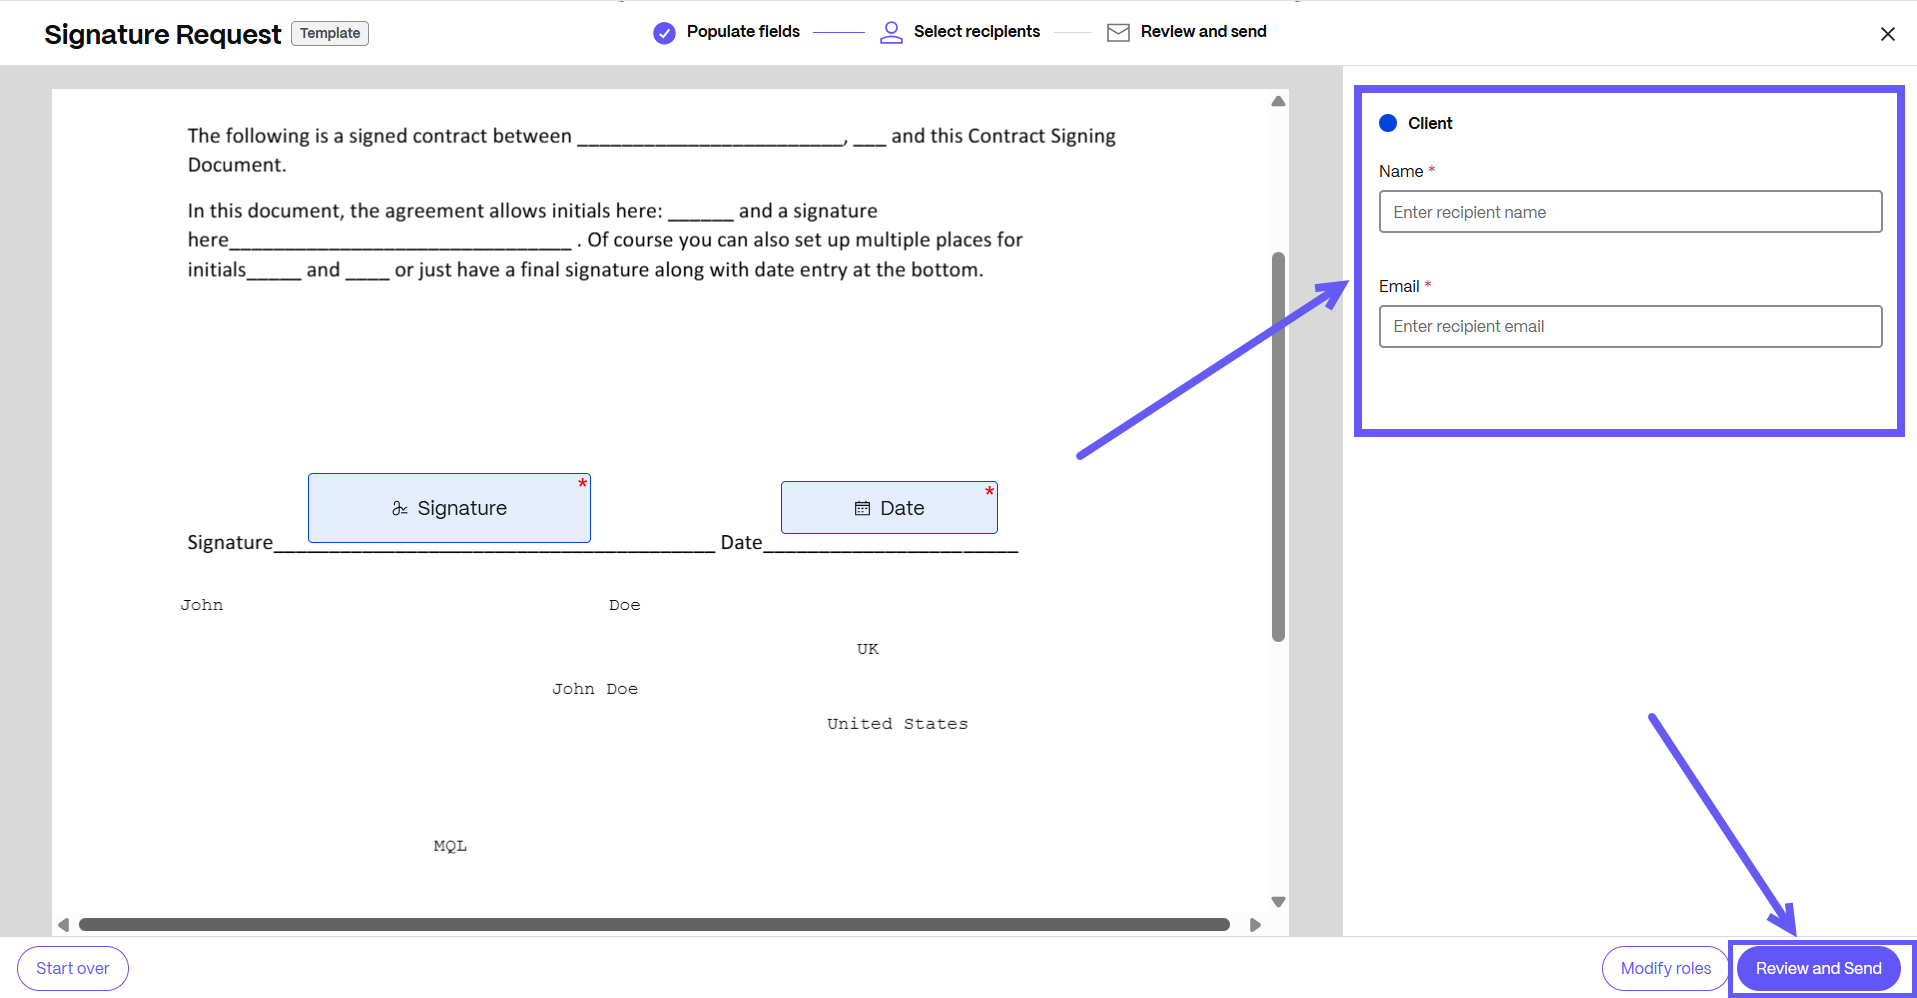
Enter the name and email for each recipient. Select Review and Send.
-
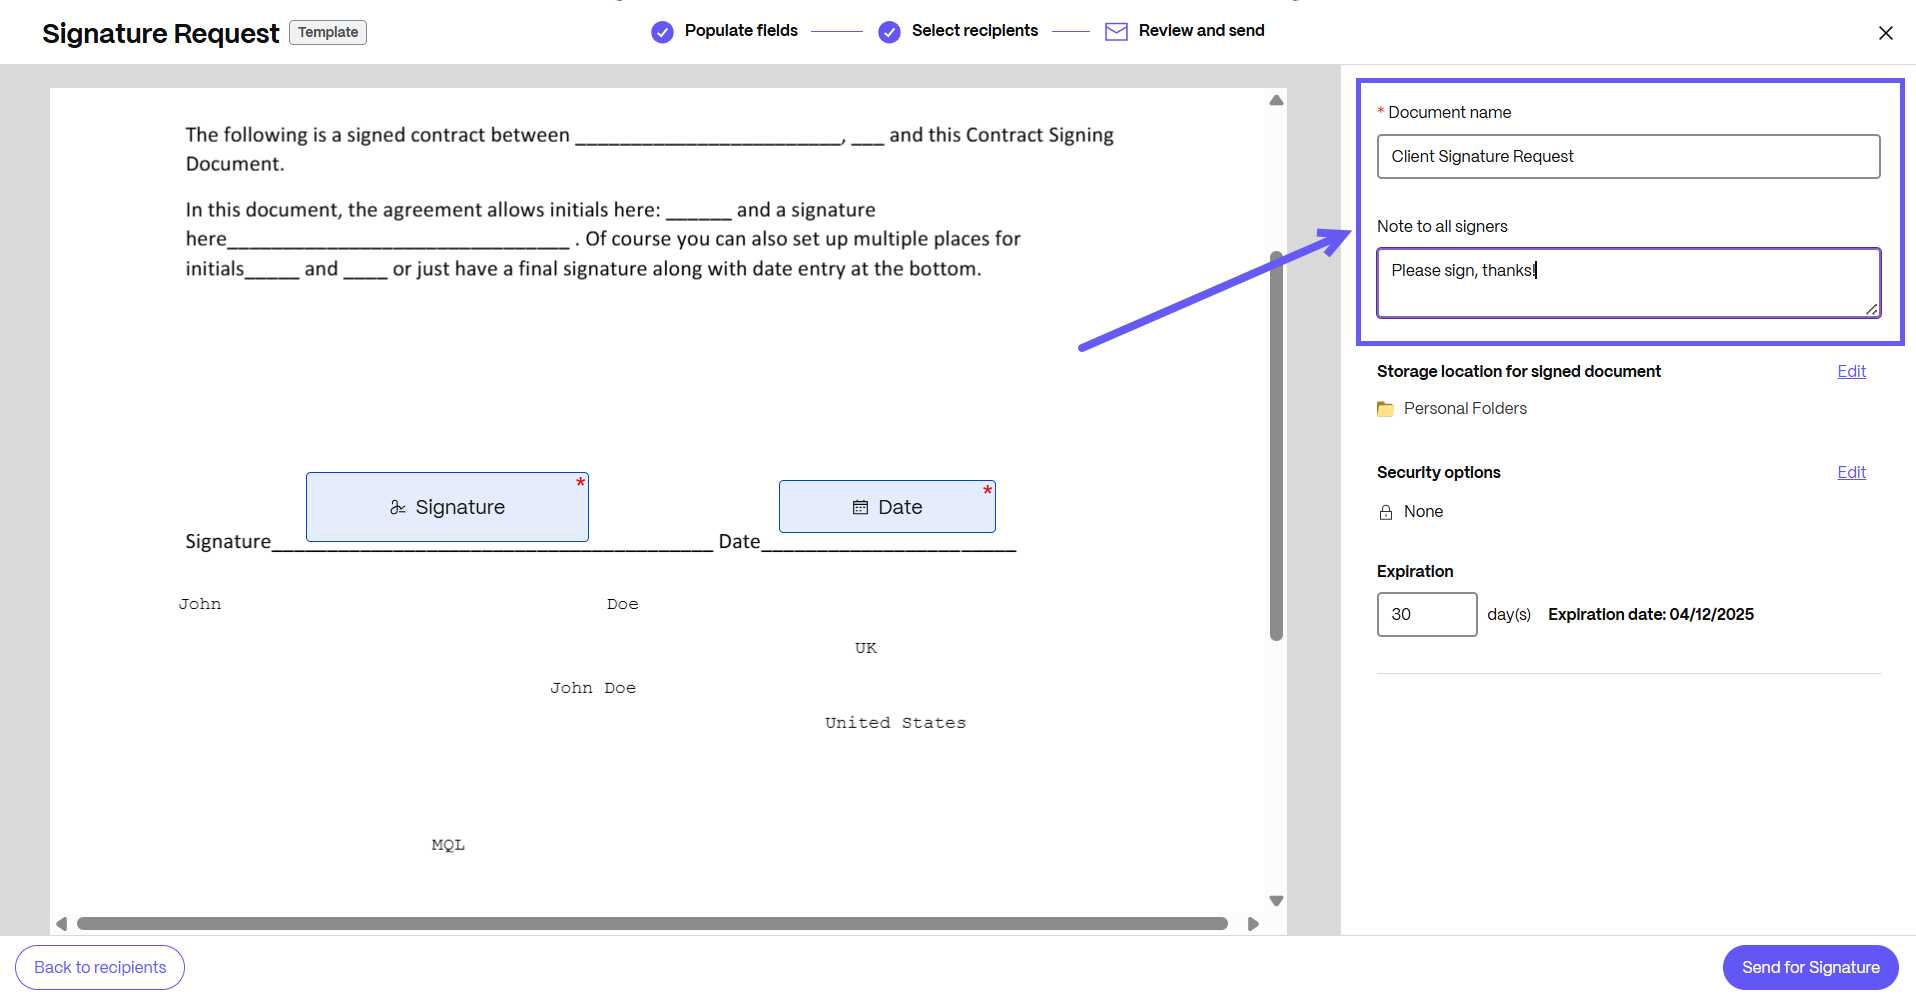
You can edit the document name and add a note that is sent to all signers. You can change the location for storing the signed document. You can also update the security options for the document.
-
Knowledge based authentication - requires signers to verify their identity with a knowledge-based quiz. Each signer must independently verify before signing the document.
-
Passcode - requires recipients to enter a 5-digit passcode to access documents.
-
-
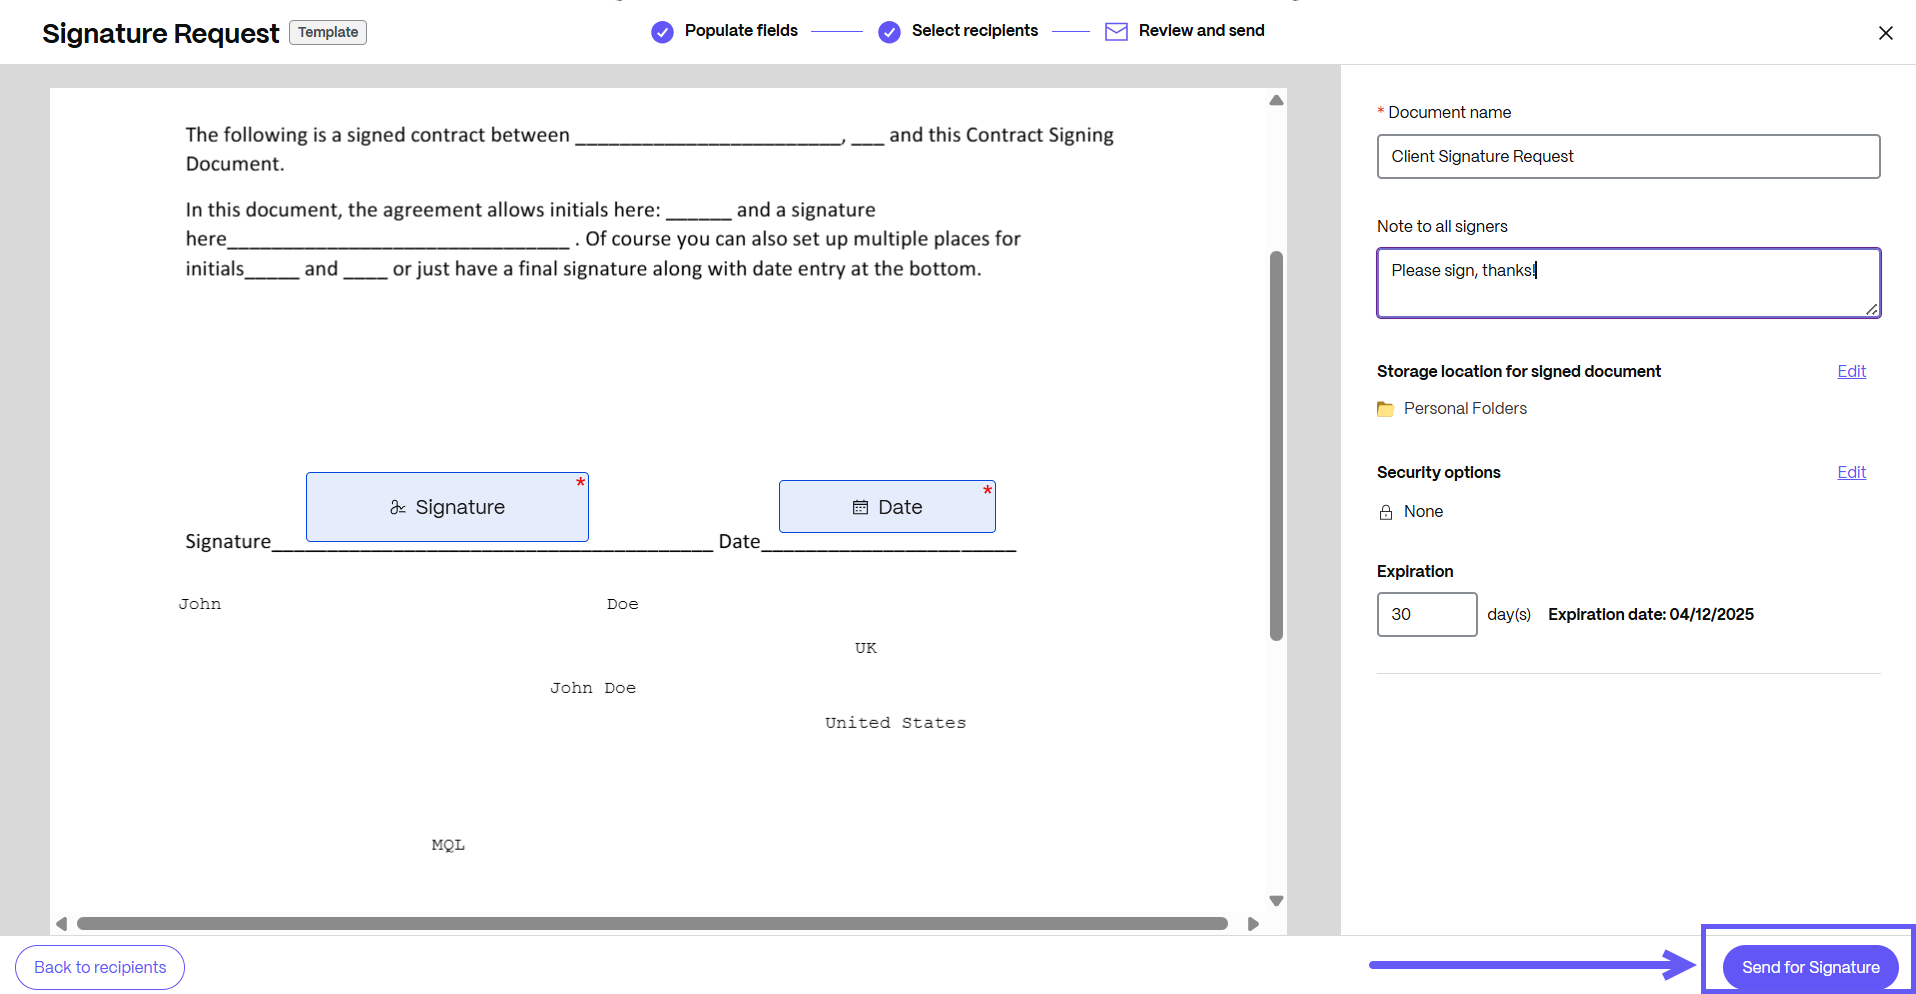
Your document is now ready to be sent for signature. Select Send for Signature.
-
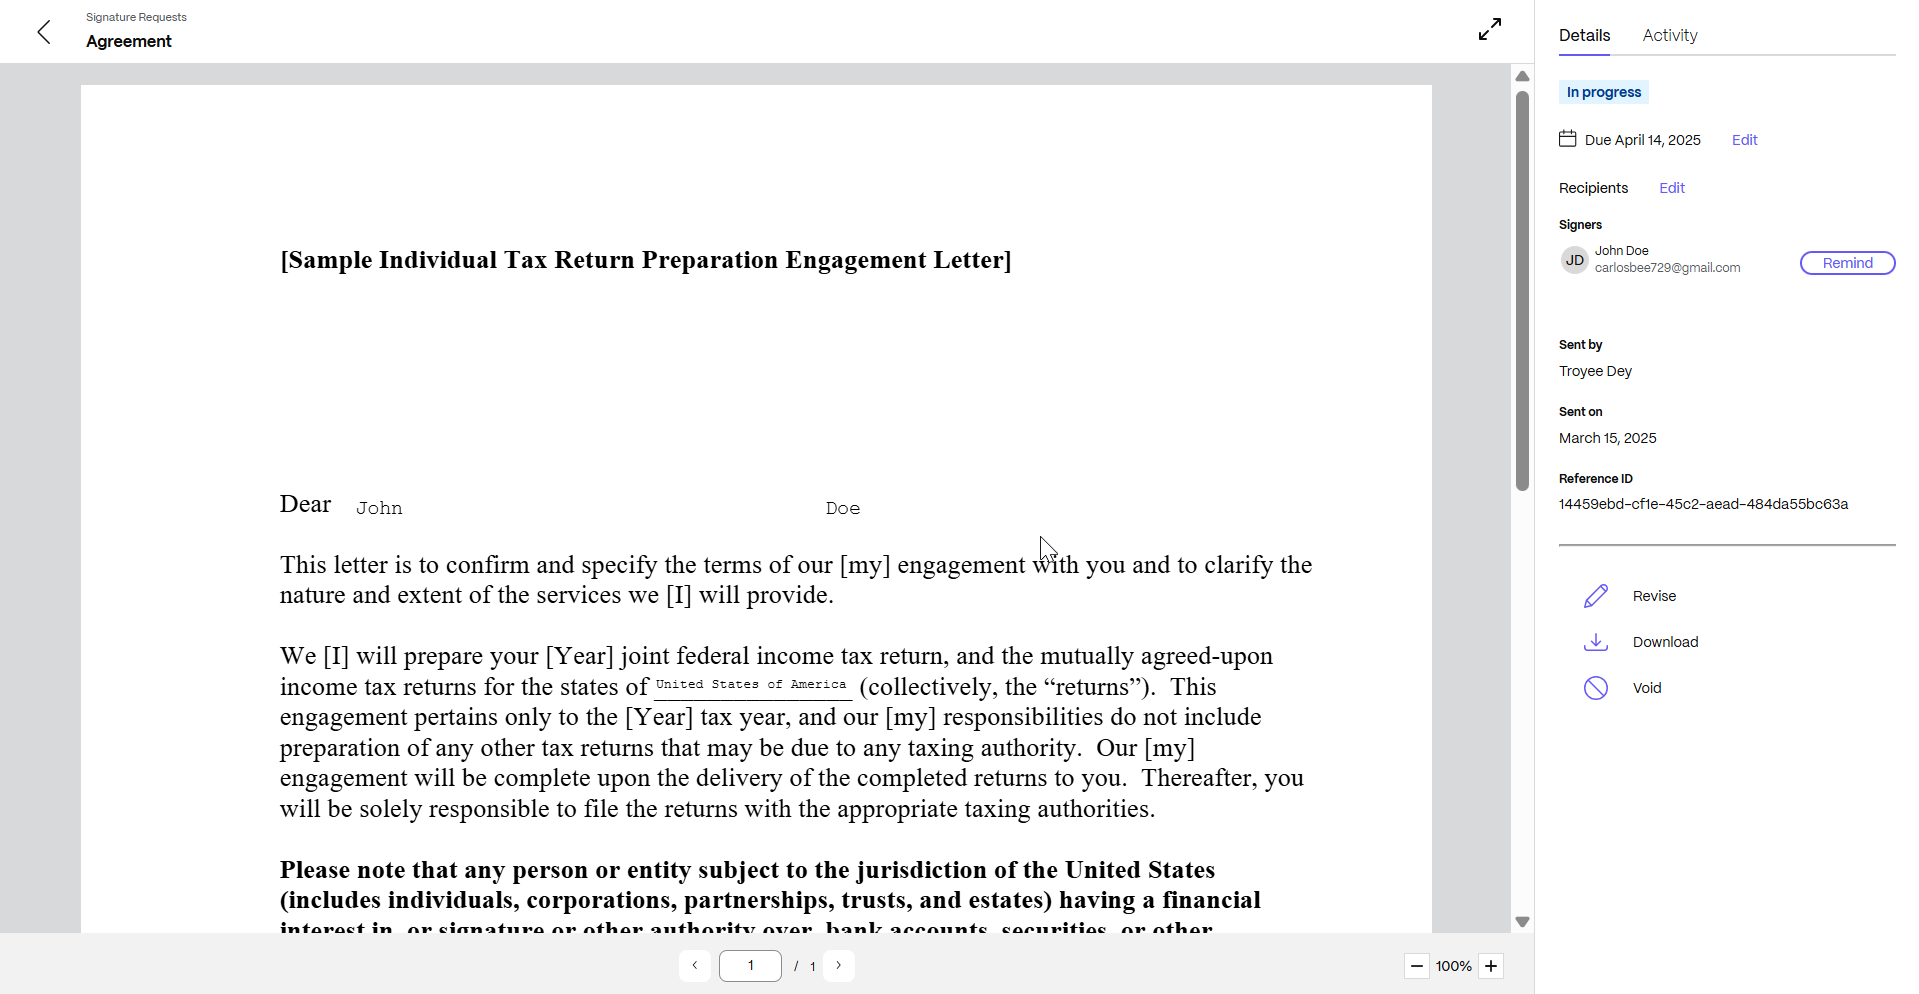
The signature request is sent, and the notification Sent signature request displays as shown below.
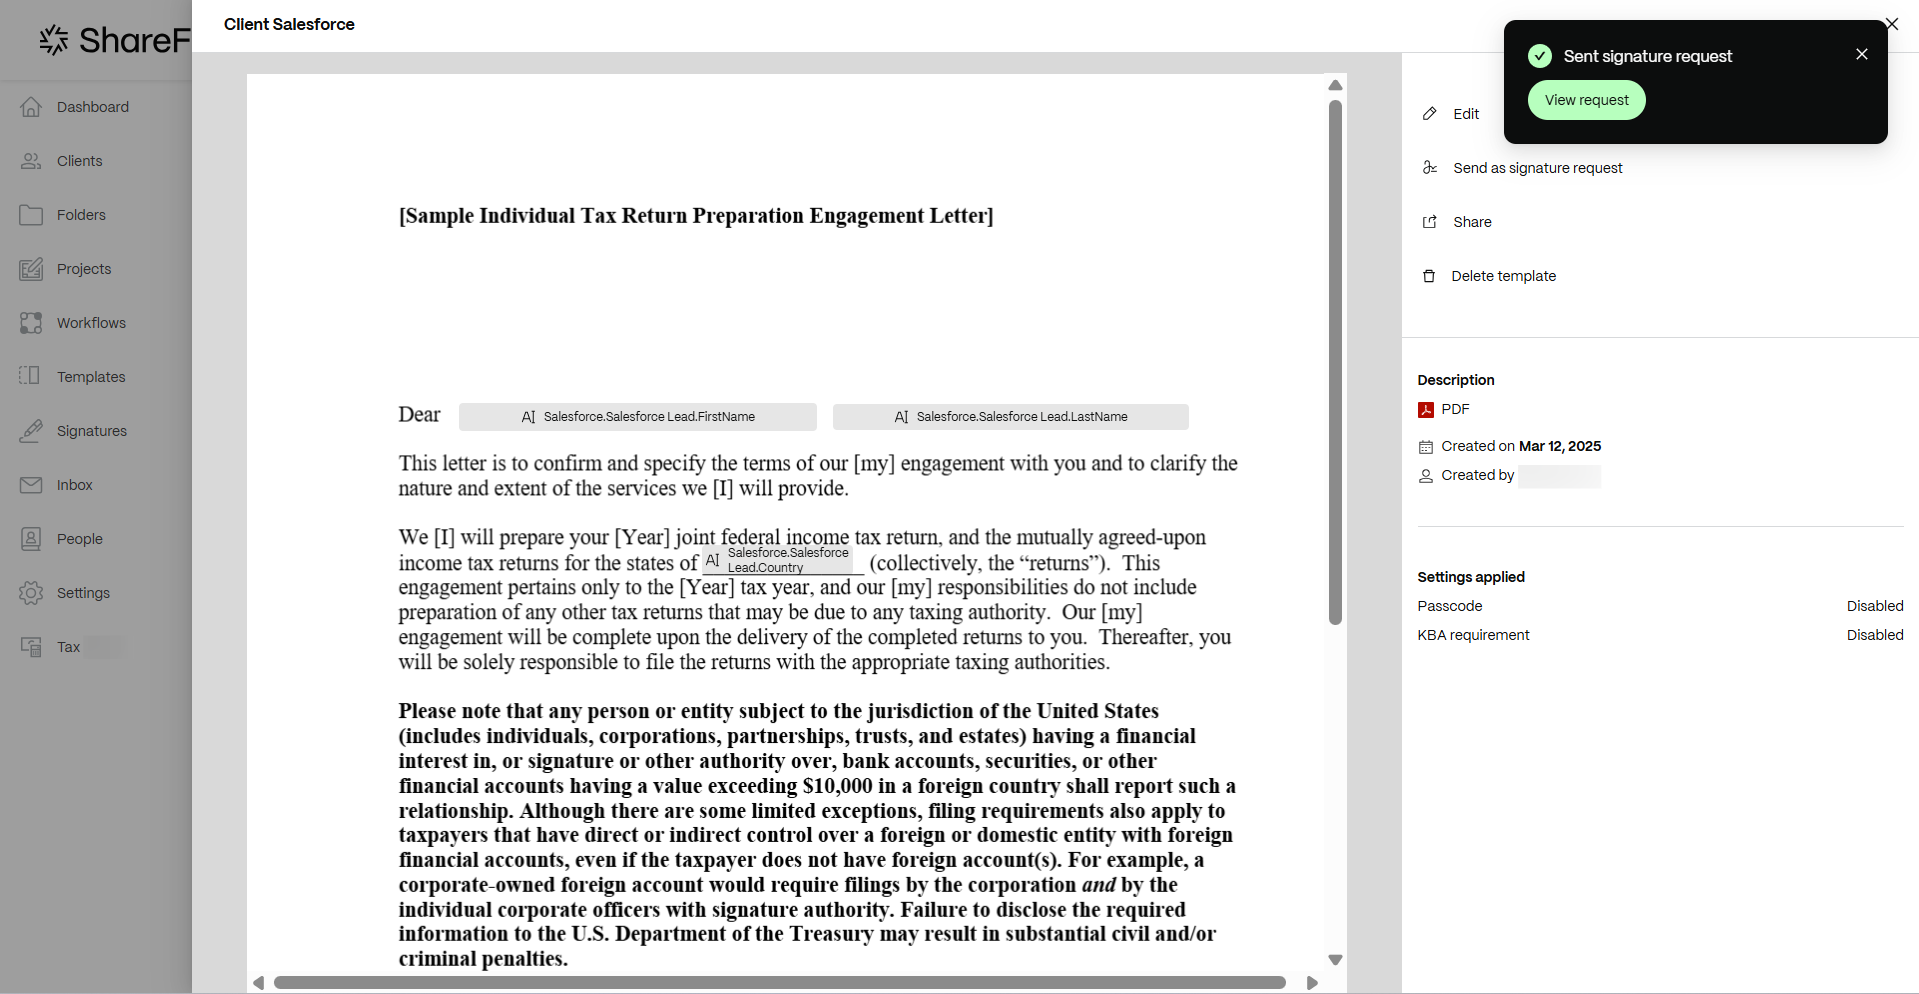
NOTE:
You can view the details of the signature request that has been sent by clicking on View. On the right pane, you can view the details and activity of the signature request that you sent. You can send reminders to the signers or revise, download, or cancel the request.
Handling missing data from variables
- In ShareFile, navigate to Templates.
-
Select the document template with all the fields, that you want to send for signature. When you click on it, the details page opens.
-
On the details page, select Send as signature request.
-
Enter the value for each variable so that most of the fields associated with that variable can be automatically filled. However, there is a possibility that all fields are not going to be auto filled.
-
After selecting the variables, click on Update fields and the Populate message displays on the right side of the page.
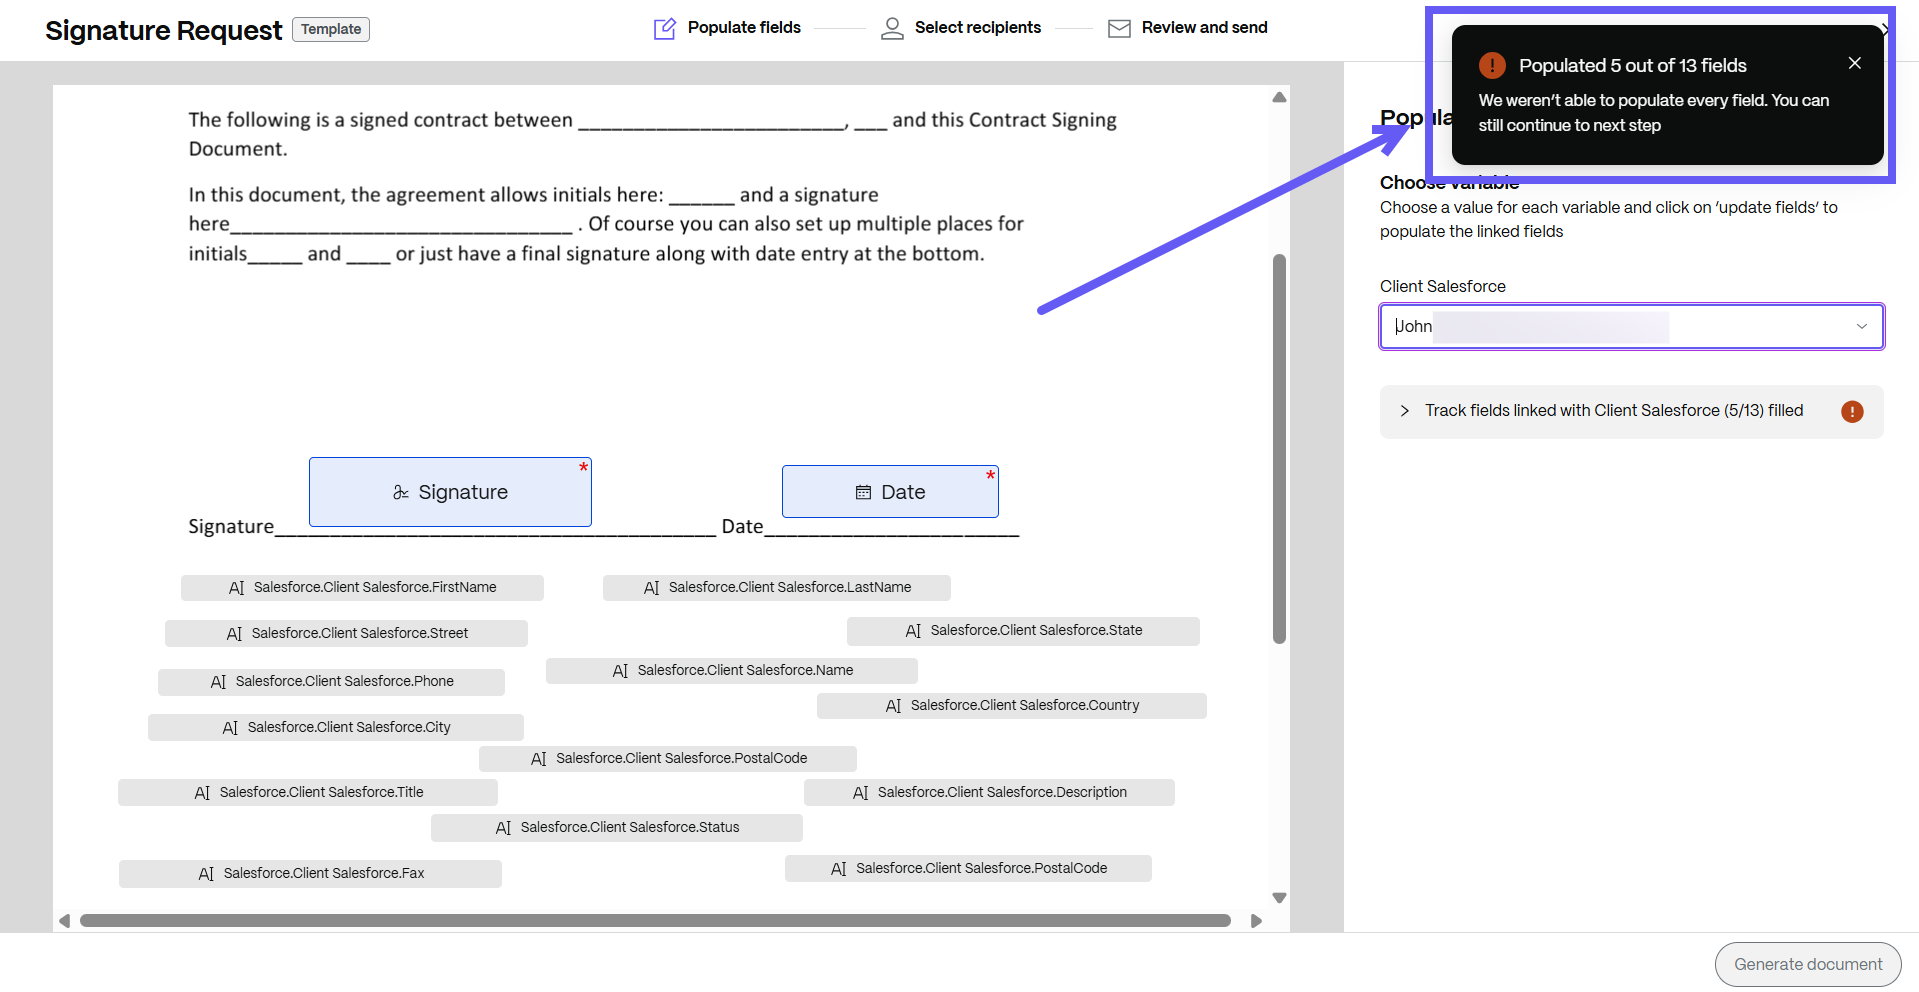
-
Select Track fields to manually edit missing information before updating the document that you want to send for signature.
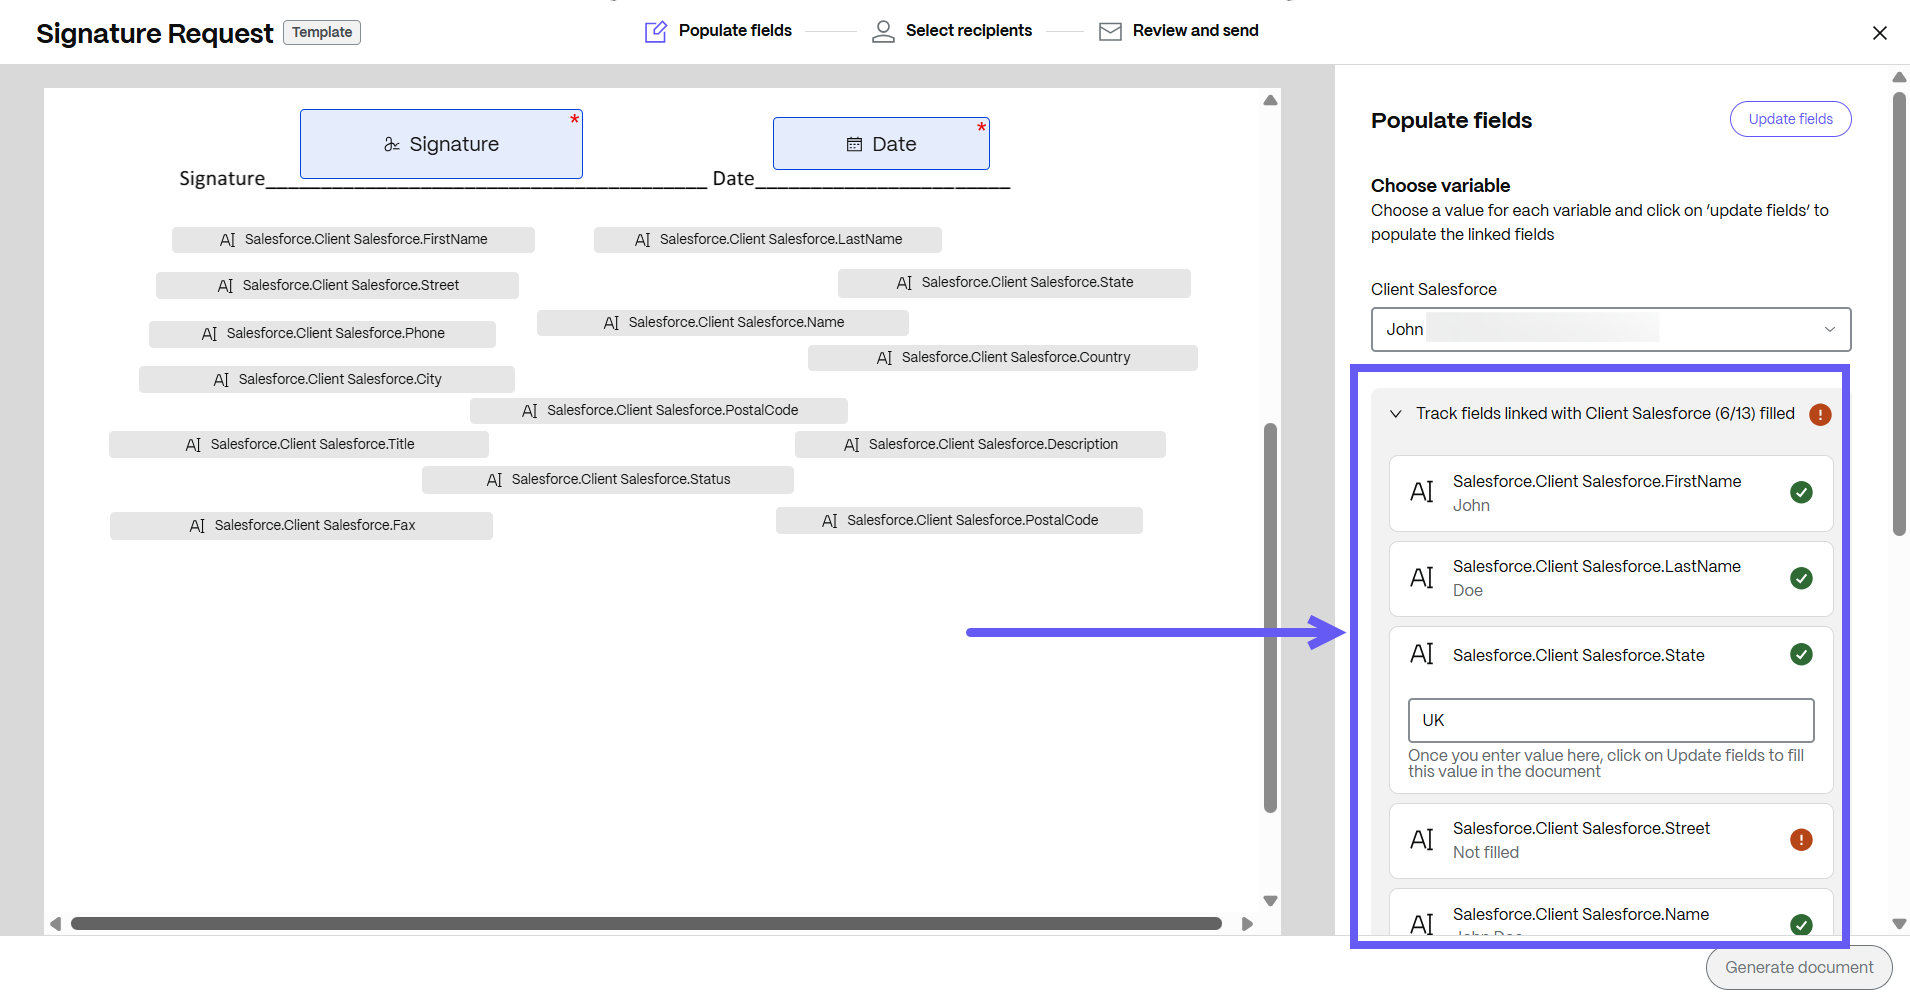
-
After editing the missing information, click on Update fields. You can also proceed with the available data if all the information is not required.
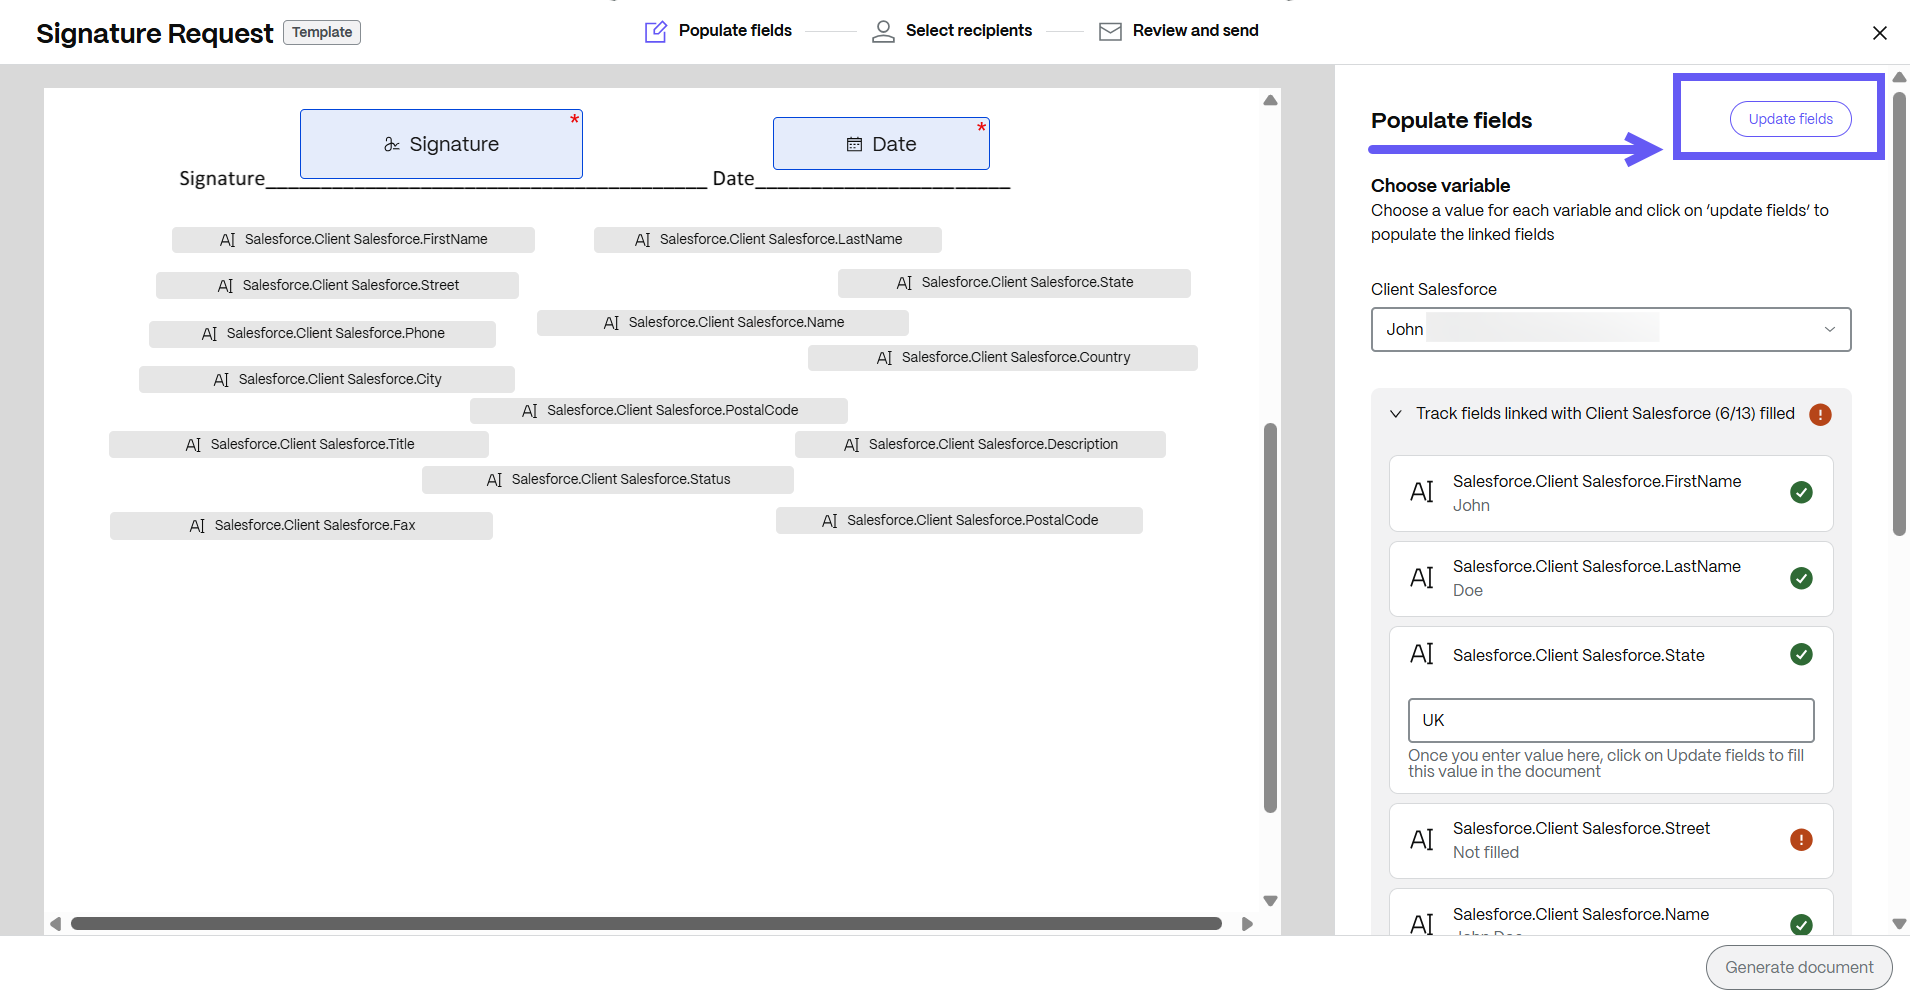
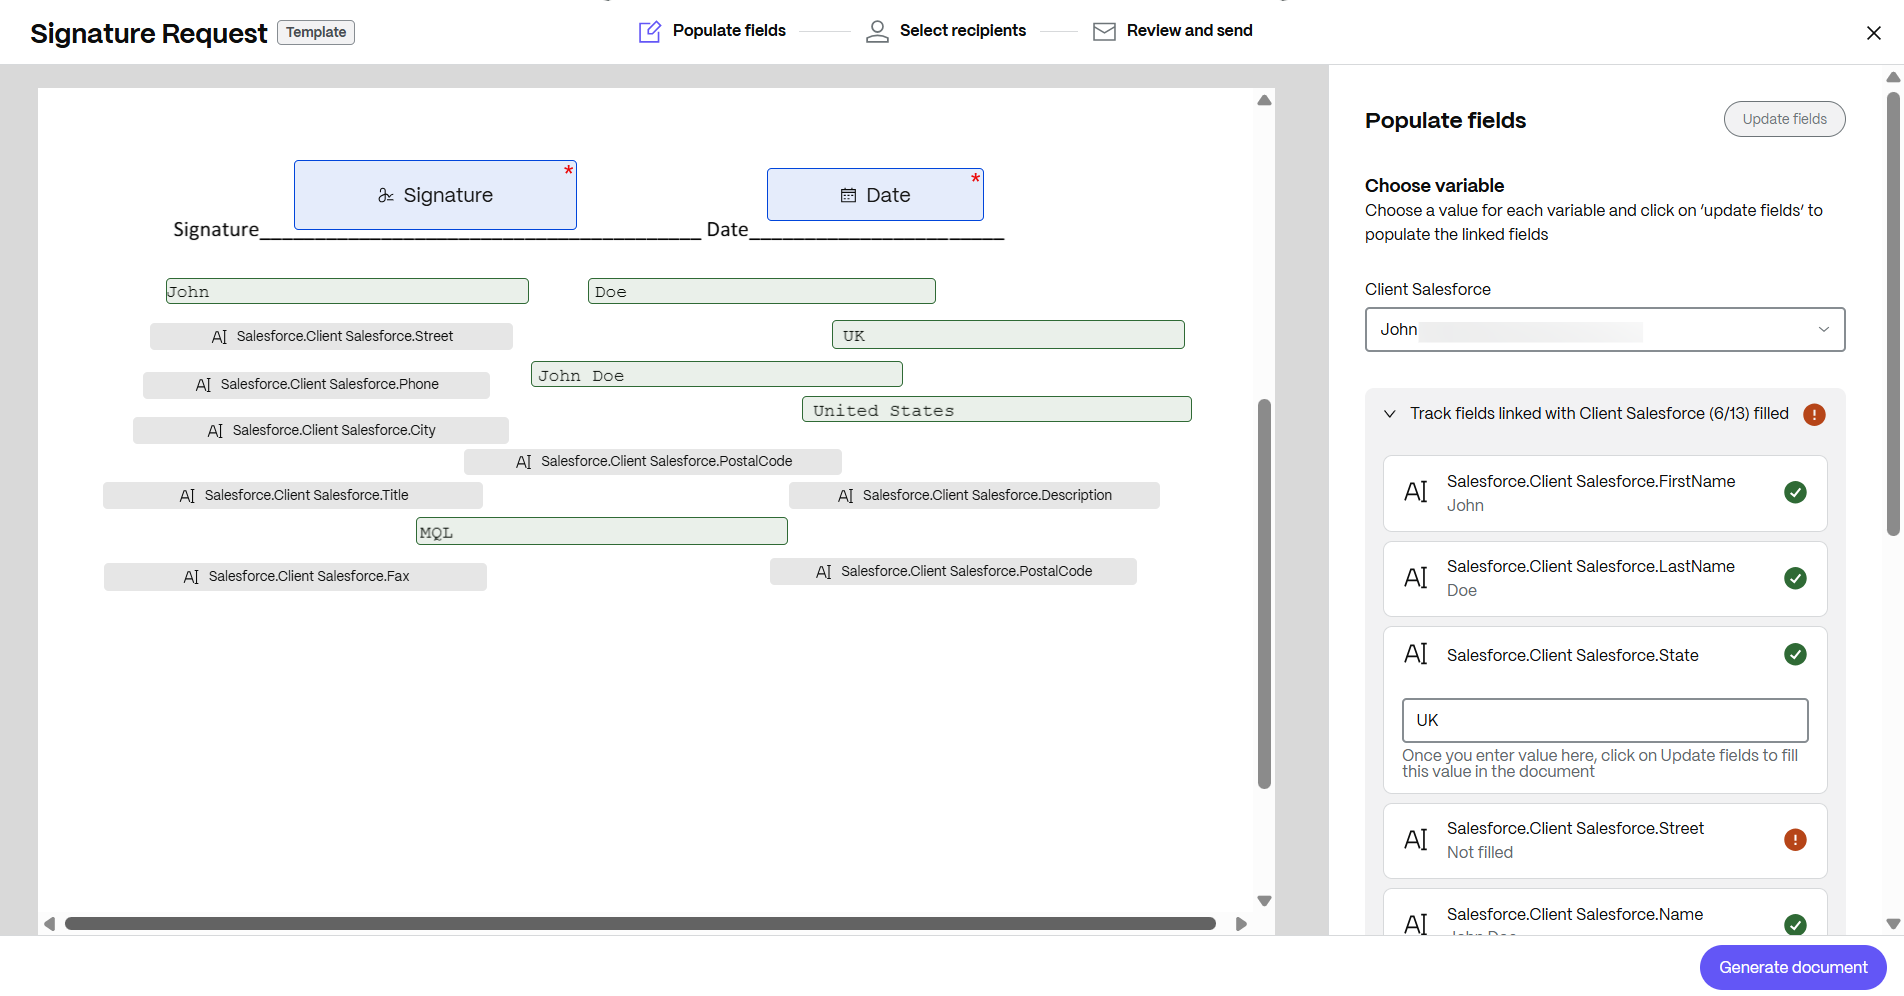
-
After updating the fields, select Generate document and the Generate document message displays. Click Generate, and once selected, you cannot edit any fields.
-
Enter the name and email for each recipient. Select Review and Send.
-
You can edit the document name and add a note that is sent to all signers.
-
You can change the location for storing the signed document.
-
Knowledge based authentication - requires signers to verify their identity with a knowledge-based quiz. Each signer must independently verify before signing the document.
-
Passcode - requires recipients to enter a 5-digit passcode to access documents.
-
-
Your document is now ready to be sent for signature. Select Send for Signature.
Edit a document template
-
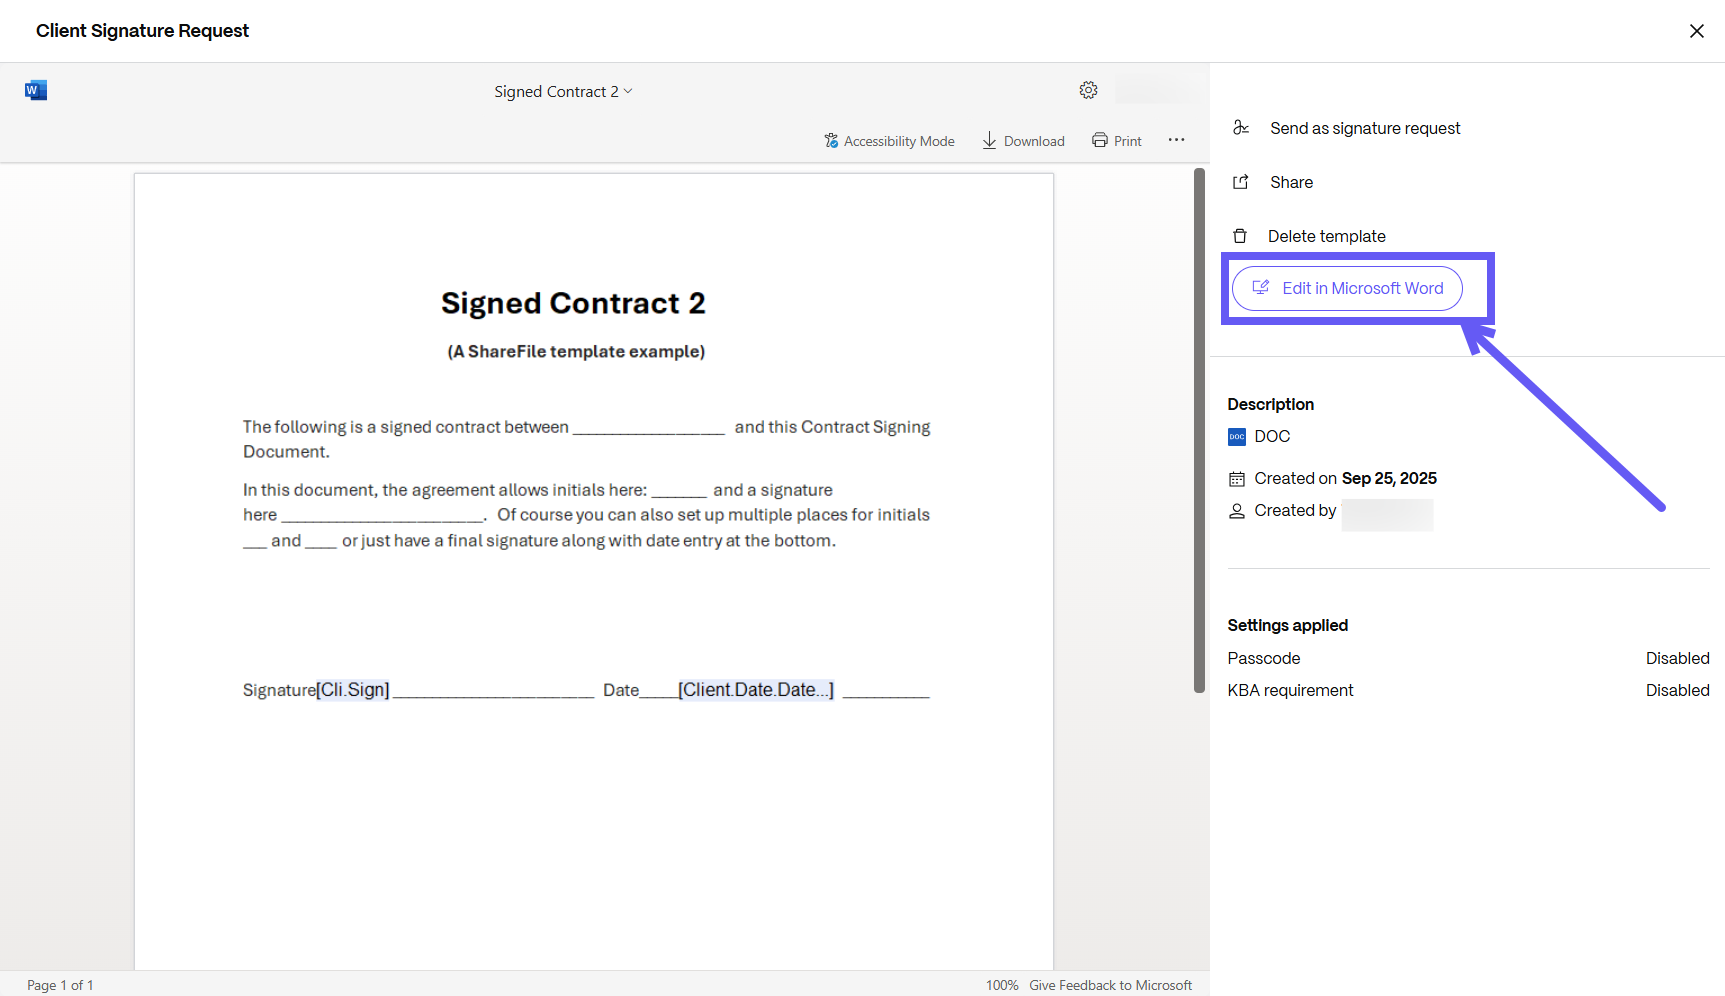
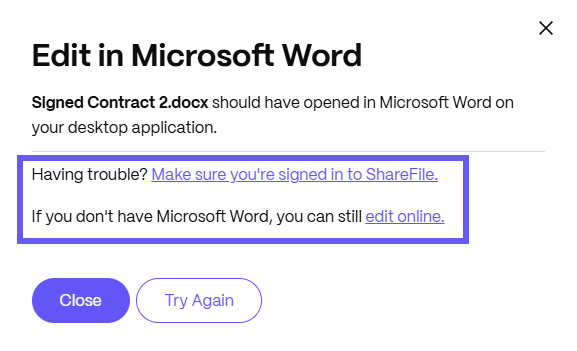
Navigate to the template details page. Click Edit in Microsoft Word. You’ll be redirected to Microsoft Word for editing.
NOTE:
If you’re having trouble re-opening the document in Microsoft Word, ensure that you’re signed in to ShareFile, or click on edit the document online instead.
-
Make the necessary edits—this could include changes to the document content or to the fields, roles and variables added via the Add-in.
-
Once all edits are complete, click on Next Step to navigate to the Settings tab.
-
In the Settings tab, click Save Template. Your document template is updated, and the latest version is available in the Template listing page in ShareFile.
NOTE:
Templates are auto saved. If you forget to manually save the template after editing, the template is considered edited and auto-save your changes.
Share
Share
In this article
This Preview product documentation is Citrix Confidential.
You agree to hold this documentation confidential pursuant to the terms of your Citrix Beta/Tech Preview Agreement.
The development, release and timing of any features or functionality described in the Preview documentation remains at our sole discretion and are subject to change without notice or consultation.
The documentation is for informational purposes only and is not a commitment, promise or legal obligation to deliver any material, code or functionality and should not be relied upon in making Citrix product purchase decisions.
If you do not agree, select I DO NOT AGREE to exit.