This content has been machine translated dynamically.
Dieser Inhalt ist eine maschinelle Übersetzung, die dynamisch erstellt wurde. (Haftungsausschluss)
Cet article a été traduit automatiquement de manière dynamique. (Clause de non responsabilité)
Este artículo lo ha traducido una máquina de forma dinámica. (Aviso legal)
此内容已经过机器动态翻译。 放弃
このコンテンツは動的に機械翻訳されています。免責事項
이 콘텐츠는 동적으로 기계 번역되었습니다. 책임 부인
Este texto foi traduzido automaticamente. (Aviso legal)
Questo contenuto è stato tradotto dinamicamente con traduzione automatica.(Esclusione di responsabilità))
This article has been machine translated.
Dieser Artikel wurde maschinell übersetzt. (Haftungsausschluss)
Ce article a été traduit automatiquement. (Clause de non responsabilité)
Este artículo ha sido traducido automáticamente. (Aviso legal)
この記事は機械翻訳されています.免責事項
이 기사는 기계 번역되었습니다.책임 부인
Este artigo foi traduzido automaticamente.(Aviso legal)
这篇文章已经过机器翻译.放弃
Questo articolo è stato tradotto automaticamente.(Esclusione di responsabilità))
Translation failed!
SMTP Server
NOTE:
Account wide Email settings are managed by Account Administrators.
By default, system notifications are sent from ShareFile mail servers to clients. At times this might not be ideal, especially when dealing with recipient mail servers that employ aggressive spam filters or whitelists. In these cases, setting a custom SMTP server allows you to send system notifications from your own mail server instead. Once these settings are configured, all emails sent through your account are sent through your mail server, instead of ShareFile’s servers. By setting a custom SMTP on your account, your users recognize your email address as the sender and any failed emails come back to you. To use a custom SMTP, an employee user must have the Allow this user to modify account-wide policies permission.
If you use Microsoft Office 365 and would like to utilize custom SMTP, view this set up guide from Microsoft.
Setting up custom SMTP
-
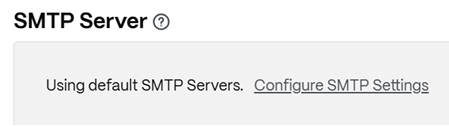
Navigate to Account settings > Advanced Preferences > Email Settings > SMTP Server.
-
Click Configure SMTP Settings. The Custom SMTP Configuration page appears.
-
Enter the appropriate information to enable this feature.
Required fields:
- Enable Custom SMTP – This option must be selected if you want to use these settings.
- Email Address – This is the from email address of sent emails.
- Server – This is the host name of the email server that is used to send emails.
- Port – This is the port number to be used. Port 25 is the default. The following ports are also allowed: 26, 443, 465, 587, 2525.
- Username – This is the user name needed to access the server.
- Password – This is the password needed to access the server.
- Notify Email on Failure – This email address is sent notices if ShareFile Mail is unable to send an email with the given settings.
Optional fields:
- Use SSL – Choose between Implicit, Explicit, or Off.
- Failback to ShareFile – If selected, messages that fail to send using the custom settings prompt ShareFile to send future emails through standard email settings.
- Authentication Method – Select an authentication method here if a particular one is required by your server.
- Click Save and Sent Test Email to complete the setup.
Troubleshooting your SMTP setup
Email Notifications / Messages are Delayed - This issue might occur when you are utilizing certain filter services or programs processing messages on your local mail servers. Before contacting ShareFile about delays in our system, verify that your messages are not being delayed by local filter services. One means of verifying that information is to review the full header details of a message and reviewing the time messages send between services or filters.
Email Notifications / Messages Do Not Arrive - This issue might occur if you have IP restrictions or policies on your local mail servers. See Firewall configuration to ensure you have whitelisted the custom SMTP IPs. Likewise, review your mail server authentication methods to ensure that ShareFile can communicate with your servers.
Too many connections from your host - This issue might occur when you have exceeded the maximum allowed connections on your SMTP server. To resolve this, you must update or increase your maximum allowed connections in your SMTP configuration, or use consolidated notifications to limit the number of connections you receive on a typical basis.
Share
Share
In this article
This Preview product documentation is Citrix Confidential.
You agree to hold this documentation confidential pursuant to the terms of your Citrix Beta/Tech Preview Agreement.
The development, release and timing of any features or functionality described in the Preview documentation remains at our sole discretion and are subject to change without notice or consultation.
The documentation is for informational purposes only and is not a commitment, promise or legal obligation to deliver any material, code or functionality and should not be relied upon in making Citrix product purchase decisions.
If you do not agree, select I DO NOT AGREE to exit.