Create a client using a shared file link
ShareFile makes it easy to add a client when you share a file. Use the following steps to complete the process in adding a client when using Share to create a link.
-
Navigate to the file that you want to share in your ShareFile account.
-
Select the file or files that you want to share.
-
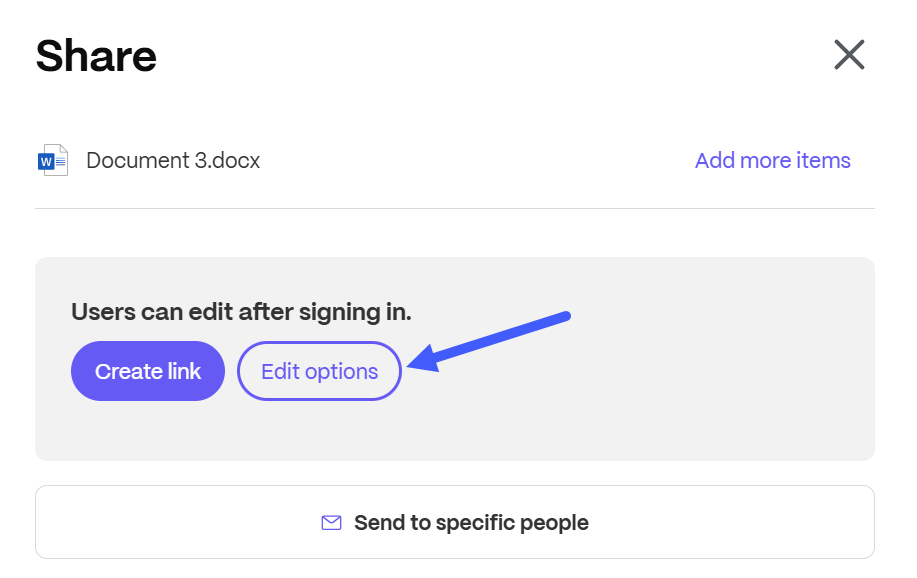
Select Share from the menu.
-
Select Edit options for the link.
-
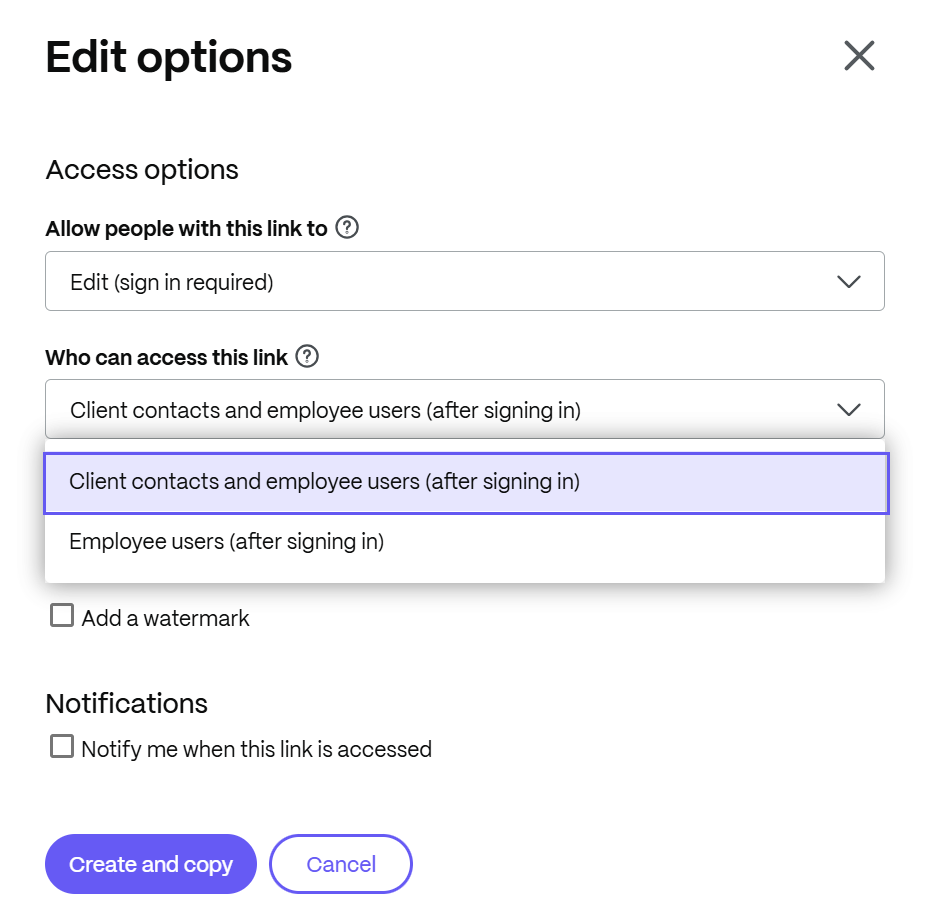
Under Who can access this link: select Client contacts and employee users (after signing in).
-
Select Create and copy. The Link copied to your clipboard message displays briefly.
-
Use the copied link to share with your email or another communication app.
-
Once the recipient accesses the shared file, navigate to People > Browse client contacts and select the recipients name.
-
Under the Basic Information tab you can enter additional information about the client.
-
Select Save Changes.
-
Select the client again then select Email Login Information from the Actions > User-level right-hand side menu to open the Resend Welcome Emails screen to let the user know they've been added to the account.
Note:
If you select Send me a copy of this email the copy you receive does not include the Activate Account option.
-
Select Notify.
The "Invitation(s) sent successfully" message displays briefly and the Browse client contacts dashboard screen displays allowing you to review the added client.
The recipient receives a message asking them to activate their account.